Overview
The Details screen is the main screen where you can view and manage information and metadata for the following ThreatConnect® object types: Indicators, Groups, Tags, Tracks, and Victims. Although data displayed on the Details screen depends on the type of object you are viewing, some of the most commonly displayed information includes Attributes added to the object, Security Labels and Tags applied to the object, a list of objects associated to the object you are viewing, and insights from CAL™. This screen also provides shortcuts to various ThreatConnect features, such as reporting and Threat Graph.
Before You Start
| Minimum Role(s) |
|
|---|---|
| Prerequisites |
Viewing the Legacy Details Screen
- On the top navigation bar, hover the cursor over Browse and select an object category (i.e., Indicators, Groups, Tags, Tracks, Victims, or Victim Assets) or type (e.g., Host, Adversary) to display a results table containing objects of the selected category or type on the Browse screen.
- Hover over an object’s entry in the table on the Browse screen and click one of the following icons displayed in its Summary cell to display the Overview tab of the new Details screen for the object:
- View full details
 : Click this icon to open the object’s Details screen in the current browser tab.
 - View full details in new tab
 : Click this icon to open the object’s Details screen in a new browser tab.
- View full details
- Click the Revert to Legacy View button at the top right of the new Details screen to display the legacy Details screen for the object.
Alternatively, click on an object’s entry in the table on the Browse screen to display its Details drawer, click the View full details icon at the upper-right corner of the drawer to display the Overview tab of the new Details screen for the object, and then click the Revert to Legacy View button at the top right of the new Details screen to display the legacy Details screen for the object.
icon at the upper-right corner of the drawer. This will display the new Details screen for the Victim to which the Victim Asset belongs.New Details Screen View
The new Details screen view is currently available for all Indicator types and the following Group types: Adversary, Attack Pattern, Campaign, Course of Action, Document, Event, Incident, Intrusion Set, Malware, Report, Tactic, Threat, Tool, and Vulnerability. It is not available for Email, Signature, and Task Groups; Tags; Tracks; and Victims.
For more information on the new Details screen view, see The Details Screen.
Legacy Details Screen View
The legacy Details screen view is available for all Indicator types, Group types, Tags, Tracks, and Victims. It is the only Details screen view available for Email, Signature, and Task Groups; Tags; Tracks; and Victims. For all other object types, the new Details screen view is the default view.
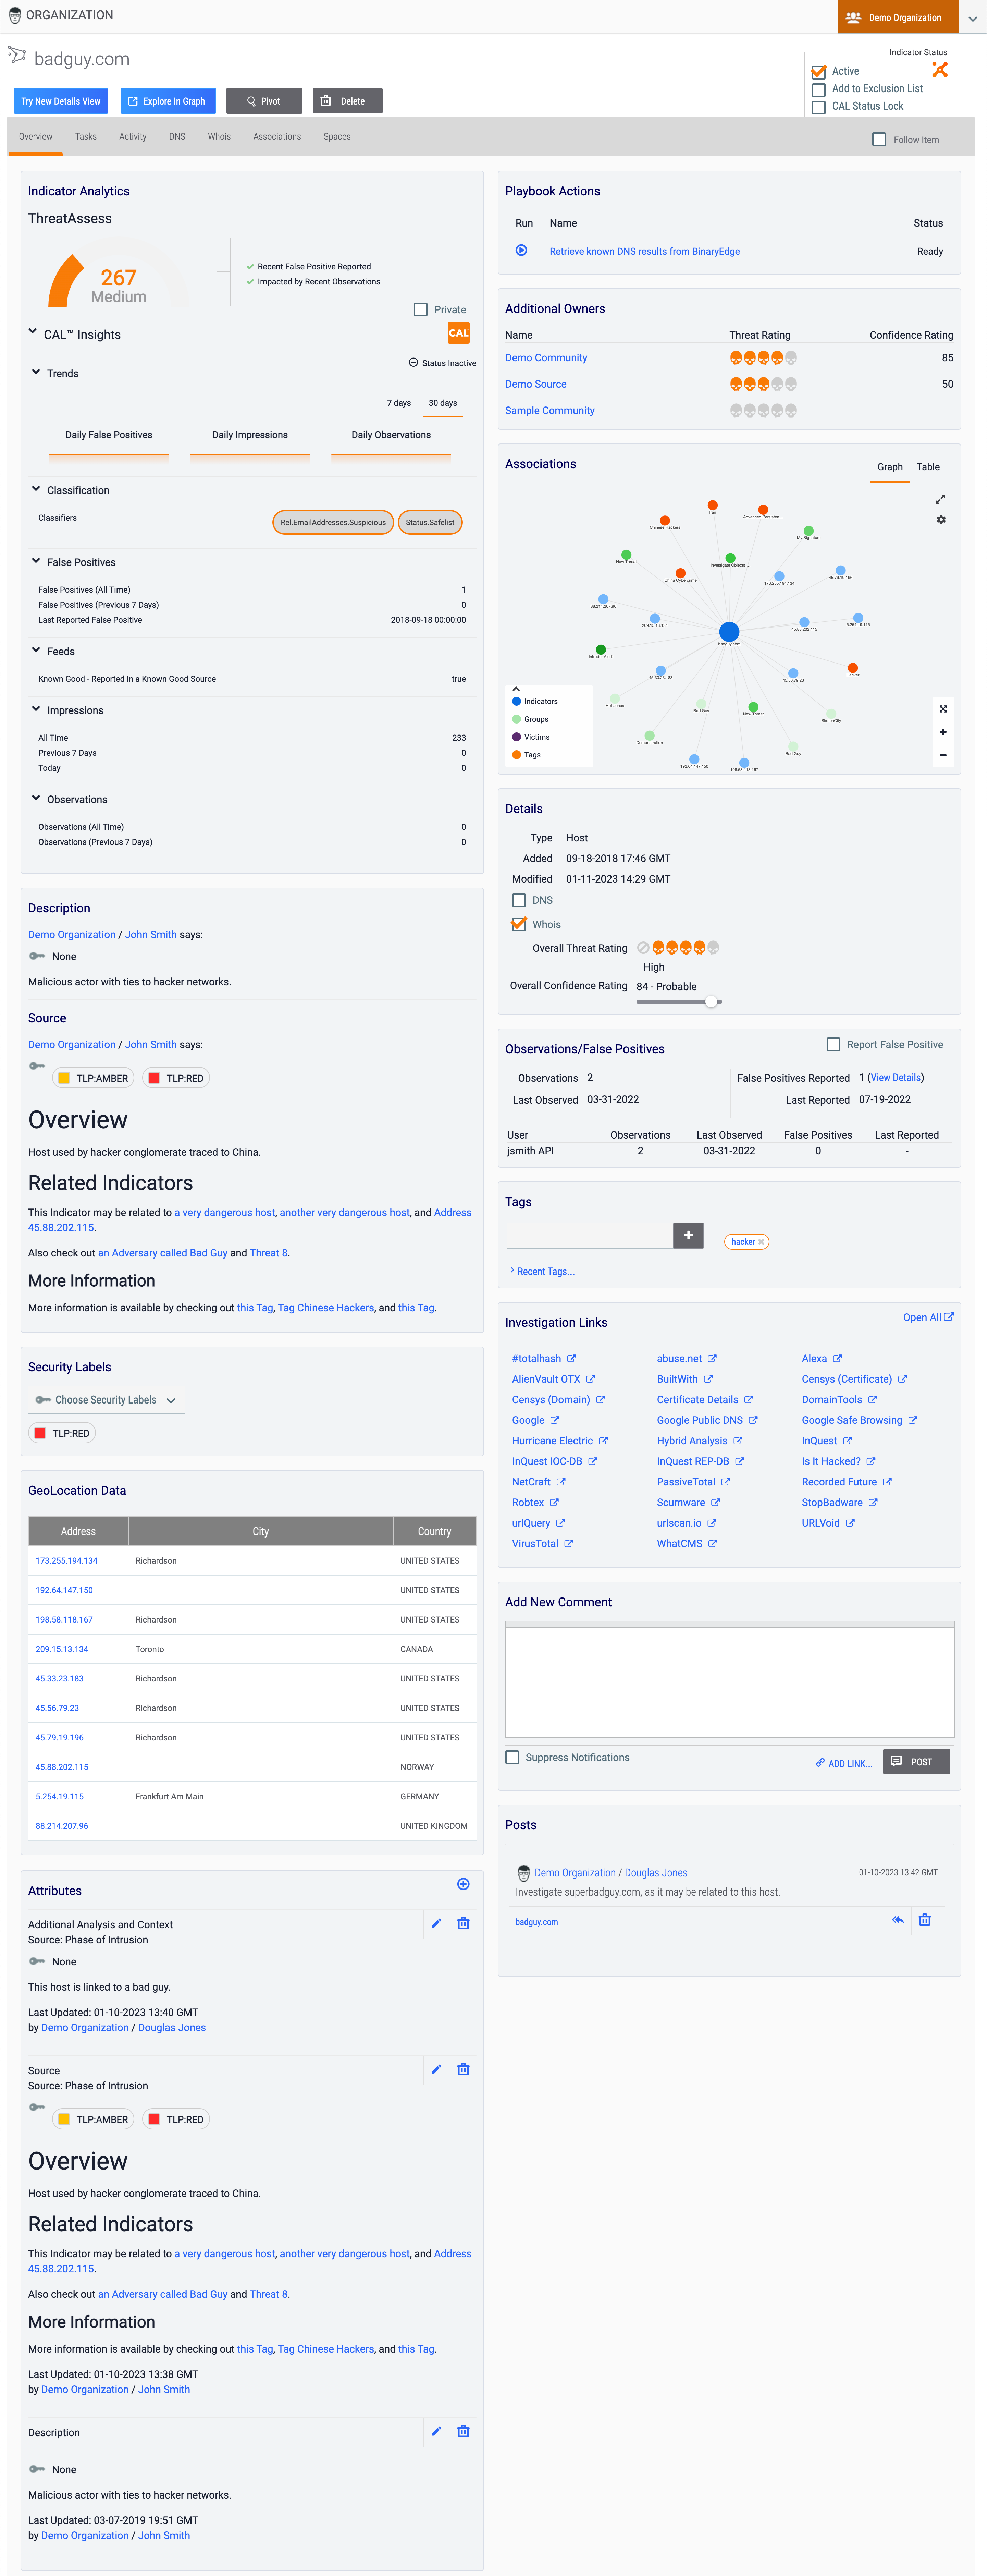
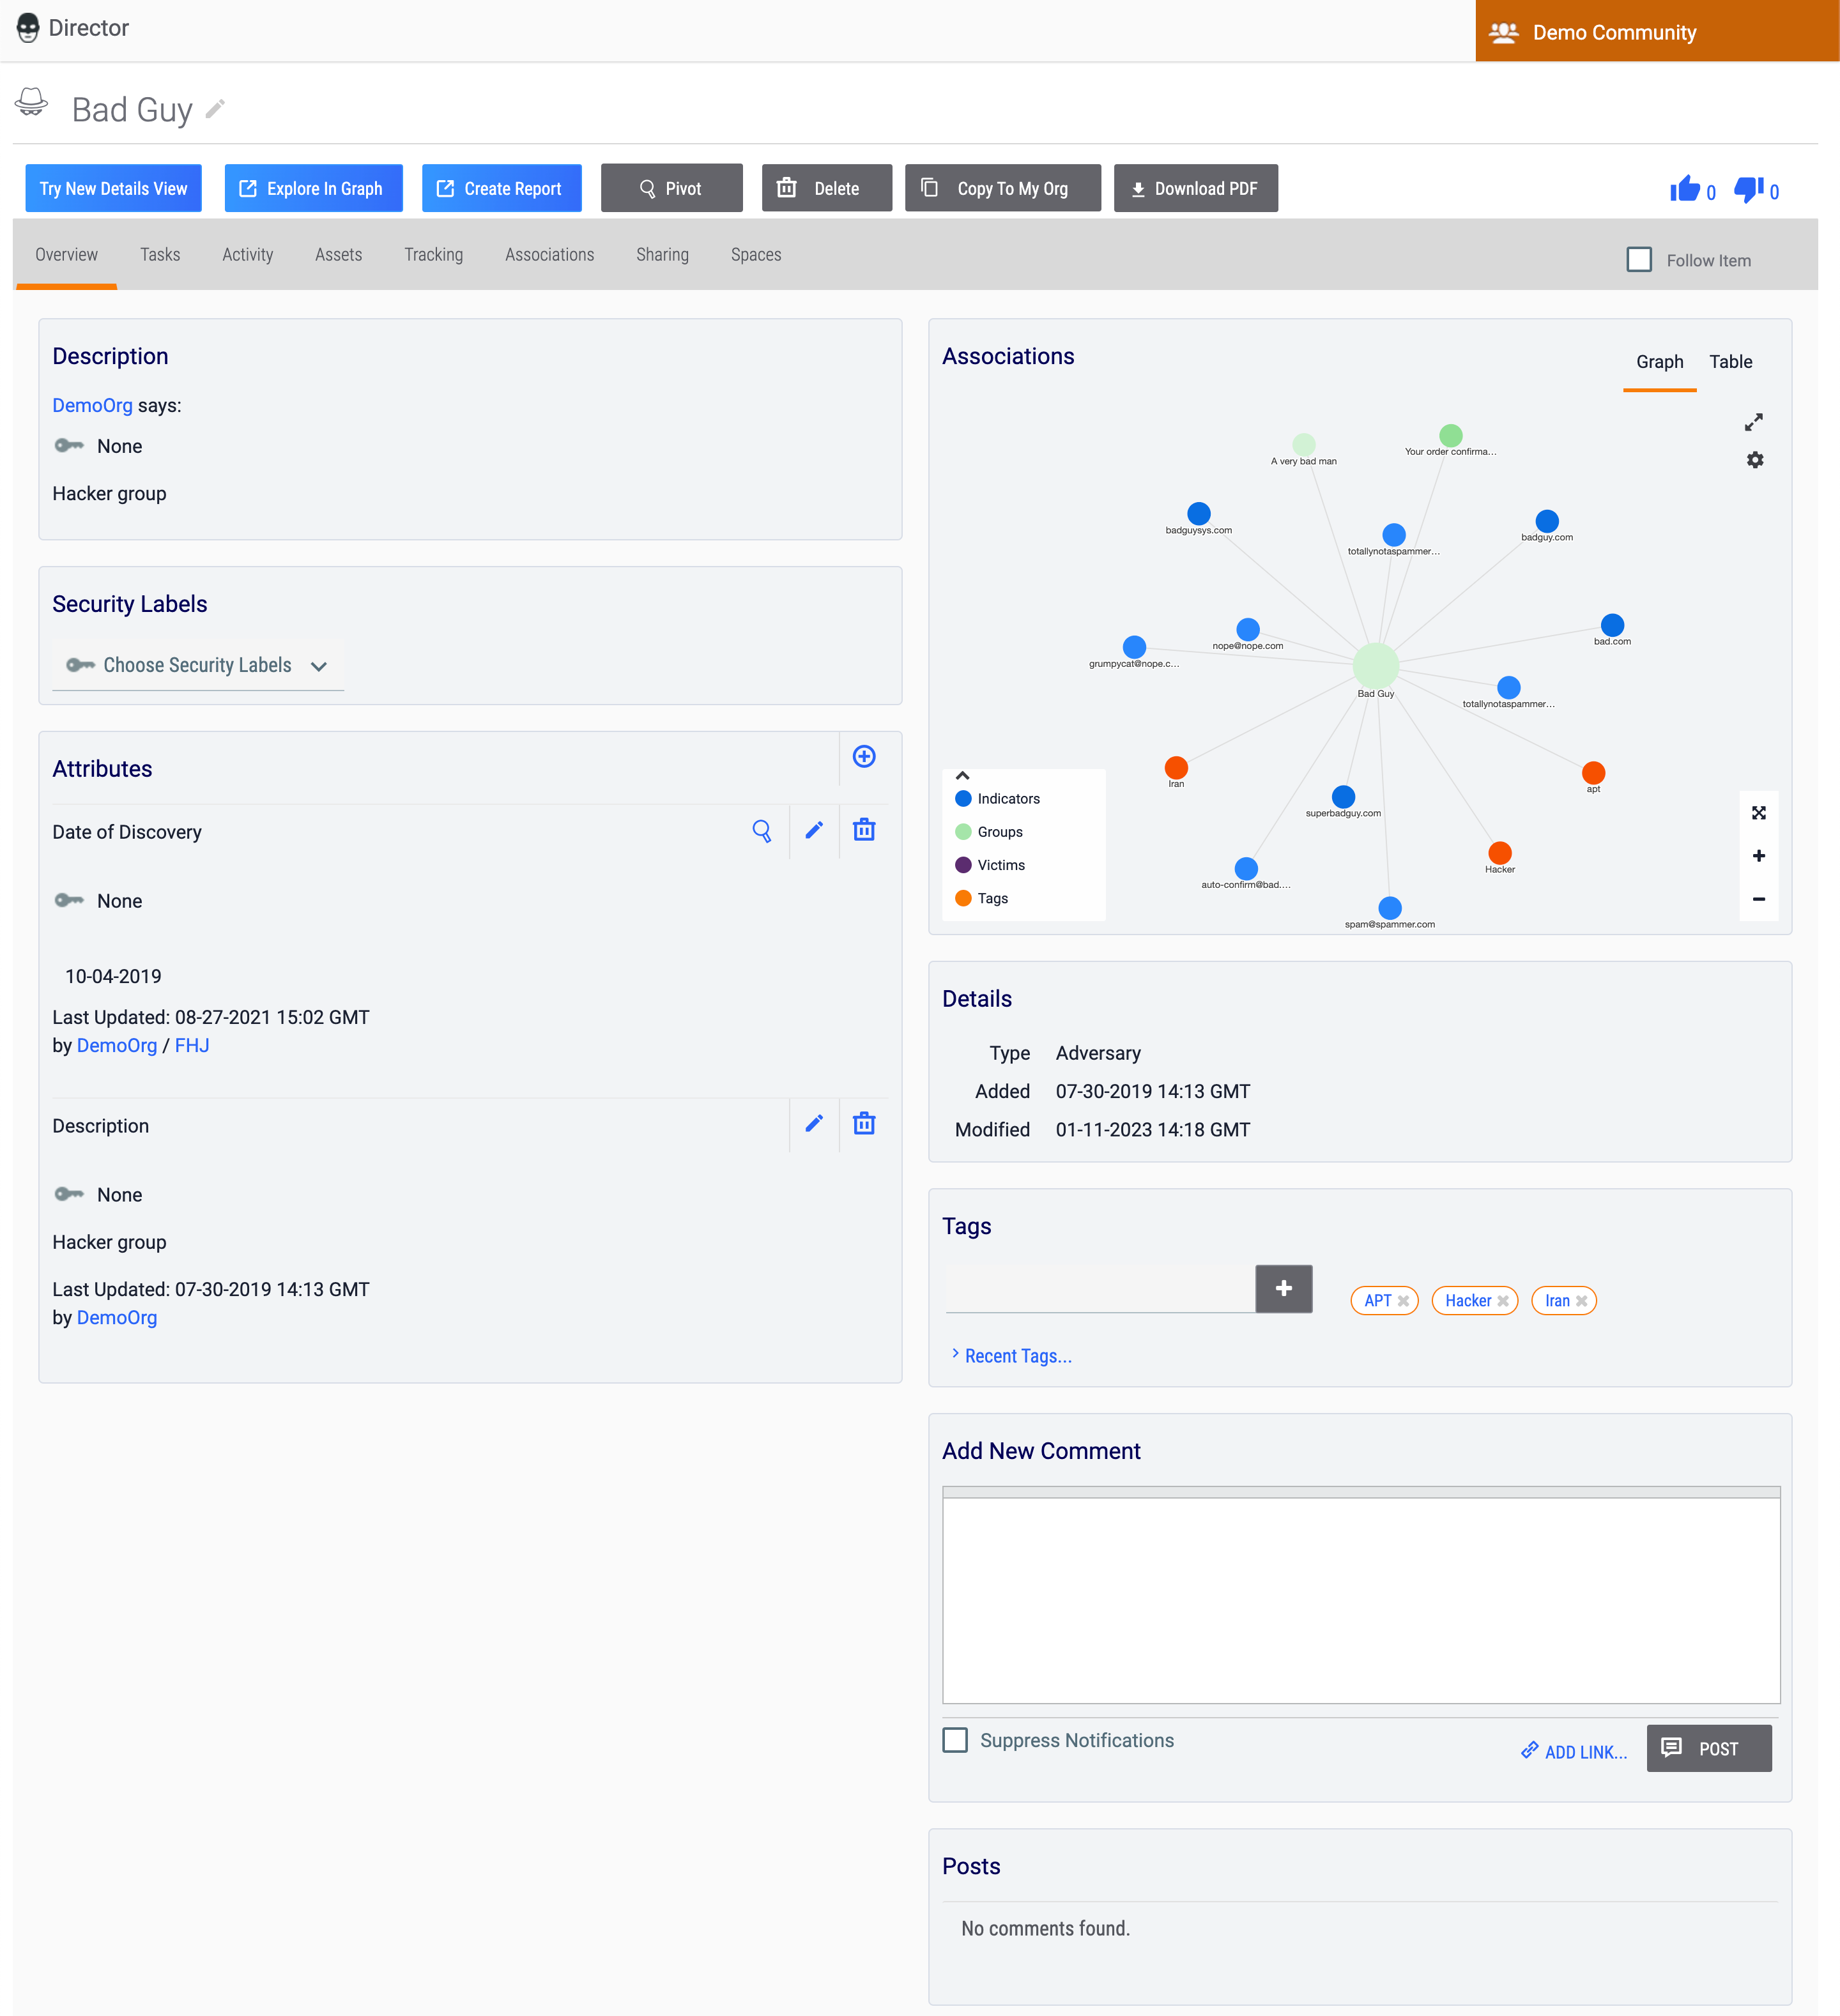
Figure 1 shows the Overview tab of the legacy Details screen for a Host Indicator (badguy.com), and Figure 2 shows the Overview tab of the legacy Details screen for an Adversary Group (Bad Guy).
Legacy Details Screen Header
Indicators
The legacy Details screen for Indicators (Figure 1) includes the following sections and elements in its header:
- Object icon and name: This section displays the Indicator’s name and an icon denoting that it is an Indicator. This icon is the same for all Indicator types.
- Owner: The orange rectangle at the upper-right corner of the screen displays the owner to which the Indicator belongs. If the Indicator belongs to multiple owners, a selector will be displayed to the right of the orange rectangle that allows you to view copies of the Indicator in each owner to which it belongs and to which you have access.
- Try New Details View: Click the Try New Details View button to display the Overview tab of the new Details screen for the Indicator in the current browser tab.
- Explore In Graph: Click the Explore In Graph button to view the Indicator in Threat Graph.
- Pivot: Click the Pivot button to pivot to a list of all associated intelligence for the Indicator.
- Delete: Click the Delete button to delete the Indicator. This button will not be displayed if you do not have permissions to delete data in ThreatConnect.
- Navigation Tab Menu: The Navigation Tab Menu contains a series of tabs relevant to the particular Indicator type. See the “Object-Specific Tabs” section for descriptions of all object-specific tabs on the legacy Details screen.
- Follow Item: Select the Follow Item checkbox on the right side of the Navigation TabMenu to receive alerts and updates on changes to the Indicator. After selecting this checkbox, select the desired notification priority level (Low, Medium, or High).
- Active: Select the checkbox to set the Indicator Status to active, or clear the checkbox to set the Indicator Status to inactive.
- Add to Exclusion List: Select this checkbox to add the Indicator to the Indicator Exclusion List corresponding to its Indicator type.ImportantThe Add to Exclusion List option will be displayed for Organization and System Administrators only on ThreatConnect instances where this functionality is enabled in the system settings. If you add an Indicator to an Exclusion List using this method, the only way to remove it from the Exclusion List is via the Organization Config screen, as detailed in the “Adding an Indicator to an Exclusion List from the Details Screen” section of Creating Indicator Exclusion Lists.
- CAL Status Lock: Select the checkbox to prevent CAL from changing the Indicator Status.
Groups
- Object icon and name: This section displays the Group’s name and an icon corresponding to its Group type. In addition, an Edit
 icon is displayed to the right of the Group’s name that, when clicked, allows you to edit the name. This icon will not be displayed if you do not have permissions to edit data in ThreatConnect.
 - Owner: The orange rectangle at the upper-right corner of the screen displays the owner to which the Group belongs.
- Try New Details View: The Try New Details View button will be displayed for all Group types except Email, Signature, and Task Groups. Click this button to display the Overview tab of the new Details screen for the Group in the current browser tab.
- Explore In Graph: Click the Explore In Graph button to view the Group in Threat Graph.
- Create Report: Click the Create Report button to create a report for the Group and open the Report Editor in a new browser tab.
- Pivot: Click the Pivot button to pivot to a list of all associated intelligence for the Group.
- Delete: Click the Delete button to delete the Group. This button will not be displayed if you do not have permissions to delete data in ThreatConnect.
- Copy To My Org: The Copy To My Org button will be displayed only for Groups that belong to a Community. Click this button to copy the Group from the Community to your Organization.
- Download PDF: The Download PDF button will be displayed for all Group types except Document, Email, Signature, and Task Groups. Click this button to generate a PDF document of the Group.
- Upvote
 and Downvote
 : This section is where you can view the number of Upvote and Downvote Intel Ratings the Group has received and update the Group's Intel Rating.
 - Navigation Tab Menu: The Navigation Tab Menu contains a series of tabs relevant to the particular Group type. See the “Object-Specific Tabs” section for descriptions of all object-specific tabs on the legacy Details screen.
- Follow Item: Select the Follow Item checkbox on the right side of the Navigation TabMenu to receive alerts and updates on changes to the Group. After selecting this checkbox, select the desired notification priority level (Low, Medium, or High).
Tags
The legacy Details screen for Tags includes the following sections and elements in its header:
- Object icon and name: This section displays the Tag's name and an icon denoting that it is a Tag. In addition, an Editicon is displayed to the right of the Tag’s name that, when clicked, allows you to edit the name. This icon will not be displayed if you do not have permissions to edit data in ThreatConnect.
- Owner: The orange rectangle at the upper-right corner of the screen displays the owner to which the Tag belongs.
- Explore In Graph: Click the Explore In Graph button to view the Tag in Threat Graph.
- Delete: Click the Delete button to delete the Tag. This button will not be displayed if you do not have permissions to delete data in ThreatConnect.
- Navigation Tab Menu: The Navigation Tab Menu contains a series of tabs relevant to Tags. See the “Object-Specific Tabs” section for descriptions of all object-specific tabs on the legacy Details screen.
- Follow Item: Select the Follow Item checkbox on the right side of the Navigation TabMenu to receive alerts and updates on changes to the Tag. After selecting this checkbox, select the desired notification priority level (Low, Medium, or High).
Tracks and Victims
The legacy Details screen for Tracks and Victims includes the following sections and elements in its header:
- Object icon and name: This section displays the object's name and an icon corresponding to its type. For Victims, an Editicon is displayed to the right of the Victim's name that, when clicked, allows you to edit the name. This icon will not be displayed if you do not have permissions to edit data in ThreatConnect.
- Owner: The orange rectangle at the upper-right corner of the screen displays the owner to which the object belongs.
- Delete: Click the Delete button to delete the object. This button will not be displayed if you do not have permissions to delete data in ThreatConnect.
- Navigation Tab Menu: The Navigation Tab Menu contains a series of tabs relevant to the particular object type. See the “Object-Specific Tabs” section for descriptions of all object-specific tabs on the legacy Details screen.
- Follow Item: Select the Follow Item checkbox on the right side of the Navigation TabMenu to receive alerts and updates on changes to the object. After selecting this checkbox, select the desired notification priority level (Low, Medium, or High).
Overview Tab
The Overview tab of the legacy Details screen (Figure 1 and Figure 2) displays several cards with relevant information for the object you are viewing. Depending on the type of object you are viewing, the cards displayed on this tab will vary.
Indicators
Table 1 provides a description of each card that may be displayed on the Overview tab of the legacy Details screen for an Indicator and the Indicator types for which the card is available.
| Card Name | Description | Applicable Indicator Type(s) |
|---|---|---|
| Add New Comment | The Add New Comment card is where you can create posts linked to the Indicator. | All |
| Additional Owners | The Additional Owners card displays any additional owners to which the Indicator belongs, along with the Threat Rating and Confidence Rating assigned to the object by those owners. If the Indicator does not belong to multiple owners, this card will not be displayed. | All |
| ASN | The ASN card displays the autonomous system (AS) number corresponding to the ASN Indicator. | ASN |
| Associations | The Associations card displays Indicators, Groups, Victim Assets, Artifacts, and Cases associated to the Indicator, as well as potential Case associations. | All |
| Attributes | The Attributes card is where you can view the Indicator's Attributes, create new Attributes, manage existing Attributes, and pivot on Attributes. | All |
| CIDR | The CIDR card displays the block of network IP addresses corresponding to the CIDR Indicator. | CIDR |
| Description | Source | The Description | Source card displays the Indicator’s default Description and Source. | All |
| Details | The Details card displays the Indicator’s type, creation date, last modified date, and overall Threat and Confidence Ratings. It is also where you can set the Indicator’s Threat Rating and Confidence Rating. Note | All |
| Email Subject | The Email Subject card displays the email subject corresponding to the Email Subject Indicator. | Email Subject |
| GeoLocation Data | The GeoLocation Data card displays IP address geographic information within ThreatConnect for an Address or Host Indicator. | Address; Host |
| Hashes | Known File Occurrences | The Hashes | Known File Occurrences card is where you can view and edit the File Indicator’s MD5, SHA1, and SHA256 file hashes and file size. It is also where you can create File Occurrences and view the filename, run path, and date of each File Occurrence added to the Indicator. Note If adding a new file hash to an existing File Indicator and a File Indicator containing that file hash exists in the same owner, you will be prompted to merge the two File Indicators into a single Indicator containing both file hashes and any Attributes, Security Labels, and Tags added to each Indicator. | File |
| Hashtag | The Hashtag card displays the hashtag corresponding to the Hashtag Indicator. | Hashtag |
| Indicator Analytics | The Indicator Analytics card displays information on the Indicator derived from ThreatAssess and CAL. Note If a System Administrator has enabled private Indicators on your ThreatConnect instance, a Private checkbox will be displayed on the right side of the Indicator Analytics card, above the CAL Insights section. Select this checkbox to mark the Indicator as private. | All |
| Investigation Links | The Investigation Links card provides links to search results of various third-party lookup and other information services. Each link is a shortcut to query results for the object, which will open in a new browser tab. | All |
| Mutex | The Mutex card displays the mutex corresponding to the Mutex Indicator. | Mutex |
| Observations/False Positives | The Observations/False Positives card is where you can view the number of observations and false positives reports for an Indicator and report it as a false positive. | All |
| Playbook Actions | The Playbook Actions card is where you can view and execute active Playbooks with a UserAction Trigger configured for the Indicator’s type. If there are no active Playbooks with a UserAction Trigger configured for the Indicator’s type, this card will not be displayed. | All |
| Posts | The Posts card is where you can view posts linked to the Indicator. | All |
| Registry Key | The Registry Key card displays the key name, value name, and value type corresponding to the Registry Key Indicator. | Registry Key |
| Security Labels | The Security Labels card is where you can view and manage Security Labels applied to the Indicator. | All |
| Tags | The Tags card is where you can view and manage Tags applied to the Indicator. | All |
| URL | The URL card displays the URL corresponding to the URL Indicator. | URL |
| User Agent | The User Agent card displays the user agent string corresponding to the User Agent Indicator. | User Agent |
Groups
Table 2 provides a description of each card that may be displayed on the Overview tab of the legacy Details screen for a Group and the Group types for which the card is available.
| Card Name | Description | Applicable Group Type(s) |
|---|---|---|
| Add New Comment | The Add New Comment card is where you can create posts linked to the Group. | All |
| Assignees | The Assignees card is where you can view and manage the users assigned to the Task Group. | Task |
| Associations | The Associations card displays Groups, Indicators, Victim Assets, Artifacts, and Cases associated to the Group, as well as potential Artifact and Case associations. | All |
| Attributes | The Attributes card is where you can view the Group’s Attributes, create new Attributes, manage existing Attributes, and pivot on Attributes. | All |
| Body | The Body card displays the body of the email corresponding to the Email Group. | |
| Description | The Description card displays the Group’s default Description. | All Group types except Document and Signature Groups |
| Description | Source | The Description | Source card displays the Group’s default Description and Source. | Document; Signature |
| Details | The Details card displays the Group’s type, creation date, and last modified date. Note Depending on the Group’s type, additional details may be displayed on the Details card. For example, the Event Date and Status fields will be displayed on this card for an Event Group, whereas the First Seen field will be displayed on this card for a Campaign Group. | All |
| Document File | The Document File card is where you can view the name, type, and size of the file uploaded to the Document Group, download the file, and replace the existing file with a new one. | Document |
| Escalate To | The Assignees card is where you can view and manage the users to whom a Task Group will be escalated. | Task |
| Header | The Header card displays the header, recipient, sender, and subject of the email corresponding to the Email Group. | |
| Playbook Actions | The Playbook Actions card is where you can view and execute active Playbooks with a UserAction Trigger configured for the Group’s type. If there are no active Playbooks with a UserAction Trigger configured for the Group’s type, this card will not be displayed. | All |
| Posts | The Posts card is where you can view posts linked to the Group. | All |
| Report File | The Report File card is where you can view the name, type, and size of the file uploaded to the Report Group, view and download the file, and replace the existing file with a new one. | Report |
| Score | The Score card displays the Threat Score assigned to the email corresponding to the Email Group. | |
| Security Labels | The Security Labels card is where you can view and manage Security Labels applied to the Group. | All |
| Signature File Content | The Signature File Content card is where you can view the name, type, size, and contents of the signature file corresponding to the Signature Group, download the file, and replace the existing file with a new one. | Signature |
| Tags | The Tags card is where you can view and manage Tags applied to the Group. | All |
Tags
Table 3 provides a description of each card that may be displayed on the Overview tab of the legacy Details screen for a Tag.
| Card Name | Description |
|---|---|
| Add New Comment | The Add New Comment card is where you can create posts linked to the Tag. |
| Associations | The Associations card displays associations between the Tag and Groups, Indicators, and Victims to which it is applied. |
| Description | The Description card displays a description of the Tag. |
| Details | The Details card displays the date when the Tag was last used. |
| Posts | The Posts card is where you can view posts linked to the Tag. |
| Synonymous Tags | The Synonymous Tags card is displayed only for main Tags defined in Tag normalization rules and provides a list of synonymous Tags associated with the main Tag. |
Tracks
Table 4 provides a description of each card that may be displayed on the Overview tab of the legacy Details screen for a Track.
| Card Name | Description |
|---|---|
| Add New Comment | The Add New Comment card is where you can create posts linked to the Track. |
| Contains | Does Not Contain | The Contains column of this card displays the terms that the Track contains, and the Does Not Contain column displays the terms the Track does not contain. |
| Description | For Tracks, the Overview tab displays two Description cards. The card on the left side of the screen displays a description of the Track, whereas the one on the right side of the screen displays the number of new results for the Track and indicates whether the Track is active. |
| Posts | The Posts card is where you can view posts linked to the Track. |
Victims
Table 5 provides a description of each card that may be displayed on the Overview tab of the legacy Details screen for a Victim.
| Card Name | Description |
|---|---|
| Add New Comment | The Add New Comment card is where you can create posts linked to the Victim. |
| Associations | The Associations card displays the Indicators and Groups to which the Victim is associated. |
| Attributes | The Attributes card is where you can view the Victim’s Attributes, create new Attributes, manage existing Attributes, and pivot on Attributes. |
| Description | The Description card displays the Victim’s default Description. |
| Details | The Details card is where you can view and edit the Victim’s organization, sub-organization, nationality, and work location. |
| Posts | The Posts card is where you can view posts linked to the Victim. |
| Security Labels | The Security Labels card is where you can view and manage Security Labels applied to the Victim. |
| Tags | The Tags card is where you can view and manage Tags applied to the Victim. |
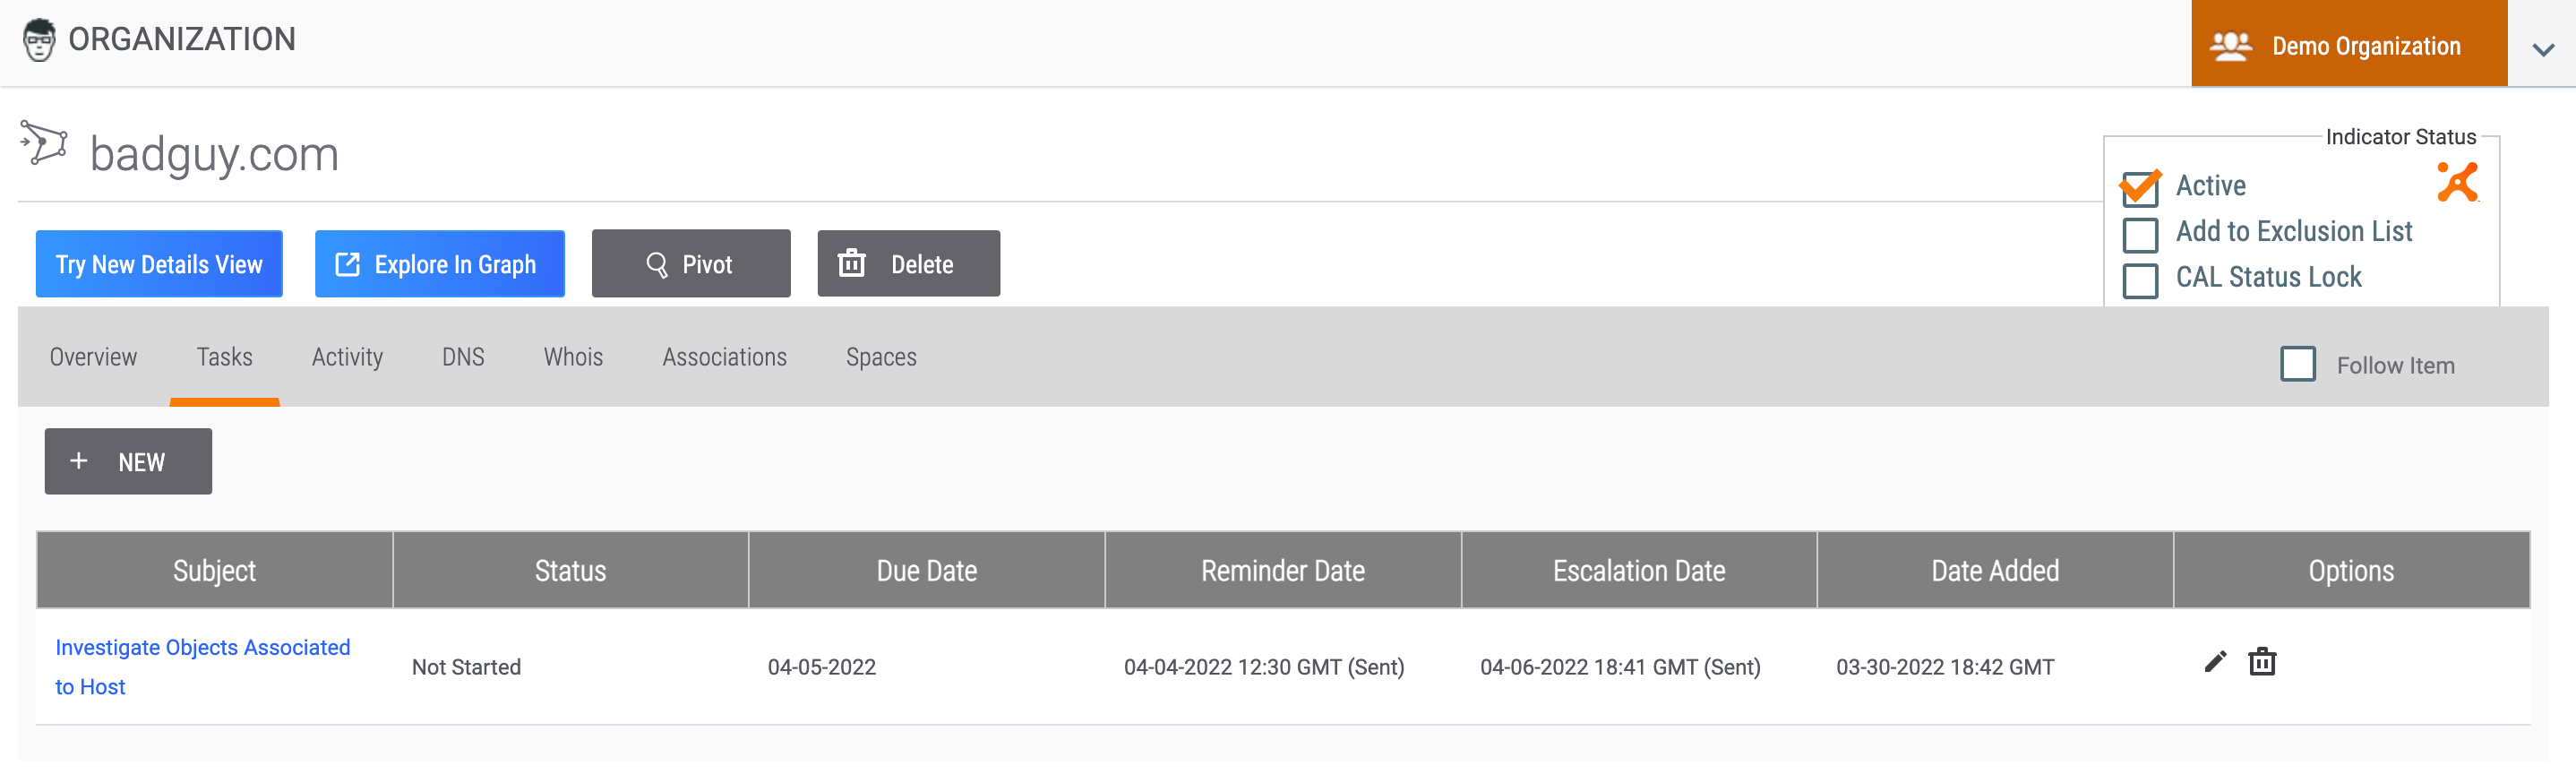
Tasks Tab
The Tasks tab (Figure 3) displays any Task Groups associated with the Indicator, Group, or Tag. To view the Details screen for an associated Task, click the Task’s name in the Subject column.
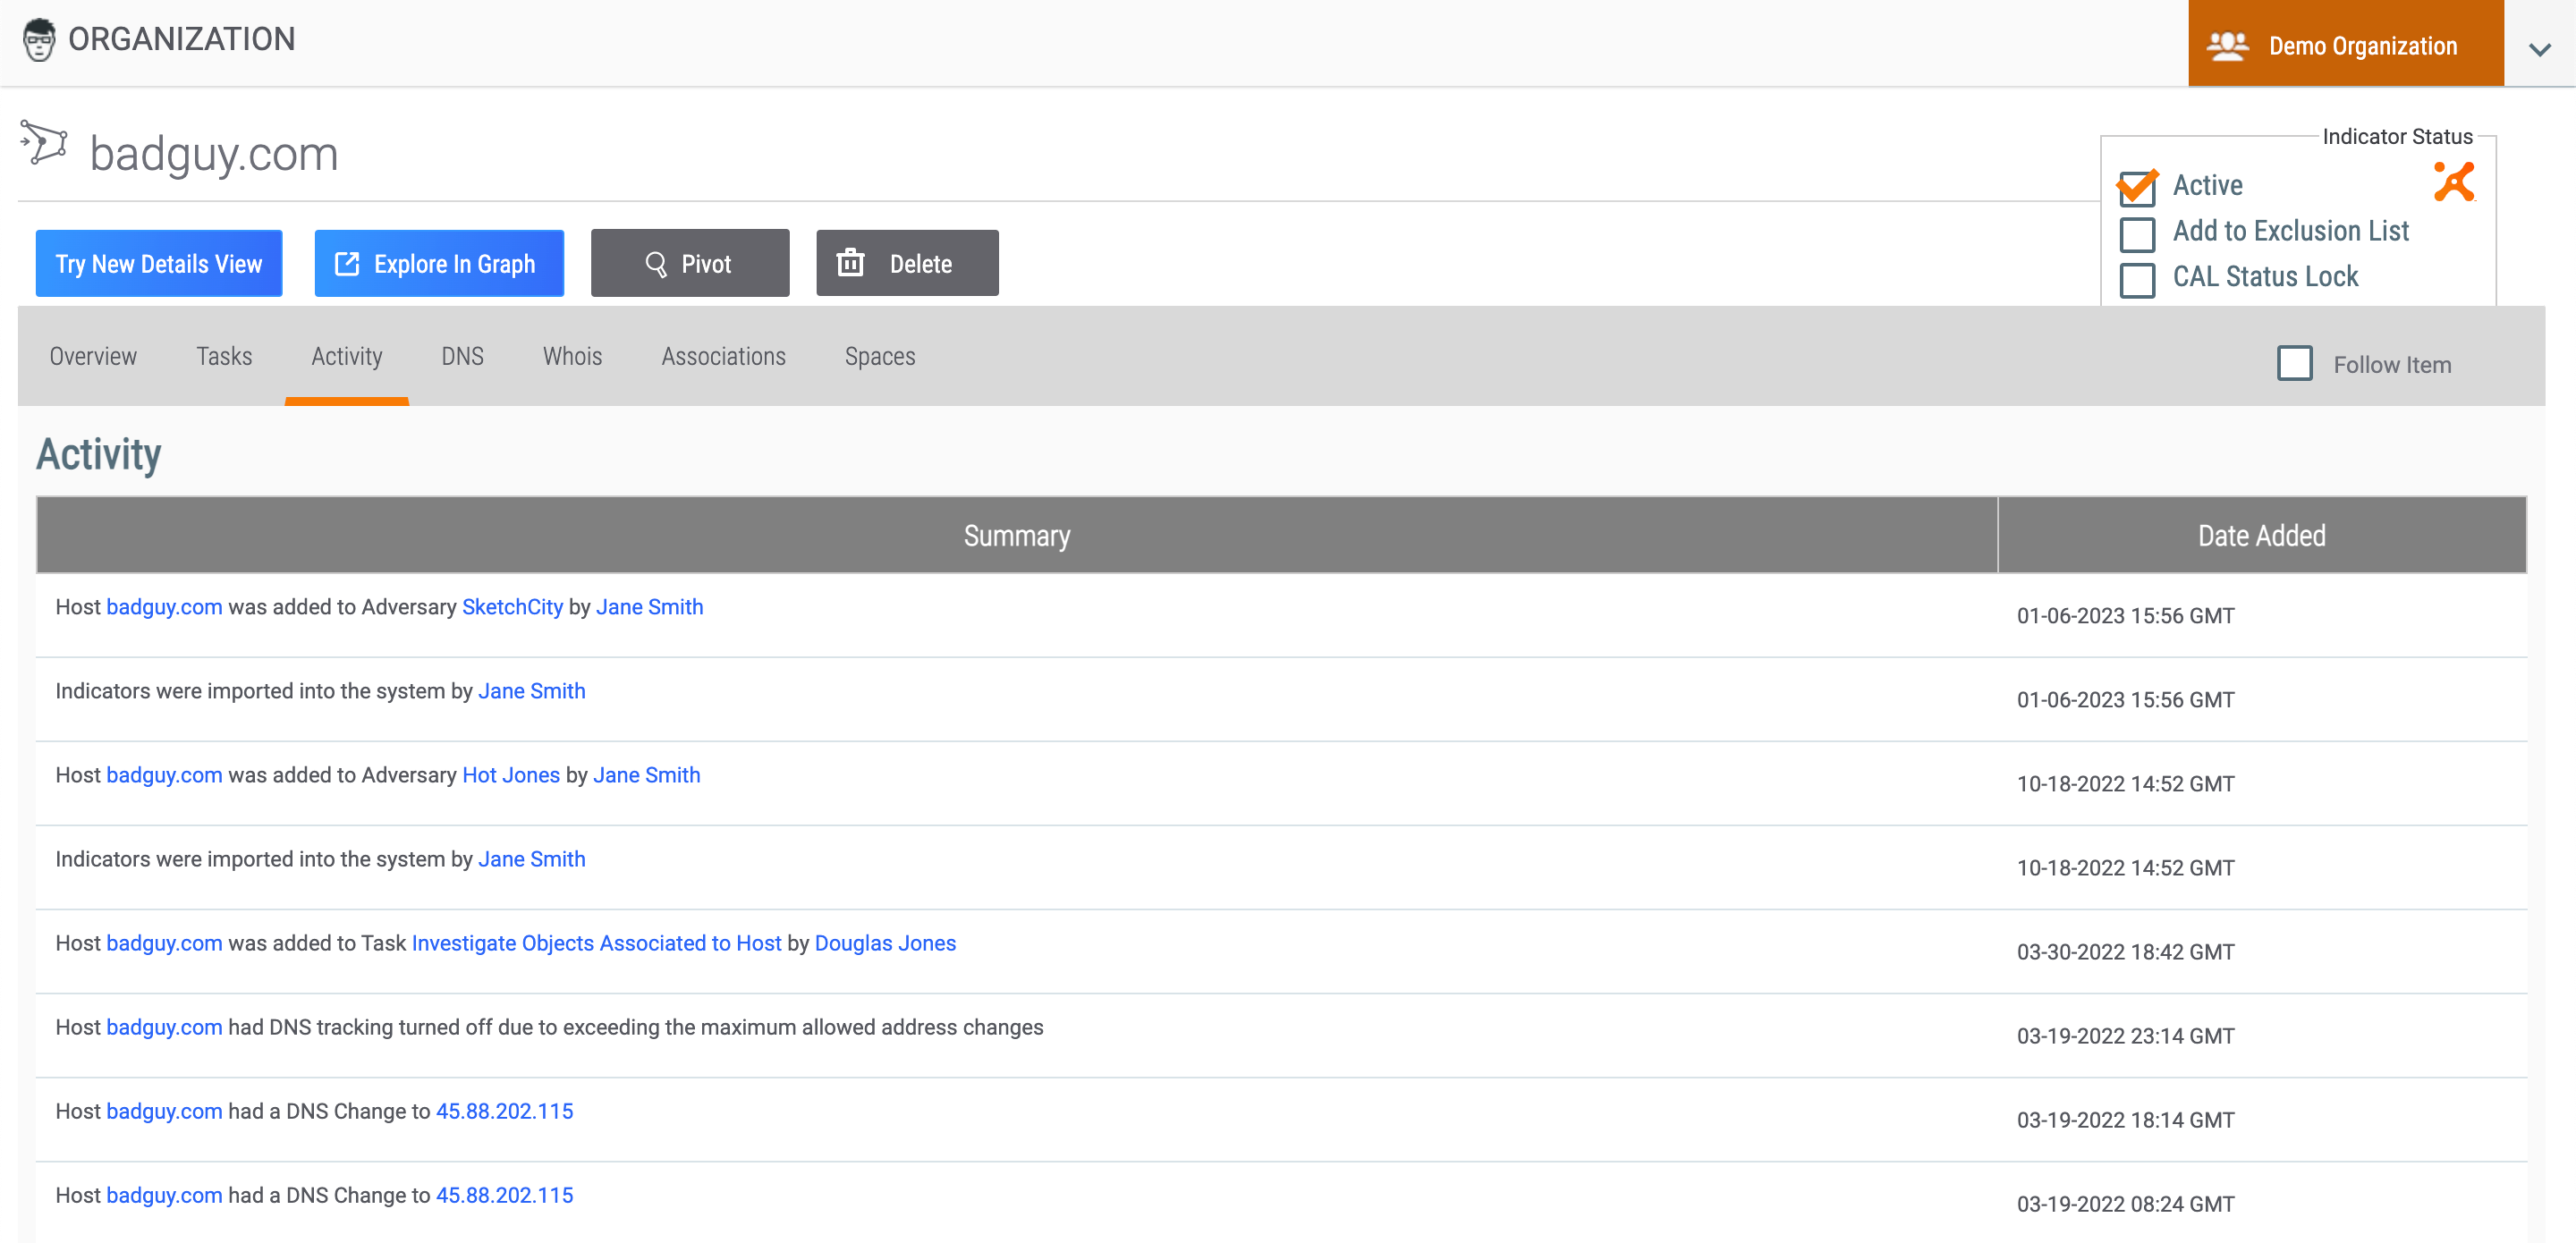
Activity Tab
The Activity tab (Figure 4) displays an activity list for the Indicator, Group, Tag, or Victim, including a summary of the activity performed and the date and time the activity occurred.
Associations Tab
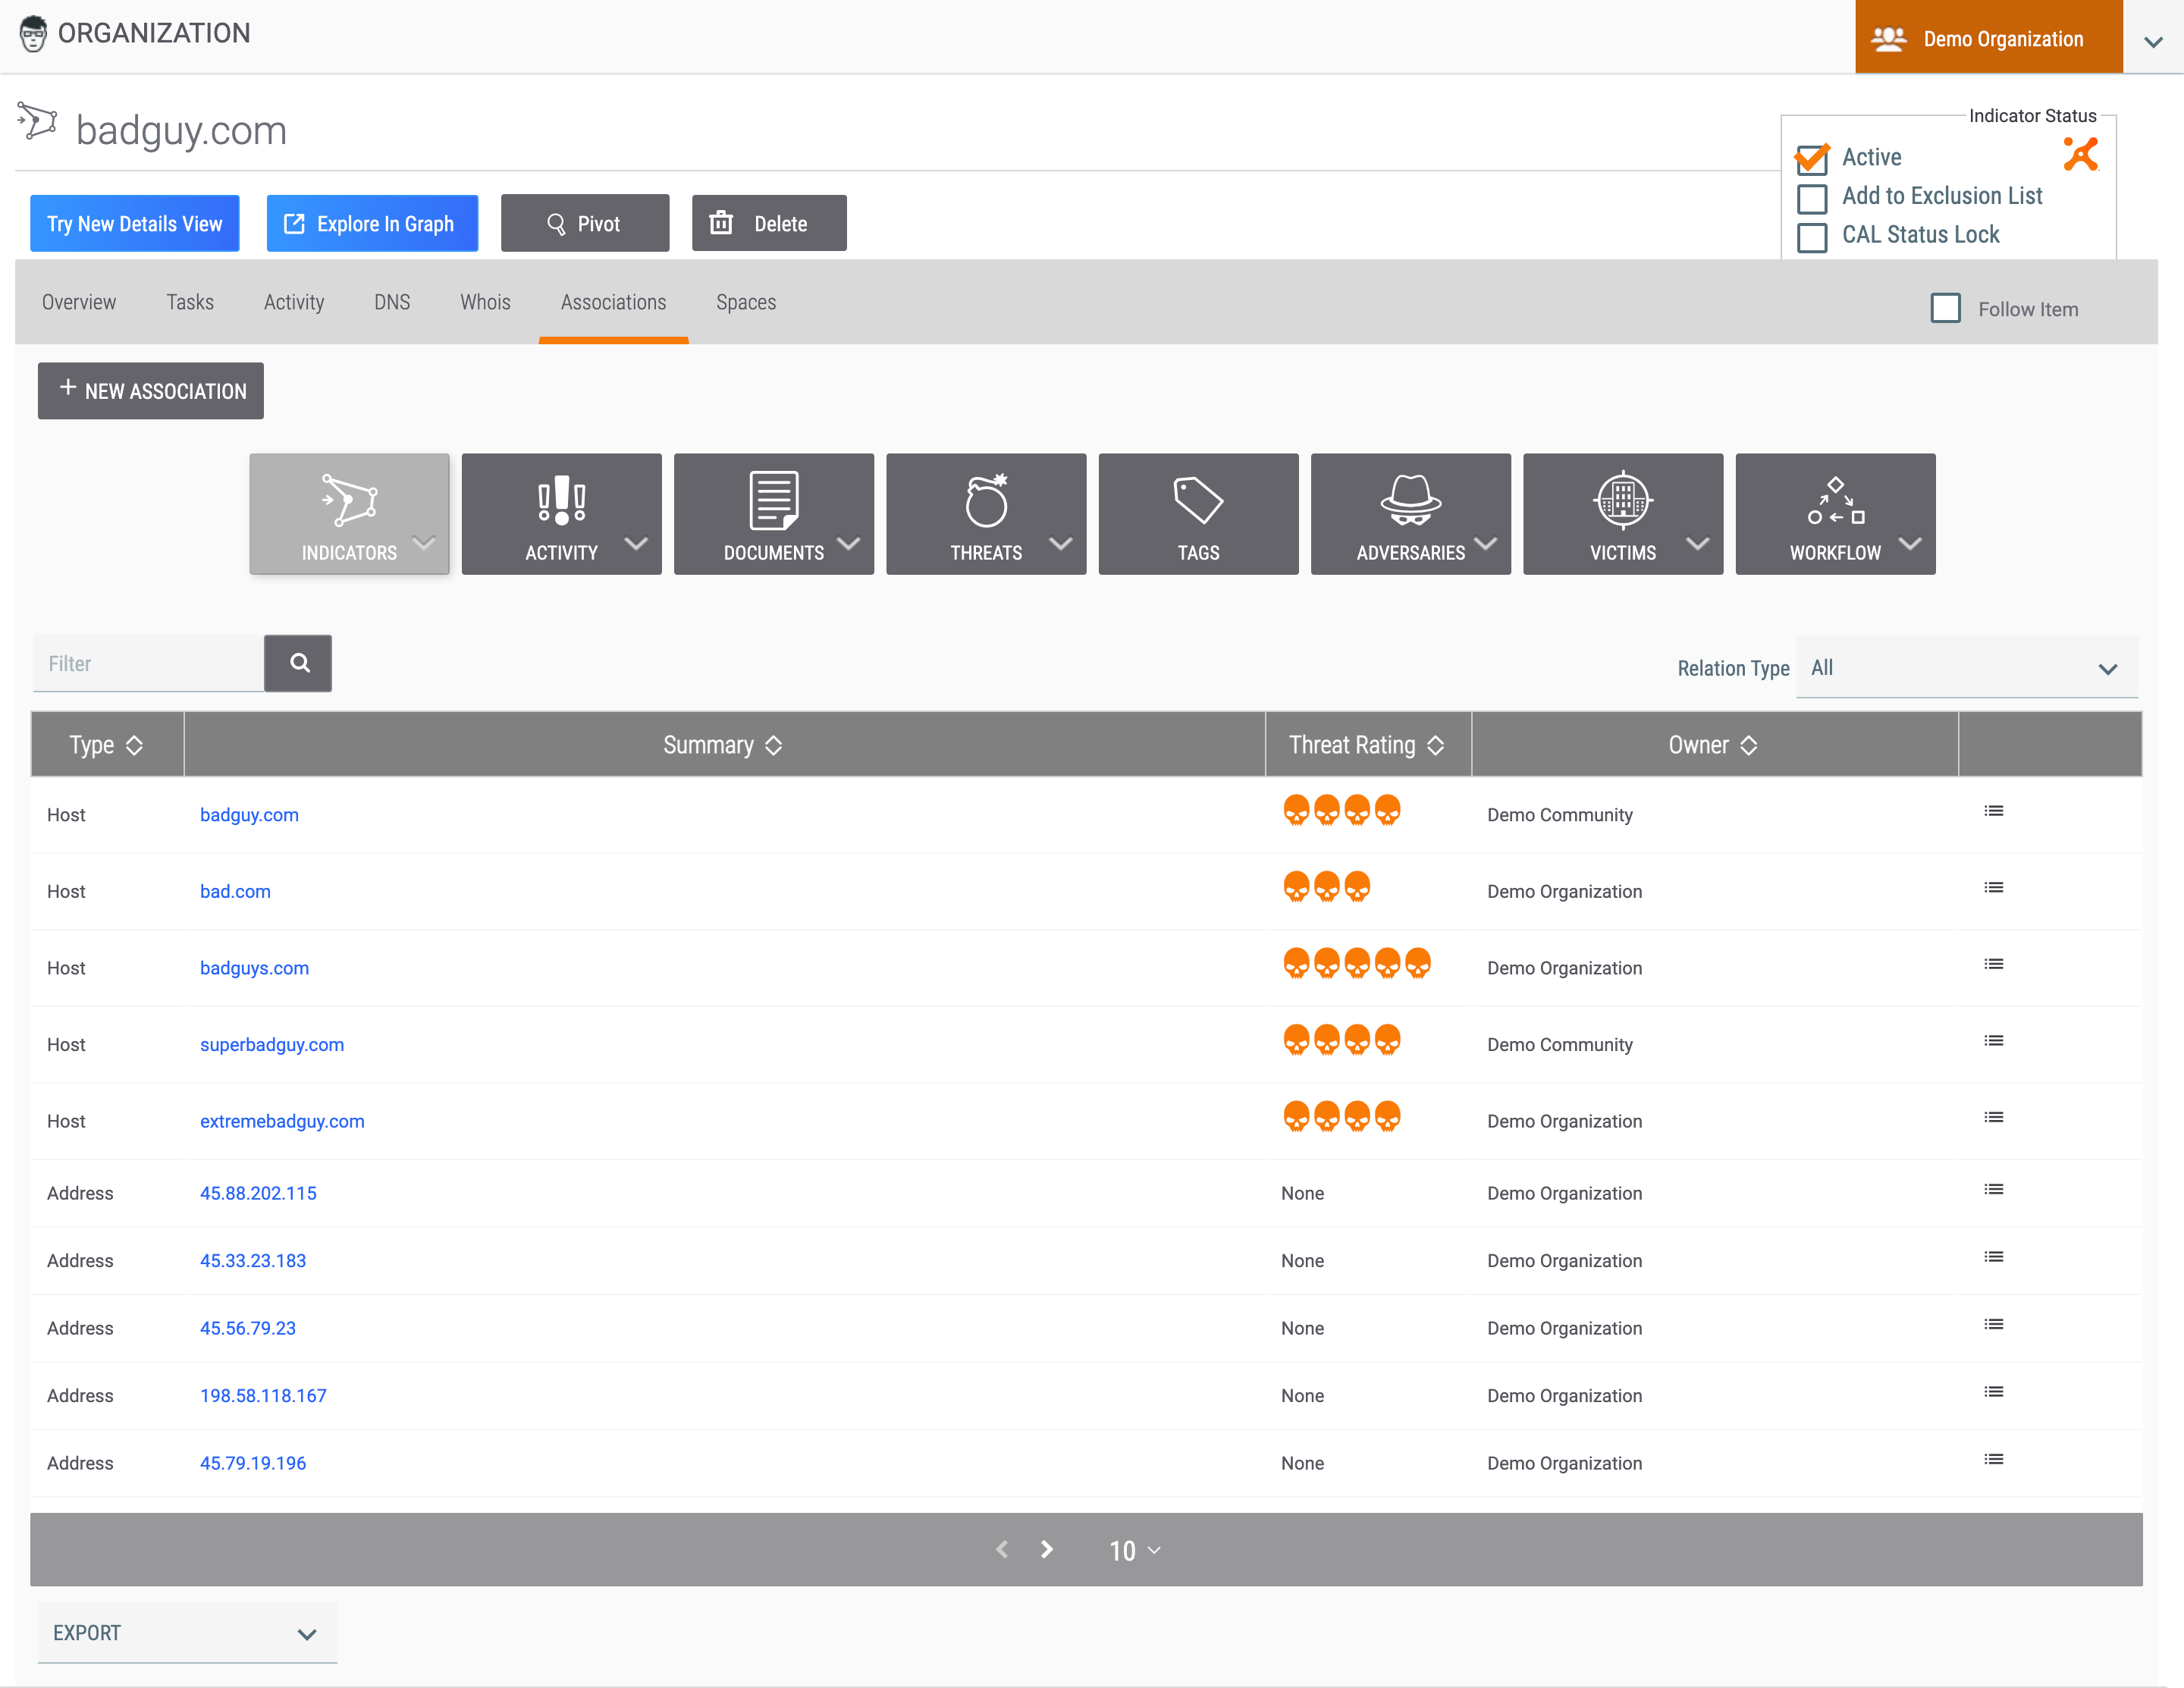
The Associations tab (Figure 5) displays the object’s first-level associations and provides options for filtering the association objects and adding an association.
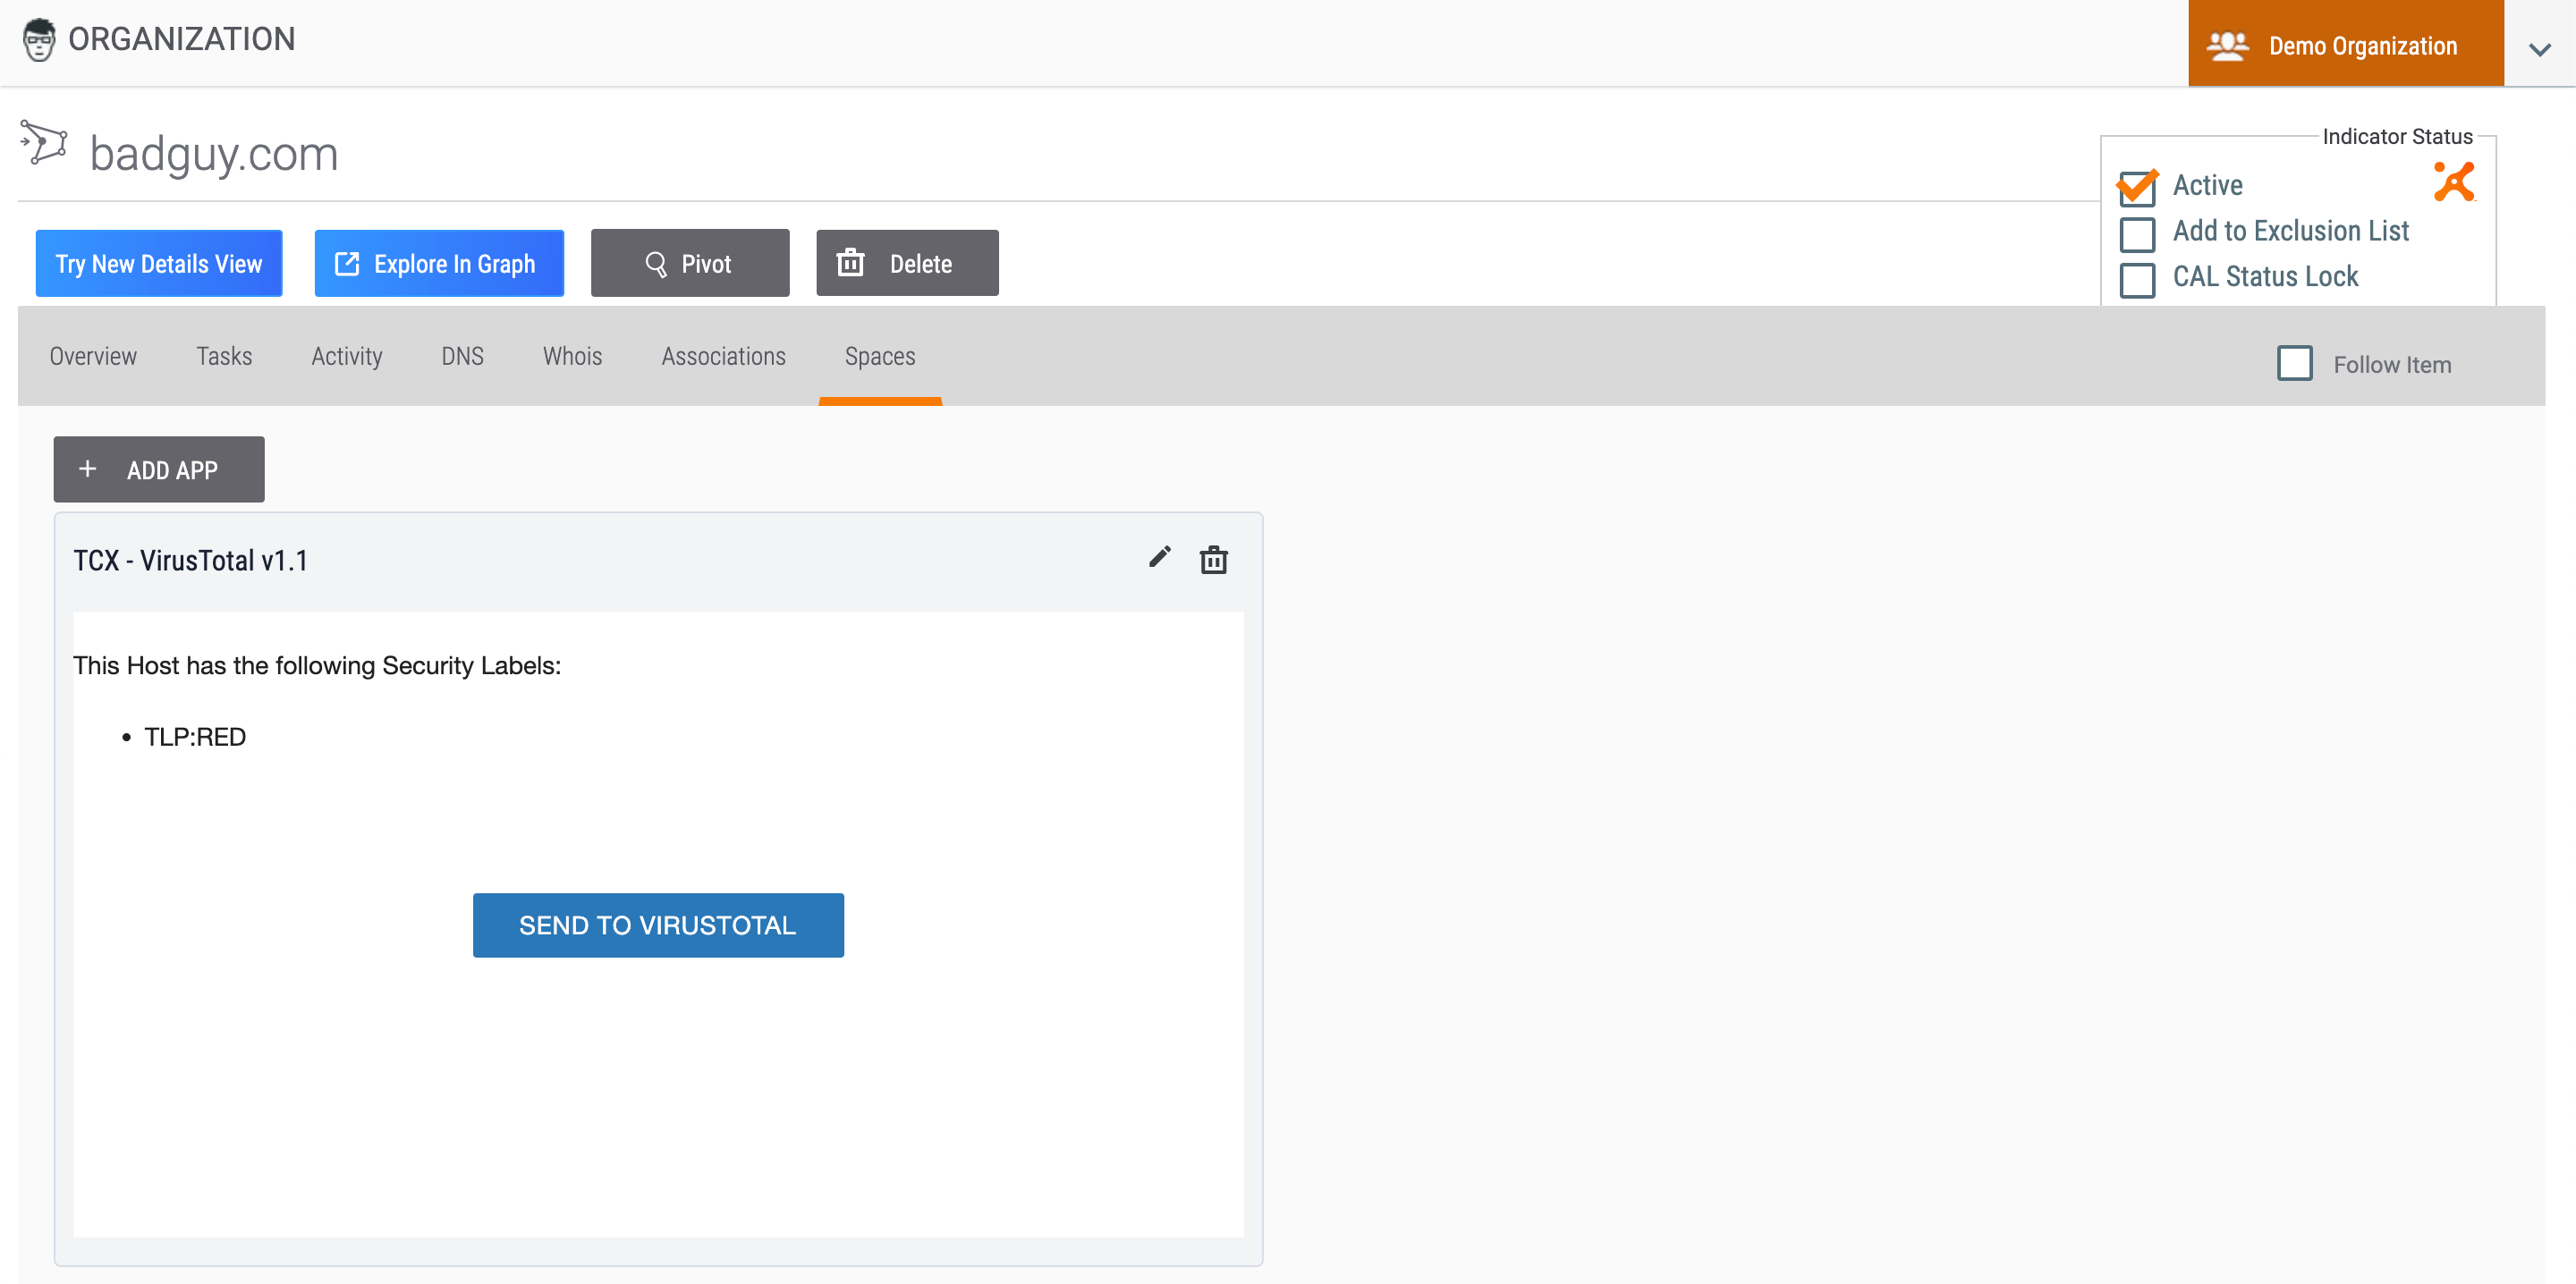
Spaces Tab
Object-Specific Tabs
Behavior Tab
File Indicators can model a special Indicator-to-Indicator association, which is based on their behavior once opened. These associations can be used to model the fact that malware may contain and create additional files or communicate with network devices The Behavior tab (Figure 7) of a File Indicator’s legacy Details screen can be used to model this behavior.

DNS Resolutions Tab
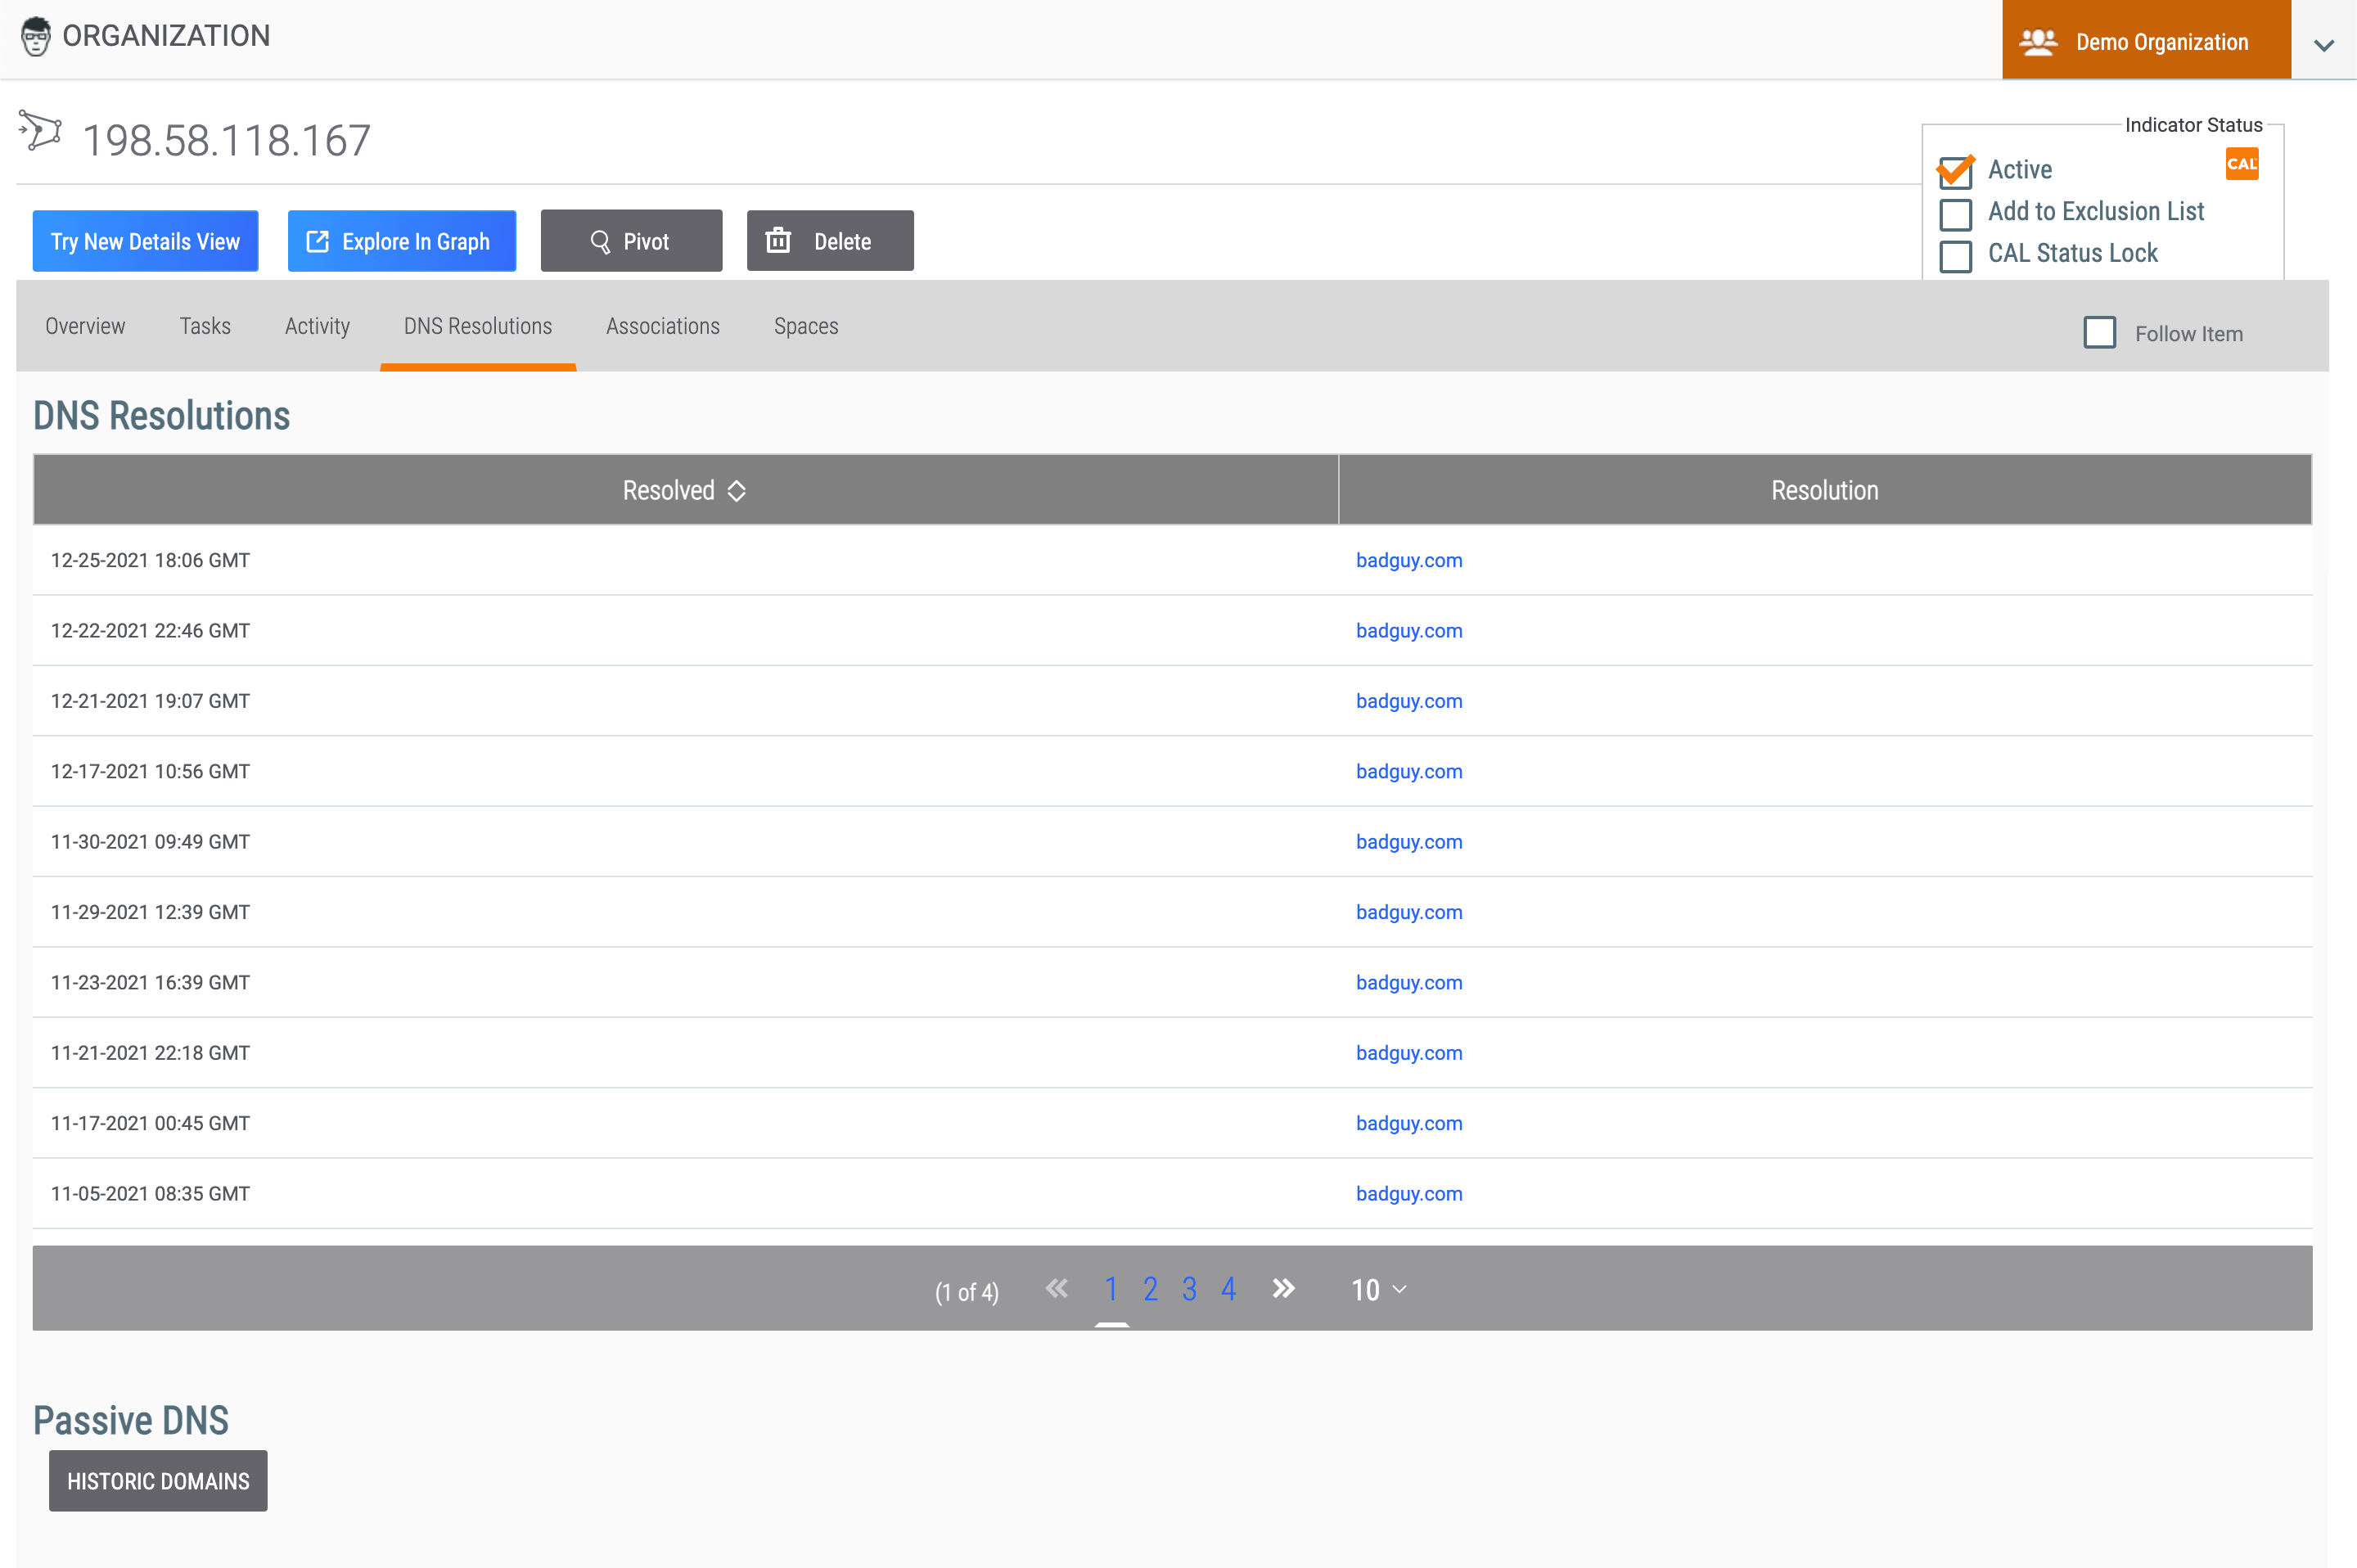
The DNS Resolutions tab (Figure 8), available for Address Indicators, displays Hosts that have resolved to the Address, presently or historically. This allows for the automated creation of associations between the Host and the Address, as well as enables pivoting.
DNS Tab
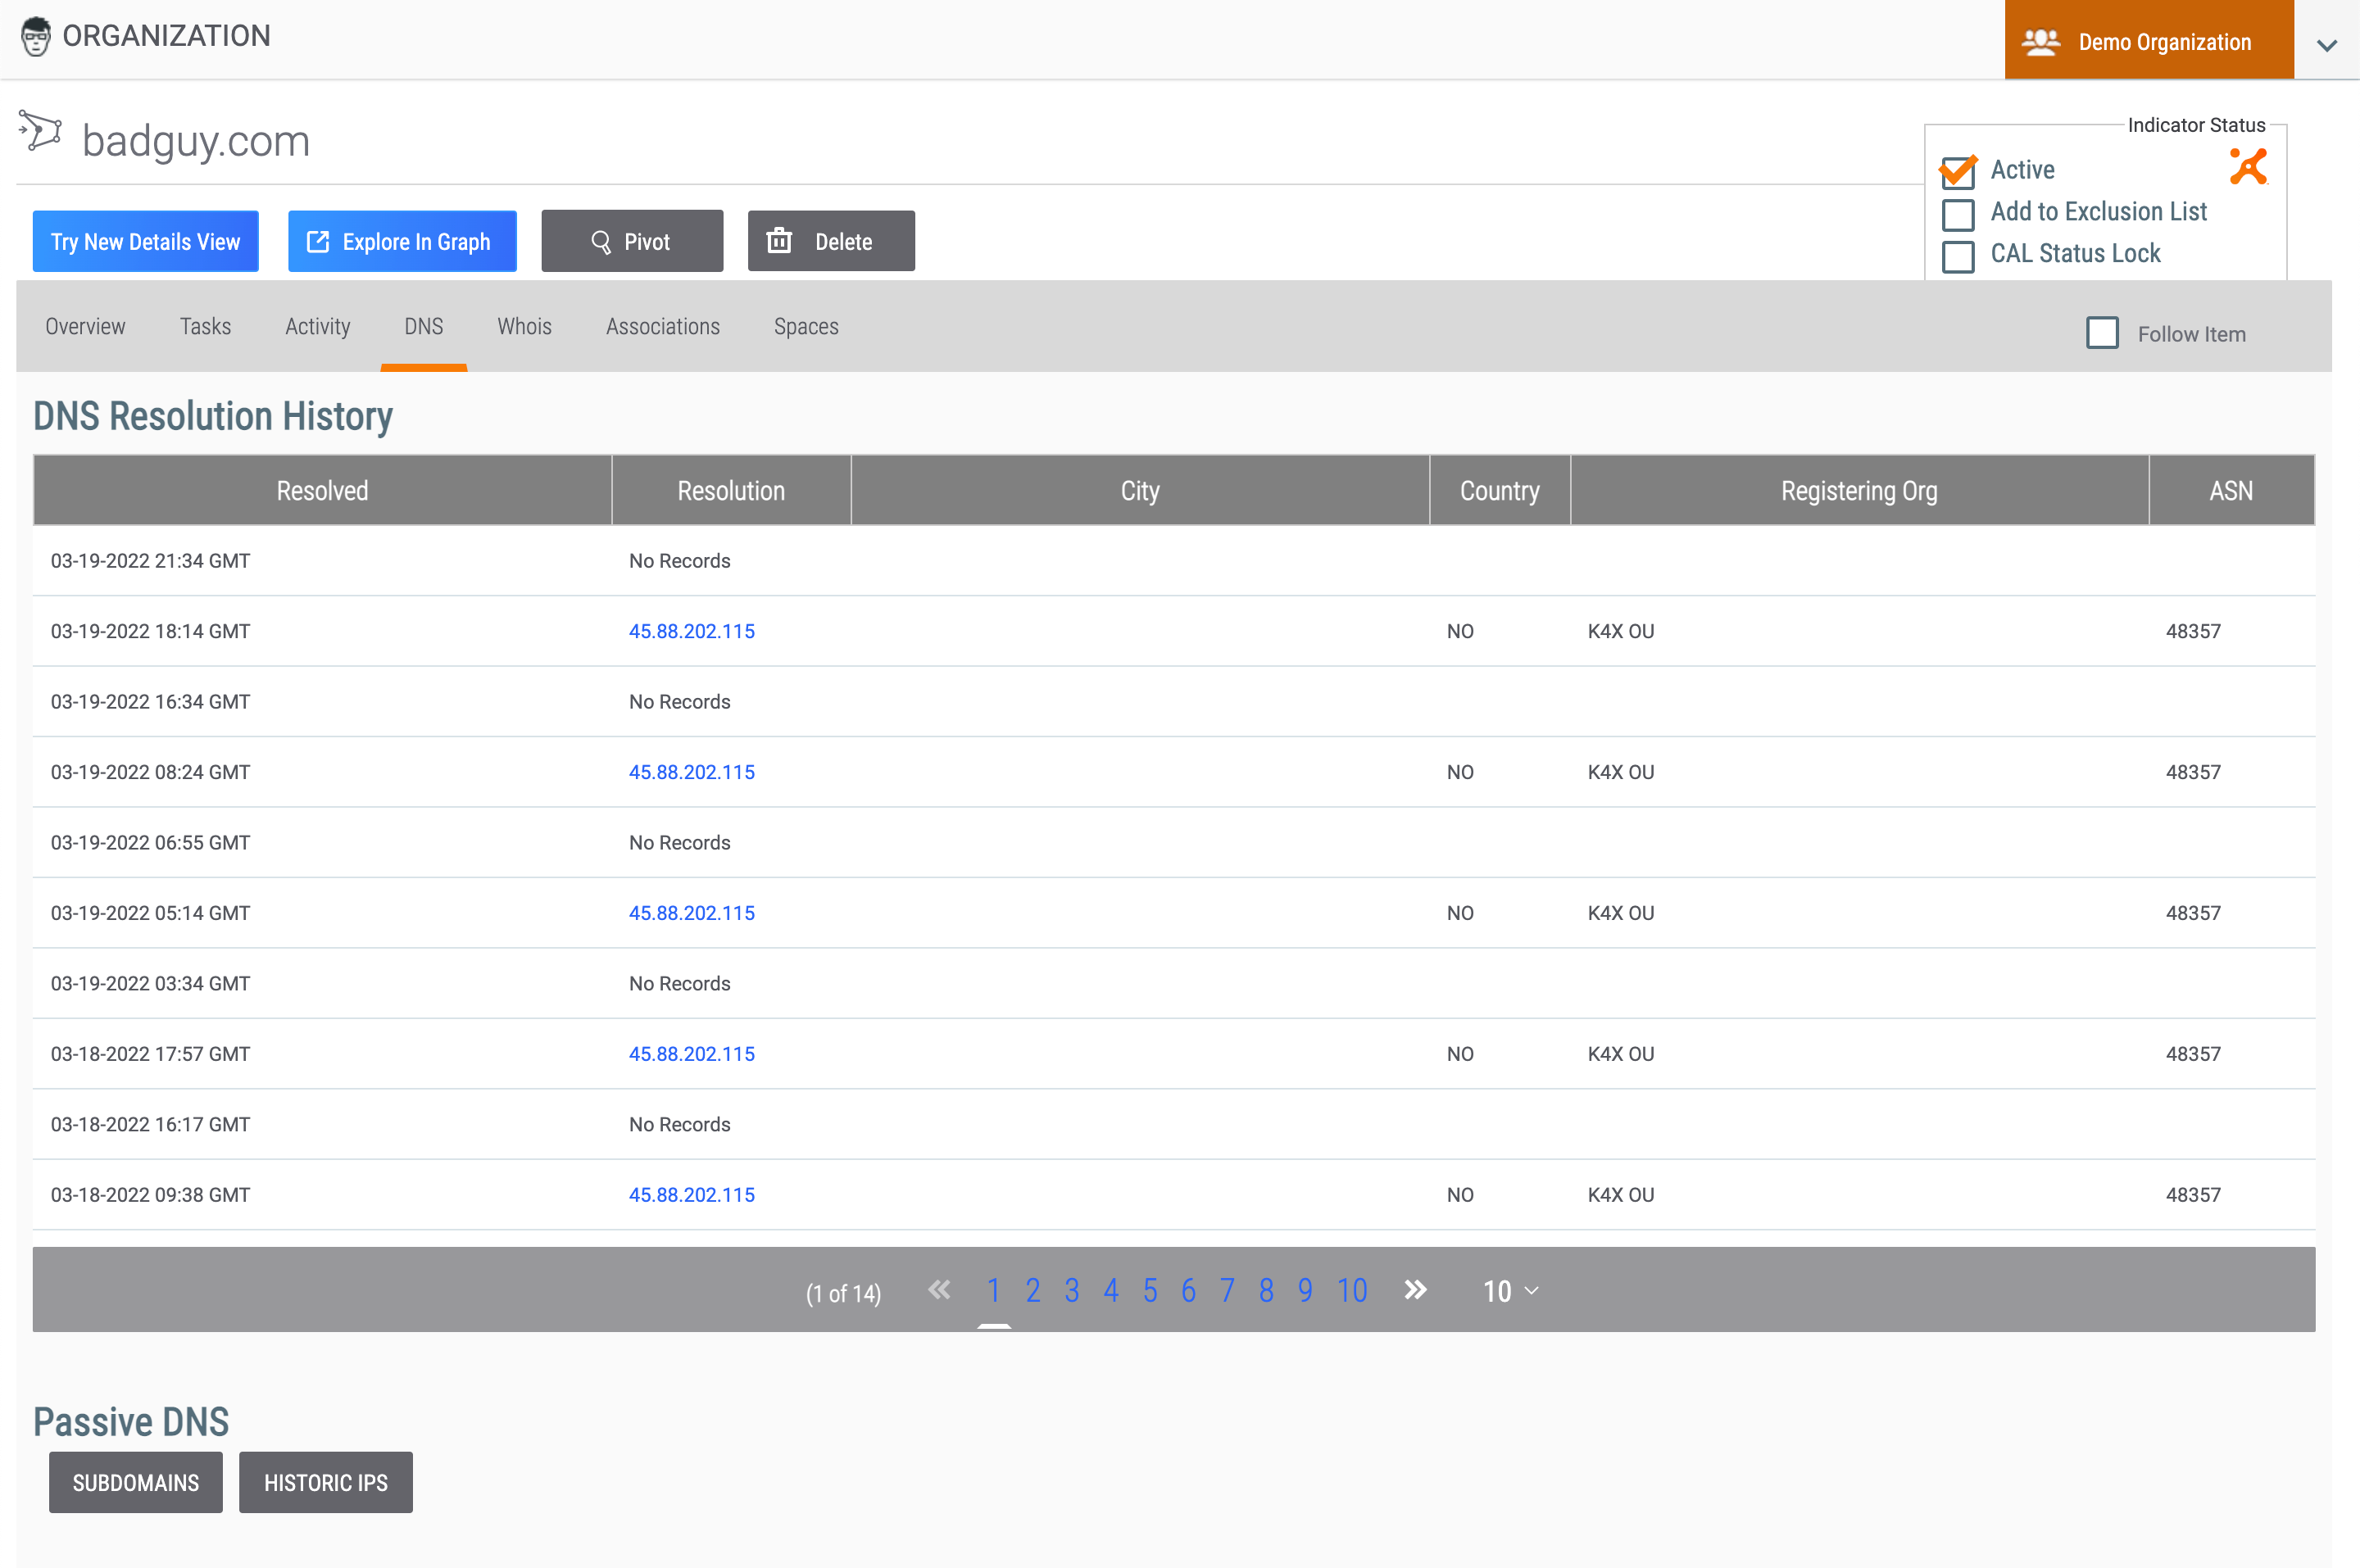
Host Indicators can leverage DNS resolution tracking for ongoing resolution changes. The DNS tab (Figure 9) for Host Indicators displays two sections:
- DNS Resolution History: This section lists the Addresses that have resolved to the Host Indicator, presently or historically.
- Passive DNS: This section, if available, provides the ability to view a list of the subdomain resolutions and historic IP address resolutions for the Host.
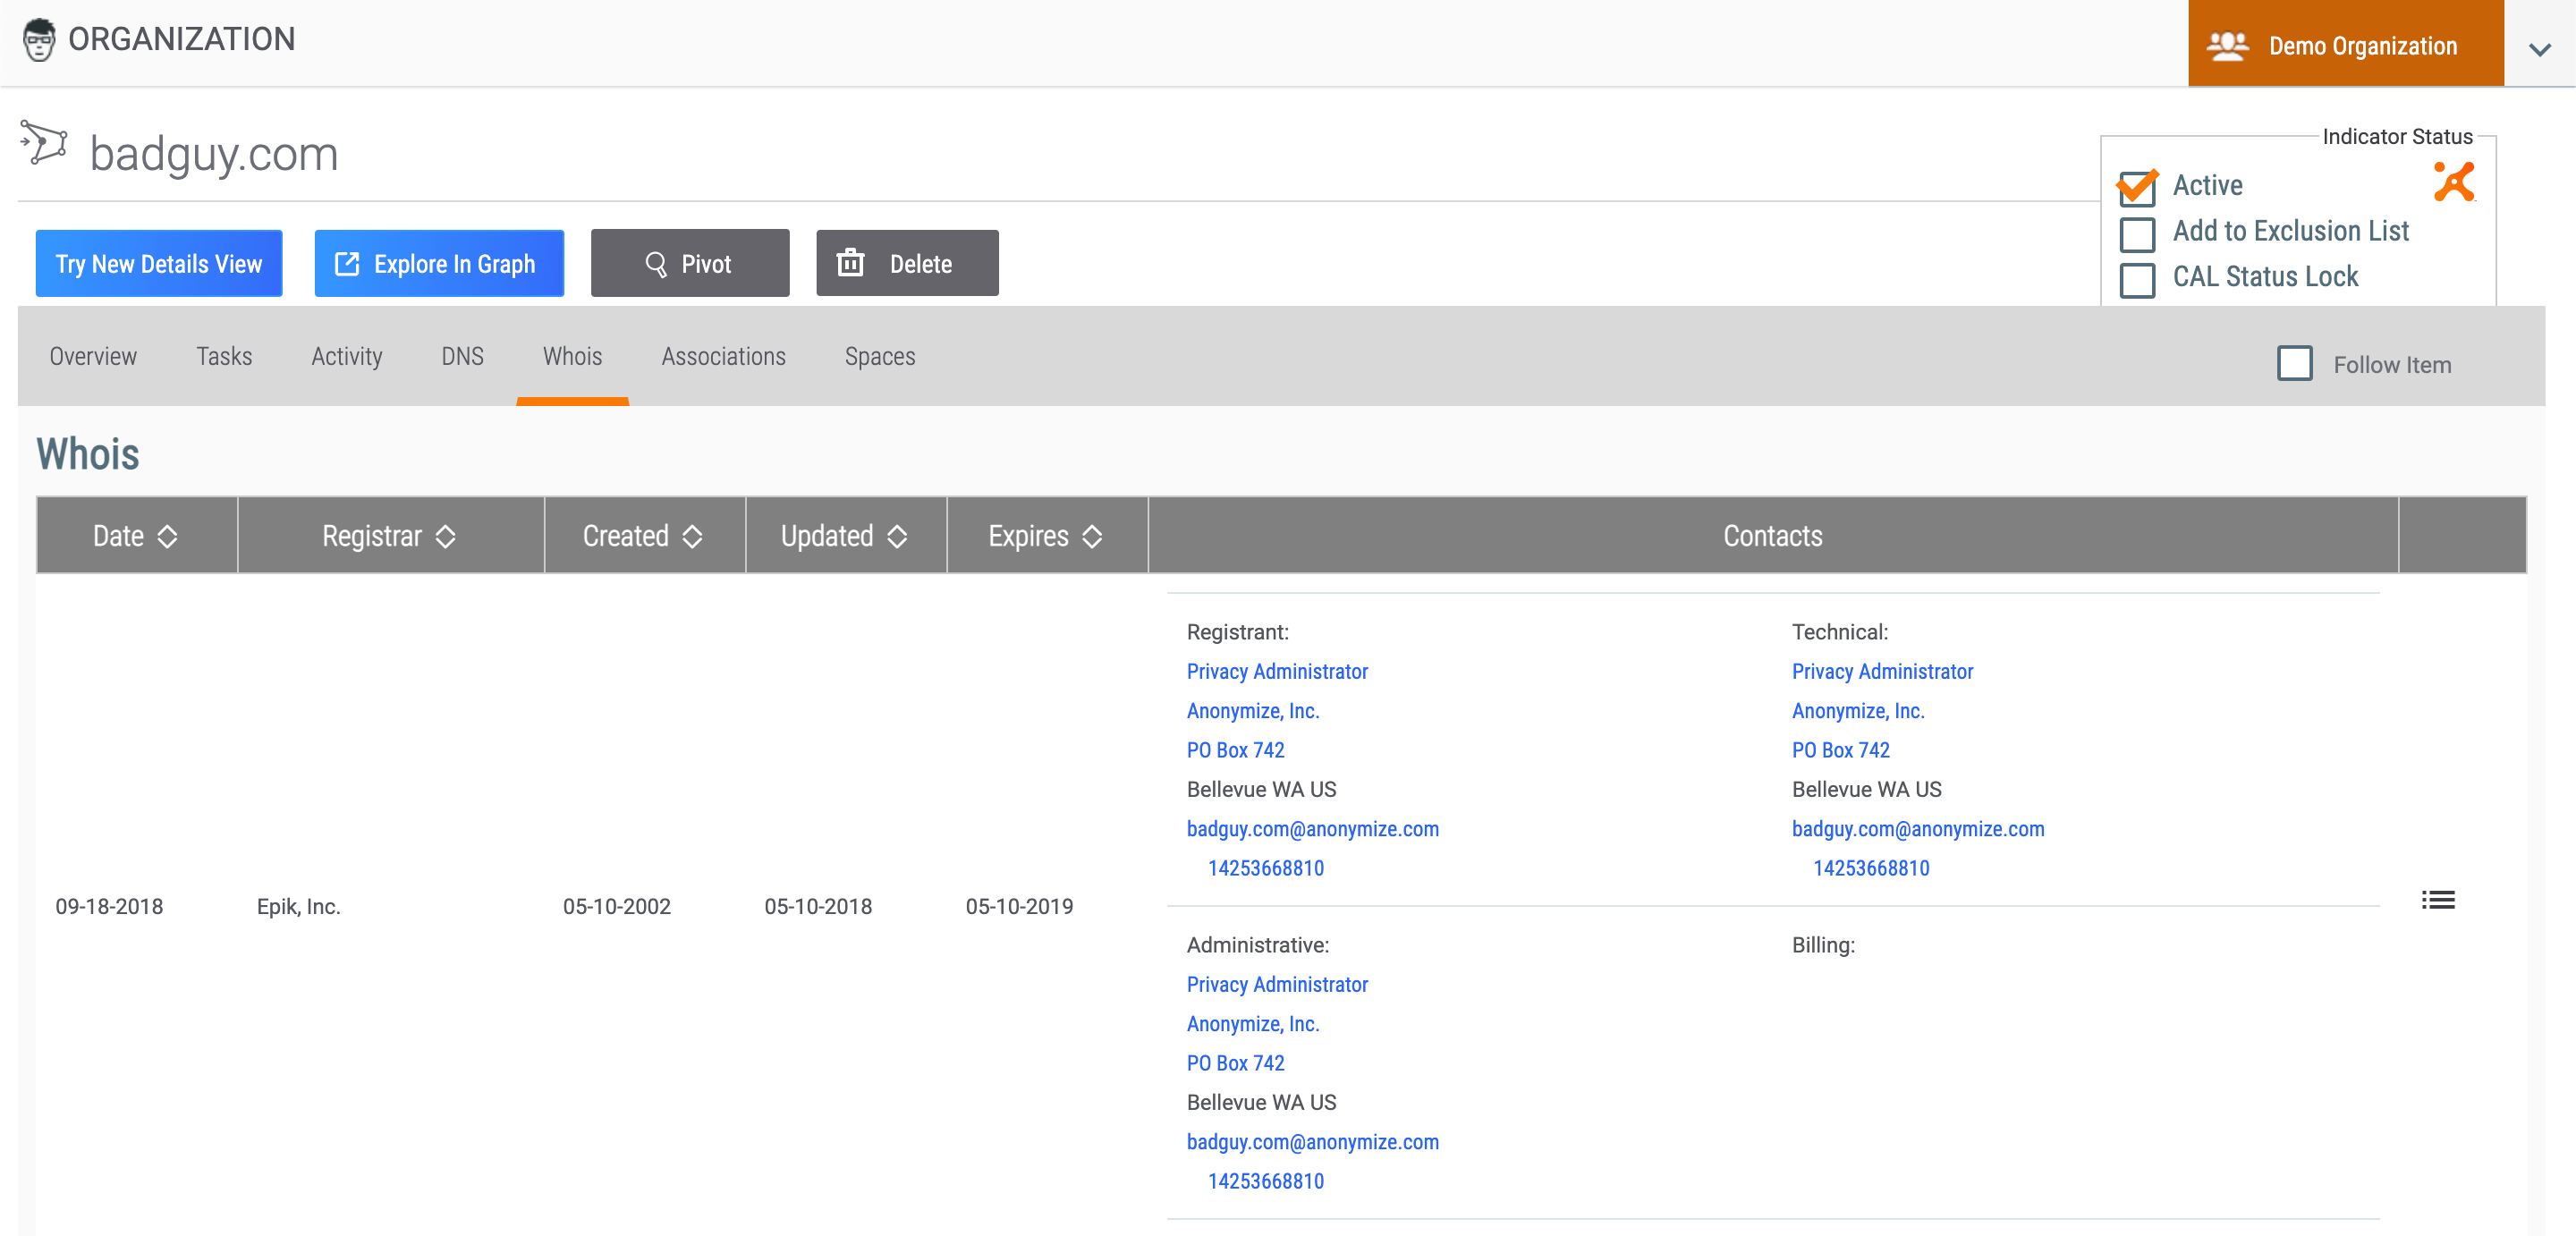
Whois Tab
The Whois tab (Figure 10) for Host Indicators provides WHOIS information, if available.
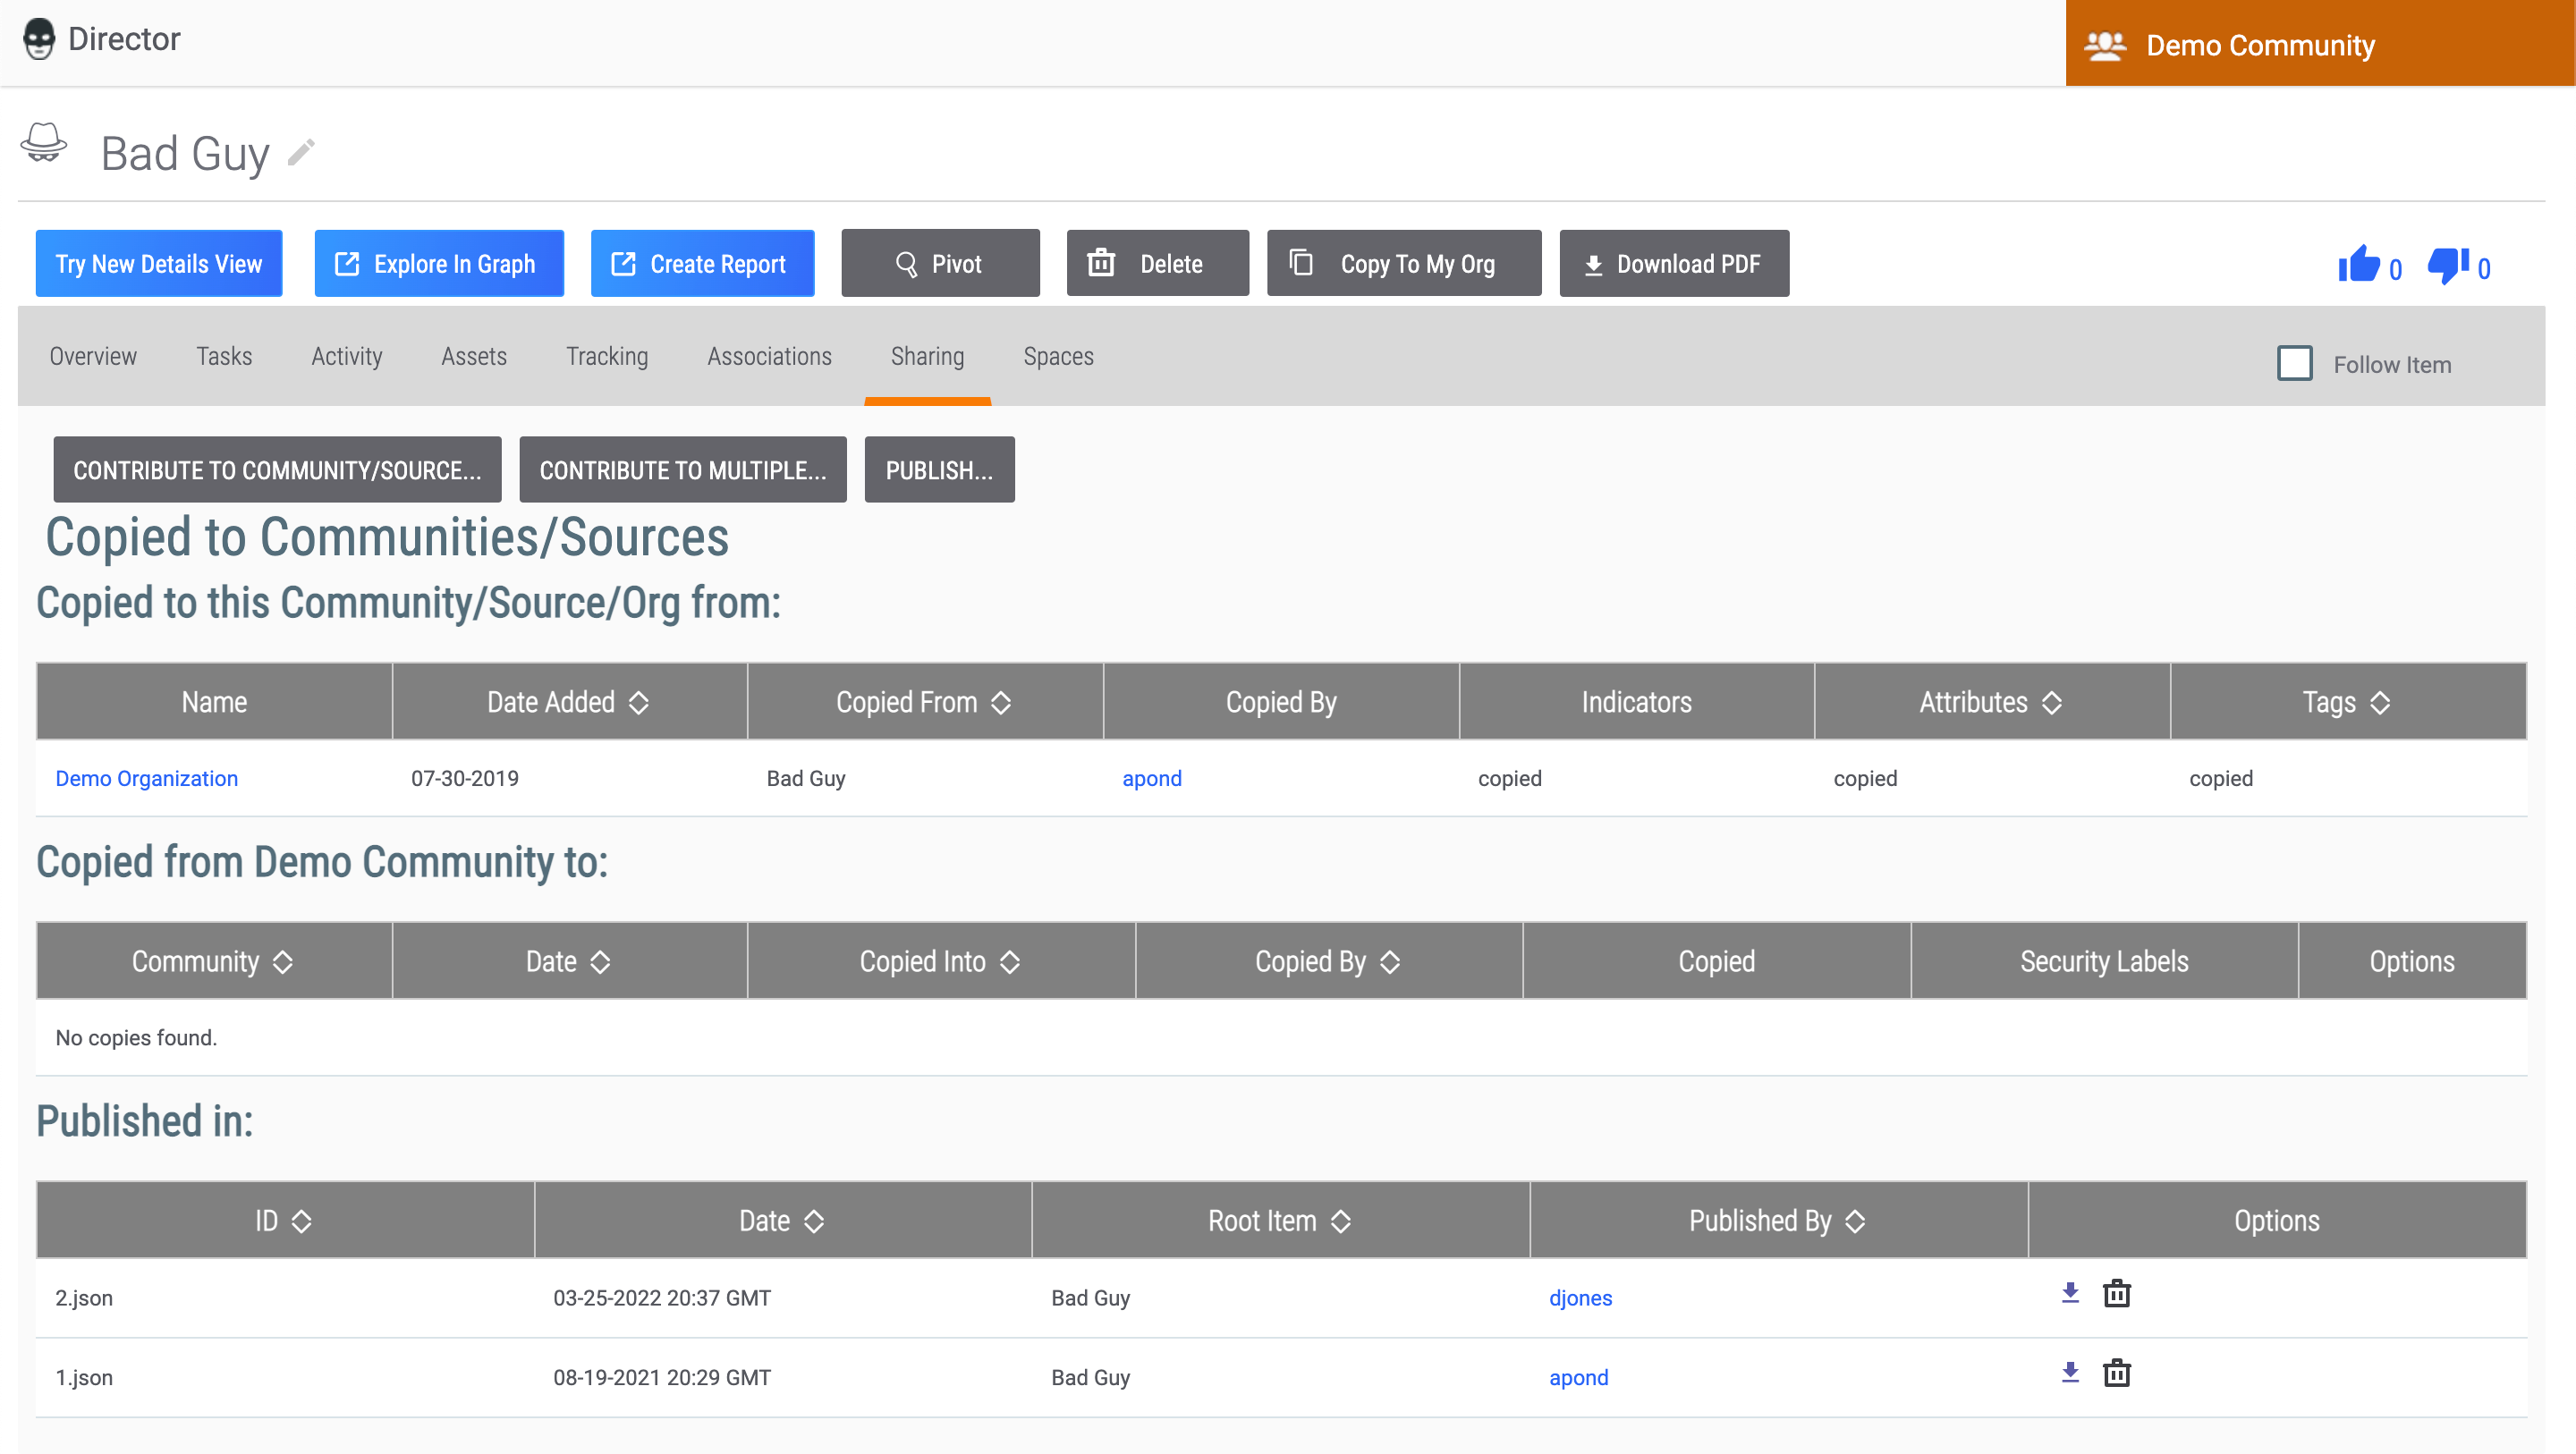
Sharing Tab
The Sharing tab (Figure 11) allows you to contribute a Group to a Community or Source, as well as publish a Group using the Publish feature. This tab is available on the legacy Details screen for the following Group types: Adversary, Attack Pattern, Campaign, Course of Action, Document, E-mail, Event, Incident, Intrusion Set, Malware, Report, Signature, Tactic, Threat, Tool, and Vulnerability.
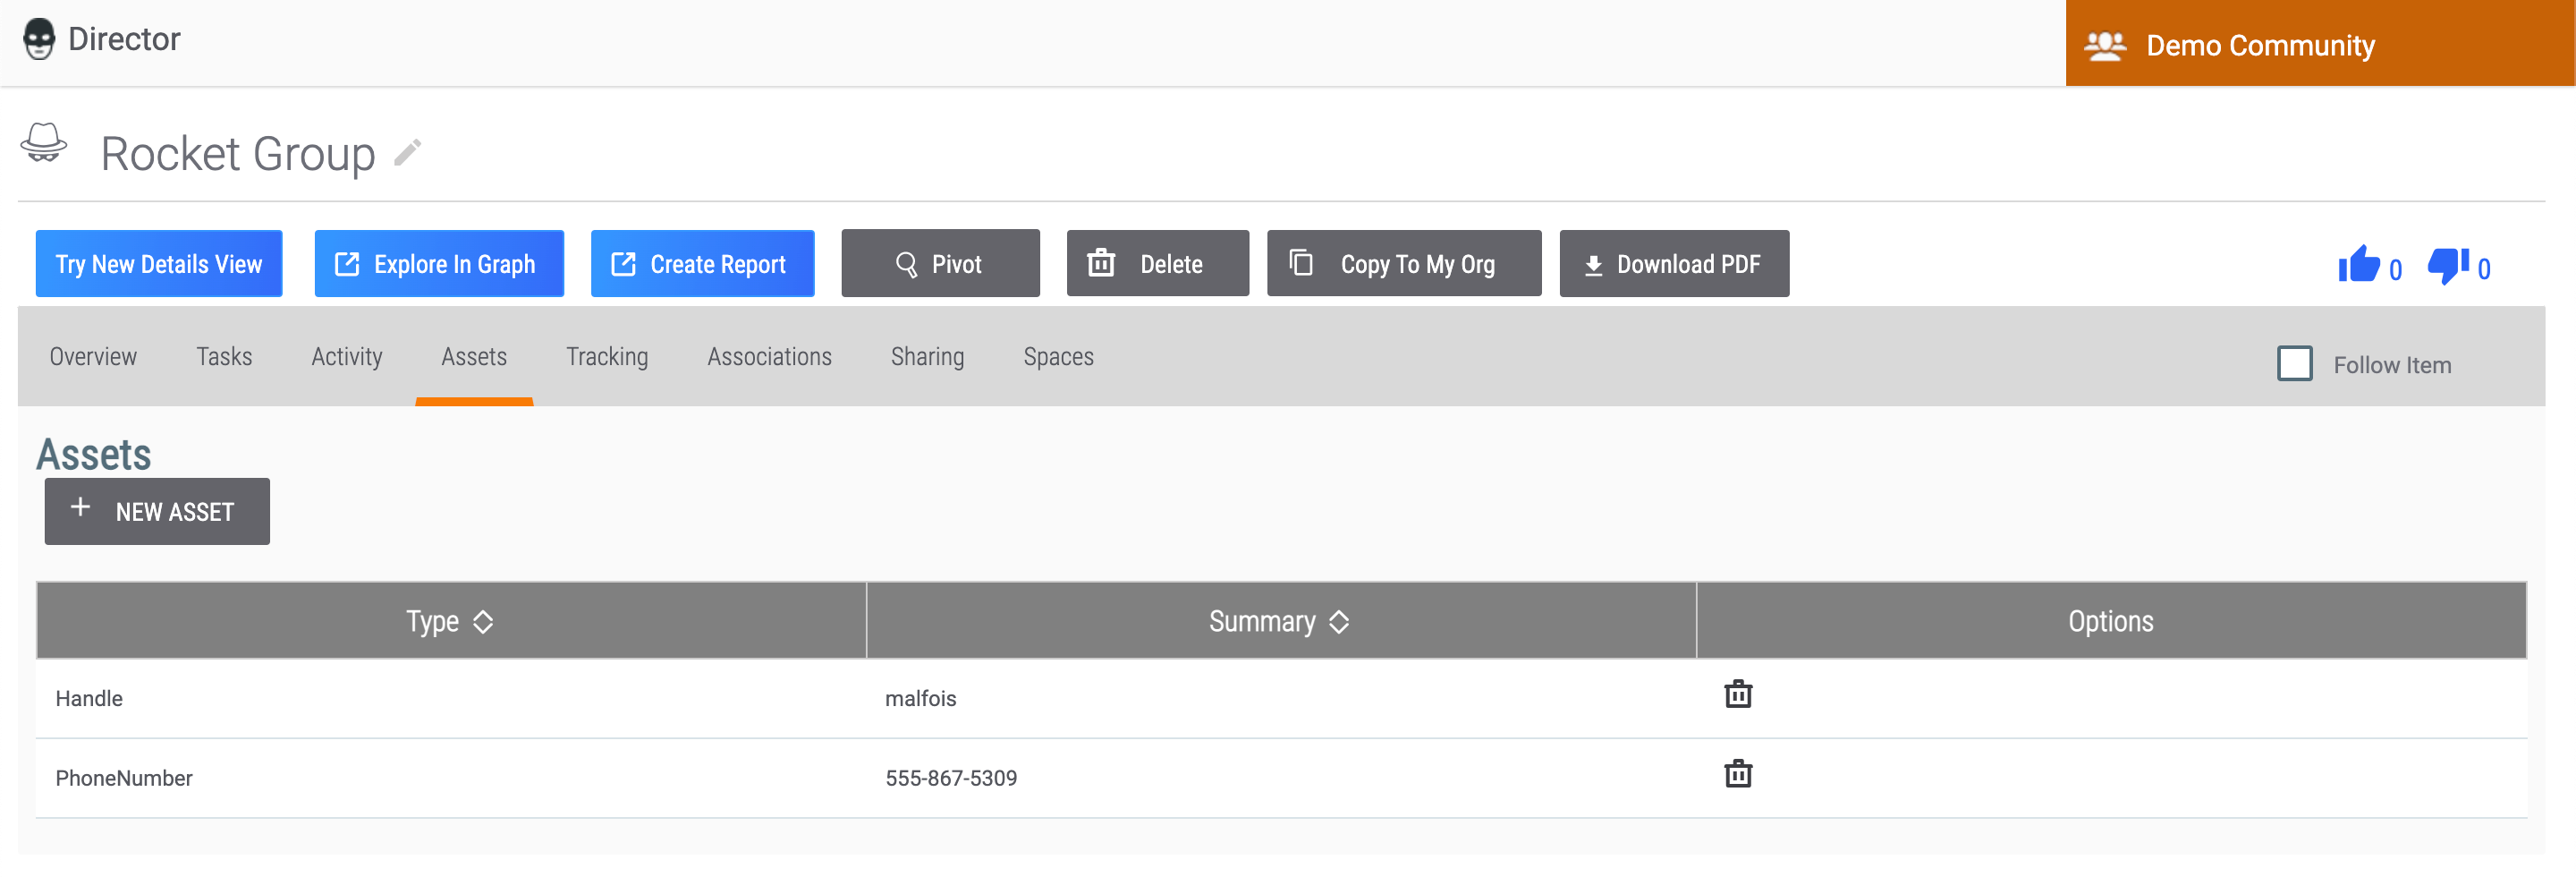
Assets Tab
The Assets tab (Figure 12) allows you to add assets to an Adversary Group or Victim. Assets that can be added to an Adversary include handles (aliases), phone numbers, and website URLs. Assets that can be added to a Victim include email addresses, social network accounts, network accounts, websites, and phone numbers.
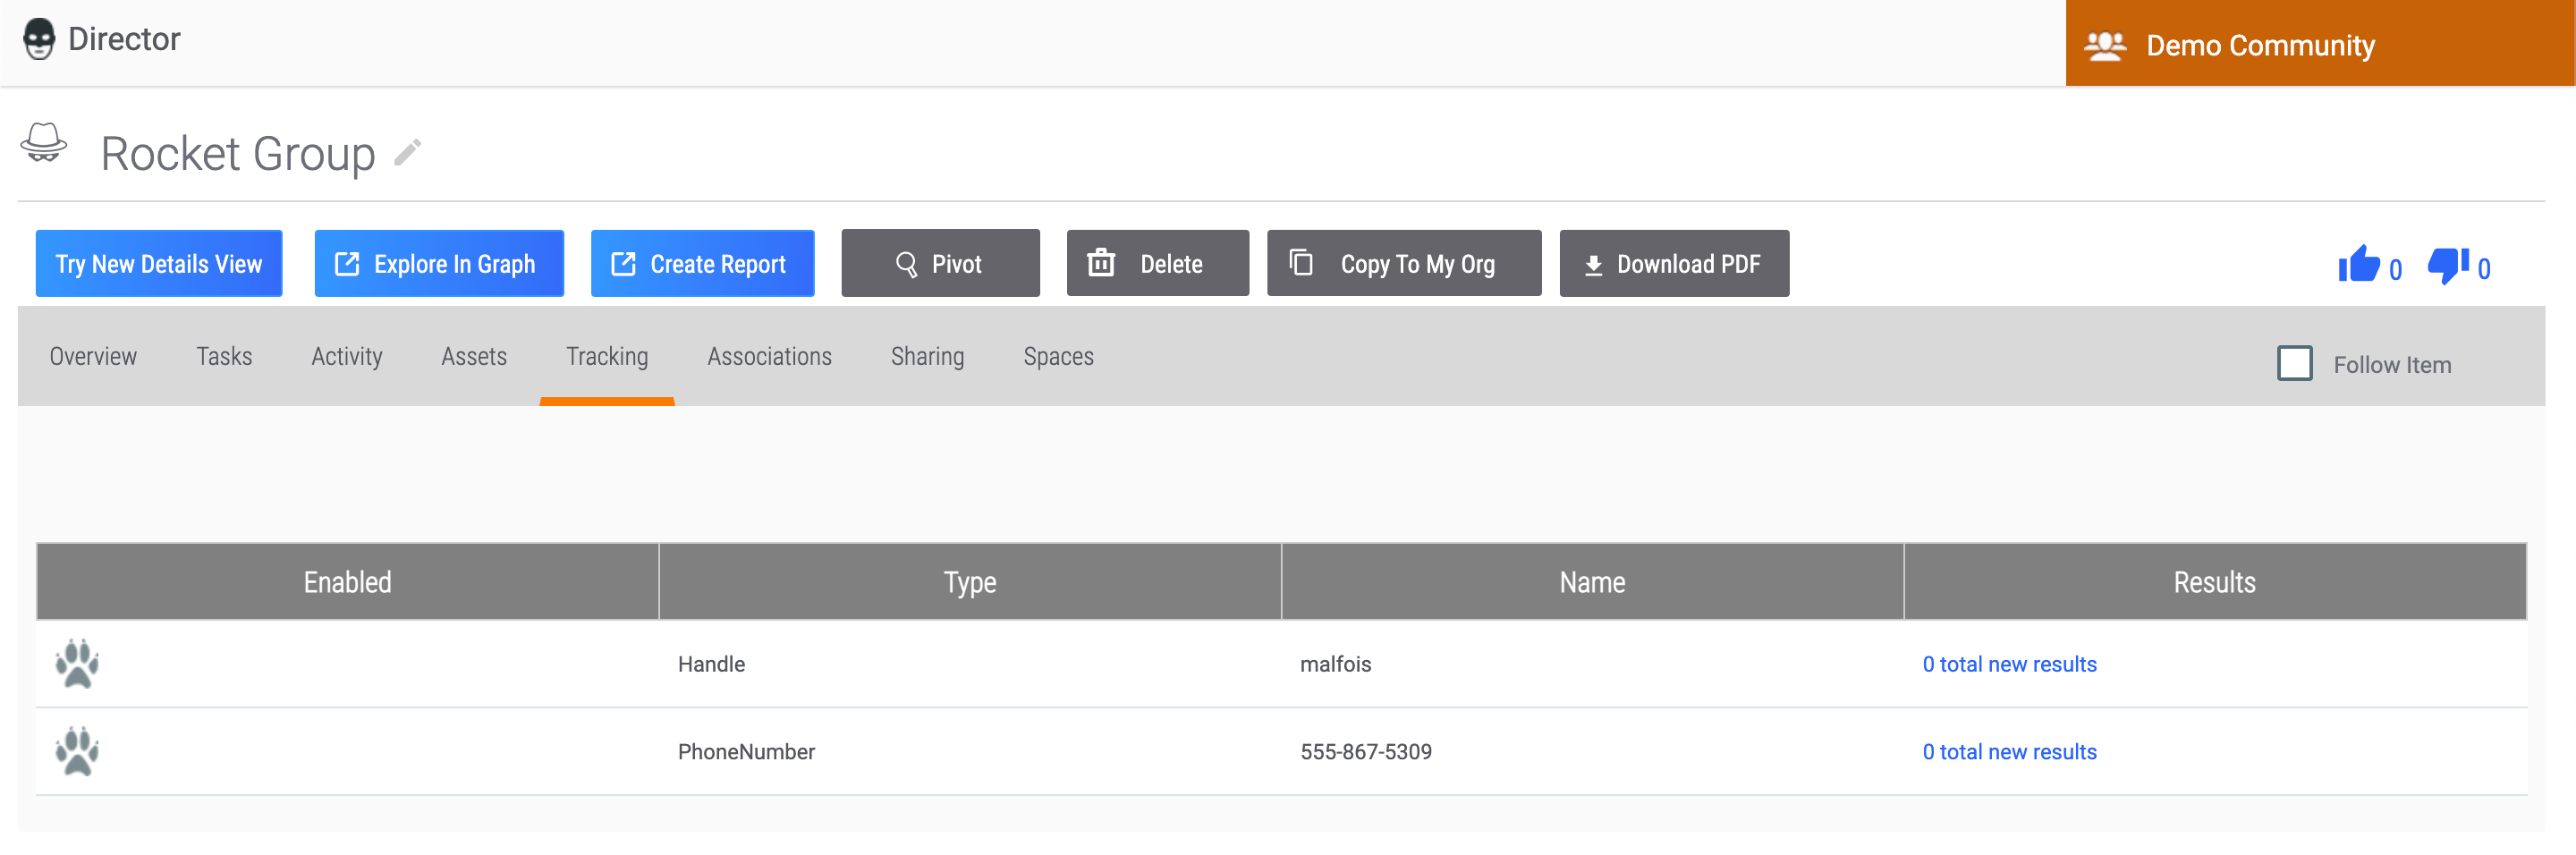
Tracking Tab
The Tracking tab (Figure 13) allows you to perform a Reverse Whois lookup on any assets added to an Adversary Group.
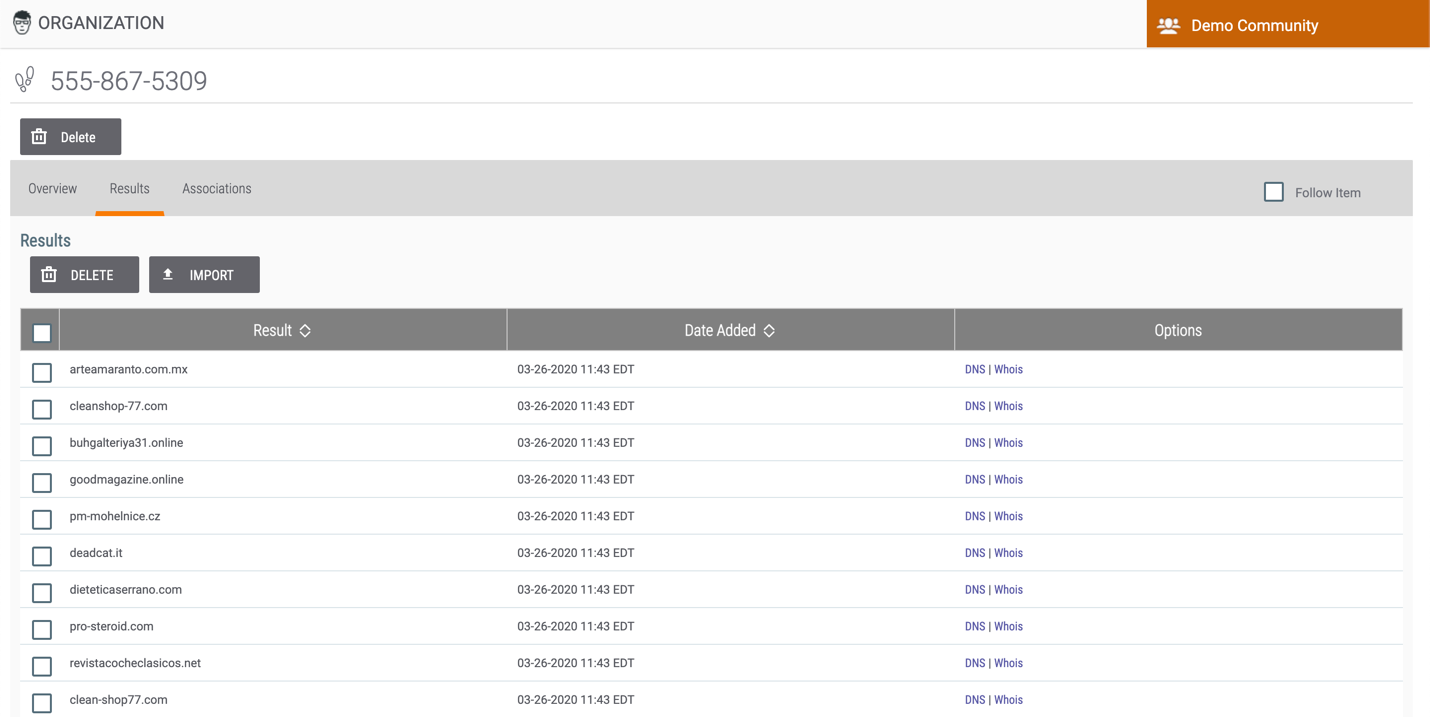
Results Tab
The Results tab (Figure 14), available only for Tracks, allows you to view domains found in a Reverse Whois lookup performed on an Adversary asset.
ThreatConnect® is a registered trademark, and CAL™ is a trademark, of ThreatConnect, Inc.
20031-01 v.12.E