The DNS resolution tracking feature in ThreatConnect®, available for Host and Address Indicators, allows you to view DNS resolution history, subdomain resolutions, and historic IP address resolutions for Indicators of those types. It also provides location and count information, if any, for computers that attempted to access suspicious domains captured by Quad9® infrastructure within the last 90 days.
If working with a Host Indicator, you can use this feature to track ongoing resolution changes, view Addresses that have resolved to the Host, and import and associate those Addresses to the Host. If working with an Address Indicator, you can use this feature to reveal the Hosts that have resolved to an Address and import and associate those Hosts to the Address.
New Details Screen
Host Indicators
Enable DNS Resolution Tracking
Follow these steps to enable DNS resolution tracking for a Host Indicator on the Details screen:
- Navigate to the Details screen for a Host Indicator.
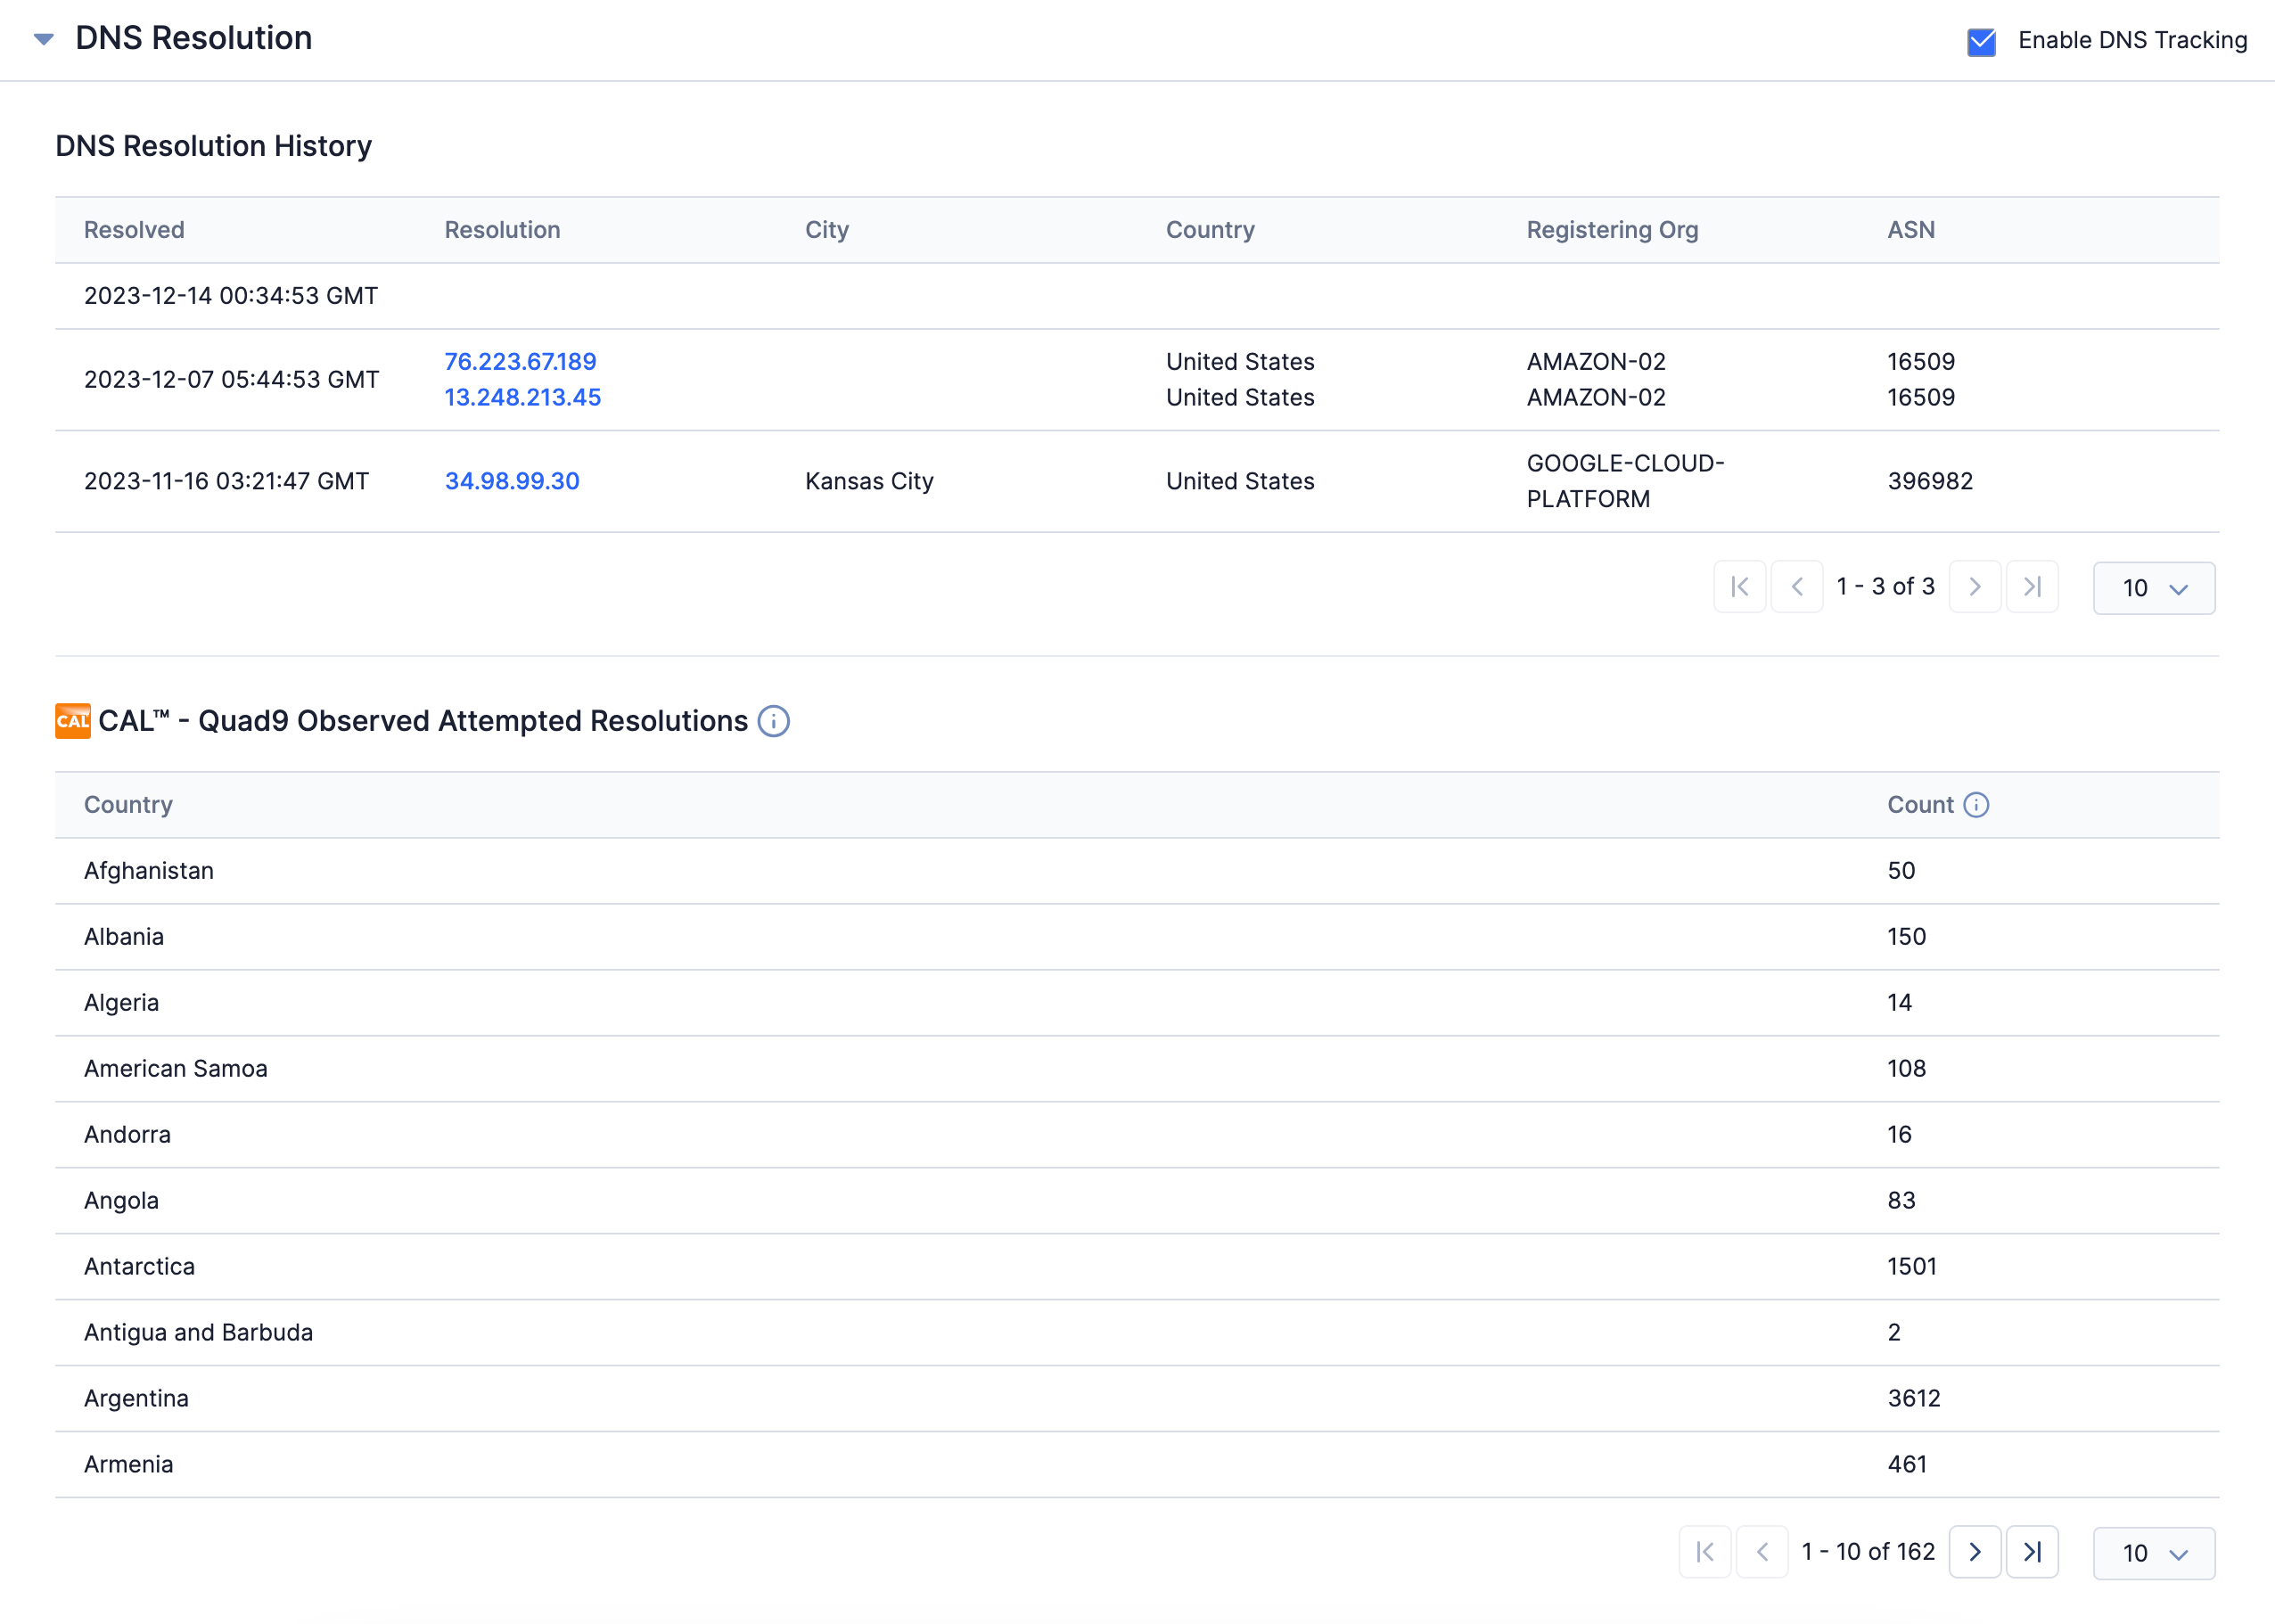
- On the Overview tab, select the Enable DNS Tracking checkbox at the upper-right corner of the DNS Resolution card (Figure 1).
 NoteIt may take up to 90 minutes for DNS information to populate after selecting the Enable DNS Tracking checkbox.
Viewing DNS Resolution History
For Host Indicators, the DNS Resolution History section of the DNS Resolution card displays the Addresses that have resolved to the Host, presently or historically; the date and time of the resolution; and the city, country, organization, and autonomous system number (ASN) associated with each Address.
Viewing Quad9 Observed Attempt Resolutions
The CAL™ - Quad9 Observed Attempted Resolutions section of the DNS Resolution card displays location and count information, if any, for computers that attempted to access suspicious domains captured by Quad9 infrastructure within the last 90 days.
Address Indicators
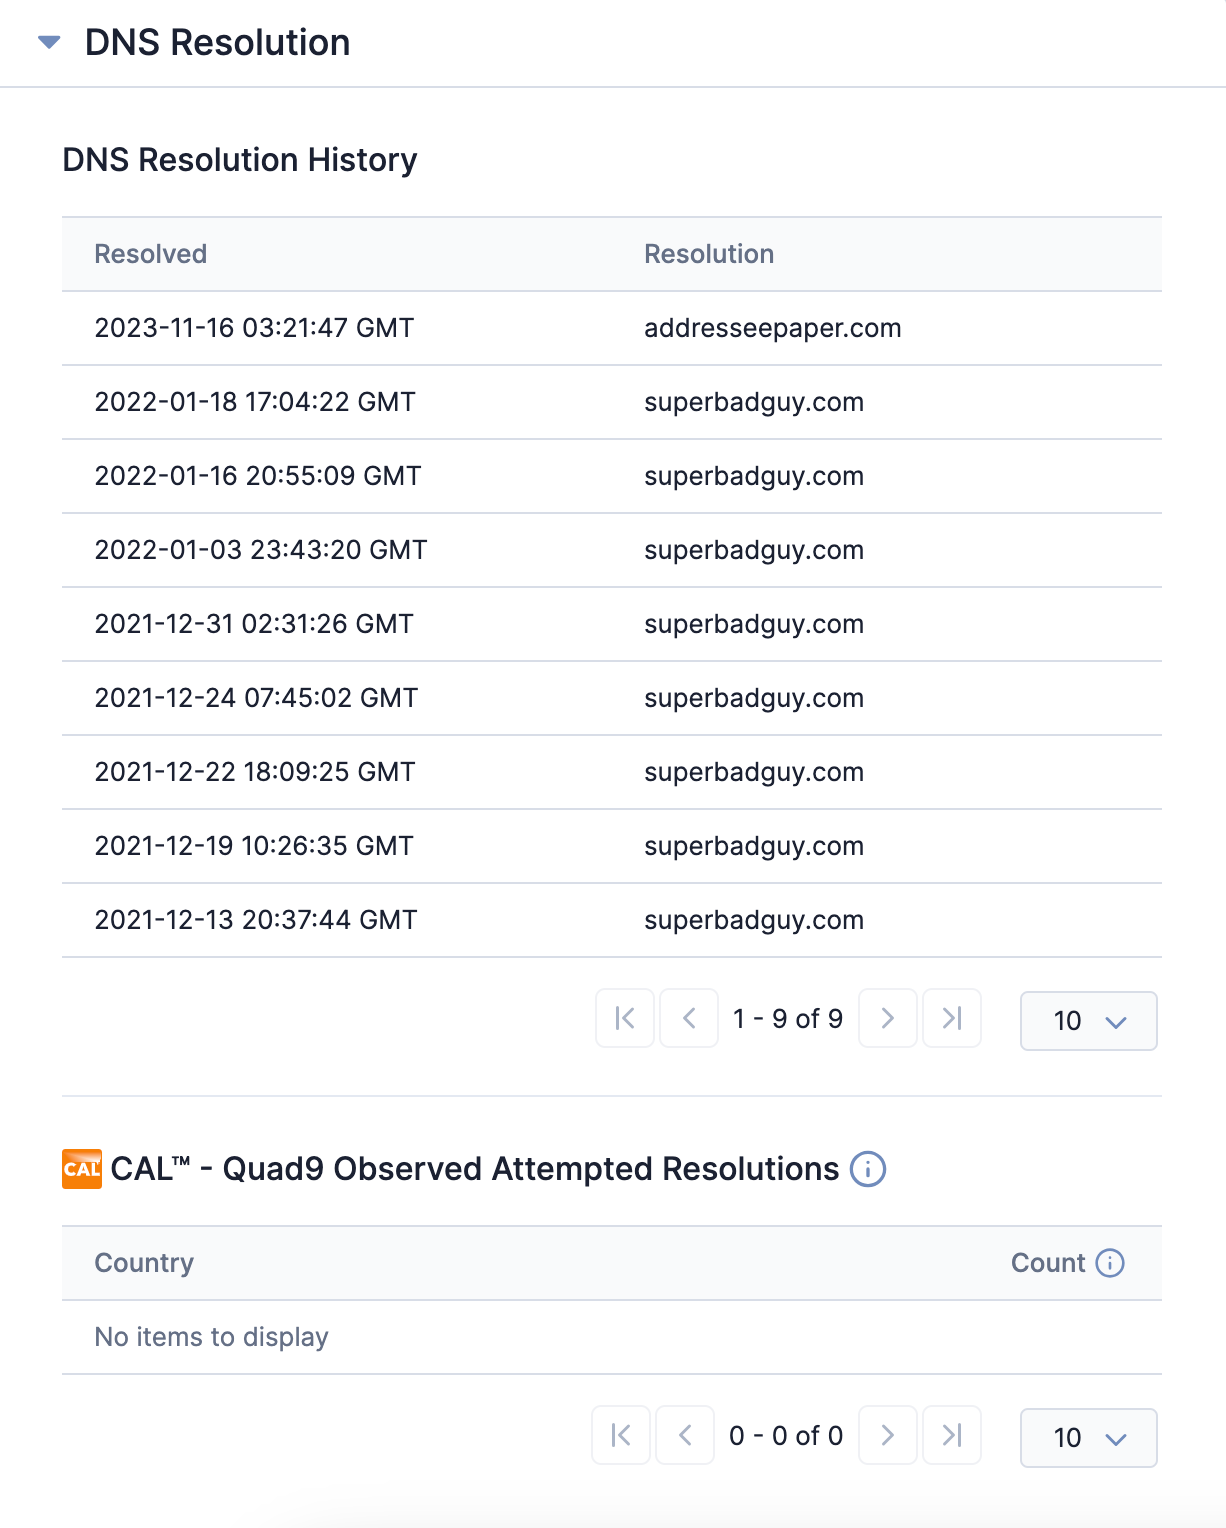
For Address Indicators, the DNS Resolution card is available on the Overview tab of the Indicator’s Details screen (Figure 2).
Viewing DNS Resolution History
For Address Indicators, the DNS Resolution History section of the DNS Resolution card displays Hosts that have resolved to the Address, presently or historically, and the date and time of each resolution.
Viewing Quad9 Observed Attempt Resolutions
The CAL™ - Quad9 Observed Attempted Resolutions section of the DNS Resolution card displays location and count information, if any, for computers that attempted to access suspicious domains captured by Quad9 infrastructure within the last 90 days.
Legacy Details Screen
Host Indicators
Enabling DNS Resolution Tracking
Follow these steps to enable DNS resolution tracking for a Host Indicator on the legacy Details screen:
- Navigate to the legacy Details screen for a Host Indicator.
- On the Overview tab, select the DNS checkbox in the Detailscard (Figure 3).
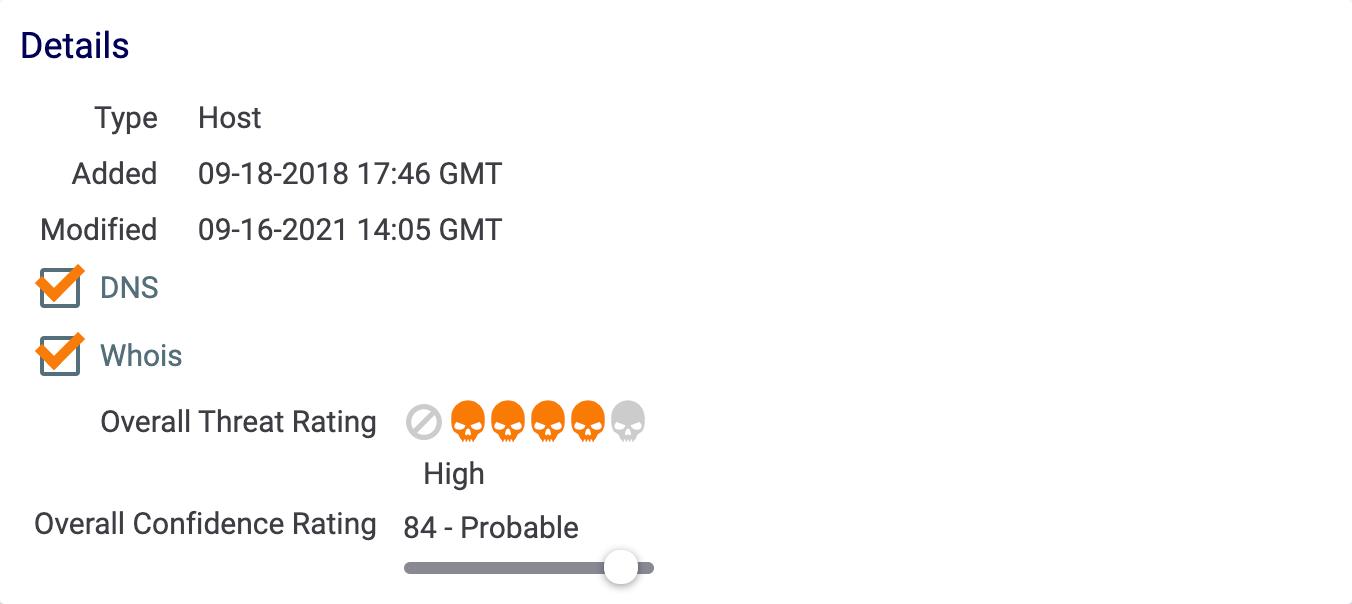 NoteIt may take up to 90 minutes for DNS information to populate after selecting the DNS checkbox.
Viewing DNS Resolution History and Passive DNS
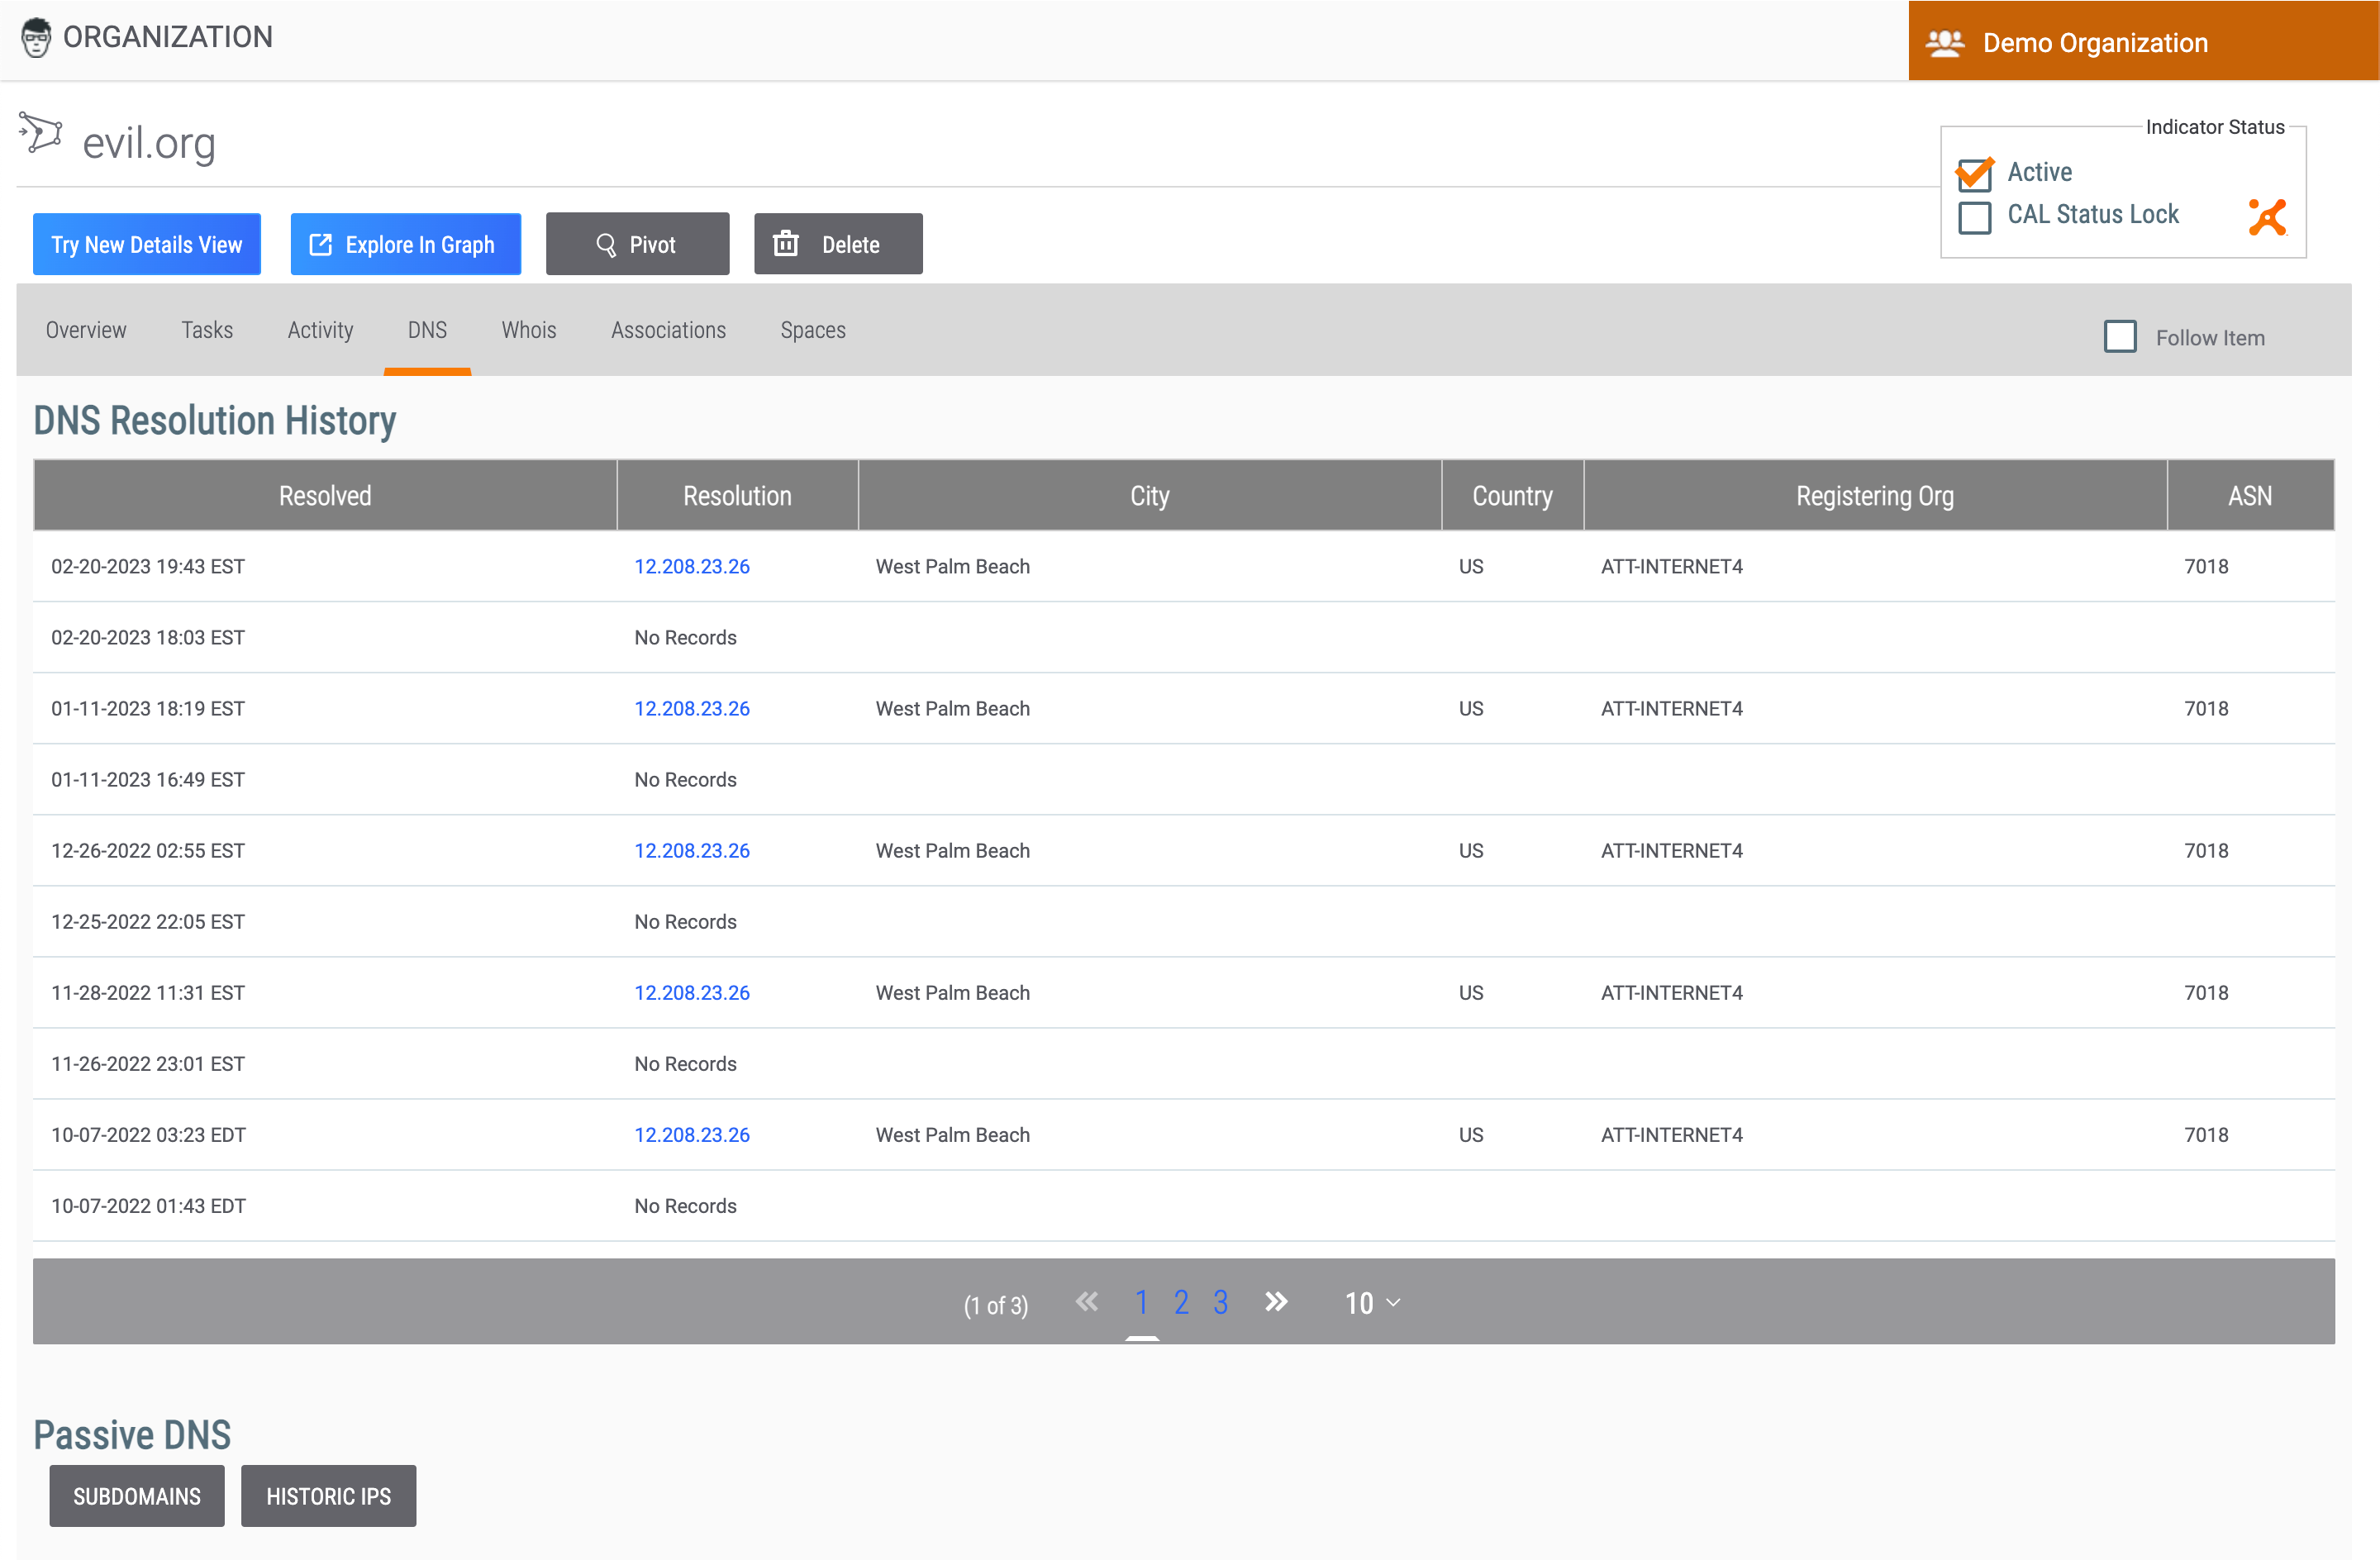
Click the DNS tab on a Host Indicator’s legacy Details screen to display the DNS screen (Figure 4).
The DNS screen consists of two sections:
- DNS Resolution History: This section displays the Addresses that have resolved to the Host Indicator, presently or historically. A Host’s DNS resolutions will be added as Address Indicators in the same owner as that of the Host and associated to the Host automatically.
- Passive DNS: Click the SUBDOMAINS or HISTORIC IPS button in this section to display subdomain resolutions or historic IP address resolutions, respectively, for the Host (Figure 5).ImportantThe Passive DNS section will be displayed only if an Organization Administrator has entered a Farsight Security API key on the Organization Settings screen.
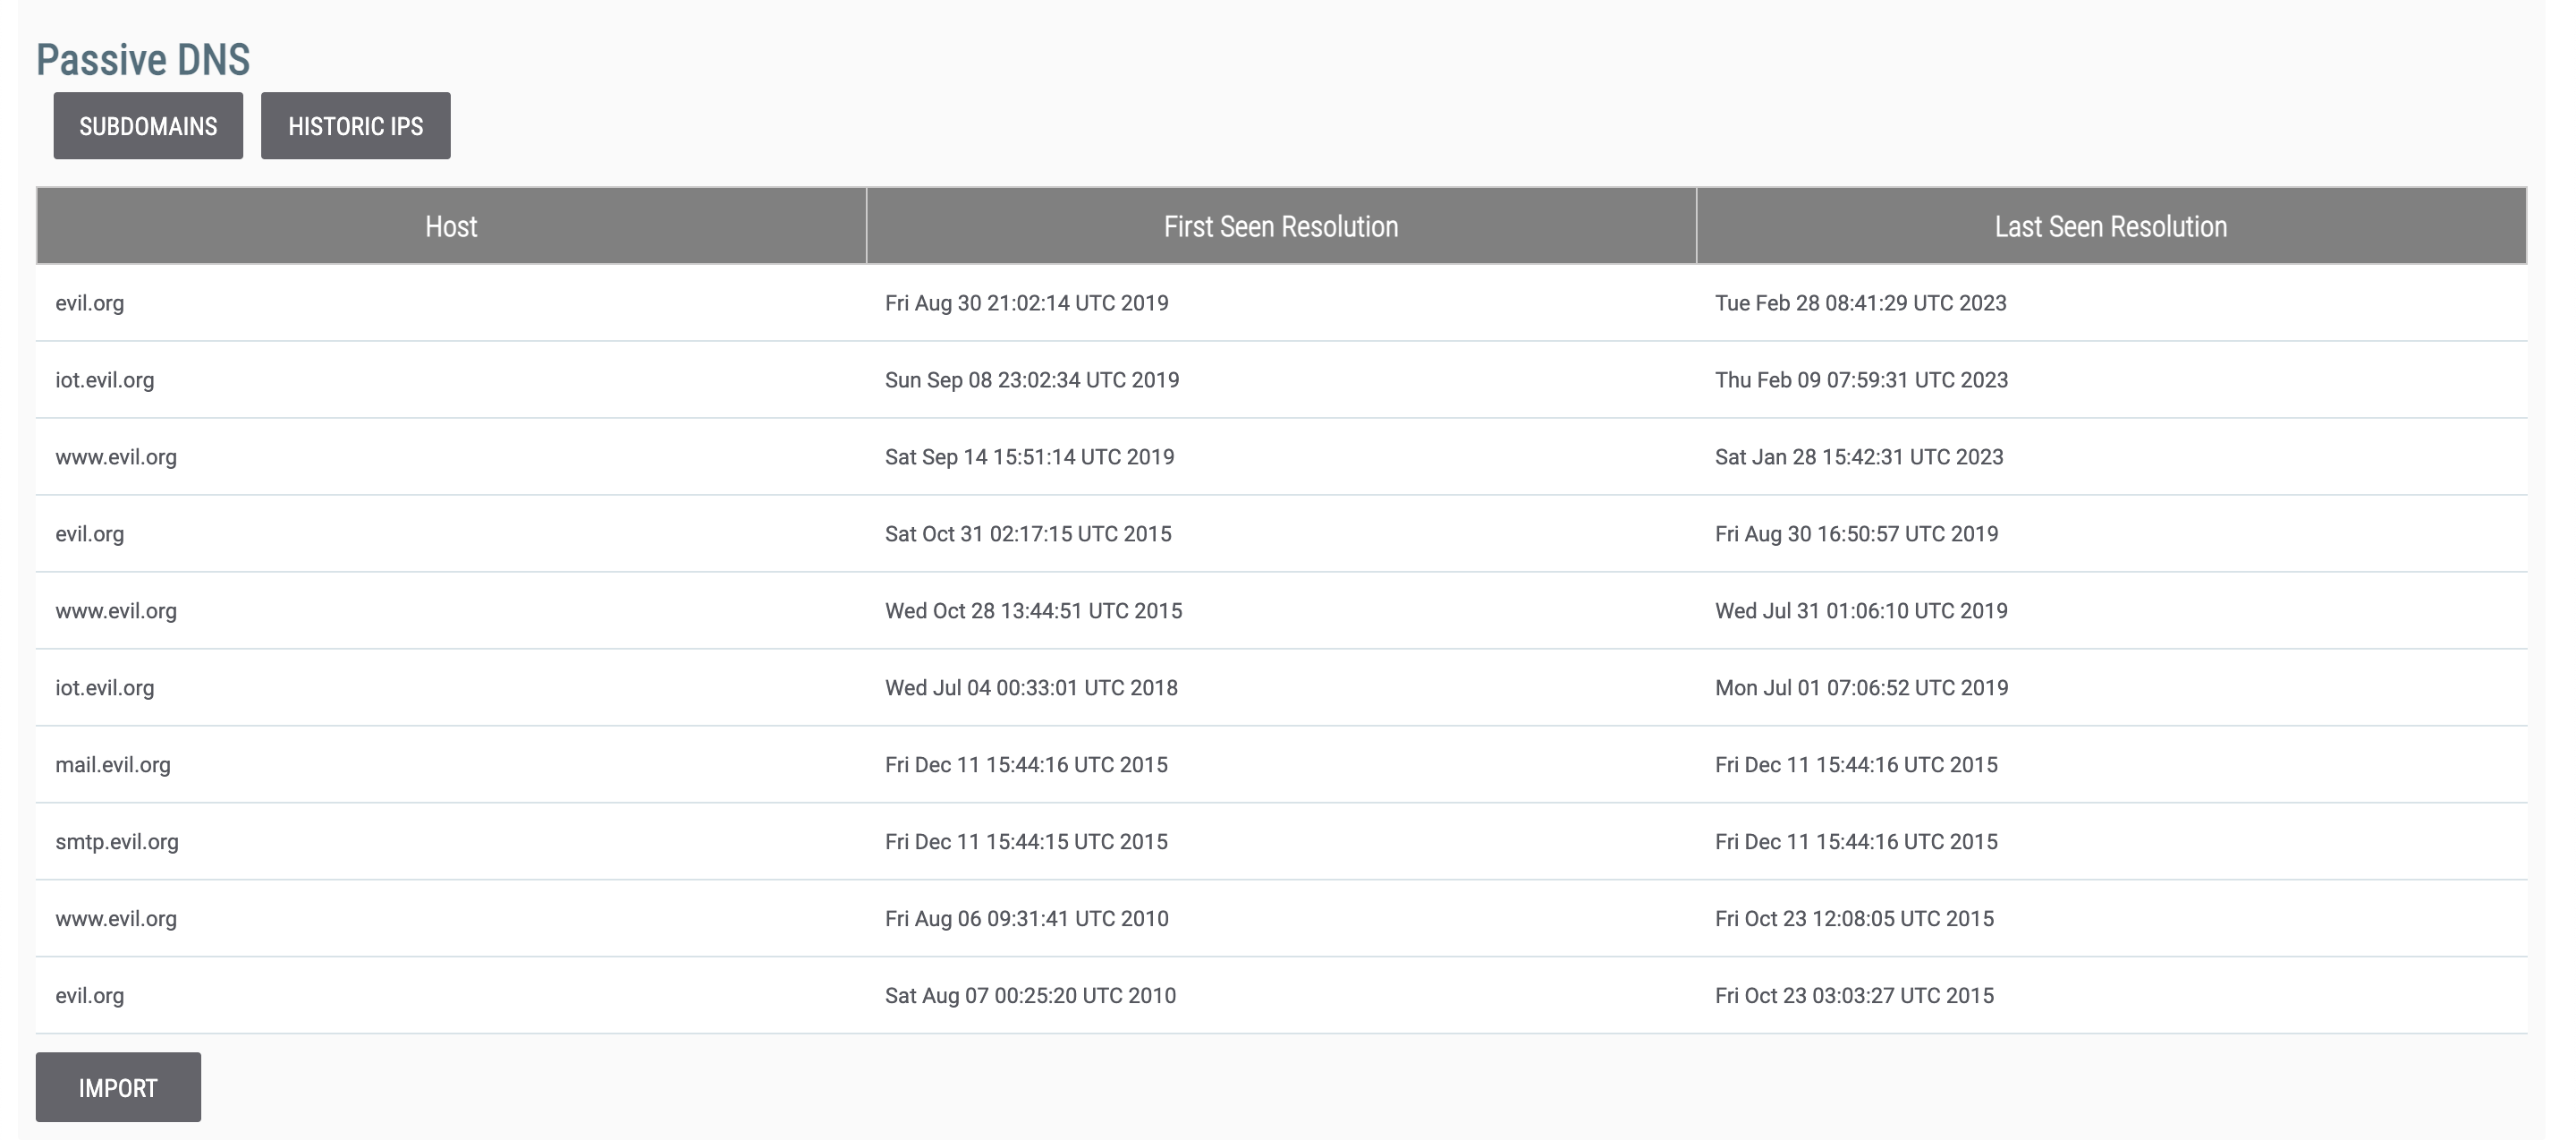
Click the HISTORIC IPS button on the Passive DNS section to view the Host’s IP address resolutions. A list of Address Indicators to which the Host has previously resolved will be displayed.
Importing Subdomains and Historic IP Addresses
Follow these steps to import data displayed in the Passive DNS section into ThreatConnect:
- Click the IMPORT button at the bottom of the table in the Passive DNS section (Figure 5) to import the data displayed in the Subdomains or Historic IPS tables as Host Indicators and Address Indicators, respectively, into ThreatConnect. A new tab will open with the Validate step of the Import Indicators screen displayed (Figure 6).
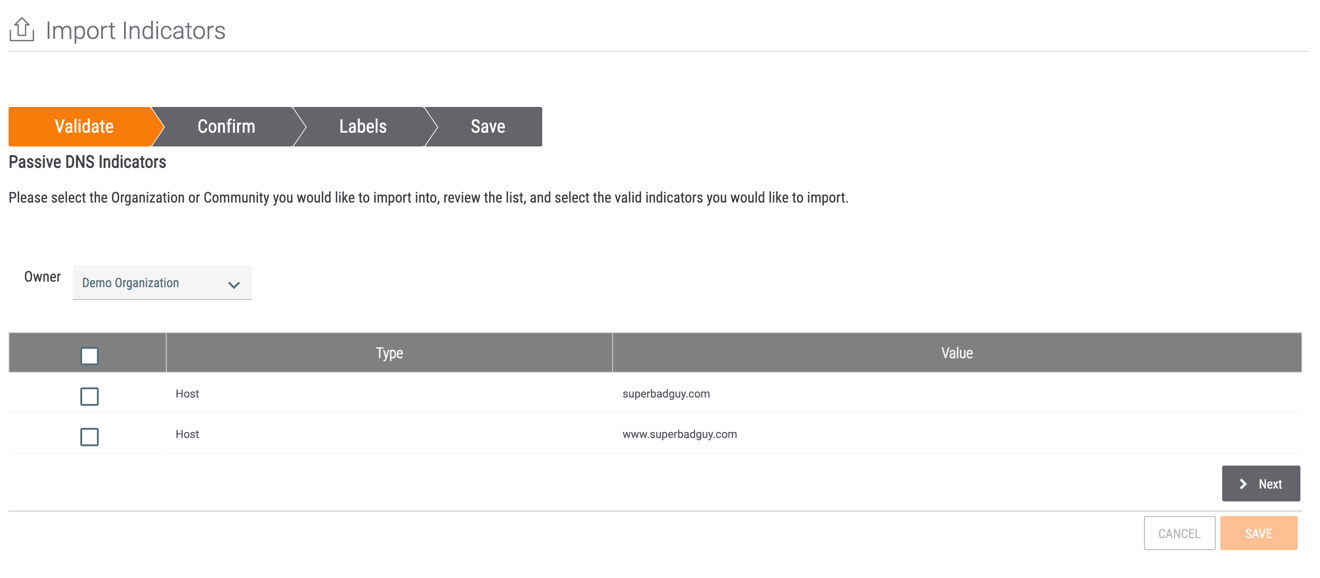
- Owner: Select the ThreatConnect owner (i.e., Organization, Community, or Source) into which to import the selected Indicators.
- Select the checkbox for each Indicator that you want to import into ThreatConnect. Subdomains will be imported as Host Indicators, and historic IP addresses will be imported as Address Indicators.
- Click the Next button.
- The Confirm step will be displayed (Figure 7).

- Description: Click Edit
 to enter a Description that will be applied to all Indicators to be imported.
 - Source: By default, the Source is set to Imported from ThreatConnect Passive DNS. Click Editto modify the Source for all Indicators to be imported.
- Threat Rating: Use the skull icons to set the Threat Rating for all Indicators to be imported.
- Confidence Rating: Use the slider to set the Confidence Rating for all Indicators to be imported.
- DNS: Select the checkbox to enable DNS resolution tracking for all Host Indicators to be imported. If importing Historic IPS data as Address Indicators, this checkbox will not be displayed.
- Whois: Select the checkbox to enable the WHOIS feature for all Host Indicators to be imported. If importing Historic IPS data as Address Indicators, this checkbox will not be displayed.
- Click the Next button.
- Description: Click Edit
- The Labels step will be displayed (Figure 8).
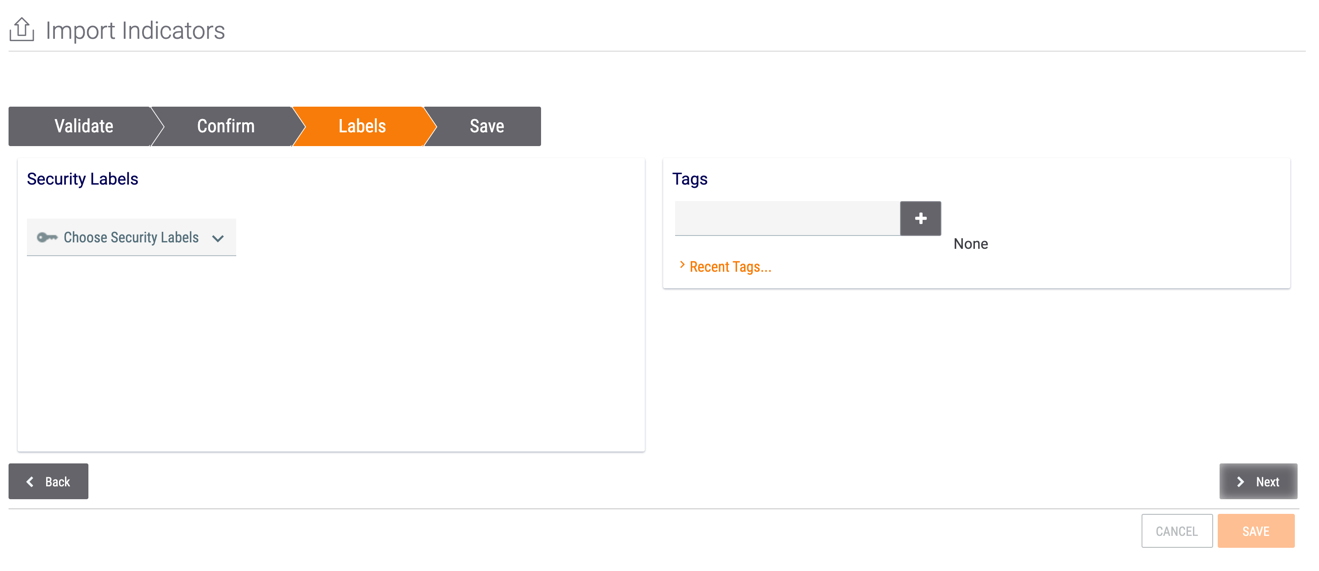
- Security Labels: Select Security Labels to apply to all Indicators to be imported, if desired.
- Tags: Enter Tags to apply to all Indicators to be imported, if desired. To view a list of Tags recently used, click Recent Tags….
- Click the Next button.
- The Save step will be displayed (Figure 9). To associate the Indicators to be imported with a Group, follow Steps 5–8. Otherwise, click the SAVE button to complete the import process and view the imported Indicators on the Browse screen.
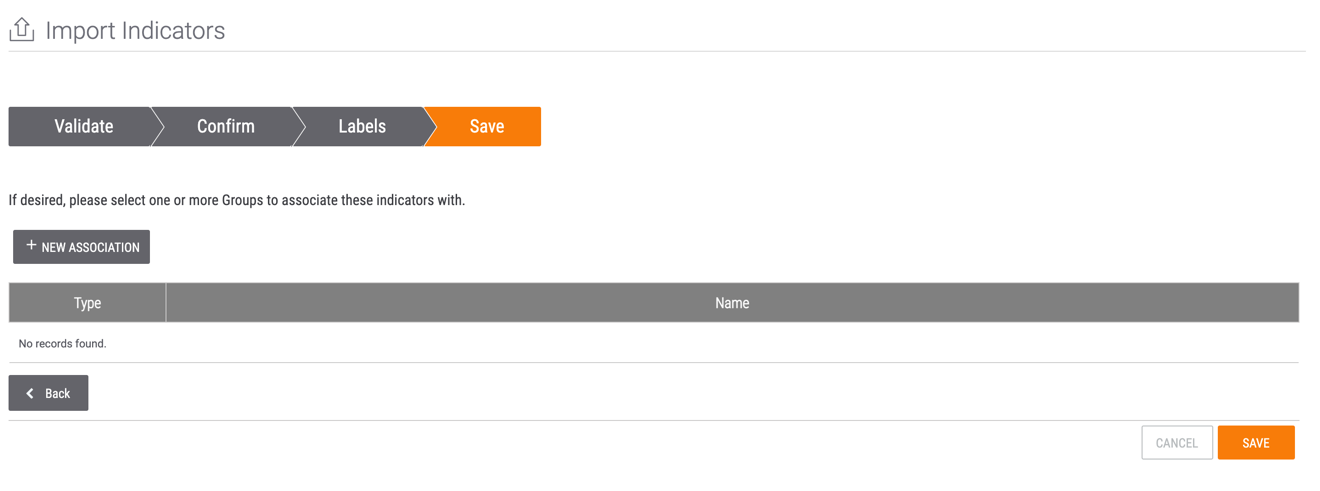
- Click the + NEW ASSOCIATION button to associate the Indicators to a Group. The Select an Association window will be displayed (Figure 10).
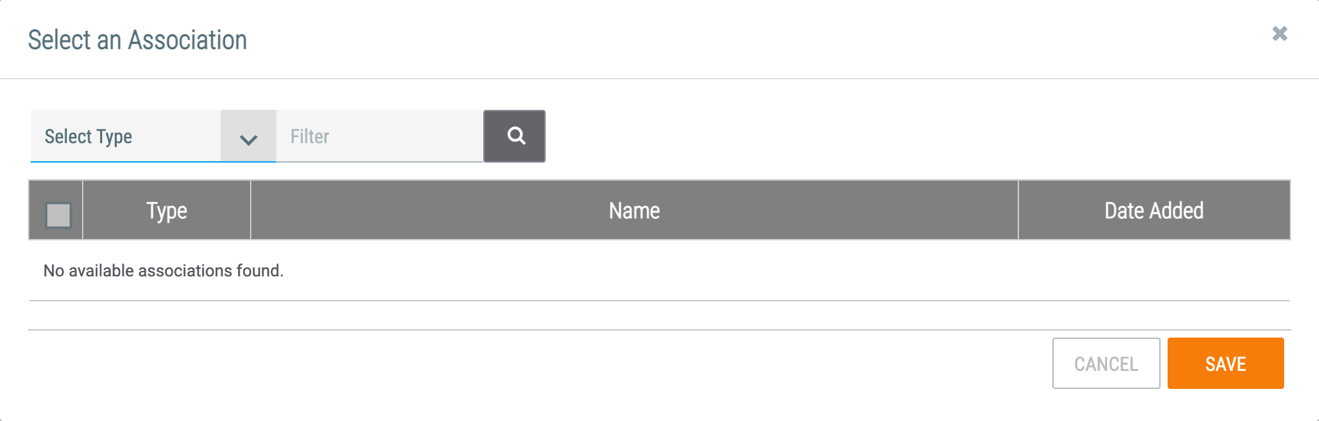
- Select a Group type from the Select Type dropdown menu. All Groups of the selected type will be displayed. If desired, enter text in the Filter box to filter the results further.
- Select one or more of the displayed Groups, and then click the SAVE button (Figure 10). Selected Groups will be displayed in the table at the bottom of the Save screen (Figure 9).NoteOnly one type of Group may be added at a time from the Select an Association window. To add more than one type of Group, click the + NEW ASSOCIATION button in Figure 9 again and select a different type of Group.NoteOnce a Group has been added to the table, it cannot be removed. The only way to exclude the Group is to click the CANCEL button and restart the Indicator import process.
- Click the SAVE button to complete the import process and view the imported Indicators on the Browse screen.
Address Indicators
Viewing DNS Resolutions and Passive DNS
Click the DNS Resolutions tab on an Address Indicator’s legacy Details screen to display the DNS Resolutions screen (Figure 11).
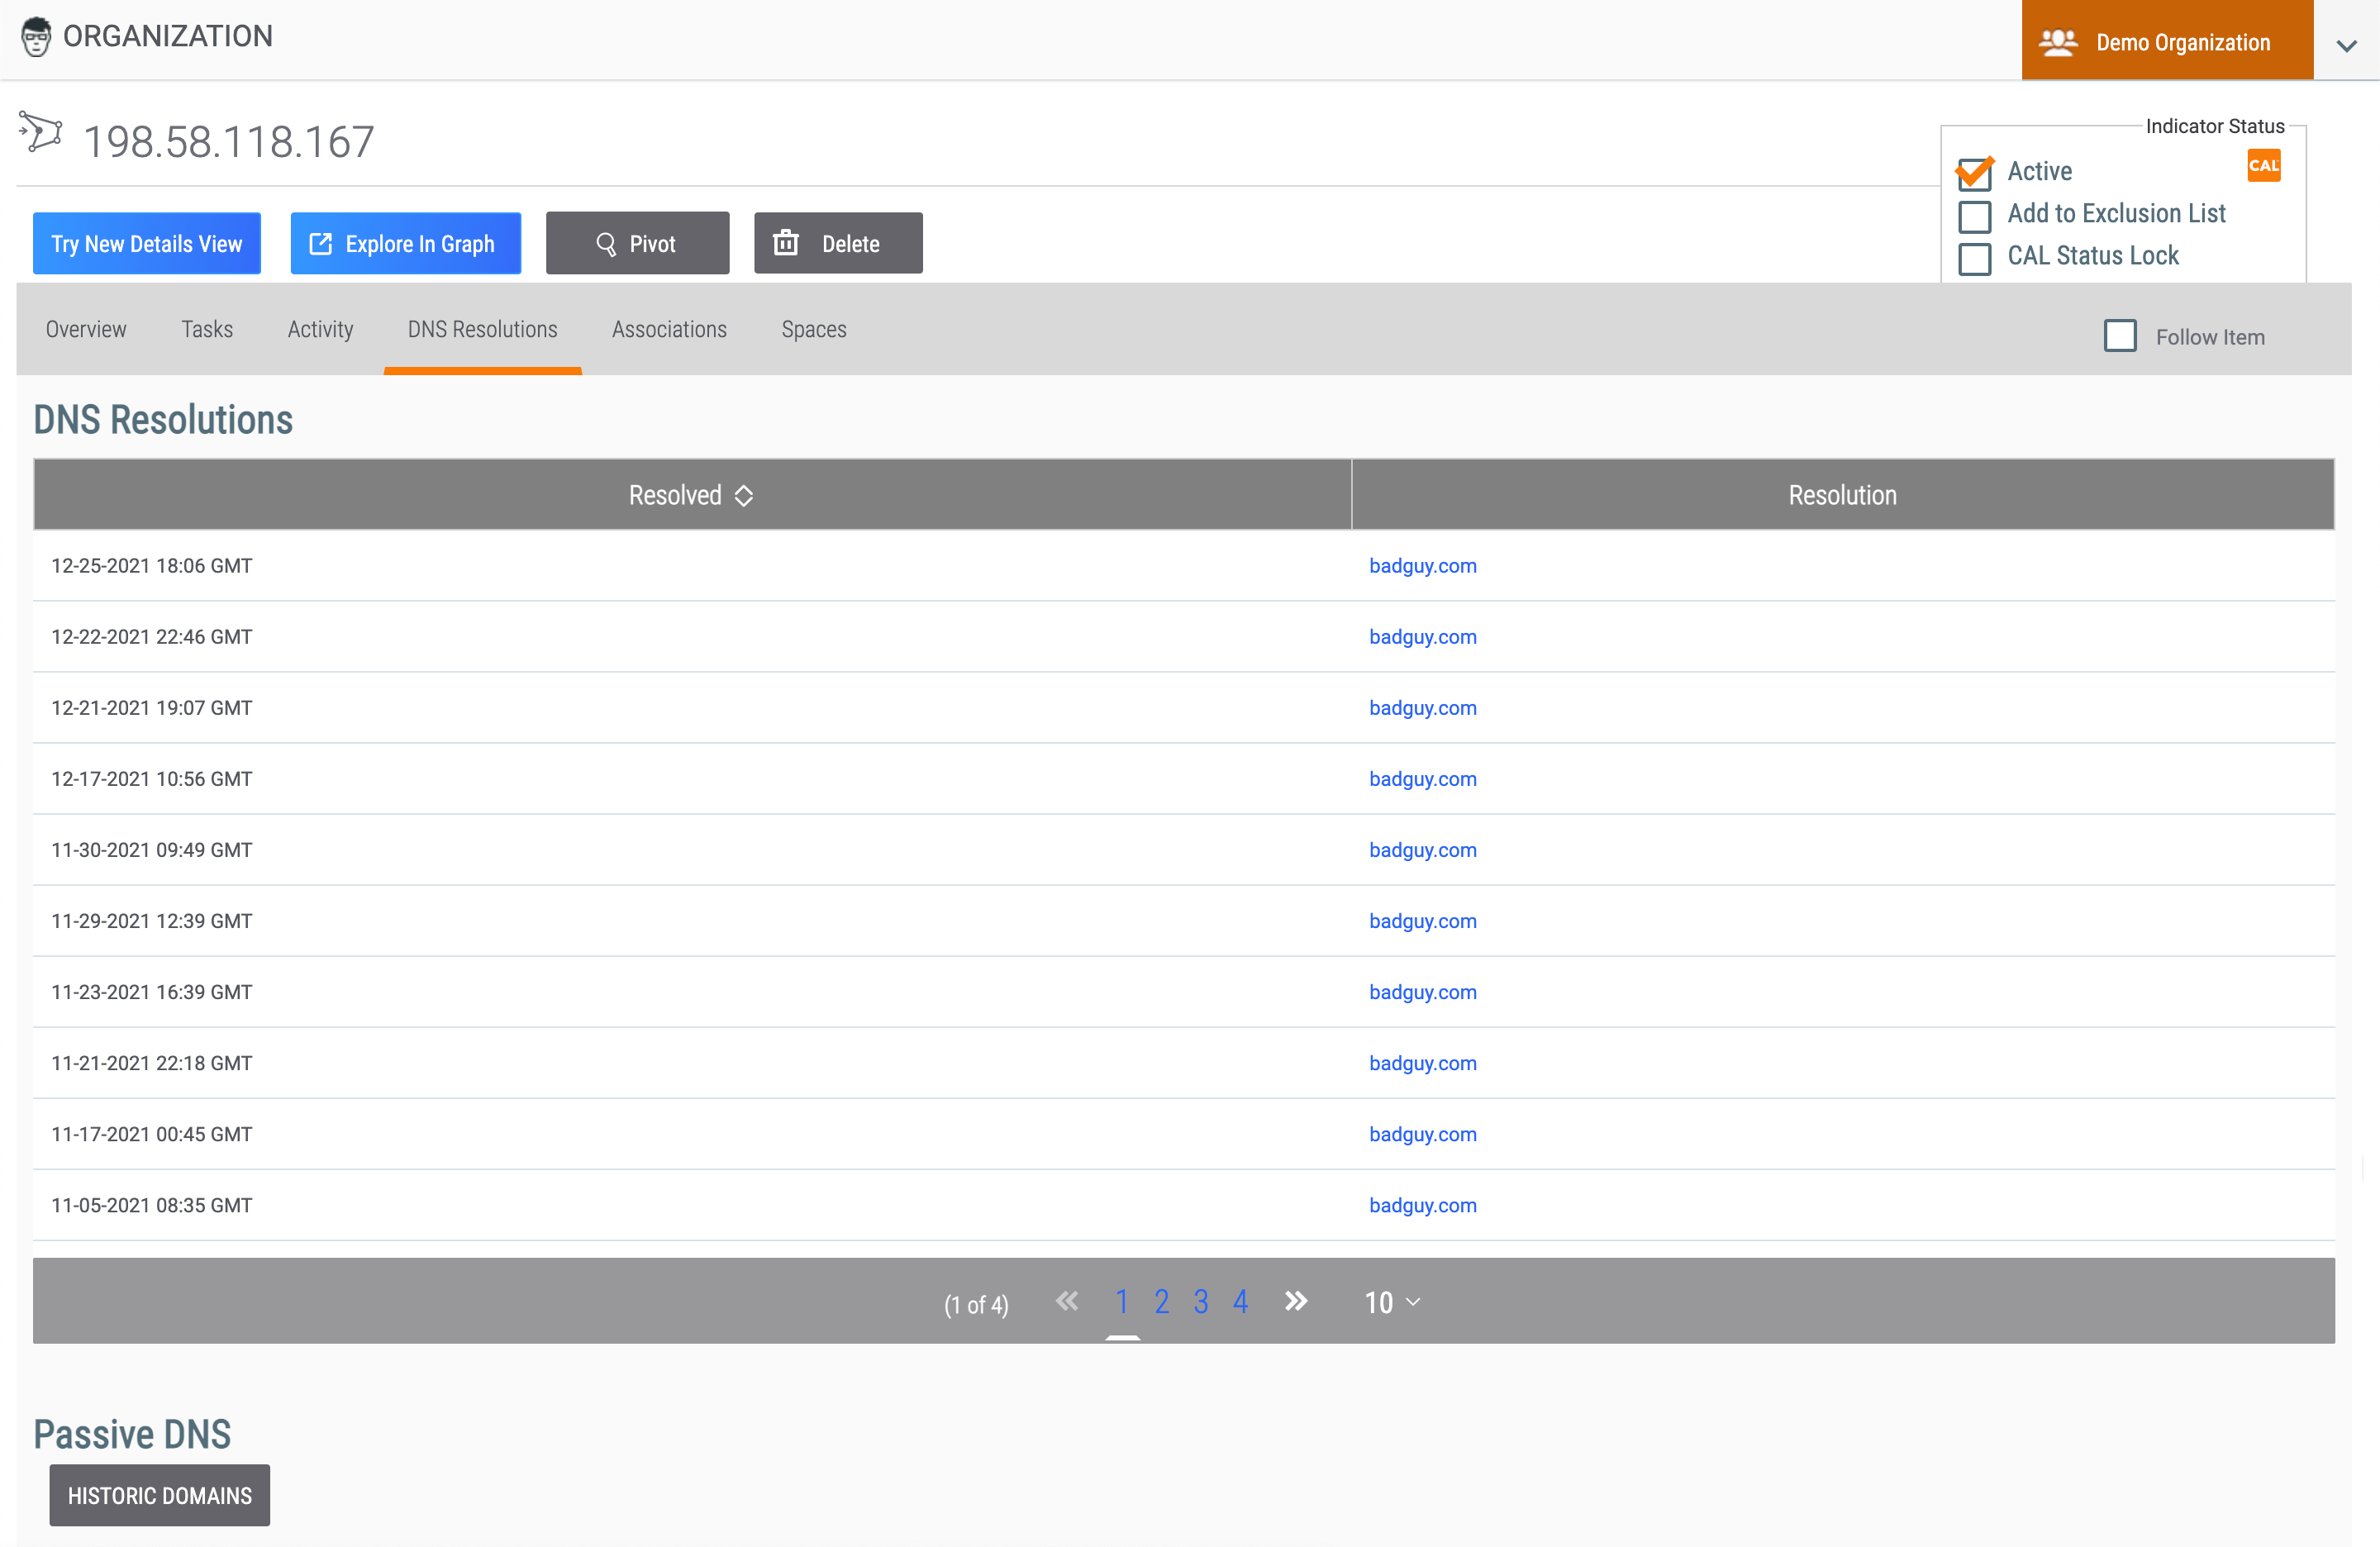
The DNS Resolutions screen consists of two sections:
- DNS Resolutions: This section displays the Hosts that have resolved to the Address, presently or historically.
- Passive DNS: Click the HISTORIC DOMAINS button in this section to display domains that have previously resolved to the Address (Figure 12).ImportantThe Passive DNS section will be displayed only if an Organization Administrator has entered a Farsight Security API key on the Organization Settings screen.
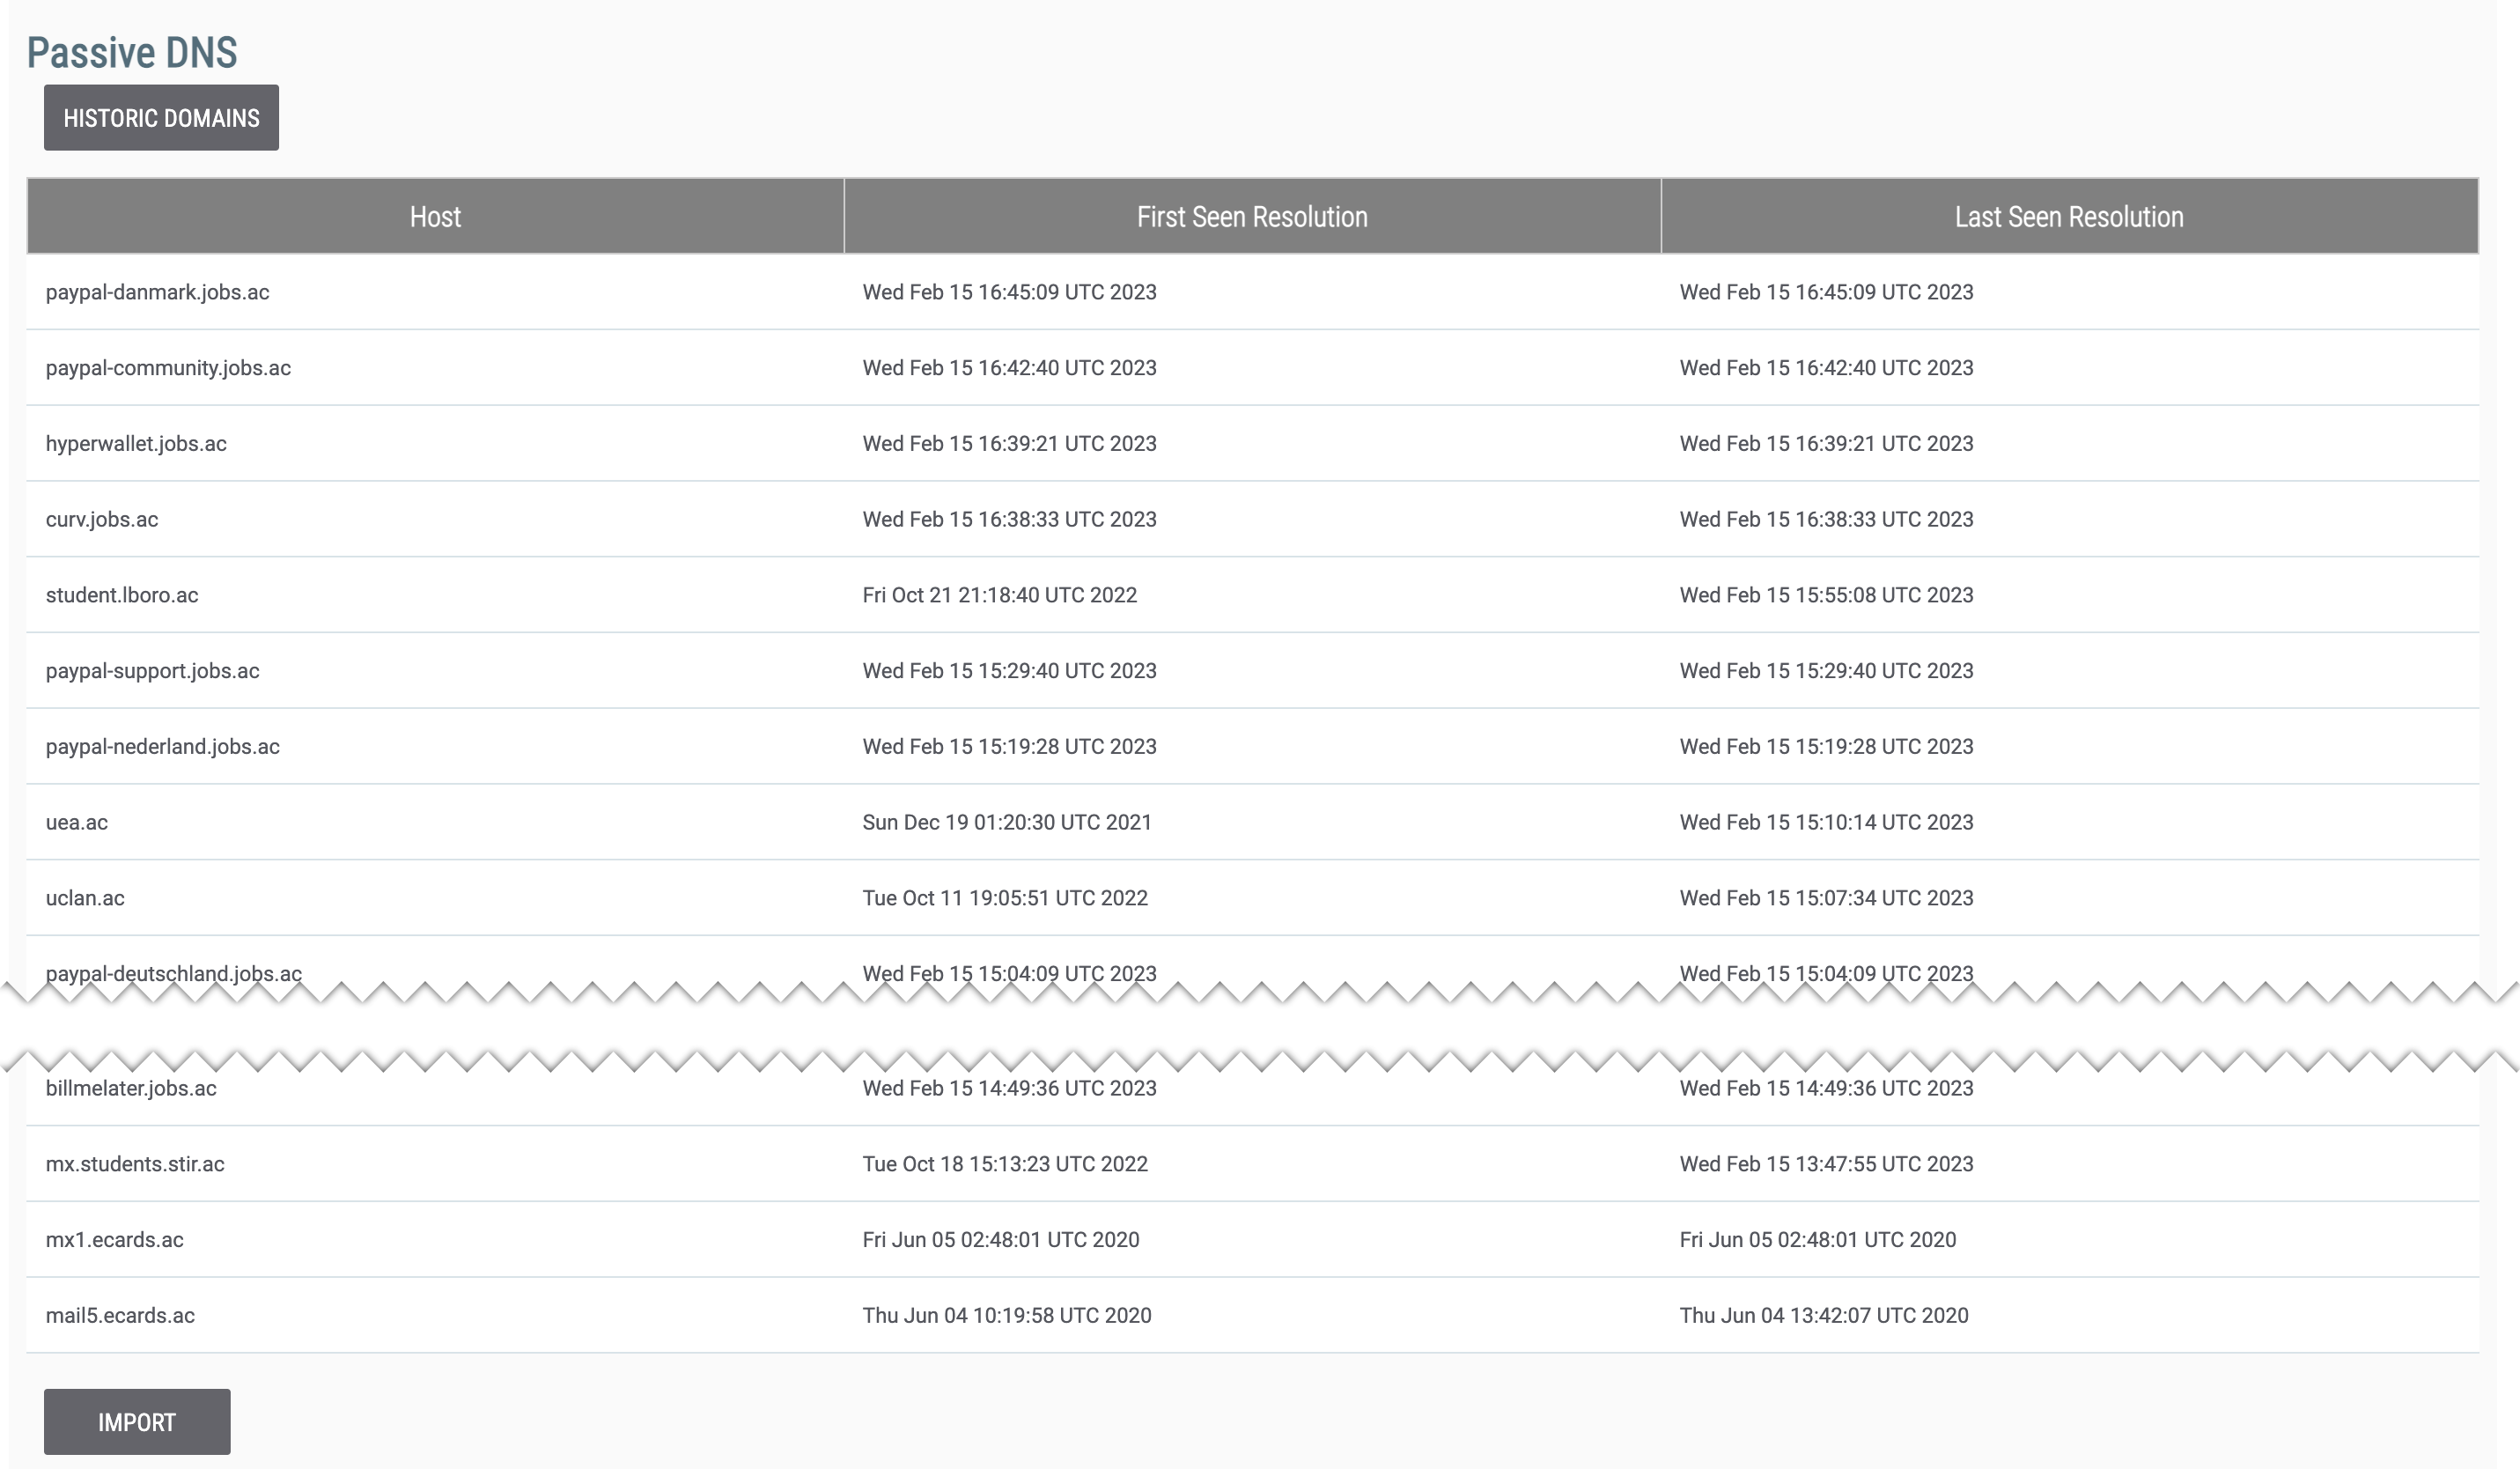
Importing Historic Domains
Click the IMPORT button at the bottom of the table in the Passive DNS section to import the historic domains into ThreatConnect as Host Indicators. See the “Importing Subdomains and Historic IP Addresses” section for steps on how to complete the import process.
ThreatConnect® is a registered trademark, and CAL™ is a trademark, of ThreatConnect, Inc.
Farsight Security® is a registered trademark of DomainTools, LLC.
Quad9® is a registered trademark of Quad9 Foundation.
20030-02 v.13.A