Overview
While viewing a Group or Case in ThreatConnect®, or when you are on the Reporting screen , you can click + Create Custom Report and select whether to create a blank report or a report based on a saved report template. After you create a report, you can add content to the report, organize the report, and save, publish, and export the report.
Before You Start
User Roles
- To create generic reports or reports for Groups, your user account must have an Organization role of Standard User, Sharing User, Organization Administrator, or App Developer.
- To create reports for Cases, your user account must have an Organization role of Standard User, Sharing User, or Organization Administrator.
Prerequisites
- To be able to create reports for Cases, turn on Workflow for your Organization on the Account Settings screen (must be an Accounts Administrator, Operations Administrator, or System Administrator to perform this action).
Creating a Report Without Using a Report Template
The following subsections describe how to create a report that is not based on a saved report template (i.e., from scratch).
Creating a Group Report
Follow these steps to create a report for a Group that is not based on a saved Group report template:
- Navigate to the Details screen or Details drawer for a Group.
- Click + Create Custom Report in the Details screen or drawer header and select Create New. The Report Editor will open and display a new report, as well as the Add Group Data menu of the Add Section drawer (Figure 1).NoteIf viewing the legacy Details screen for a Group, click Create Report in the screen’s header to create a report for the Group.
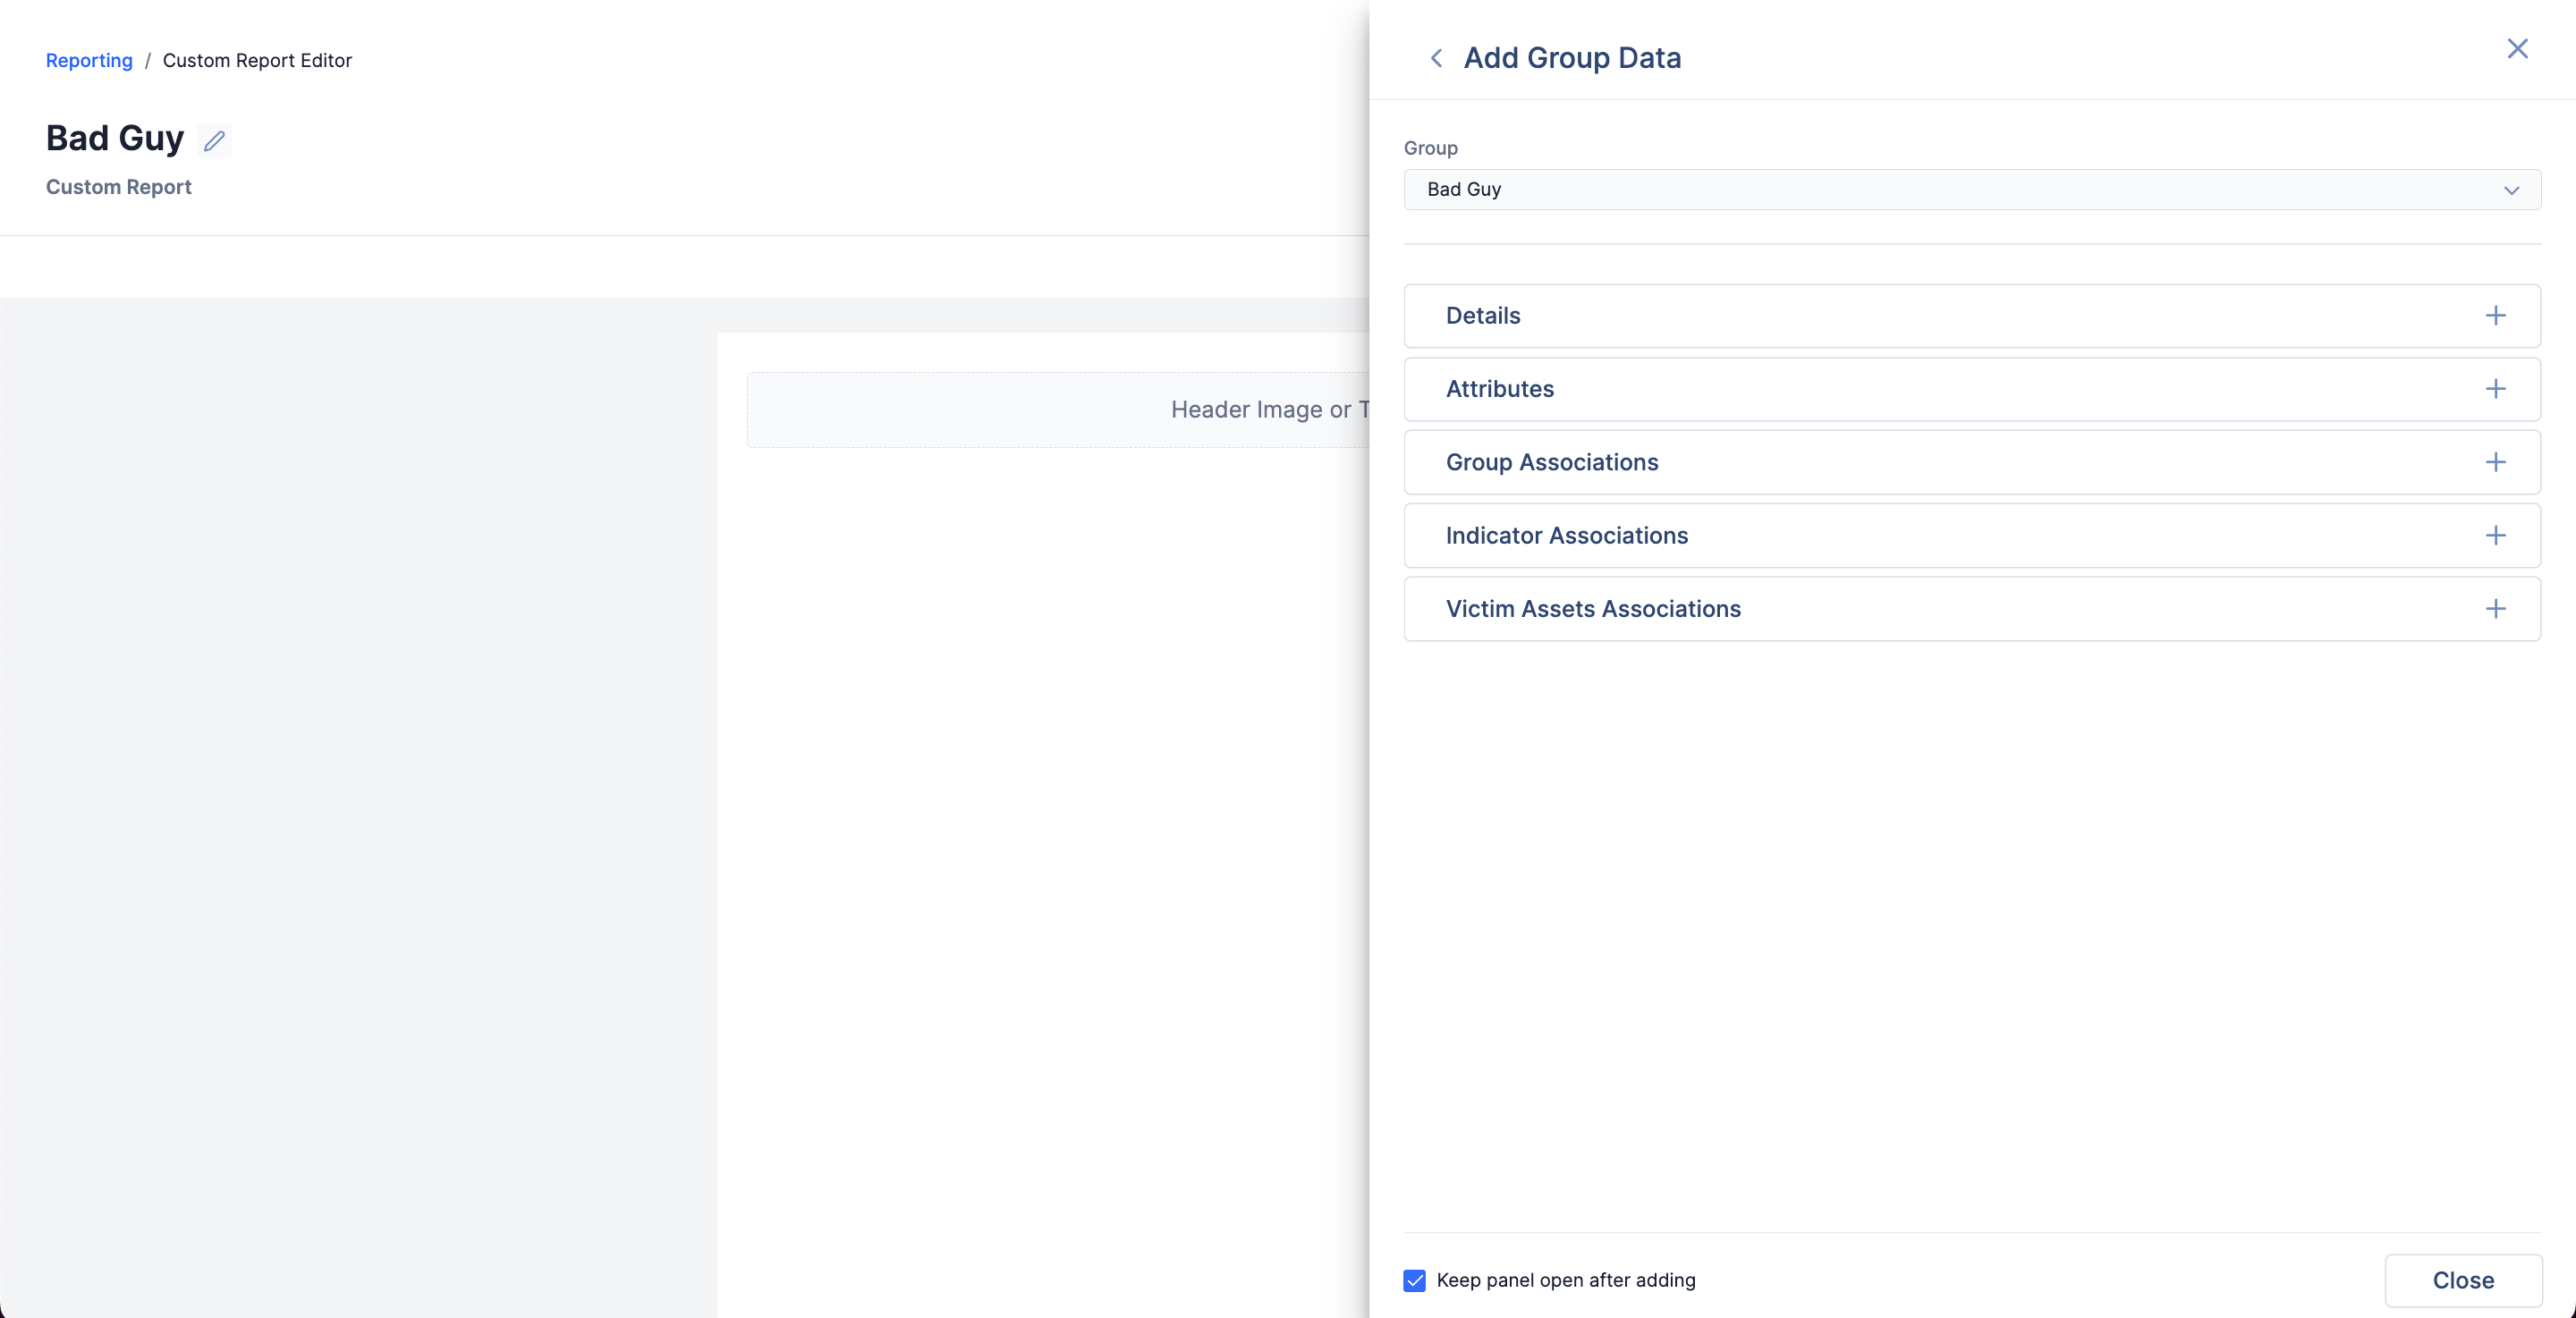
- Select one or more Group Data sections to add to the report.NoteBy default, the Group you created the report for will be selected in the Group dropdown on the Add Group Data menu. To add a different Group’s data to the report, click the Group dropdown, select View All Groups…, and select a Group on the Select a Group window.
- (Optional) To return to the main menu of the Add Section drawer and add Basic Elements and Layout Elements sections to the report, click < Add Group Data at the top left of the drawer.
- (Optional) Organize the report’s contents and layout.
- Save, publish, or export the report.
Creating a Case Report
Follow these steps to create a report for a Case that is not based on a saved Case report template:
- Click Workflow on the top navigation bar. Alternatively, hover over Workflow on the top navigation bar and select Cases.
- Select a Case on the Cases screen to view the Case's details.
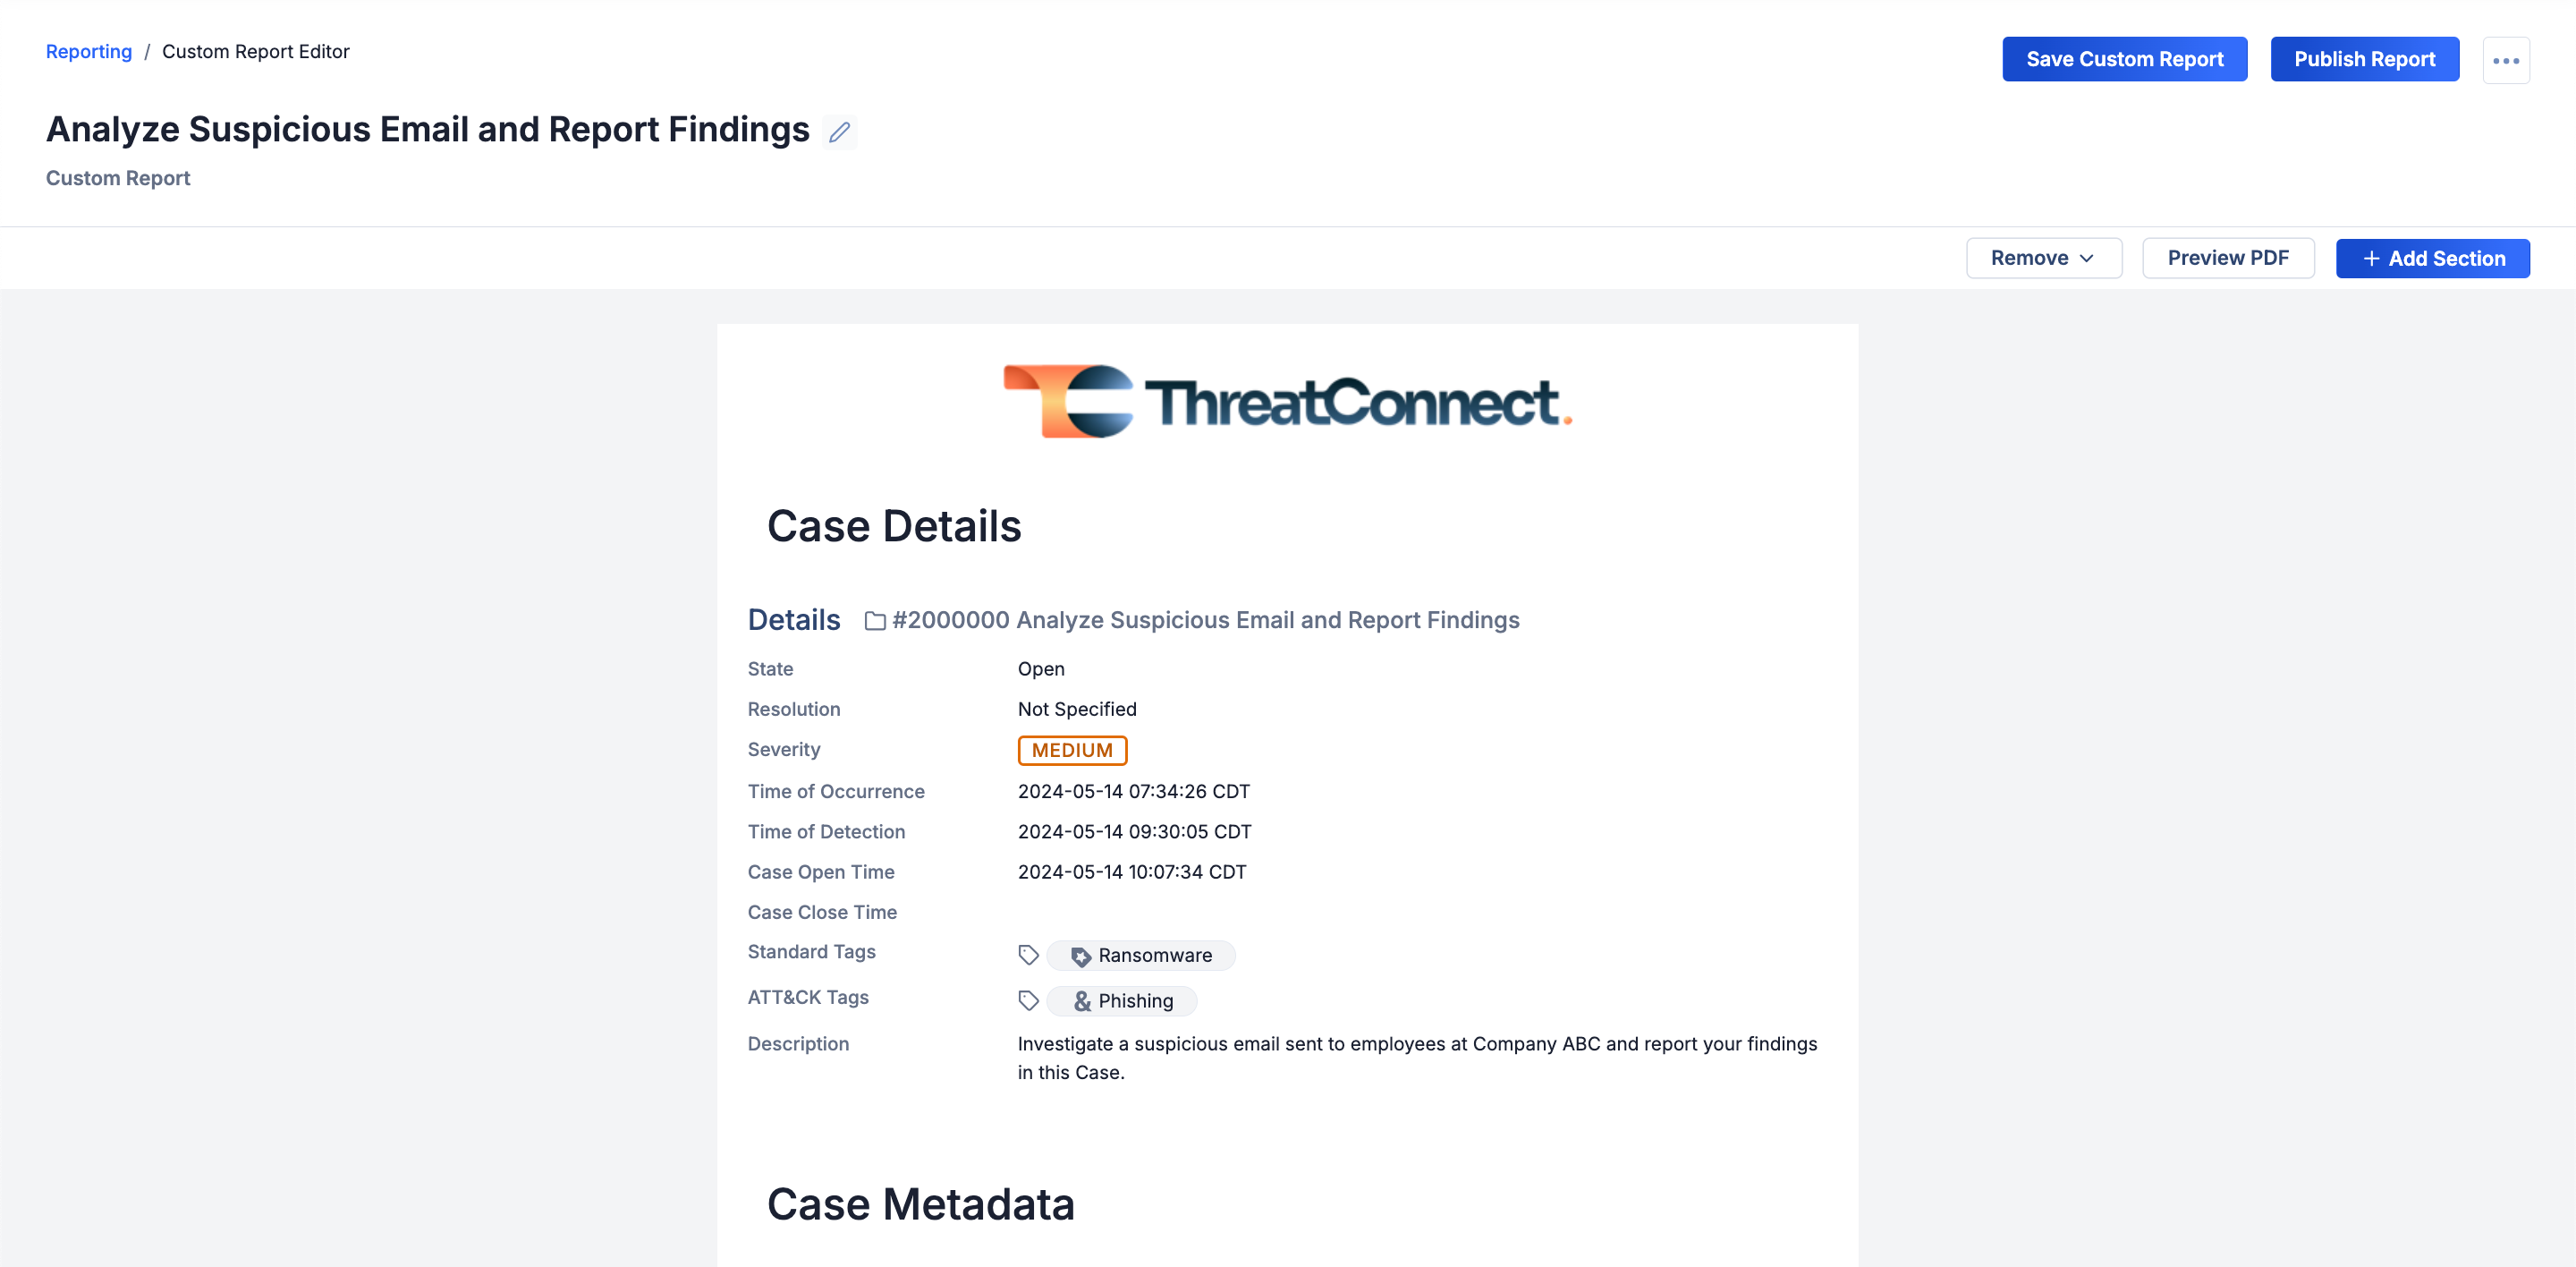
- Click + Create Custom Report at the top right of the Case and select Create New. The Report Editor will open and display a new report, as well as the Add Case Data menu of the Add Section drawer (Figure 2).NoteYou can also access the + Create Custom Report button on a Case’s Details drawer while the drawer is open on the Search screen .
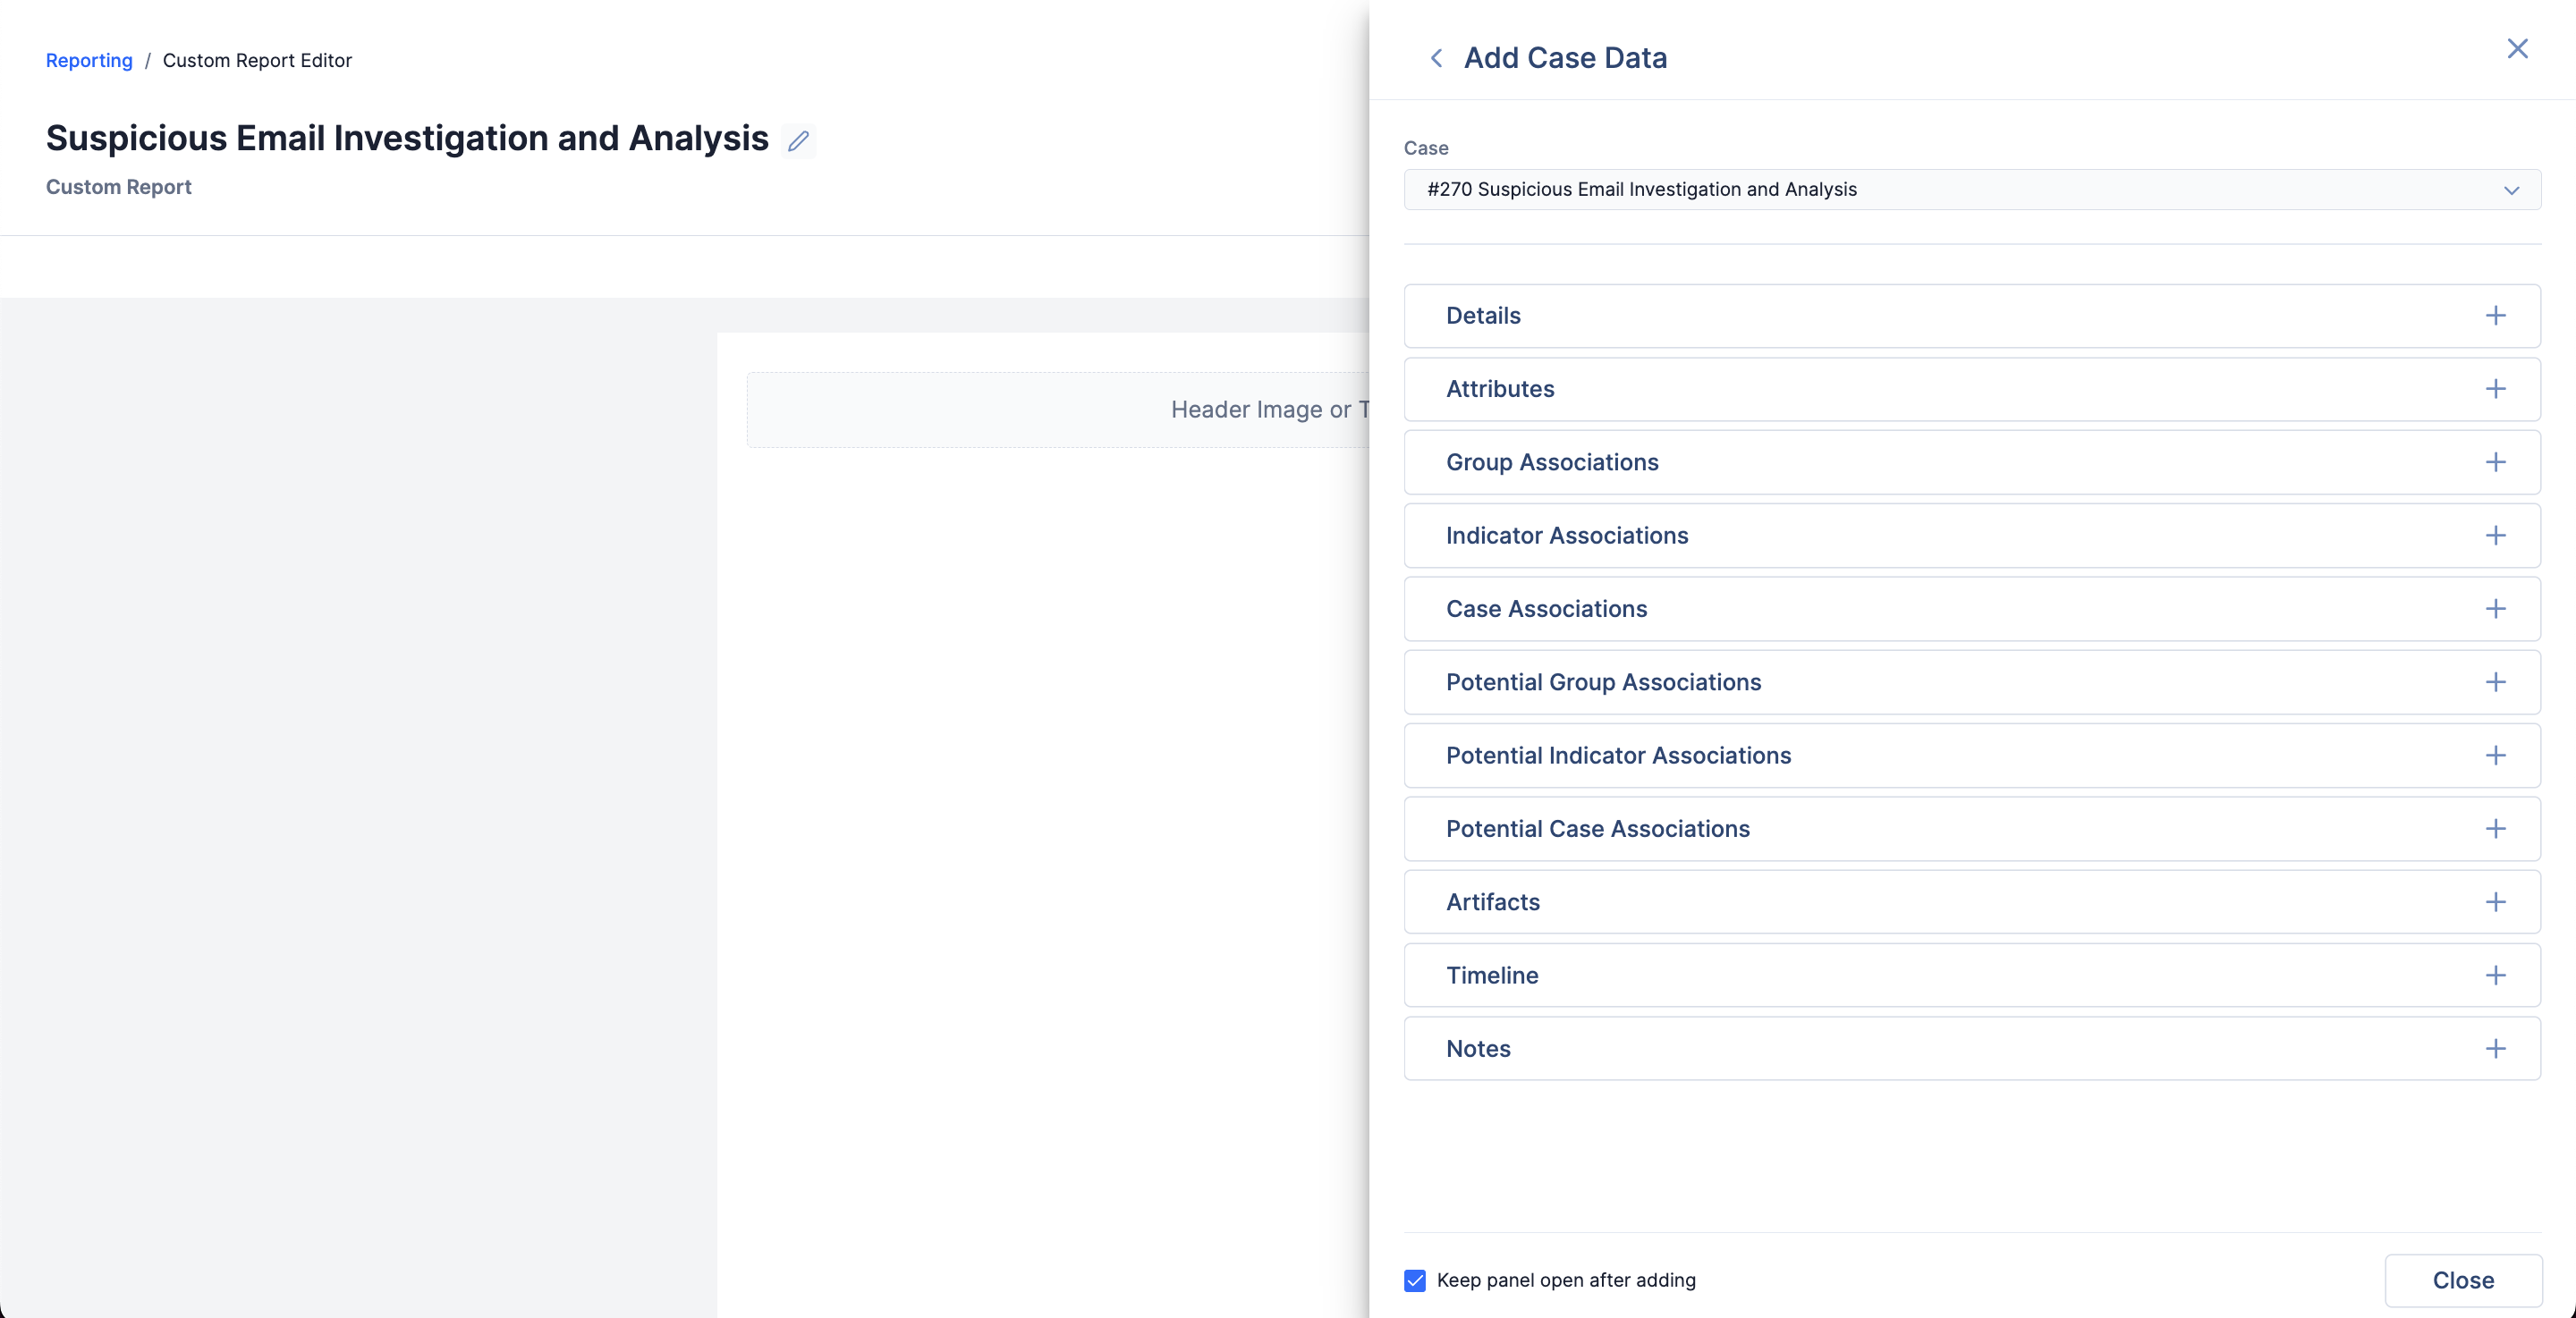
- Select one or more Case Data sections to add to the report.NoteBy default, the Case you created the report for will be selected in the Case dropdown on the Add Case Data menu. To add a different Case’s data to the report, click the Case dropdown, select View All Cases…, and select a Case on the Select a Case window.
- (Optional) To return to the main menu of the Add Section drawer and add Basic Elements and Layout Elements sections to the report, click < Add Case Data at the top left of the drawer.
- (Optional) Organize the report’s contents and layout.
- Save, publish, or export the report.
Creating a Generic Report
Follow these steps to create a generic report (i.e., a report that is not for a specific Group or Case) that is not based on a saved generic report template:
- Click Reporting on the top navigation bar.
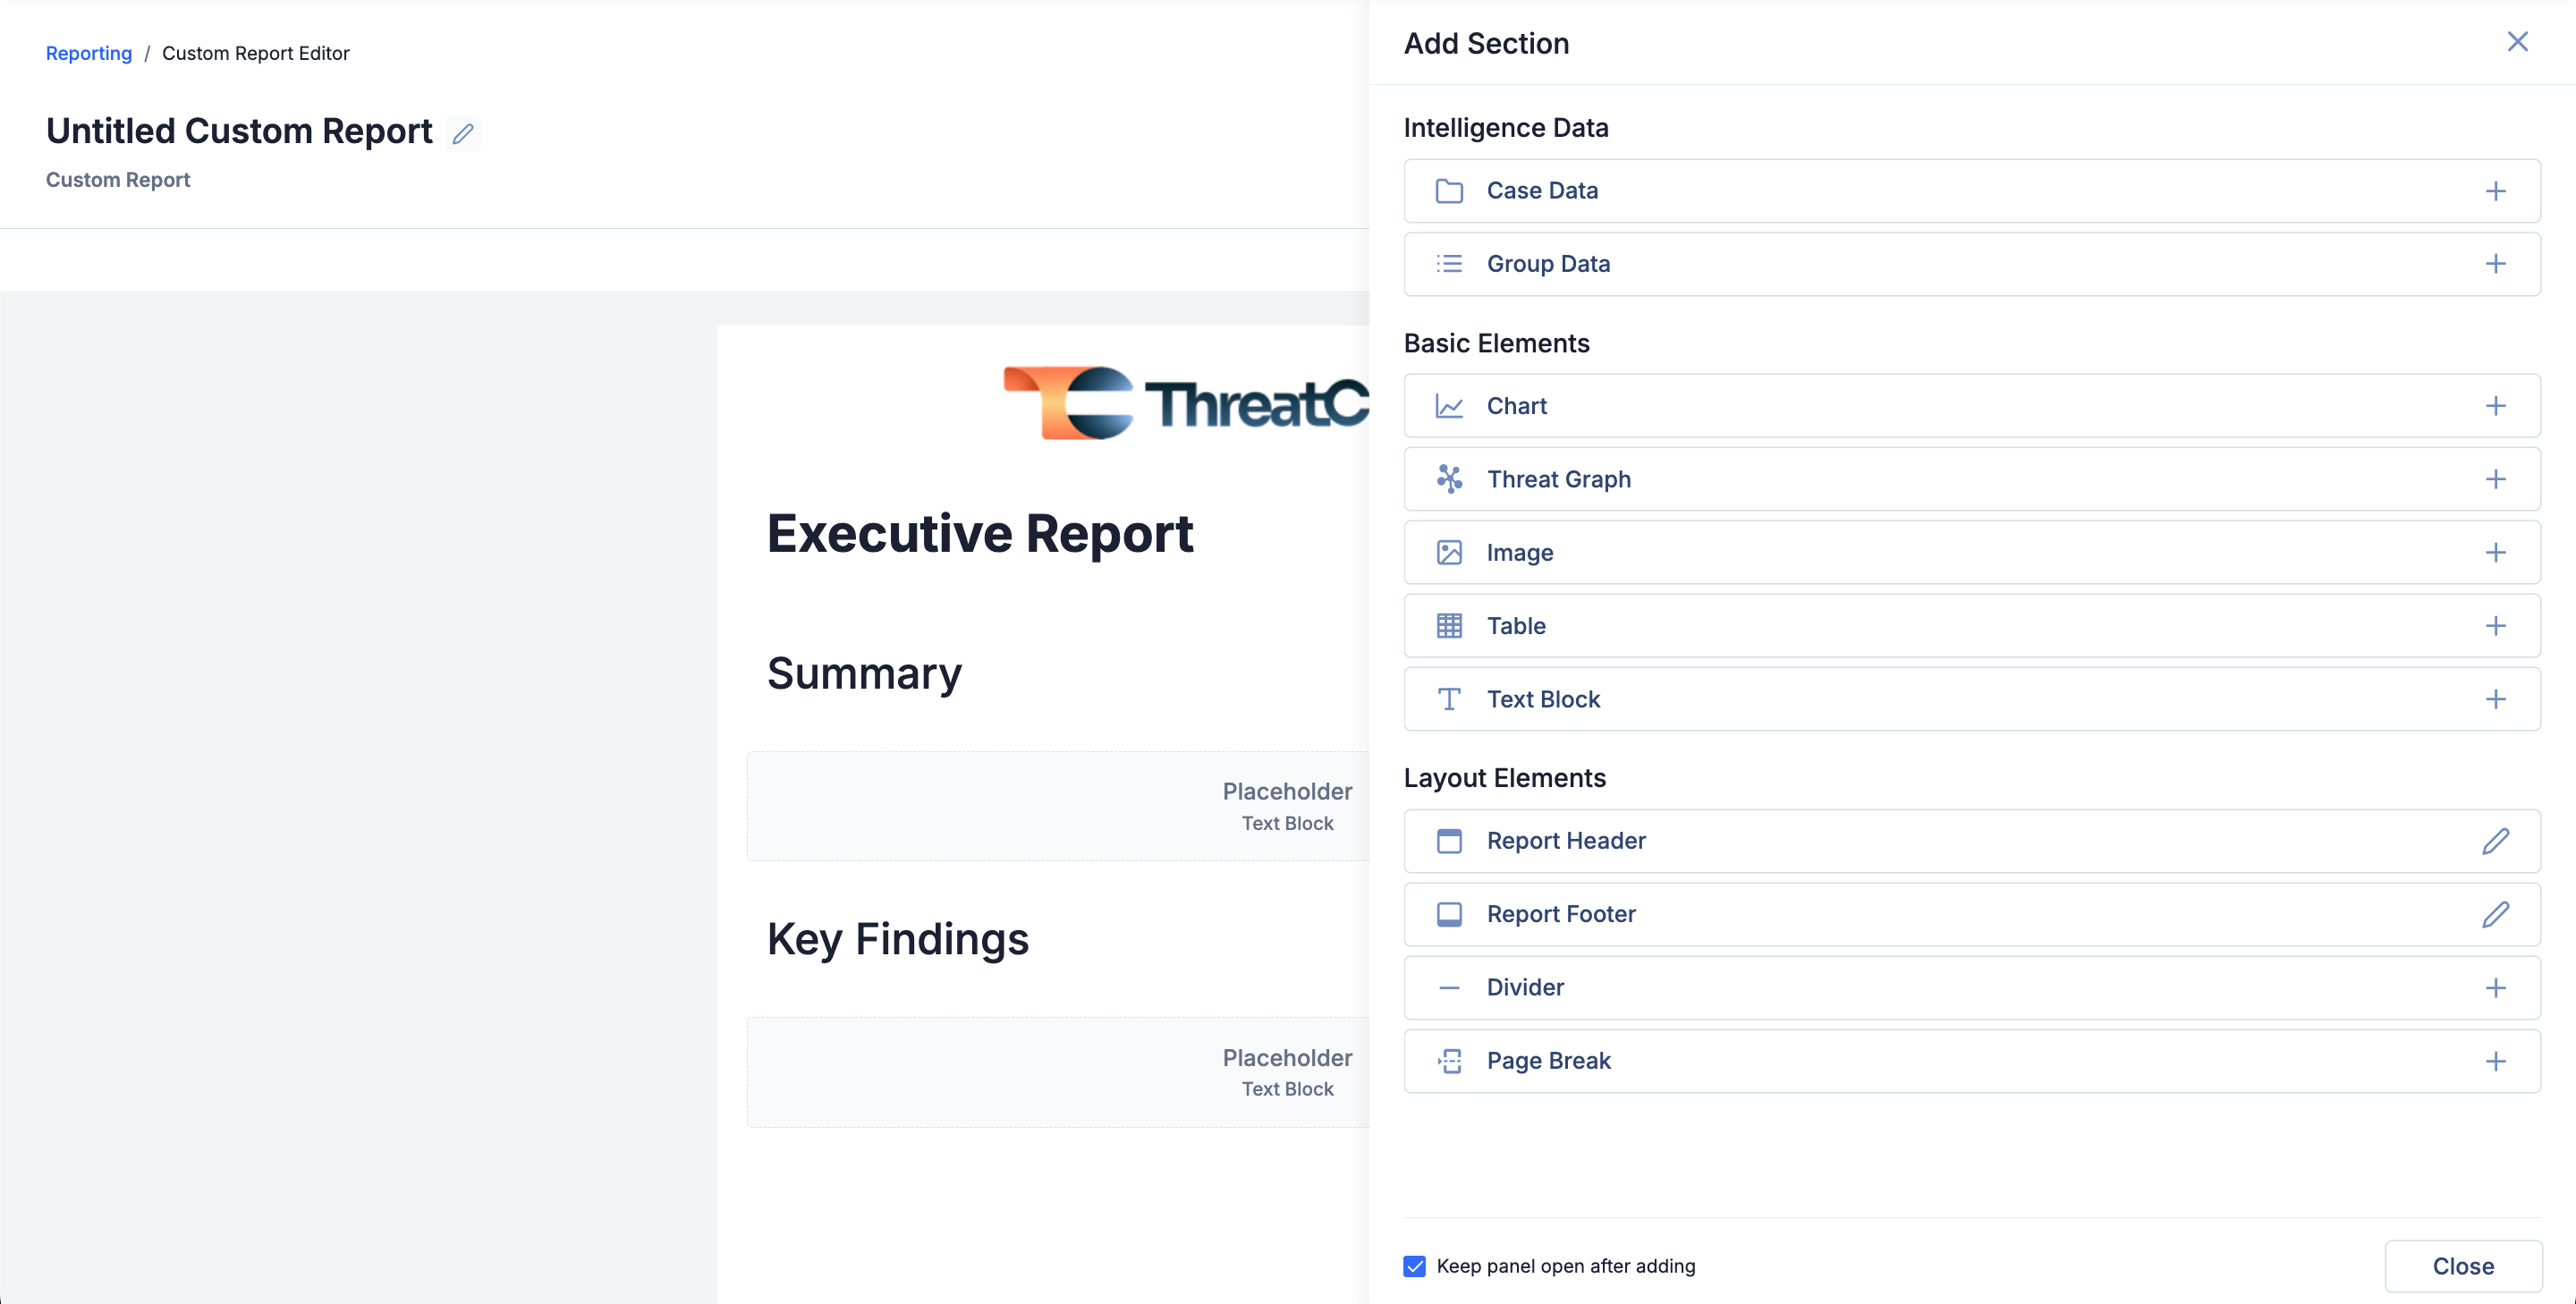
- Click + Create Custom Report at the top right of the Reporting screen and select Create New. The Report Editor will open and display a new report, as well as the Add Section drawer (Figure 3).
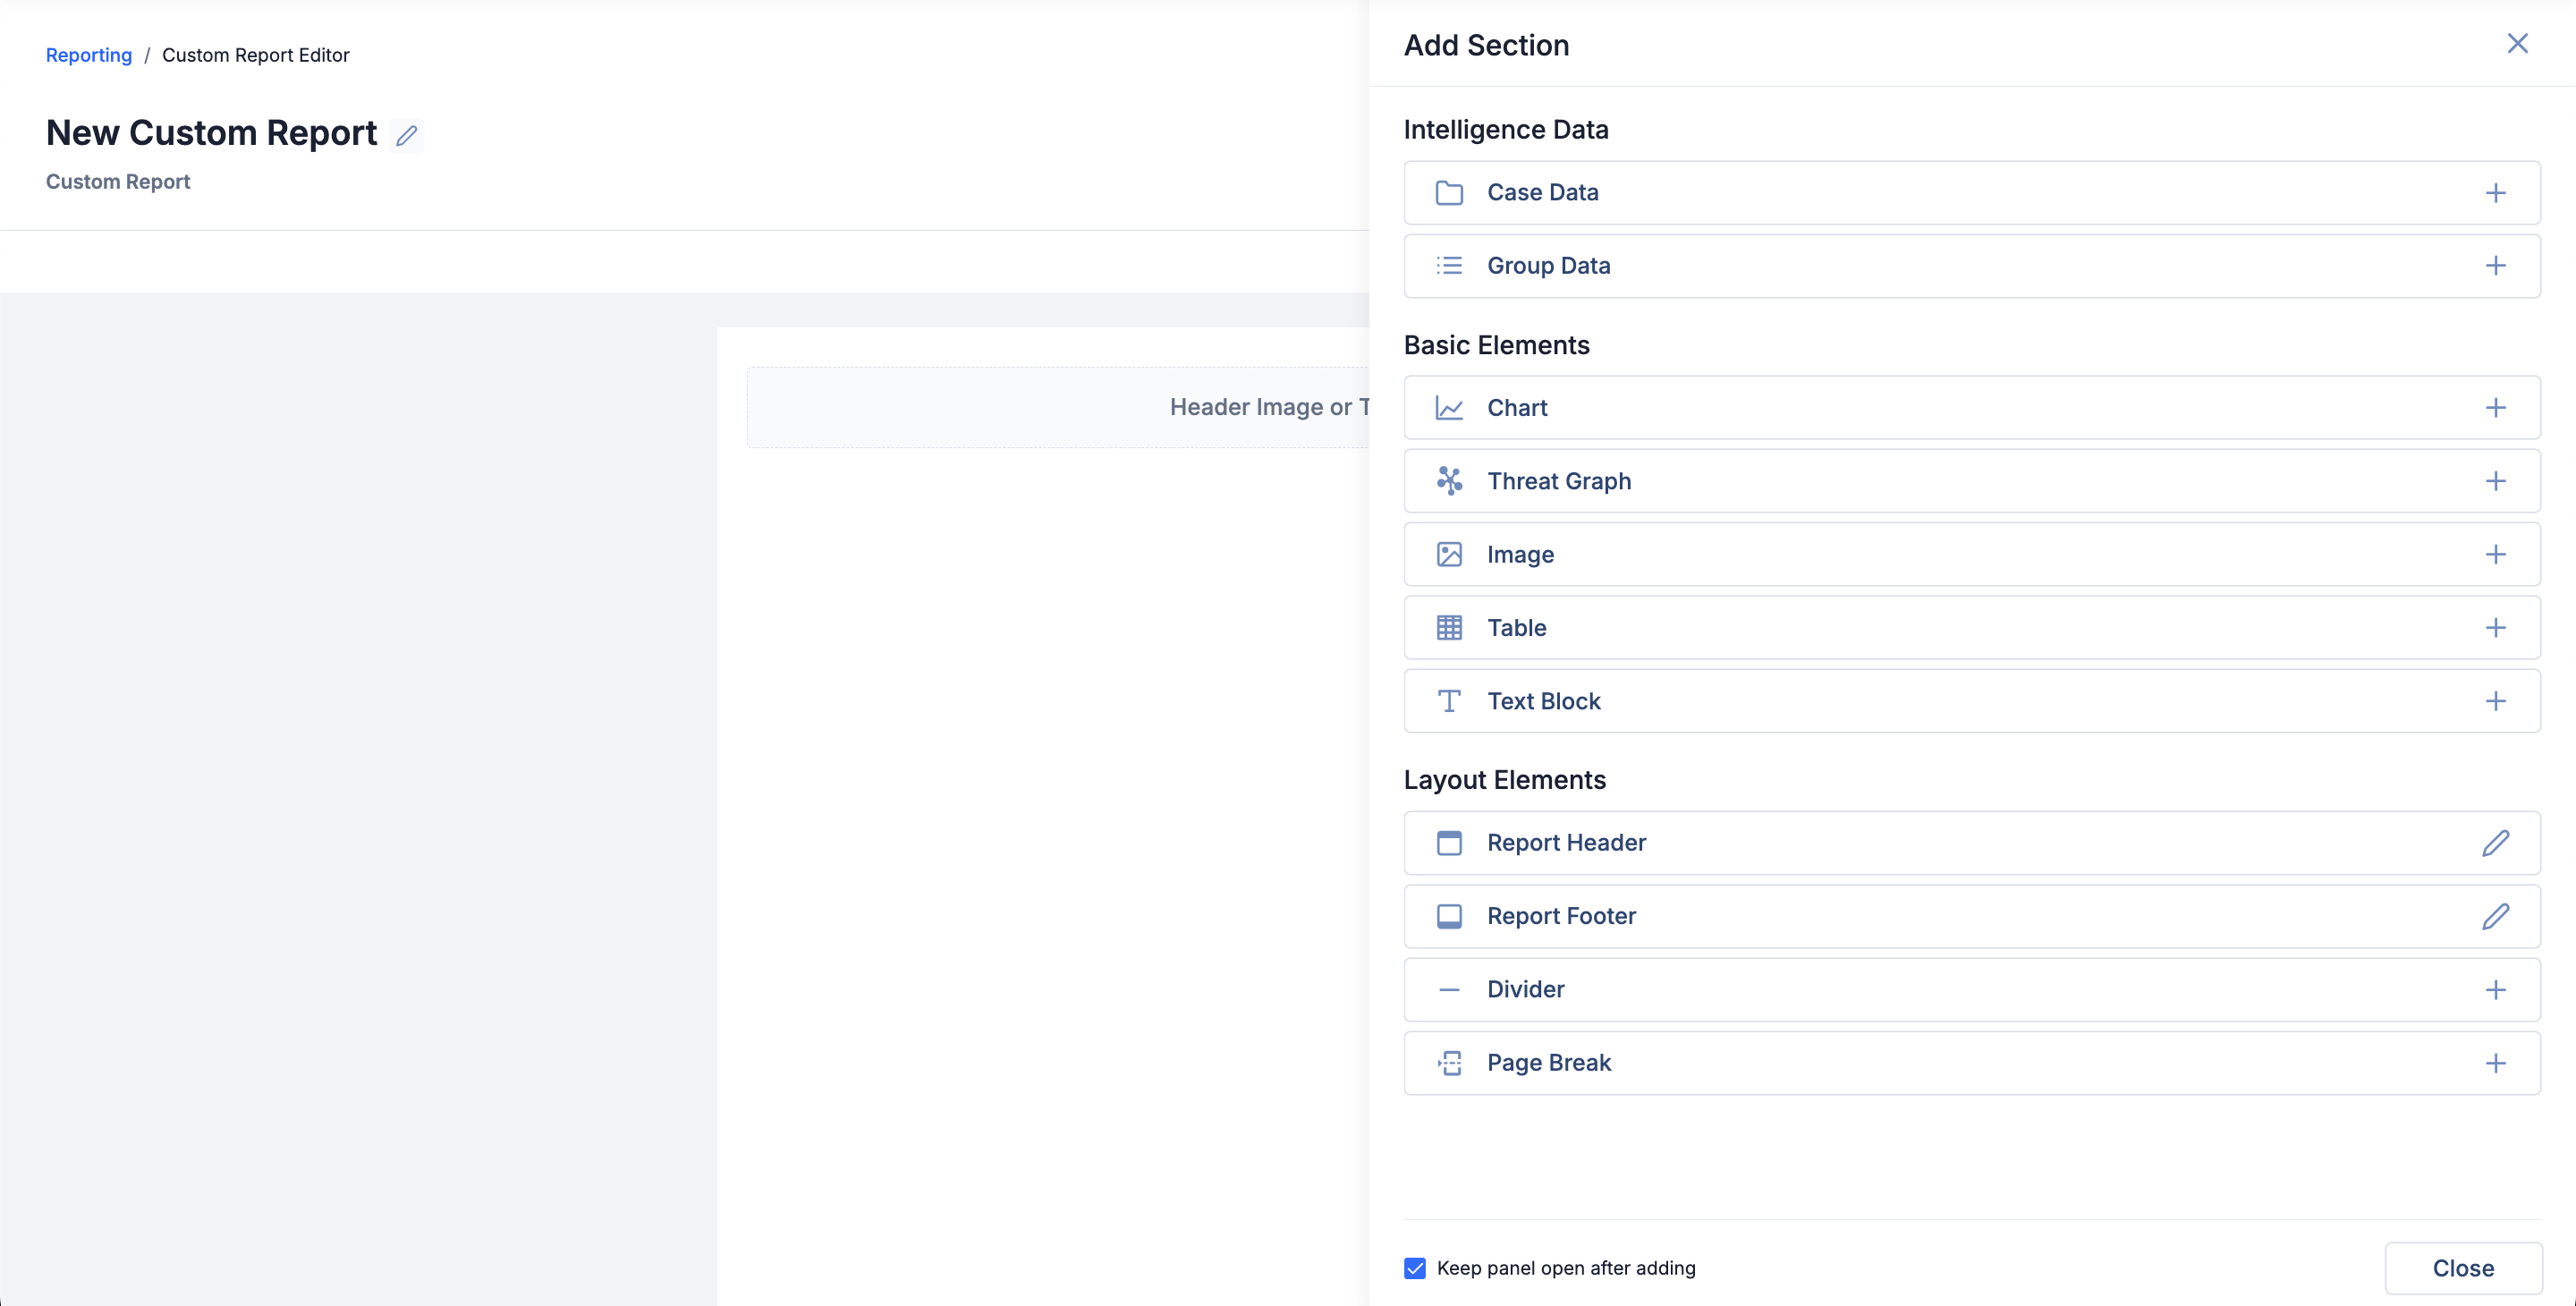
- Select Intelligence Data, Basic Elements, and Layout Elements sections to add to the report.
- (Optional) Organize the report’s contents and layout.
- Save, publish, or export the report.
Creating a Report From a Report Template
The following subsections describe how to create a report from a saved report template. Using a report template ensures that your report is consistent with other reports your team has created and reduces time spent creating the report from scratch.
Creating a Report From a Group Report Template
Follow these steps to create a report for a Group from a saved Group report template:
- Navigate to the Details screen or Details drawer for a Group.
- Click + Create Custom Report in the Details screen or drawer header and select Create From Group Template….NoteYou cannot create a report for a Group from a saved Group report template when creating a report on the legacy Details screen.
- Select a saved Group report template on the Create From Group Report Template window, and then click Create Custom Report. The Report Editor will open and display a new report based on the selected Group report template (Figure 4).
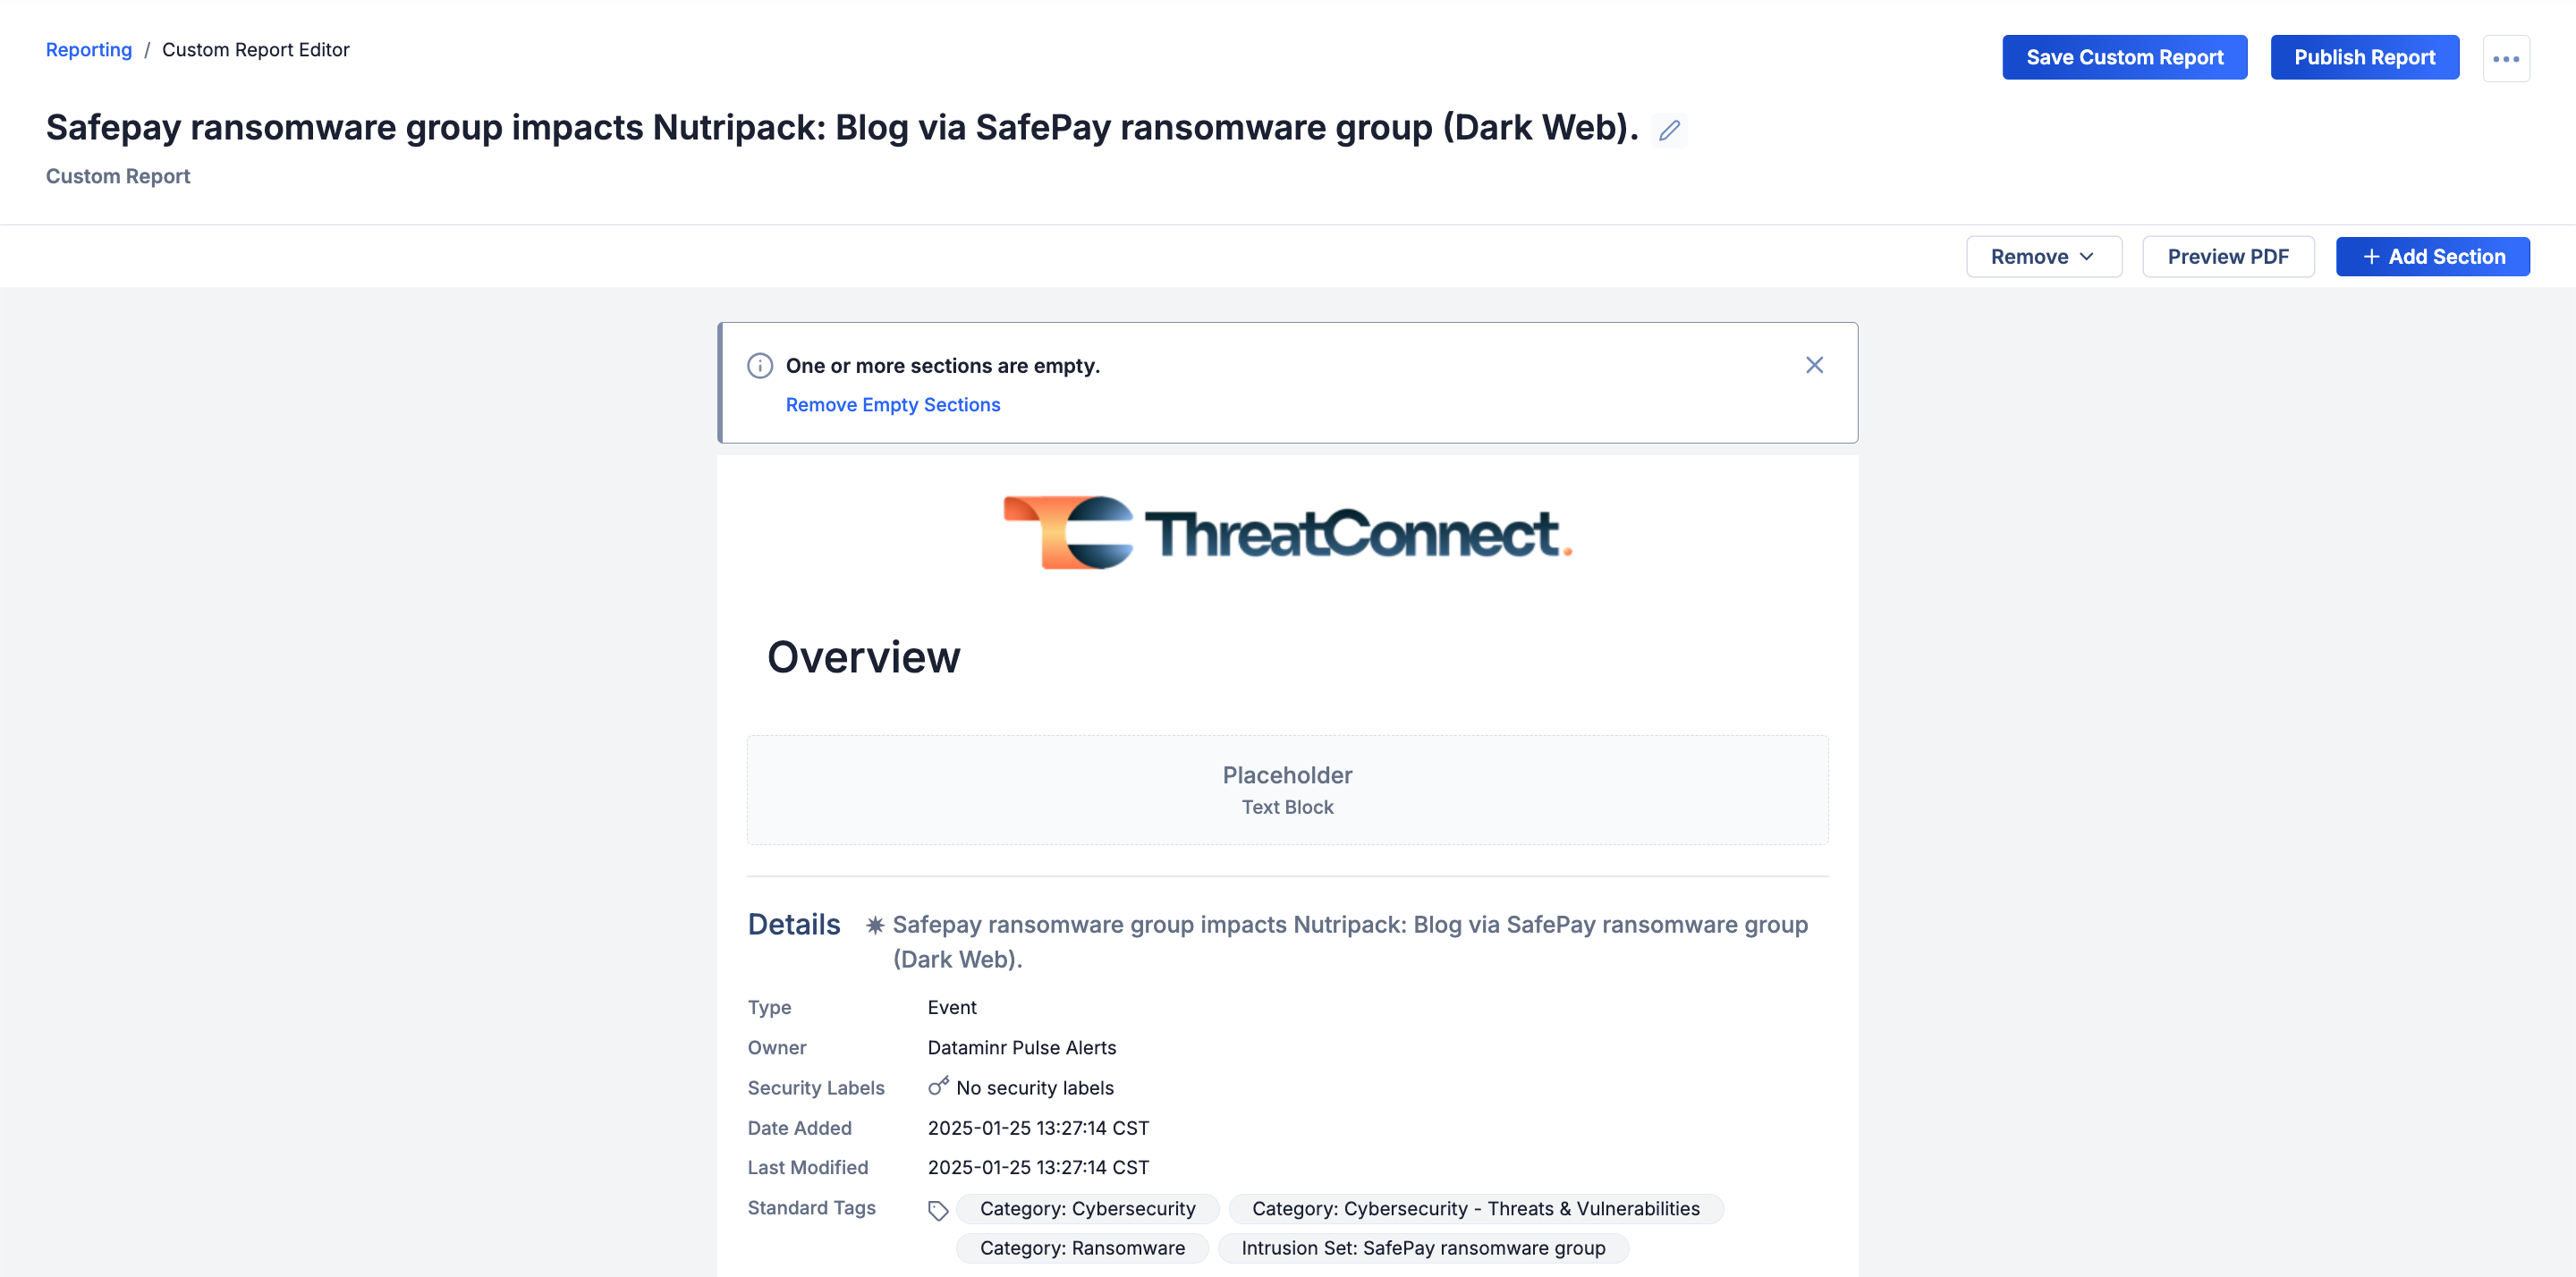 NoteIf there are one or more sections in the report that are not populated with data, a message stating “One or more sections are empty.” will be displayed at the top of the Report Editor. To remove the empty sections, click Remove Empty Sections in this message, or click Remove in the Report Editor toolbar and select Empty Sections.
 - Review the report to identify placeholder sections that need to be configured manually. Hover over each placeholder section, click Edit Content
 , and provide the required information. Alternatively, click Remove Placeholders in the Report Editor toolbar to remove all placeholder sections in the report.
 - (Optional) Click + Add Section in the Report Editor toolbar to add additional Group Data, Basic Elements, and Layout Elements sections to the report.
- (Optional) Organize the report’s contents and layout.
- Save, publish, or export the report.
Creating a Report From a Case Report Template
Follow these steps to create a report for a Case from a saved Case report template:
- Click Workflow on the top navigation bar. Alternatively, hover over Workflow on the top navigation bar and select Cases.
- Select a Case on the Cases screen to view the Case's details.
- Click + Create Custom Report at the top right of the Case and select Create From Case Report Template….NoteYou can also access the + Create Custom Report button on a Case’s Details drawer while the drawer is open on the Search screen .
- Select a saved Case report template on the Create From Case Report Template window, and then click Create Custom Report. The Report Editor will open and display a new report based on the selected Case report template (Figure 5).
 NoteIf there are one or more sections in the report that are not populated with data, a message stating “One or more sections are empty.” will be displayed at the top of the Report Editor. To remove the empty sections, click Remove Empty Sections in this message, or click Remove in the Report Editor toolbar and select Empty Sections.
 - Review the report to identify placeholder sections that need to be configured manually. Hover over each placeholder section, click Edit Content, and provide the required information. Alternatively, click Remove Placeholders in the Report Editor toolbar to remove all placeholder sections in the report.
- (Optional) Click + Add Section in the Report Editor toolbar to add additional Case Data, Basic Elements, and Layout Elements sections to the report.
- (Optional) Organize the report’s contents and layout.
- Save, publish, or export the report.
Creating a Report From a Generic Report Template
Follow these steps to create a generic report (i.e., a report that is not for a specific Group or Case) from a saved generic report template:
- Click Reporting on the top navigation bar.
- Click + Create Custom Report at the top right of the Reporting screen and select Create From Generic Template….
- Select a saved generic report template on the Create From Generic Report Template window, and then click Create Custom Report. The Report Editor will open and display a new report based on the selected generic report template, as well as the Add Section drawer (Figure 6).
 NoteIf there are one or more sections in the report that are not populated with data, a message stating “One or more sections are empty.” will be displayed at the top of the Report Editor. To remove the empty sections, click Remove Empty Sections in this message, or click Remove in the Report Editor toolbar and select Empty Sections.
 - (Optional) On the Add Section drawer, select Intelligence Data, Basic Elements, and Layout Elements sections to add to the report. You may also close the Add Section drawer and reopen it later by clicking + Add Section in the Report Editor toolbar.
- Review the report to identify placeholder sections that need to be configured manually. Hover over each placeholder section, click Edit Content, and provide the required information. Alternatively, click Remove Placeholders in the Report Editor toolbar to remove all placeholder sections in the report.
- (Optional) Organize the report’s contents and layout.
- Save, publish, or export the report.
ThreatConnect® is a registered trademark of ThreatConnect, Inc.
20144-02 v.04.C