Overview
A File Indicator represents a unique file hash (MD5, SHA1, and SHA256) or series of hashes. On a File Indicator’s Details screen, you can view and manage the Indicator’s hashes, size (in bytes), and known File Occurrences.
Before You Start
| Minimum Role(s) | Organization role of Standard User |
|---|---|
| Prerequisites | A File Indicator created in one of your ThreatConnect owners |
Managing File Hash Details
New Details Screen
- Navigate to the Details screen for a File Indicator.
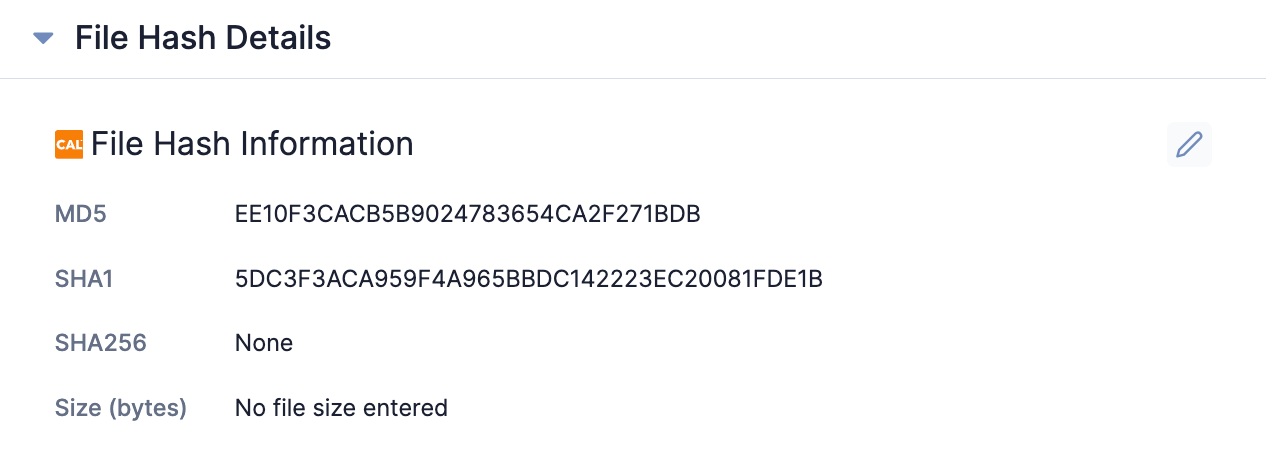
- Scroll down to view the File Hash Details card on the left side of the screen (Figure 1). The File Hash Information section of this card displays the File Indicator’s hashes and size.
 NoteIf file hash information exists in CAL™ for the Indicator, a CAL™ File Hash Information section will be displayed on the File Hash Details card. See the “Viewing CAL Data for an Indicator” section of ThreatAssess and CAL for more information on the CAL™ File Hash Information section.
 - Click Edit
 at the top right of the File Hash Details card, or click on any of the fields in the File Hash Information section. The File Hash Information section will now be editable (Figure 2).
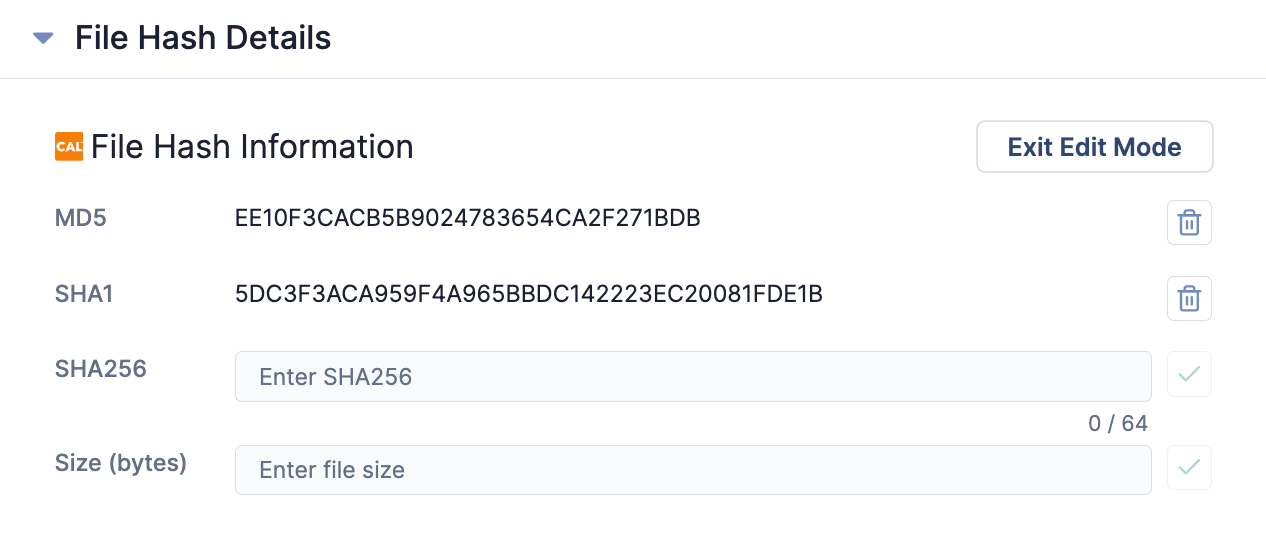
- MD5, SHA1, and SHA256:
- If the File Indicator does not contain the respective hash, a text box in which you can enter the hash will be displayed. After entering a valid file hash, click Save
 to the right of the text box.
 - If the File Indicator contains the respective hash, a Delete
 button will be displayed to the right of the hash. Click this button to delete the hash. Note that if a File Indicator contains only one hash, you will not be able to delete the hash.
- If the File Indicator does not contain the respective hash, a text box in which you can enter the hash will be displayed. After entering a valid file hash, click Save
- Size (bytes):
- If the File Indicator does not contain a file size, a text box in which you can enter the file size, in bytes, will be displayed. After entering the File Indicator’s size, click Saveto the right of the text box.
- If the File Indicator contains a file size, a Deletebutton will be displayed to the right of the file size. Click this button to delete the file size.
- If the File Indicator does not contain a file size, a text box in which you can enter the file size, in bytes, will be displayed. After entering the File Indicator’s size, click Save
- MD5, SHA1, and SHA256:
- After all desired changes are made, click Exit Edit Mode at the top right of the File Hash Details card.
If you add a new hash to an existing File Indicator and a File Indicator containing that hash exists in the same owner, the Merge File Indicators window will be displayed. Click the Merge button to merge the two File Indicators into a single File Indicator that contains both hashes and each Indicator’s Attributes, Security Labels, and Tags.
Legacy Details Screen
- Navigate to the legacy Details screen for a File Indicator.
- Scroll down to view the Hashes card on the left side of the screen (Figure 3). This card displays the File Indicator’s hashes and size.
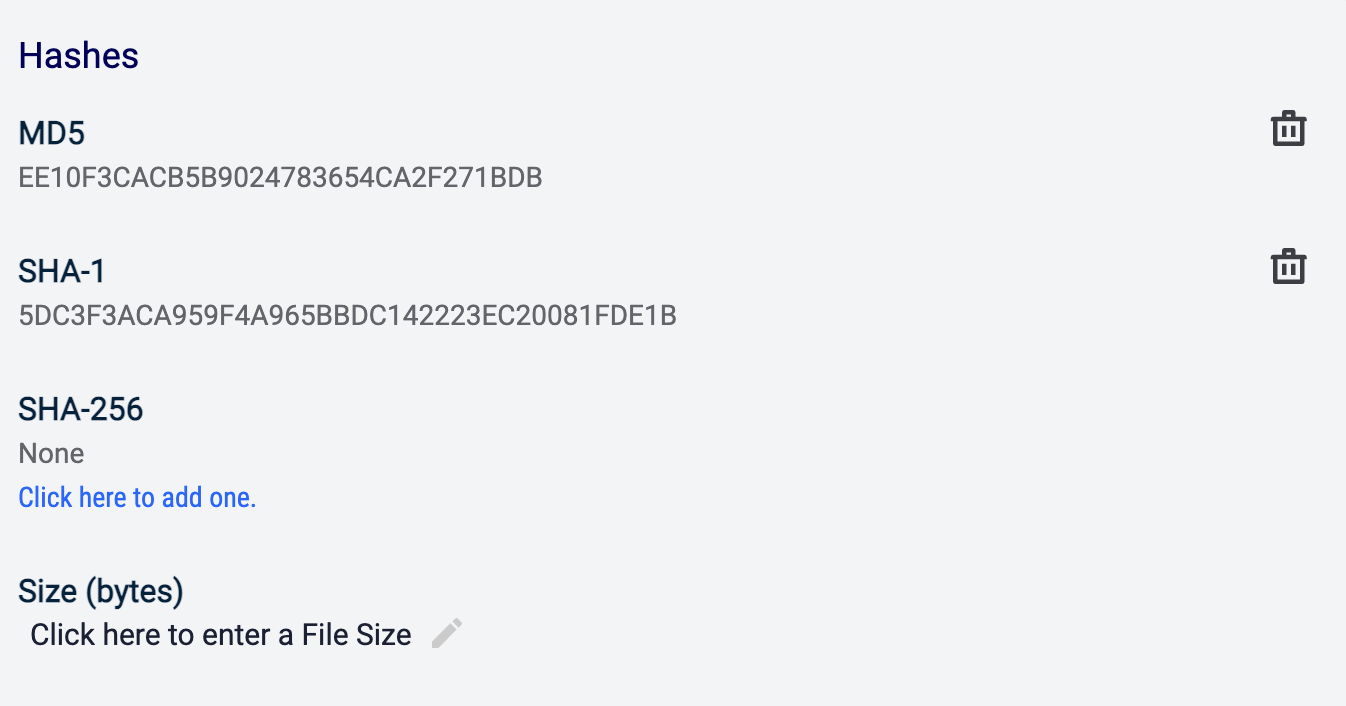
- MD5, SHA-1, and SHA-256:
- If the File Indicator does not contain the respective hash, a Click here to add one. link will be displayed. Click this link to display the Add Hash window, which is where you can enter the hash.
- If the File Indicator contains the respective hash, a Delete
 icon will be displayed to the right of the hash. Click this button to delete the hash. Note that a File Indicator must contain at least two hashes for the Deleteicon to be displayed.
- Size (bytes): Click Edit
 to display a text box where you can enter the File Indicator’s size, in bytes. After entering the size in the text box, click Save
 .
.
- MD5, SHA-1, and SHA-256:
If you add a new hash to an existing File Indicator and a File Indicator containing that hash exists in the same owner, the Add Hash window will display a Merge Hashes checkbox (Figure 4).
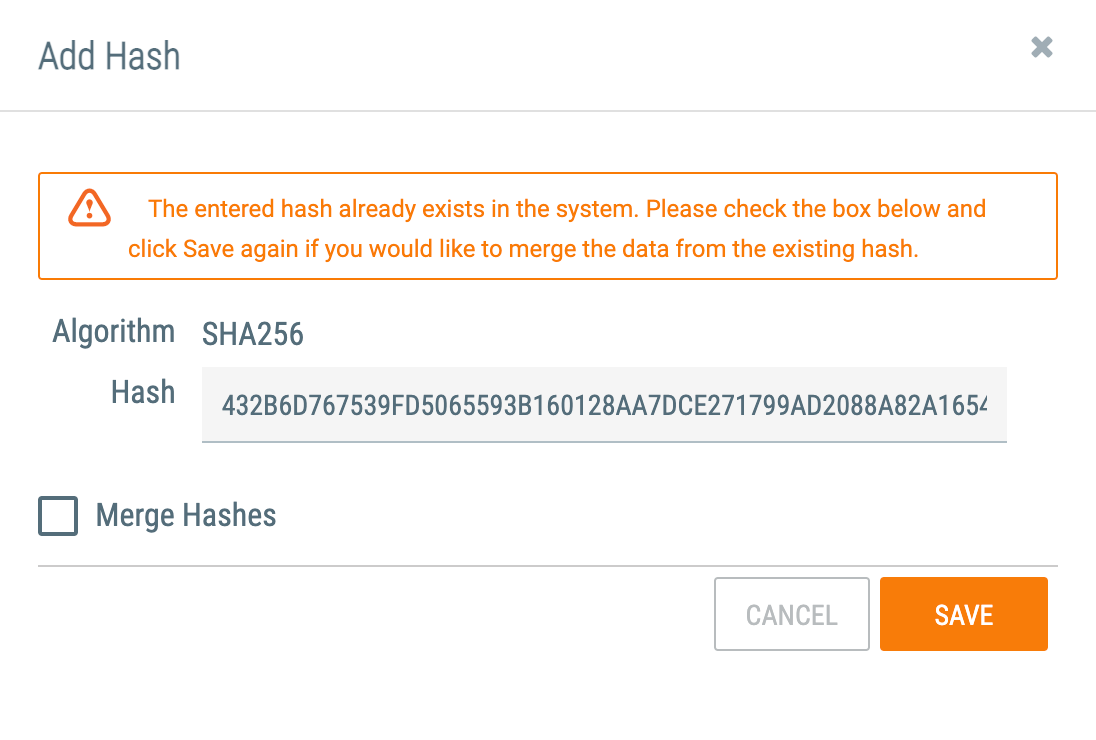
Select this checkbox and then click the SAVE button to merge the two File Indicators into a single File Indicator that contains both hashes and each Indicator’s Attributes, Security Labels, and Tags.
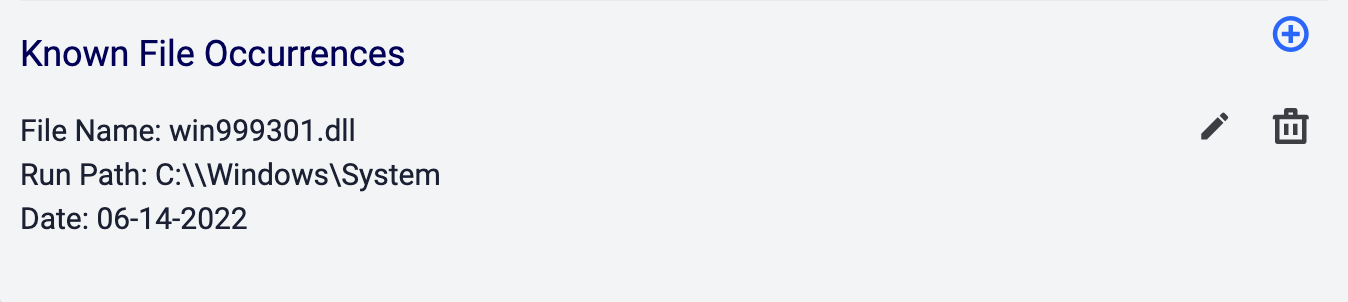
Known File Occurrences
Known File Occurrences provide a record of the various file names being used for the File Indicator you are investigating.
New Details Screen
Creating File Occurrences
- Navigate to the Details screen for a File Indicator.
- Scroll down to view the Known File Occurrences card on the right side of the screen (Figure 5).

- Click Add
 at the upper-right corner of the Known File Occurrences card. The Add File Occurrence window will be displayed (Figure 6).
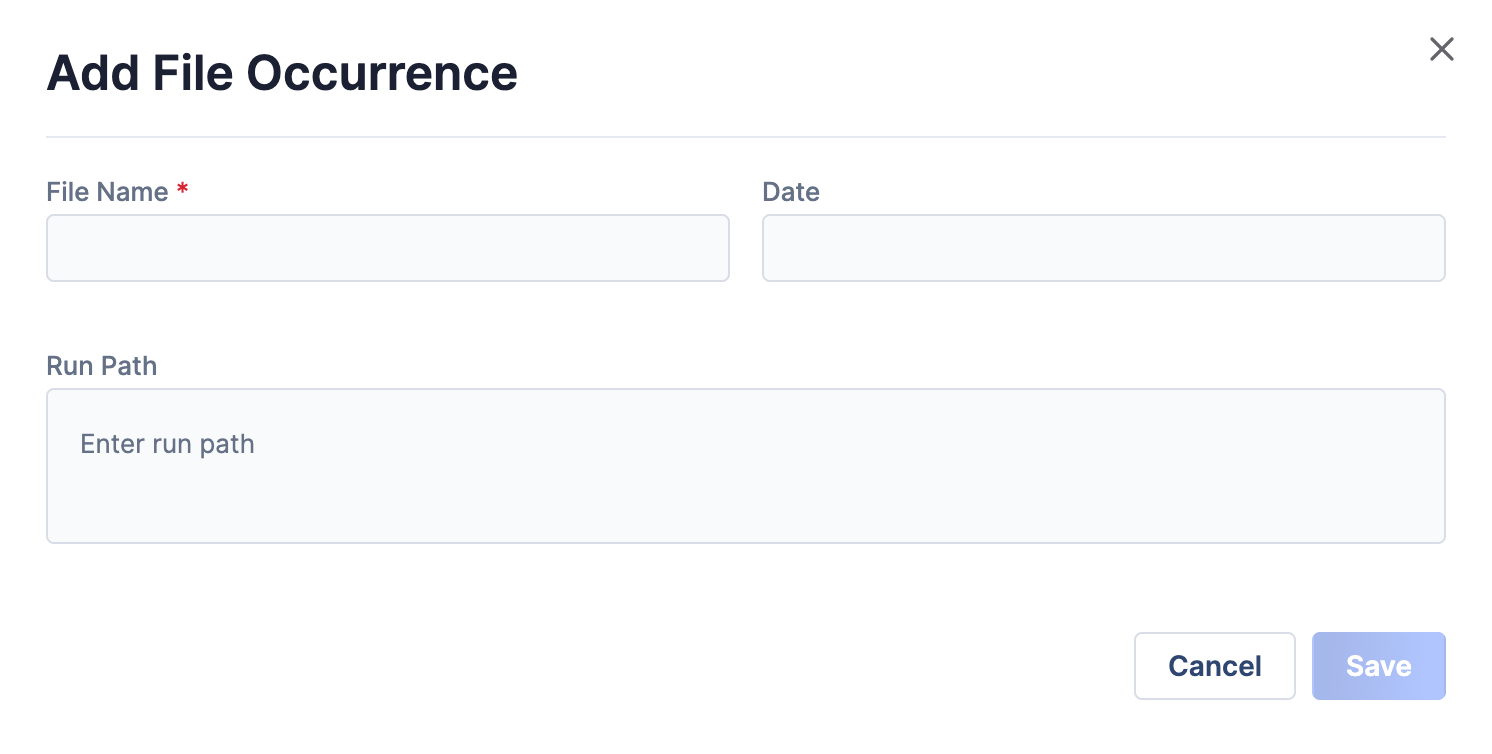
- File Name: Enter the file name of the File Occurrence.
- Date: Select the date of the File Occurrence.
- Run Path: Enter the run path of the File Occurrence.
- Click the Save button.
Managing File Occurrences
Click Editor Deletein the rightmost column for a File Occurrence to edit or delete it, respectively.
Legacy Details Screen
Creating File Occurrences
- Navigate to the legacy Details screen for a File Indicator.
- Scroll down to view the Known File Occurrences card on the left side of the screen (Figure 7).
- Click Add New Occurrence
 at the upper-right corner of the Known File Occurrences card. Fields for entering the File Occurrence’s details will be displayed (Figure 8).
- File Name: Enter the file name of the File Occurrence.
- Run Path: Enter the run path of the File Occurrence.
- Date: Select the date of the File Occurrence.
- Click the SAVE button.
Managing File Occurrences
Click Edit or Deleteto the right of a File Occurrence to edit or delete it, respectively.
ThreatConnect® is a registered trademark, and CAL™ is a trademark, of ThreatConnect, Inc.
20148-01 v.02.A