Overview
A post is a comment in your Organization or one of your Communities or Sources in ThreatConnect®. When creating posts, you can link them to Groups, Indicators, Tags, Tracks, or Victims in ThreatConnect by using the ADD LINK… feature or ThreatConnect Markup.
On the Posts screen, you can view, create, reply to, and delete posts in your Organization, Communities, and Sources. You can also perform these same actions for posts linked to threat intelligence objects via an object’s Details screen.
Before You Start
| Minimum Role(s) | In an Organization, all users can view posts; all users except Read Only Users (System and Organization role of Read Only User) can create and reply to posts and delete their own posts; and only Organization Administrators can delete any post. In a Community, all users except Banned users can view posts; all users except Users (Community role of User) and Subscribers can create and reply to posts and delete their own posts; and only Editors and Directors can delete any post. See ThreatConnect Owner Roles and Permissions for more details. |
|---|---|
| Prerequisites | None |
Viewing Posts
You can view posts on the Posts screen, the Details screen, and the legacy Details screen. The following subsections describe how to view posts on each of these screens.
Posts Screen
Follow these steps to access the Posts screen and view posts in all of your ThreatConnect owners (i.e., your Organization, Communities, and Sources), as well as those in a specific owner:
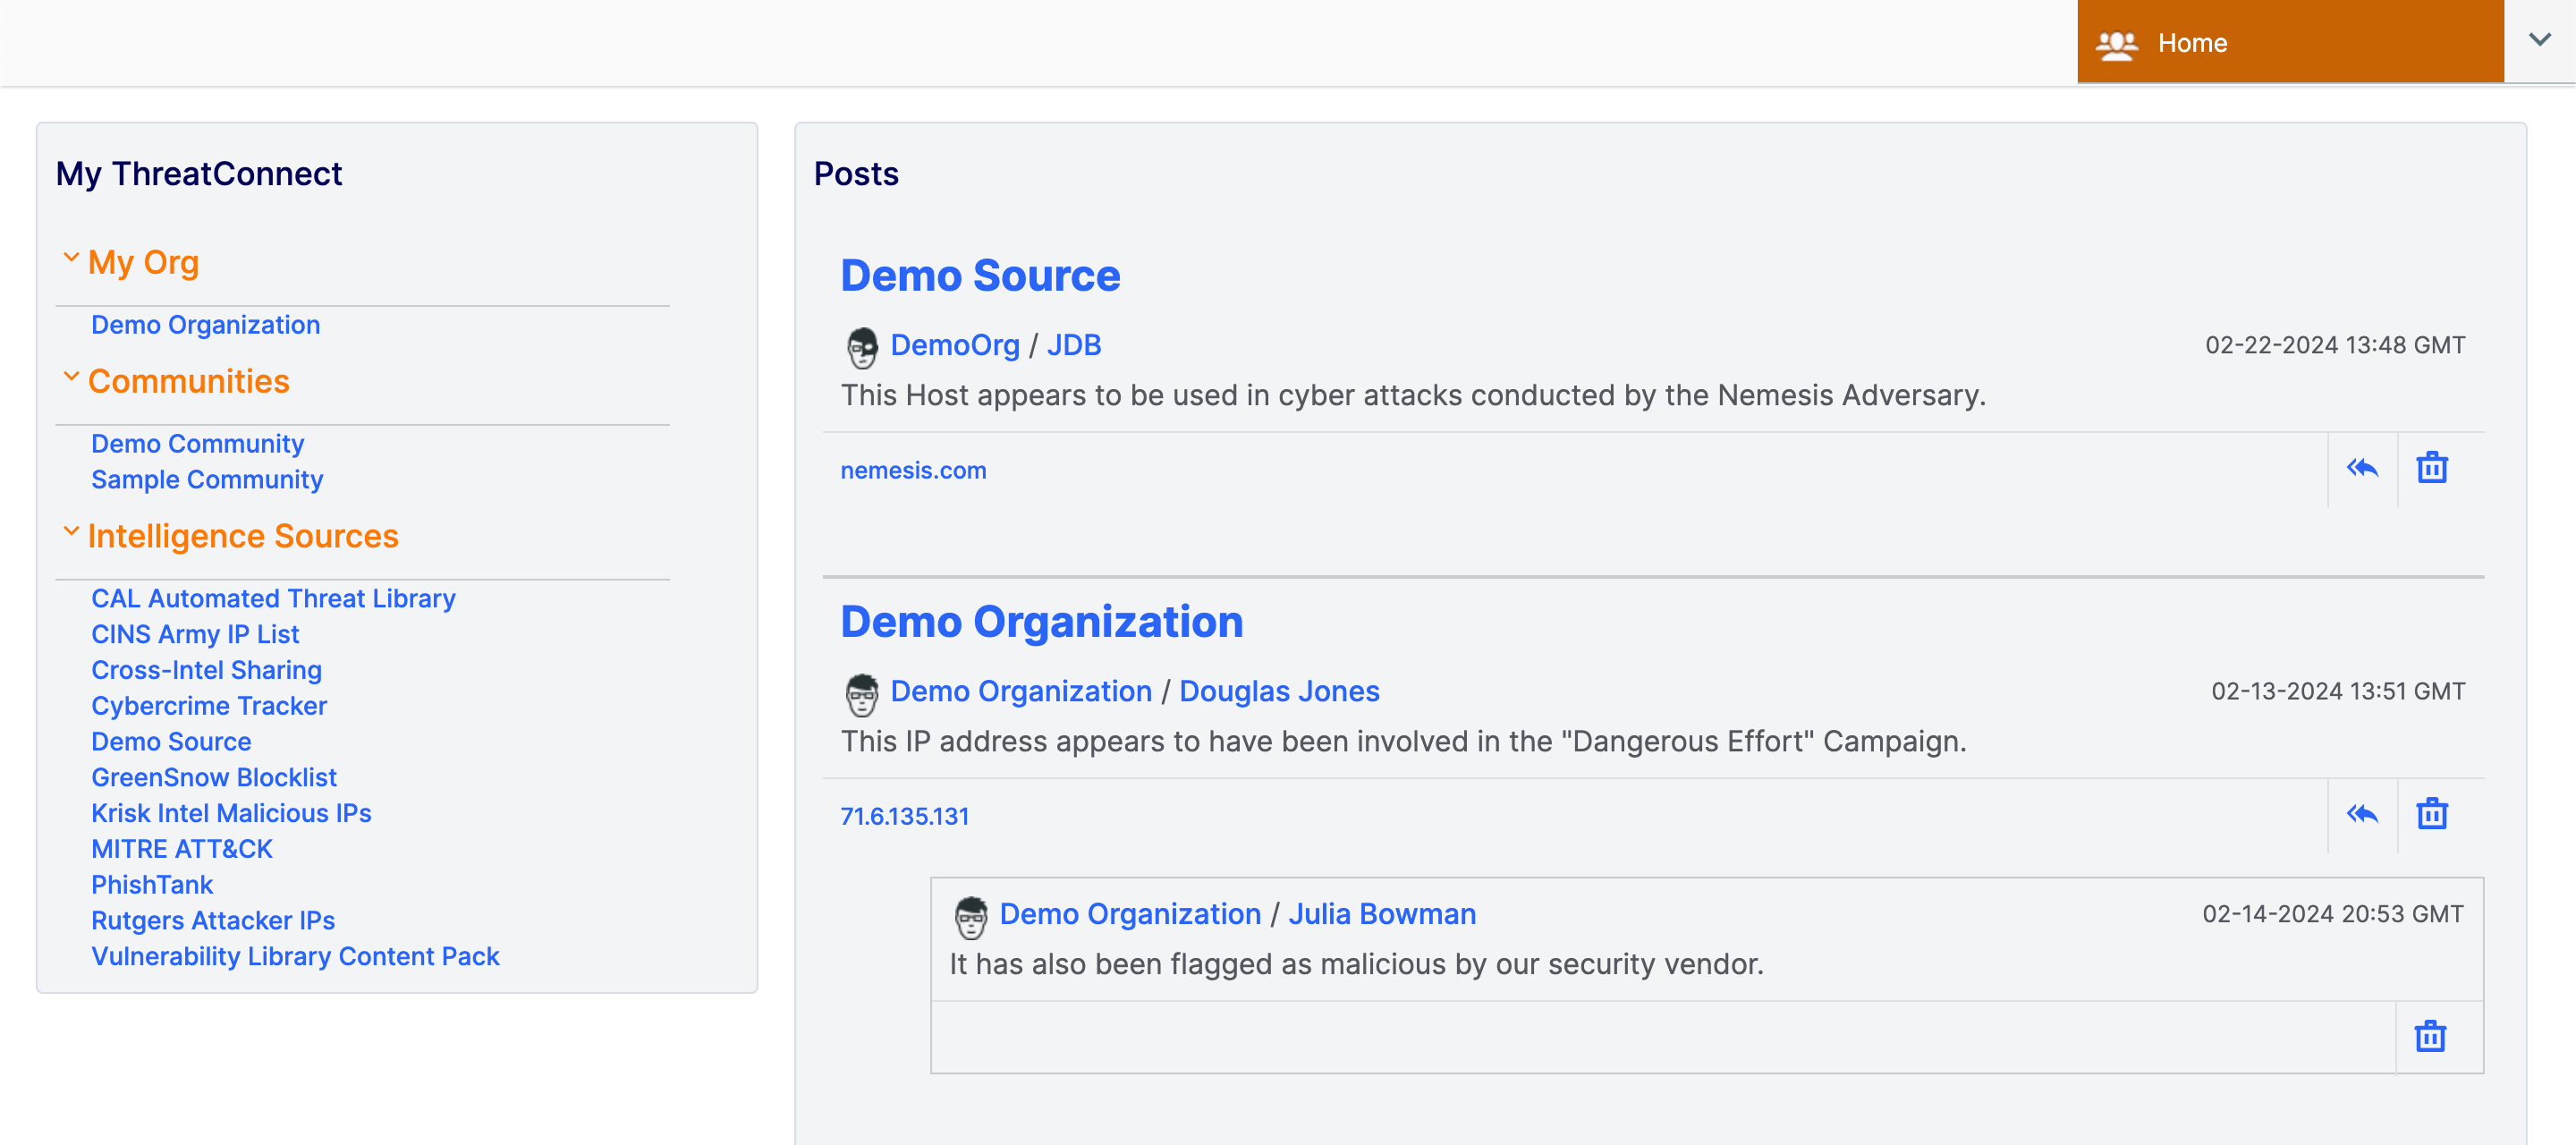
- On the top navigation bar, click Posts to display the Home view of the Posts screen (Figure 1). This screen displays posts for your Organization and all Communities and Sources to which you have viewing access.NoteAn orange circle displayed at the top right of the Posts option on the top navigation bar indicates that there are new, unviewed posts.
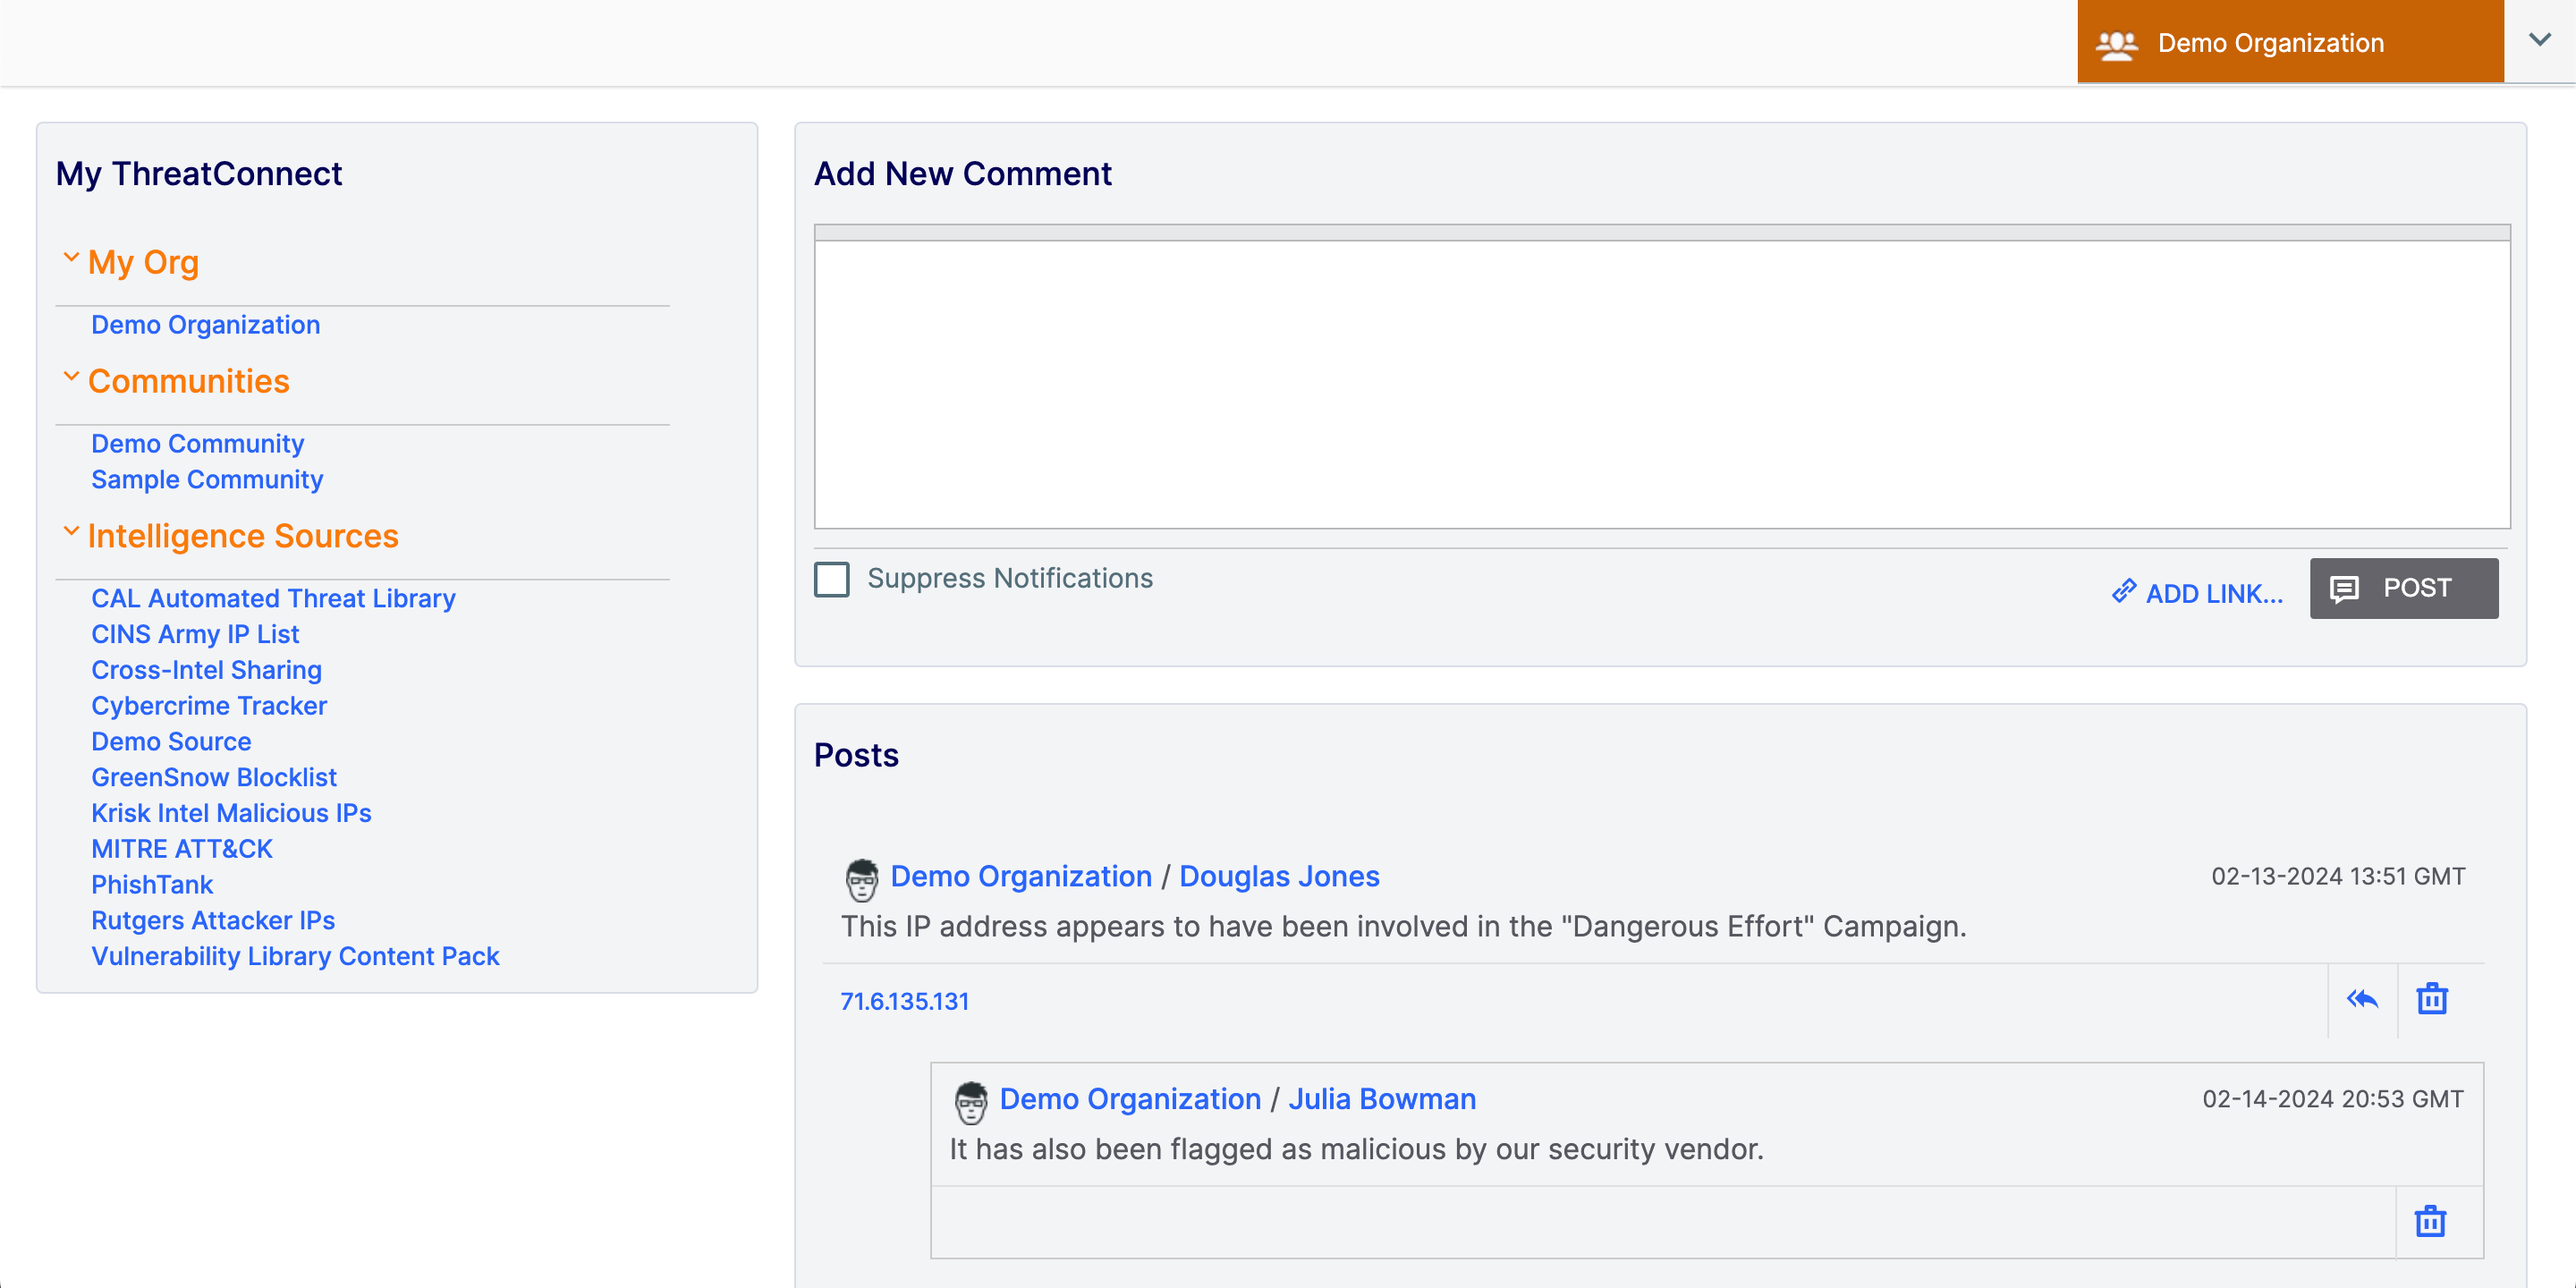
- To view posts in a specific owner, select an Organization, Community, or Source from the My ThreatConnect card, or use the selector at the upper-right corner of the Posts screen. After you select an owner, the Posts screen will display all posts in that owner (Figure 2).
Details Screen
You can view posts linked to a Group, Indicator, Tag, Track, or Victim on the object’s Details screen. Follow the steps in the following subsections to view posts on the new and legacy Details screens.
New Details Screen
- Navigate to the Details screen for a Group or Indicator.ImportantThe new Details screen is not currently available for Email, Signature, and Task Groups; Tags; Tracks; and Victims. As such, you can view posts linked to these object types on the legacy Details screen only.
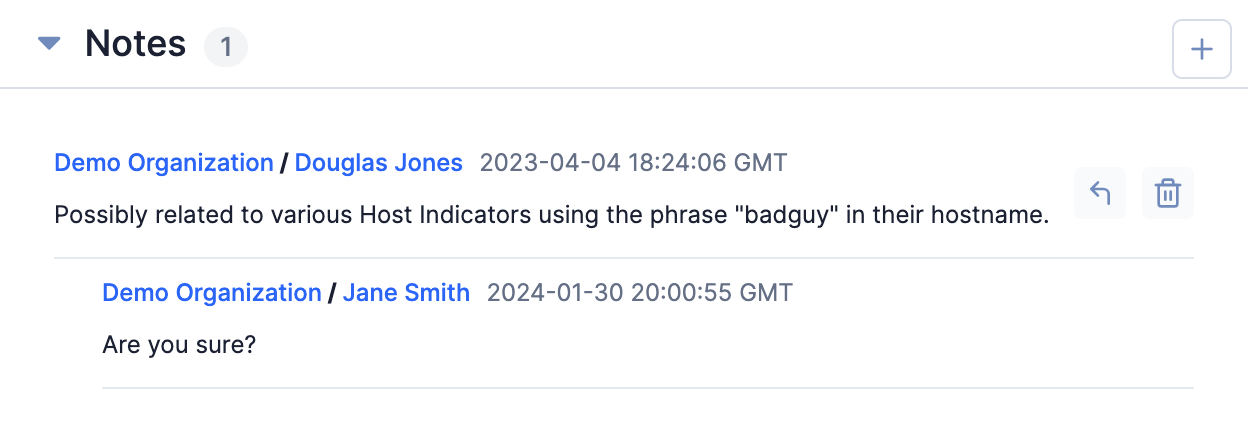
- On the Overview tab, scroll down to the Notes card on the right side of the screen to view posts linked to the object (Figure 3).
Legacy Details Screen
- Navigate to the legacy Details screen for a Group, Indicator, Tag, Track, or Victim.
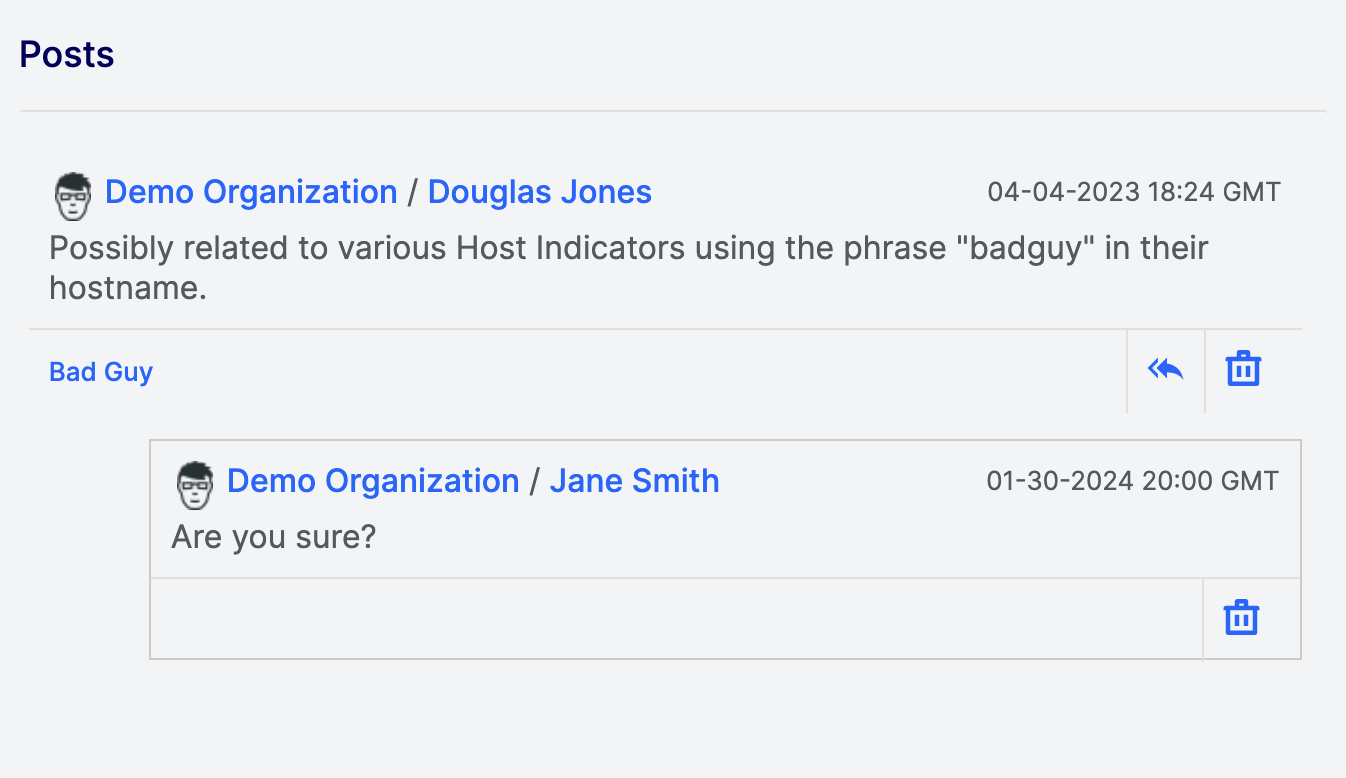
- On the Overview tab, scroll down to the Posts card on the right side of the screen to view posts linked to the object (Figure 4).
Creating Posts
You can create posts on the Posts screen, the Details screen, and the legacy Details screen. Note that the process for creating posts on the Posts and legacy Details screens is similar.
Posts Screen and Legacy Details Screen
- Navigate to either the Posts screen for one of your owners (to create a post in that owner) or the legacy Details screen for an object in one of your owners (to create a post linked to that object).
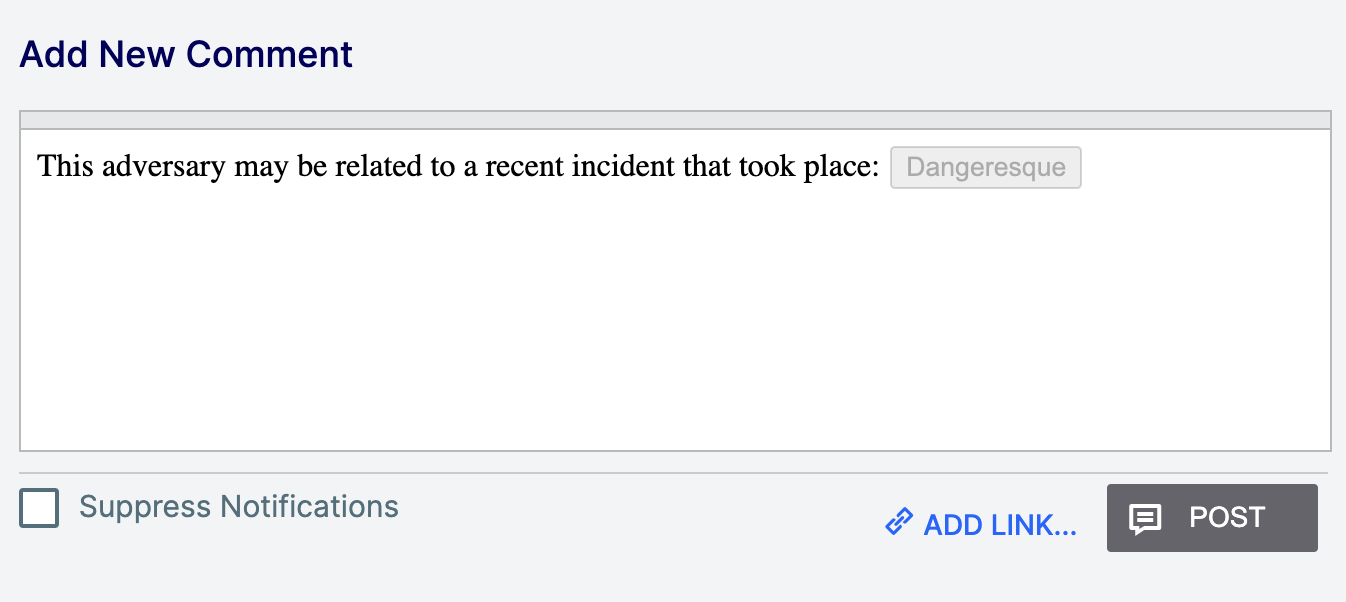
- Locate the Add New Comment card on the Posts screen or legacy Details screen (Figure 5).

- Click in the text box to enter the contents of the post.
- Suppress Notifications: Select this checkbox if you do not want to receive notifications when others reply to your post.NoteNotifications will be suppressed only for posts that have the Suppress Notifications checkbox selected. They will not be suppressed for replies to the post unless those replies also have the Suppress Notifications checkbox selected.
- ADD LINK…: Click this button to link the post to a Group, Indicator, Tag, Track, or Victim. See the “Linking Posts to Objects” section for instructions on using this feature.NoteIf you create a post via the Add New Comment card on an object’s Details screen, the post will be linked to the object automatically.
- Click the POST button.
After you create a post, it will be displayed in the Posts card below the Add Comment card on the Posts screen or an object’s legacy Details screen.
New Details Screen
- Navigate to the Details screen for a Group or Indicator.ImportantThe new Details screen is not currently available for Email, Signature, and Task Groups; Tags; Tracks; and Victims. As such, you can create posts linked to these object types on the legacy Details screen only.
- On the Overview tab, scroll down to the Notes card on the right side of the screen.
- Click Add
 at the upper-right corner of the Notes card to create a post linked to the object whose Details screen you are viewing. The Add Note window will be displayed (Figure 6).
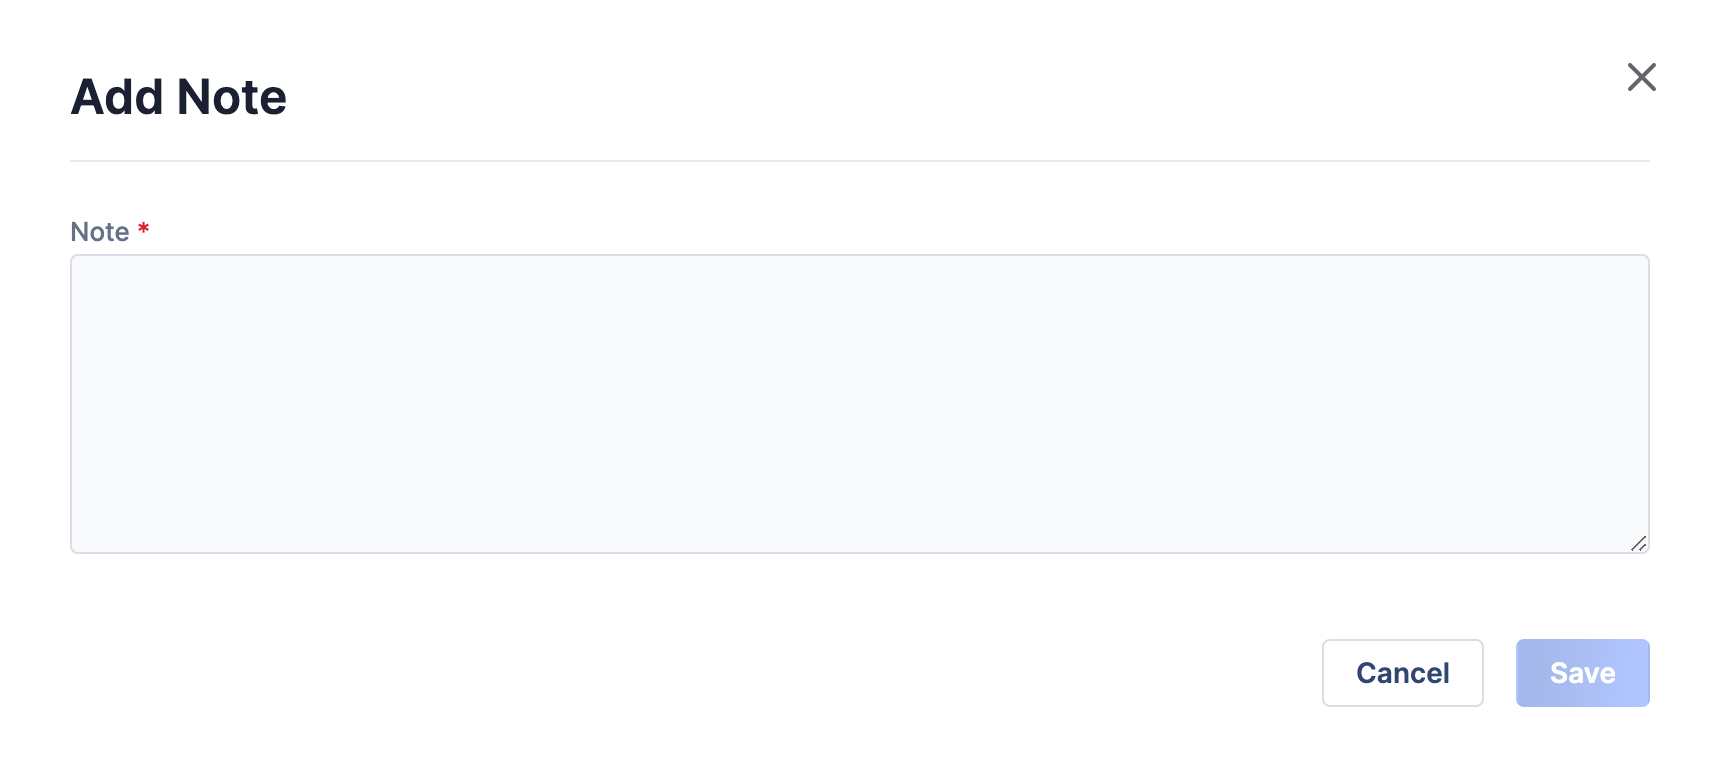
- Note: Enter the contents of the post in the text box.
- Click the Save button.
After you create a post, it will be displayed in the Notes card on the object’s Details screen, as well as in the Posts card on the Posts screen for the object’s owner.
Replying to Posts
While viewing posts on the Posts screen or one of the Details screens, click a post’s Reply icon ( or
or ) to add a reply to the post.
Deleting Posts
While viewing posts on the Posts screen or one of the Details screens, click a post’s Delete icon ( or
or ) to delete the post.
Linking Posts to Objects
When creating or replying to a post on the Posts screen or an object’s legacy Details screen, you can use the ADD LINK… feature or ThreatConnect Markup to link the post to an object that exists in the selected owner.
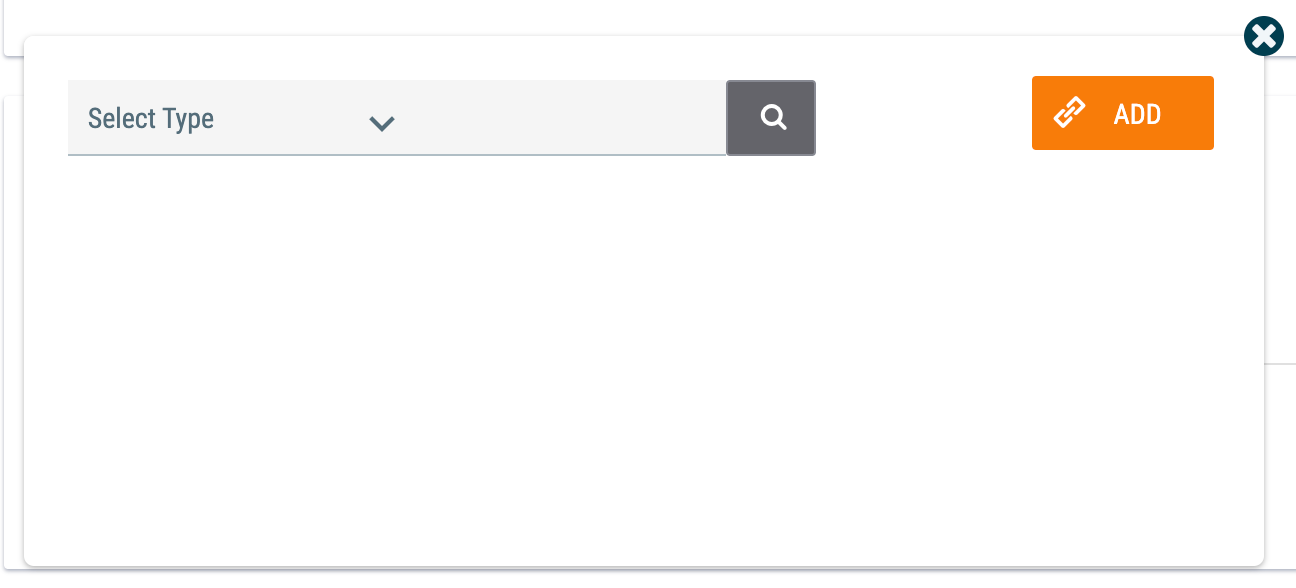
- On the Add New Comment card (Figure 5), click ADD LINK… to display a window below the card (Figure 7).
- Use the Select Type dropdown menu to select the type of object to which the post will be linked. After an object type is selected (Adversary Group in this example), the window will display all objects of that type (Figure 8).
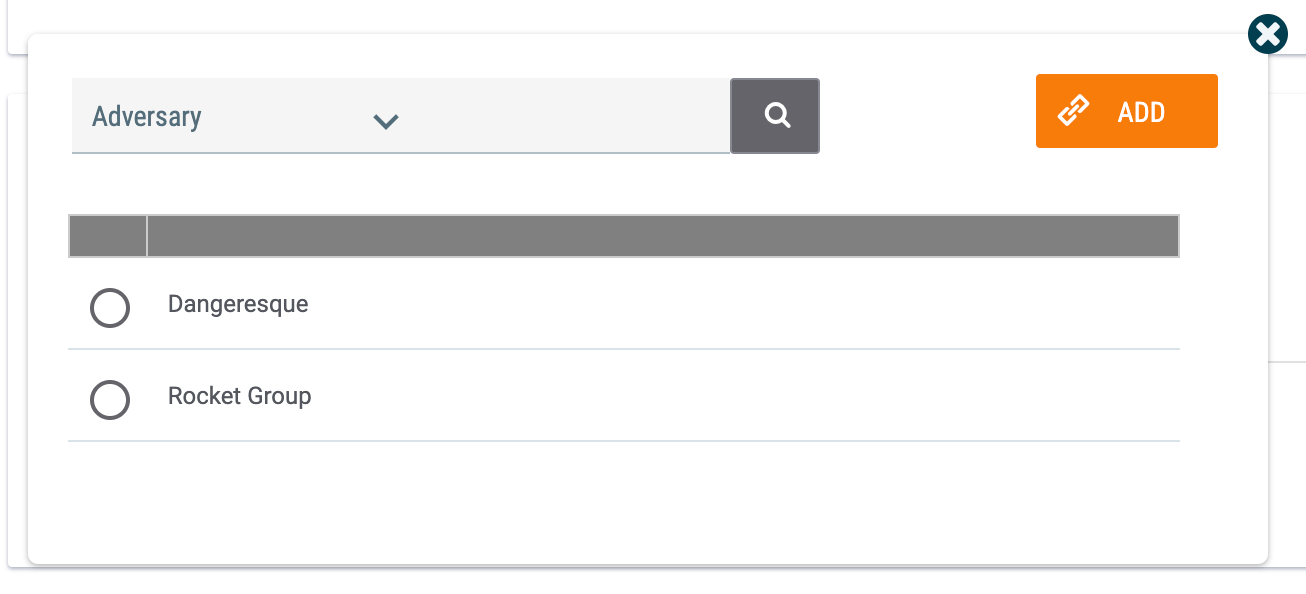
- Filter: If desired, enter a search term in this field and click Search
 to narrow the results.
 - Select the object to which the post will be linked.
- Click the ADD button.
- Filter: If desired, enter a search term in this field and click Search
- A link to the selected object will be displayed in the Add New Comment text box (Figure 9). After finalizing the post, click the POST button.
 ImportantThe ADD LINK… feature allows you to link one object to a post at a time. To link more than one object to a post using the ADD LINK… feature, repeat Steps 1–3 for each object.
You can use ThreatConnect Markup to link posts to objects by typing the syntax directly into the text box on the Add New Comment card using the formats provided in Table 1, where the values in italics represent the content of the object.
| Object Type | ThreatConnect Markup Syntax | Example |
|---|---|---|
| Owner | [[@this]] Note Only the owner in which the post is being created can be linked. Do not replace “this” with the name of the owner after the @ sign. The only valid expression is [[@this]]. The ADD LINK… feature does not support this link type, so the only way to link the owner is through this syntax. | [[@this]] |
| Address | [[address:Address]] | [[address:38.21.240.4]] |
| Adversary | [[adversary:Adversary]] | [[adversary:Bad Guy]] |
| Attack Pattern | [[attackpattern:AttackPattern]] | [[attackpattern:Session Credential Falsification through Forging]] |
| Campaign | [[campaign:Campaign]] | [[campaign:Dangerous Effort]] |
| Course of Action | [[courseofaction:CourseOfAction]] | [[courseofaction:User Training]] |
| Document | [[document:Document]] | [[document:FireEye APT28.pdf]] |
| [[email:Email]] | [[email:Your ACME order]] | |
| Email Address | [[emailaddress:EmailAddress]] | [[emailaddress:hacker@bad.com]] |
| Event | [[event:Event]] | [[event:Hash seen on endpoint]] |
| File | [[file:FileHash]] | [[file:463E093C46962CABDFCDC2AB61480A6F]] |
| Host | [[host:Host]] | [[host:bad.com]] |
| Incident | [[incident:Incident]] | [[incident:Something bad happened here]] |
| Intrusion Set | [[intrusionset:IntrusionSet]] | [[intrusionset:Frozen Penguin]] |
| Malware | [[malware:Malware]] | [[malware:Ransomware - Ryuk]] |
| Report | [[report:Report]] | [[report:BadRabbit Ransomware Report]] |
| Signature | [[signature:Signature]] | [[signature:20190322B.rules]] |
| Tactic | [[tactic:Tactic]] | [[tactic:TA0011 Command and Control]] |
| Tag | [[tag:Tag]] | [[tag:hacker]] |
| Task | [[task:Task]] | [[task:Investigate this]] |
| Threat | [[threat:Threat]] | [[threat:Very bad people]] |
| Tool | [[tool:Tool]] | [[tool:Nmap]] |
| Track | [[track:Track]] | [[track:202-555-1212]] |
| URL | [[url:URL]] | [[url:https://www.bad.com]] |
| Victim | [[victim:Victim]] | [[victim:ACME Analyst]] |
| Vulnerability | [[vulnerability:Vulnerability]] | [[vulnerability:CVE-2021-44228]] |
ThreatConnect® is a registered trademark of ThreatConnect, Inc.
20016-01 v.12.A