The Associations Tab
- 04 Oct 2024
- 27 Minutes to read
-
Print
-
DarkLight
-
PDF
The Associations Tab
- Updated on 04 Oct 2024
- 27 Minutes to read
-
Print
-
DarkLight
-
PDF
Article summary
Did you find this summary helpful?
Thank you for your feedback!
The Associations tab of an object’s Details screen provides options for filtering associated objects, adding associations, and removing associations. Depending on which Details screen version you are viewing, this tab will feature additional functionality. The Associations tab on the new Details screen allows you to view and manage potential associations for an object and create associations automatically using queries written in ThreatConnect Query Language (TQL), and the Associations tab on the legacy Details screen allows you to export associated Indicators.
New Details Screen View
Figure 1 shows the Associations tab of the new Details screen for the APT28 Intrusion Set Group. This tab displays separate cards containing Intelligence Requirements (IRs), Groups, Indicators, Victim Assets, Artifacts, and Cases associated to the object whose Details screen you are viewing (i.e., the primary object), with the total number of associated objects displayed to the right of the tab’s name. It also displays cards containing Cases and, for Groups only, Artifacts suggested as associations that you may want to add to the primary object. If viewing a Group’s Details screen, a card containing TQL queries added to the Group for TQL associations will also be displayed.
Important
If cross-owner associations are not enabled on your ThreatConnect instance, the Artifact Associations, Case Associations, and Potential Associations cards will not be displayed for Indicators and Groups in Communities and Sources.
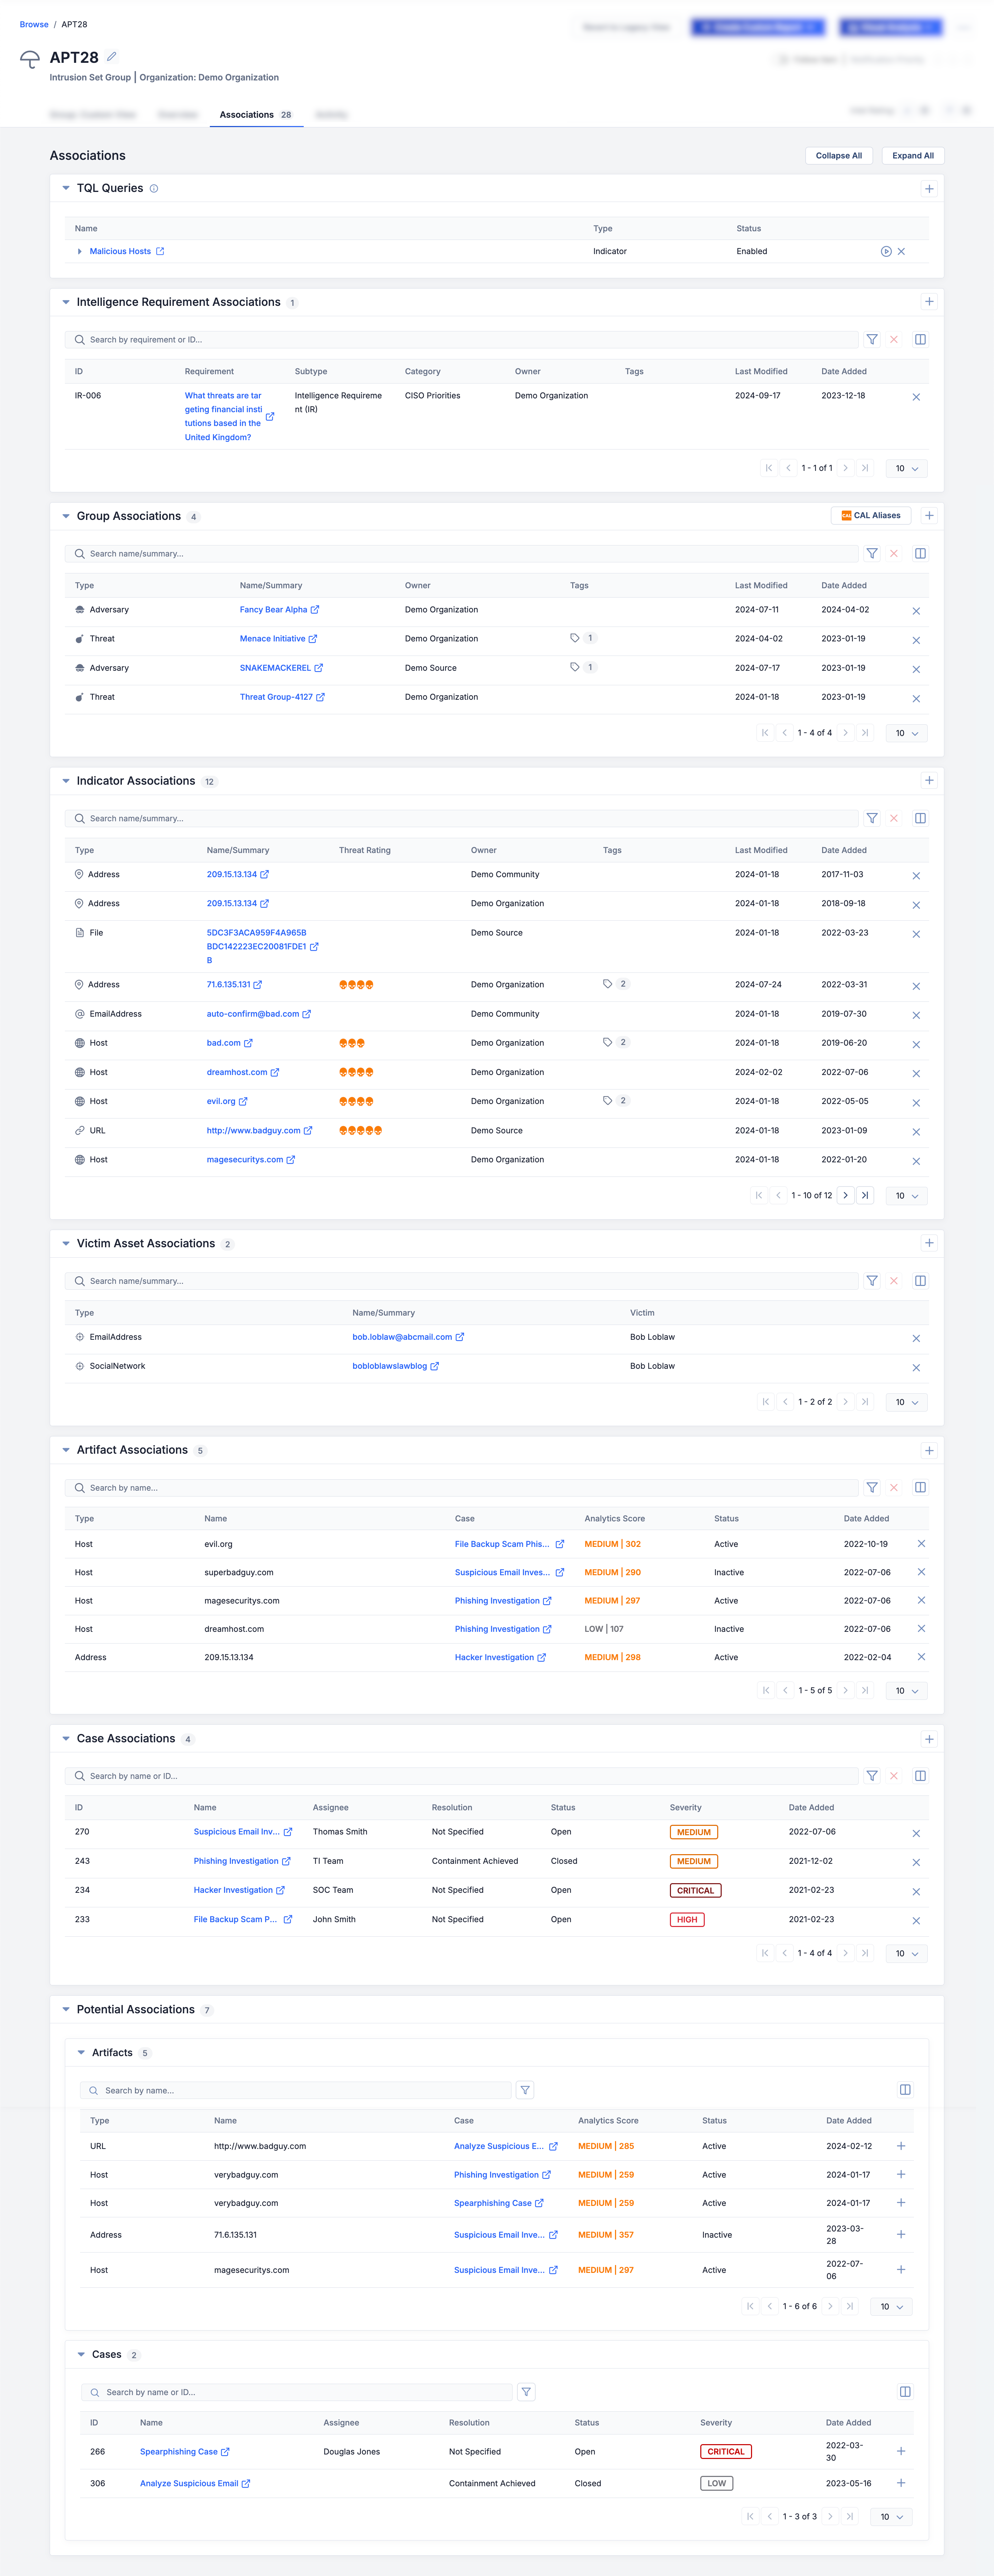
You can collapse and expand all cards on the Associations tab by clicking the Collapse All or Expand All button, respectively. By default, all cards are expanded.
Each card displays its contents in a paginated table. To control which table columns are displayed on the table, click the Select columns button at the top right of the card. To filter objects displayed in a table, use the search bar and Filters
 menu at the top left of the card.
Note
You cannot hide columns that are grayed out in the menu displayed when you click the Select columnsbutton.
button.TQL Queries
The TQL Queries card, available for IRs and Groups only, displays all TQL queries used to create associations for an IR or a Group. Queries added to an IR or a Group will run automatically based on a schedule configured by your System Administrator (the default schedule is every night at midnight), but you may also run a query manually from the TQL Queries card.
Each time a query added to an IR or a Group runs, the query creates associations to results (i.e., objects returned by the query) that are not already associated to the IR or Group. If cross-owner associations are enabled on your ThreatConnect instance, the query will create associations to results that exist in any of your owners; otherwise, the query will create associations only to results that exist in the same owner as the IR or Group. You may view Groups and Indicators associated to an IR or a Group via a TQL query on the Group Associations and Indicator Associations cards, respectively, of the Associations tab.
The table displayed on the TQL Queries card contains the following columns:
- Name: This column displays the query’s name. To view the query itself, click the arrow to the left of its name. To view the results of the query on the Browse screen in a new browser tab, click View query in browse
 .
. - Type: This column displays the query’s type, which corresponds to the type of objects the query will associate to the IR or Group. At this time, you can add only one Group query and one Indicator query to a single IR or Group object.
- Status: This column displays the query’s status (Enabled or Disabled). If the query has a Disabled status,
 and
and icons will be displayed to the left and right, respectively, of the status. To view a tooltip explaining why the query was disabled, hover over one of these icons.
Note
You can use the associatedGroupSource and associatedIndicatorSource TQL parameters to filter Groups and Indicators based on the method (e.g., manual, API, TQL, etc.) used to create a Group or Indicator association, respectively. For more information on these parameters, see TQL Operators and Parameters.
Adding a TQL Query
Click the Add Query button at the upper-right corner of the TQL Queries card and then select Group Query or Indicator Query to add a Group or Indicator query, respectively, to an IR or a Group. Based on the type of query selected, the Add Group TQL Query (Figure 2) or Add Indicator TQL Query window will be displayed with the Existing Queries option selected, showing all saved TQL queries.
Note
If a Group or Indicator query has been added to an IR or a Group, the Group Query or Indicator Query option, respectively, will be grayed out. Similarly, if the maximum number of queries that can be added to an IR or a Group has been reached, the Add Querybutton will be grayed out.
button will be grayed out.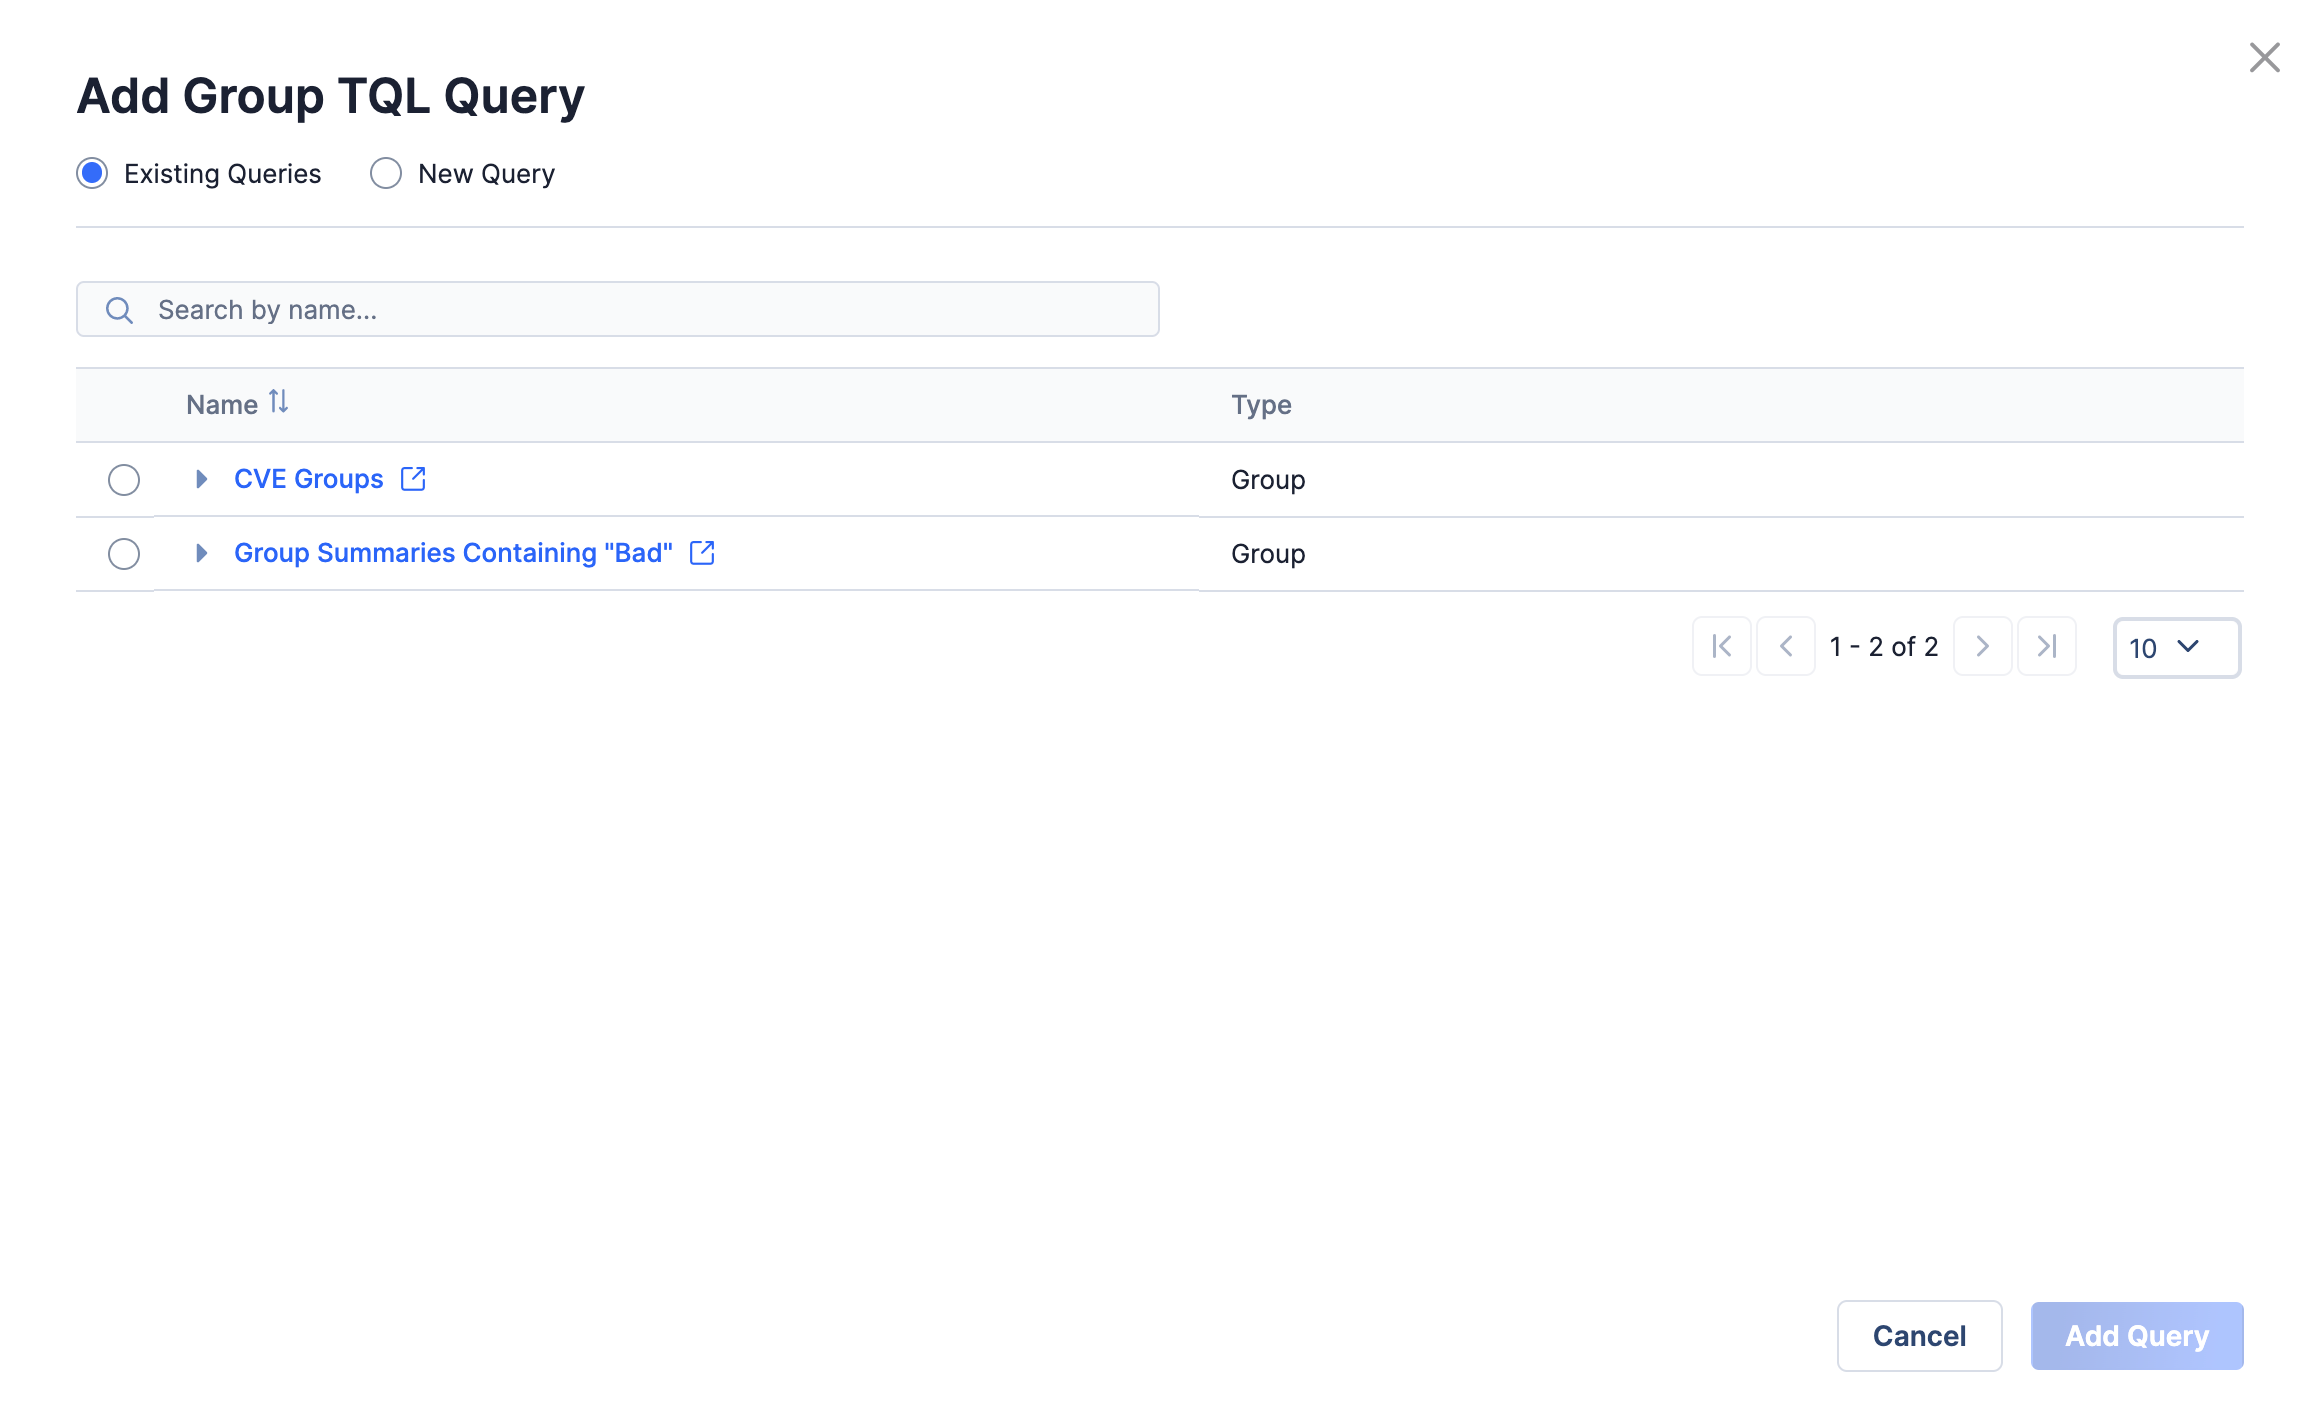
- Select the query to add to the IR or Group. To view the query itself, click the arrow to the left of its name. To view the results of the query on the Browse screen in a new browser tab, click View query in browse.
- Click the Add Query button. The selected query will be displayed on the TQL Queries card.
Important
If you try to add a query to an IR or a Group when the maximum number of assigned TQL queries on your ThreatConnect instance has been reached, an error message will be displayed at the lower-left corner of the Add Group TQL Query or Add Indicator TQL Query window.
To create a new Group or Indicator query, select New Query at the top left of the Add Group TQL Query or Add Indicator TQL Query window, respectively. The window will now display options for creating a new query (Figure 3).
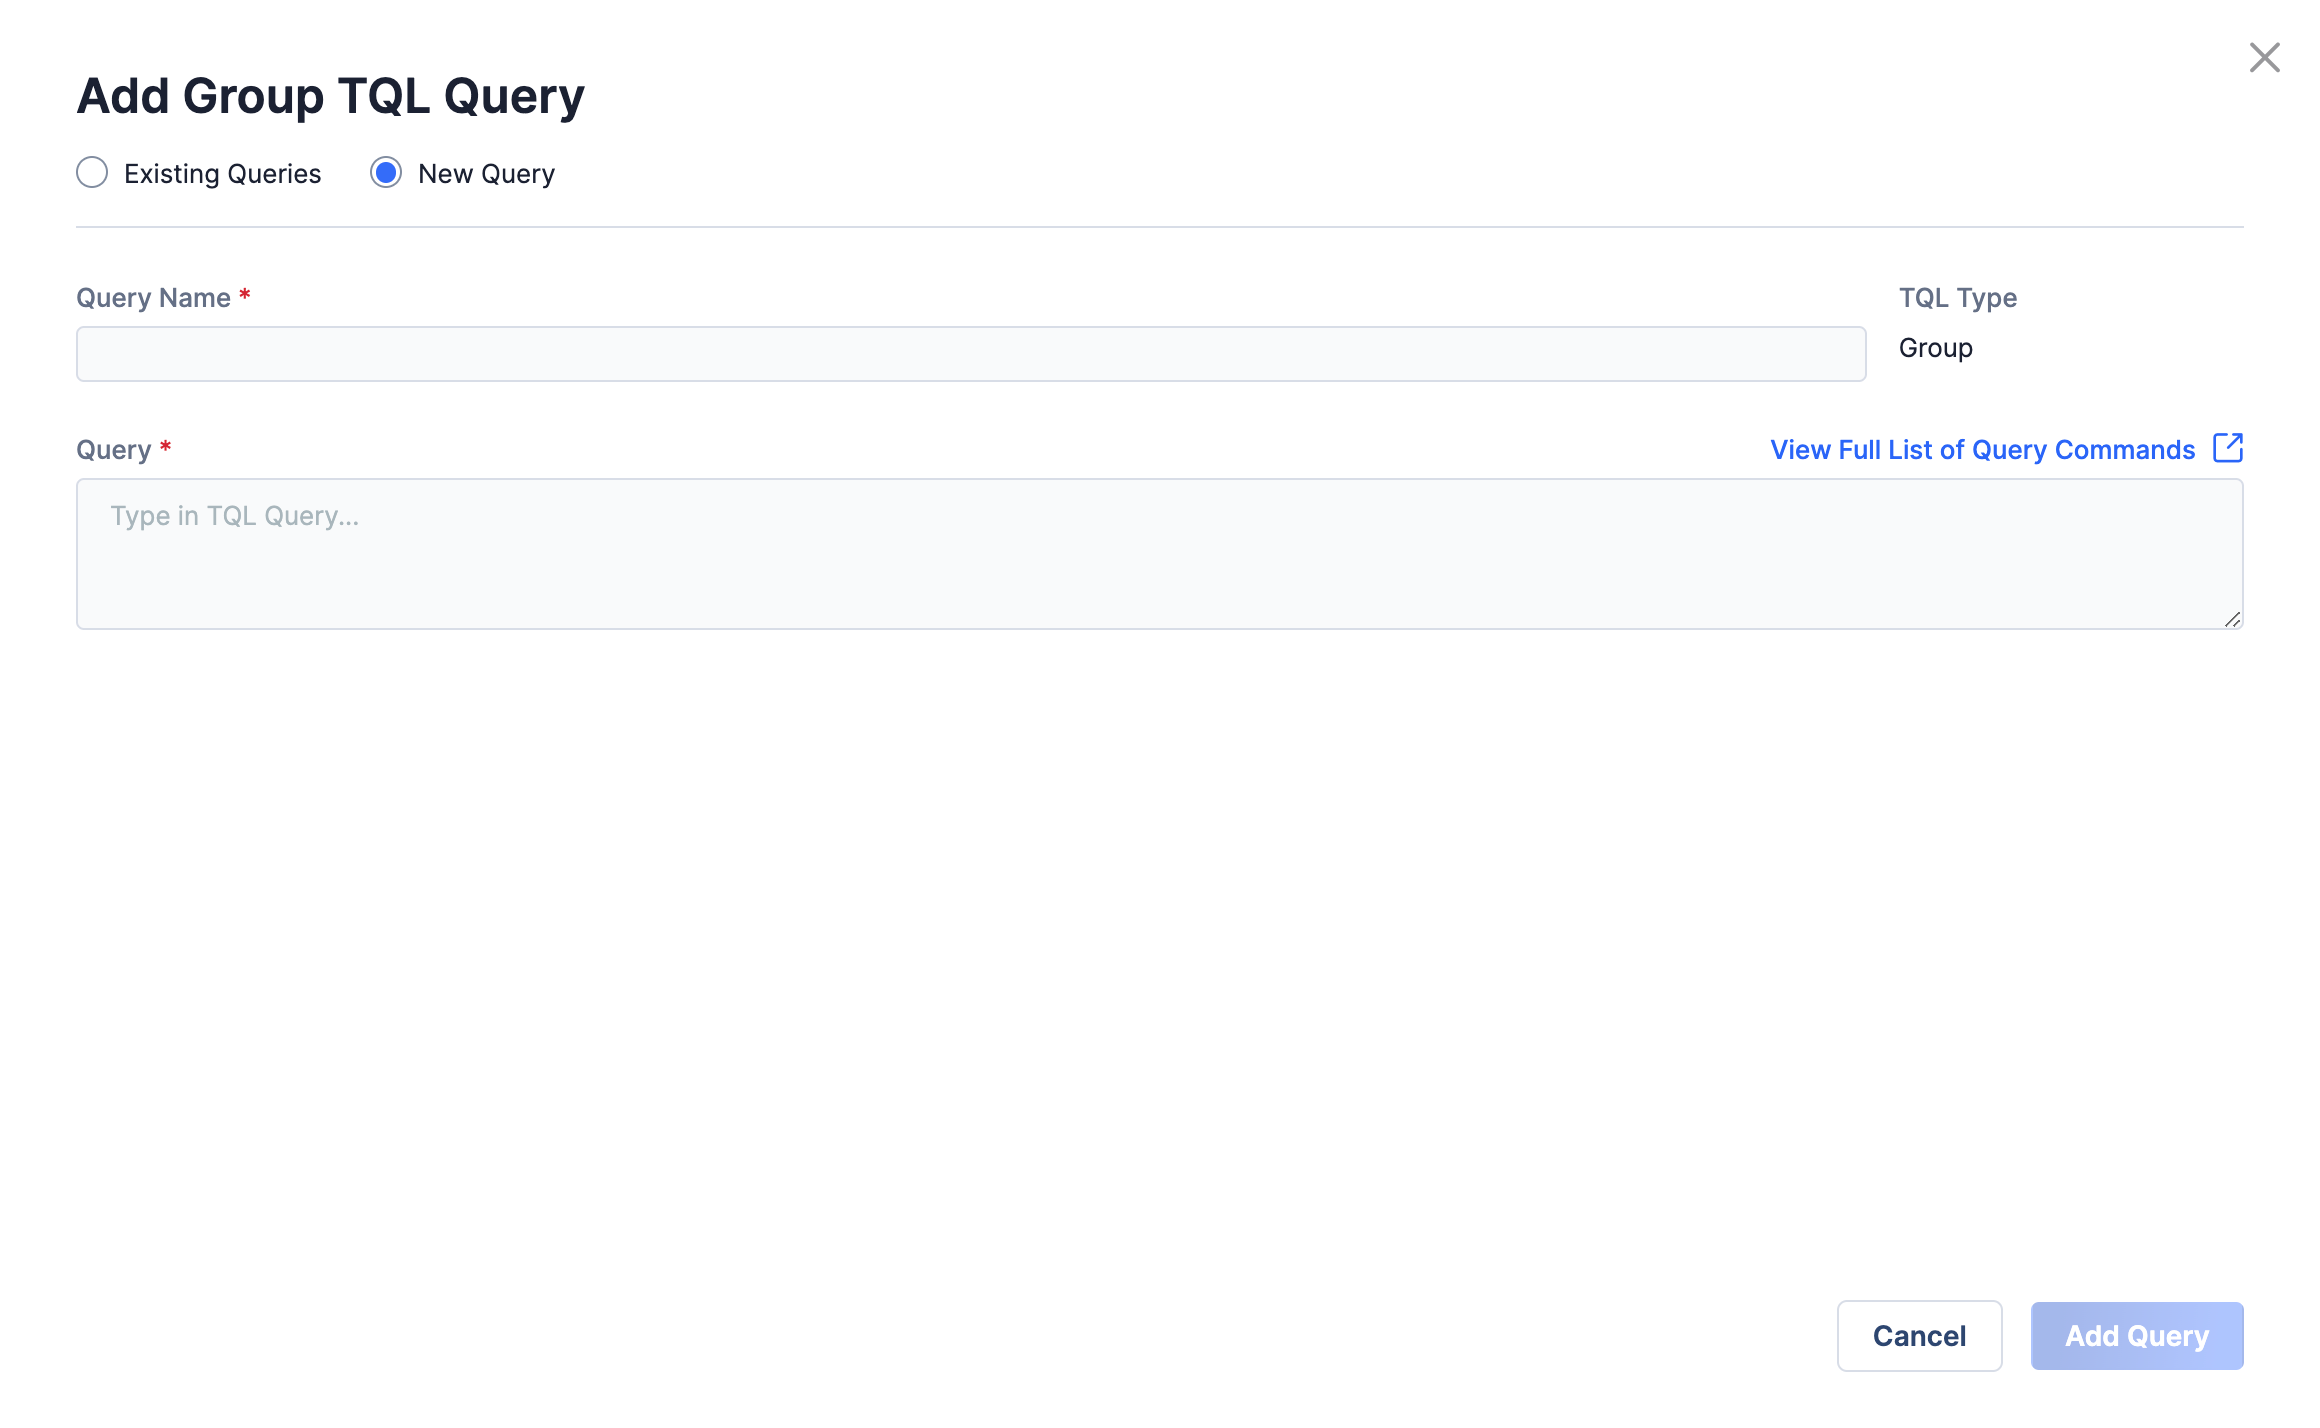
- Query Name: Enter a name for the query.
- TQL Type: The type of object (Group or Indicator) that the query will associate to the IR or Group. The query’s type is based on the option you selected after clicking the Add Querybutton and cannot be changed.
- Query: Enter the query written in TQL. To view a list of TQL operators and parameters in a new browser tab, click the View Full List of Query Commandslink above the Query text box.ImportantIf you try to create a new query and that query already exists (i.e., it is a saved query), an error message will be displayed at the lower-left corner of the Add Group TQL Query or Add Indicator TQL Query window directing you to use the existing query.
- Click the Add Query button. The newly created query will be displayed on the TQL Queries card and saved to your saved queries list.
Note
The query you enter will not be validated on the Add Group TQL Query or Add Indicator TQL Query window. After adding a query to an IR or a Group, it is recommended to click View query in browseto the right of the query’s name on the TQL Queries card and verify that the query functions properly.
to the right of the query’s name on the TQL Queries card and verify that the query functions properly.Running a TQL Query Manually
Click Run Query in the rightmost column for a query to run it manually. Messages indicating the status of the query’s execution will be displayed at the lower-left corner of the screen.
Note
If a query has a Disabled status, then the Run Querybutton for that query will be grayed out.
button for that query will be grayed out.Removing a TQL Query
Click Remove in the rightmost column for a query to remove it from an IR or a Group. A message confirming the query removal will be displayed at the lower-left corner of the screen. If you removed a query from an IR or a Group by accident, click UNDO in this message to re-add the query to the IR or Group.
Note
Removing a query from an IR or a Group will not remove associations created when the query ran previously.
Intelligence Requirement Associations
The Intelligence Requirement Associations card displays all IRs associated to the primary object in a paginated table, with the total number of associated IRs displayed to the right of the card’s header. The table displayed on this card contains the following columns:
- ID: This column displays the IR’s ID.
- Requirement: This column displays the IR’s summary (i.e., the question, topic, or statement on which the IR focuses). To open the IR’s Details screen in the current browser tab or a new one, click its summary or View details in new tab, respectively.
- Subtype: This column displays the IR’s subtype.
- Category: This column displays the IR’s category.
- Owner: This column displays the owner to which the IR belongs.
- Tags: If one or more Tags are applied to the IR, this column will display a count of those Tags; otherwise, no value will be displayed in this column. Click on the number displayed in this column to view the standard Tags and ATT&CK® Tags applied to the IR, as well as links to each Tag’s Details screen.
- Date Added: This column displays the date when the IR was created.
Creating an Association
Click the Add Associationbutton at the upper-right corner of the Intelligence Requirement Associations card to create associations to one or more IRs. The Add Intelligence Requirements window will be displayed (Figure 4), showing all IRs that are not already associated to the primary object.
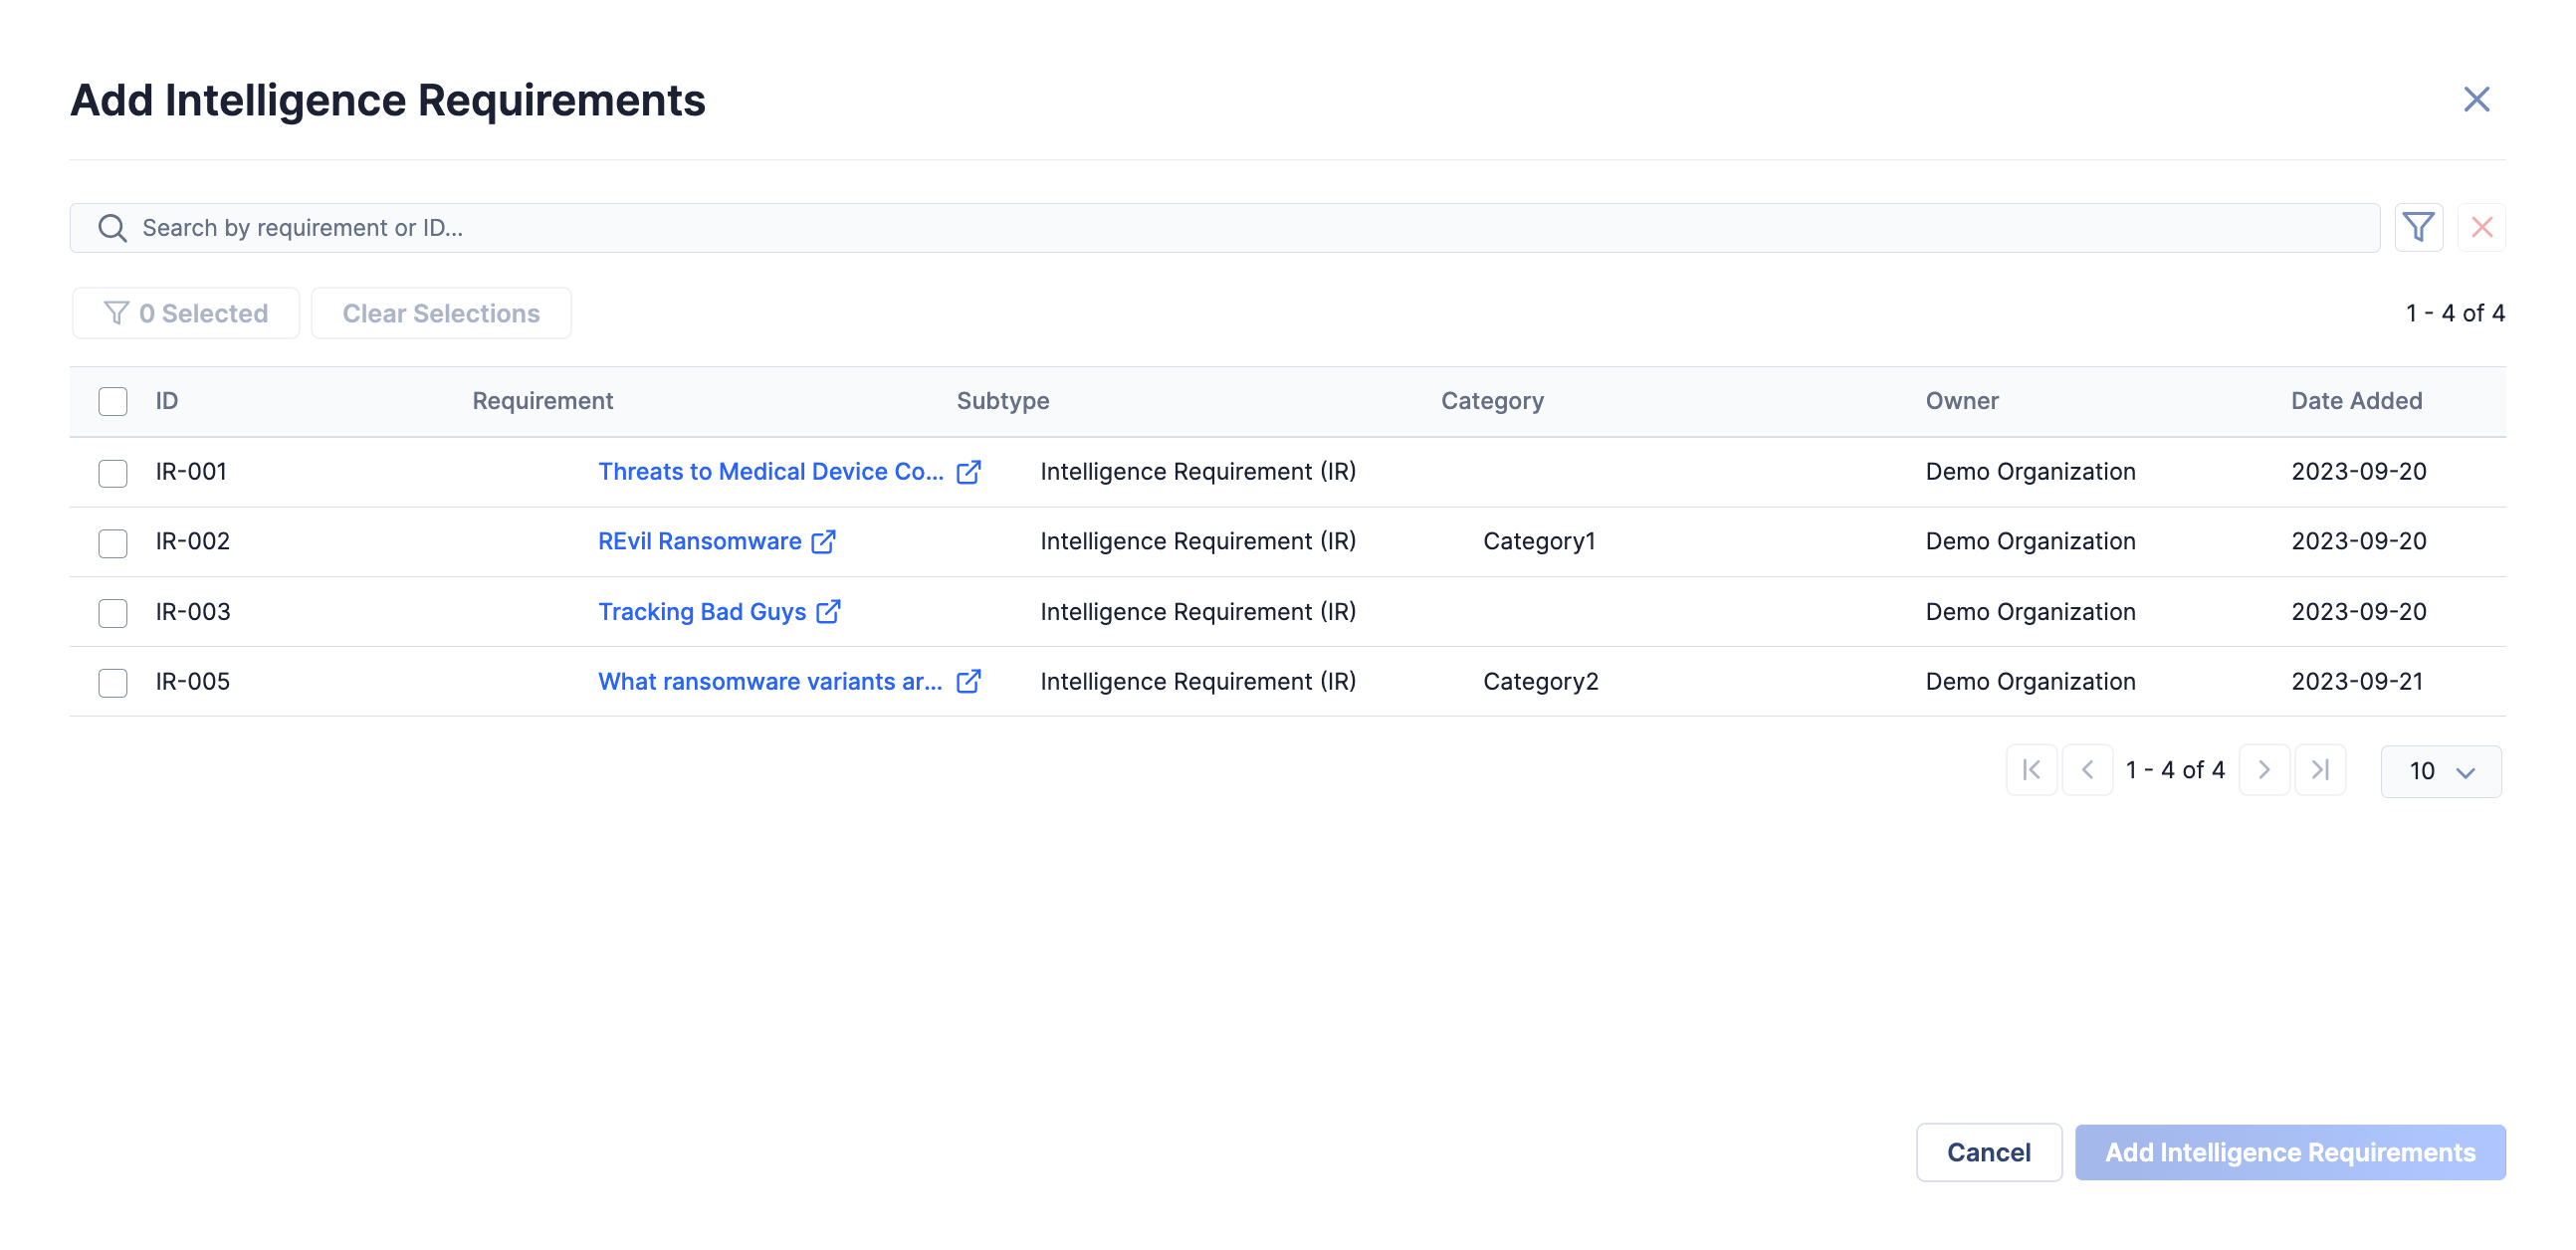
- Select one or more IRs to associate to the primary object. As you select IRs, the Selected button at the top left of the window will update to reflect the current number of selected items. When at least one IR is selected, you can click the Selected or Clear Selection button to view only the selected items or clear all selections, respectively.
- To filter IRs by owner, subtype, category, creation date, and last modified date, use the Filtersmenu; to filter IRs by their requirement text or ID, use the search bar.
- Click the Add Intelligence Requirements button to create associations to the selected IRs.
Removing an Association
Click Removein the rightmost column for an IR to dissociate it from the primary object.
Group Associations
The Group Associations card displays all Groups associated to the primary object in a paginated table, with the total number of associated Groups displayed to the right of the card’s header. The table displayed on this card contains the following columns:
- Type: This column displays the Group’s type.
- Name/Summary: This column displays the Group’s summary. To open the Group’s Details screen in the current browser tab or a new one, click its summary or View details in new tab, respectively.
- Owner: This column displays the owner to which the Group belongs.
- Tags: If one or more Tags are applied to the Group, this column will display a count of those Tags; otherwise, no value will be displayed in this column. Click on the number displayed in this column to view the standard Tags and ATT&CK Tags applied to the Group, as well as links to each Tag’s Details screen.
- Last Modified: This column displays the date when the Group was last modified.
- Date Added: This column displays the date when the Group was created.
Creating an Association
Click the Add Associationbutton at the upper-right corner of the Group Associations card to create associations to one or more Groups. The Add Groups window will be displayed (Figure 5), showing all Groups that are not already associated to the primary object.
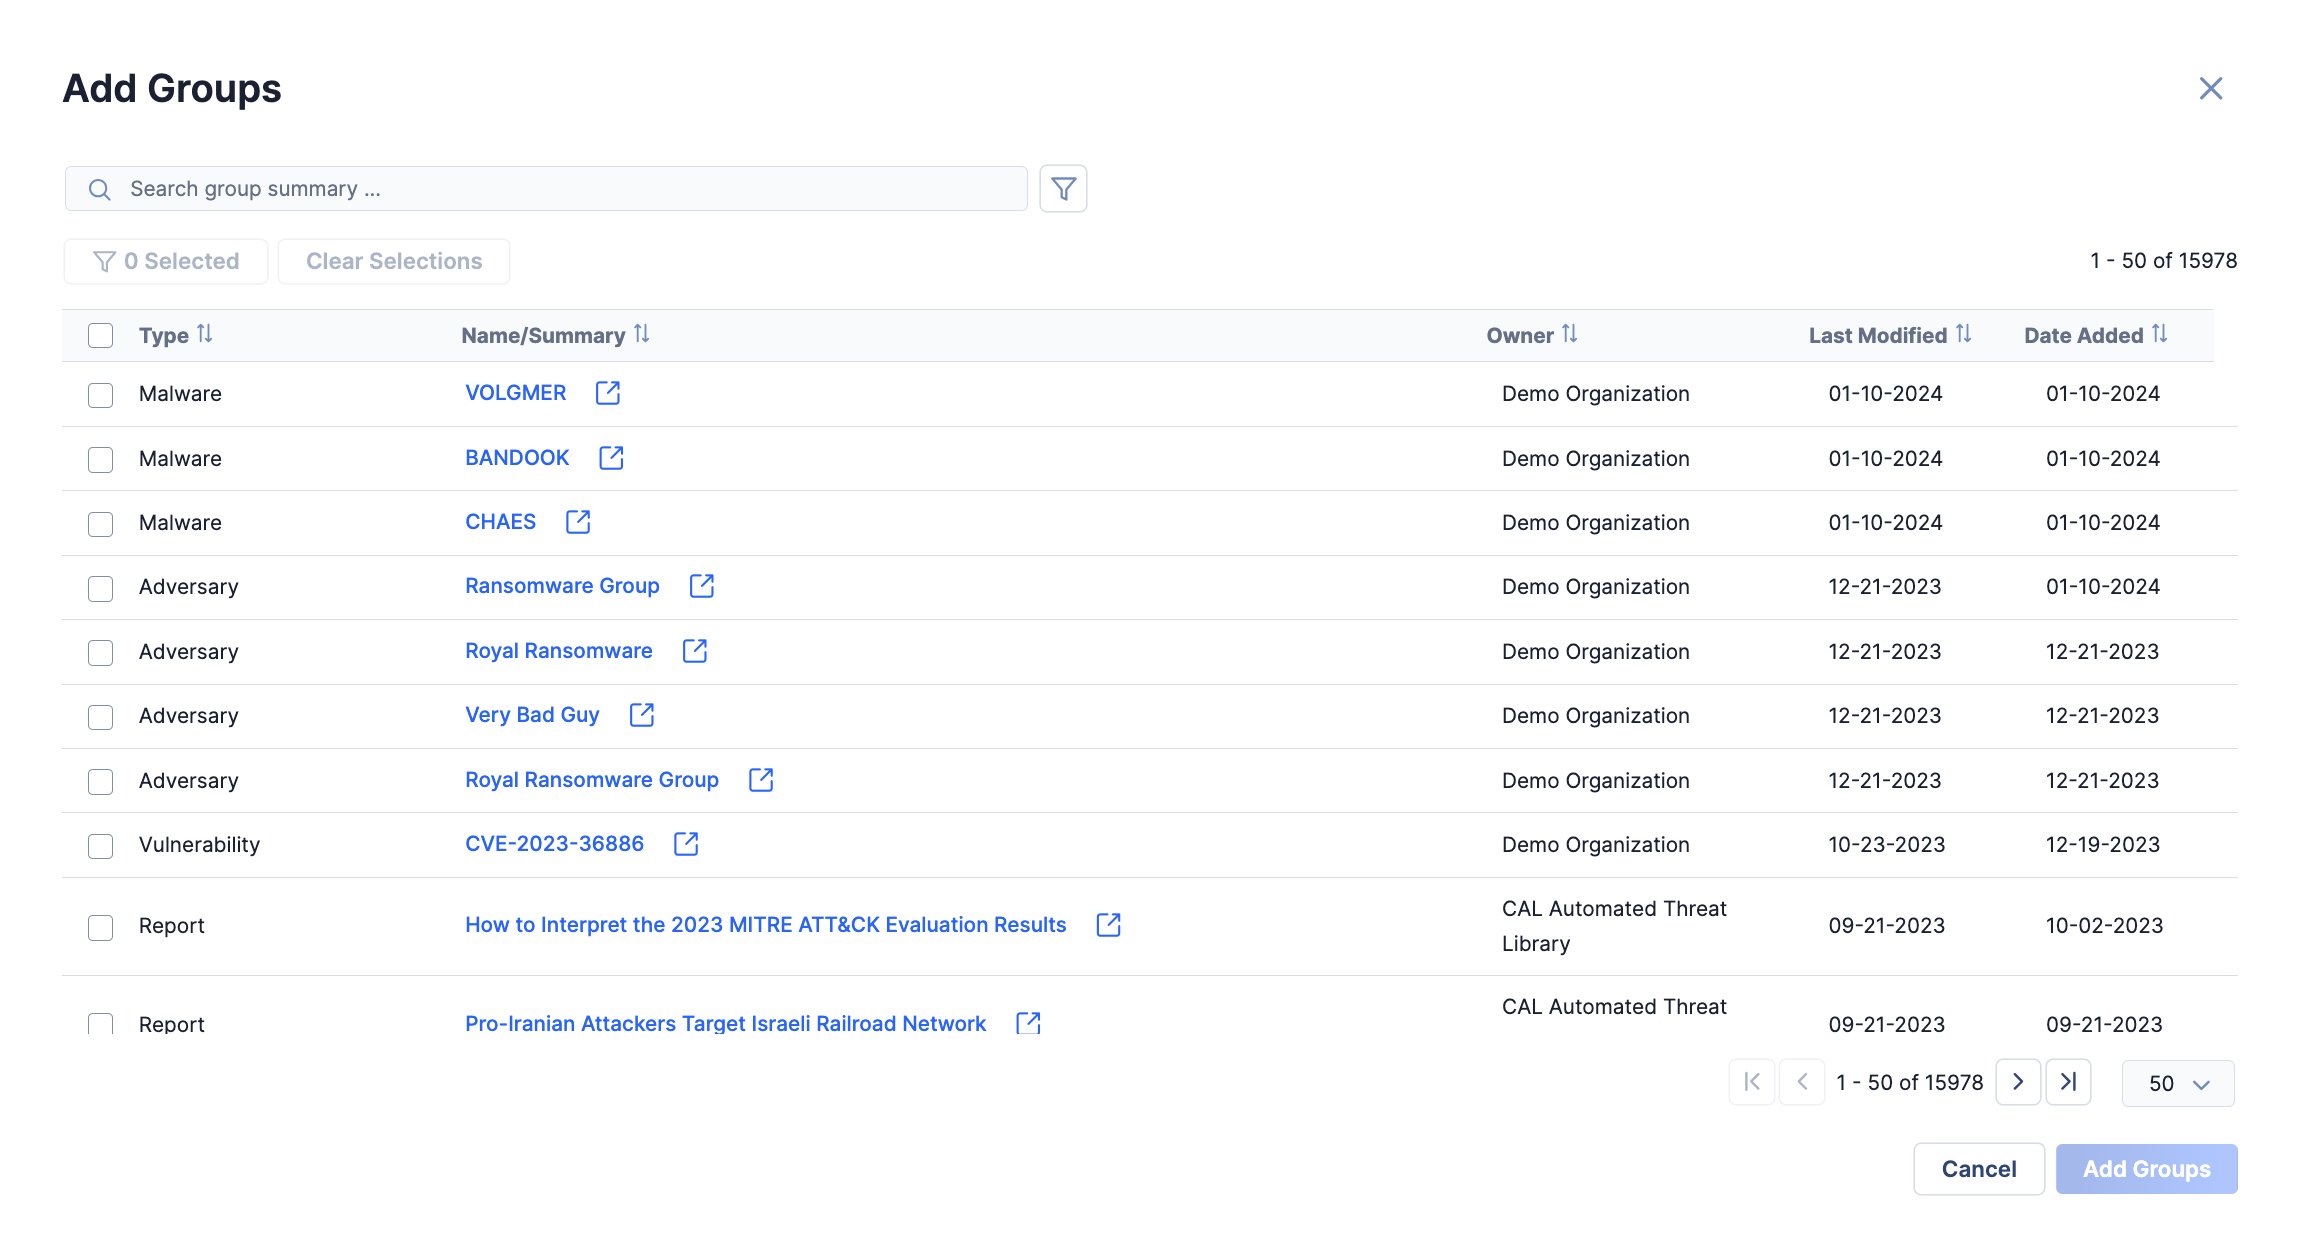
- Select one or more Groups to associate to the primary object. As you select Groups, the Selected button at the top left of the window will update to reflect the current number of selected items. When at least one Group is selected, you can click the Selected or Clear Selection button to view only the selected items or clear all selections, respectively.
- To filter Groups by type, creation date, last modified date, and, if cross-owner associations are enabled, owner, use the Filtersmenu; to filter Groups by summary, use the search bar.
- Click the Add Groups button to create associations to the selected Groups.
Removing an Association
Click Removein the rightmost column for a Group to dissociate it from the primary object.
Viewing CAL Alias Information
If you are viewing the Details screen for a Group and known alias information for the Group exists in CAL™, a CAL Aliases button will be displayed at the upper-right corner of the Group Associations card, as in Figure 1. Click this button to display the Groups Via CAL Aliases window, which shows one or more Groups in your ThreatConnect owners that CAL recommends associating to the Group being viewed (Figure 6). These Groups are recommended as associations because each has a summary that matches a known alias of the Group you are viewing.
Important
If CAL is not enabled on your ThreatConnect instance or for your Organization, the CAL Aliases button will not be displayed for Groups for which known alias information exists in CAL.
Note
If there are no unassociated Groups with a summary that matches a known alias of the Group being viewed, a message stating so will be displayed in the Groups Via CAL Aliases window, and no Groups will be displayed in this window.
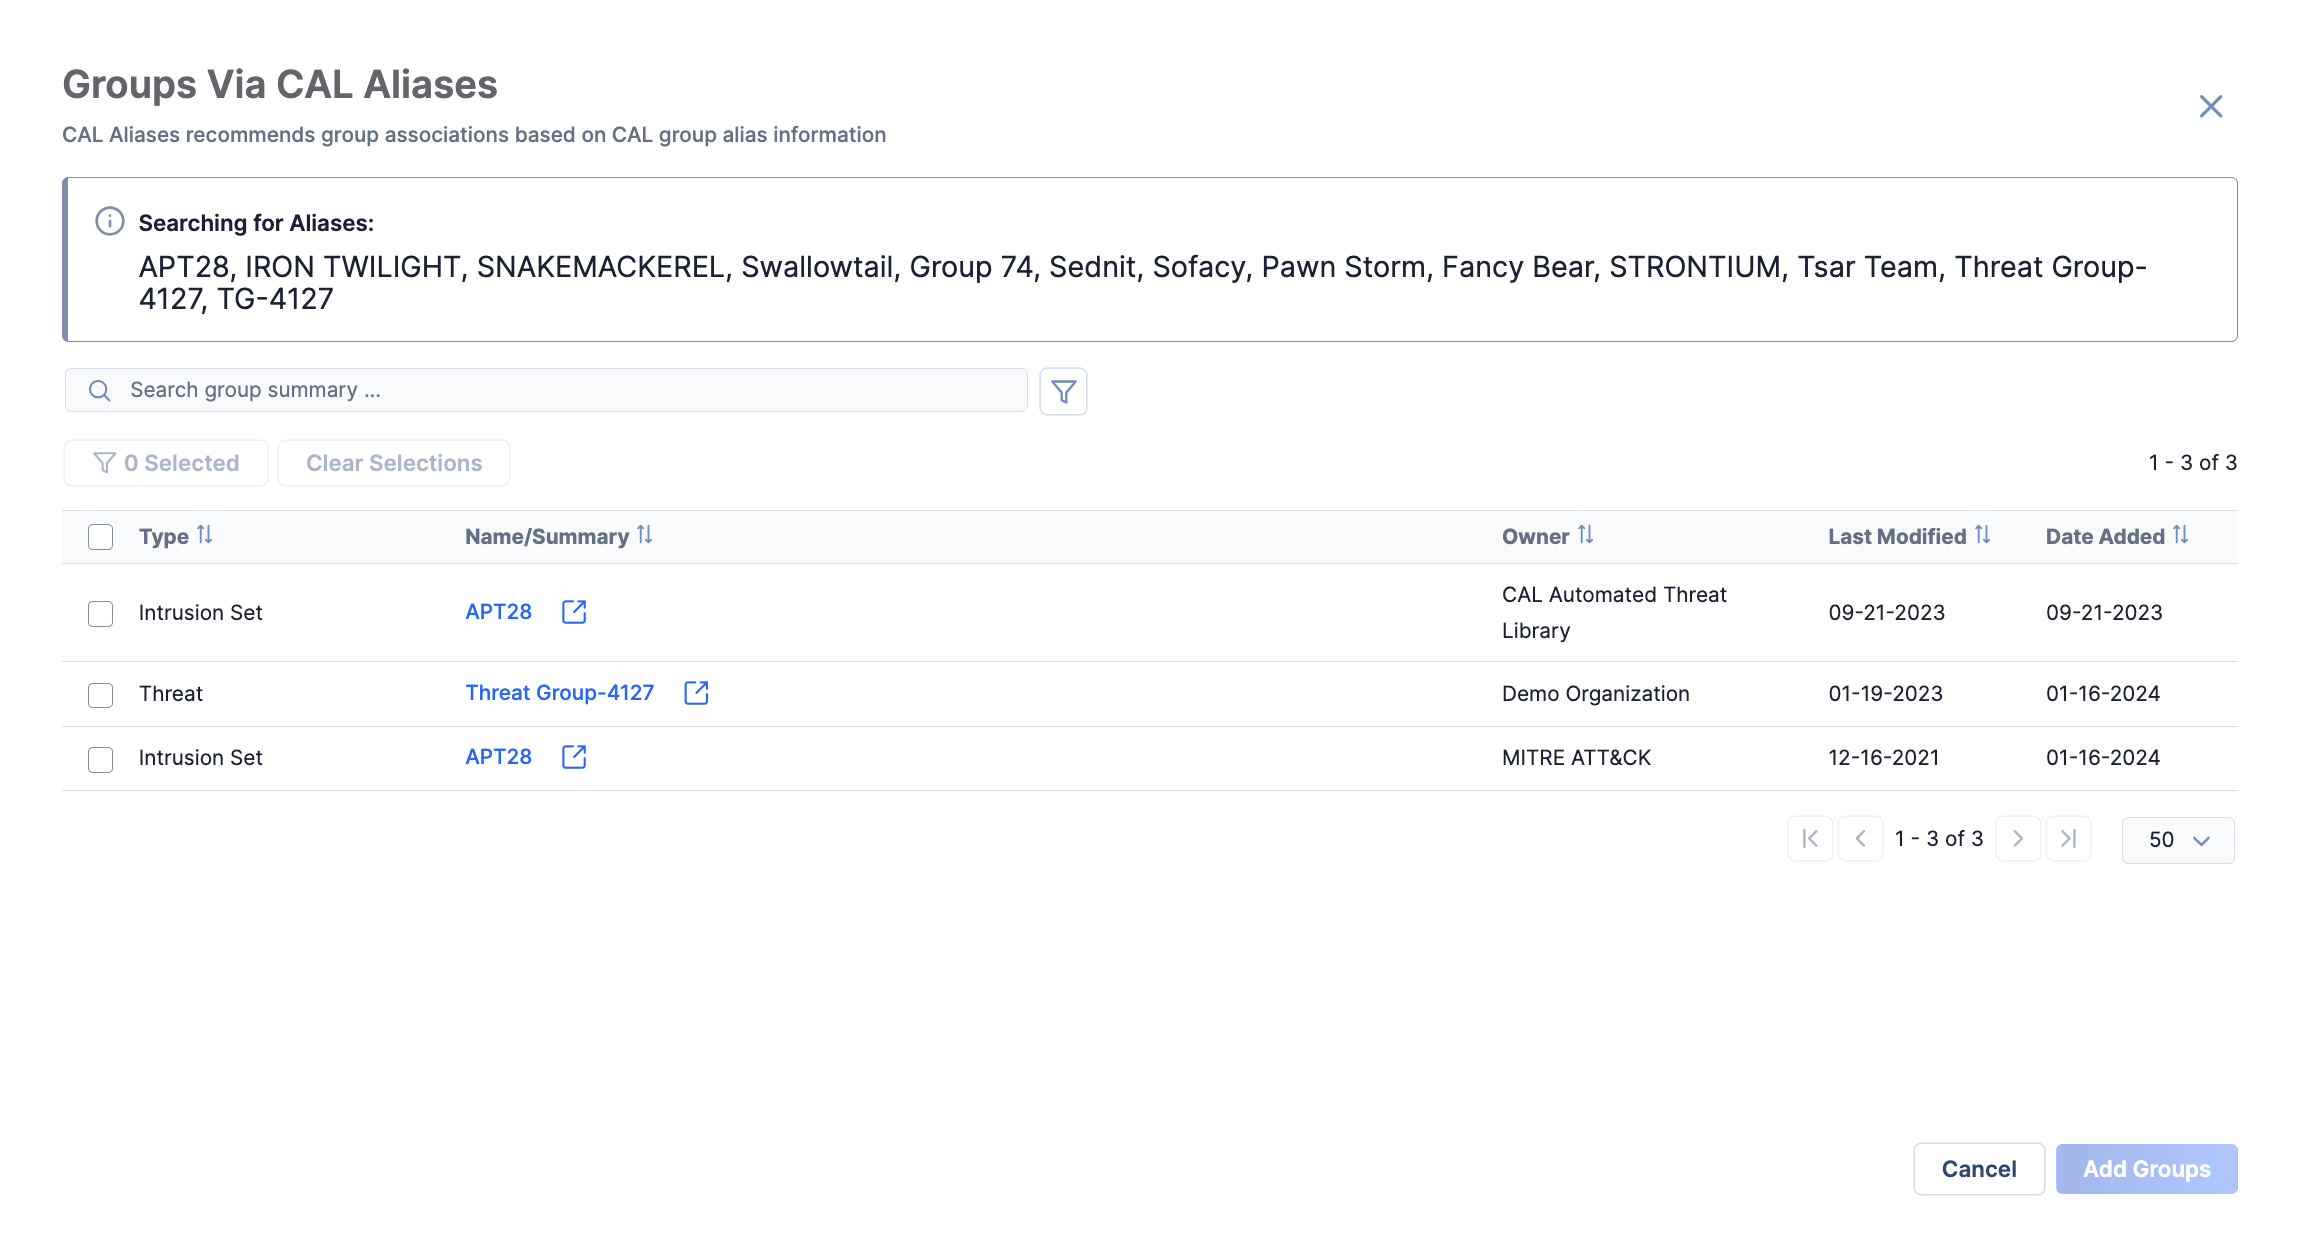
- Select one or more Groups to associate to the Group being viewed. As you select Groups, the Selected button at the top left of the window will update to reflect the current number of selected items. When at least one Group is selected, you can click the Selected or Clear Selection button to view only the selected items or clear all selections, respectively.
- To filter Groups by type, creation date, last modified date, and, if cross-owner associations are enabled, owner, use the Filtersmenu; to filter Groups by summary, use the search bar.
- Click the Add Groups button to create associations to the selected Groups.
Indicator Associations
The Indicator Associations card displays all Indicators associated to the primary object in a paginated table, with the total number of associated Indicators displayed to the right of the card’s header. The table displayed on this card contains the following columns:
- Type: This column displays the Indicator’s type.
- Name/Summary: This column displays the Indicator’s summary. To open the Indicator’s Details screen in the current browser tab or a new one, click its summary or View details in new tab, respectively.
- Threat Rating: This column displays the Indicator’s Threat Rating, if one has been set for the Indicator.
- Owner: This column displays the owner to which the Indicator belongs.
- Tags: If one or more Tags are applied to the Indicator, this column will display a count of those Tags; otherwise, no value will be displayed in this column. Click on the number displayed in this column to view the standard Tags and ATT&CK Tags applied to the Indicator, as well as links to each Tag’s Details screen.
- Last Modified: This column displays the date when the Indicator was last modified.
- Date Added: This column displays the date when the Indicator was created.
Creating an Association
Click the Add Associationbutton at the upper-right corner of the Indicator Associations card to create associations to one or more Indicators. The Add Indicators window will be displayed. If the primary object is an Indicator, the Add Indicators window will look like Figure 7.
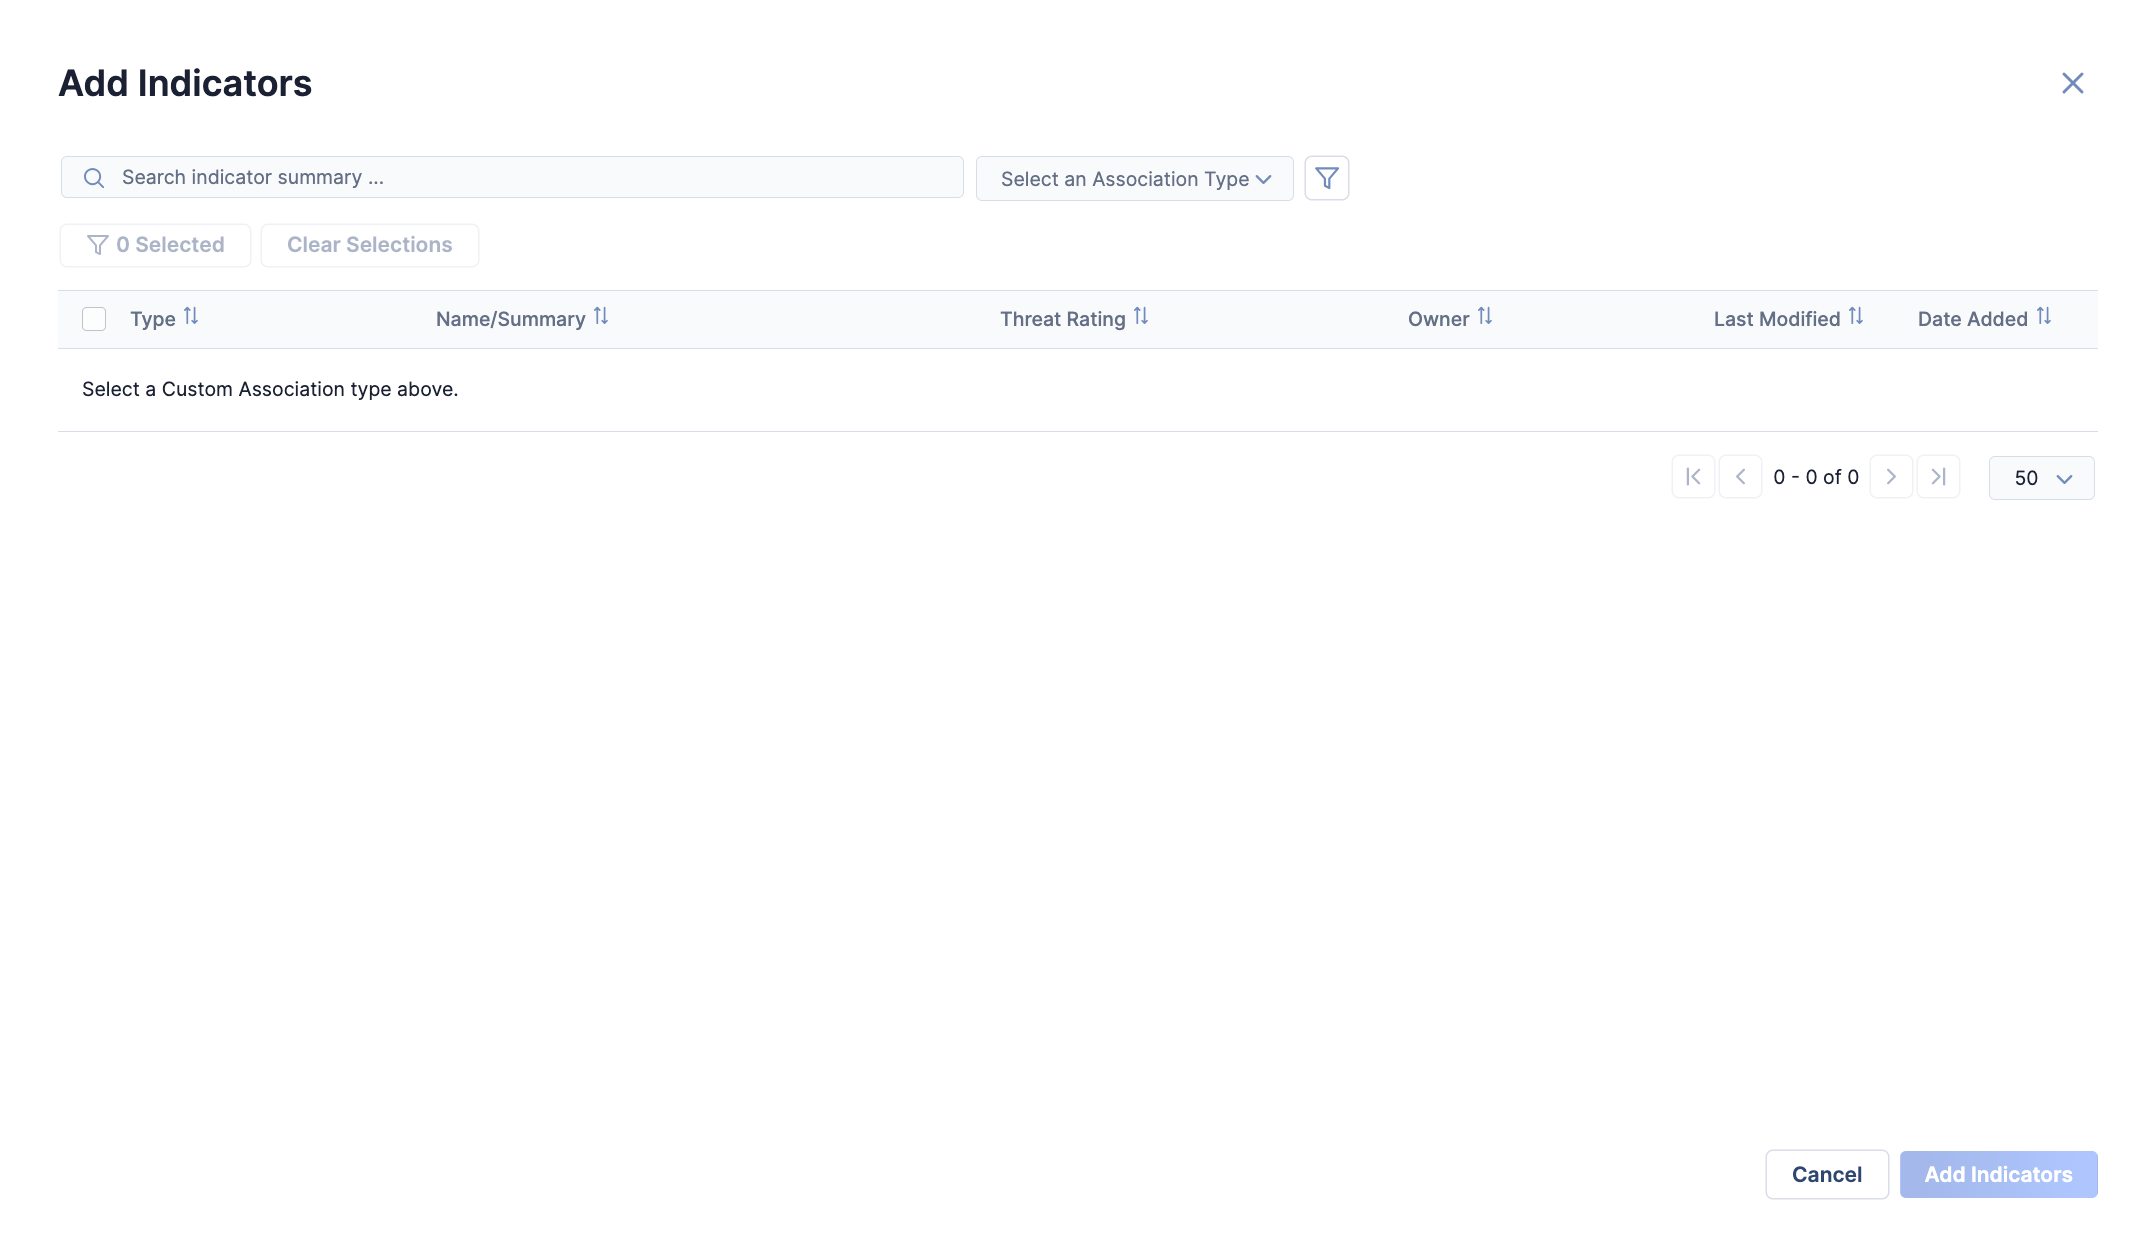
- Select an Association Type: Select a custom Indicator-to-Indicator association type. Indicators of the target type that are not associated to the primary object will be displayed.
- Select one or more Indicators to associate to the primary object. As you select Indicators, the Selected button at the top left of the window will update to reflect the current number of selected items. When at least one Indicator is selected, you can click the Selected or Clear Selection button to view only the selected items or clear all selections, respectively.
- To filter Indicators by creation date, last modified date, and, if cross-owner associations are enabled, owner, use the Filtersmenu; to filter Indicators by summary, use the search bar.
- Click the Add Indicators button to create associations to selected Indicators.
If the primary object is a Group, the Add Indicators window will look like Figure 8. By default, the Add Indicators window will be displayed with the Existing Indicators option selected, showing all existing Indicators not associated to the Group. To create an association to an Indicator that exists in one of your ThreatConnect owners, keep the selection of Existing Indicators at the top left of the Add Indicators window.
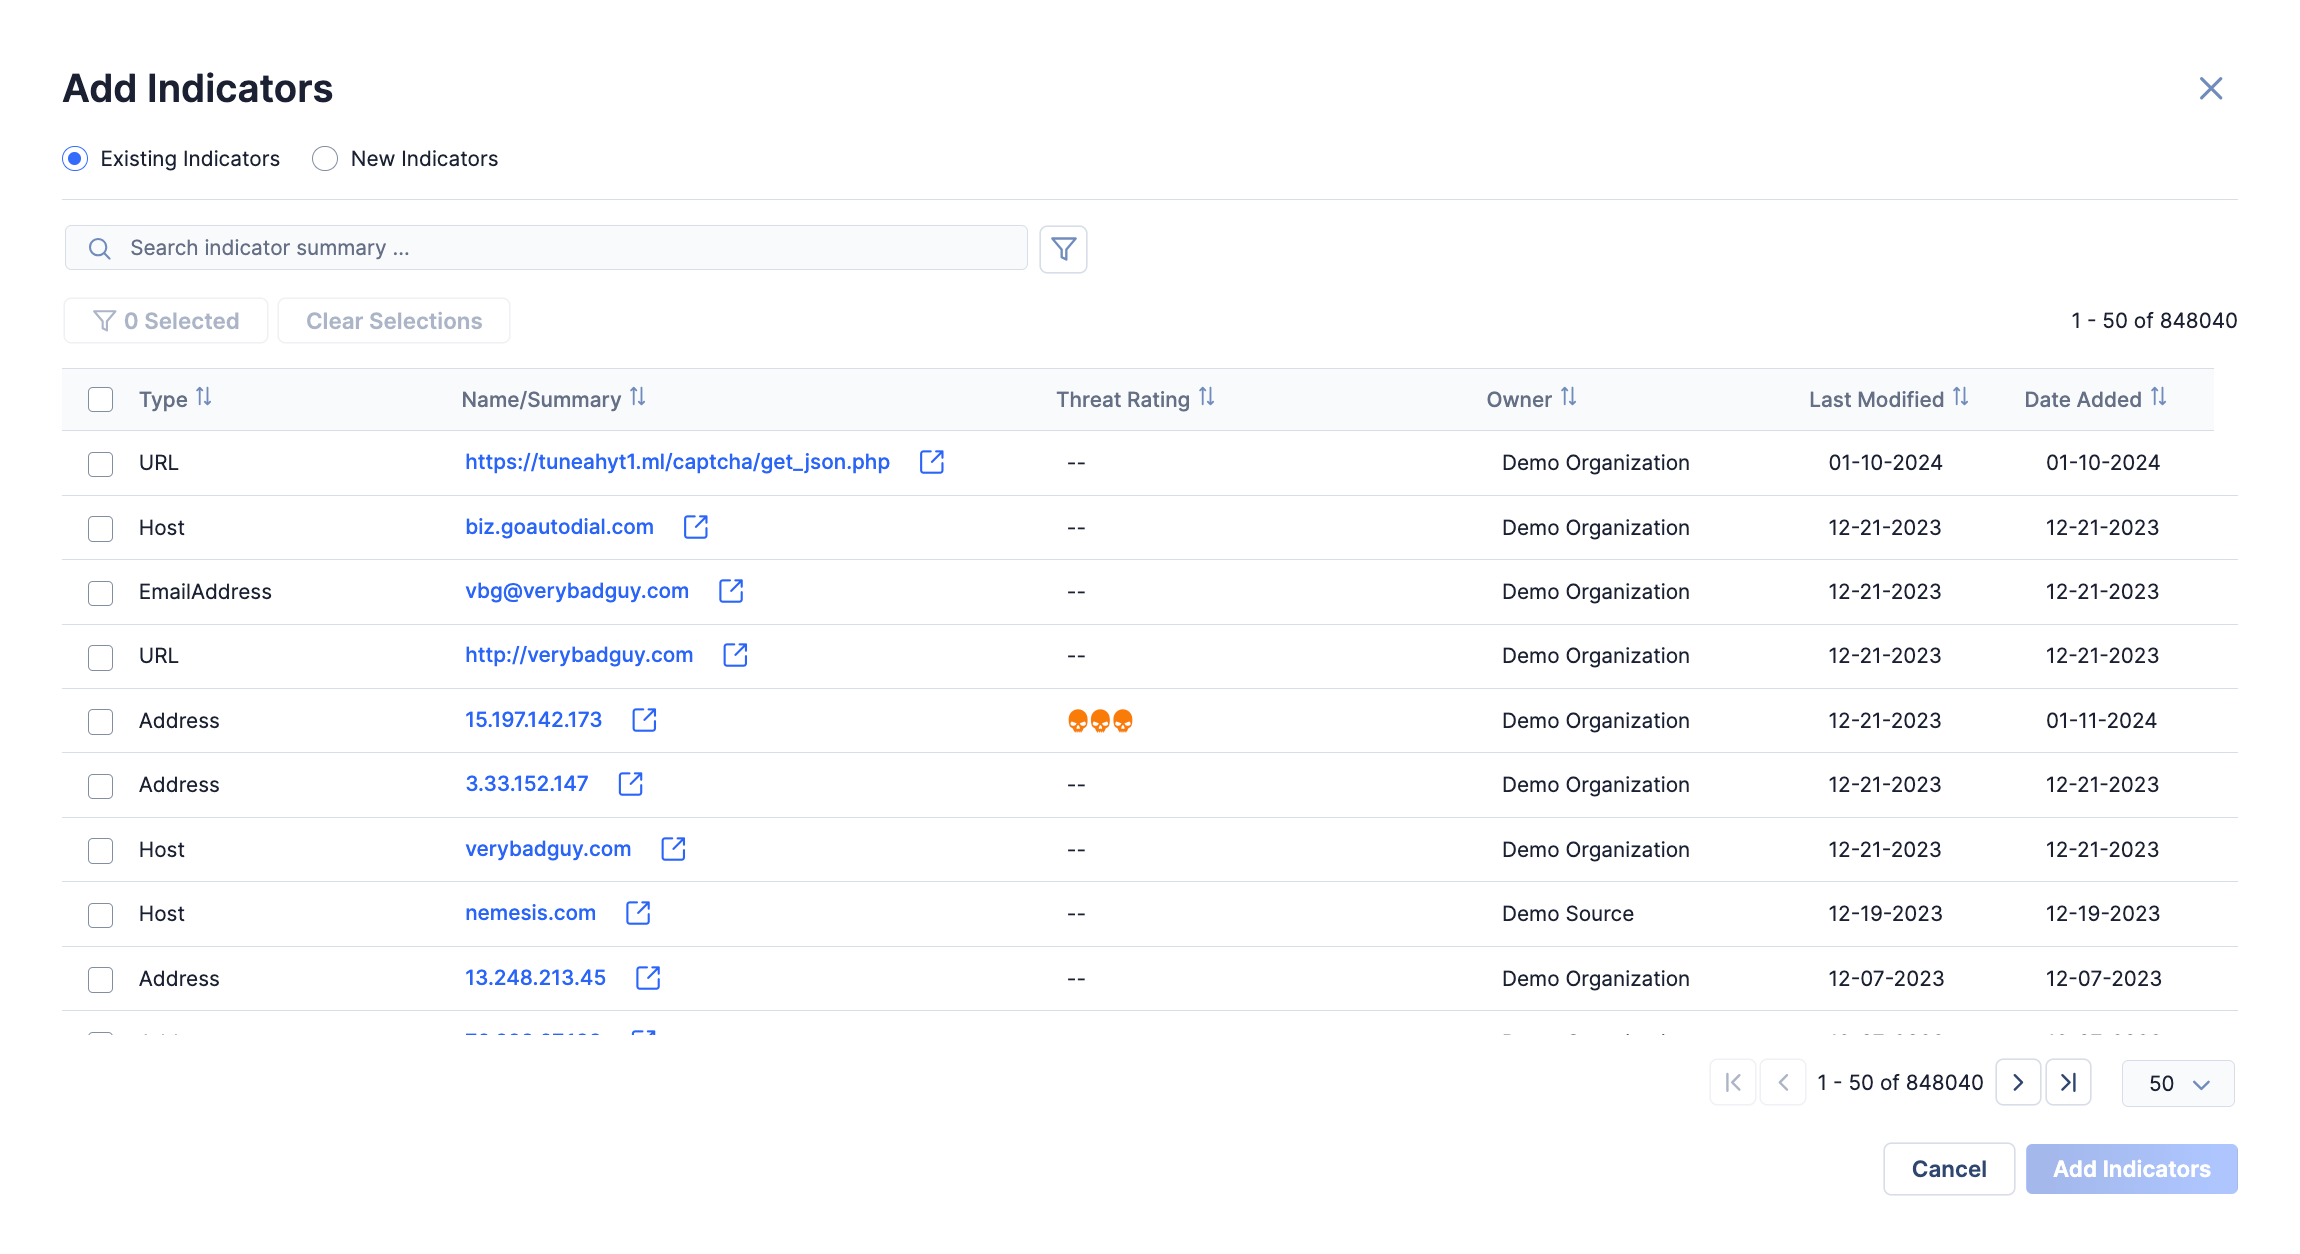
- Select one or more Indicators to associate to the selected Group. As you select Indicators, the Selected button at the top left of the window will update to reflect the current number of selected items. When at least one Indicator is selected, you can click the Selected or Clear Selection button to view only the selected items or clear all selections, respectively.
- To filter Indicators by type, creation date, last modified date, and, if cross-owner associations are enabled, owner, use the Filtersmenu; to filter Indicators by summary, use the search bar.
- Click the Add Indicators button to create associations to selected Indicators.
To create an association to an Indicator that does not exist in one of your ThreatConnect owners, select New Indicators at the top left of the Add Indicators window. The window will now display options for creating new Indicators (Figure 9).

- Indicator Type: Select an Indicator type (available choices include Unknown - (parsed), File, Email Subject, Hashtag, Mutex, Registry Key, and User Agent). The Indicator Type section will display options for entering Indicators of the selected type. If you selected Unknown - (parsed), options to upload a file or enter text to be parsed for Indicators will be displayed, as in Figure 9. After entering the Indicator values or content to be parsed for Indicators, click the + Add button.Note
Parsable Indicator types include Address, Email Address, File, Host, URL, ASN, and CIDR. Custom Indicator types may also be parsed if the following conditions are met:
- a System Administrator selected the Parsable checkbox when configuring the custom Indicator type;
- the custom Indicator type accepts a single value;
- a System Administrator created an import rule for the custom Indicator type.
For more information on custom Indicator types and Indicator import rules, see the “Custom Indicator Types” and “Indicator Import Rules” sections, respectively, of ThreatConnect System Administration Guide.
ImportantIndicators included on an Indicator Exclusion List will not be imported or associated to the Group. - New Indicators to be Associated: This section displays the Indicator(s) that will be created and associated to the Group in a table with the following columns:
- Type: This column displays the Indicator’s type.
- Summary: This column displays the Indicator’s summary.
- Known: This column indicates whether the Indicator exists in the Group's owner.
- Private: This column will be displayed only if your System Administrator has enabled private Indicators. To mark an Indicator as private, select the corresponding checkbox in the Private column.
- Actions: To remove an Indicator from the table, click Delete
 in this column.
- Additional Details: In this section, you can fill out the following information for all Indicators being created and associated to the Group:
- Owner: This required field is displayed only if cross-owner associations are enabled on your ThreatConnect instance. Select the owner in which the Indicator(s) will be created. If cross-owner associations are not enabled on your ThreatConnect instance, the Indicator(s) will be created in the owner to which the primary Group object belongs.
- Description: Enter a Description for the Indicator(s).
- Tags: Enter Tags to apply to the Indicator(s).
- Confidence Rating: Use the slider to set the Confidence Rating for the Indicator(s).
- Threat Rating: Use the skull icons to set the Threat Rating for the Indicator(s).
- Click the Add Indicators button to create the new Indicators and associate them to the Group.
Removing an Association
If the primary object is a Group, click Removein the rightmost column for the Indicator to dissociate it from the Group.
If the primary object is an Indicator, click the ⋯ menu in the rightmost column and select Association Details. The Association Details window will be displayed, showing how the Indicator is associated to the primary Indicator (e.g., directly associated via an Indicator-to-Indicator association, indirectly associated via a shared Group association). Click the Remove Association button on the Association Details window to dissociate the Indicator from the primary Indicator.
Victim Asset Associations
The Victim Asset Associations card displays all Victim Assets associated to the primary object in a paginated table, with the total number of associated Victim Assets displayed to the right of the card’s header. The table displayed on this card contains the following columns:
- Type: This column displays the Victim Asset’s type.
- Name/Summary: This column displays the Victim Asset’s summary. To open the Details screen for the Victim to which the Victim Asset belongs in the current browser tab or a new one, click its summary or View details in new tab, respectively.
- Victim: This column displays the Victim to which the Victim Asset belongs.
Creating an Association
Click the Add Associationbutton at the upper-right corner of the Victim Asset Associations card to create associations to one or more Victim Assets. The Add Victim Assets window will be displayed (Figure 10), showing all Victim Assets that are not already associated to the primary Group object.
Important
The Add Associationbutton is displayed only for Groups, as you cannot create direct associations between Victim Assets and Indicators. Also, cross-owner associations are not supported for Victim Assets at this time.
button is displayed only for Groups, as you cannot create direct associations between Victim Assets and Indicators. Also, cross-owner associations are not supported for Victim Assets at this time.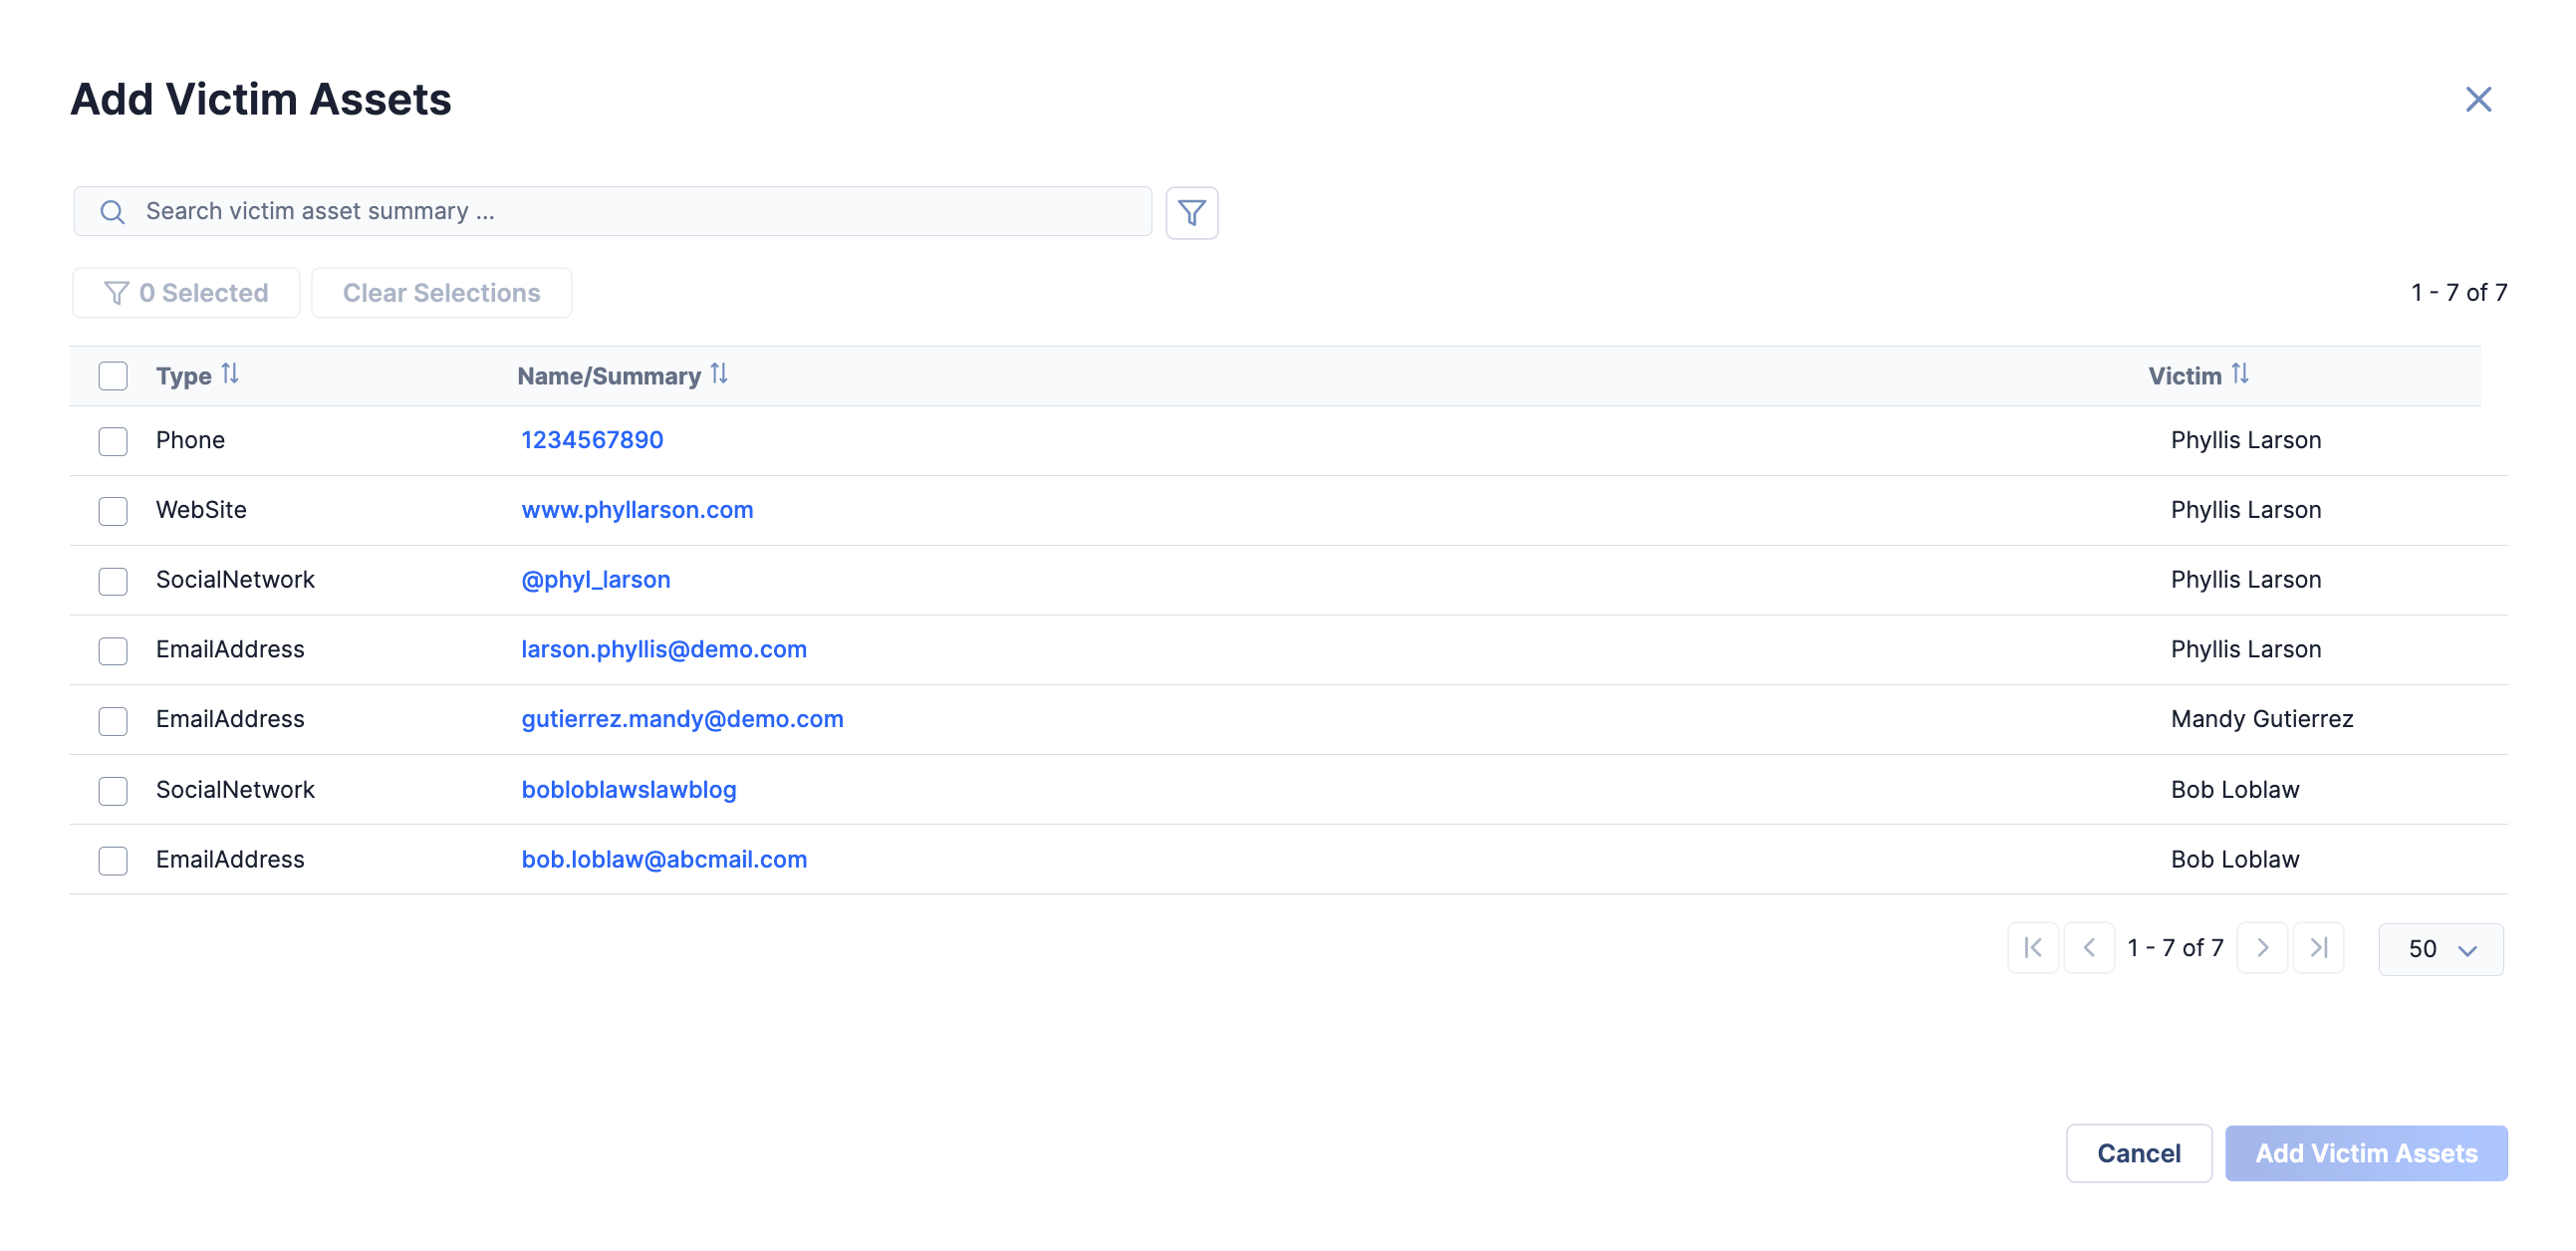
- Select one or more Victim Assets to associate to the Group. As you select Victim Assets, the Selected button at the top left of the window will update to reflect the current number of selected items. When at least one Victim Asset is selected, you can click the Selected or Clear Selection button to view only the selected items or clear all selections, respectively.
- To filter Victim Assets by type, use the Filtersmenu; to filter Victim Assets by summary, use the search bar.
- Click the Add Victim Assets button to create associations to the selected Victim Assets.
Removing an Association
If the primary object is an Indicator, click the ⋯ menu in the rightmost column and select Association Details. The Association Details window will be displayed, showing how the Victim Asset is associated to the primary Indicator (i.e., indirectly associated via a shared Group association). Click the Remove Association button on the Association Details window to dissociate the Victim Asset from the primary Indicator.
If the primary object is a Group, the only way you can dissociate the Victim Asset from the Group is by navigating to the Details screen for the Victim to which the Victim Asset belongs and removing the association from the Associated Groups section of the Associations card.
Artifact Associations
The Artifact Associations card displays all Artifacts associated to the primary object in a paginated table, with the total number of associated Artifacts displayed to the right of the card’s header. The table displayed on this card contains the following columns:
- Type: This column displays the Artifact’s type.
- Name: This column displays the Artifact’s summary.
- Case: This column displays the Workflow Case to which the Artifact belongs. To open the Case in the current browser tab or a new one, click its summary or View details in new tab, respectively.
- Analytics Score: This column displays the Artifact’s ThreatAssess assessment level and score.
- Status: For Artifacts that are ThreatConnect Indicator types, this column displays CAL’s assessment of whether the Indicator is an active Indicator of Compromise (IOC) at the current time. If an Artifact is not a ThreatConnect Indicator, or if CAL did not return data identifying whether the Indicator is active or inactive at the current time, then no value will be displayed in this column for the Artifact.
- Date Added: This column displays the date when the Artifact was created.
Note
If cross-owner associations are not enabled on your ThreatConnect instance, the Artifact Associations card will not be displayed for Indicators and Groups in Communities and Sources.
Creating an Association
Click the Add Associationbutton at the upper-right corner of the Artifact Associations card to create associations to one or more Artifacts. The Link Artifacts drawer will be displayed (Figure 11), showing all Artifacts in all of the Workflow Cases in your Organization that are not already associated to the primary object.
Note
The Add Associationbutton is displayed for Indicators and Groups in an Organization only. To associate Artifacts to Indicators and Groups in Communities and Sources, navigate to the Case containing the Artifact, expand the Artifact to view its details, and create the association from the Associated Indicators or Associated Groups section, respectively.
button is displayed for Indicators and Groups in an Organization only. To associate Artifacts to Indicators and Groups in Communities and Sources, navigate to the Case containing the Artifact, expand the Artifact to view its details, and create the association from the Associated Indicators or Associated Groups section, respectively.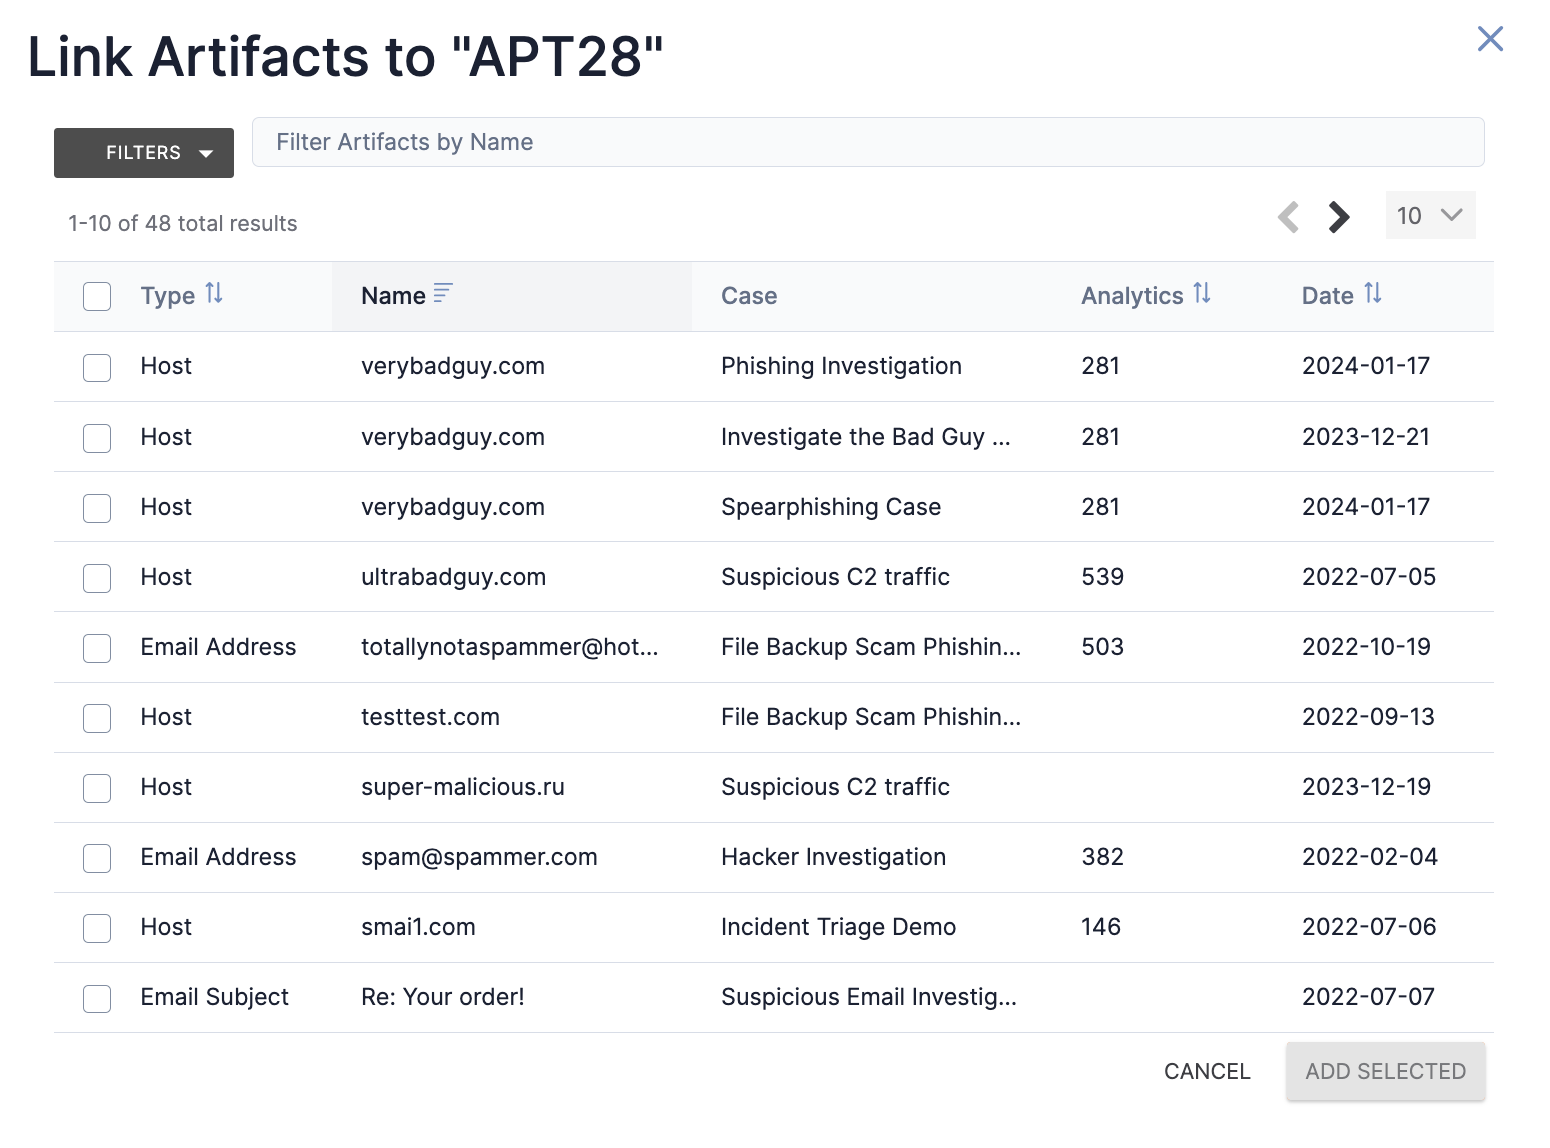
- Select one or more Artifacts to associate to the primary object. To filter Artifacts by type, use the FILTERS selector; to filter Artifacts by summary, use the search bar.
- Click the ADD SELECTED button to create associations to the selected Artifacts.
You can also create associations between Indicators or Groups and Artifacts within a Workflow Case via the Case’s Artifacts card. See the “Associated Indicators” and “Associated Groups” sections of Viewing Artifact Details for more information.
Removing an Association
Click Removein the rightmost column for an Artifact to dissociate it from the primary object.
Case Associations
The Case Associations card displays all Workflow Cases associated to the primary object in a paginated table, with the total number of associated Cases displayed to the right of the card’s header. The table displayed on this card contains the following columns:
- ID: This column displays the Case’s ID number.
- Name: This column displays the Case’s name. To open the Case in the current browser tab or a new one, click its summary or View details in new tab, respectively.
- Assignee: This column displays the user or user group to which the Case is assigned.
- Resolution: This column displays the Case’s resolution.
- Status: This column displays the Case’s status.
- Severity: This column displays the Case’s severity.
- Date Added: This column displays the date when the Case was created.
Note
If cross-owner associations are not enabled on your ThreatConnect instance, the Case Associations card will not be displayed for Indicators and Groups in Communities and Sources.
Creating an Association
Click the Add Associationbutton at the upper-right corner of the Case Associations card, and then select one of the following options to create associations to one or more Cases:
- Add Existing…: Select this option to create associations to one or more existing Cases.
- Add New…: Select this option to create an association to a newly created Case.
Selecting Add Existing… in the Add Associationmenu will open the Add Cases window (Figure 12), showing all Cases in your Organization that are not associated to the primary object.
Note
The Add Associationbutton is displayed for Indicators and Groups in an Organization only. To create an association between a Case and an Indicator or Group in a Community or Source, navigate to the Case’s Associations card and create the association from there.
button is displayed for Indicators and Groups in an Organization only. To create an association between a Case and an Indicator or Group in a Community or Source, navigate to the Case’s Associations card and create the association from there.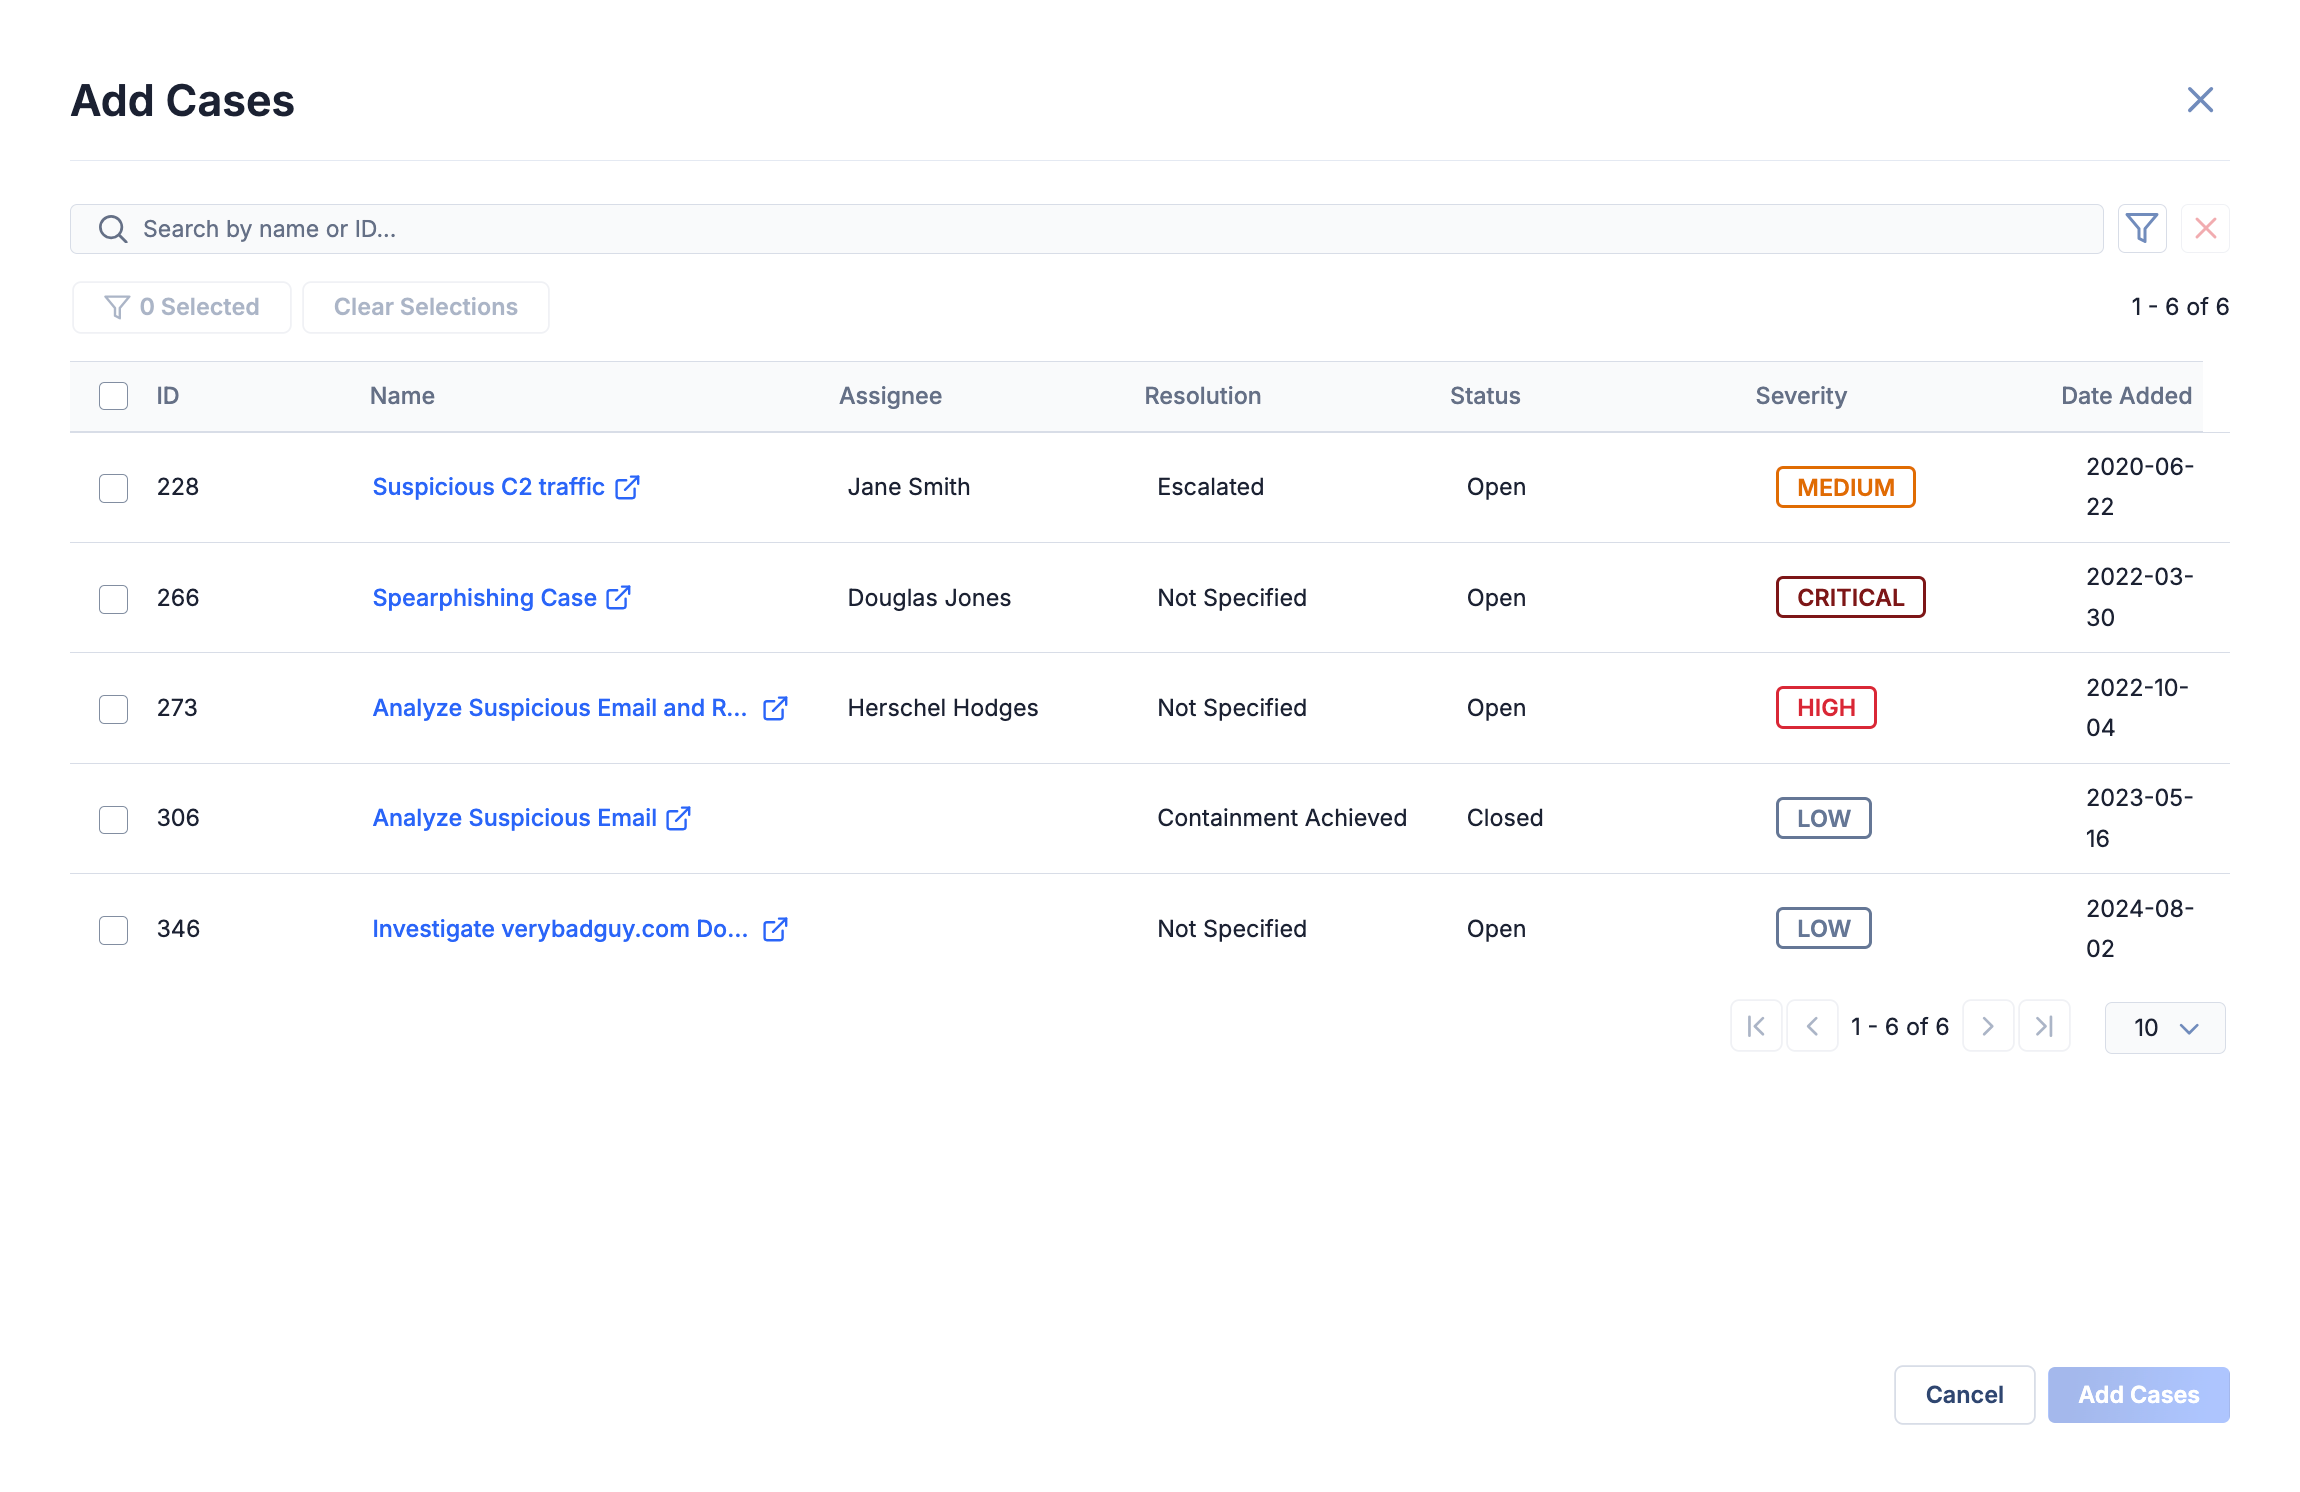
- Select one or more Cases to associate to the primary object. As you select Cases, the Selected button at the top left of the window will update to reflect the current number of selected items. When at least one Case is selected, you can click the Selected or Clear Selection button to view only the selected items or clear all selections, respectively.
- To filter Cases by severity, resolution, status, assignee, and creation date, use the Filters
 menu; to filter Cases by name, use the search bar.
 - Click the Add Cases button to create associations to the selected Cases.
Selecting Add New… in the Add Associationmenu will open the New Case drawer (Figure 13).
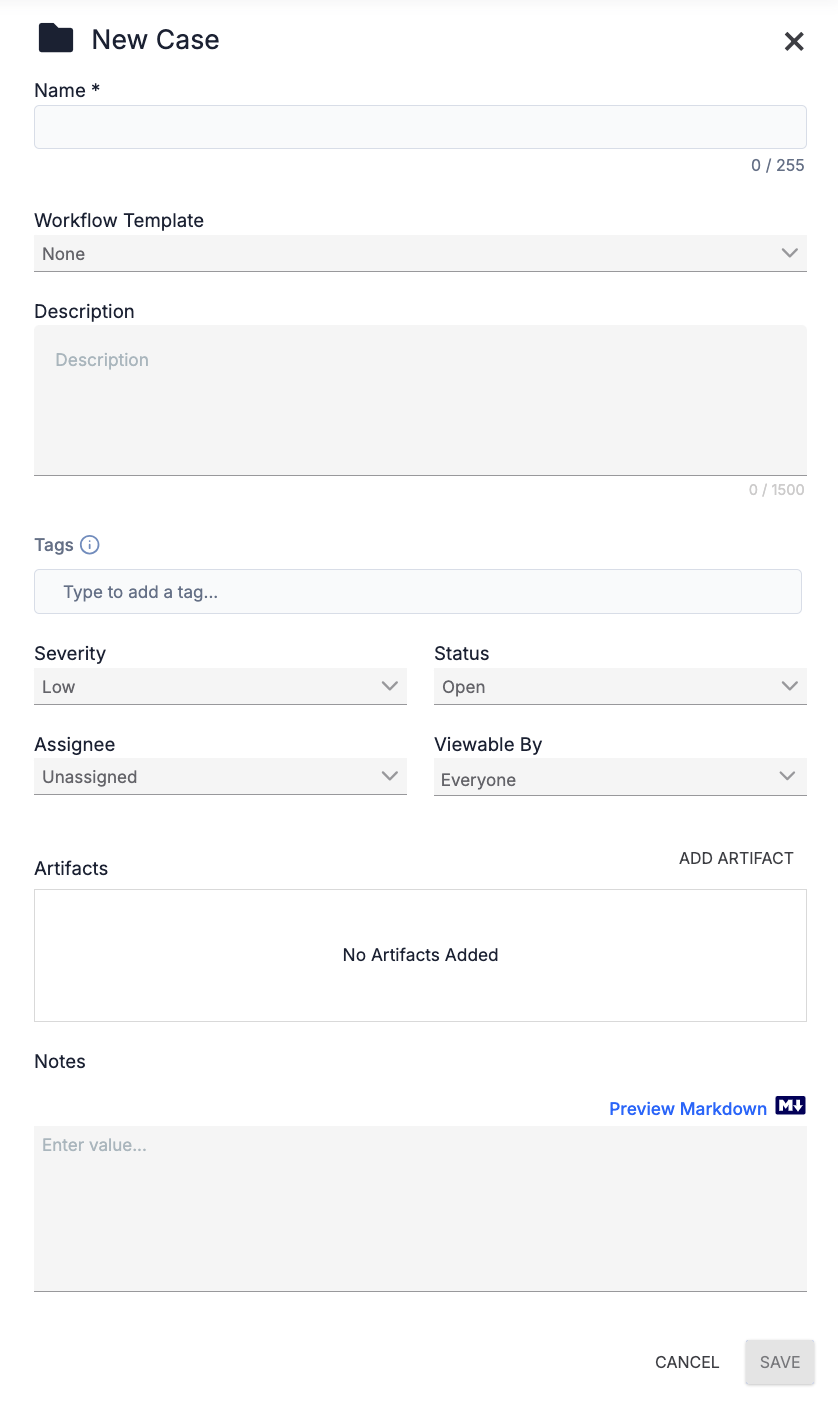
- See Creating Cases for descriptions of each option on this drawer.
- Click the SAVE button to create the new Case and associate it to the primary object.
You can also create associations between Indicators or Groups and Workflow Cases via a Case’s Associations card. See the “Indicators” and “Groups” sections of Associations Card for Cases for more information.
Removing an Association
Click Removein the rightmost column for a Case to dissociate it from the primary object.
Potential Associations
The Potential Associations card displays Cases and, for Groups only, Artifacts suggested as associations that you may want to add to the primary object.
Note
If cross-owner associations are not enabled on your ThreatConnect instance, the Potential Associations card will not be displayed for Indicators and Groups in Communities and Sources.
Viewing Potentially Associated Artifacts
The Artifacts sub-card, available for Groups only, displays Artifacts that have their Use to potentially associate cases. checkbox selected and meet one or both of the following conditions, depending on how your System Administrator configured potential associations for your ThreatConnect instance:
- The Artifact matches the summary and type of an Indicator associated to the Group (e.g., an Artifact whose type is Host and summary is bad.com will be suggested as an association for a Group associated to the bad.com Host Indicator). Artifacts that meet this condition will be suggested as associations only if your System Administrator set the potential associations system setting to Matched or Both.
- The Artifact is associated to an Indicator associated to the Group. Artifacts that meet this condition will be suggested as associations only if your System Administrator set the potential associations system setting to Associated or Both.
When reviewing potential Artifact associations, you can click on the name of the Artifact’s Case to investigate both items further and decide whether to associate the Artifact to the Group.
Viewing Potentially Associated Cases
The Cases sub-card, available for Groups and Indicators, displays Cases that meet one or both of the following conditions, depending on the object’s type and how your System Administrator configured potential associations for your ThreatConnect instance:
- Groups
- The Case contains an Artifact that has its Use to potentially associate cases. checkbox selected and matches the summary and type of an Indicator associated to the Group (e.g., a Case that contains an Artifact whose type is Host and summary is bad.com will be suggested as an association for a Group associated to the bad.com Host Indicator). Cases that meet this condition will be suggested as associations only if your System Administrator set the potential associations system setting to Matched or Both.
- The Case is associated to an Indicator associated to the Group. Cases that meet this condition will be suggested as associations only if your System Administrator set the potential associations system setting to Associated or Both.
- Indicators
- The Case contains an Artifact that has its Use to potentially associate cases. checkbox selected and matches the summary and type of the Indicator you are viewing (e.g., a Case that contains an Artifact whose type is Host and summary is bad.com will be suggested as an association for the bad.com Host Indicator). Cases that meet this condition will be suggested as associations only if your System Administrator set the potential associations system setting to Matched or Both.
- The Case is associated to a Group associated to the Indicator. Cases that meet this condition will be suggested as associations only if your System Administrator set the potential associations system setting to Associated or Both.
Creating an Association
To associate an Artifact or Case suggested as a potential association to the primary object, click the Add Associationbutton in the rightmost column for the Artifact or Case. After the Artifact or Case is added as an association, it will be removed from the Potential Associations card.
If at any point you dissociate an Artifact or Case that was suggested as a potential association from the primary object, it will be readded to the Artifacts or Cases sub-card, respectively.
Note
The Add Associationbutton is displayed for Indicators and Groups in an Organization only. To associate a potentially associated Case to an Indicator or Group in a Community or Source, navigate to the Case’s Potential Associations card and create the association from there. To associate a potentially associated Artifact to a Group in a Community or Source, navigate to the Case containing the Artifact, expand the Artifact to view its details, and create the association from the Associated Groups section.
button is displayed for Indicators and Groups in an Organization only. To associate a potentially associated Case to an Indicator or Group in a Community or Source, navigate to the Case’s Potential Associations card and create the association from there. To associate a potentially associated Artifact to a Group in a Community or Source, navigate to the Case containing the Artifact, expand the Artifact to view its details, and create the association from the Associated Groups section.Legacy Details Screen View
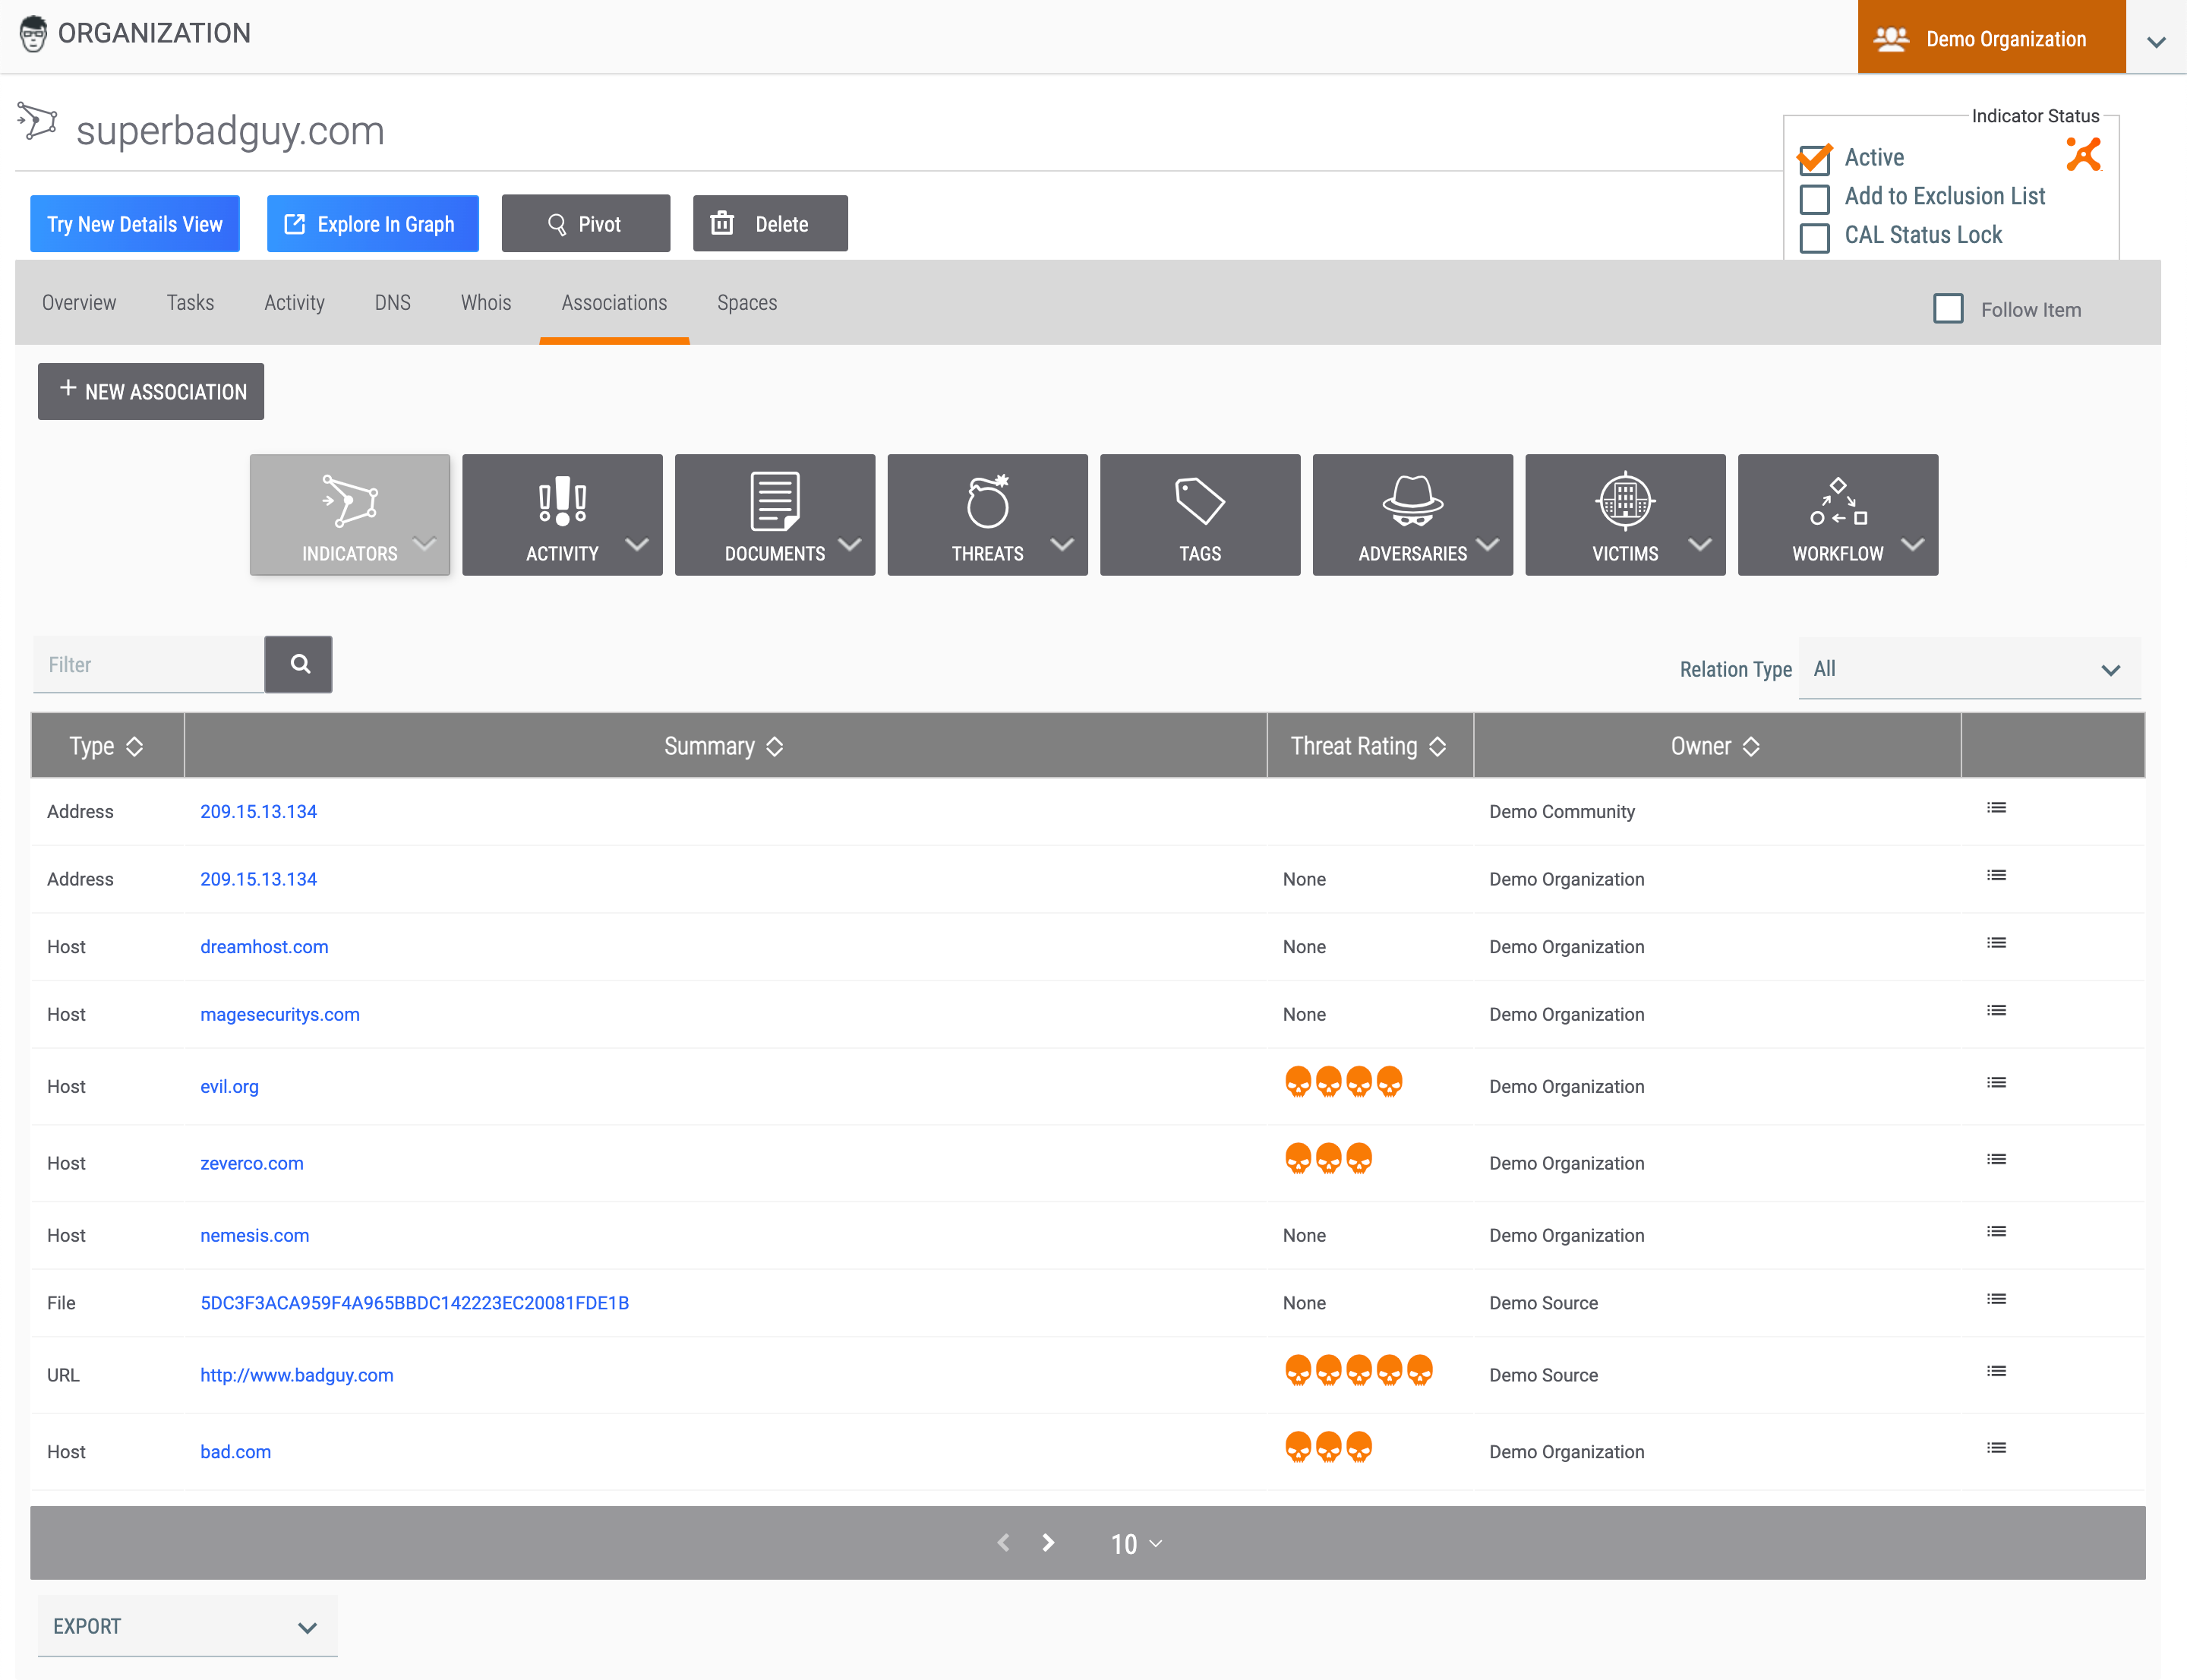
Figure 14 shows the Associations tab of the legacy Details screen for the superbadguy.com Host Indicator. In addition to being able to filter associated objects and add and remove associations, you can export associated objects to a CSV file on the Associations tab of the legacy Details screen.
Viewing and Filtering Associations
The associated objects provided in the table of the Associations tab are classified by type according to the icon menus in the center. Choosing an item from each menu (e.g., Signatures from the Documents menu) displays only associated objects of that type. Clicking on the menu itself (i.e., clicking on the icon without selecting an item from its menu) displays associated objects of all of the types listed in that menu, as in Figure 14, which lists all Indicators associated with the primary Indicator, including custom Indicator-to-Indicator associations, Indicators that are associated to the primary Indicator by a DNS resolution or a File action (File Archive, File Drop, or File Traffic), and Indicators that are associated to the primary Indicator via a shared Group.
The table columns depend on the type of primary object and which menu or menu item has been selected. For example, for a primary Indicator object, any Indicators table that is populated with at least one entry has a column with Details icons that, when clicked, provide information about the Group object to which both Indicators (the primary Indicator and the associated Indicator) are associated and options to dissociate the primary Indicator from the Group (and therefore from all Indicators associated with the Group). For a primary Group object, the Indicators tables do not have this icon, but rather a Dissociate link that, when clicked, immediately (i.e., without a request for confirmation) dissociates the Group from the Indicator. As another example, the Reports and Signatures tables have Intel Rating (Thumbs Up and Thumbs Down) columns.
For a primary Indicator object, the Indicators tables will display a Relation Type menu at the top right of the table, as in Figure 14. This menu allows you to filter the Indicators shown by type of association (i.e., custom Indicator-to-Indicator association, DNS resolution, type of File action, or type of Group through which the Indicator-to-Group-to-Indicator first-level association exists).
Adding an Association
- Click the +NEW ASSOCIATION button in Figure 14. The Select an Association window will be displayed (Figure 15).
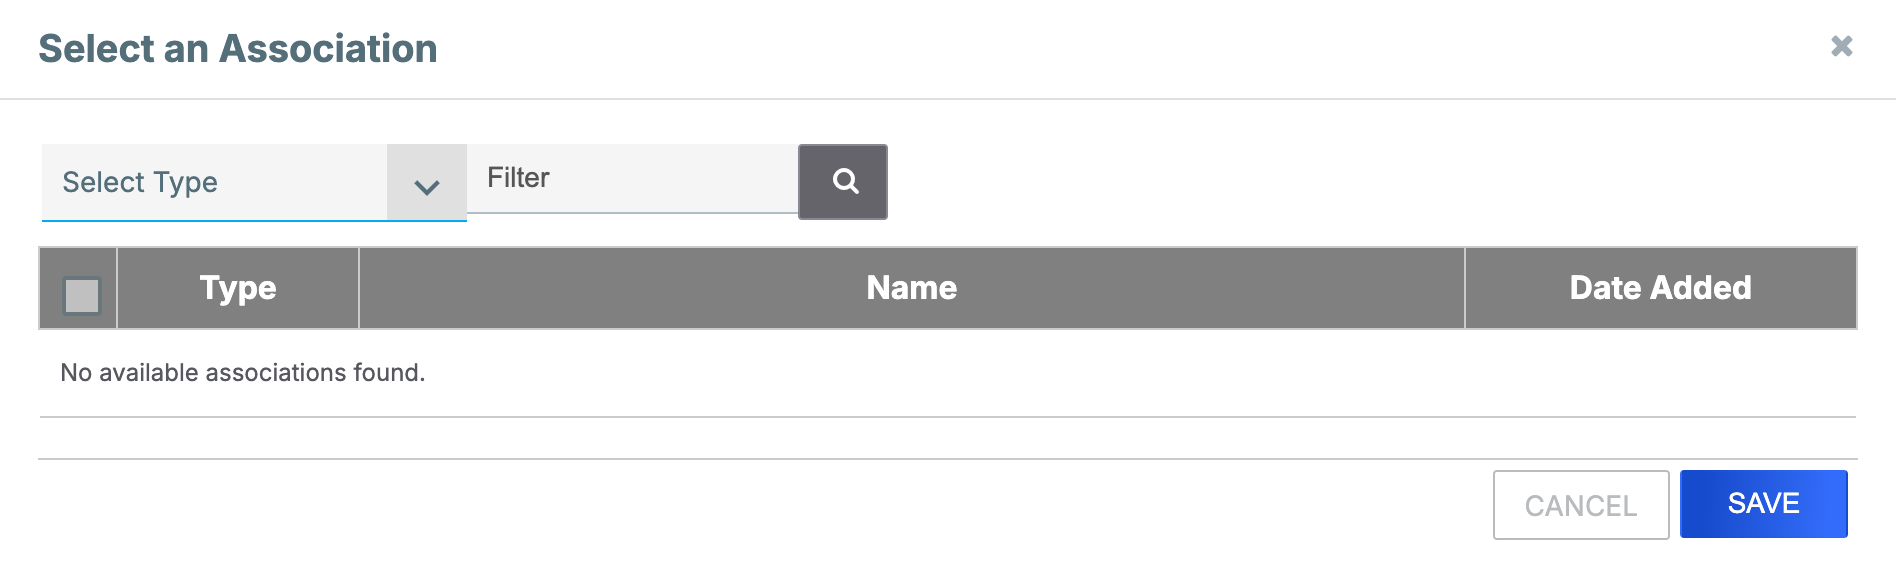
- Use the Select Type dropdown menu to select the association type to create. Objects that qualify for this association type will be displayed in the table. For example, in Figure 16, Adversary was selected.
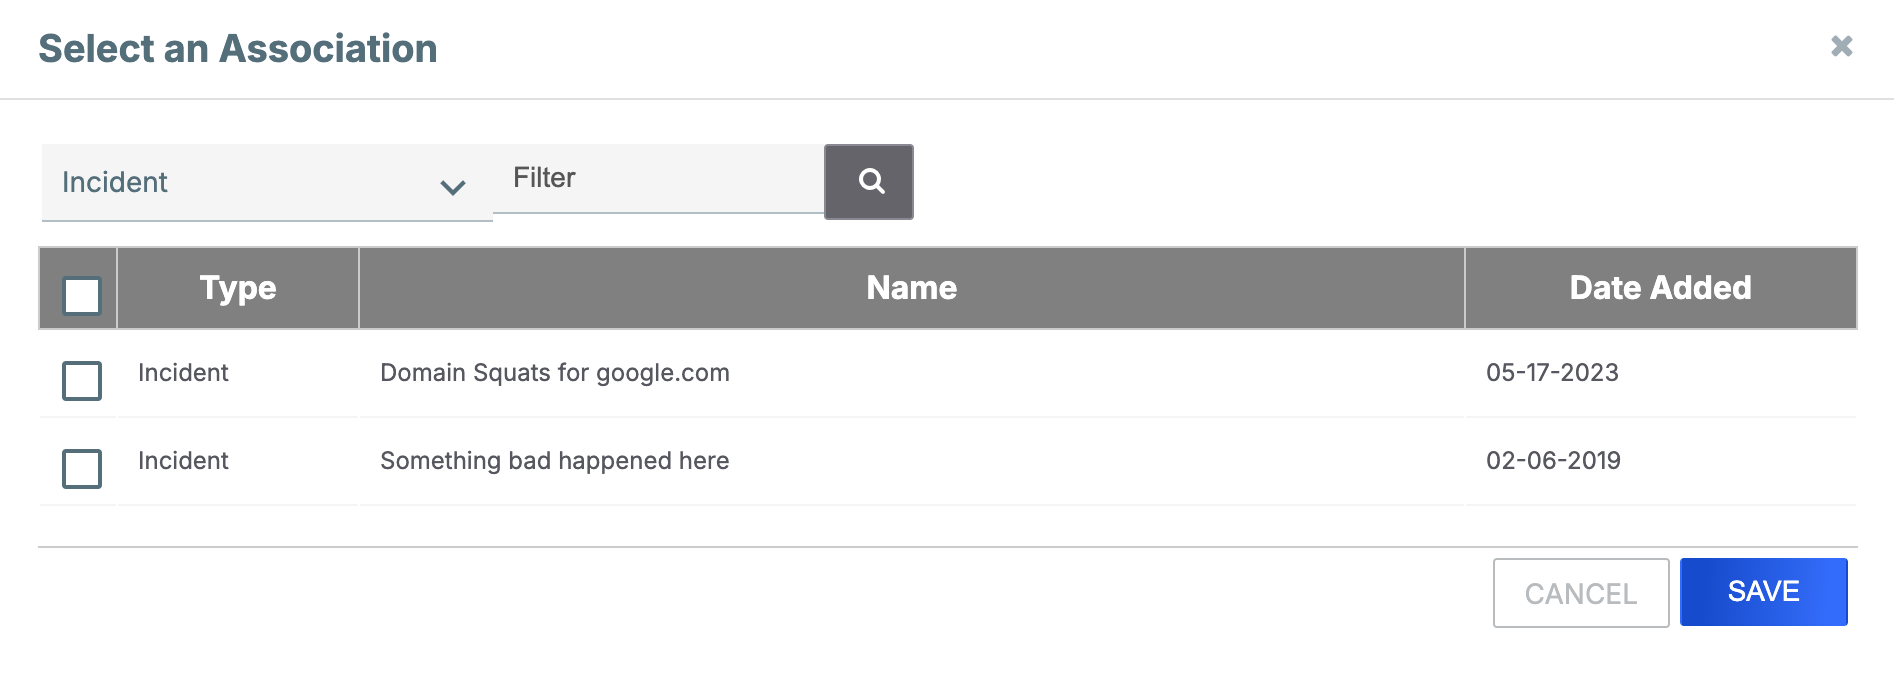
- Select the Indicator(s) or Group(s) to associate to the primary object. If desired, use the Filter box to filter Indicators or Groups displayed in the table.ImportantWhen searching for file hashes, the Filter box performs a case-sensitive search. For example, a search for the file hash “0413F832D8161187172AEF7A769586515F969479” will not return “0413f832d8161187172aef7a769586515f969479” as a result.
- Click the SAVE button.NoteYou can also add associations from both the graph view and table view of the Associations card on the Overview tab of the legacy Details screen.
Exporting Associated Objects
Click on the EXPORT dropdown menu at the lower-left corner of the screen (Figure 14) and select the ThreatConnect CSV option. The Export Data window will be displayed (Figure 17).
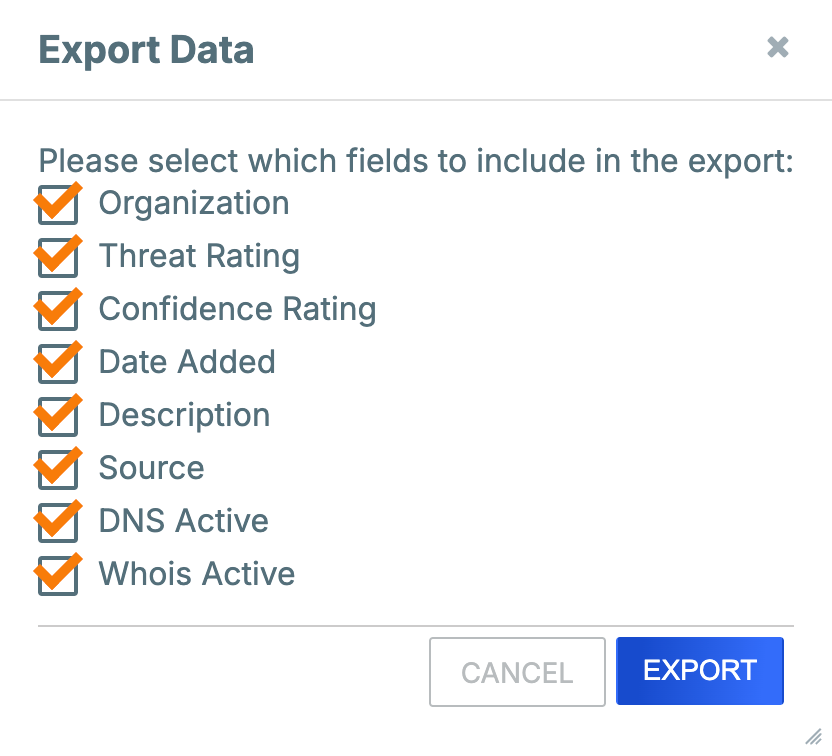
- Clear the checkbox(es) for any field(s) that should not be included in the CSV file.
- Click the EXPORT button. The CSV file will download to your computer.
ThreatConnect® is a registered trademark of ThreatConnect, Inc.
MITRE ATT&CK® and ATT&CK® are registered trademarks of The MITRE Corporation.
20076-13 v.14.A
Was this article helpful?
