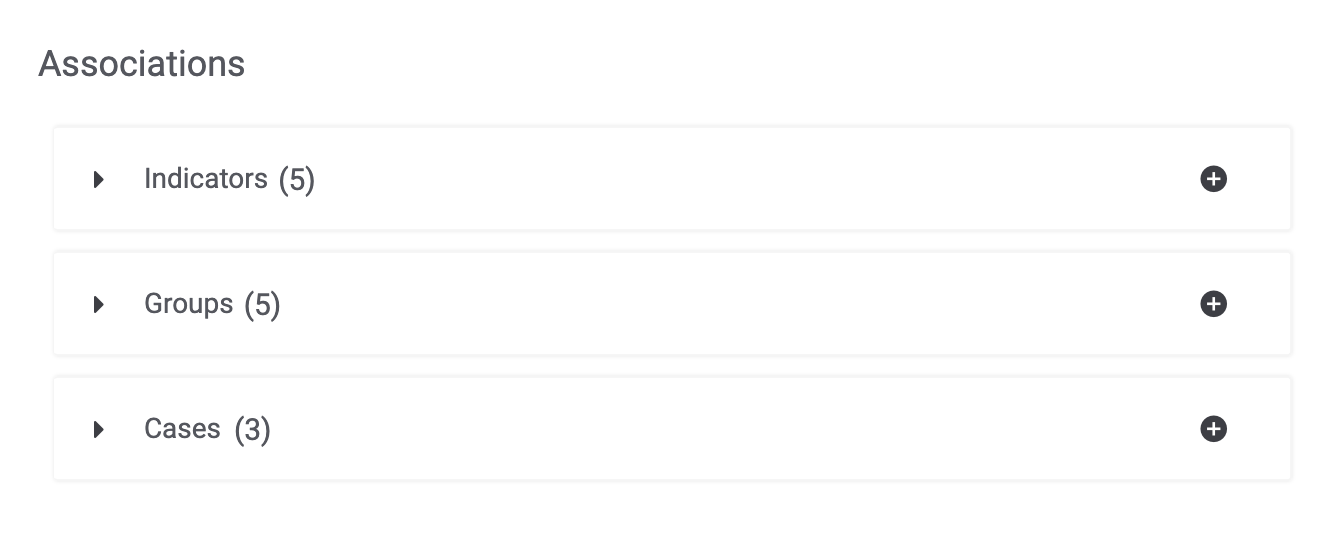
Figure 1 shows an example of the Associations card for a Case, which is located below the Attributes card on the right side of the screen displaying the Case. You can collapse and expand the Associations card by hovering the cursor anywhere in the card and clicking the arrow displayed at the upper-right corner of the card.
Indicators
Expand the Indicators section to display all Indicators manually associated to the Case you are viewing (Figure 2). Each Indicator’s type, CAL score, Indicator Status, ThreatAssess score, and creation date will be displayed in the table.
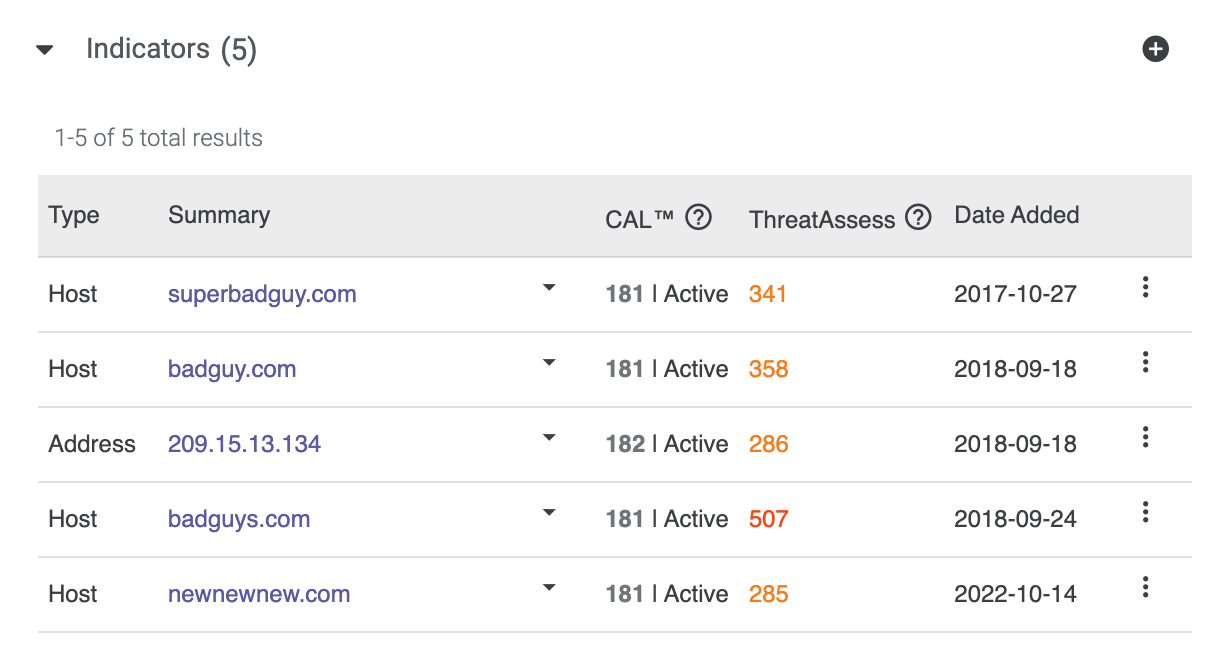
To view the owner(s) to which an Indicator belongs, click the arrow.png) icon to the right of its summary.
icon to the right of its summary.
Viewing Indicator Details
Select an owner in the arrowdropdown to display the Details drawer for the Indicator in that owner. You can also click the link in the Summary column or select Details from the vertical ellipsis to the right of an Indicator’s table entry to display the Details drawer for the Indicator in the owner listed at the top of the arrowdropdown.
Adding Indicator Associations
To add a new associated Indicator to the Case, click the New…  button at the upper-right corner of the Case and select Associate Indicator, or click Add Indicators
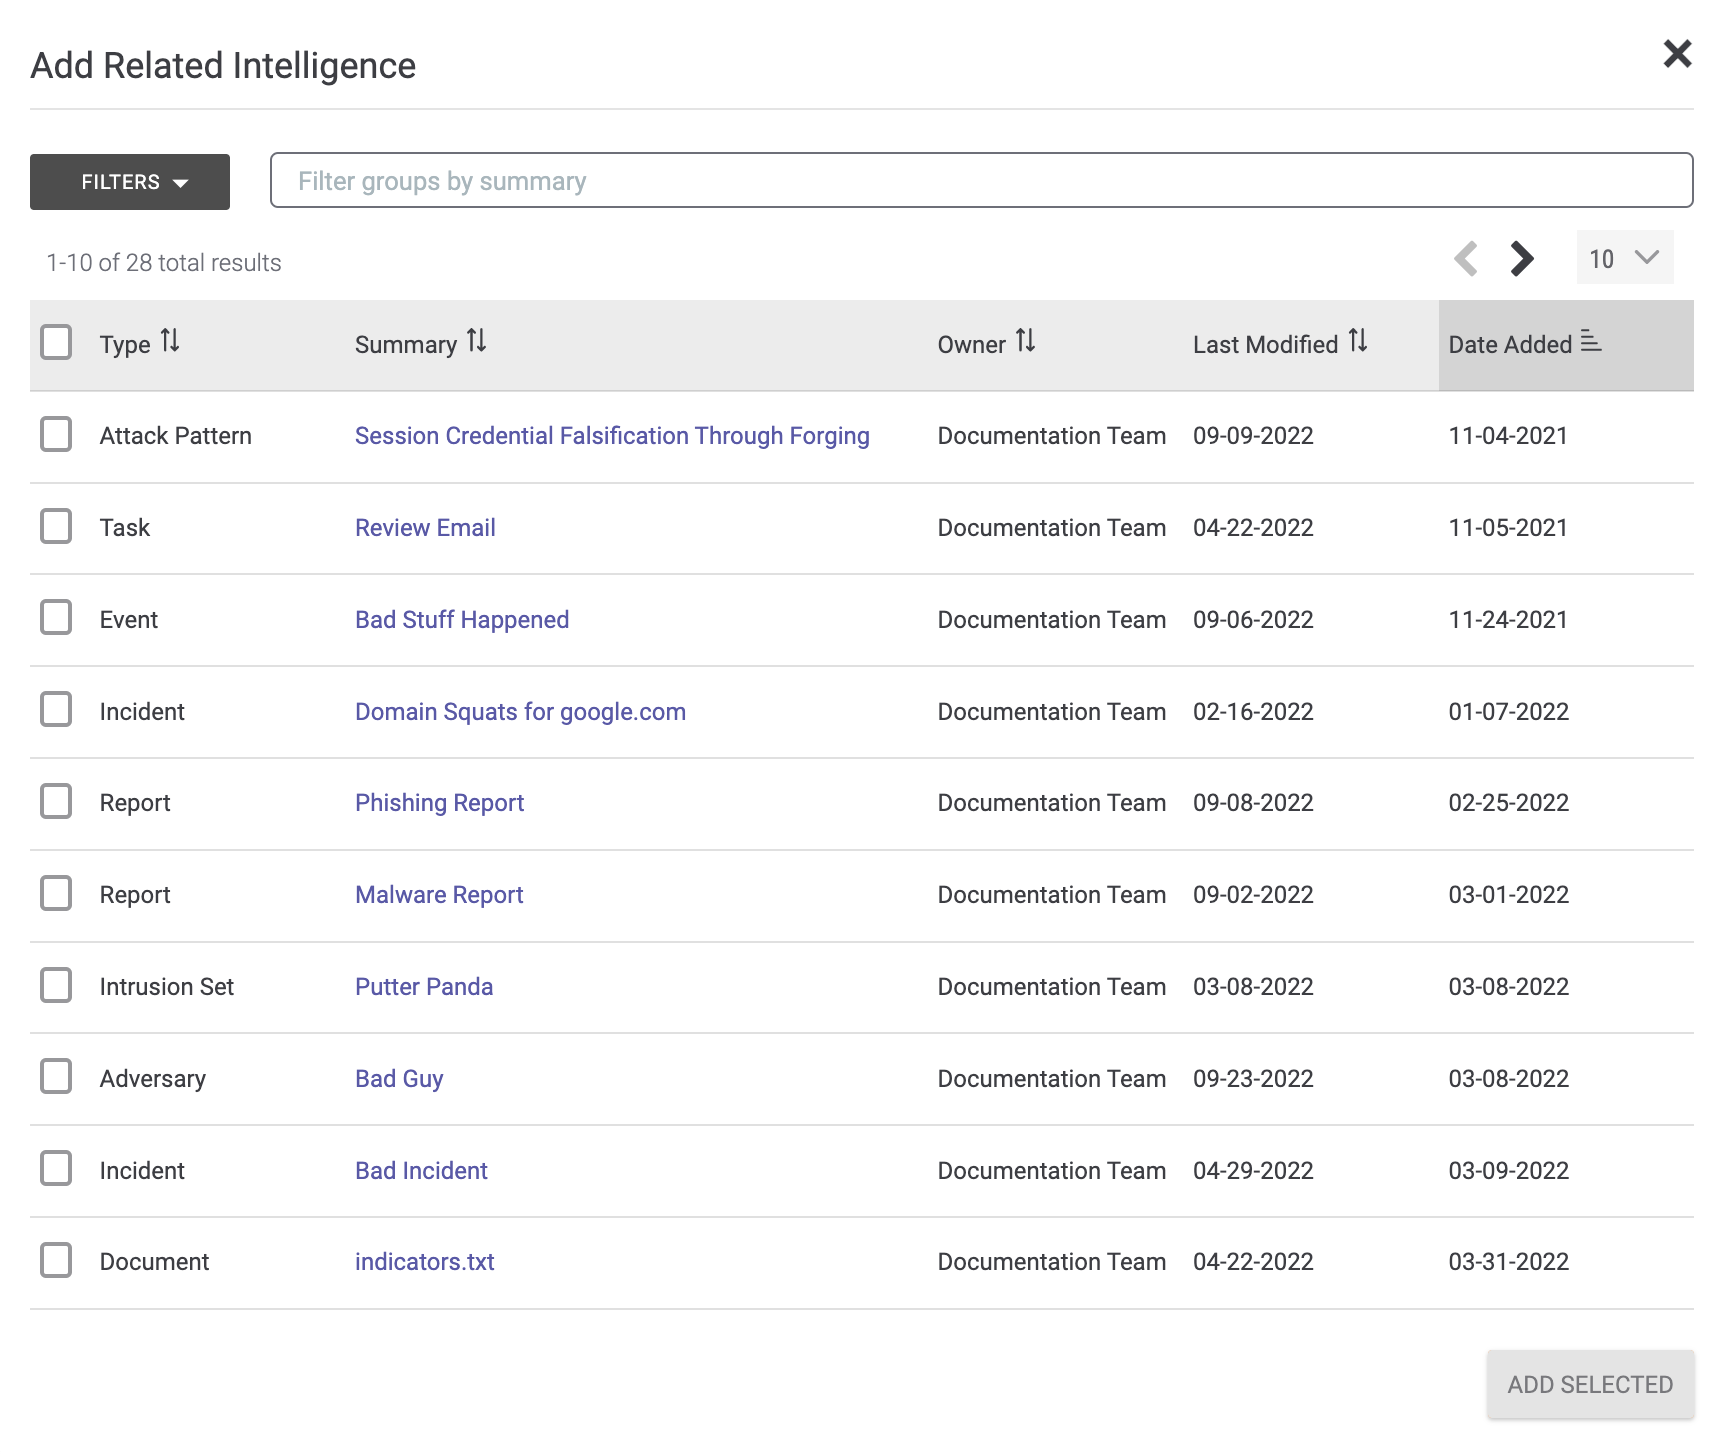
 at the top right of the Indicators section. The Add Related Intelligence drawer will be displayed, showing all available Indicators that are not associated to the Case (Figure 3).
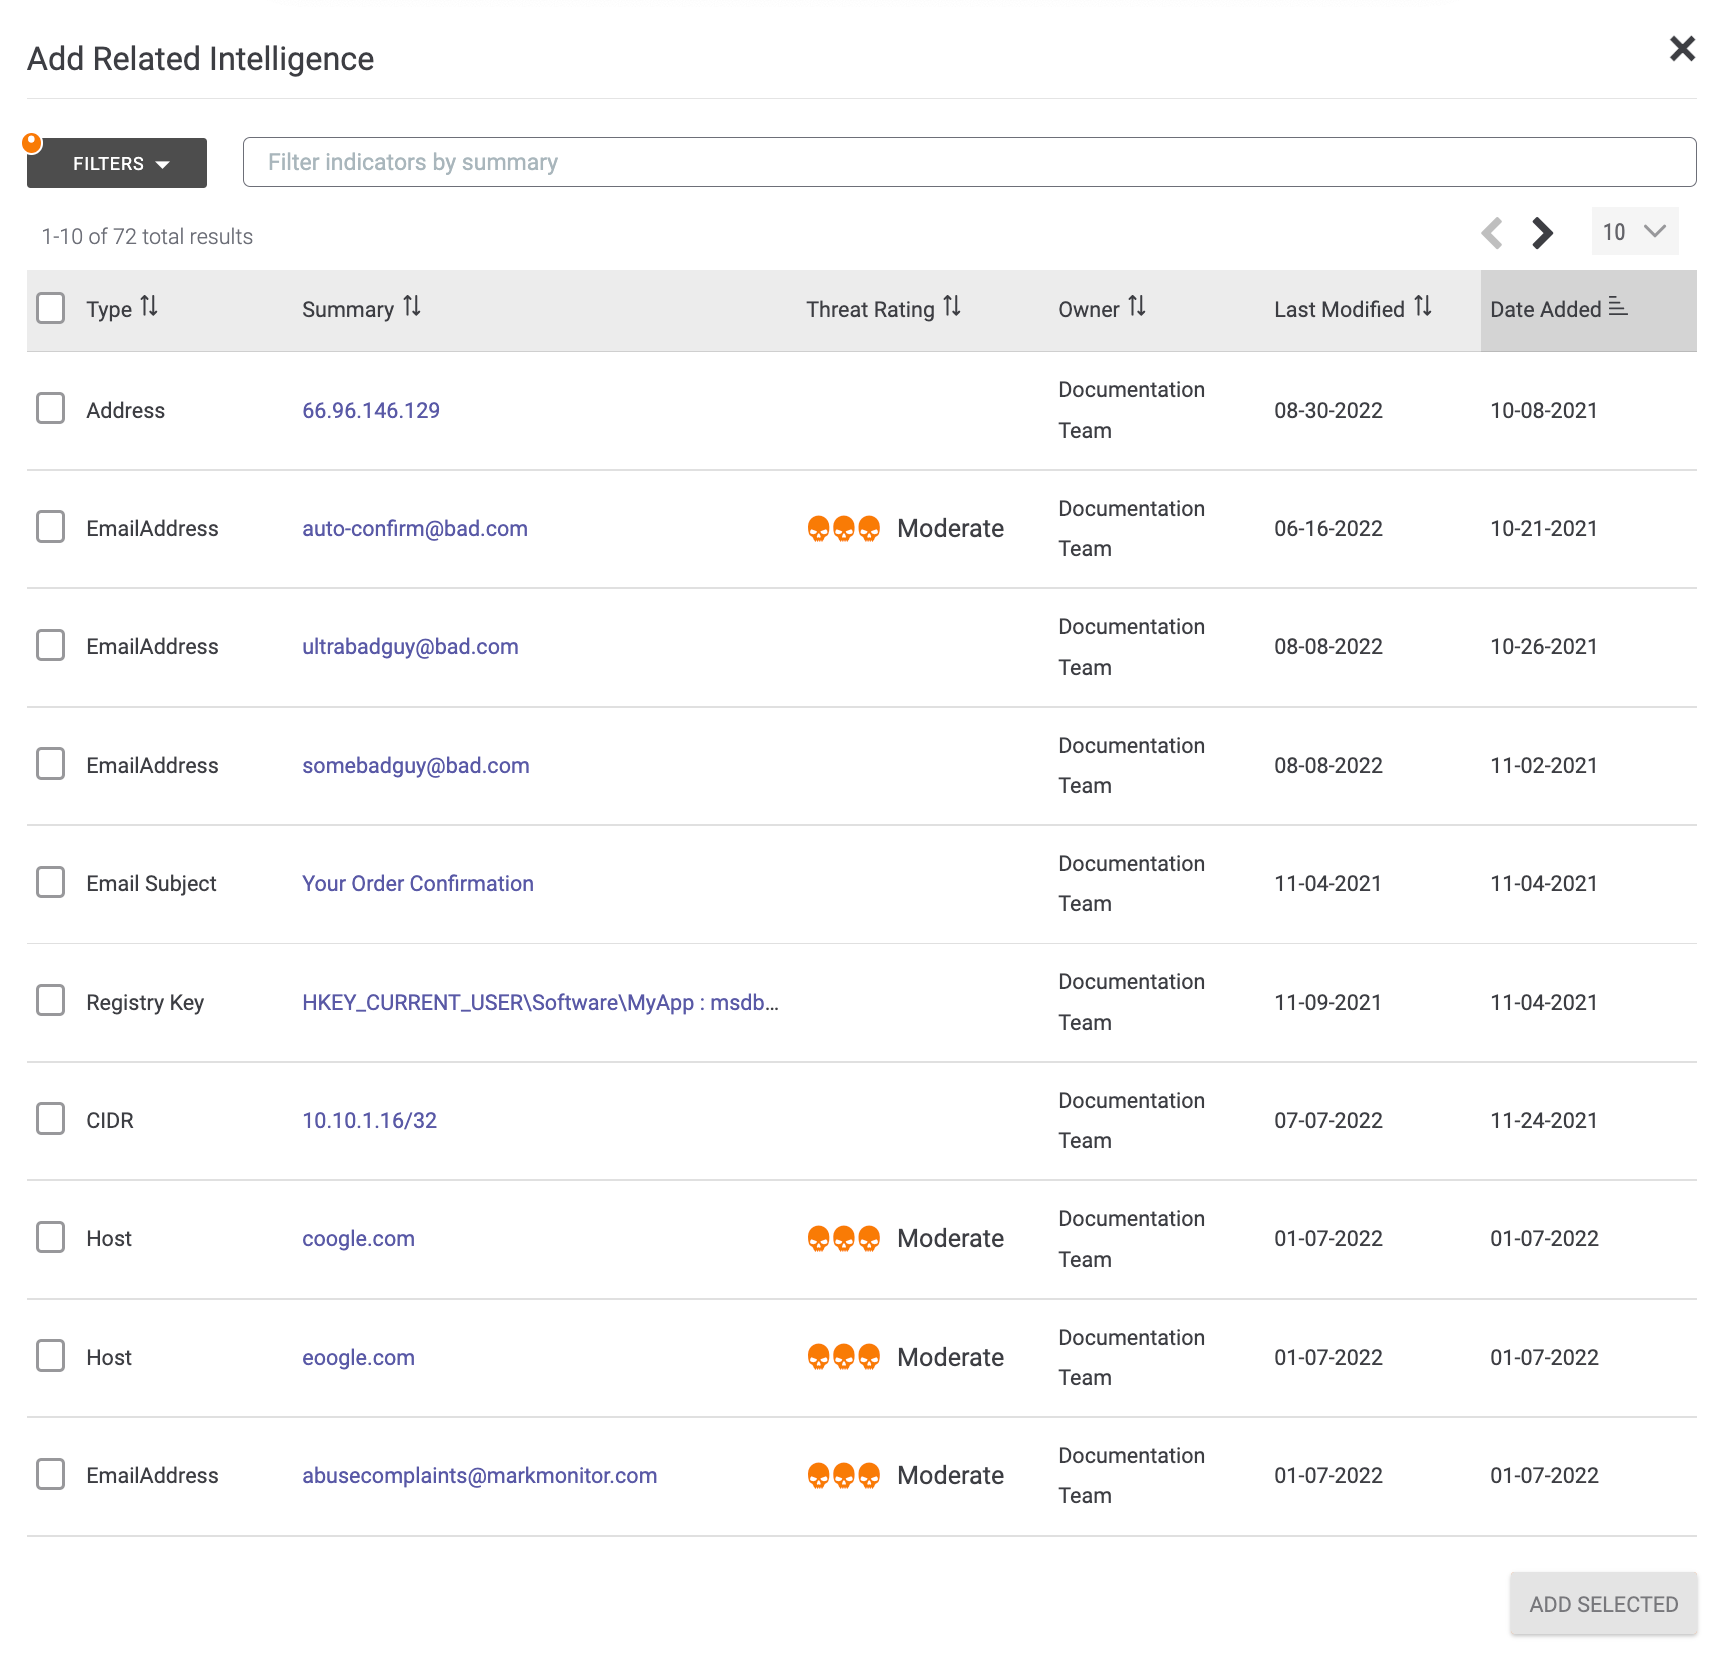
- Select one or more Indicators to associate to the Case. If desired, use the FILTERS selector to filter Indicators by type, owner, a range of dates within which Indicators were last modified, or a range of dates within which Indicators were created. You can also enter text in the box to the right of the FILTERS selector to filter Indicators by summary. To view the Details drawer for an Indicator, click its summary in the Summary column.
- Click the ADD SELECTED button. The selected Indicator(s) will be associated to the Case and added to the Indicators table on the Associations card.NoteAll copies of a selected Indicator in all owners to which you have access will be added as associations, even if you select a copy in only one owner. For example, if a bad.com Host Indicator exists in your Organization, a Community, and a Source and you select only the copy in the Community, all three copies of bad.com will be added as associations.
Removing Indicator Associations
To dissociate an Indicator from a Case, select Dissociate from the vertical ellipsis to the right of an Indicator’s table entry. The dissociation will happen immediately, and you will not be prompted for confirmation.
Groups
Expand the Groups section to display all Groups, categorized by type, manually associated to the Case you are viewing (Figure 4). When a Group type’s section is expanded, the summary and creation date for each Group of that type will be displayed..
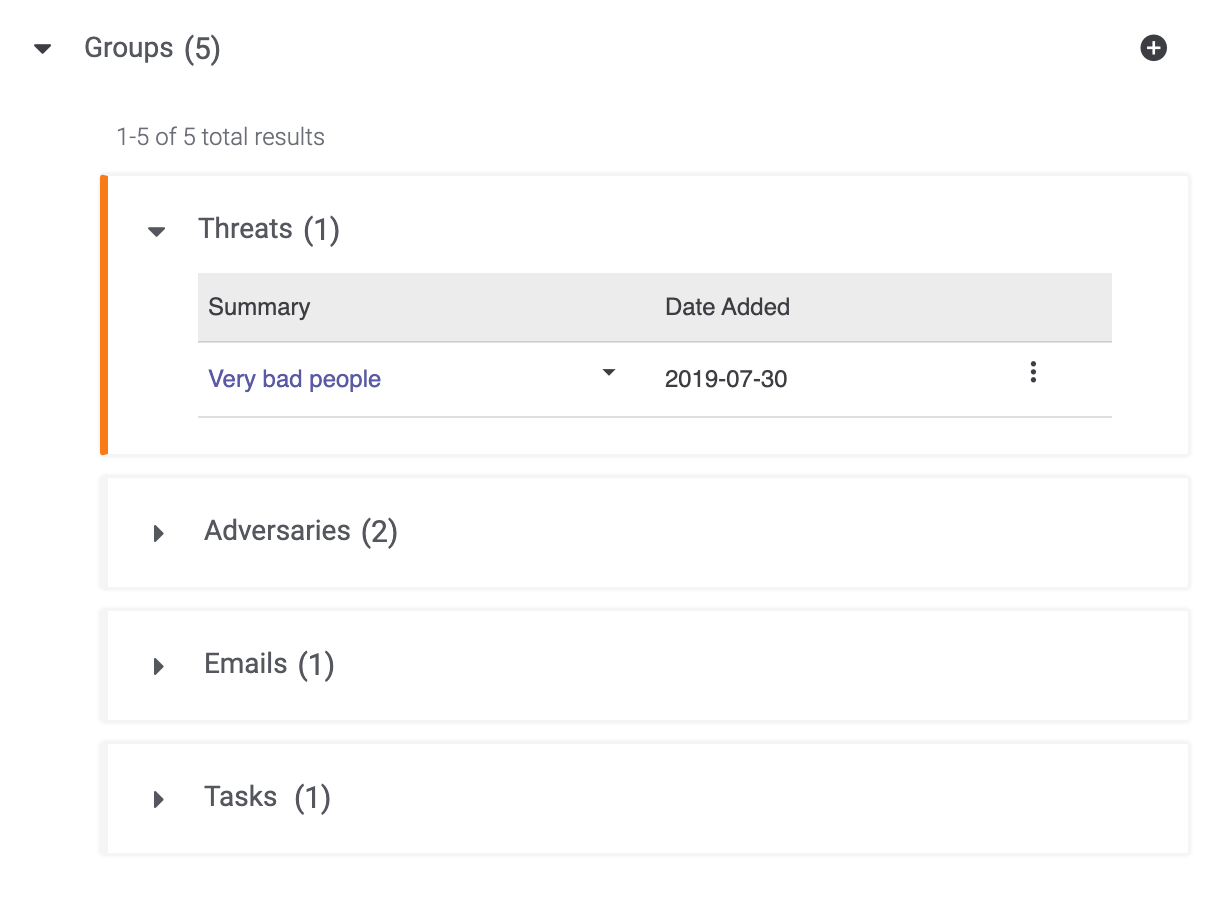
To view the owner(s) to which a Group belongs, click the arrowicon to the right of its summary.
Viewing Group Details
Select an owner in the arrow dropdown to display the Details drawer for the Group in that owner. You can also click the link in the Summary column or select Details from the vertical ellipsis to the right of a Group’s table entry to display the Details drawer for the Group in the owner listed at the top of the arrowdropdown.
Adding Group Associations
To add a new associated Group to the Case, click the New…  button at the upper-right corner of the Case and select Associate Group, or click Add Groups
 at the top right of the Groups section. The Add Related Intelligence drawer will be displayed, showing all available Groups (Figure 5).
- Select one or more Groups to associate to the Case. If desired, use the FILTERS selector to filter Groups by type owner, a range of dates within which Groups were last modified, or a range of dates within which Groups were created. You can also enter text in the box to the right of the FILTERS selector to filter Groups by summary. To view the Details drawer for a Group, click its summary in the Summary column.
- Click the ADD SELECTED button. The selected Group(s) will be associated to the Case and added to the Groups table on the Associations card.NoteAll copies of a selected Group in all owners to which you have access will be added as associations, even if you select a copy in only one owner. For example, if a Bad Guy Adversary Group exists in your Organization, a Community, and a Source and you select only the copy in the Community, all three copies of Bad Guy will be added as associations.
Removing Group Associations
To dissociate a Group from a Case, select Dissociate from the vertical ellipsis to the right of a Group’s table entry. The dissociation will happen immediately, and you will not be prompted for confirmation.
Cases
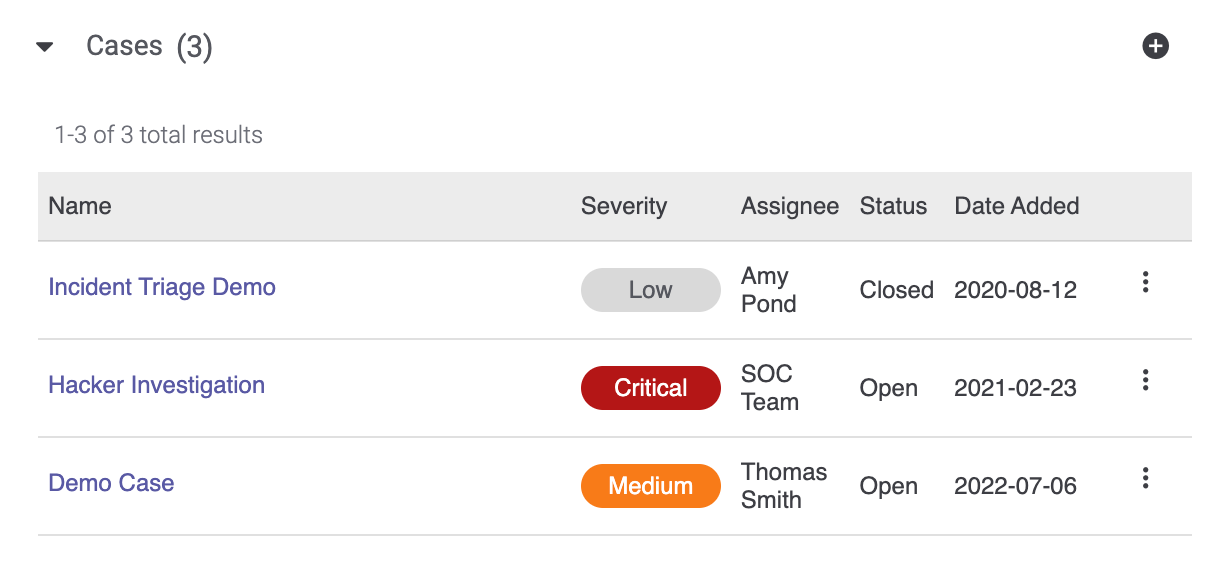
Expand the Cases section to display all Cases manually associated to the Case you are viewing (Figure 6).
Viewing Case Details
Click the Case’s name, or select Details from the vertical ellipsis to the right of the Case’s table entry, to open the Case in a new browser tab.
Adding Case Associations
To add a new associated Case, click the New…  button at the upper-right corner of the Case and select Associate Case, or click Add Cases
 at the top right of the Cases section. The Add Related Cases drawer will be displayed, showing all available Cases (Figure 7).
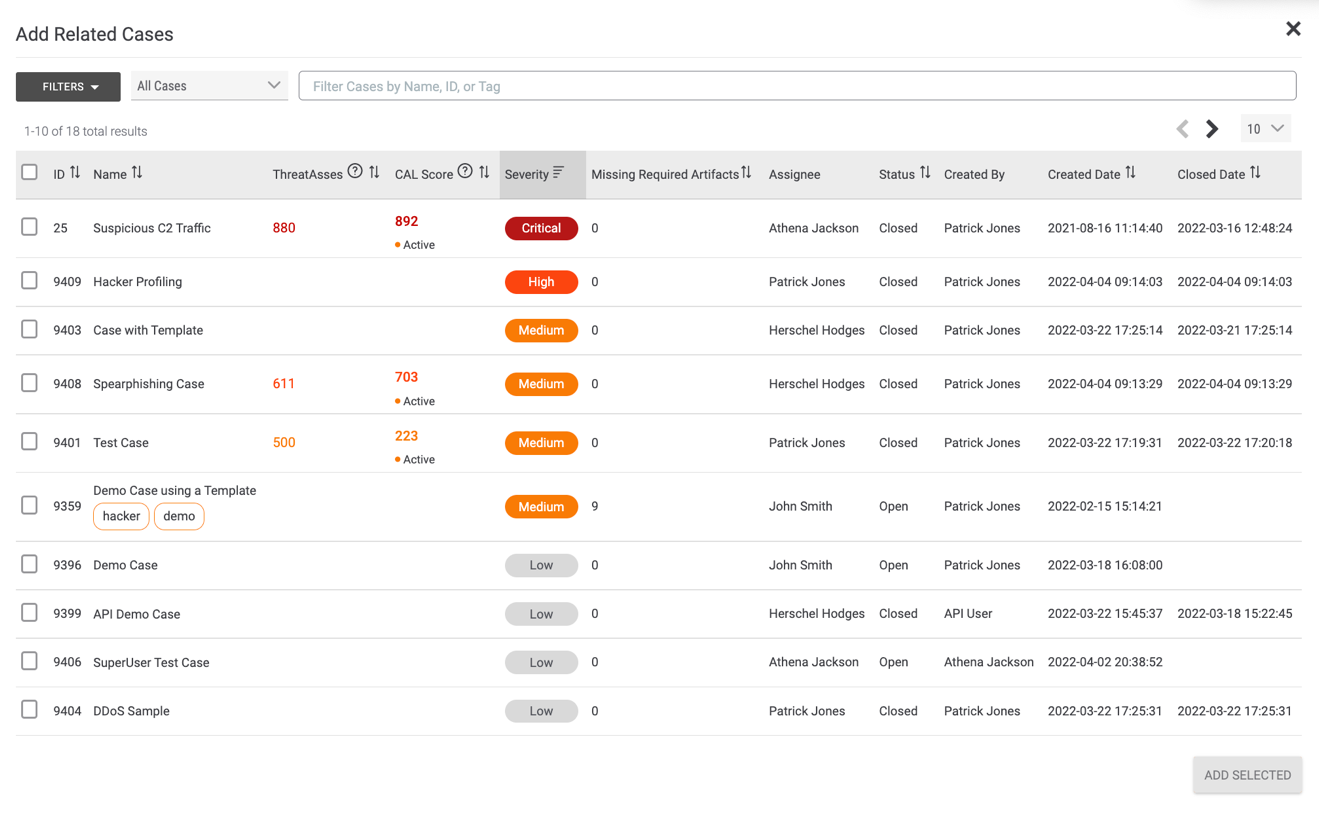
- Select one or more Cases to associate to the Case you are viewing. If desired, use the FILTERS selector, the default display menu, or the box to the right of the FILTERS selector to filter the displayed Cases. For more information on how to filter Cases using these options, see the “Filtering Cases” section of Viewing, Managing, and Filtering Cases.
- Click the ADD SELECTED button. The selected Case(s) will be associated to the Case and added to the Cases table on the Associations card for the Case.
Removing Case Associations
To dissociate a Case from the Case you are viewing, select Dissociate from the vertical ellipsis to the right of a Case’s table entry. The dissociation will happen immediately, and you will not be prompted for confirmation.
ThreatConnect® is a registered trademark of ThreatConnect, Inc.
20124-02 v.05.A