Follow these steps to view more details about an Artifact added to a Workflow Case in ThreatConnect®:
- On the top navigation bar, hover over Workflow and select Cases. The Cases screen will be displayed.
- Select a Case on the Cases screen. A detailed view of the Case will be displayed.
- Scroll down to the Artifacts card on the right side of the screen and then click the
 icon to the left of an Artifact’s type to display more details about the Artifact (Figure 1). To view more information in a specific section for the Artifact, click the
 icon to the left of the section’s heading.
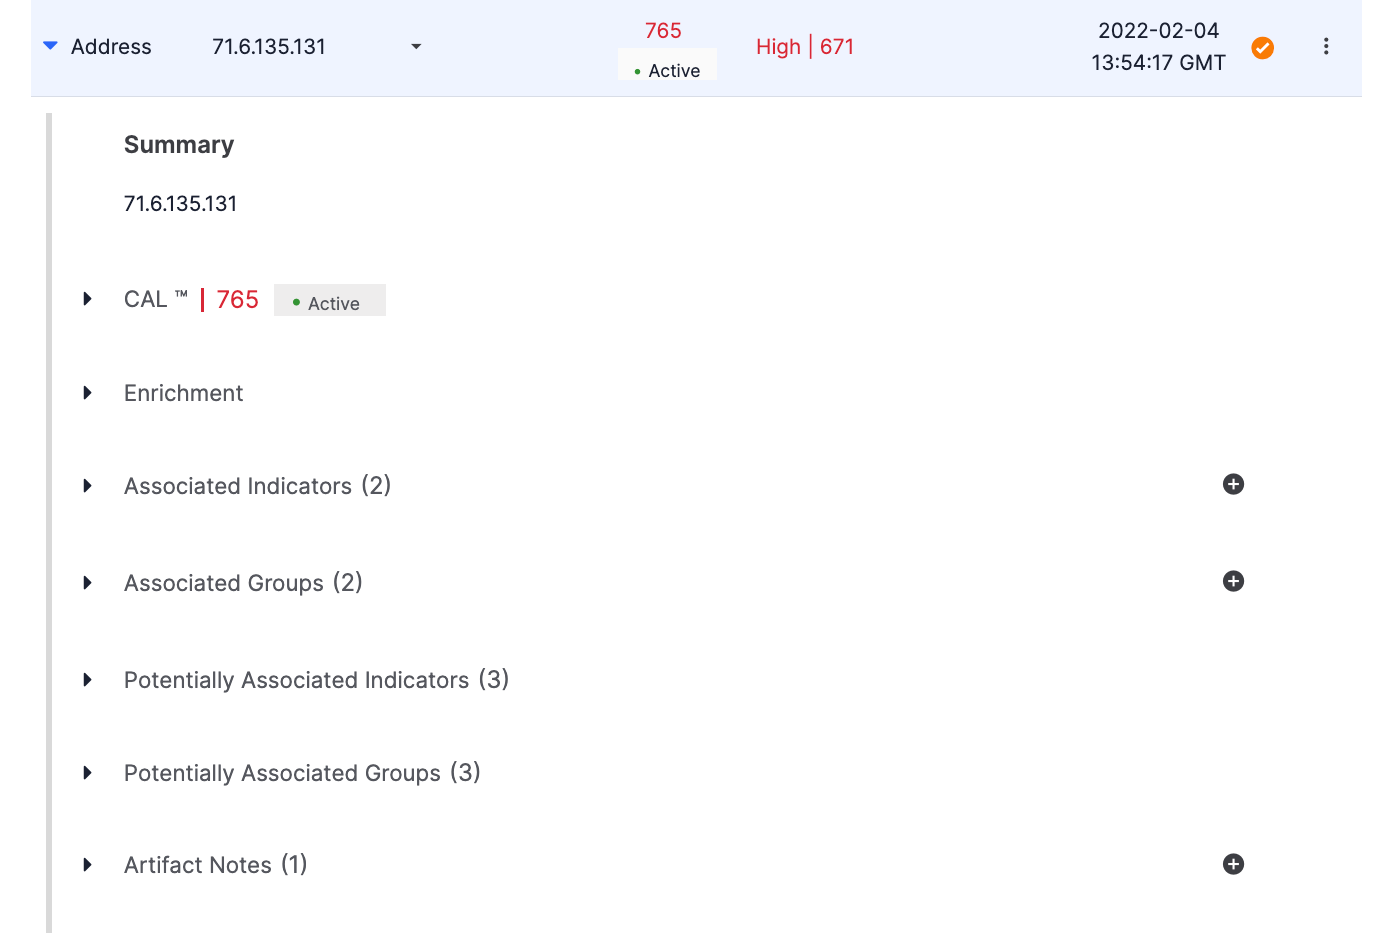
Summary
This section provides the full summary (i.e., contents) of the Artifact. Artifacts that are too long to be fully displayed in the table on the Artifacts card may be viewed here in their entirety.
CAL
The CAL section, available only for Artifacts whose type maps to a ThreatConnect Indicator type, displays information that CAL™ has on the corresponding Indicator. When collapsed, it displays the Indicator’s CAL reputation score and status. The status (• Active for the 71.6.135.131 Address Artifact in Figure 1) indicates CAL’s assessment of whether the corresponding Indicator is an active Indicator of Compromise (IOC) at the current time. Depending on this assessment, one of the following statuses may be displayed below the Indicator’s CAL reputation score:
- • Active: CAL has identified the Indicator as an active IOC at the current time.
- • Inactive: CAL has identified the Indicator as an inactive IOC at the current time.
If CAL did not return data identifying whether the corresponding Indicator is active or inactive at the current time, no status will be displayed to the right of the Indicator’s CAL reputation score.
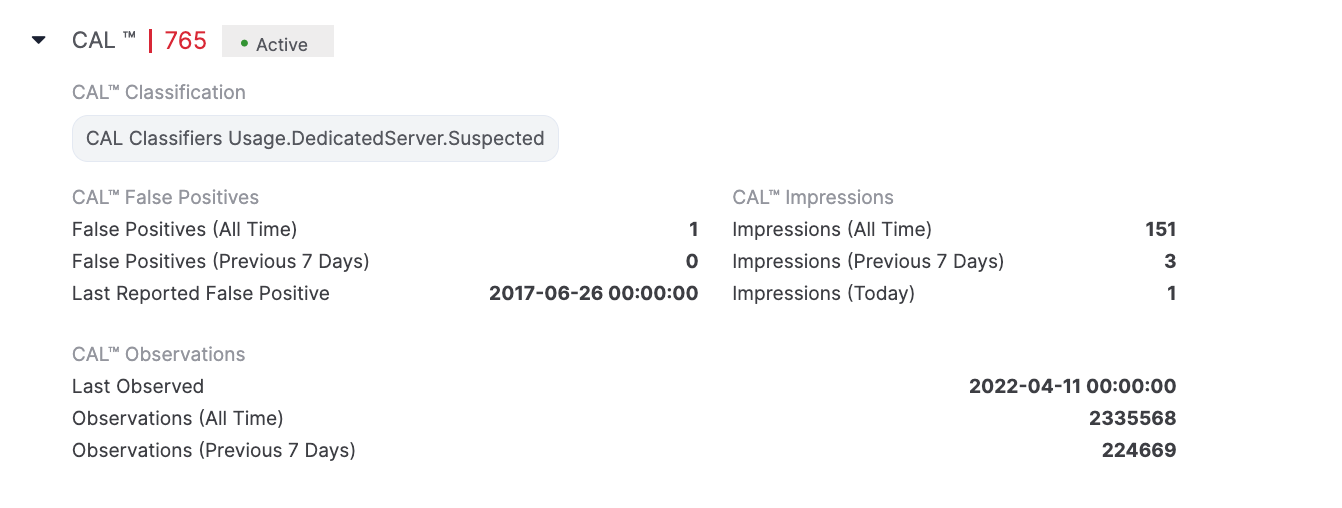
When expanded, the CAL section displays information provided by CAL for the corresponding Indicator, including CAL Classifiers applied to it, false positive reports, impressions, and observations (Figure 2).
Enrichment
The Enrichment section, available only for Artifacts whose type maps to an Indicator type for which a third-party enrichment service is available, displays a summary of data retrieved from a third-party enrichment service for the Indicator and the date and time the data were last retrieved. At this time, VirusTotal™ is the only third-party enrichment service available for Artifacts, and it is available only for Artifacts whose type maps to the Address, File, Host, or URL Indicator types.
Figure 3 shows the Enrichment section for the 71.6.135.131 Address Artifact, where a VirusTotal subsection is displayed because VirusTotal is available for Address Indicators. In this example, VirusTotal is also enabled on the ThreatConnect instance and for Address Indicators, so the VirusTotal section displays data retrieved from VirusTotal for the 71.6.135.131 Address Indicator.
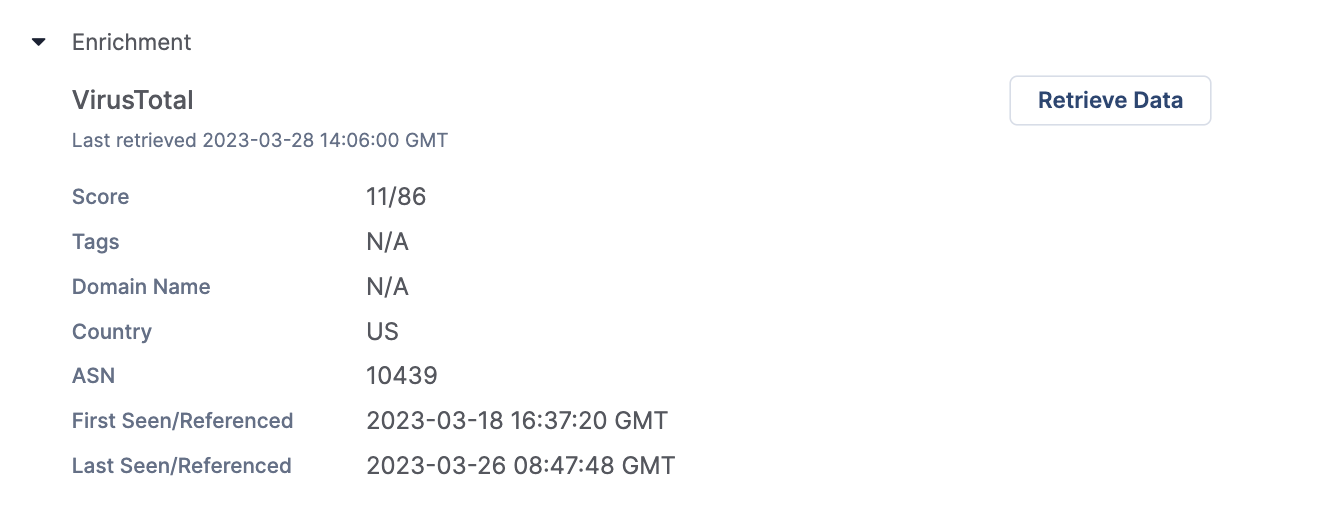
The information displayed in the Enrichment section varies based on the Indicator type to which the Artifact’s type maps. See the “Data Overview” section of VirusTotal Enrichment for a list of data fields that may be displayed in the VirusTotal subsection of the Enrichment section and the Indicator type(s) to which each field applies.
Retrieving Enrichment Data
When you expand an Artifact’s Enrichment section for the first time, data will be retrieved from an enrichment service automatically if your System Administrator has enabled automatic data retrieval for that enrichment service. Otherwise, a message stating that “Automatic Data Retrieval has been disabled by the System Administrator” will be displayed on the card, and you will need to click the Retrieve Data button to populate the card with data. Once data have been retrieved, they will be cached for a period of time configured by your System Administrator. Each time you revisit that Artifact’s Enrichment section, the cached enrichment data will be displayed until this period of time has passed.
To retrieve the latest data from an enrichment service manually, click the Retrieve Data button.
Associated Indicators
The Associated Indicators section displays Indicators associated to the Artifact (Figure 4).
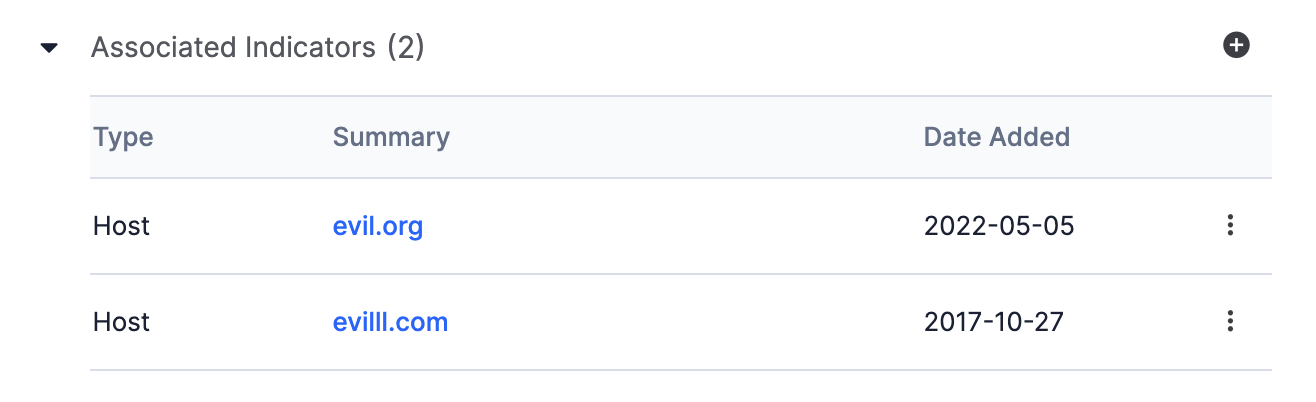
Click the link in the Summary column, or click the Indicator’s vertical ellipsis and select Details, to display the Indicator’s Details drawer.
Adding Indicator Associations
Click Add Associated Indicators at the top right of the Associated Indicators section to associate one or more Indicators to the Artifact. The Add Related Intelligence drawer will be displayed, showing all Indicators that are not already associated to the Artifact (Figure 5).
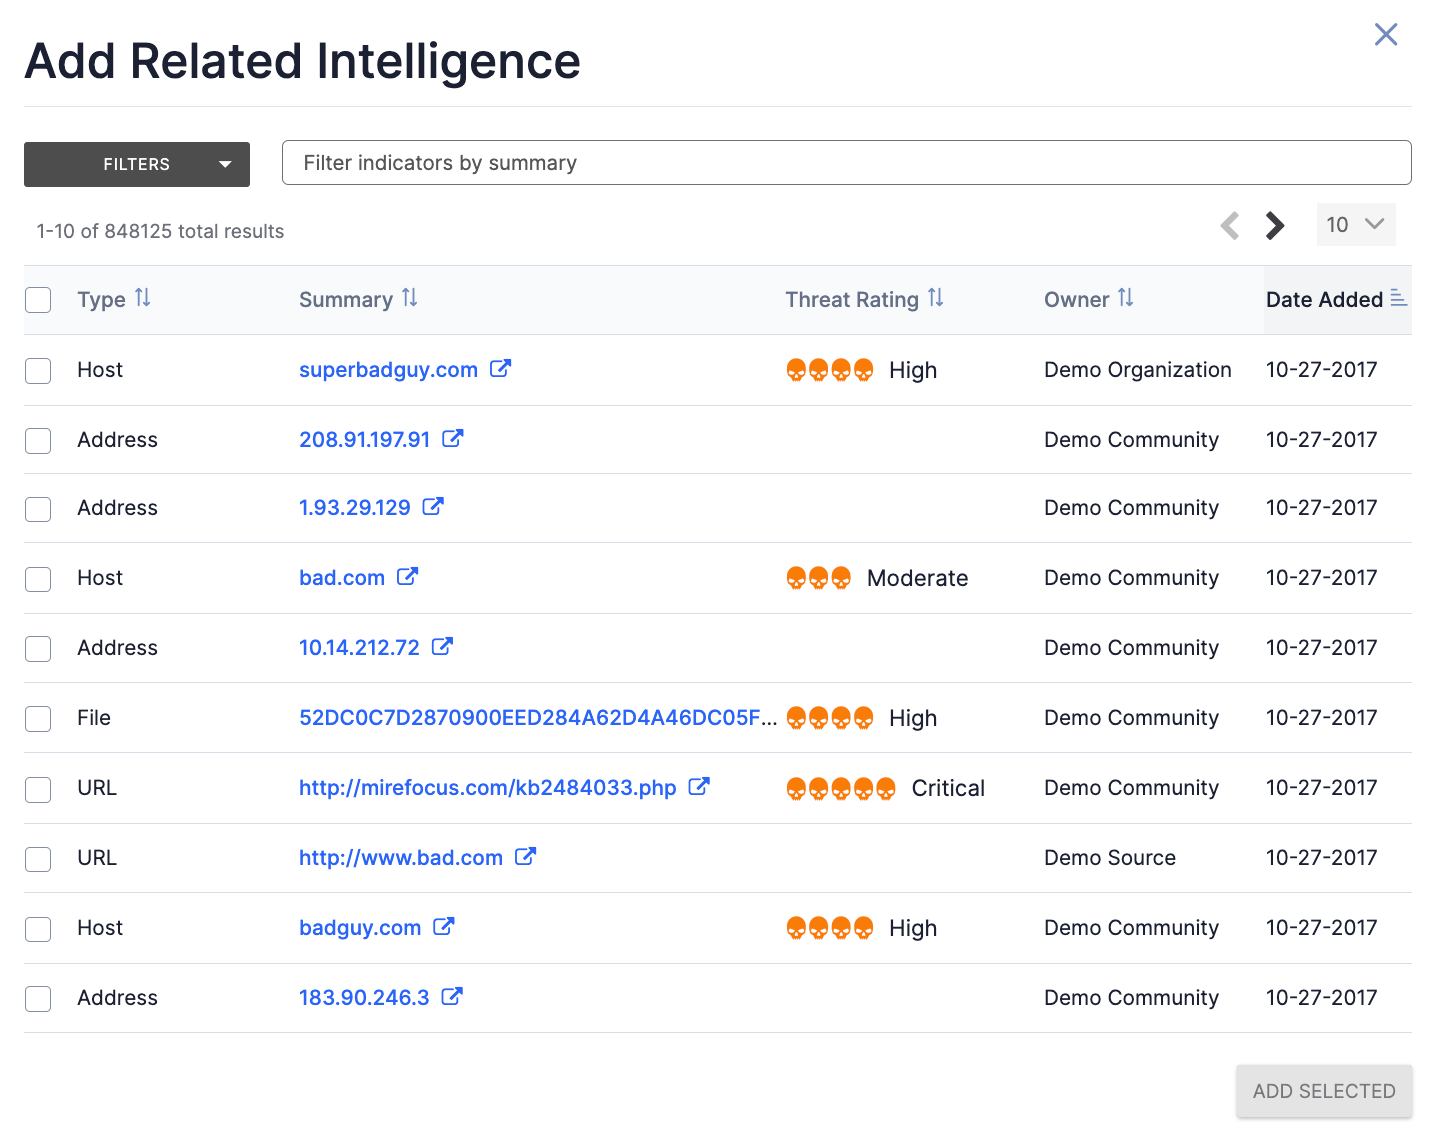
- Select one or more Indicators to associate to the Artifact.
- To filter Indicators by type, creation date, last modified date, and, if cross-owner associations are enabled, owner, use the FILTERS selector; to filter Indicators by summary, use the search bar.
- Click the ADD SELECTED button to associate the selected Indicator(s) to the Artifact.
Removing Indicator Associations
Click the Indicator’s vertical ellipsis and select Dissociate to dissociate the Indicator from the Artifact. The dissociation will happen immediately, and you will not be prompted for confirmation.
Associated Groups
The Associated Groups section displays Groups, categorized by type, associated to the Artifact (Figure 6). When a Group type’s section is expanded, the summary and creation date for each Group of that type will be displayed.
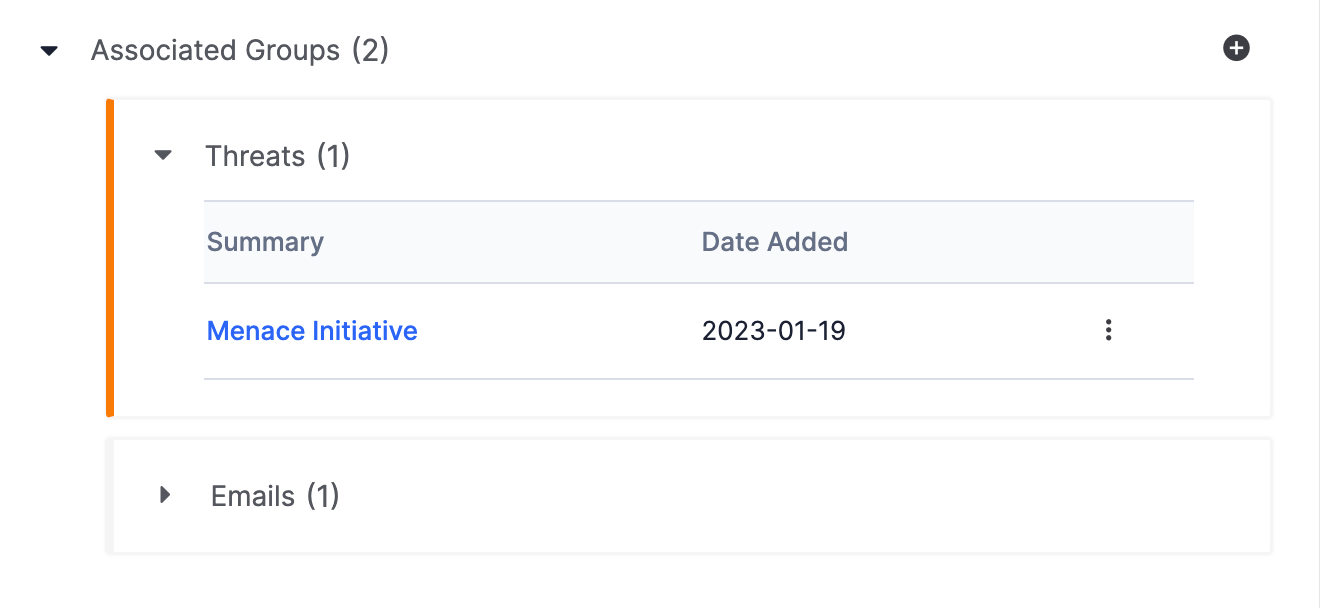
Click the link in the Summary column, or click the Group’s vertical ellipsis and select Details, to display the Group’s Details drawer.
Adding Group Associations
Click Add Associated Groupat the top right of the Associated Groups section to associate one or more Groups to the Artifact. The Add Related Intelligence drawer will be displayed, showing all Groups that are not already associated to the Artifact (Figure 7).
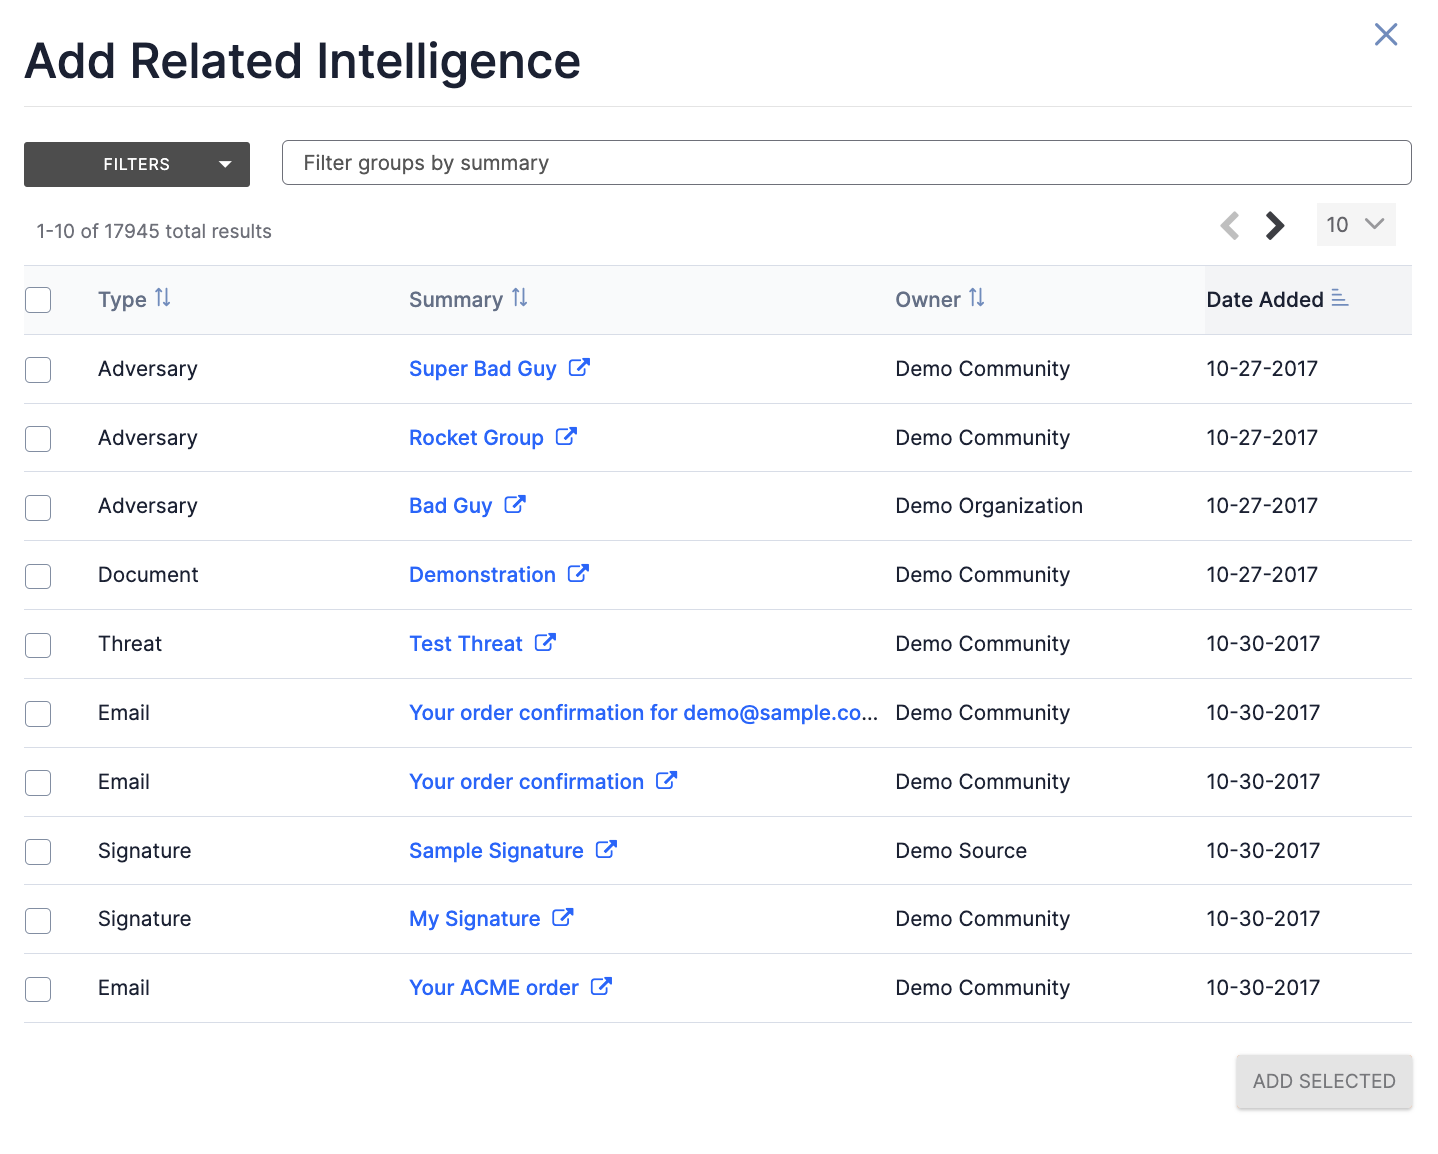
- Select one or more Groups to associate to the Artifact.
- To filter Groups by type, creation date, last modified date, and, if cross-owner associations are enabled, owner, use the FILTERS selector; to filter Groups by summary, use the search bar.
- Click the ADD SELECTED button to associate the selected Group(s) to the Artifact.
Removing Group Associations
Click a Group’s vertical ellipsis and select Dissociate to dissociate the Group from the Artifact. The dissociation will happen immediately, and you will not be prompted for confirmation.
Potentially Associated Indicators
The Potentially Associated Indicators section displays the ThreatConnect owners (i.e., Organization, Communities, and Sources) in which an Indicator with the same summary and type as the Artifact exists (Figure 8). If no such Indicators exist, this section will not be displayed when viewing the Artifact’s details.
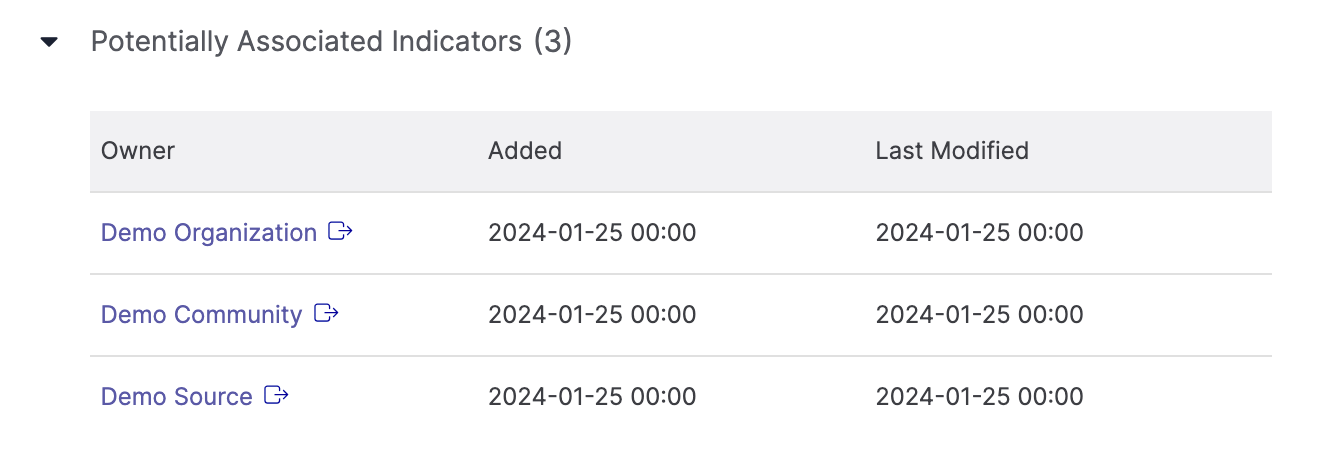
In the Potentially Associated Indicators section, you can review the Indicators suggested as potential associations and determine whether to associate them to the Artifact (i.e., by adding them to the Associated Indicators section; see the “Associated Indicators” section for more information). To view the Details drawer for an Indicator in one of the owners listed in the table, click the owner’s name in the Owner column.
When viewing a potentially associated Indicator’s Details drawer, you can review the Groups listed in the Associated Intel section and the Indicators listed in the Associated Indicators section and determine whether to also associate them to the Artifact as well. Creating these associations is one of the primary ways to connect information gathered within a Workflow Case to your threat intelligence data.
Potentially Associated Groups
The Potentially Associated Groups section displays Groups, categorized by type, suggested as associations for the Artifact (Figure 9). These Groups are suggested as associations because they meet one or both of the following conditions, depending on how your System Administrator configured potential associations for your ThreatConnect instance:
- The Group is associated to an Indicator that matches the type and summary of the Artifact. Groups that meet this condition will be suggested as associations only if your System Administrator set the potential associations system setting to Matched or Both.
- The Group is associated to an Indicator associated to the Case to which the Artifact belongs. Groups that meet this condition will be suggested as associations only if your System Administrator set the potential associations system setting to Associated or Both.
If no such Groups exist, this section will not be displayed when viewing the Artifact’s details.
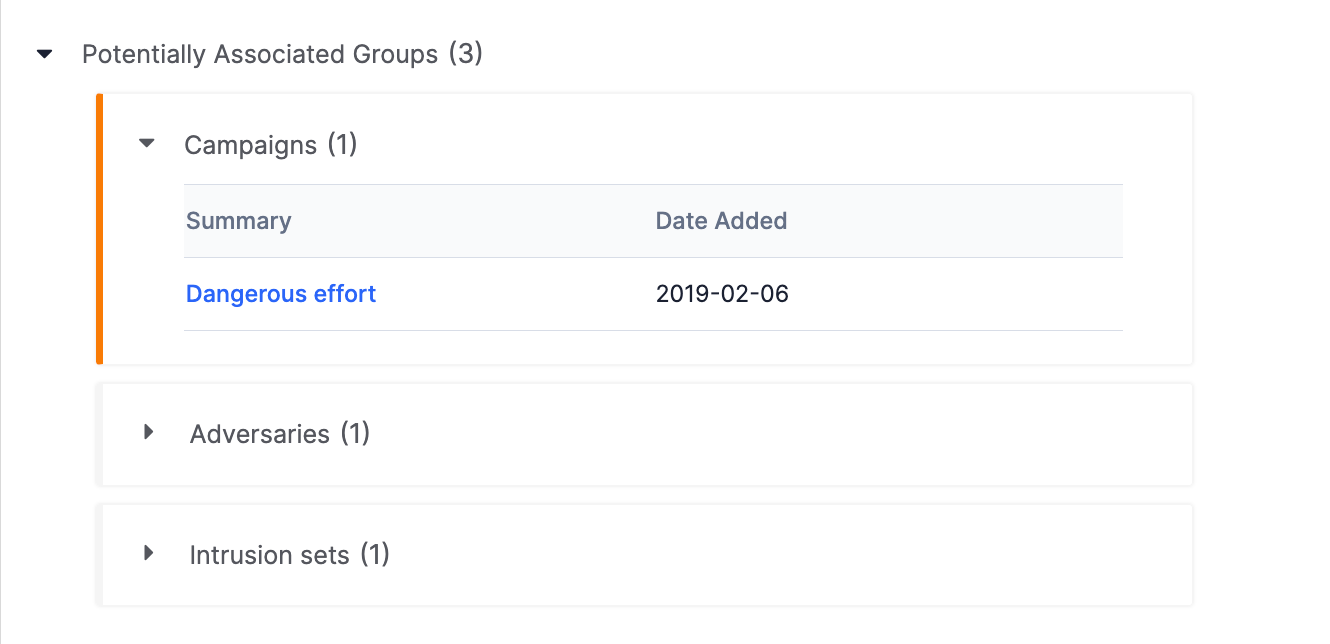
In the Potentially Associated Groups section, you can review the Groups suggested as associations and determine whether to associate them to the Artifact (i.e., by adding them to the Associated Groups section; see the “Associated Groups” section for more information). When a Group type’s section is expanded, the summary and creation date for each Group of that type will be displayed. Click the link in the Summary column to display the Group’s Details drawer.
When viewing a potentially associated Group’s Details drawer, you can review the Groups listed in the Associated Intel section and the Indicators listed in the Associated Indicators section to determine whether to associate them to the Artifact as well. Creating these associations is one of the primary ways to connect information gathered within a Workflow Case to your threat intelligence data.
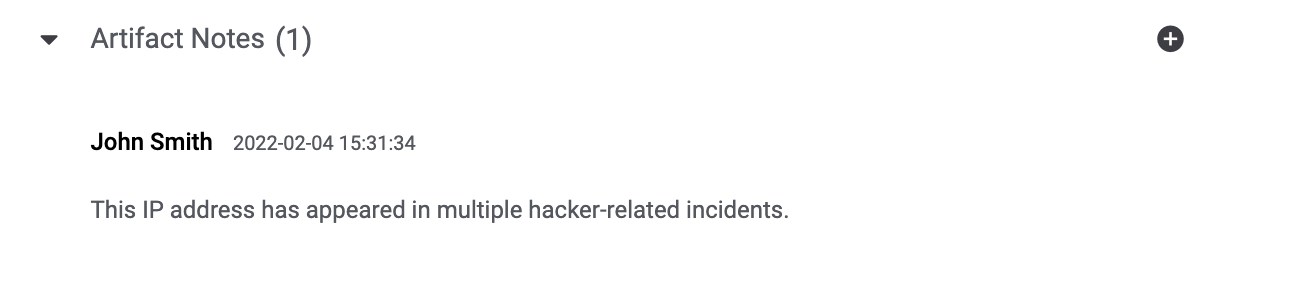
Artifact Notes
The Artifact Notes section displays Notes added to the Artifact (Figure 10).
Hovering over a Note in this section will display the following options:
 : Click the vertical ellipsis and select Remove to remove the Note.
 : Click this icon to preview the Note.
 : Click this icon to edit the Note.
Adding Notes to an Artifact
To add a new Note to the Artifact, click Add Artifact Notesat the top right of the Artifact Notes section.
ThreatConnect® is a registered trademark, and CAL™ is a trademark, of ThreatConnect, Inc.
VirusTotal™ is a trademark of Google, Inc.
20123-05 v.05.A