You can use Layout Elements sections to include headers and footers in a report and organize the report’s contents.
To add a Layout Elements section to a report, click the + Add Section button along the top of the Report Editor, or click the + Add Above or + Add Below button when hovering over an existing section added to the report, and then select a Layout Elements section (Figure 1). Available sections include Report Header, Report Footer, Divider, and Page Break.
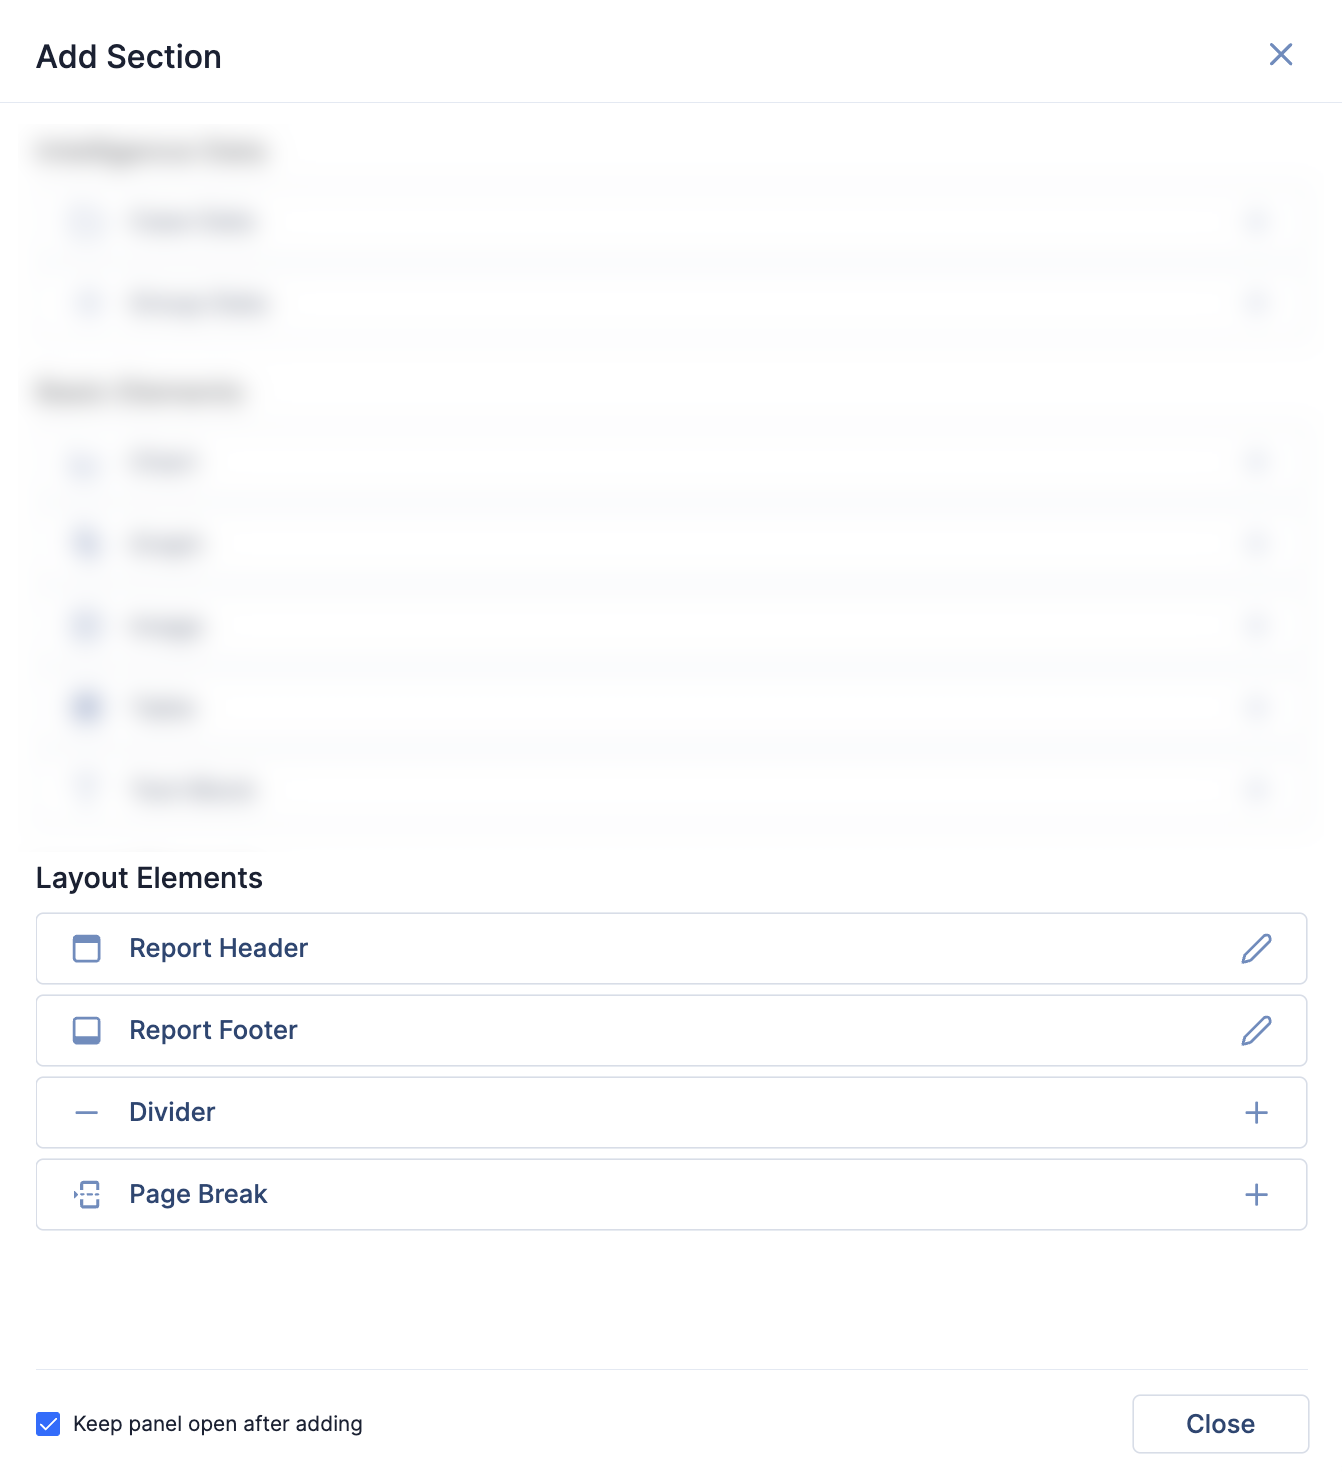
Report Header
The Report Header section can be used to display a header containing text or an image in the report. If adding a header containing an image, the image file must meet the following conditions:
- File type: PNG, JPG, or JPEG file
- Maximum file size: 500 kilobytes (KB)
- Maximum width: 650 pixels
- Maximum height: 60 pixels
To add this section to a report, select Report Header from the Add Section drawer (Figure 1). The Add Report Header menu will be displayed (Figure 2).

- Header Type: Select the header’s type. Available header types include the following:
- Text: Select this option to add a header containing text to the report.
- Upload image: Select this option to add a header containing an image to the report.
- Alignment: Select the alignment of the header’s contents.
- Header Text: If you selected Text as the header’s type, a Header Text field will be displayed. Enter the header’s text into this field. Text-based headers can contain a maximum of 40 characters and are displayed at a font size of 36 pixels.
- Drop image or click to select image.: If you selected Upload image as the header’s type, a Drop image or click to select image. box will be displayed. Drag and drop a file into the box, or click the box to browse for and select a file. If the image was successfully uploaded, a preview of it will be displayed below the Drop image or click to select image. box; otherwise, an error message will be displayed below the Drop image or click to select image. box indicating why the image was not uploaded.
- Click the Add button to add the section to the report.
You can add only one Report Header section to a single report. If this section has been added to a report, an Edit icon will be displayed to the right of the Report Header option in the Add Section drawer (Figure 1). In this case, selecting Report Header will allow you to edit the configuration of the existing Report Header section.
Report Footer
The Report Footer section can be used to display a footer containing text or an image in the report. If adding a footer containing an image, the image file must meet the following conditions:
- File type: PNG, JPG, or JPEG file
- Maximum file size: 500 KB
- Maximum width: 650 pixels
- Maximum height: 30 pixels
To add this section to a report, select Report Footer from the Add Section drawer (Figure 1). The Add Report Footer menu will be displayed (Figure 3).
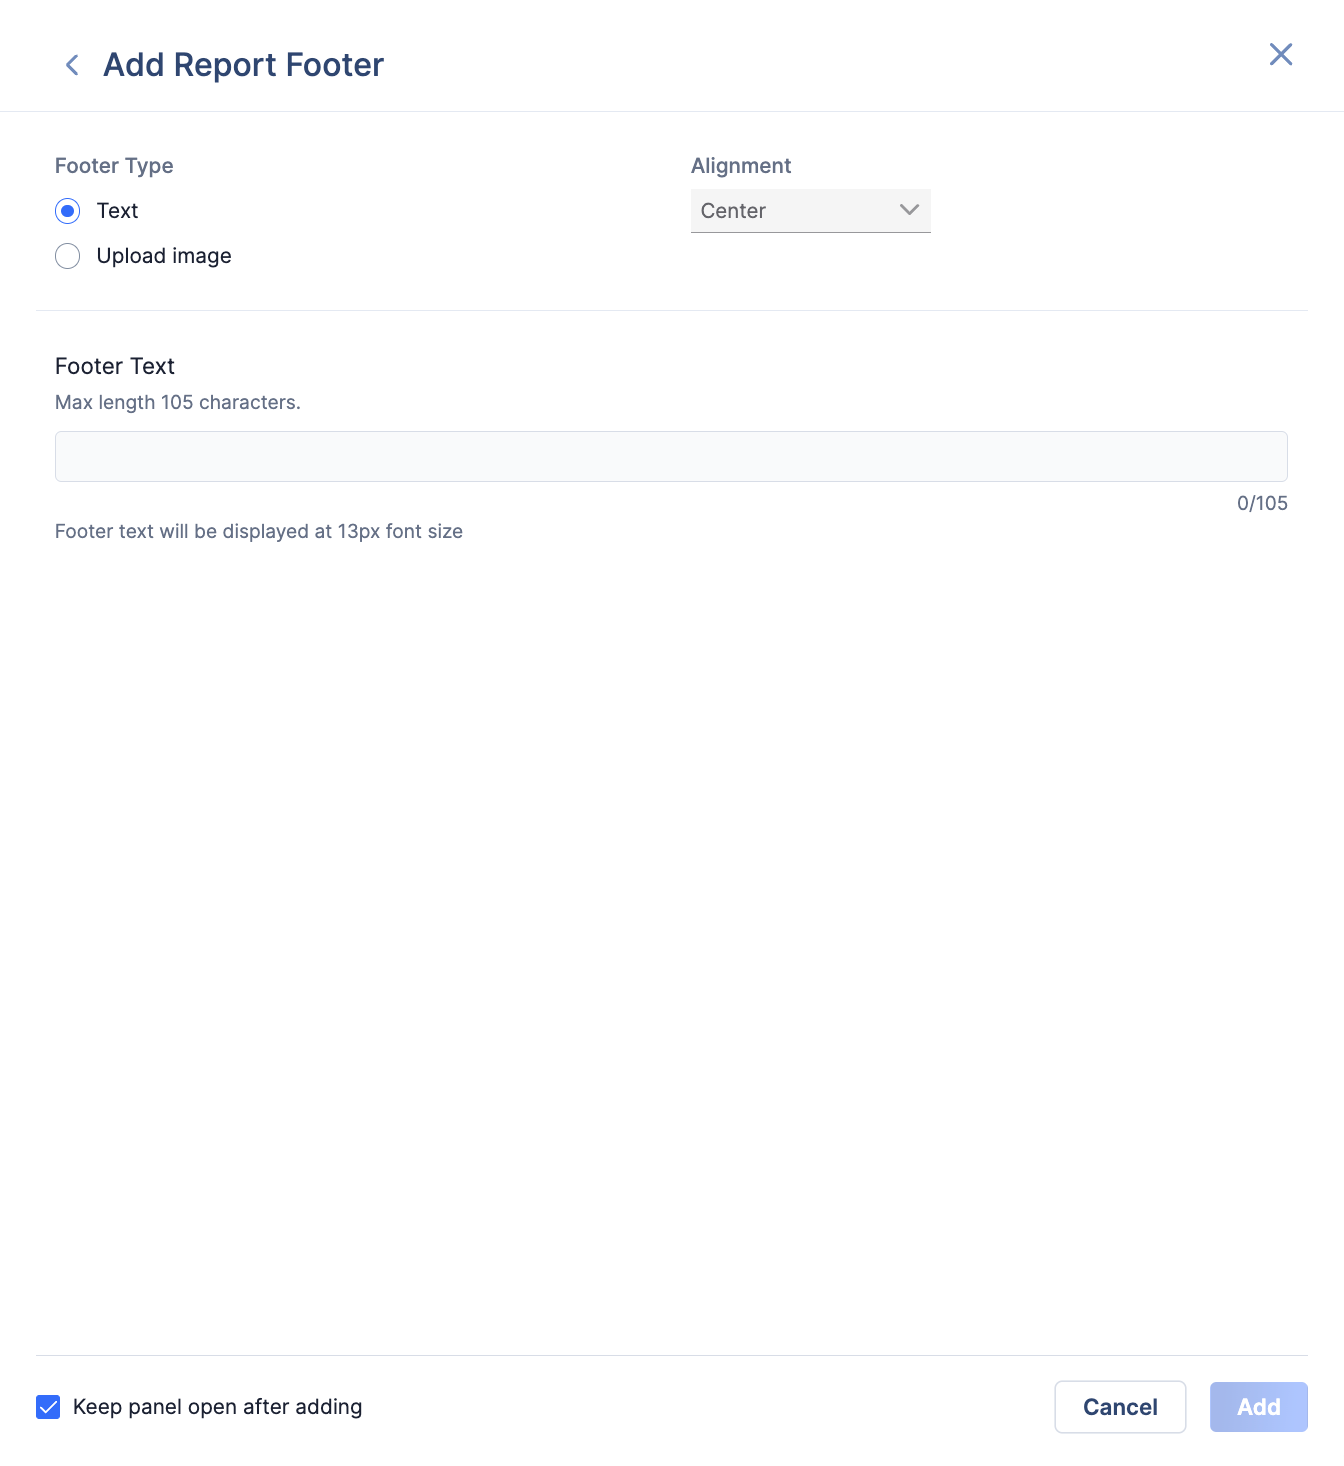
- Footer Type: Select the footer’s type. Available footer types include the following:
- Text: Select this option to add a footer containing text to the report.
- Upload image: Select this option to add a footer containing an image to the report.
- Alignment: Select the alignment of the footer’s contents.
- Footer Text: If you selected Text as the footer’s type, a Footer Text field will be displayed. Enter the footer’s text into this field. Text-based footers can contain a maximum of 105 characters and are displayed at a font size of 13 pixels.
- Drop image or click to select image.: If you selected Upload image as the footer’s type, a Drop image or click to select image. box will be displayed. Drag and drop a file into the box, or click the box to browse for and select a file. If the image was successfully uploaded, a preview of it will be displayed below the Drop image or click to select image. box; otherwise, an error message will be displayed below the Drop image or click to select image. box indicating why the image was not uploaded.
- Click the Add button to add the section to the report.
You can add only one Report Footer section to a single report. If this section has been added to a report, an Editicon will be displayed to the right of the Report Footer option in the Add Section drawer (Figure 1). In this case, selecting Report Footer will allow you to edit the configuration of the existing Report Header section.
Divider
The Divider section can be used to add a horizontal rule to the report. To add this section to a report, select Divider from the Add Section drawer (Figure 1).
Page Break
The Page Break section can be used to split sections of the report to different pages. To add a Page Break section to a report, select Page Break from the Add Section drawer (Figure 1).
ThreatConnect® is a registered trademark of ThreatConnect, Inc.
20144-05 v.02.A