Tag Normalization
- 18 Mar 2025
- 6 Minutes to read
-
Print
-
DarkLight
-
PDF
Tag Normalization
- Updated on 18 Mar 2025
- 6 Minutes to read
-
Print
-
DarkLight
-
PDF
Article summary
Did you find this summary helpful?
Thank you for your feedback!
Overview
System Administrators can create Tag normalization rules in ThreatConnect® that convert one or more synonymous Tags to a main Tag. When a Tag normalization rule is enabled, existing Tags in all owners on the ThreatConnect instance that match one of the rule’s synonymous Tags are converted to the main Tag at that time, and new Tags created on the ThreatConnect instance that match one of the rule’s synonymous Tags are converted to the main Tag whenever they are applied to Indicators, Groups, Victims, and Workflow Cases. This feature simplifies the management and consolidation of Tags and makes it easier for analysts to categorize objects accurately and uniformly.
Before You Start
User Roles
- To create and manage Tag normalization rules, your user account must have a System role of Administrator.
- To view main Tags on the Browse screen in owners to which you have access, your user account can have any Organization role.
- To view the legacy Details screen for a main Tag in an owner to which you have access, your user account can have any Organization role.
- To identify main Tags applied to an object, your user account can have any Organization role.
Tag Normalization Rules
Creating and Enabling Tag Normalization Rules
- Log into ThreatConnect with a System Administrator account.
- Hover over Settings
 on the top navigation bar and select System Settings.
 - Select the Tags tab on the System Settings screen.
- Retain the selection of Normalization from the menu on the left side of the Tags screen to access the Normalization screen (Figure 1).
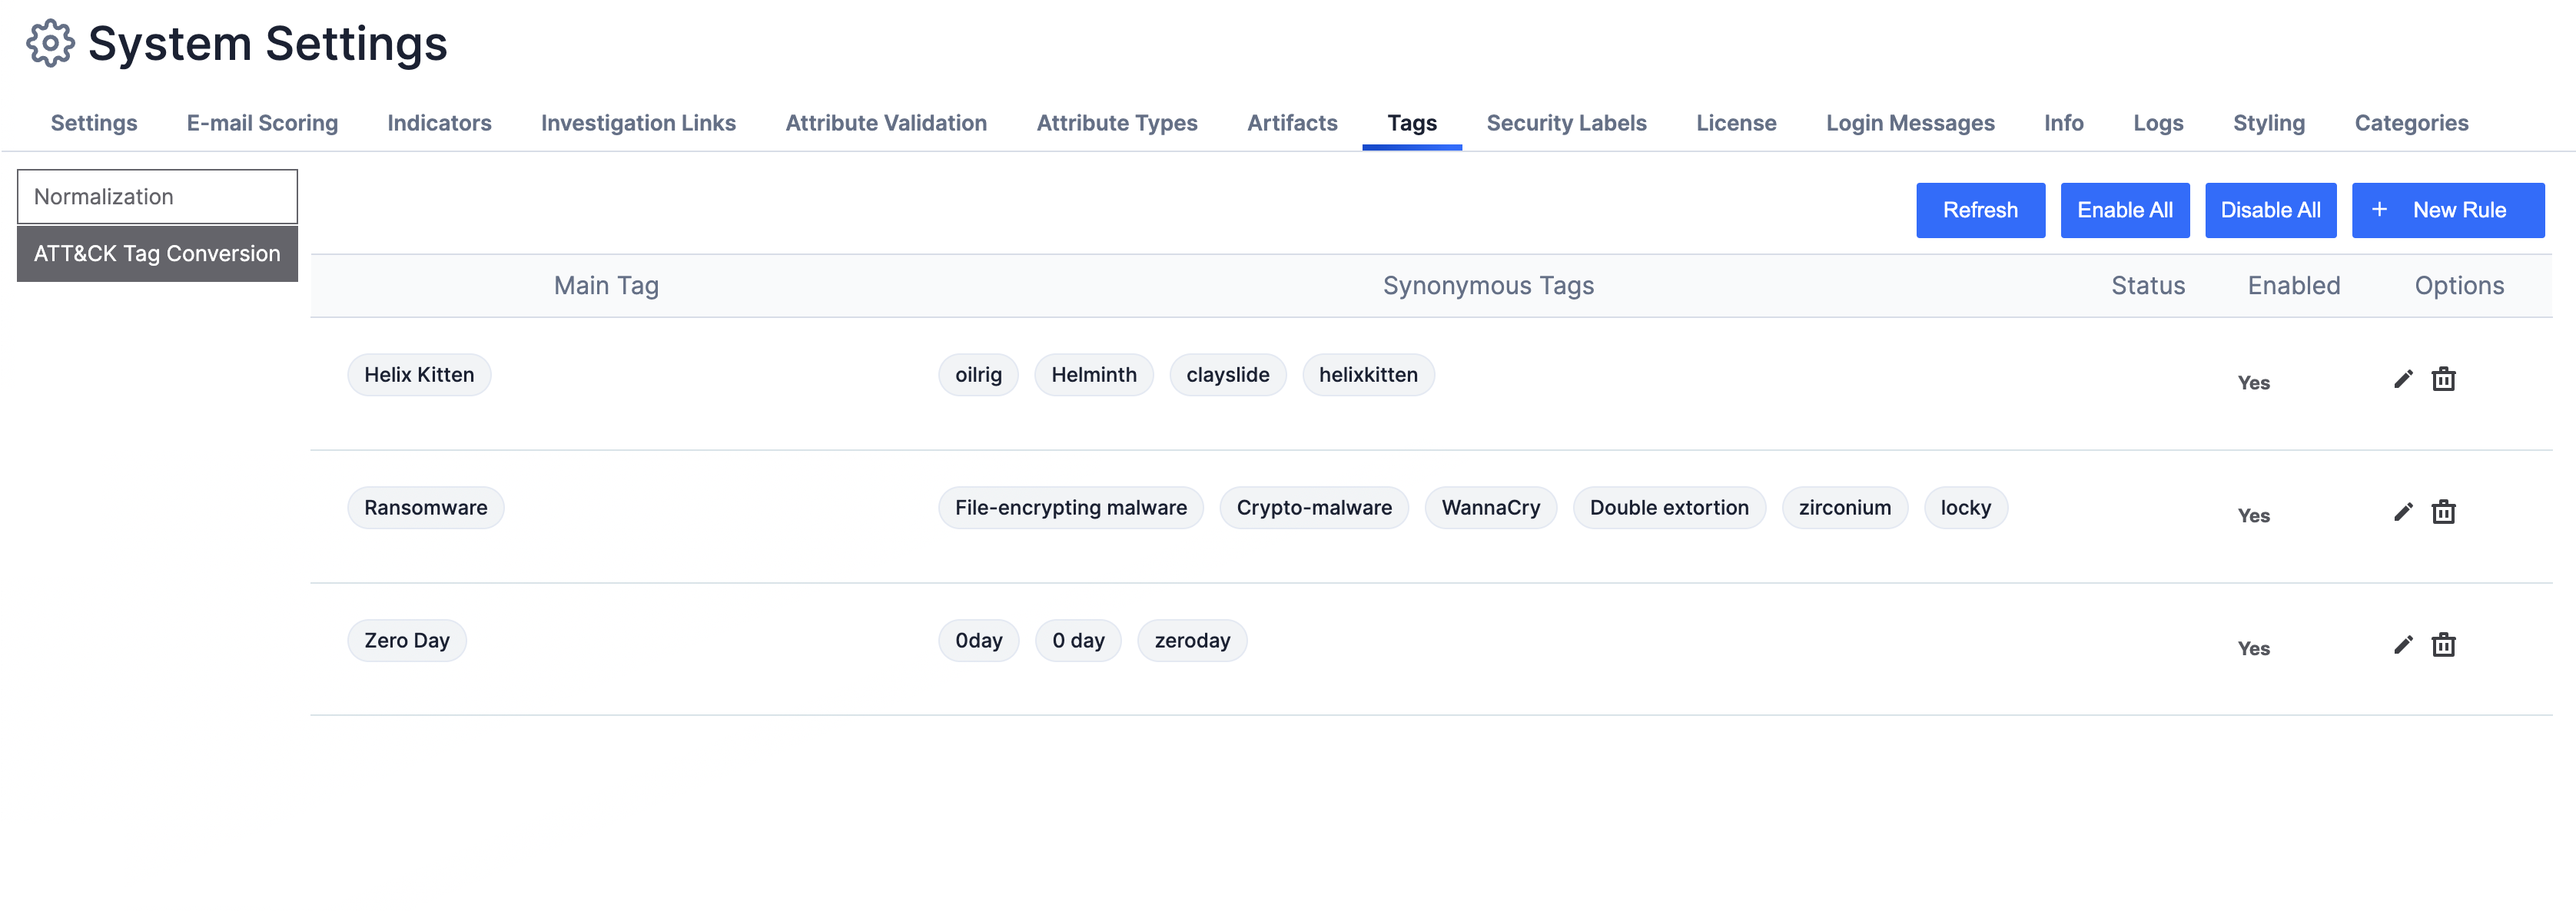
- Click + New Rule at the top right of the Normalization screen.
- Fill out the fields on the Tag Rule window (Figure 2) as follows:
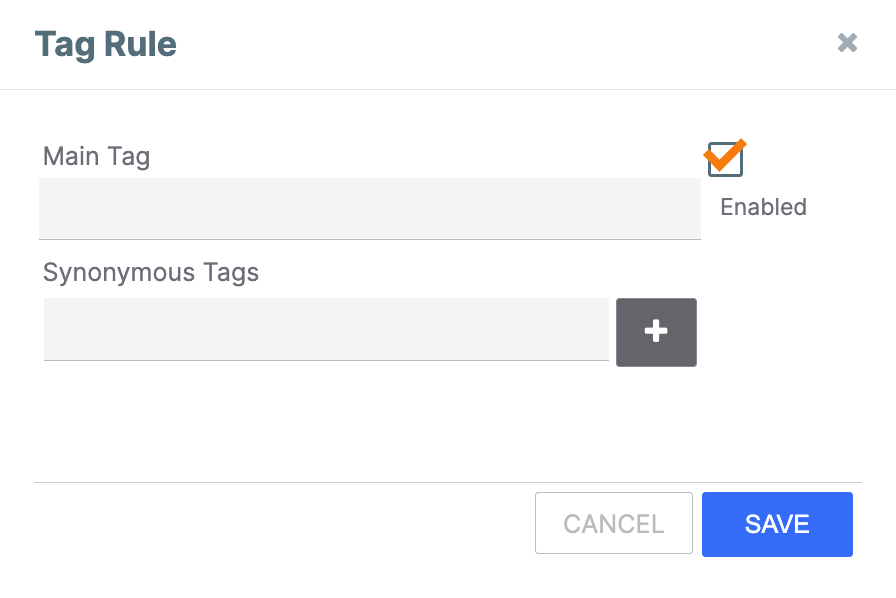
- Main Tag: Enter the main Tag to which the synonymous Tags will be converted. If there are existing Tags that match part or all of the entered text, a menu with those Tags will be displayed. In this scenario, you can select a Tag from the menu to add it as the main Tag.NoteWhenever a main Tag is applied to an object, the Tag’s name will match the letter case used when it was entered on the Tag Rule window.
- Synonymous Tags: Enter one or more Tags to convert to the main Tag. After entering each Tag, click Add
 or press Enter on your keyboard to add it to the list of synonymous Tags. Because Tag normalization rules do not maintain case sensitivity when searching for synonymous Tags, you can use any letter case when entering them. For example, if you enter “ransomware” as a synonymous Tag, any form of that Tag (e.g., Ransomware, RANSOMWARE, rAnSoMwArE, etc.) will be converted to the main Tag listed in the rule.ImportantYou cannot use ATT&CK® Tags as synonymous Tags in a Tag normalization rule.
 - Enabled: Select this checkbox to enable the Tag normalization rule. (See Step 8.) If you do not select this checkbox, you can still save the rule and enable it later, either by editing it, selecting the Enabled checkbox, and saving it again or by using the Enable All button to enable all rules at one time.
- Main Tag: Enter the main Tag to which the synonymous Tags will be converted. If there are existing Tags that match part or all of the entered text, a menu with those Tags will be displayed. In this scenario, you can select a Tag from the menu to add it as the main Tag.
- Click SAVE on the Tag Rule window.ImportantThe main Tag in one Tag normalization rule cannot be a synonymous Tag in another rule. Similarly, a synonymous Tag in one Tag normalization rule cannot be a synonymous Tag in another rule. Attempting to save a Tag normalization rule that violates either of these conditions will cause an error message to be displayed in the Tag Rule window.
- If you selected the Enabled checkbox on the Tag Rule window, the Enable Rule window (Figure 3) will be displayed after you click SAVE on the Tag Rule window. Click Enable & Merge Tags on the Enable Rule window to enable the Tag normalization rule and convert all existing synonymous Tags on the ThreatConnect instance to the main Tag.
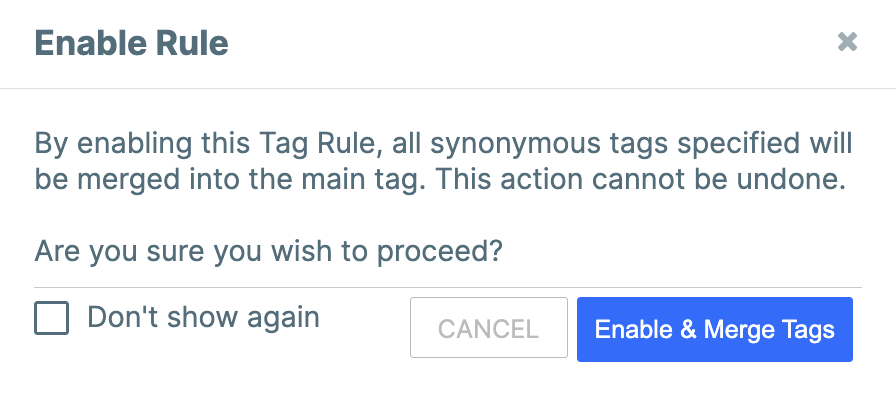 WarningThe conversion process cannot be stopped once started, is irreversible, and applies to Tags in all owners on the ThreatConnect instance. As part of the conversion process, all existing synonymous Tags are replaced by the main Tag and removed from the ThreatConnect instance.
Viewing Conversion Status
After you enable a Tag normalization rule, the Status column on the Normalization screen (Figure 1) will display the status of the conversion process. If the process is queued or in progress, a Queued status will be displayed. Once the process is complete, the number of synonymous Tags converted to the main Tag will be displayed (e.g., 7 items merged). Click Refresh at the top right of the screen to refresh the Status column.
Enabling All Tag Normalization Rules
To enable all Tag normalization rules at once and start the conversion process for each one, click Enable All at the top right of the Normalization screen (Figure 1), and then click Enable & Merge on the Enable All window.
Disabling All Tag Normalization Rules
To disable all Tag normalization rules at once, click Disable All at the top right of the Normalization screen (Figure 1). All rules will be disabled immediately, and you will not be prompted for confirmation.
Note
Disabling a Tag normalization rule does not reverse the effects of the rule and restore previously converted synonymous Tags. Instead, it stops the rule from converting newly created Tags that match a synonymous Tag listed in the rule into the main Tag.
Editing Tag Normalization Rules
Click Edit in the Options column of the Normalization screen (Figure 1) to edit a Tag normalization rule. If the rule is enabled, you will be prompted to restart the conversion process after saving your changes.
Deleting Tag Normalization Rules
Click Delete in the Options column of the Normalization screen (Figure 1) to delete a Tag normalization rule. When you delete a rule, any newly created Tags that match a synonymous Tag listed in the rule will no longer be converted to the main Tag.
Note
Deleting a Tag normalization rule does not reverse the effects of the rule and restore previously converted synonymous Tags.
Viewing Main Tag Details
Browse Screen
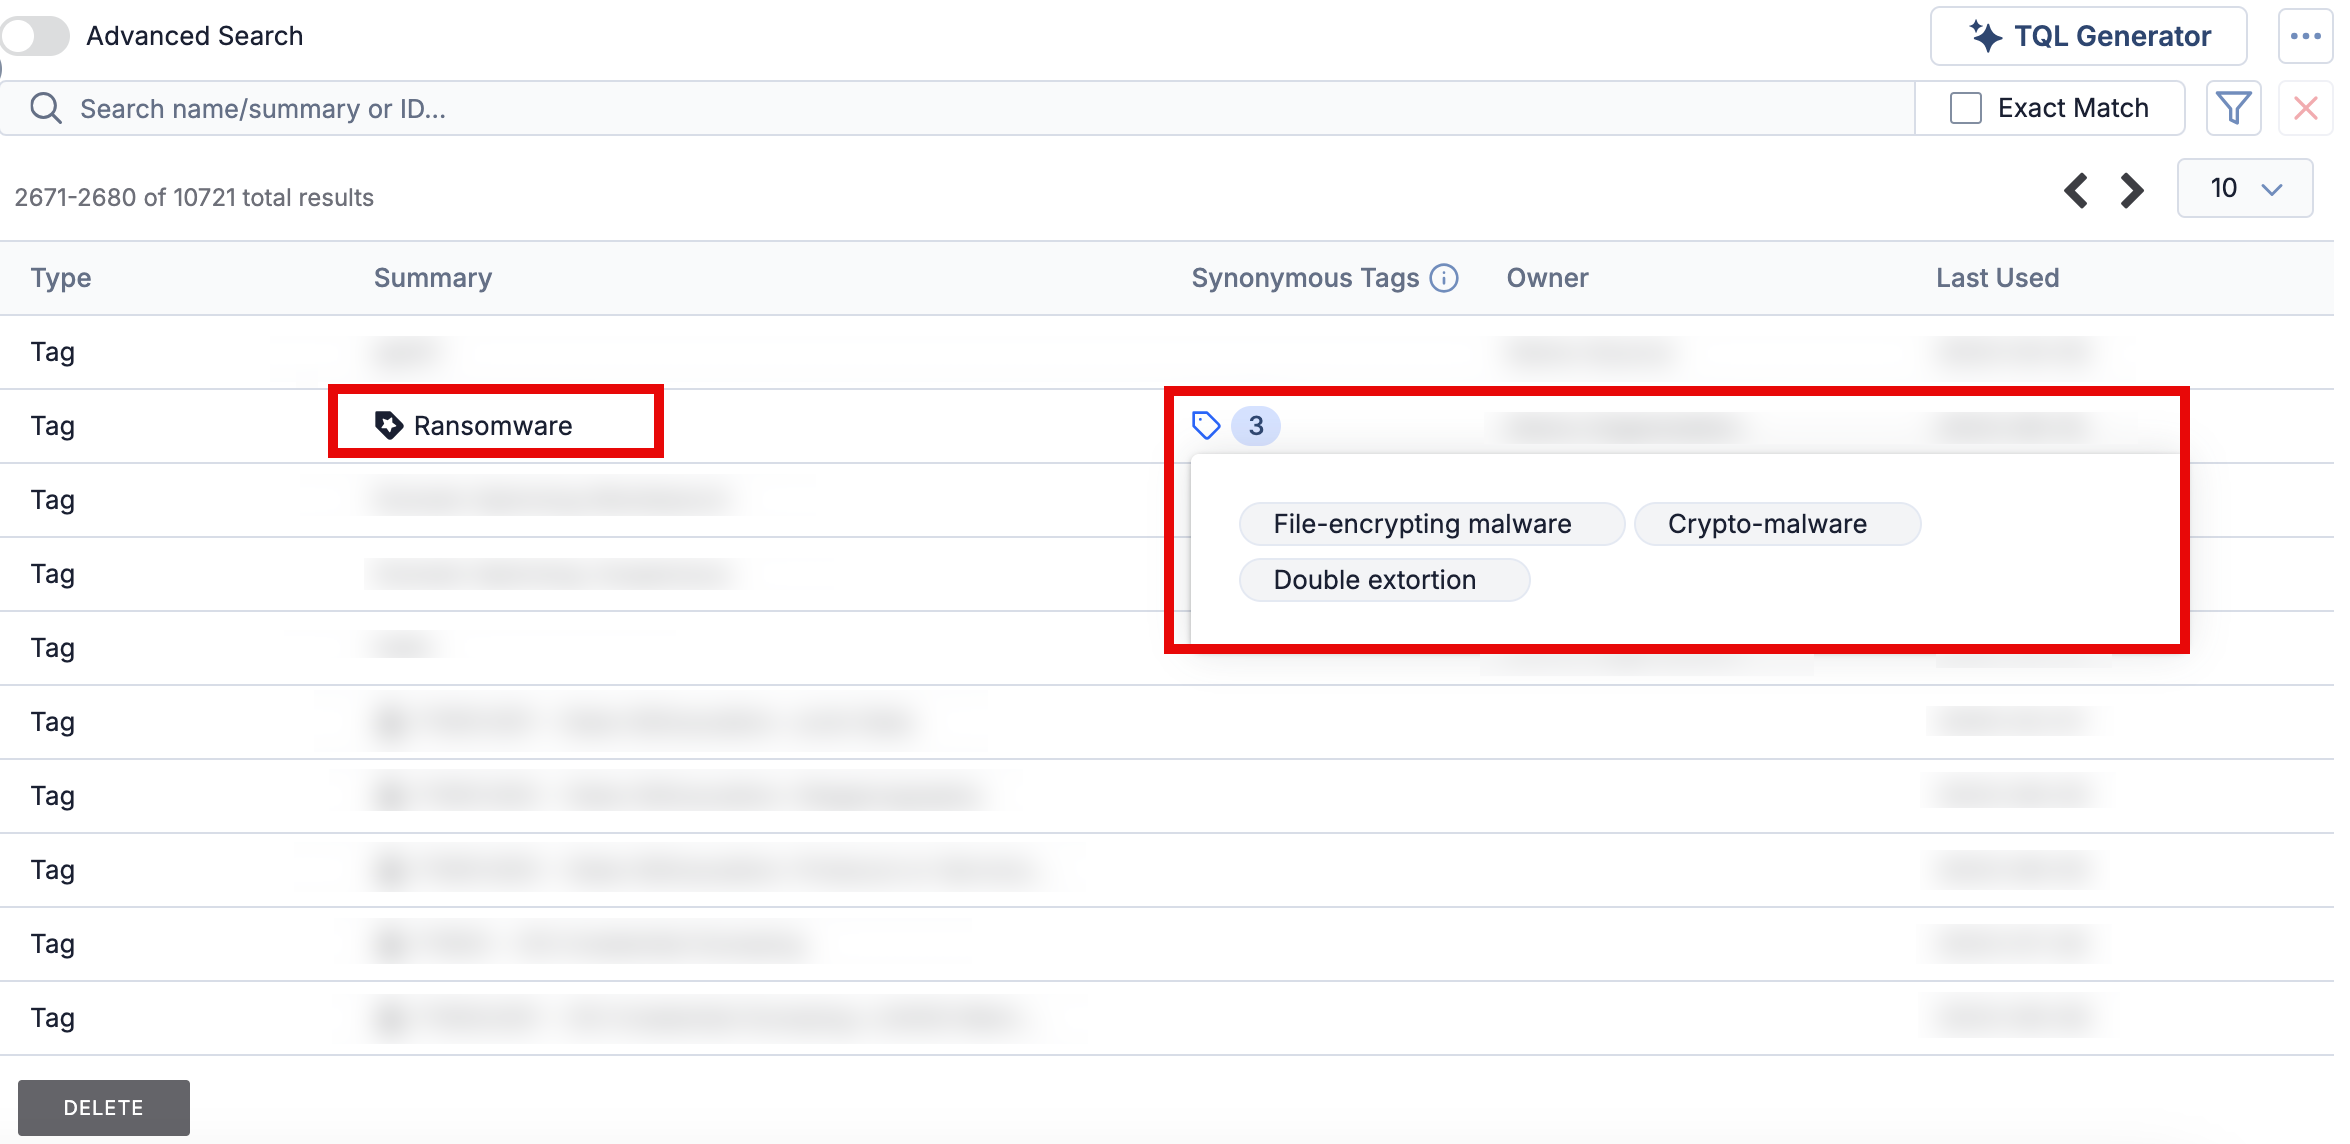
When viewing Tags on the Browse screen, main Tags have a icon displayed to the left of their name in the Summary column. The number of synonymous Tags listed in the corresponding Tag normalization rule is displayed in the Synonymous Tags column. Click the number to view the synonymous Tags associated with the main Tag (Figure 4)
Note
To view only main Tags on the Browse screen, turn on the Advanced Search toggle above the search bar to switch to the advanced search feature, ensure Tags is selected in the dropdown to the right of the toggle, enter normalized = true into the search bar, and click Search to the right of the search bar or press Enter on your keyboard.
to the right of the search bar or press Enter on your keyboard.Legacy Details Screen
On a main Tag’s legacy Details screen, all synonymous Tags listed in the corresponding Tag normalization rule are displayed on the Synonymous Tags card (Figure 5).

Identifying Main Tags Applied to Objects
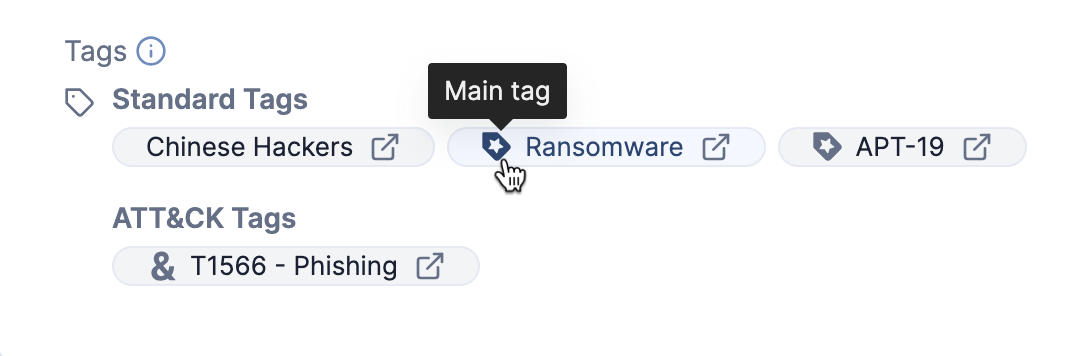
On an object’s Details screen and Details drawer , or while viewing a Case, main Tags have a icon displayed to the left of their name (Figure 6). This icon is also displayed when applying Tags to an object, under the Standard Tags section.
Note
On the legacy Details screen, main Tags are not denoted with theicon.
icon.When you apply a newly created Tag to an object and it matches a synonymous Tag listed in a Tag normalization rule, it will be converted to the main Tag listed in the rule, and a message stating “One or more tags have been changed due to system tag normalization rules” will be displayed at the lower-left corner of the screen.
ThreatConnect® is a registered trademark of ThreatConnect, Inc.
MITRE ATT&CK® and ATT&CK® are registered trademarks of The MITRE Corporation.
20155-01 v.01.C
Was this article helpful?
