Overview
In ThreatConnect®, you can receive push notifications and email updates when changes are made to Groups, Indicators, Intelligence Requirements, Tags, Tracks, Victims, and other items that you want to track. You can view notifications in the Notifications Center and configure them based on object type, priority level, and desired notification type (push vs. immediate email vs. daily-digest email).
You can follow an object and receive notifications when changes are made to it by navigating to its Details screen and toggling the Follow Item setting on. You can also follow your Organization, allowing you to receive updates and alerts on work done to your data. In addition, you can use the ThreatConnect Notification Playbook App to set up notifications.
Before You Start
| Minimum Role(s) |
|
|---|---|
| Prerequisites | None |
Notifications Center
Viewing Notifications
Click Notifications on the top navigation bar. The Notifications Center will be displayed (Figure 1).
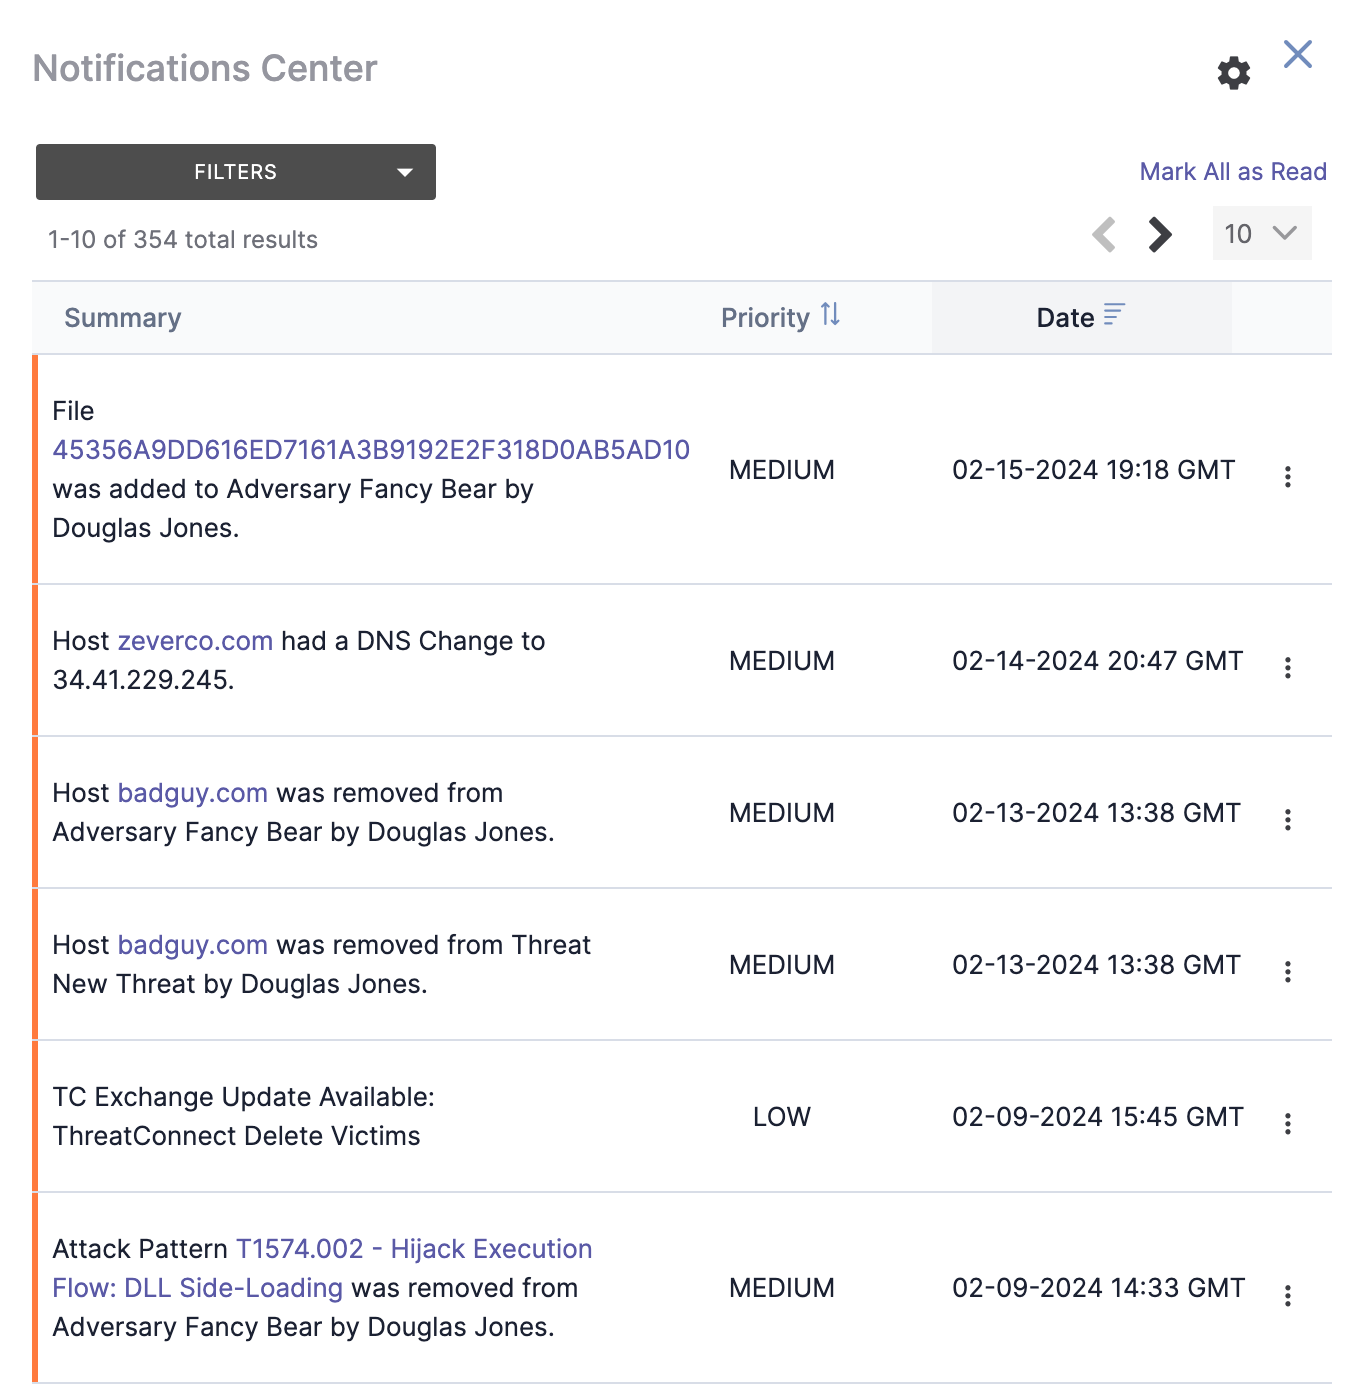
- Summary: This column displays a summary of the notification.
- Priority: This column displays the notification’s priority level (LOW, MEDIUM, or HIGH). Click the Priority column heading to sort the notifications by priority level.
- Date: This column displays the date and time when the notification was generated. Click the Date column heading to sort notifications by the date and time when they were generated.
Based on the type of notifications you’ve elected to receive and the number of unread notifications, the Notifications icon may appear as follows:
 : An orange circle containing a number at the top right of the icon indicates the number of unread push notifications.
 : An orange circle at the top right of the icon indicates that there are no unread push notifications, but there are other unread notifications.
- : If there is no orange circle at the top right of the icon, then there are no unread messages in the Notifications Center (although messages that have previously been read may still exist in the Notifications Center).
If there are unread push notifications when you hover the cursor over the Notifications icon, a summary of the unread push notifications will be displayed (Figure 2). See the “Notifications Settings” section for more information on push notifications.
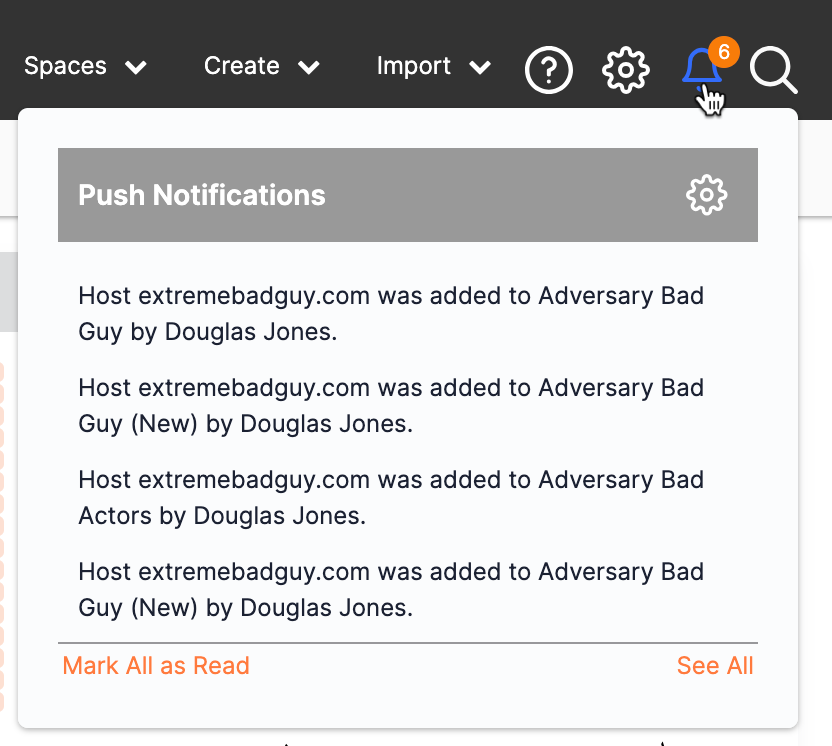
- Mark All as Read: Click this text to mark the notifications as read.
- See All: Click this text (or the Notifications icon) to view all the notifications in the Notifications Center (Figure 1).
Marking Notifications as Read
A vertical orange line to the left of an entry in the table indicates an unread notification. To mark a notification as read, click the vertical ellipsis in the rightmost column for the entry and select Mark Read. The orange line for that entry will disappear. To mark all notifications as read, click Mark All as Read at the upper-right corner of the Notifications Center.
Deleting Notifications
To delete a notification, click the vertical ellipsis in the rightmost column for the entry and select Delete.
Filtering Notifications
You can filter the table in the Notifications Center to show only notifications of a certain type or priority level, or only notifications that have been read or unread. Click the FILTERS selector at the top left of the Notifications Center to display a menu with the following options:
- Type: To filter notifications by type (i.e., the object or other kind of information being monitored for changes), select one of the following options from the Type dropdown:
- All: Show notifications for all item types.
- Contribute: Show only notifications for Groups being contributed to a Community or Source.
- Group: Show only notifications for changes made to Groups.
- Indicator: Show only notifications for changes made to Indicators.
- Post: Show only notifications for new posts.
- Tag: Show only notifications for changes made to Tags.
- Track: Show only notifications for changes made to Tracks.
- Victim: Show only notifications for changes made to Victims.
- Case: Show only notifications for changes made to Workflow Cases, , including Case assignments, Task assignments, and overdue notices for Tasks assigned to you.NoteWhen an Organization Administrator assigns multiple Cases to you via a bulk action, you will receive a single notification in the Notifications Center that provides the number of Cases assigned to you and a link to view all open Cases assigned to you (e.g., “You have been assigned 3 cases. My Open Cases”). In addition, a single email that contains this information will be sent to the email address associated with your ThreatConnect user account.
- TC Exchange: Show only notifications for installed TC Exchange Apps with a pending update available.
- Intel Requirement: Show only notifications for changes made to Intelligence Requirements.
- Priority: To filter notifications by priority level, select one of the following options from the Priority dropdown:
- All: Show notifications with any priority level.
- High: Show only notifications with a High priority level.
- Medium: Show only notifications with a Medium priority level.
- Low: Show only notifications with a Low priority level.
- Read/Unread: To filter notifications based on whether they have been read, select one of the following options from the Read/Unreaddropdown:
- All: Show read and unread notifications.
- Unread Only: Show only unread notifications.
- Read Only: Show only read notifications.
Notifications Settings
Click Settings at the upper-right corner of the Notifications Center. The Notifications Settings screen will be displayed in the drawer (Figure 3).
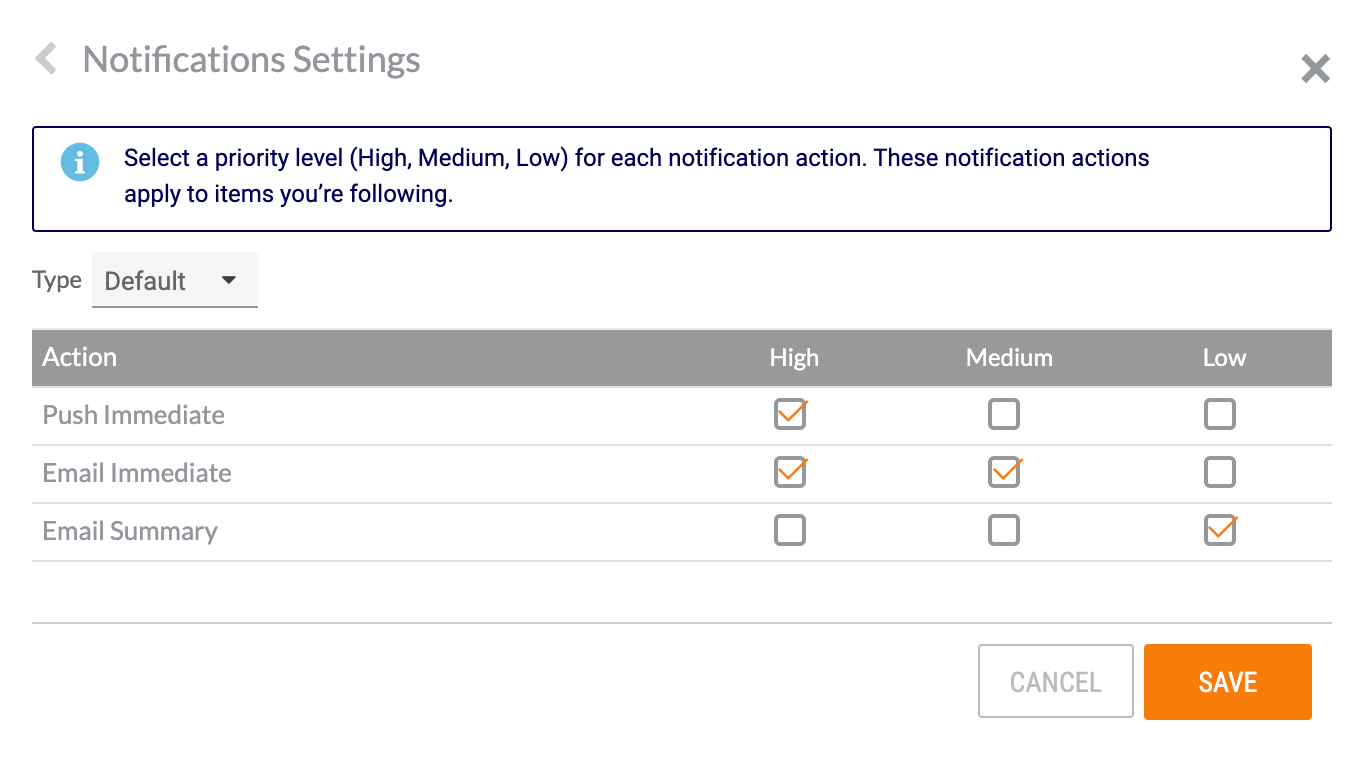
- Type: Select the type of notification to configure. Use the first option, Default, to configure the default settings for all types of notifications. Select any of the other options, which are the same options in the Type menu under the Filter dropdown menu in the Notifications Center (see the “Filtering Notifications” section), to configure the settings for notifications for that type of item.
- Select the desired checkboxes in the table to indicate the type(s) of notifications that should be sent for each priority level for the selected item type:
- Push Immediate: Send a push notification to the Notifications Center.
- Email Immediate: Send an email immediately when a change occurs.
- Email Summary: Include information about the change in a daily-digest summary email. The time of the daily digest is configured on the My Profile screen, as detailed in the “Setting the Email Summary Daily-Digest Delivery Time” section.NoteTo follow a particular type without receiving any of the delivery actions, clear all checkboxes. Notifications for that type will be displayed in the Notifications Center, but no push or email notifications will be sent.NoteTo modify the notification settings for notifications generated when an Organization Administrator assigns you to multiple Cases via a bulk action, select Case as the type and then select the desired checkboxes in the Medium column.
- Click the SAVE button to save any changes.
Following Items
You can choose to receive notifications on changes made to an Indicator, Group, Tag, Track, or Victim by navigating to its Details screen and toggling the Follow Item setting on. For Indicators and Groups, you can toggle this setting on from the new and legacy Details screen; for Tags, Tracks, and Victims, you can toggle this setting on from the legacy Details screen only.
After toggling the Follow Item setting on for an object, you can configure the desired notification priority level. The actions taken for each priority level for the type of item are configured in the Notifications Settings screen .
New Details Screen
- Navigate to the Details screen for an Indicator or Group.ImportantThe new Details screen is not currently available for Email, Signature, and Task Groups; Tags; Tracks; and Victims. As such, you can follow these object types on the legacy Details screen only.
- In the Details screen header, toggle the Follow Item setting on. Options for setting the notification priority will be displayed (Figure 4).
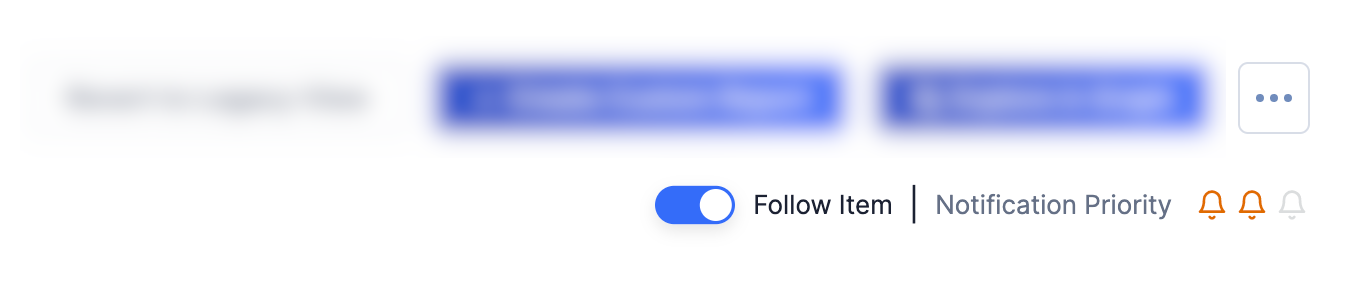
- Use the bell
 icons to set the desired notification priority level, where Low is oneicon, Medium is twoicons, and High is threeicons.
Legacy Details Screen
- Navigate to the legacy Details screen for an Indicator, Group, Tag, Track, or Victim.
- In the legacy Details screen header, select the Follow Item checkbox. A Notification Priority dropdown menu will be displayed to the left of the checkbox (Figure 5).
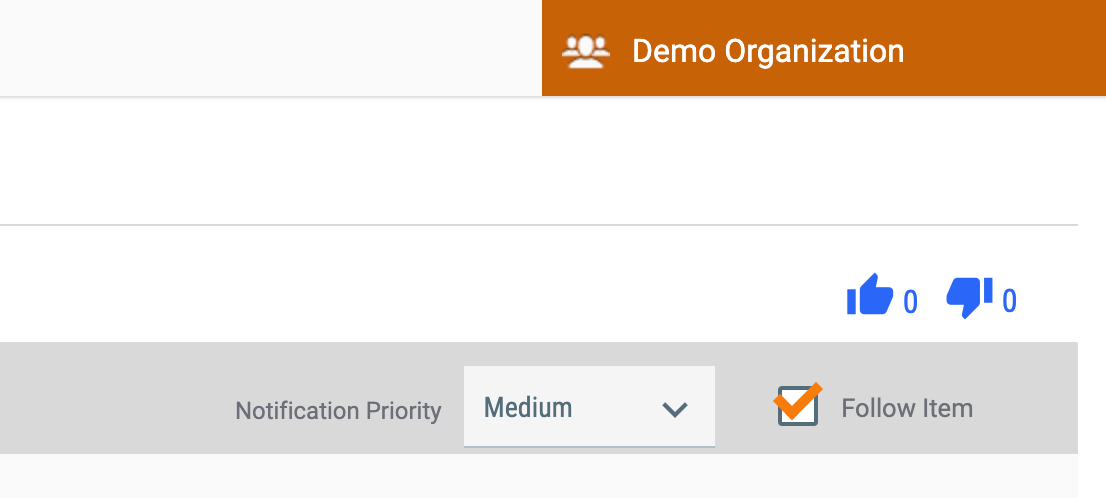
- Select the desired notification priority level. Available options include Low, Medium, or High.
Setting the Email Summary Daily-Digest Delivery Time
- Hover the cursor over Settings
 on the top navigation bar and select My Profile. The My Profile screen will be displayed with the Overview tab selected (Figure 6).
- Time Zone: Select your time zone.
- Summary E-mail Time: Select the desired email summary daily-digest time.
- Receive Post Reply Notification Emails: Select this checkbox to receive notifications when other users reply to your posts.
- Follow Organization Posts: Select this checkbox to follow posts in your Organization. After this checkbox is selected, a dropdown menu will be displayed (Figure 7) to set the level of notifications.
 NoteNotifications for replies to posts are not configurable by notification priority level, and they are not displayed in the Notifications Center. New notifications for replies to posts are indicated by an orange circle next to the Posts option on the top navigation bar.
 - Click the SAVE button.
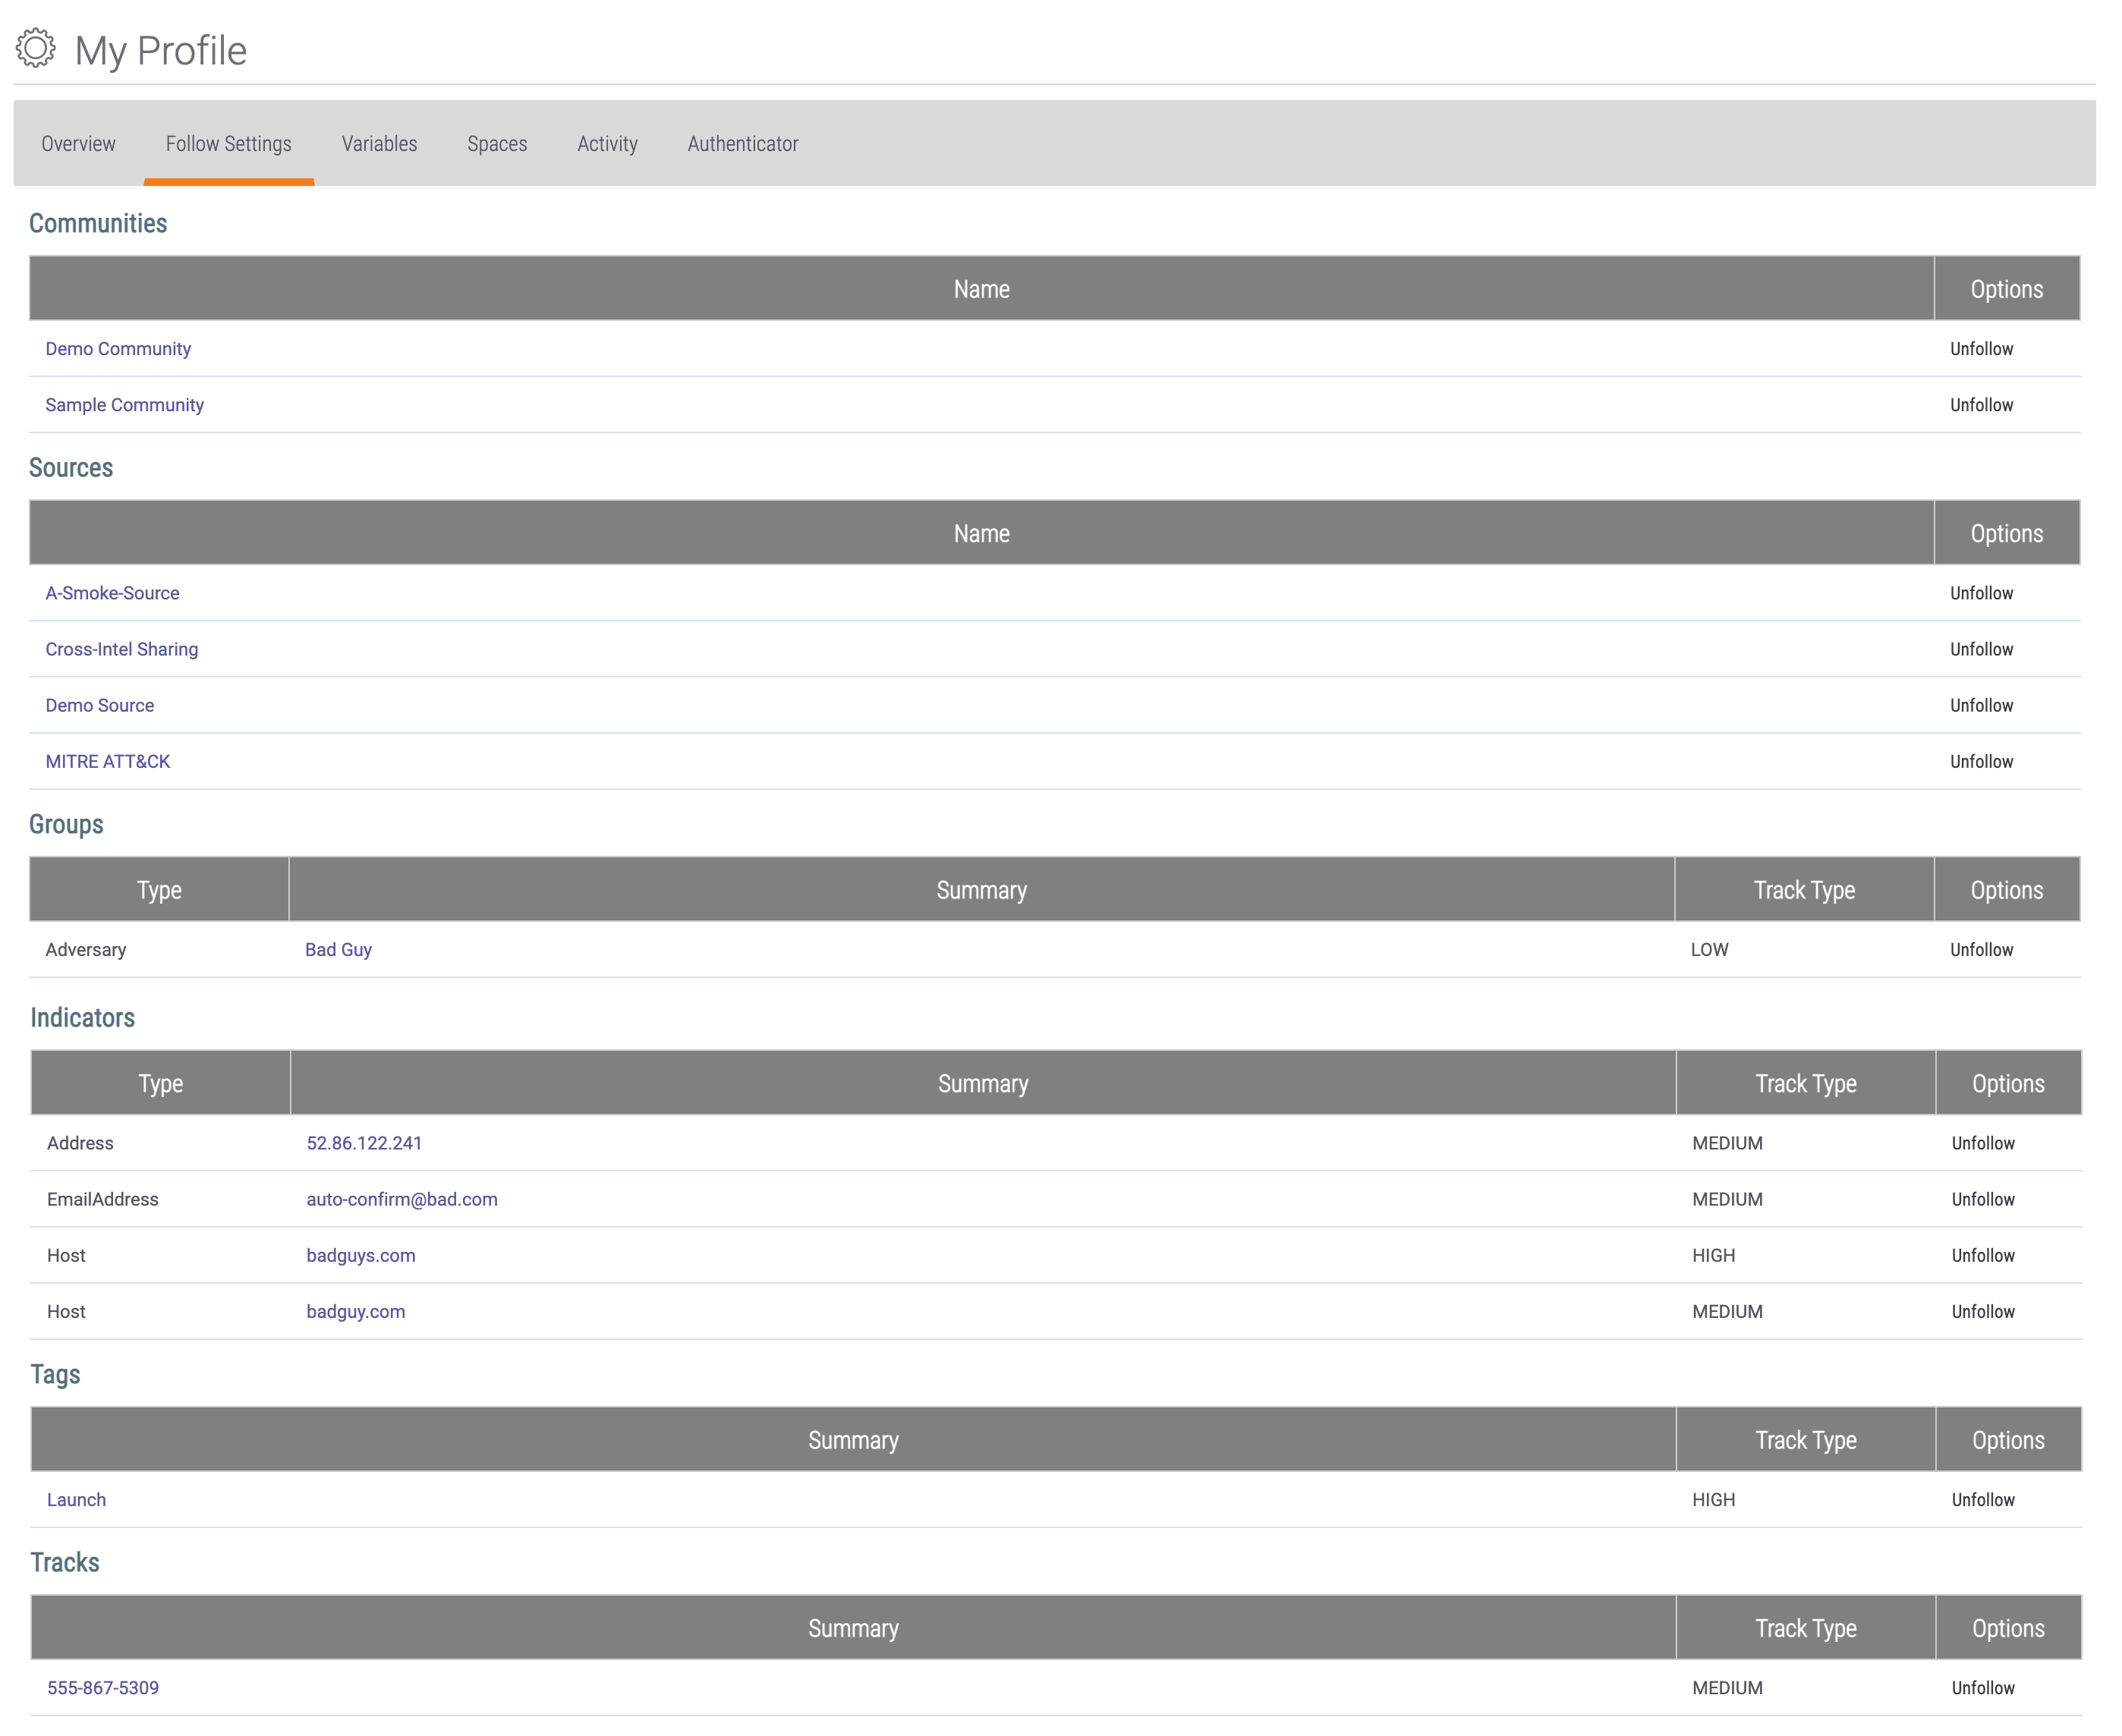
- Click the Follow Settings tab to manage the list of Communities, Sources, Groups, Indicators, Tags, and Tracks that you are following (Figure 8).
Configuring Follow Settings for Community Posts and Contributions
Organization Administrators can configure Follow settings for Community posts and contributions.
- On the top navigation bar, hover the cursor over Settingsand select Org Settings. The Organization Settings screen will be displayed with the Membership tab selected.
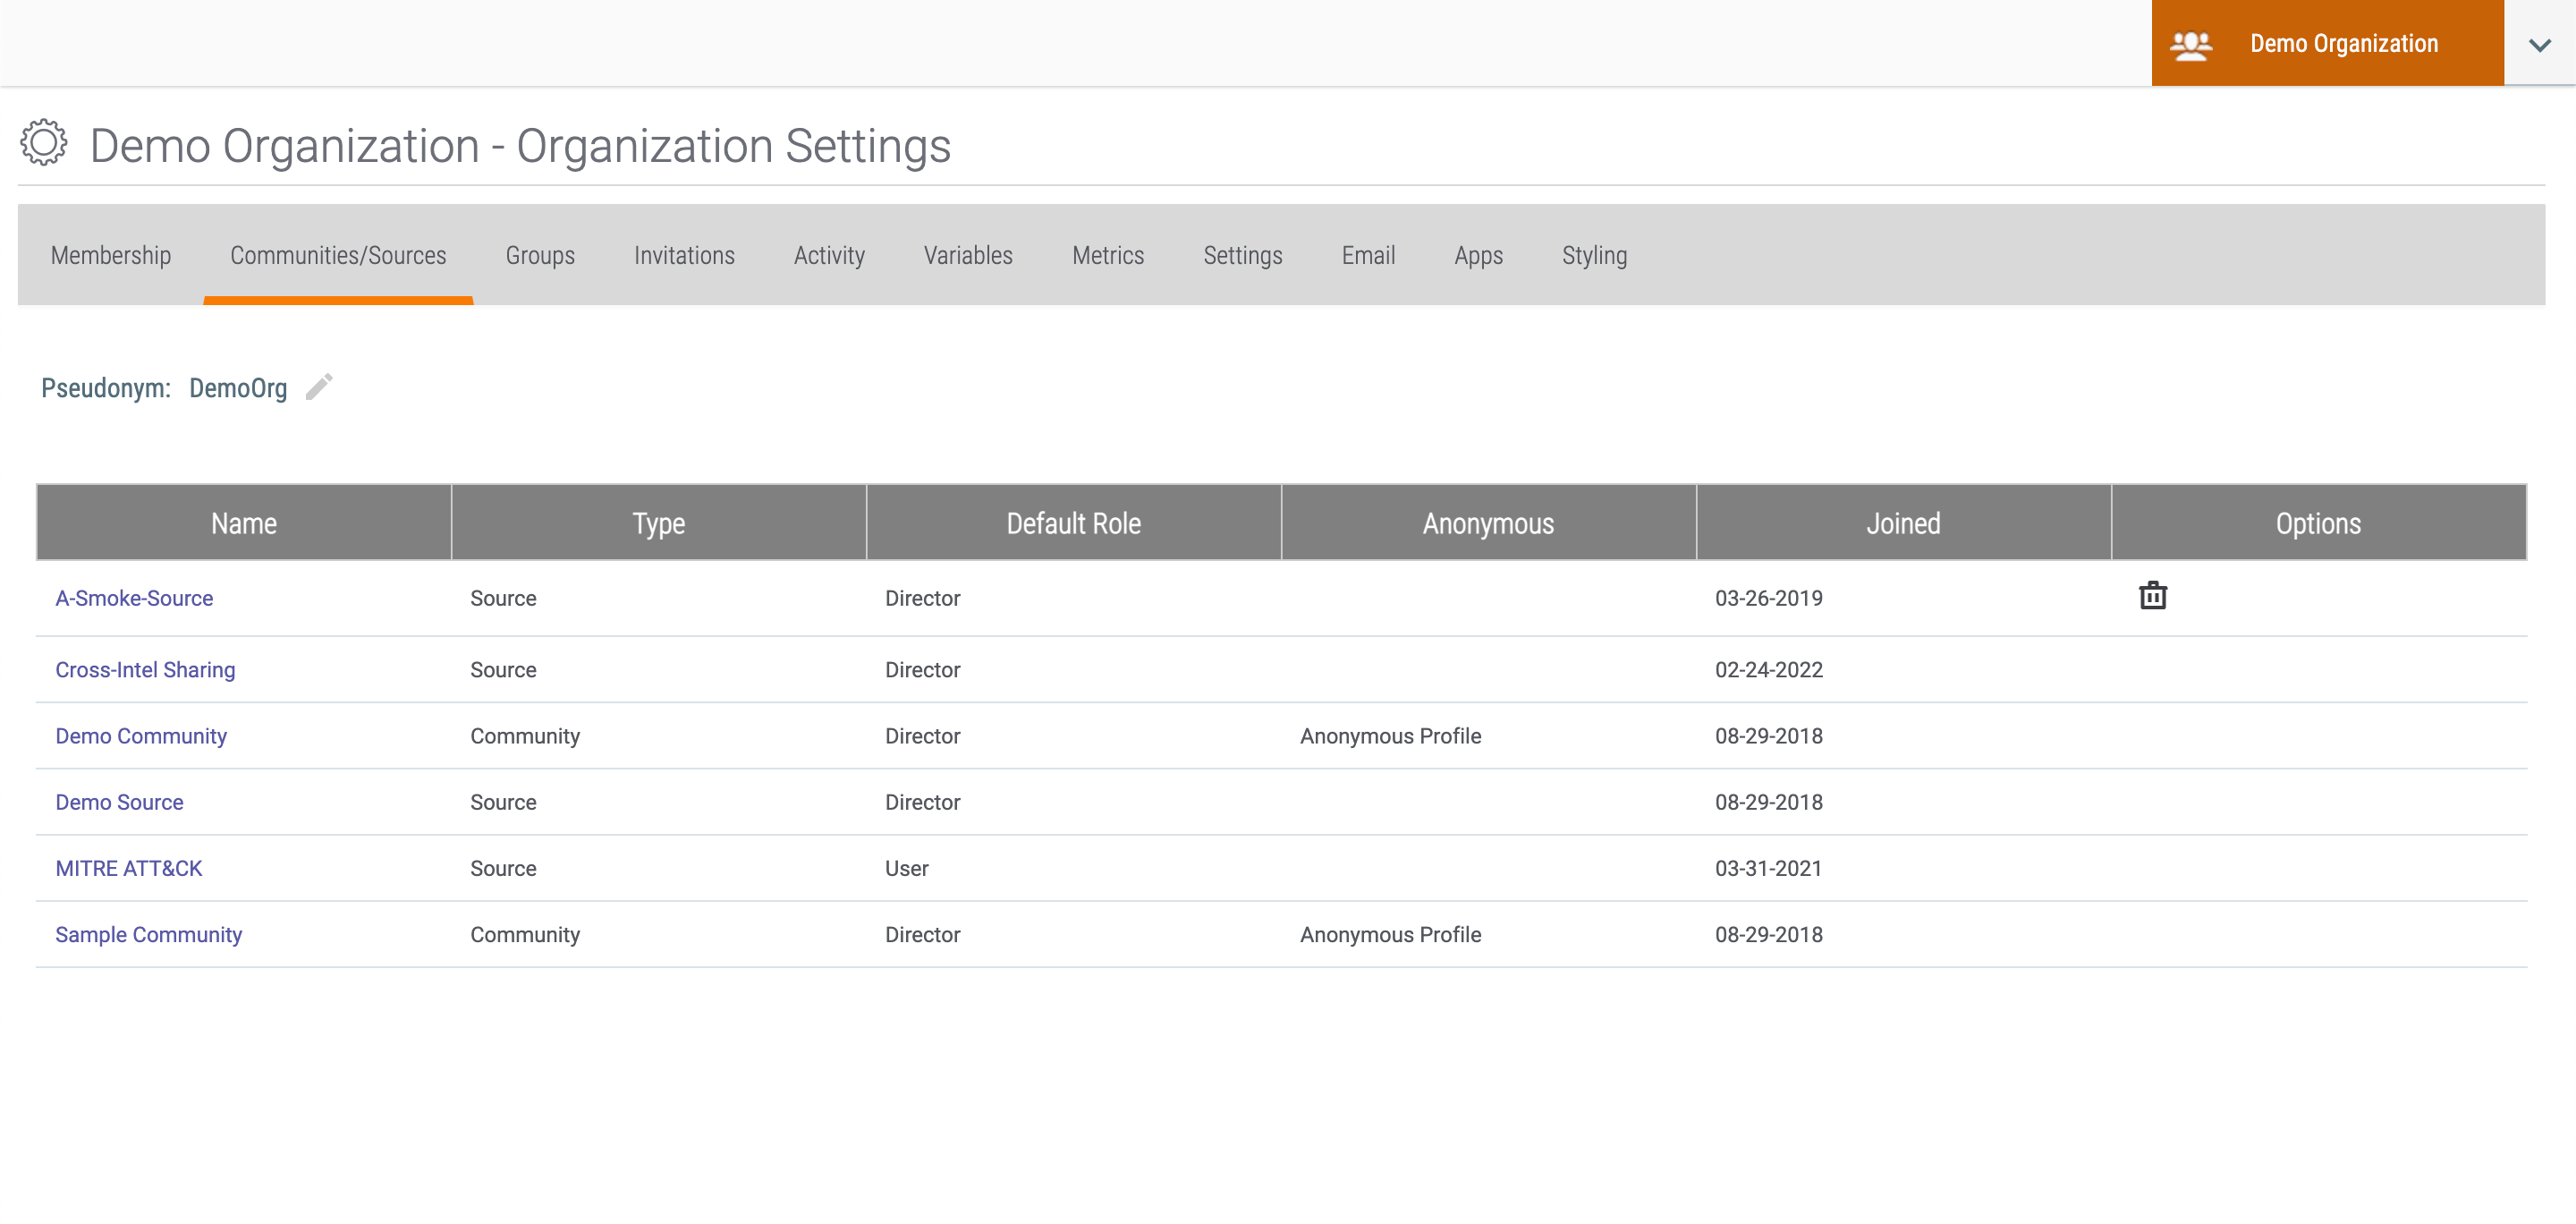
- Click the Communities/Sources tab. The Communities/Sources screen will be displayed (Figure 9).
- Select a Community to display its Community profile page (Figure 10).
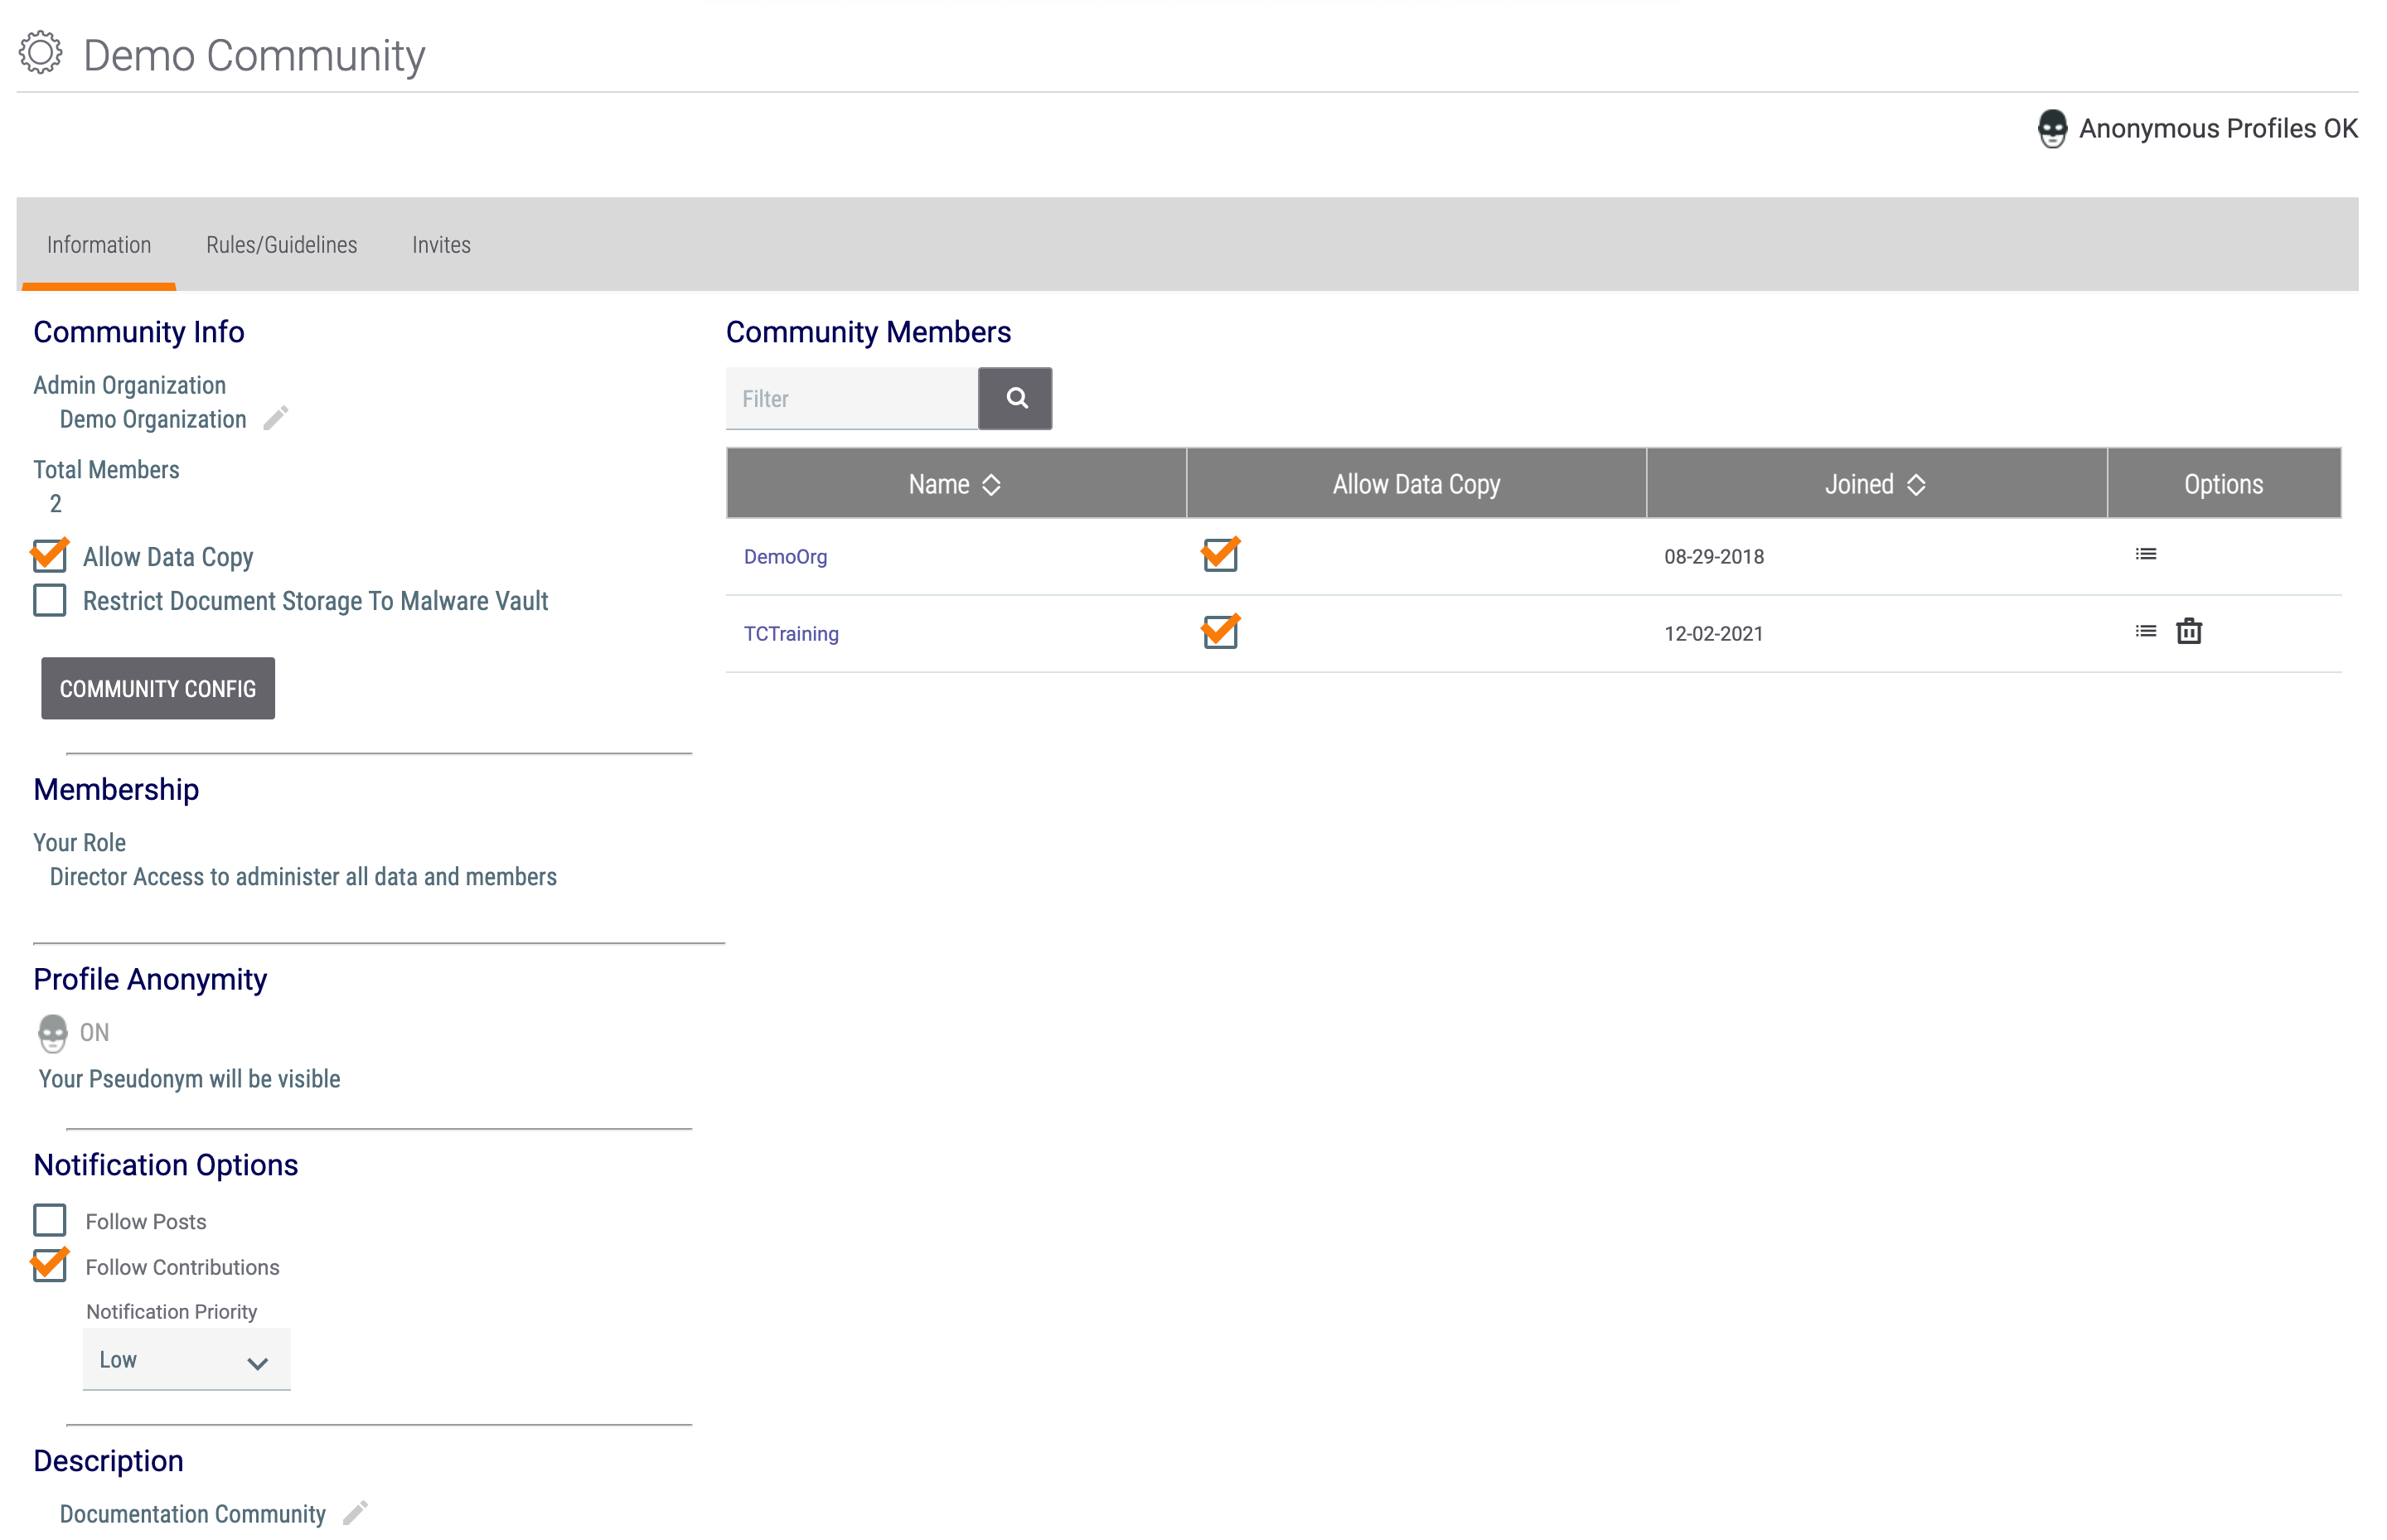
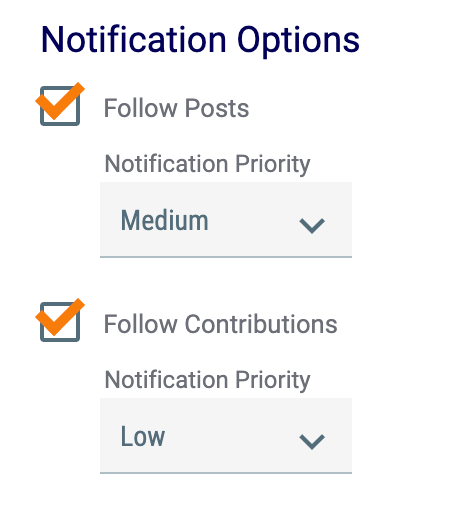
- In the Notification Options section towards the bottom left, use the following options to configure notifications for Community posts and contributions:
- Follow Posts: Select this checkbox to follow posts in the Community.
- Follow Contributions: Select this checkbox to follow contributions to the Community.
- Notification Priority: When one of the preceding checkboxes is selected, a Notification Priority dropdown menu will be displayed (Figure 11). Select the desired notification priority level for the respective option.
ThreatConnect Notification Playbook App
When used in a Playbook, the ThreatConnect Notification App allows you to automate the delivery of notifications to users in ThreatConnect. With this App, you can send notifications to a single recipient, multiple recipients, or all users in your Organization.
For more information on the ThreatConnect Notification App, see the App’s documentation. For more information on building Playbooks, see The Playbook Designer.
ThreatConnect® is a registered trademark, and TC Exchange™ is a trademark, of ThreatConnect, Inc.
20077-01 v.04.A