Managing Data in All Organizations: Workflow
- 10 Jan 2024
- 4 Minutes to read
-
Print
-
DarkLight
-
PDF
Managing Data in All Organizations: Workflow
- Updated on 10 Jan 2024
- 4 Minutes to read
-
Print
-
DarkLight
-
PDF
Article summary
Did you find this summary helpful?
Thank you for your feedback!
As a Super User, you can view, create, modify, assign, and delete Workflow Tasks, Workflows, Templates, and Cases in all Organizations on your ThreatConnect instance.
Workflow Tasks
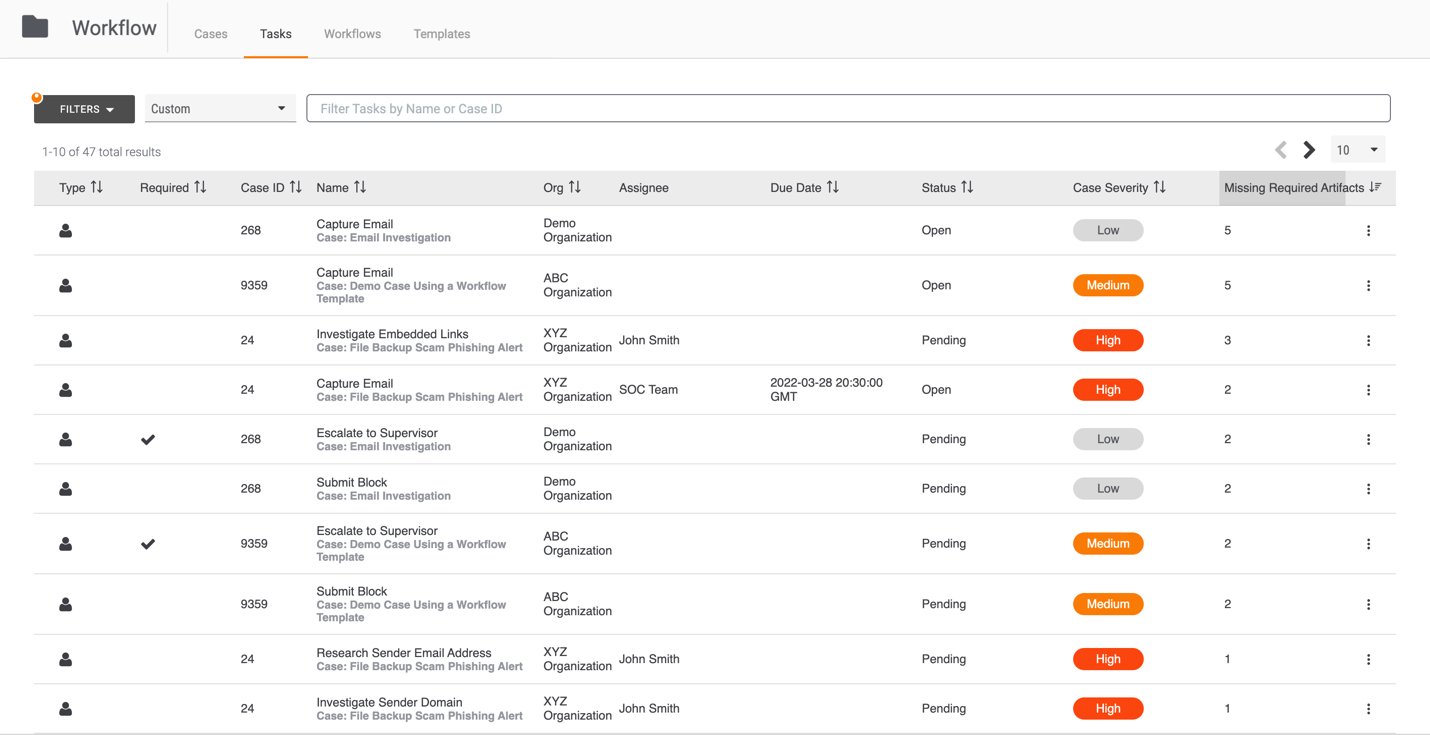
The Workflow Tasks screen will display all Tasks in all Cases in all Organizations on your instance, with the Org column indicating the Organization to which each Task belongs (Figure 1).
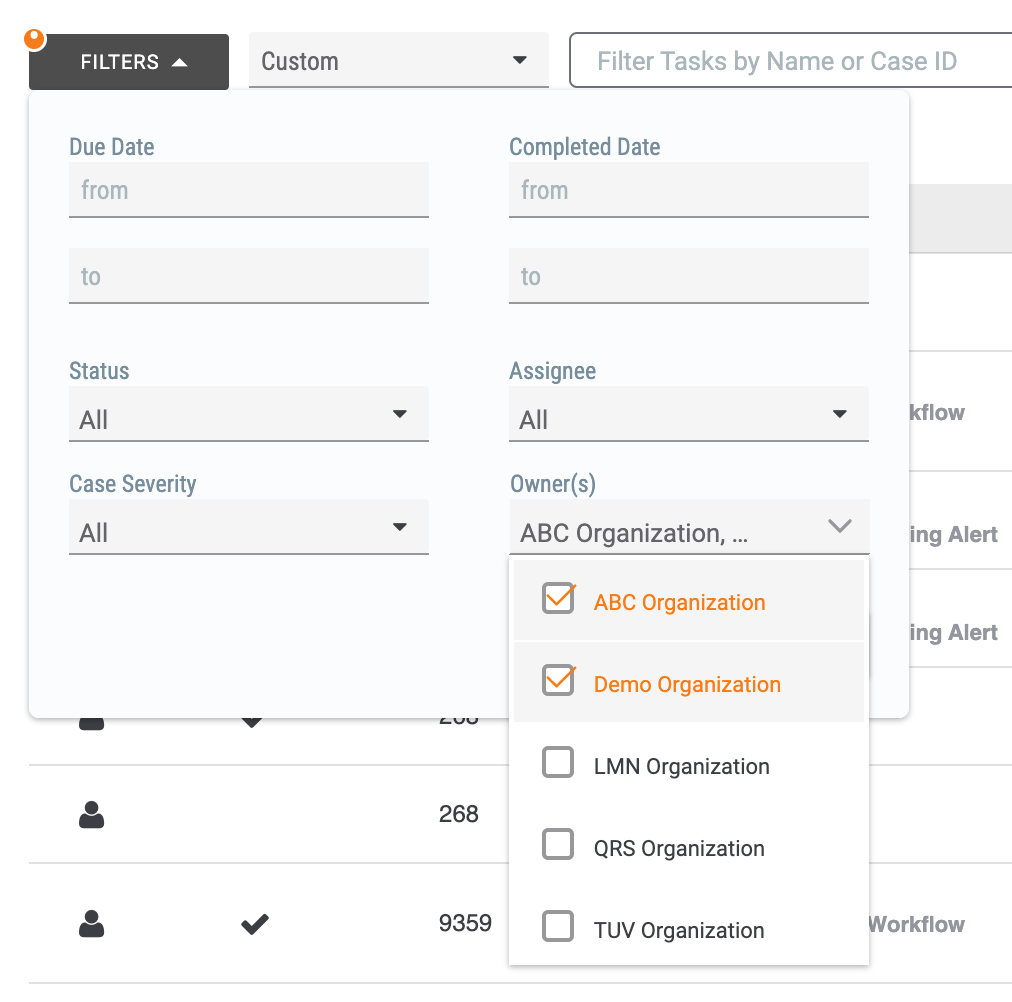
You can use the Owner(s) dropdown menu in the FILTERS selector to select the Organizations you want to include in the Tasks table (Figure 2).
Note
If the Tasks table is blank when you first use your Super User account to access the Tasks screen, this may be because there are no Organizations selected in the Owner(s) menu. Selecting at least one Organization will cause the table to populate (as long as the selected owners contain at least one Case with at least one Task in it).
You can select an assignee for any Task in any Case, but the assignee must belong to the Organization that owns the Case.
Workflows
The Workflows Screen
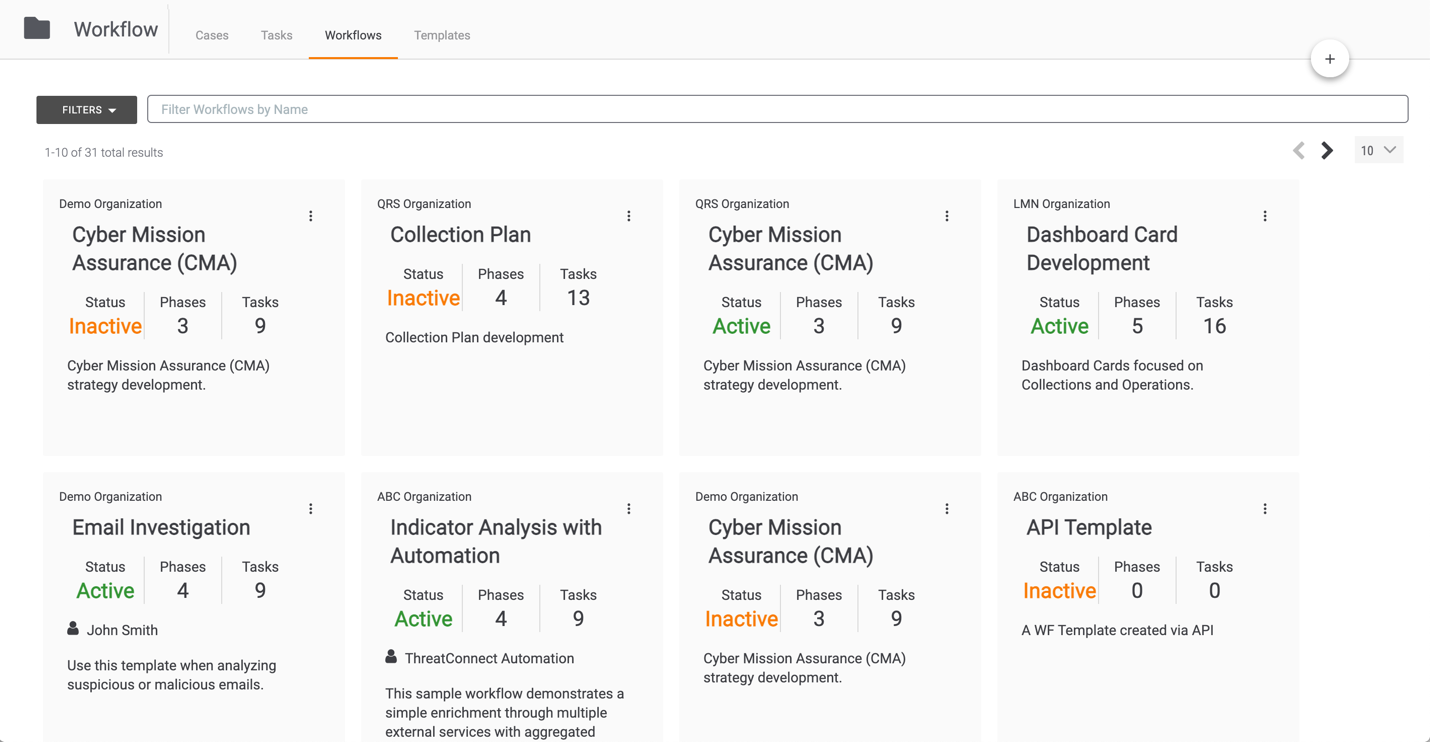
The Workflows screen will display all Workflows in all Organizations on your instance, with the text at the top left of each Workflow card indicating the Organization to which the Workflow belongs (Figure 3).
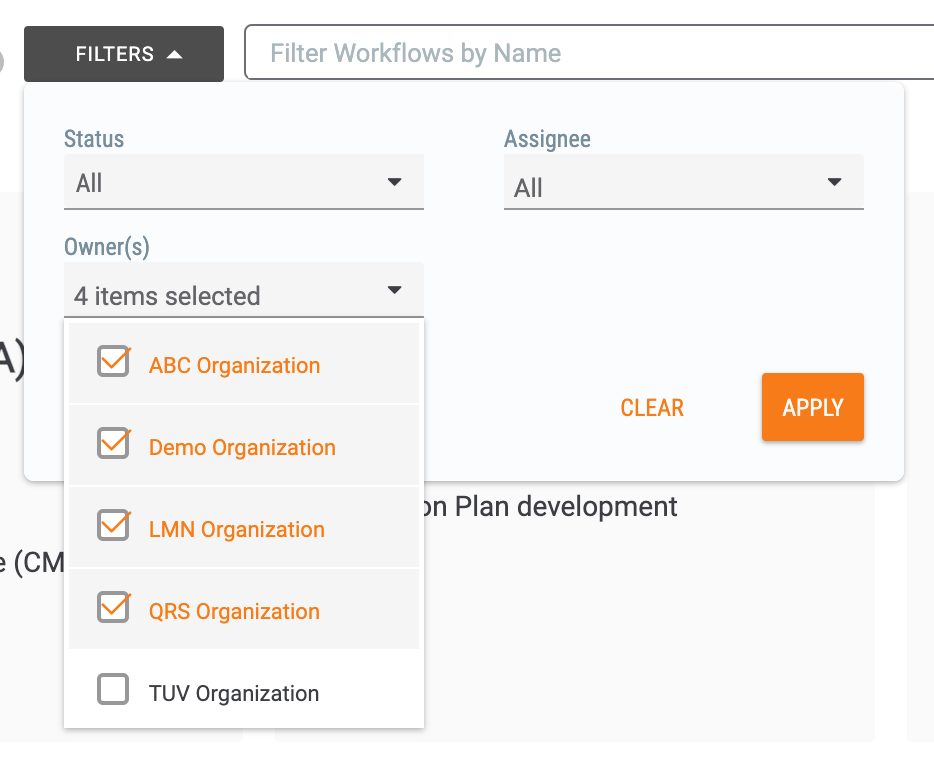
You can use the Owner(s) dropdown menu in the FILTERS selector to select the Organizations you want to include in the Workflows table (Figure 4).
Note
If the Workflows table is blank when you first use your Super User account to access the Workflows screen, this may be because there are no Organizations selected in the Owner(s) menu. Selecting at least one Organization will cause the table to populate (as long as the selected owners contain at least one Workflow).
Creating a Workflow
When creating a new Workflow, you must select the Organization that will own the Workflow (Figure 5).
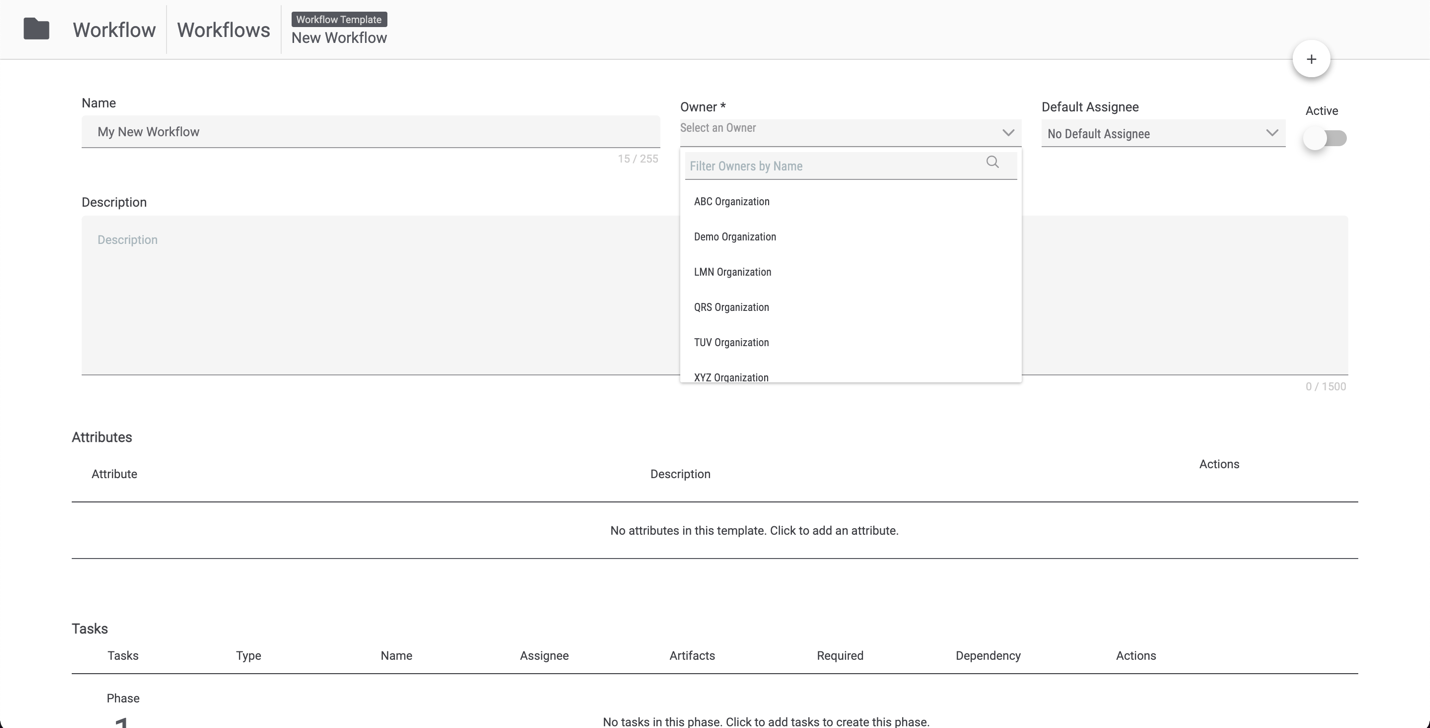
Note
The Default Assignee menu will not populate with any options besides No Default Assignee until you select an Organization from the Owner menu. After you select an Organization, a list of users in that Organization will be displayed in the Default Assignee menu for the Workflow and Tasks added to it. This list of users will include your Super User account, even if the selected Organization is not your home Organization.
Importing a Workflow
When importing a Workflow, you must select the Organization that will own the Workflow (Figure 6).

Note
In addition to the Validating Workflow and Select Owner steps, you may see steps labeled Variables or Missing Apps. See the “Importing a Workflow” section of Workflows Screen for more information.
Sharing a Workflow Across Organizations
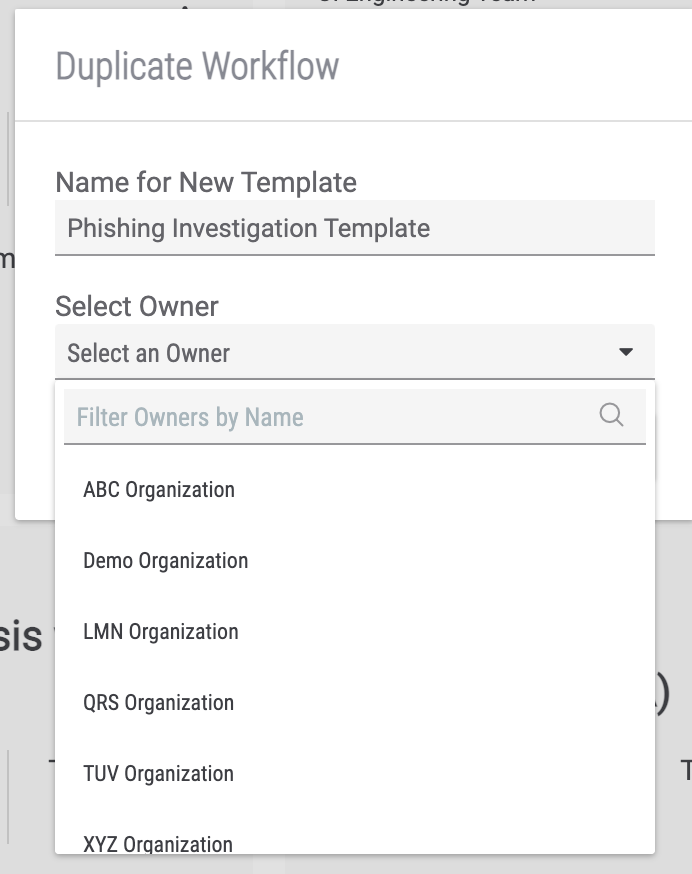
As a Super User, you can easily share Workflows across Organizations. On the Workflows screen, select the Duplicate option from the vertical ellipsis menu for a Workflow. Enter a name for the Workflow, and then select the destination Organization from the Select Owner menu (Figure 7).
Workflow Templates
The Templates Screen
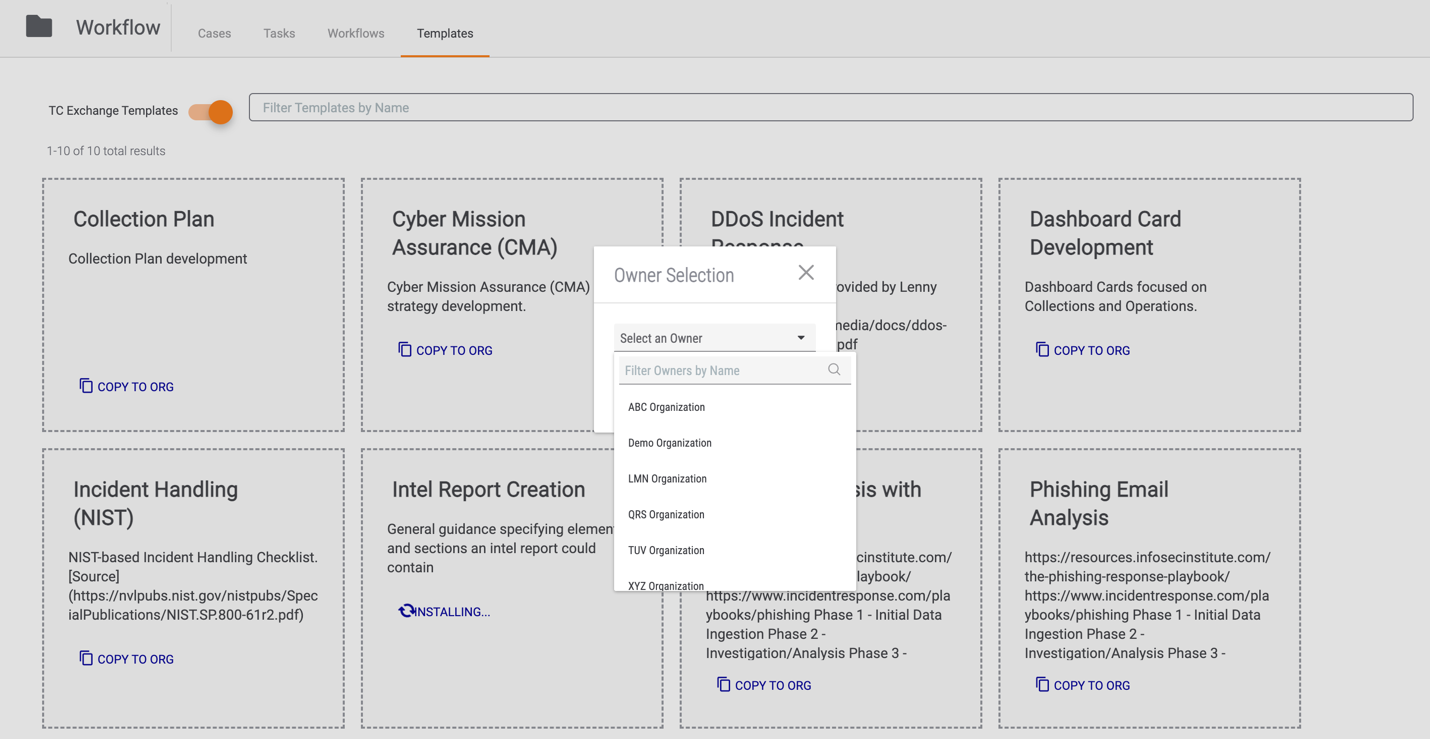
The Templates screen will display all System-level and TC Exchange™ Templates that you can copy to an Organization as a Workflow. To view TC Exchange Templates, toggle the TC Exchange Templates slider on, as in Figure 8. Toggling this slider off will display all Templates installed at the System level in your ThreatConnect instance.
Copying a Template to an Organization
When copying a System-level or TC Exchange Template to an Organization as a Workflow, you must select the destination Organization (Figure 8).
Workflow Cases
The Cases Screen
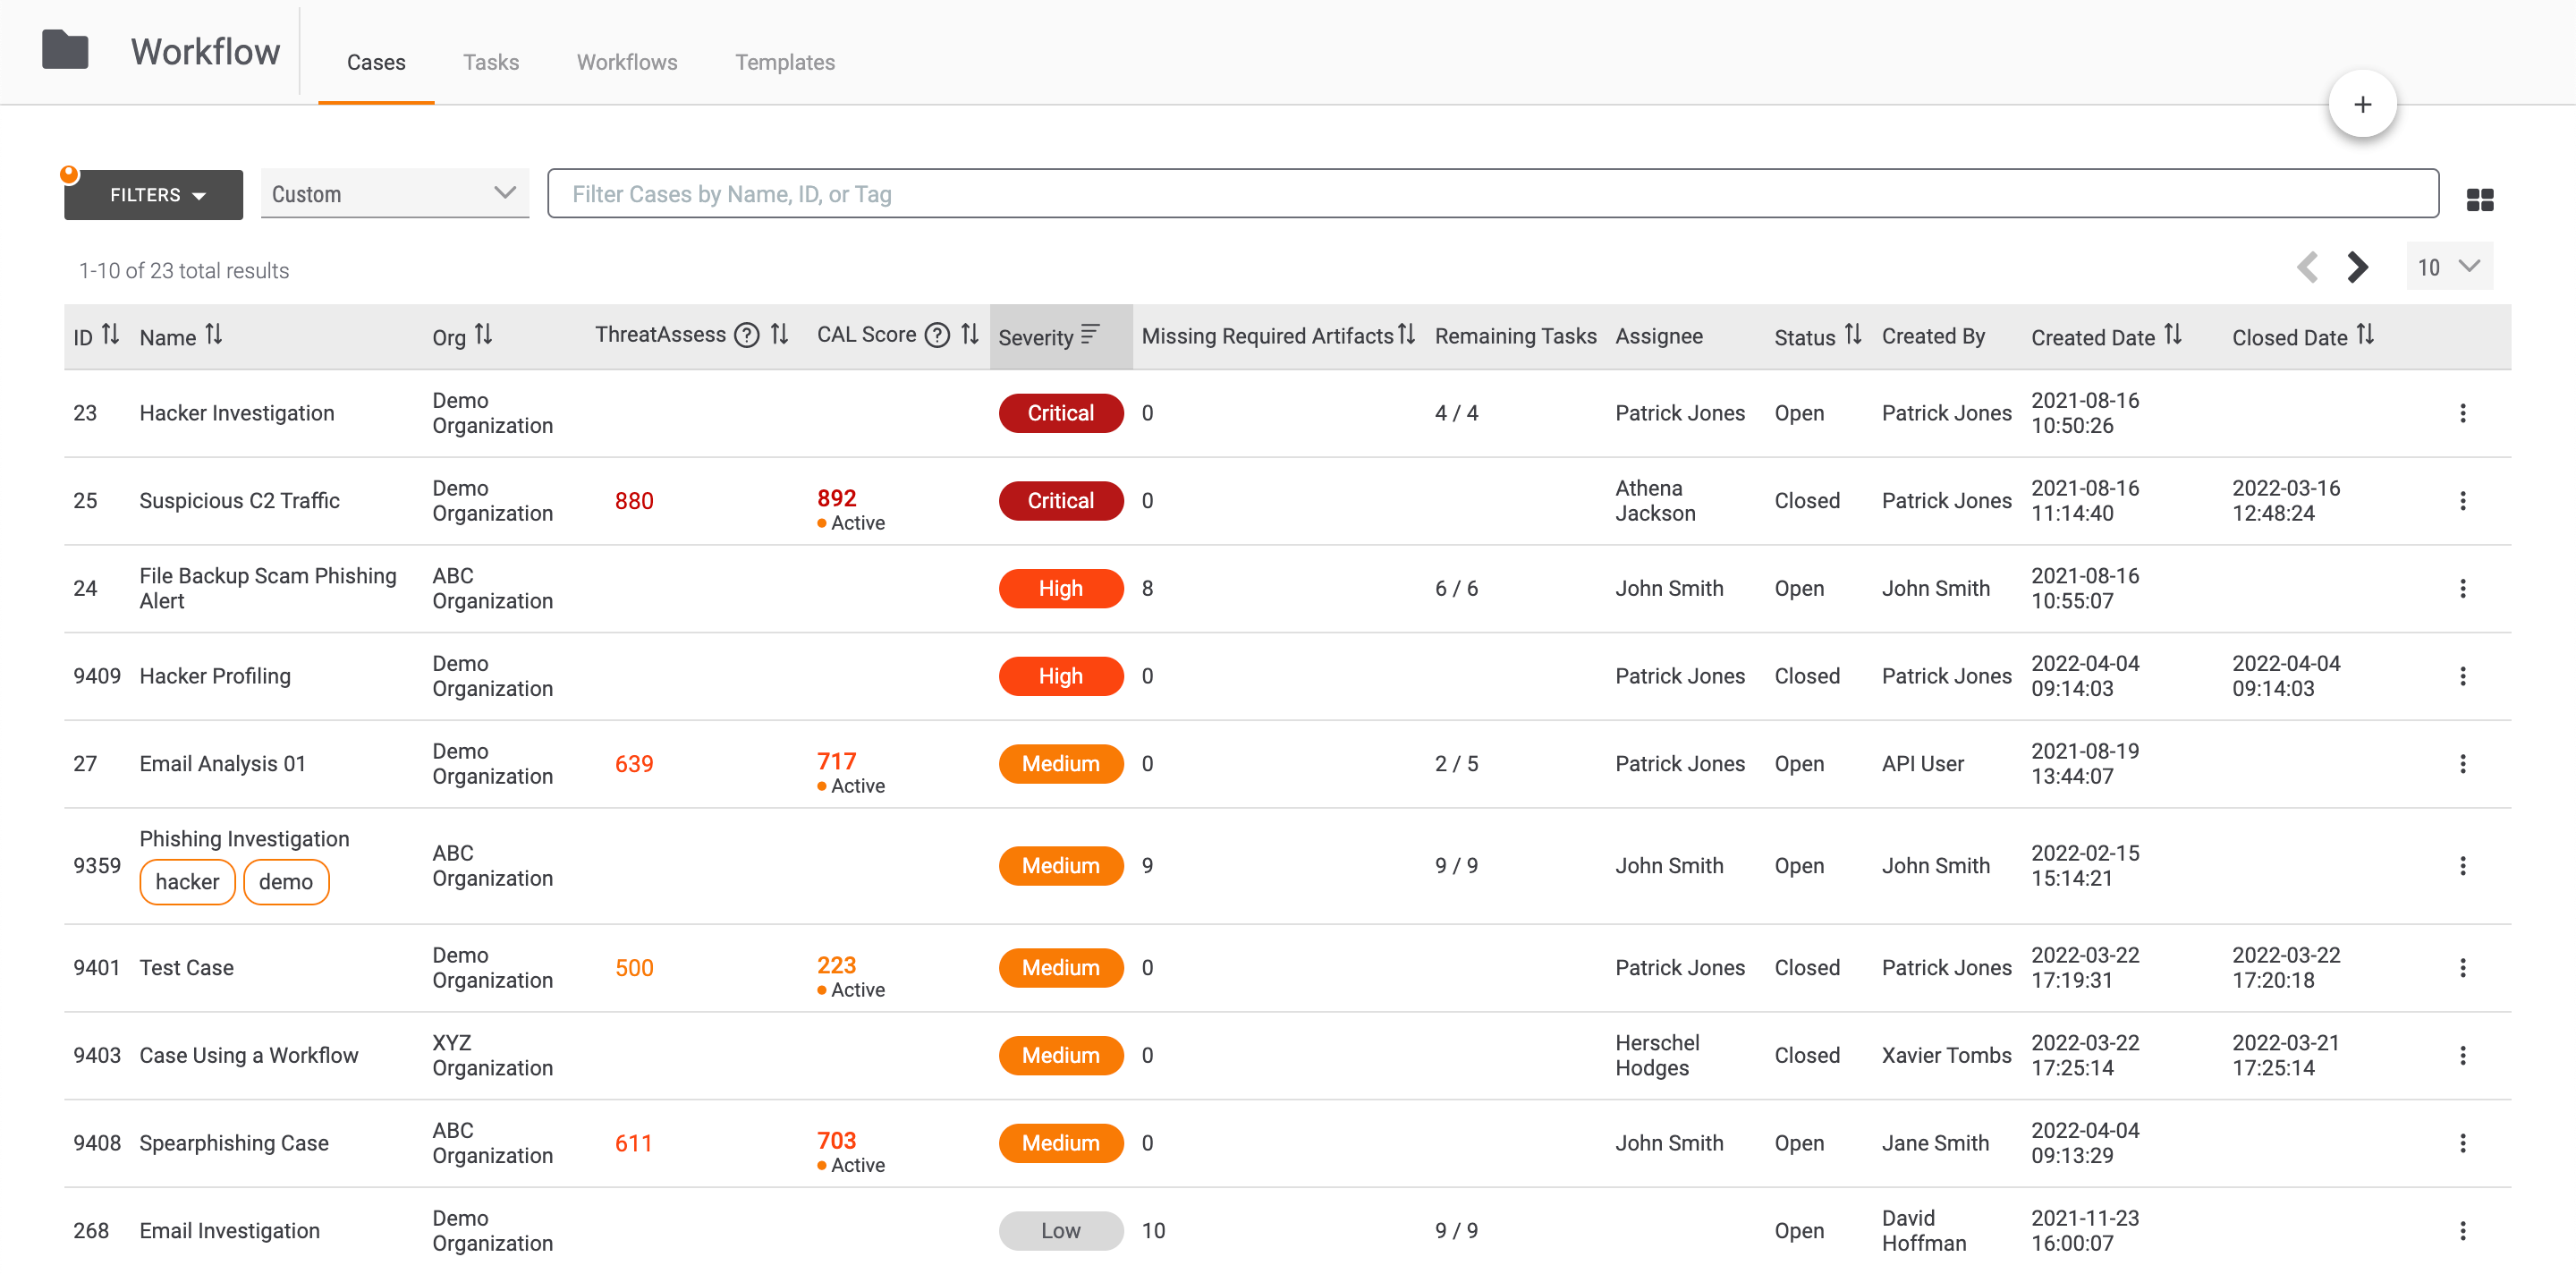
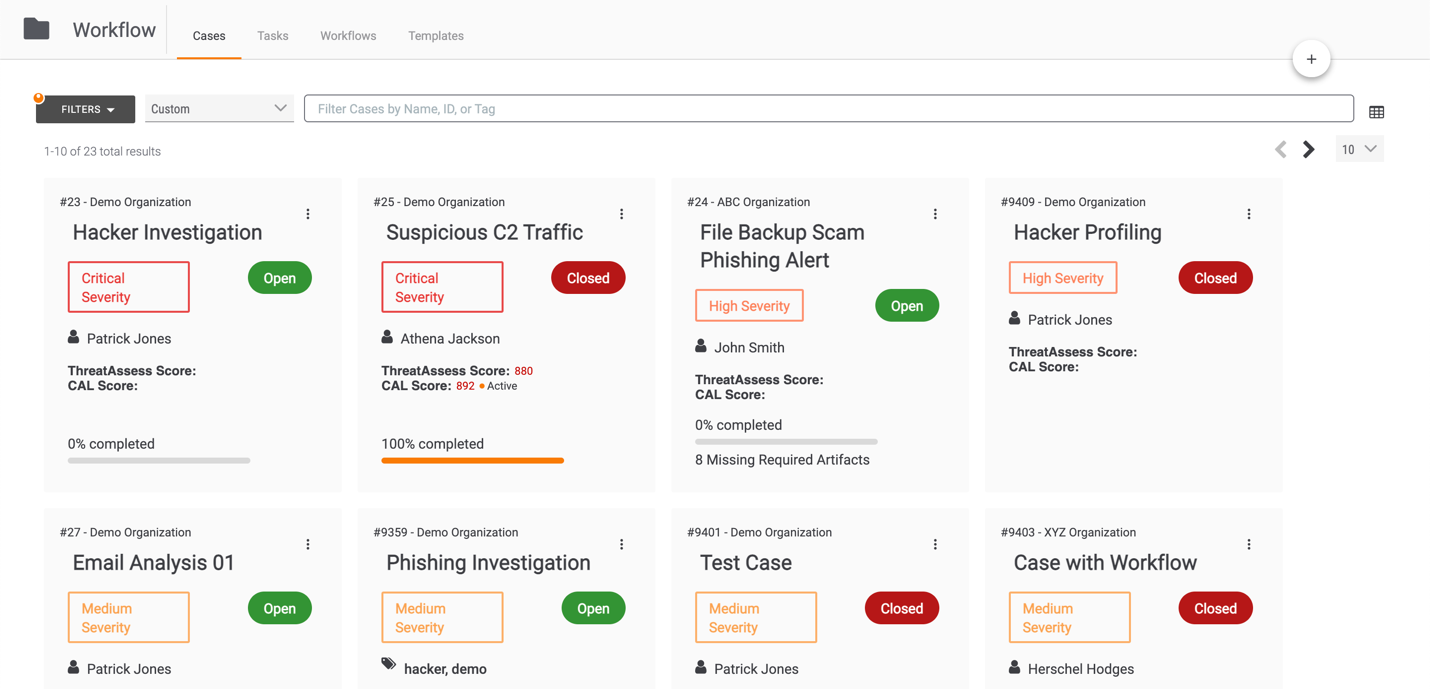
The Workflow Cases screen will display all Cases in all Organizations on your instance, with the Org column indicating the Organization to which each Case belongs (Figure 9).
In card view, the Organization that owns the Case is displayed at the top of the Case’s card (Figure 10).
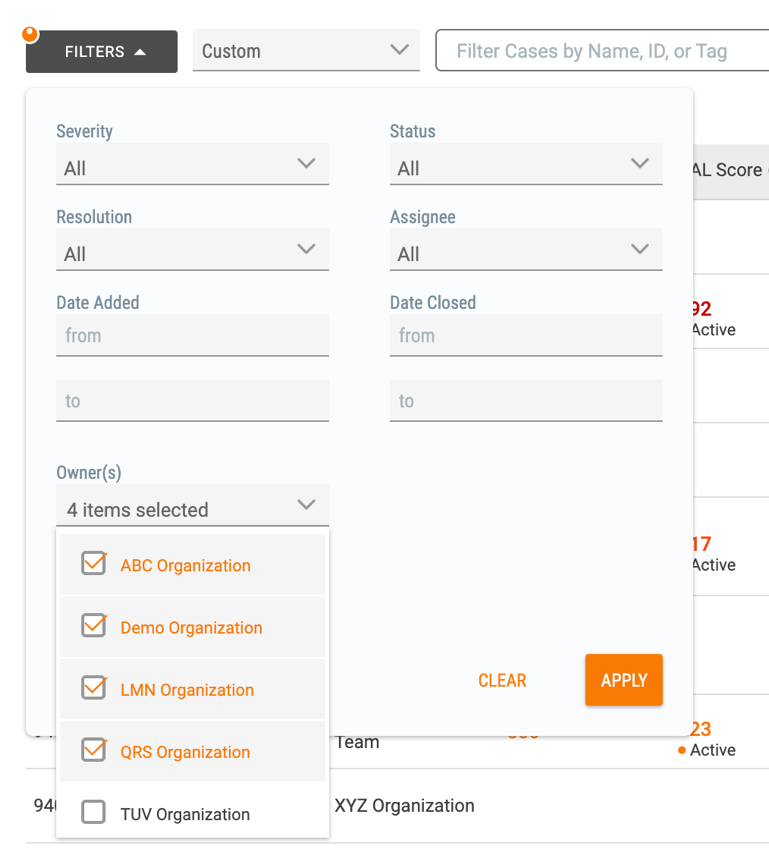
You can use the Owner(s) dropdown menu in the FILTERS selector to select the Organizations you want to include in the Cases table (Figure 11).
Note
If the Cases screen is blank when you first use your Super User account to access the Cases screen, this may be because there are no Organizations selected in the Owner(s) menu. Selecting at least one Organization will cause the screen to populate (as long as the selected owners contain at least one Case).
Creating a Case
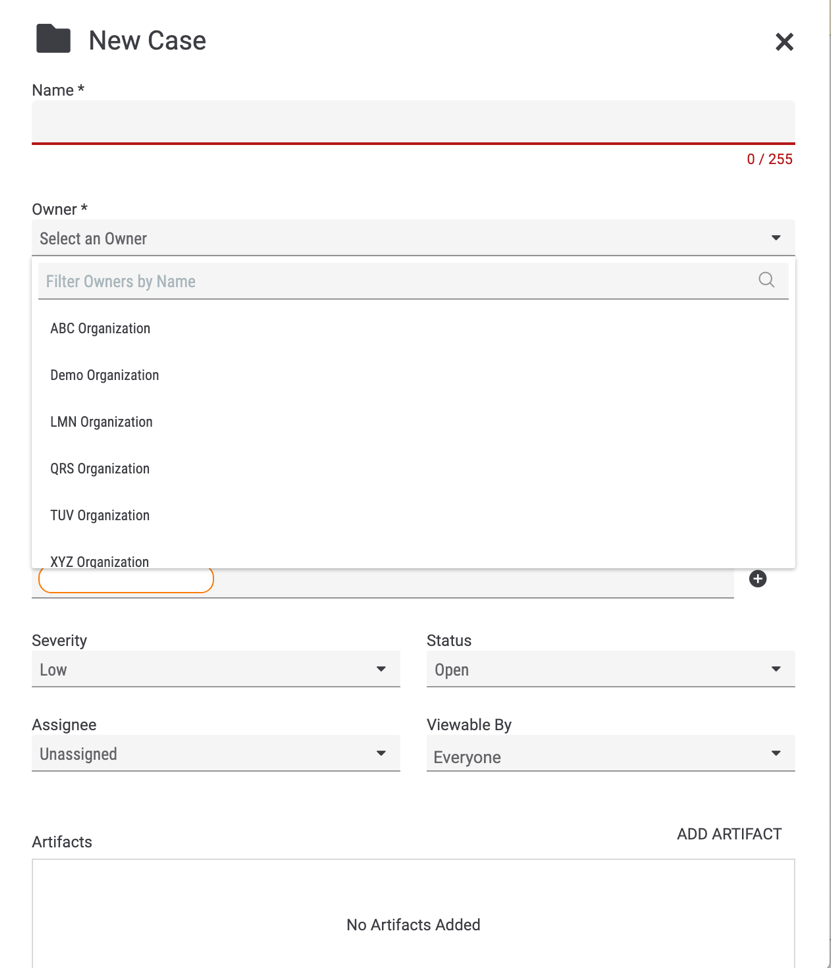
When creating a new Case, you must select the Organization that will own the Case (Figure 12).
Note
The Assignee menu will not populate with any options besides Unassigned until you select an Organization from the Owner menu. After you select an Organization, a list of users in that Organization will be displayed in the Assignee menu for the Case and Tasks added to it. This list of users will include your Super User account, even if the selected Organization is not your home Organization.
Viewing a Case
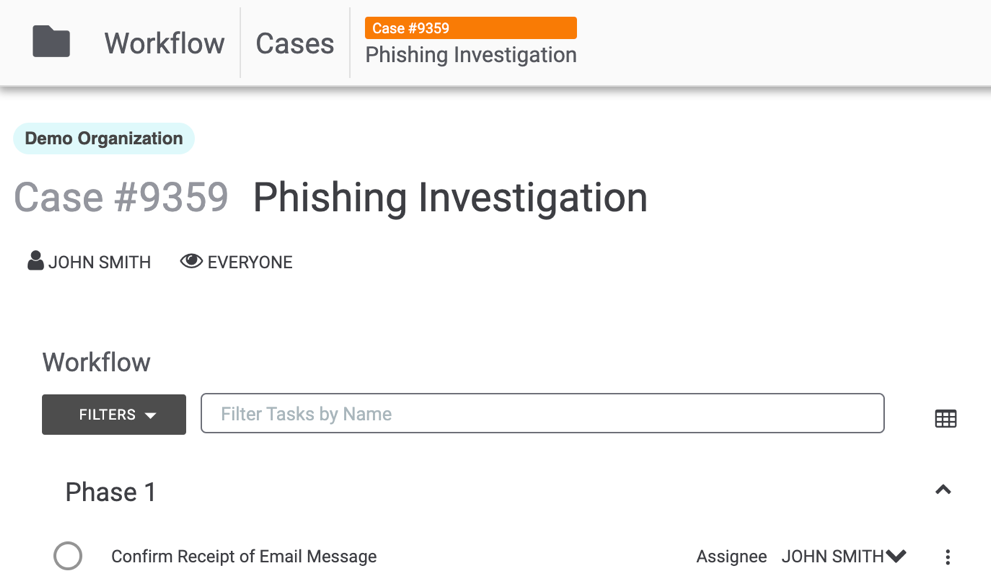
When you view a Case, you will see the Organization that owns the Case at the top left of the screen (Figure 13).
Viewing Artifact Owners
If an Artifact that is a ThreatConnect Indicator type exists in multiple Organizations on your instance, you can view the Organizations in the dropdown list in the Summary column (Figure 14).
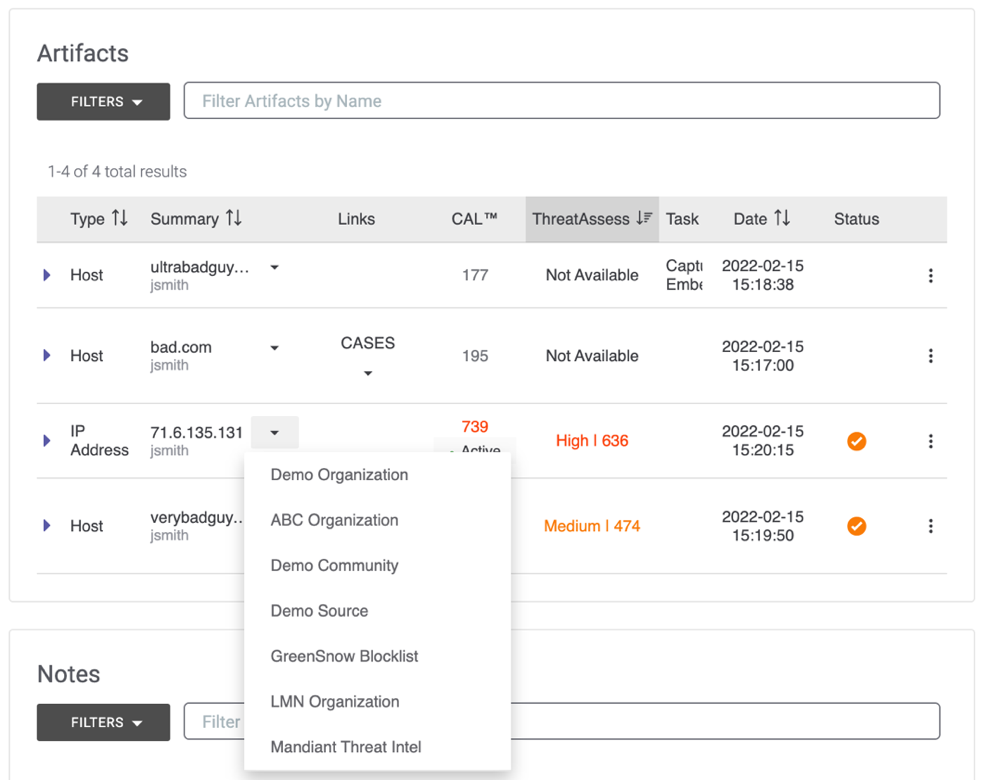
Click on an Organization’s name in the list to view the Details drawer for the Indicator in that Organization.
Note
If an Artifact that is a ThreatConnect Indicator type exists in multiple owners, including multiple Organizations, only the Indicator in your home Organization and the copies in Communities and Sources for which potential Case associations are enabled will be suggested as potential Indicator associations for the Case being viewed. Note that this condition applies only if your System Administrator configured potential associations to be based on matching Artifacts for your ThreatConnect instance.
Was this article helpful?
