Overview
Apps normally run for a specified length of time. Service Apps, or Services, however, are microservices that continuously run in the background. Currently, there are two types of Services available in ThreatConnect®, and they are installed exactly like other apps, through the TC Exchange™ Settings screen:
- Trigger Service: Trigger Services create custom Playbook Triggers. A Trigger Service’s type is determined by the App used to create the Service. Currently, there are two Trigger Service types:
- Custom Trigger Service: This type of Trigger creates push-type events to handle a custom protocol or raw-port access or that pull on a configured interval.
- Webhook Trigger Service: This type of Trigger creates push-type events that have complex data requiring normalization, filtering, or a better UX. This Trigger Service is essentially a custom WebHook Trigger.
- REST API Service: REST API Apps create a microservice that implements a RESTful system aimed to provide on-demand operations for any number of use cases.
Before You Start
| Minimum Role(s) |
|
|---|---|
| Prerequisites | Playbooks enabled by a System Administrator |
Creating a Service
Trigger Services
- Log into ThreatConnect with an Organization Administrator or System Administrator account.
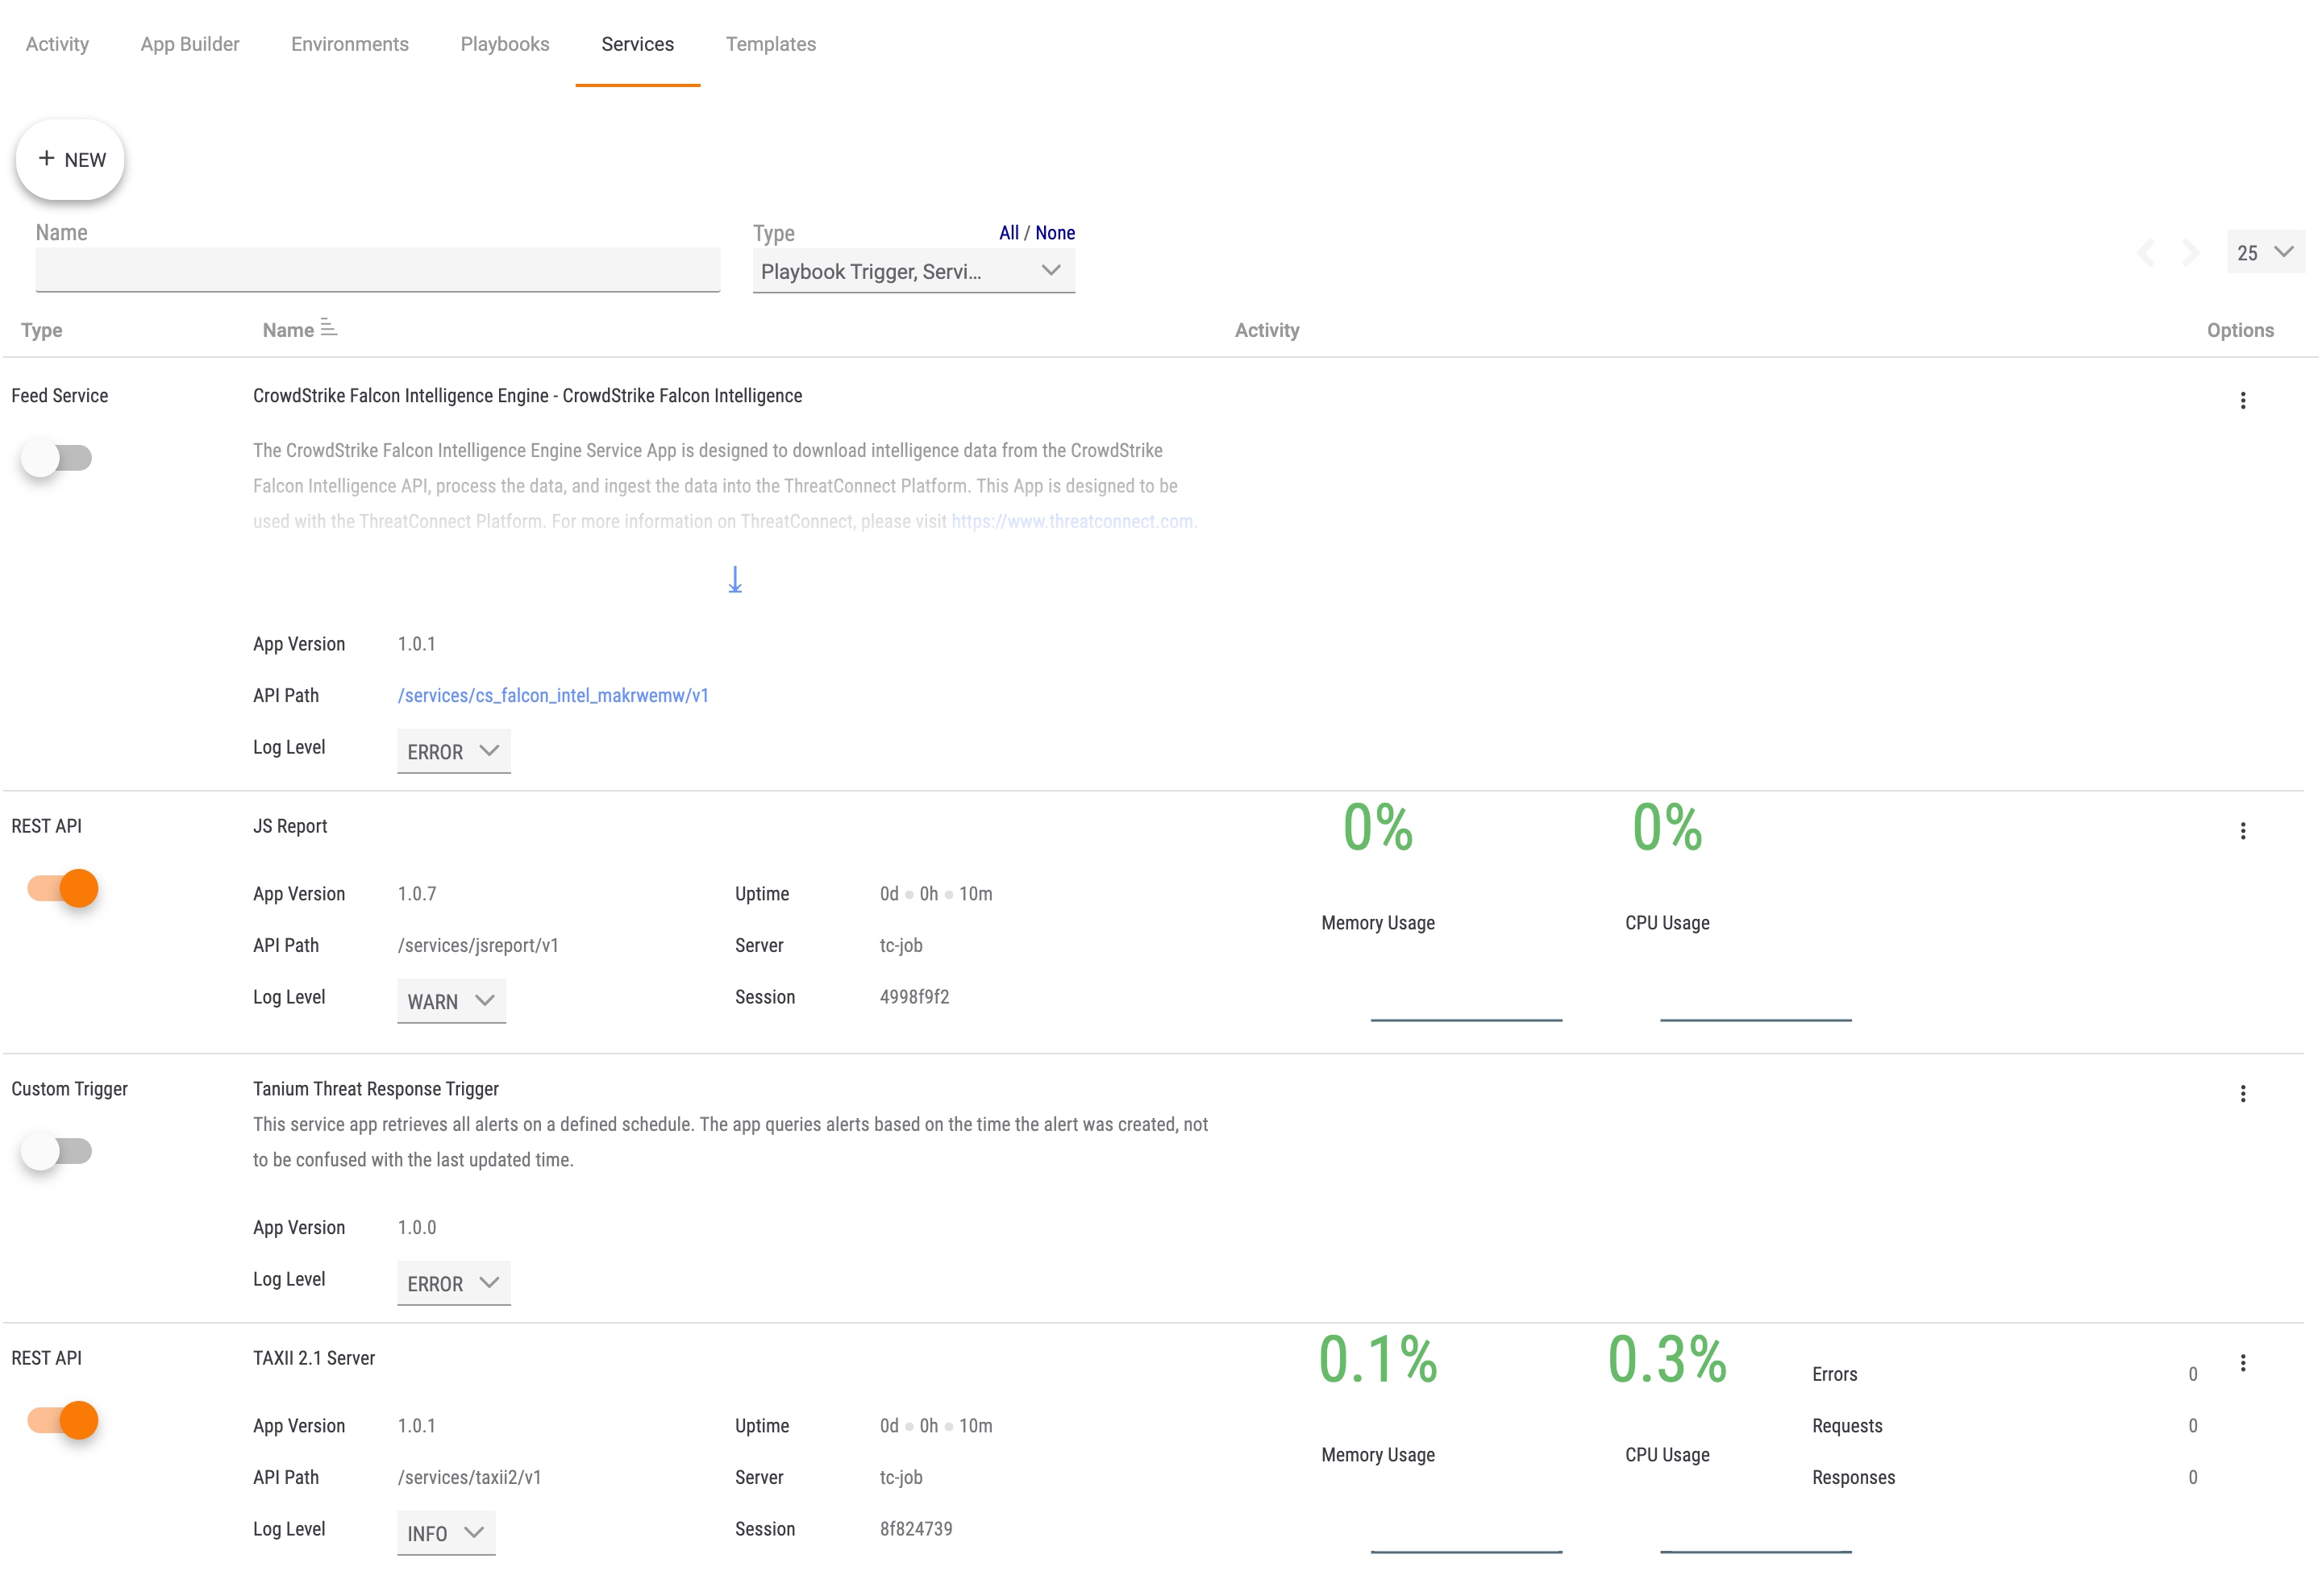
- On the top navigation bar, hover the cursor over Playbooks and select Services. The Services tab of the Playbooks screen will be displayed (Figure 1). This screen shows all Services that have been created in your ThreatConnect instance.
- Click the + NEW button at the upper-left corner of the screen. The Select screen of the Create Service drawer will be displayed (Figure 2).
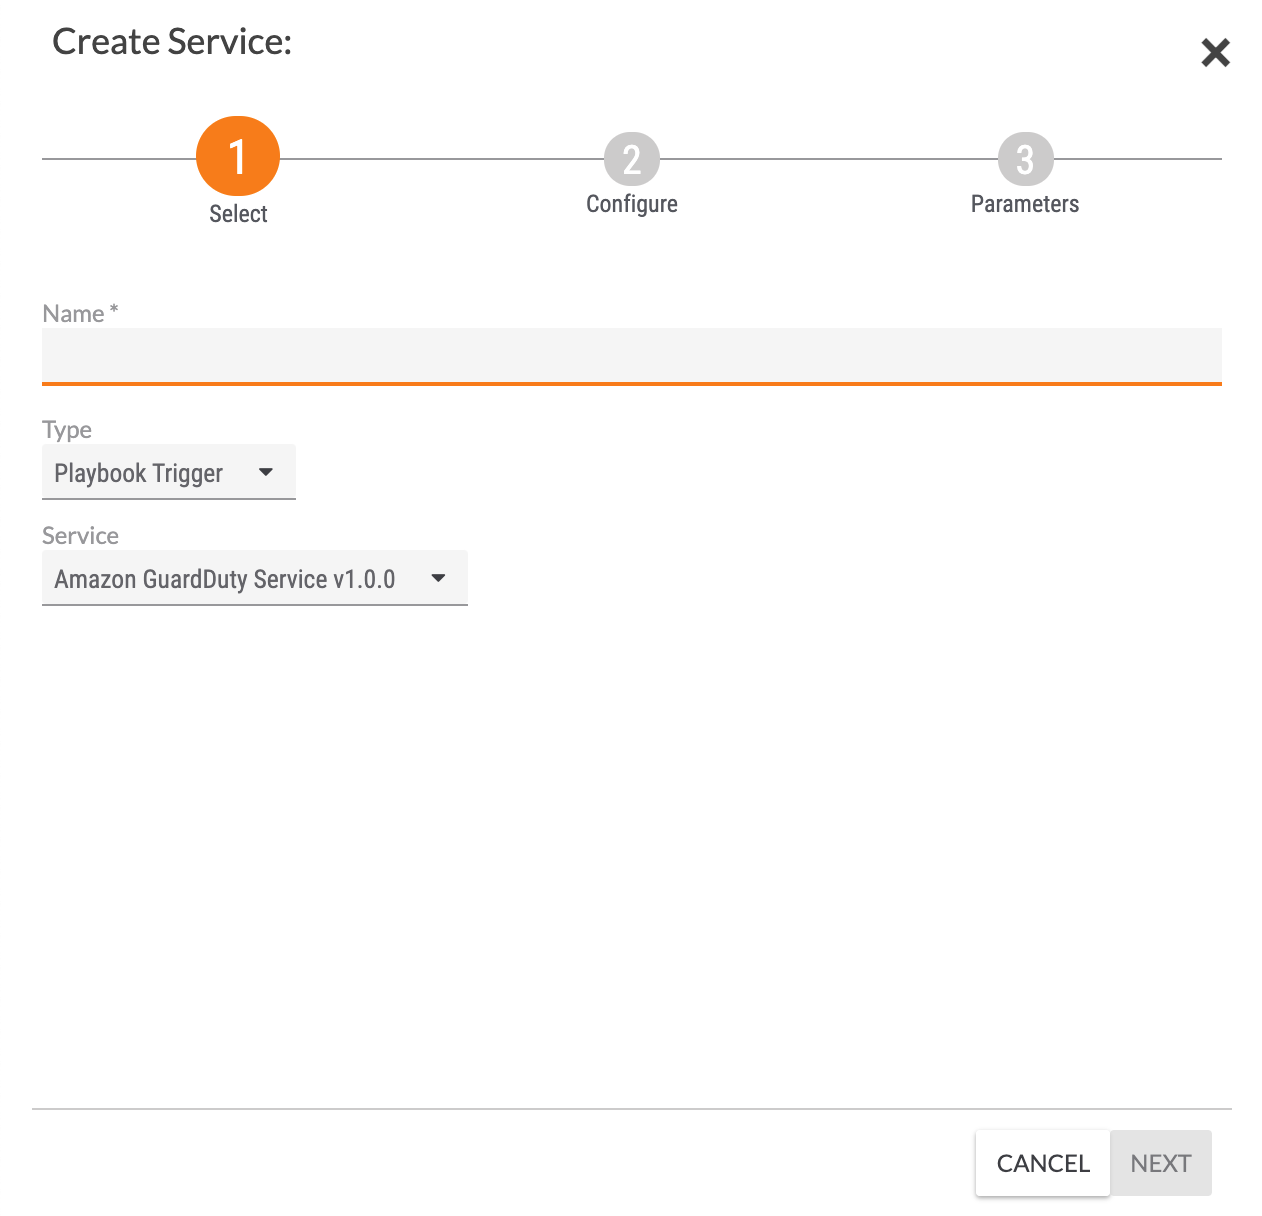
- Name: Enter a name for the Service. Since you can use the same Service App multiple times to create different Services, use a name that differentiates the Service you are creating.
- Type: Keep the selection of Playbook Trigger.
- Service: Select a Service App that has been installed via the TC Exchange Settings screen.
- Click the NEXT button.
- The Configure screen of the Create Service drawer will be displayed (Figure 3).

- Launch Server: Select the server on which the Service will launch. Typically, on multi-server environments, the Service is launched on the tc-job server.ImportantThreatConnect Cloud customers should never select tc-mon as the launch server when creating a Service.
- Permissions: Select which Organization(s) will have access to the Service. This option will be displayed only for System Administrators and Organization Administrators with a System role of Accounts Administrator or Operations Administrator.NoteFor Organization Administrators with a System role of Accounts Administrator or Operations Administrator, the Permissions dropdown menu will only list the Organization to which their account belongs.
- Allow all: Select this checkbox to grant all Organizations on the ThreatConnect instance access to the Service. This option will be displayed only for System Administrators and Organization Administrators with a System role of Accounts Administrator or Operations Administrator.
- Enable Notifications: Select this checkbox to send an email when the Service fails to start. It is recommended to enable this setting.
- Email Address: If the Enable Notifications checkbox is selected, enter the email address to which notifications should be sent. It is recommended to enter an email address for a ThreatConnect user with a System role of Administrator.
- Max restart attempts on failure: Enter the number of times ThreatConnect should try to restart the Service if it fails. It is recommended to set this value to 3.
- Click the NEXT button.
- Launch Server: Select the server on which the Service will launch. Typically, on multi-server environments, the Service is launched on the tc-job server.
- The Parameters screen of the Create Service drawer will be displayed (Figure 4).
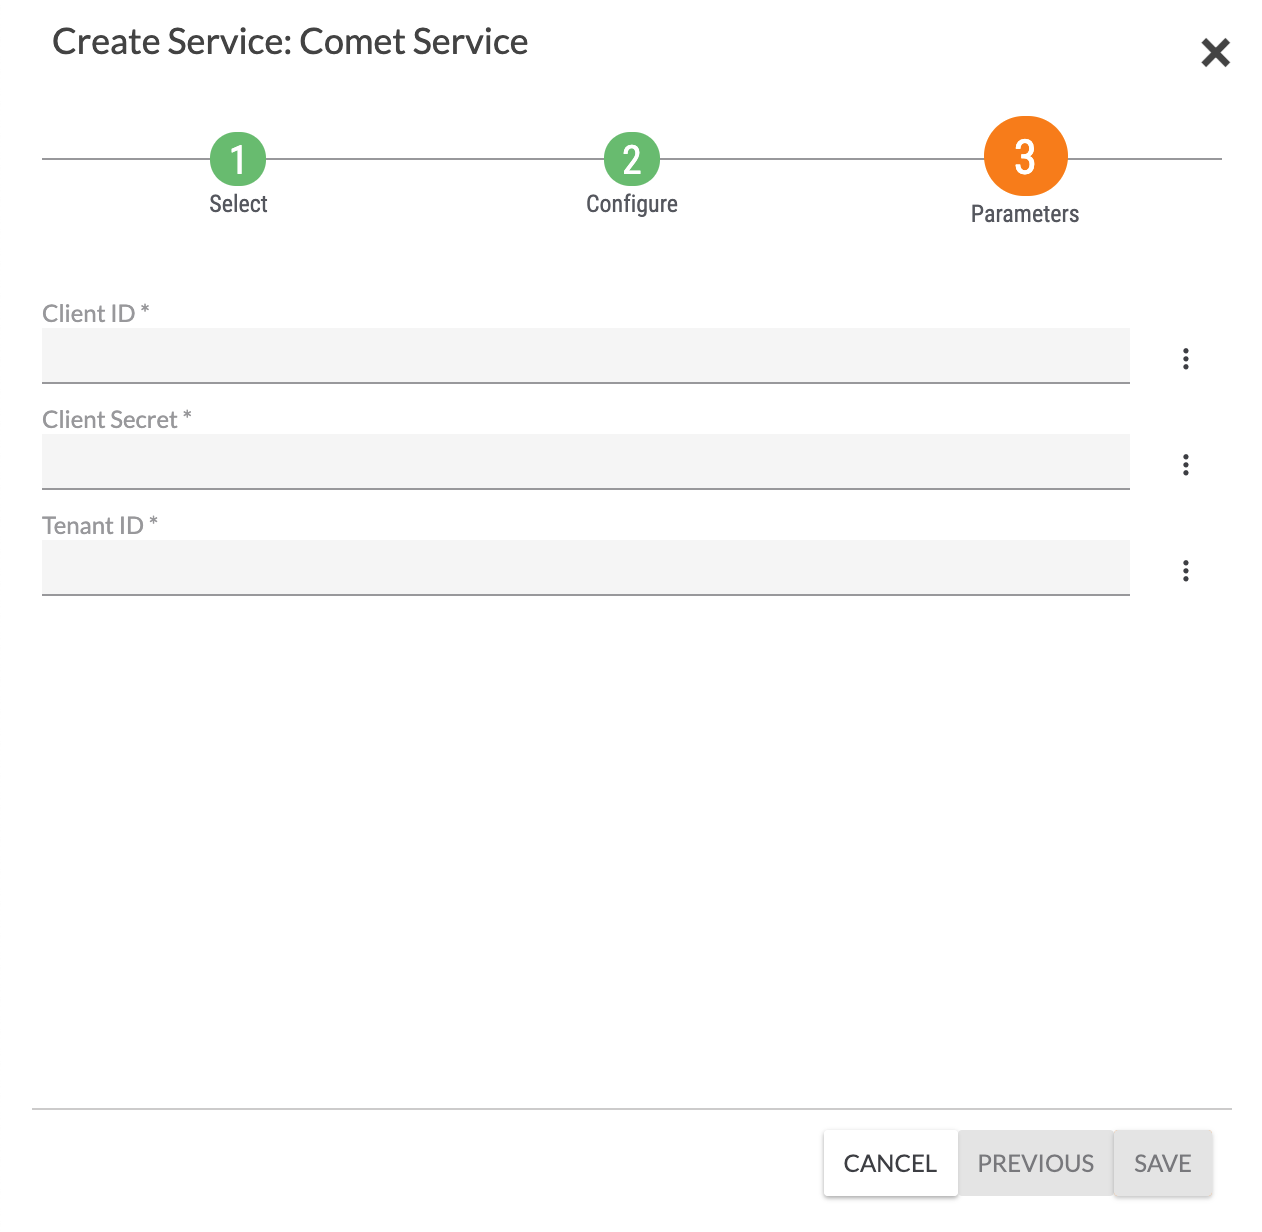
- The contents of this screen depend on the Service App that was selected on the Select screen. Fill out all required fields on this screen.
- Click the SAVE button.
The Service will now be displayed on the Services screen (Figure 5). Toggle its slider on to activate the Service. If the Service is not activated, If the Service is not activated, a validation error will occur in Playbooks that use its Trigger.
If you try to activate a Service and it fails to activate, a Service Failed message will be displayed in the Activity column for the Service (Figure 5) and along the top of your screen. This message will include the date and time when the Service failed to start and a summary of why it failed to start, which is retrieved from the corresponding log files.

REST API
The process for creating a REST API Service is similar to the process for creating Trigger Services. Currently, the following Service Apps that can be created as REST API Services:
- JS Report Service (for previewing a report as a PDF)
- ThreatConnect App for Splunk Gateway Service (for using the ThreatConnect App for Splunk®)
- ThreatConnect TAXII Server (for using the ThreatConnect TAXII™ 2.1 server)
Viewing a Service
When a Service is active, the Services screen will display a dashboard with information about it (Figure 6).

- Service type: The type of Service (Custom Trigger, Web Hook Trigger, or REST API) is displayed at the top left, above the toggle.
- Toggle: Use the toggle at the top left to activate (orange) and deactivate (gray) the Service.
- Service Name: The name of the Service is displayed to the right of the Service type.
- Description: A description of the App used to create the Service is displayed under the name of the Service. If the description is longer than a few lines, an
 icon will be displayed. Click this icon to expand this section and display more details about the App.
 - App Version: The installed version of the App.
- API Path: The API path associated with a REST API Service. If the corresponding App’s configuration has designated that the API path destination has a UI, then the API path will be a clickable hyperlink to the full URL path.
- Log Level: Select the log level for the Service. Changes in log level are effective immediately.
- Running Service Metrics: Uptime, Server, Memory Usage, and CPU Usage are core platform metrics.
- Session: The session identification number for the running Service. It is useful for debugging and triaging the Service.
- App-Based Metrics: The right side of the Service dashboard displays performance metrics for the Service.
- Trigger Services: Depending on the specific Service, a subset of the following metrics will be displayed: Active Playbooks, Failed Playbooks, Inactive Playbooks, Errors, Hits, Misses, PlaybooksBacklogged, and Total Backlog.
- REST API Services: The following metrics will be displayed for REST API Services: Errors, Requests, and Responses.
Administrating a Service
Click the vertical ellipsis in the Options column to access the following administrative options for a Service:
- Delete: Select this option to delete the Service.
- Edit: Select this option to edit the Service.
- Environment: Select this option to set up remote execution for a Service. See Playbook Environments and Multi-Environment Orchestration: Executing Playbook Apps Through a Firewall for more information.NoteEnvironment Server 2.0 is required for remote executions.
- Download Logs: Select this option to download a truncated version of logs for the Service in .zip format.
- Run on Startup: Toggle this slider on to have the Service automatically run when the ThreatConnect instance is started.
For Organization Administrators, the vertical ellipsis will be displayed only for Services that they or another Organization Administrator in their Organization created.
Using Services
Using a Trigger Service in a Playbook
- On the top navigation bar, click Playbooks to display the Playbooks screen. Alternatively, click the Playbooks tab to the left of the Services tab when on the Services screen.
- Hover over the NEW button at the upper-left corner of the screen and select Create Playbook. The Create Playbook window will be displayed (Figure 7).
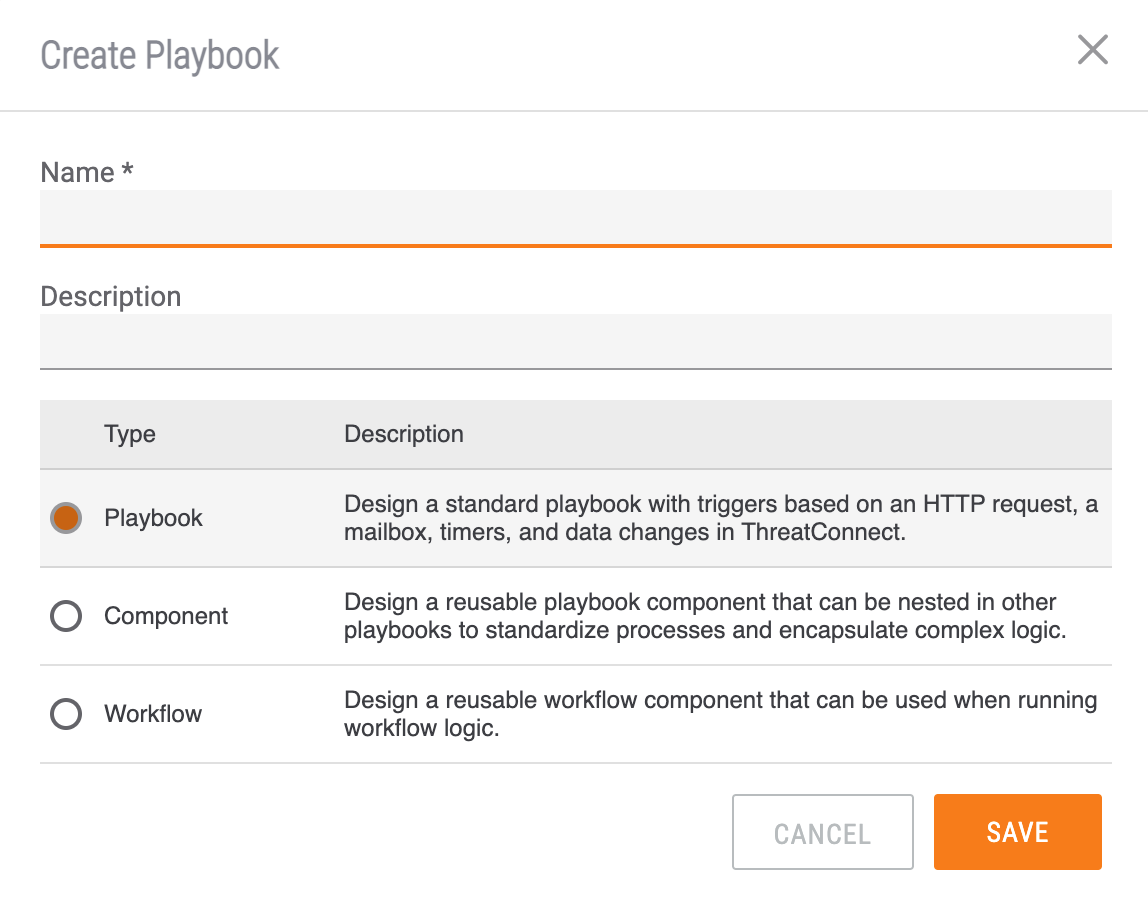
- Name: Enter a name for the Playbook.
- Description: Enter a description for the Playbook.
- Type: Keep the selection of Playbook.
- Click the SAVE button.
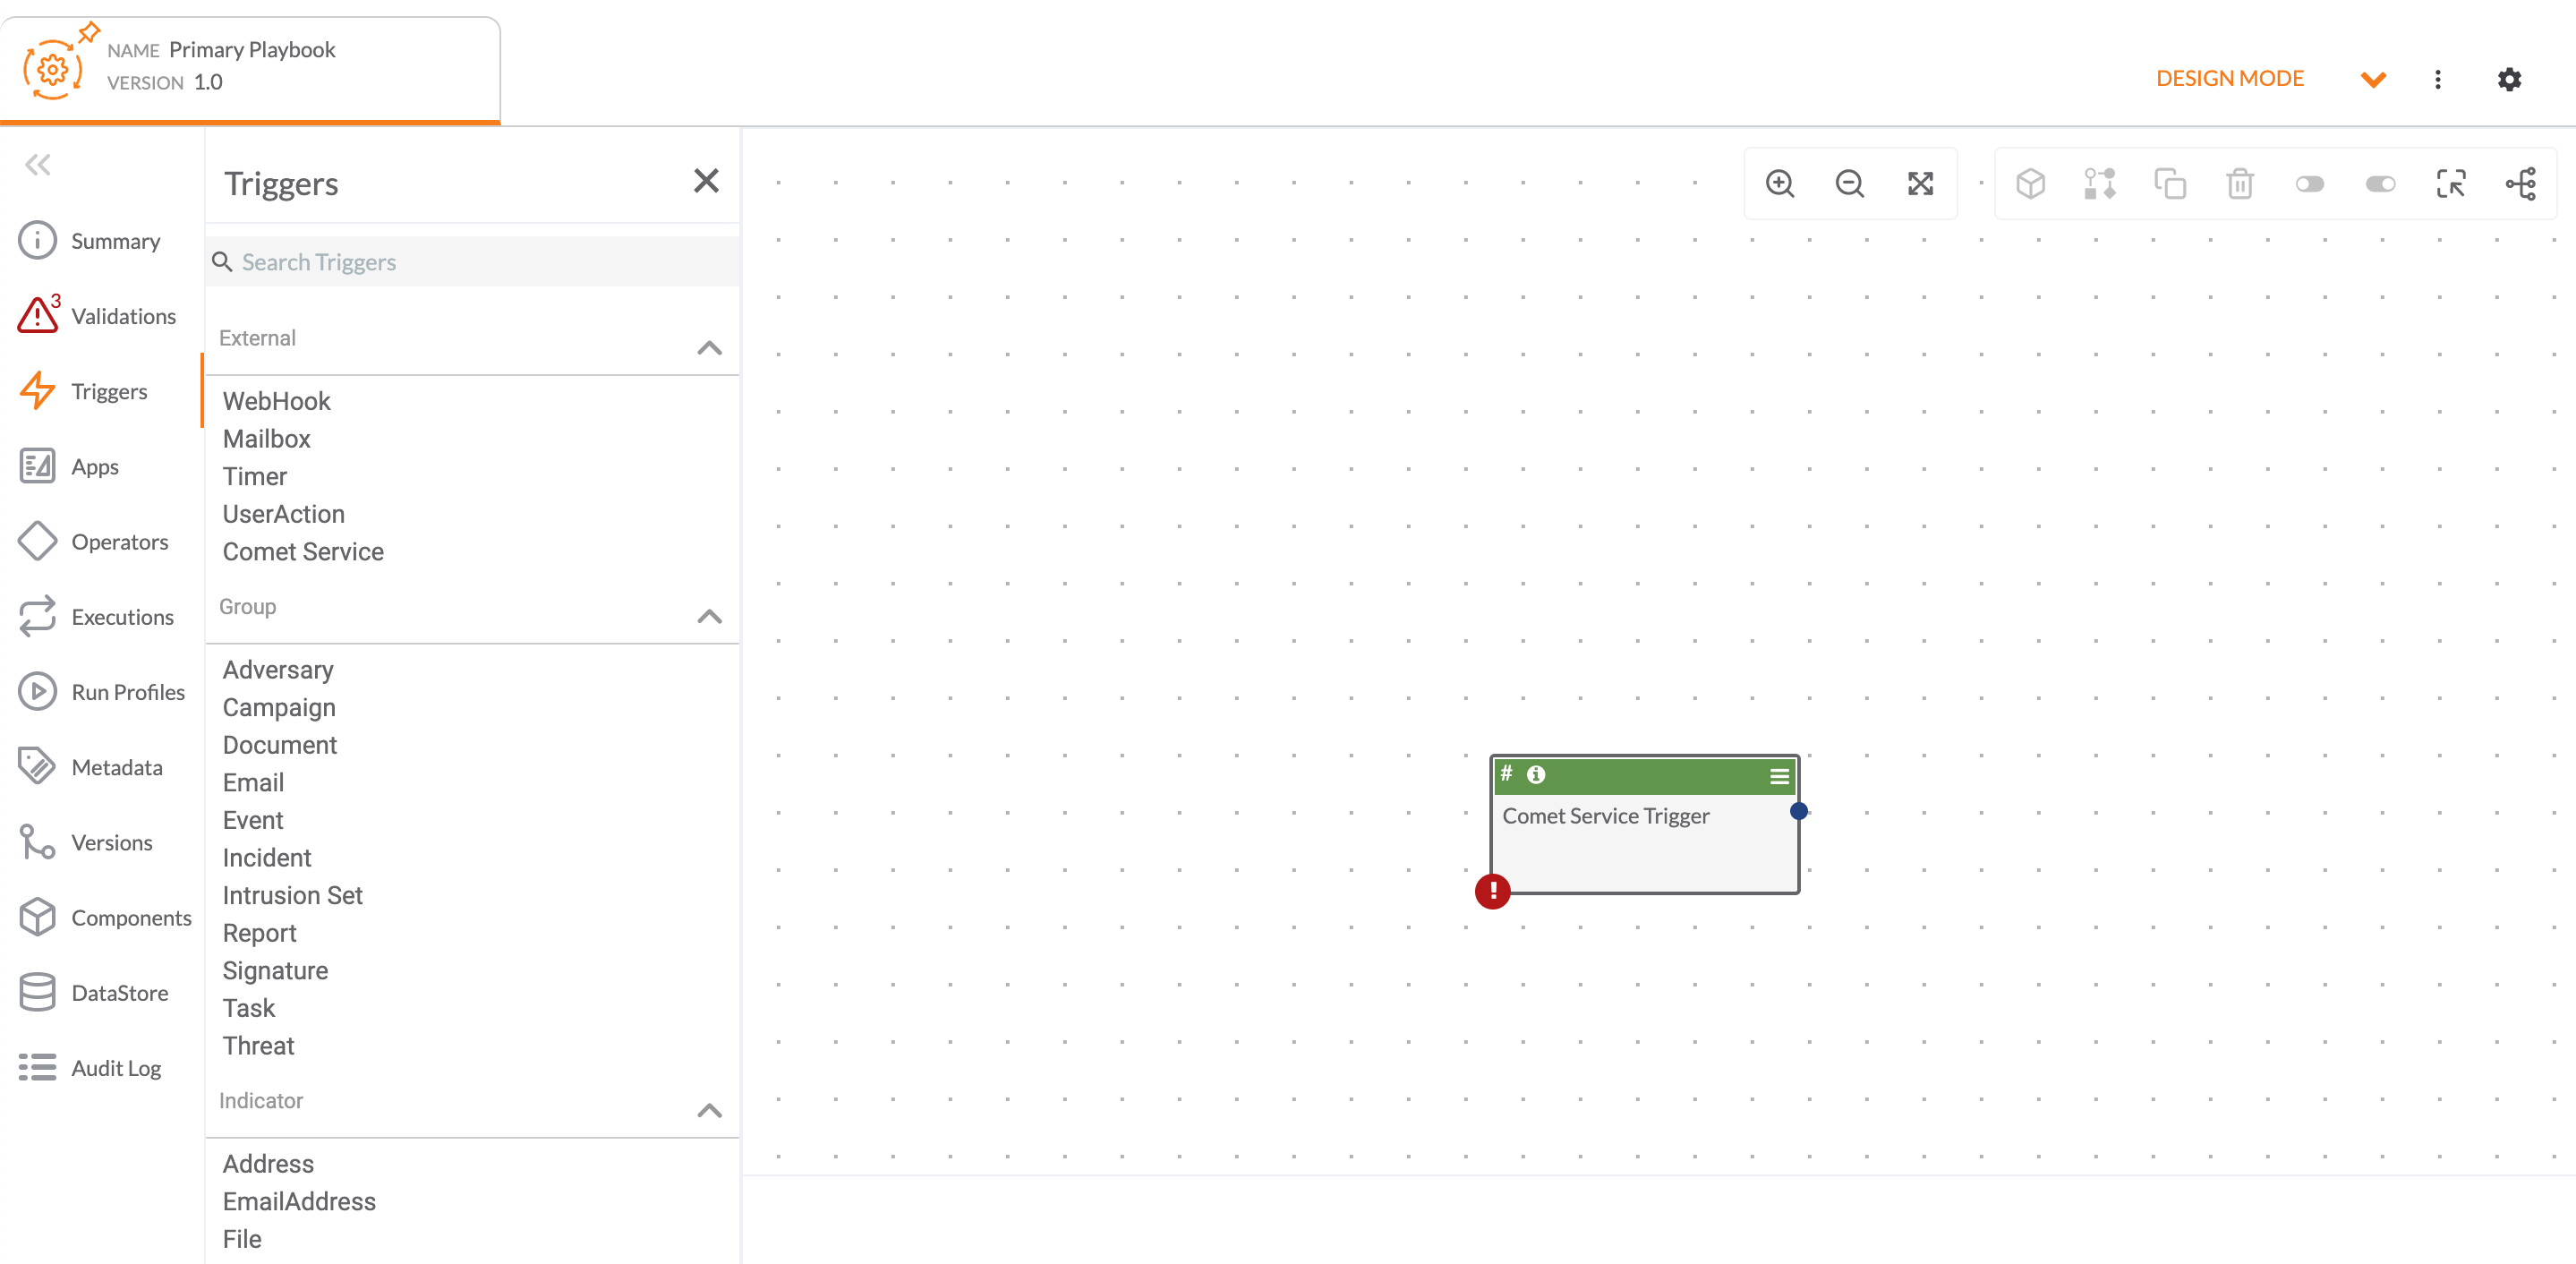
- The Playbook Designer will be displayed. Select a Trigger Service (Comet Service in this example) from the Triggers pane on the left side of the Playbook Designer. Webhook Trigger Services are found in the External section on the Triggers pane. The categories in which Custom Trigger Services are found depend on the App used to create the Service.
- The Trigger will be added to the design pane (Figure 8). Double-click the Trigger to configure it. Trigger configuration is covered in Adding and Configuring Playbook Elements and, for Webhook Trigger Services, in The WebHook Trigger. After you configure the Trigger, continue building the rest of the Playbook.
 icon in the green bar along the top of the Trigger.
After you have finished building the Playbook, the Trigger will be linked to the Service created in the “Creating a Service” section.
For the WebHook Trigger in this example, when a request is made to the endpoint URL linked to the Trigger, ThreatConnect will send the request data to the Service, which will determine whether the Playbook will execute. To view the endpoint URL, hover the cursor over the icon in the green bar along the top of the Trigger.
Using a REST API Service
For instructions on using the REST API Services currently available in ThreatConnect, refer to the following documentation:
- JS Report Service: Editing, Saving, and Exporting a Report
- ThreatConnect App for Splunk Gateway Service: ThreatConnect App for Splunk
- ThreatConnect TAXII Server: Using the ThreatConnect TAXII 2.1 Server
ThreatConnect® is a registered trademark, and CAL™ and TC Exchange™ are trademarks, of ThreatConnect, Inc.
Splunk® is a registered trademark of Splunk, Inc.
TAXII™ is a trademark of The MITRE Corporation.
20096-01 v.05.C