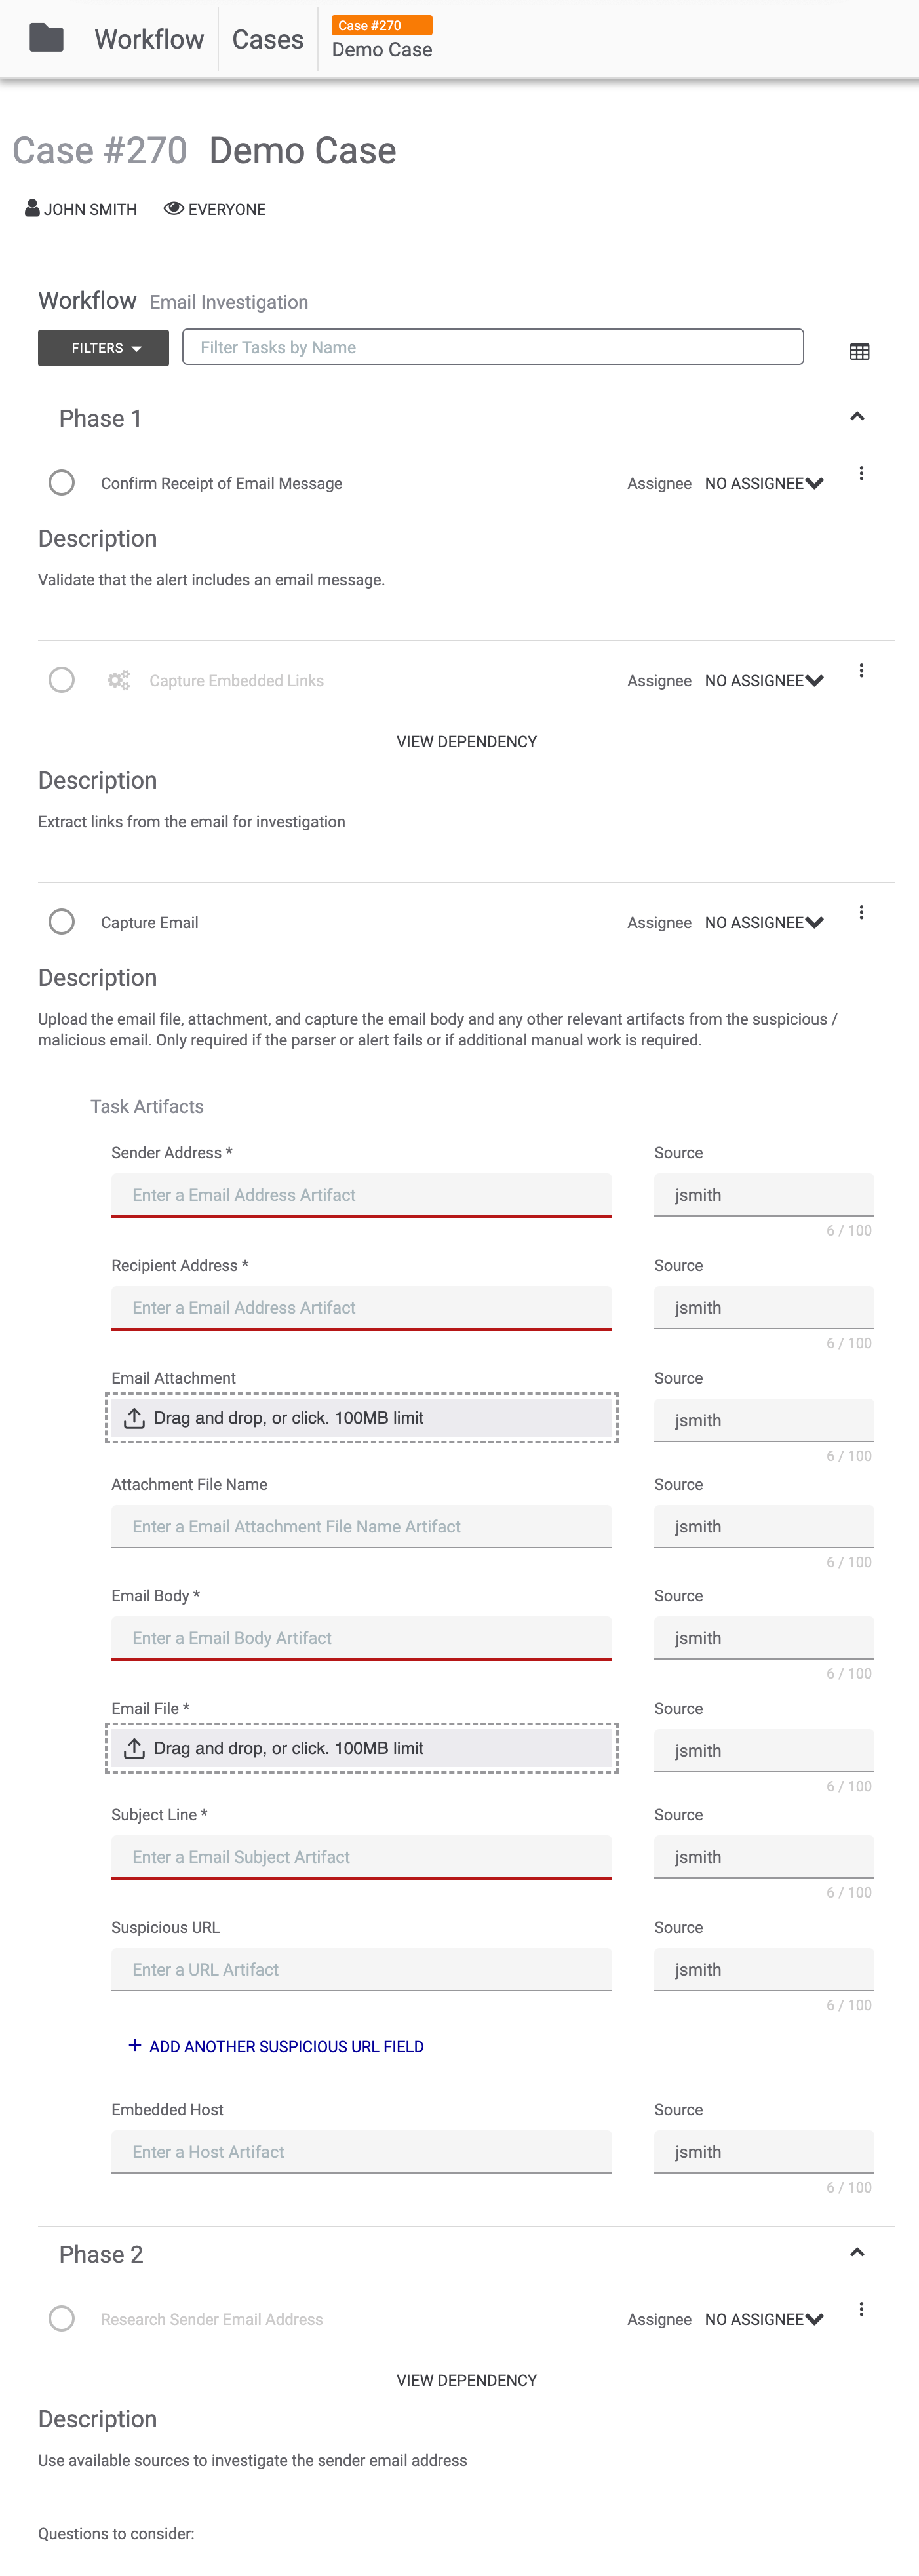
Figure 1 shows an example Phases and Tasks section for a Case that uses a Workflow for an email investigation.
Phases
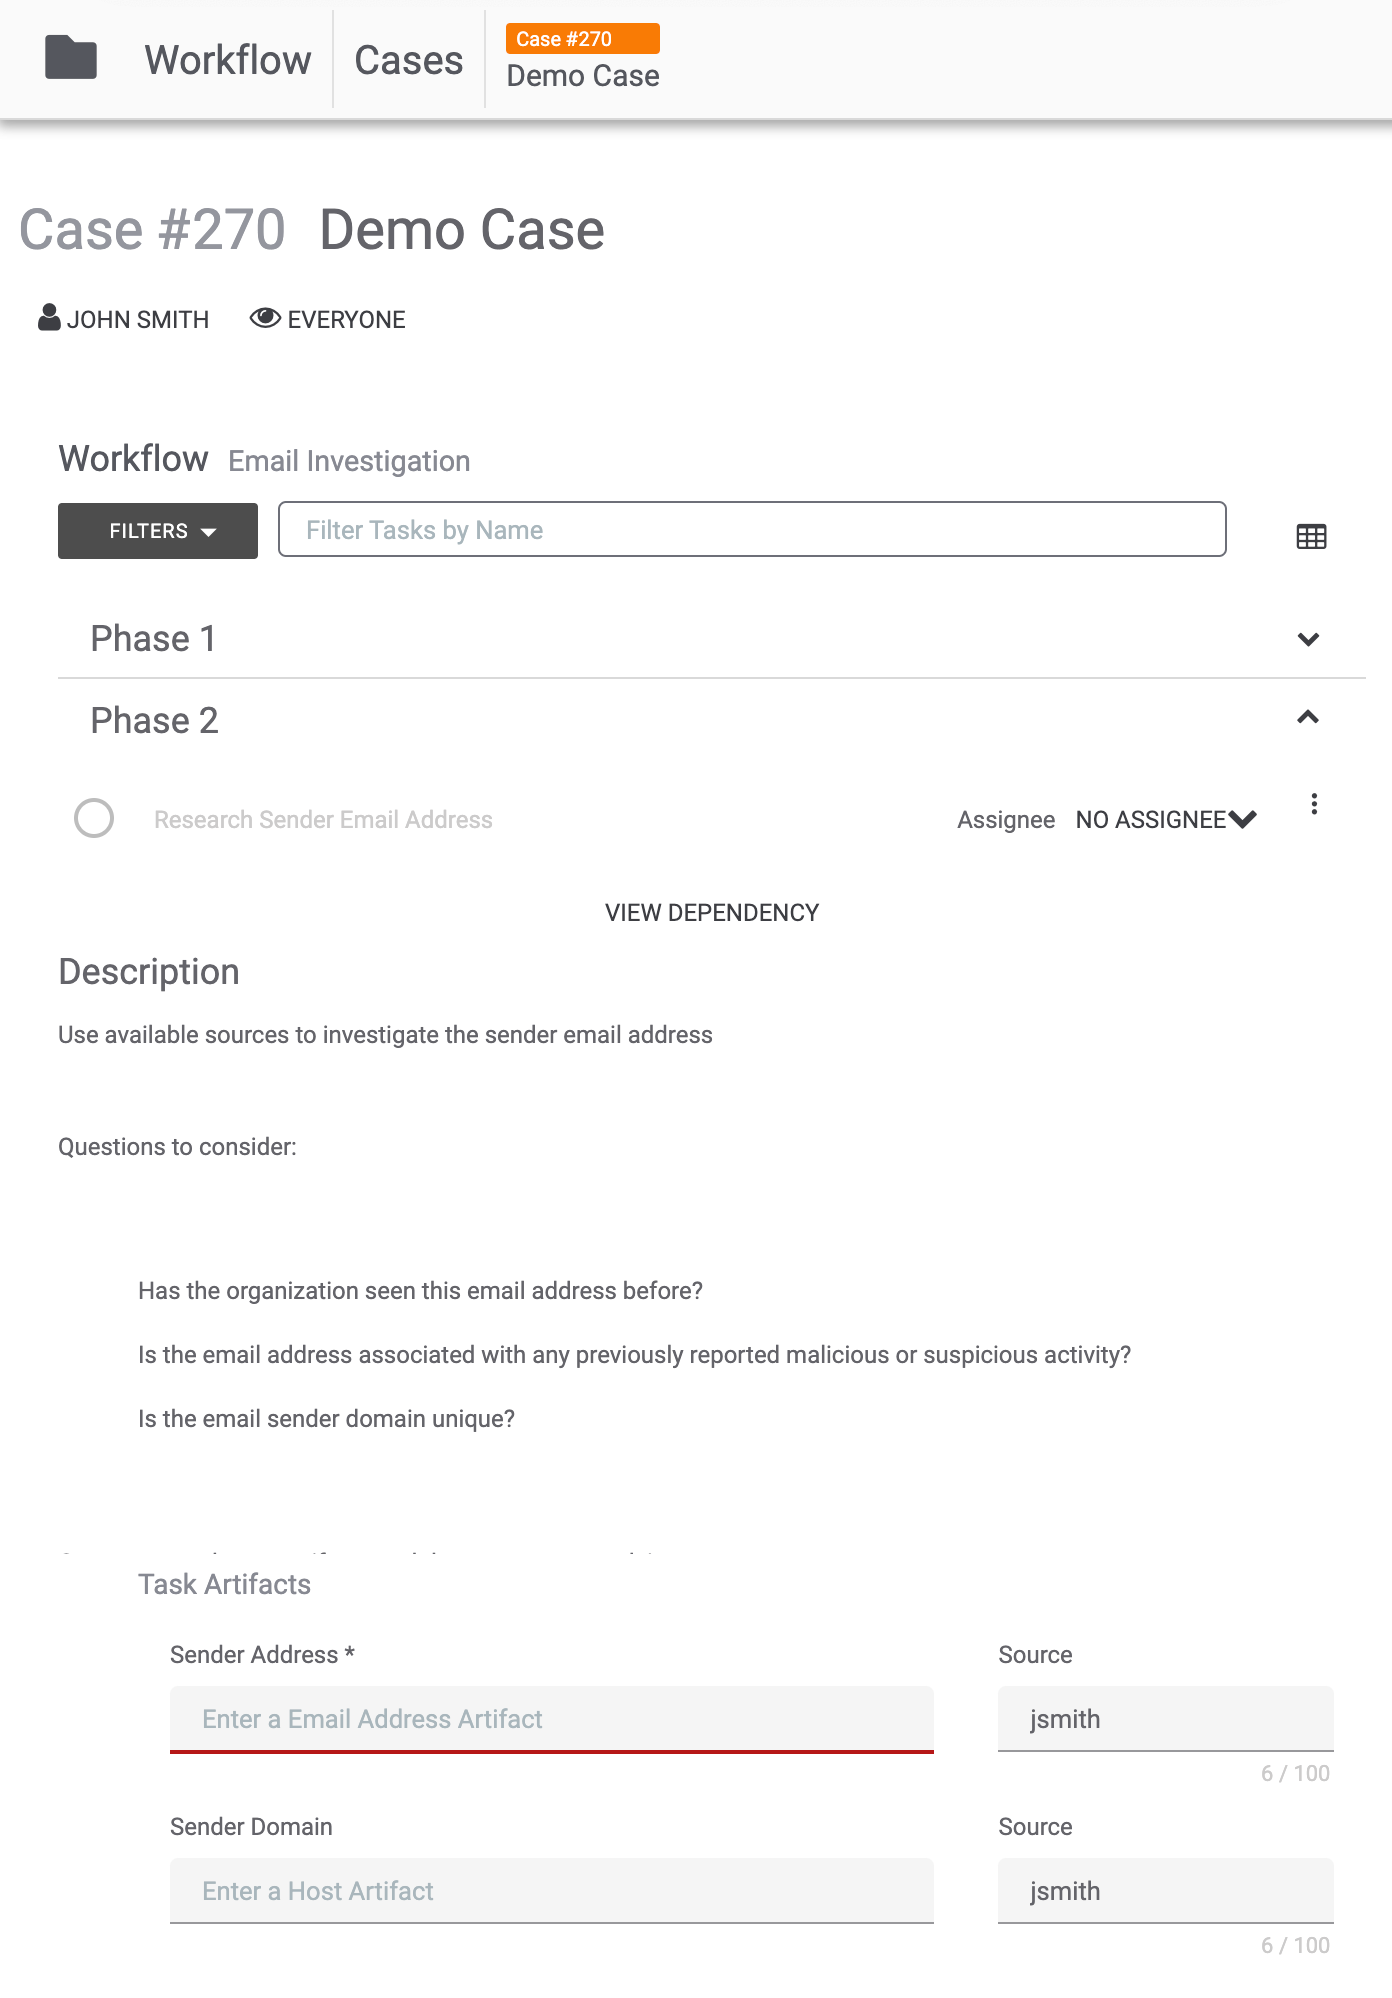
When a Phase is expanded, all Tasks included in the Phase will be displayed. You can collapse or expand a Phase to show or hide all Tasks, respectively, by clicking the arrow  icon at the upper-right corner of the Phase.
Tasks
The format and requirements of Tasks differ, depending on each Task’s configuration and what is to be accomplished.
Manual Tasks with No Inputs
Some manual Tasks prompt you to do something outside of the Task, and possibly outside of ThreatConnect. For example, the first Task in Phase 1 in Figure 1 (Confirm Receipt of Email Message) prompts you to confirm receipt of an email message. In this case, you would check your email account to ensure that you received the message and then mark the Task as complete by selecting the circle to the left of the Task name.
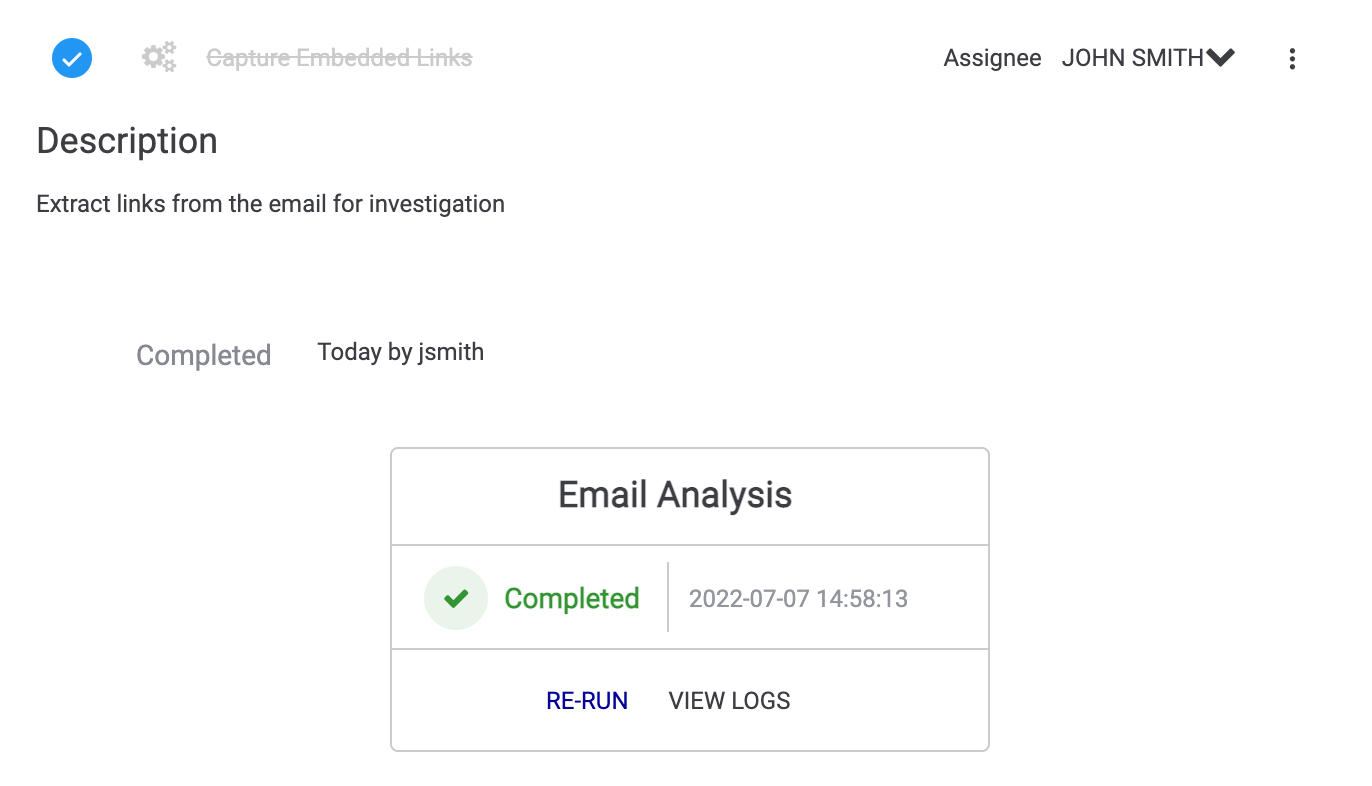
When you mark a Task as complete, the following changes will take place on the screen displaying the Case (Figure 3):
- The circle to the left of the Task will be checked
 .
. - The Task will be crossed out and grayed out.
- A line of text will be added at the bottom of the Task indicating that the Task was completed and naming the user who completed it.
- If the Task is the first Task completed in the Case, a completion bar will be displayed above the first Phase, showing the number of Tasks completed and the total number of Tasks. If the Task is not the first Task completed in the Case, the existing completion bar will be updated to indicate that another Task was completed.
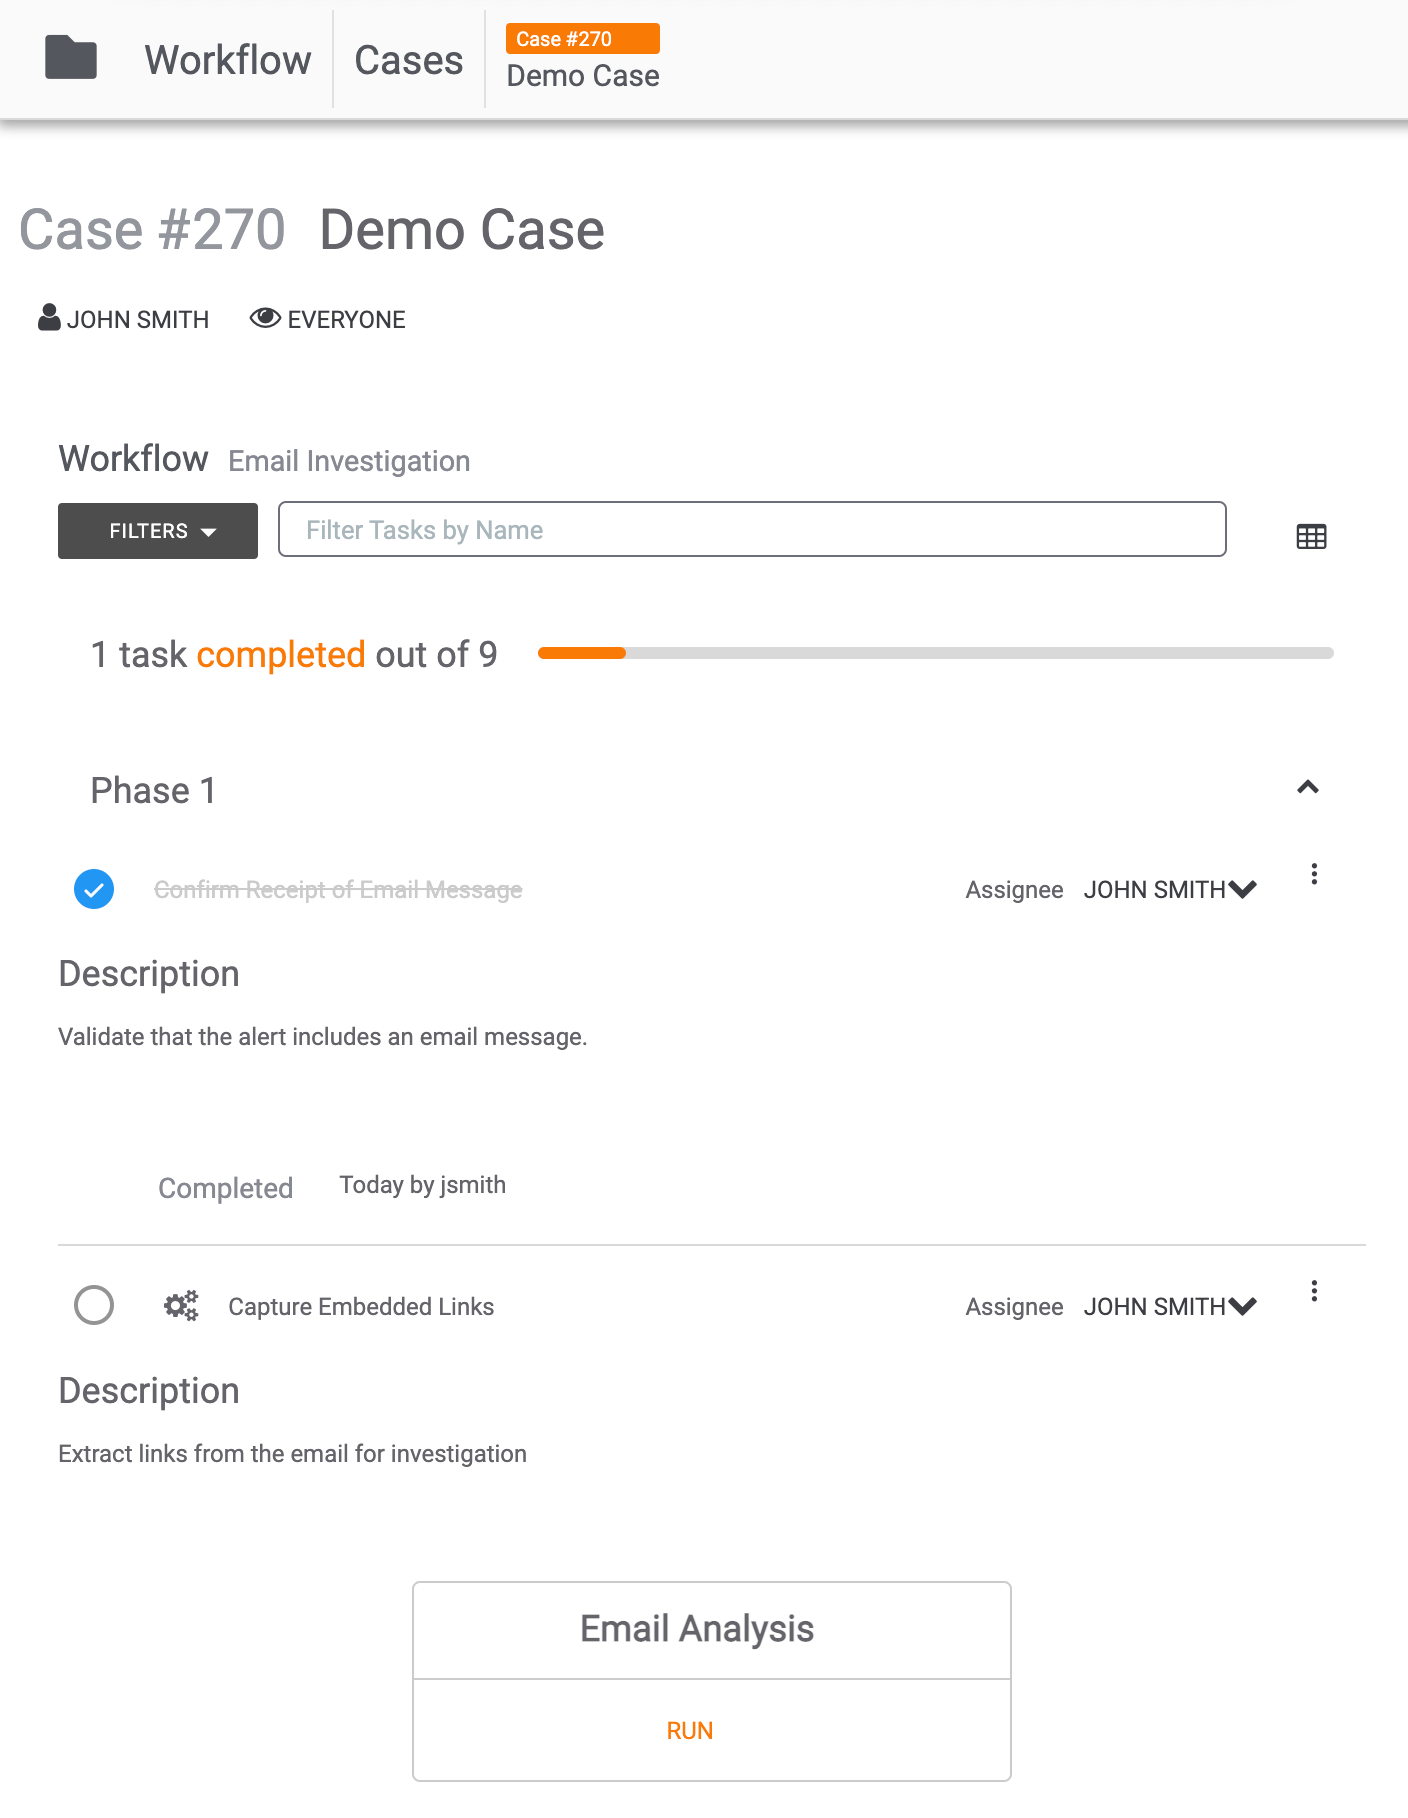
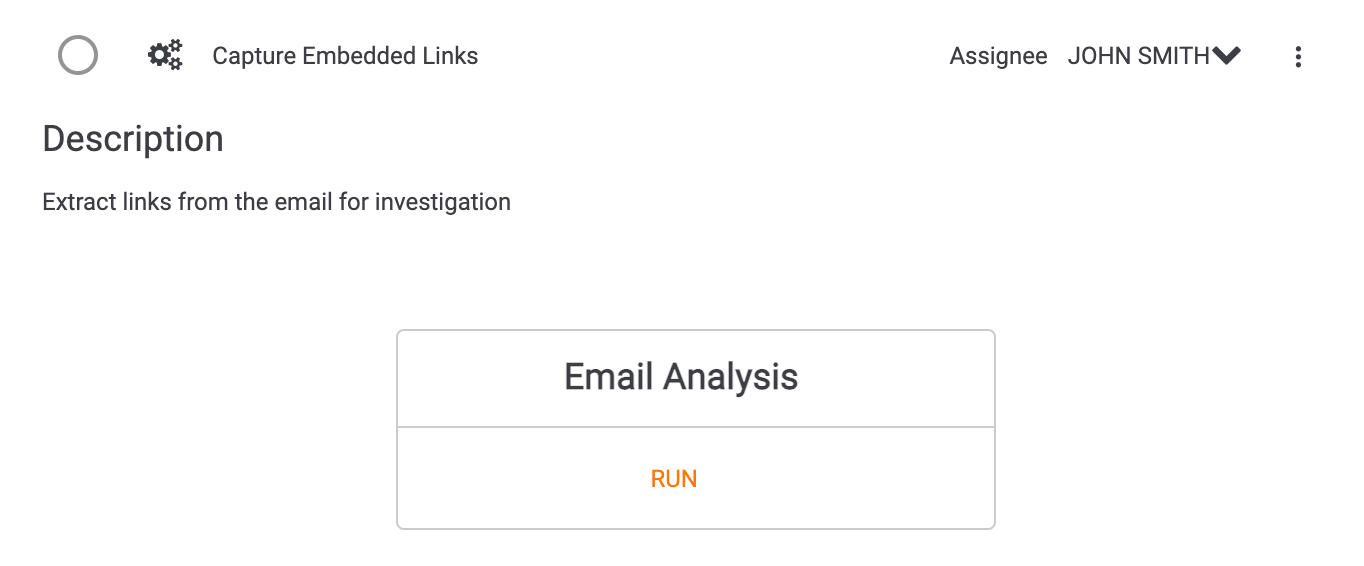
After you mark a Task as complete, dependent Tasks will become available for completion. For example, in Figure 3, the Capture Embedded Links automated Task is no longer grayed out (as it was in Figure 1), and there is a RUN link that you can click to run the Playbook. (See the “Automated Tasks” section for more information.)
To re-open a completed Task, click the blue circleto the left of the Task name. The following changes will take place on the screen displaying the Case:
- The blue circle will be cleared.
- The Task will no longer be crossed out and grayed out.
- The line of text at the bottom of the Task indicating that the Task was completed and the name of the user who completed it will be removed.
- If the Task was the only Task completed in the Case, the completion bar displayed above the first Phase will be removed. If the Task was not the only Task completed in the Case, the completion bar will be updated to indicate that one fewer Task was completed.
- The following message will be displayed at the lower-left corner of the screen: Task ‘<Task Name>’ Reopened.
- A Timeline Event labeled Task ‘<Task Name>’ Reopened will be added to the Case’s timeline.
Re-opening a Task will not make dependent manual Tasks unavailable again. In this situation, dependent manual Tasks will remain open and available for completion when the Task on which they are dependent is re-opened.
Manual Tasks with Inputs
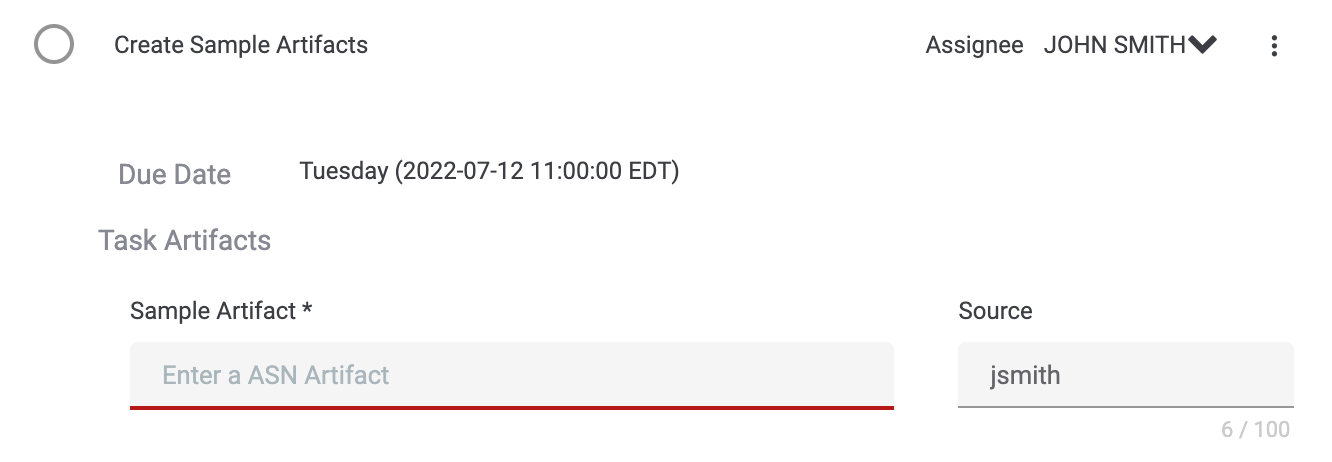
Some manual Tasks prompt you to provide inputs in designated fields within the Task (i.e., the Task Artifacts section). For example, the third Task in Phase 1 in Figure 1 (Capture Email) prompts you to enter a Sender Address and a Recipient Address, among other fields. It also prompts you to upload files, such as an Email Attachment and an Email File.
Required input fields are displayed with an asterisk next to the name of the input field (e.g., Sender Address*). If a required input field accepts text as a valid input, it will also be underlined in red. All inputs to a Task are saved as Artifacts that are associated with the Task.
By default, the Source for an input field is the user viewing the Case (jsmith in this example), but may be changed by entering a new name in the field.
Some input fields provide an option to add more than one value for the field. For example, near the bottom of the third Task in Phase 1 (Capture Email), you have the option to add more Suspicious URL fields (Figure 4).
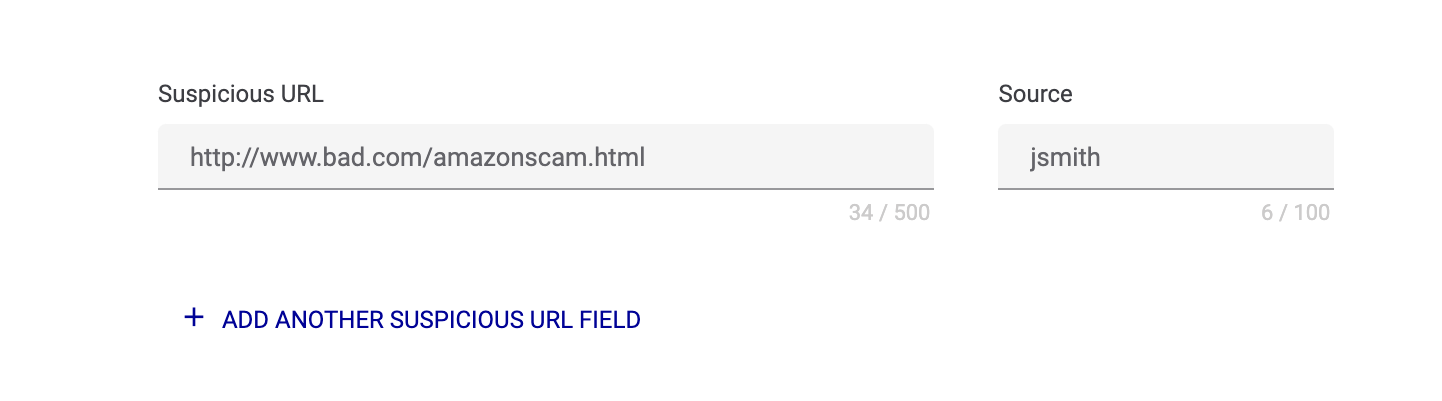
Click the corresponding text (+ ADD ANOTHER SUSPICIOUS URL FIELD in this example) to display a new text box for adding another value to the input field (Figure 5).
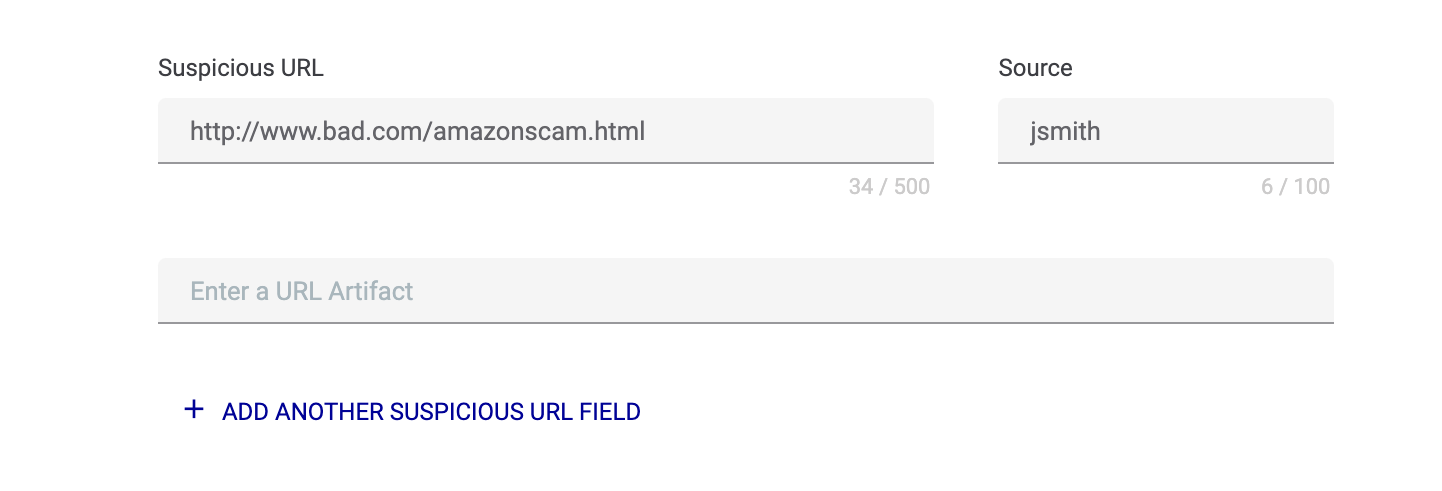
After filling in an input field, clicking anywhere outside of it will automatically save the value entered in the field as an Artifact and populate it in the table on the Artifacts card.
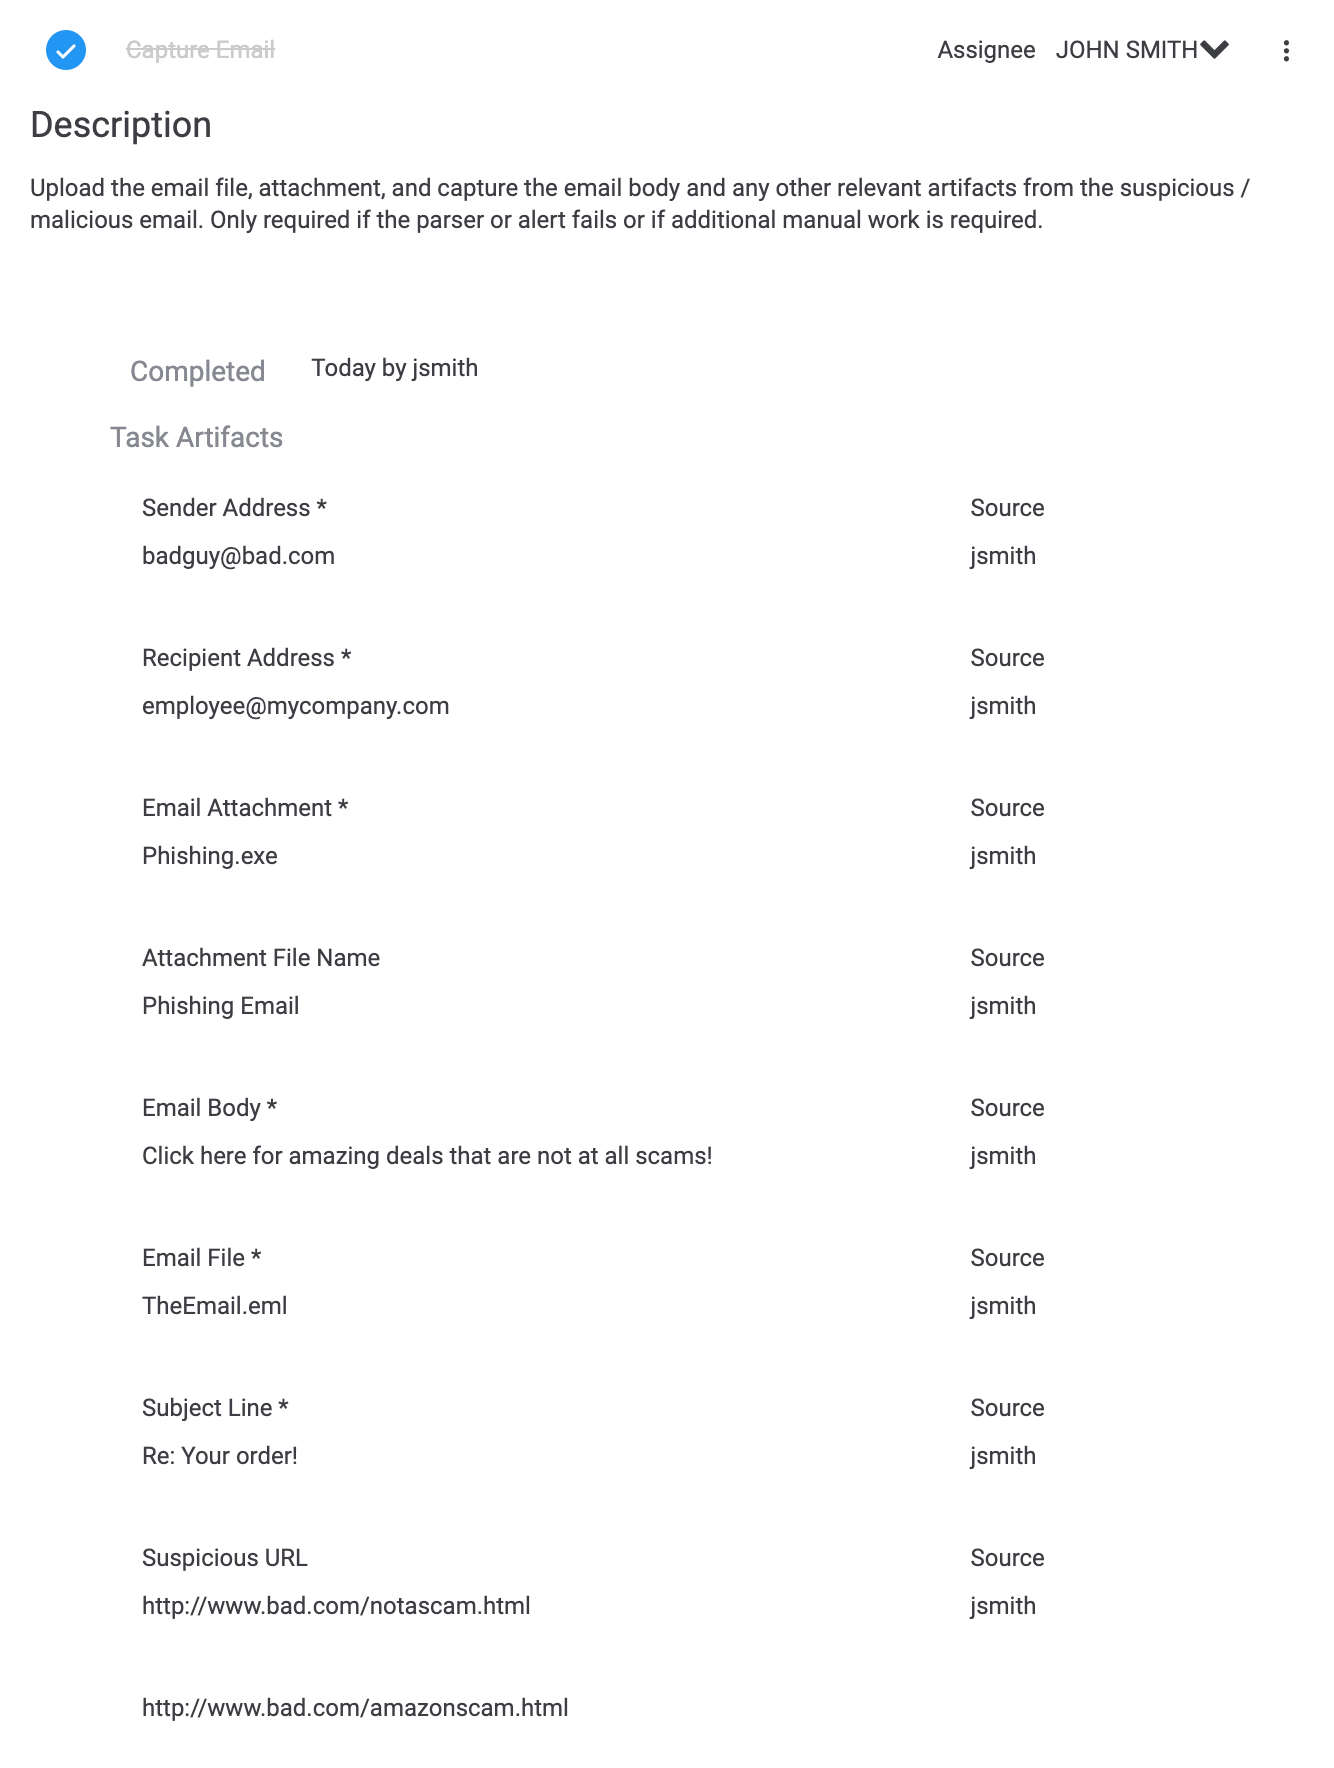
Alternatively, once all of the required input fields have been filled in and saved, you can mark the Task as complete by selecting the circleto the left of the Task. When you mark a manual Task with input fields as complete, the following changes will be displayed on the screen (Figure 6):
- The circle to the left of the Task will be checked.
- The Task will be crossed out and grayed out.
- A line of text will be added indicating that the Task was completed and naming the user who completed it.
- Inputs entered and the Source who entered them will be listed.
- If the Task is the first Task completed in the Case, a completion bar will be displayed above the first Phase, showing the number of Tasks completed and the total number of Tasks. If the Task is not the first Task completed in the Case, the completion bar will be updated to indicate that another Task has been completed.
To re-open a completed Task, click the blue circleto the left of the Task. The following changes will be displayed on the screen:
- The blue circle will be cleared.
- The Task will no longer be crossed out and grayed out.
- The line of text at the bottom of the Task indicating that the Task was completed and the name of the user who completed it will be removed.
- If the Task was the only Task completed in the Case, the completion bar displayed above the first Phase will be removed. If the Task was not the only Task completed in the Case, the existing completion bar will be updated to indicate that one fewer Task was completed.
- The following message will be displayed at the lower-left corner of the screen: Task ‘<Task Name>’ Reopened.
- A Timeline Event labeled Task ‘<Task Name>’ Reopened will be added to the Case’s timeline.
Re-opening a Task will not make dependent manual Tasks unavailable again. In this situation, dependent manual Tasks will remain open and available for completion when the Task on which they are dependent is re-opened. However, if a user enters new data into the Task on which the dependency exists and completes that Task again, the dependent manual Task will not automatically receive those data. Therefore, it is recommended to complete and then re-open the dependent manual Task after reopening the Task on which it is dependent.
Automated Tasks
Automated Tasks, designated by the icon to the left of their name, are Tasks that are executed by a Workflow Playbook. If the Playbook has been configured to run automatically after the completion of dependent Tasks or at Case creation, the Task will complete on its own. If the Playbook has not been configured in either of these two ways, you will need click RUN under the name of the Playbook to run the Playbook manually (Figure 7).
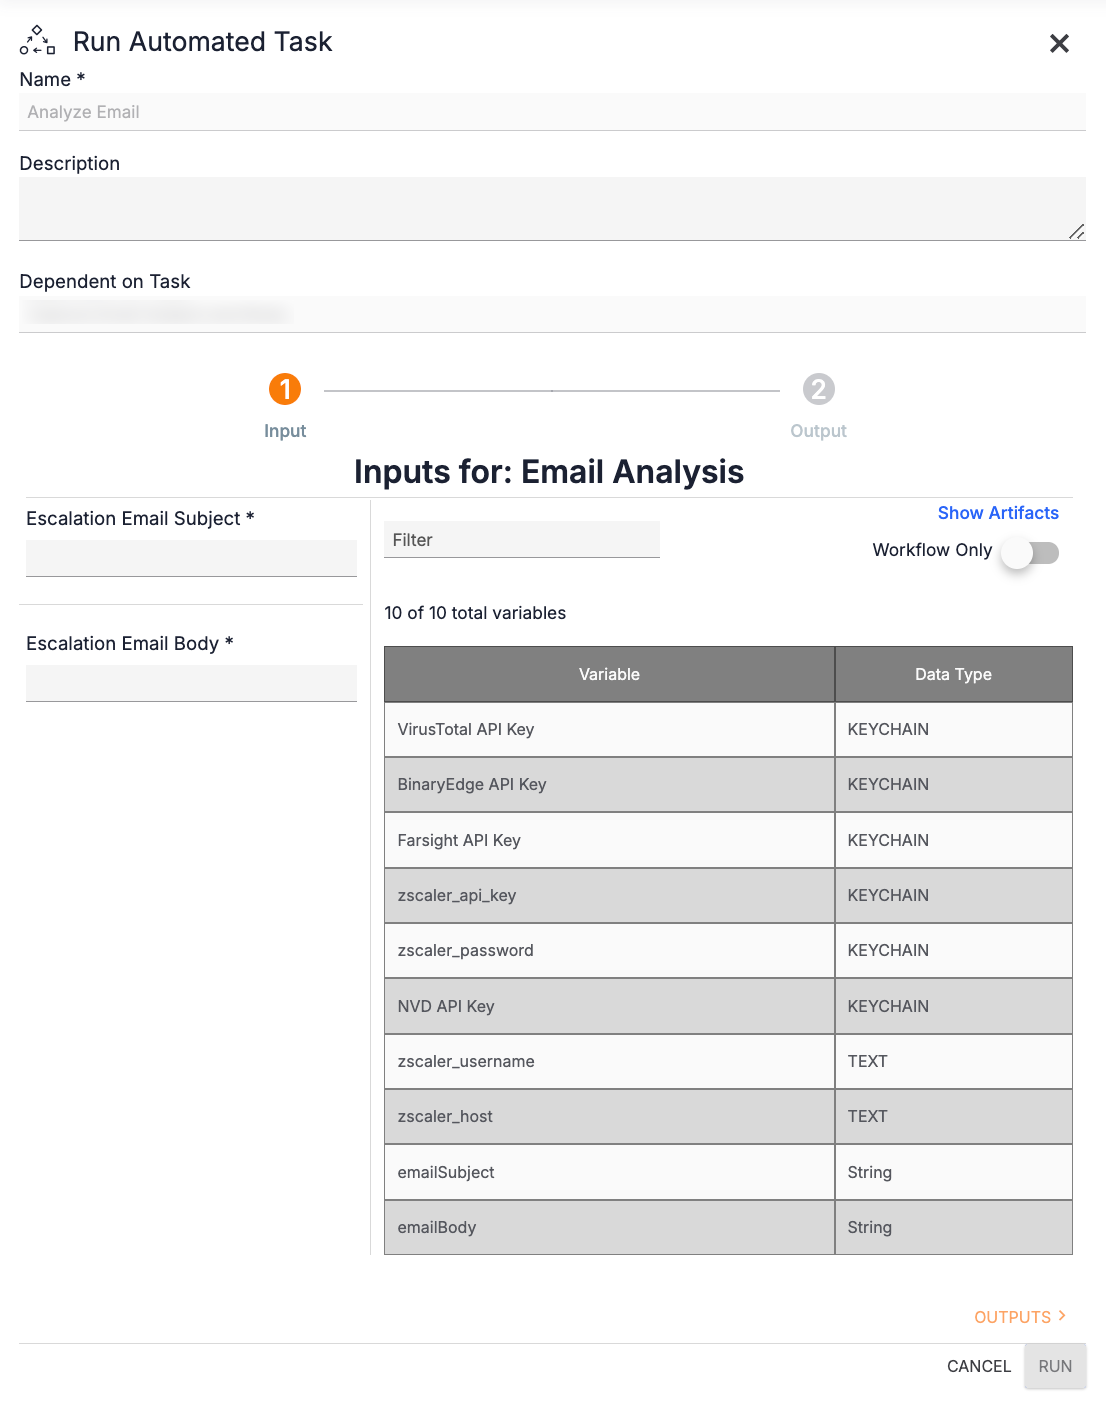
The Run Automated Task drawer will be displayed (Figure 8).
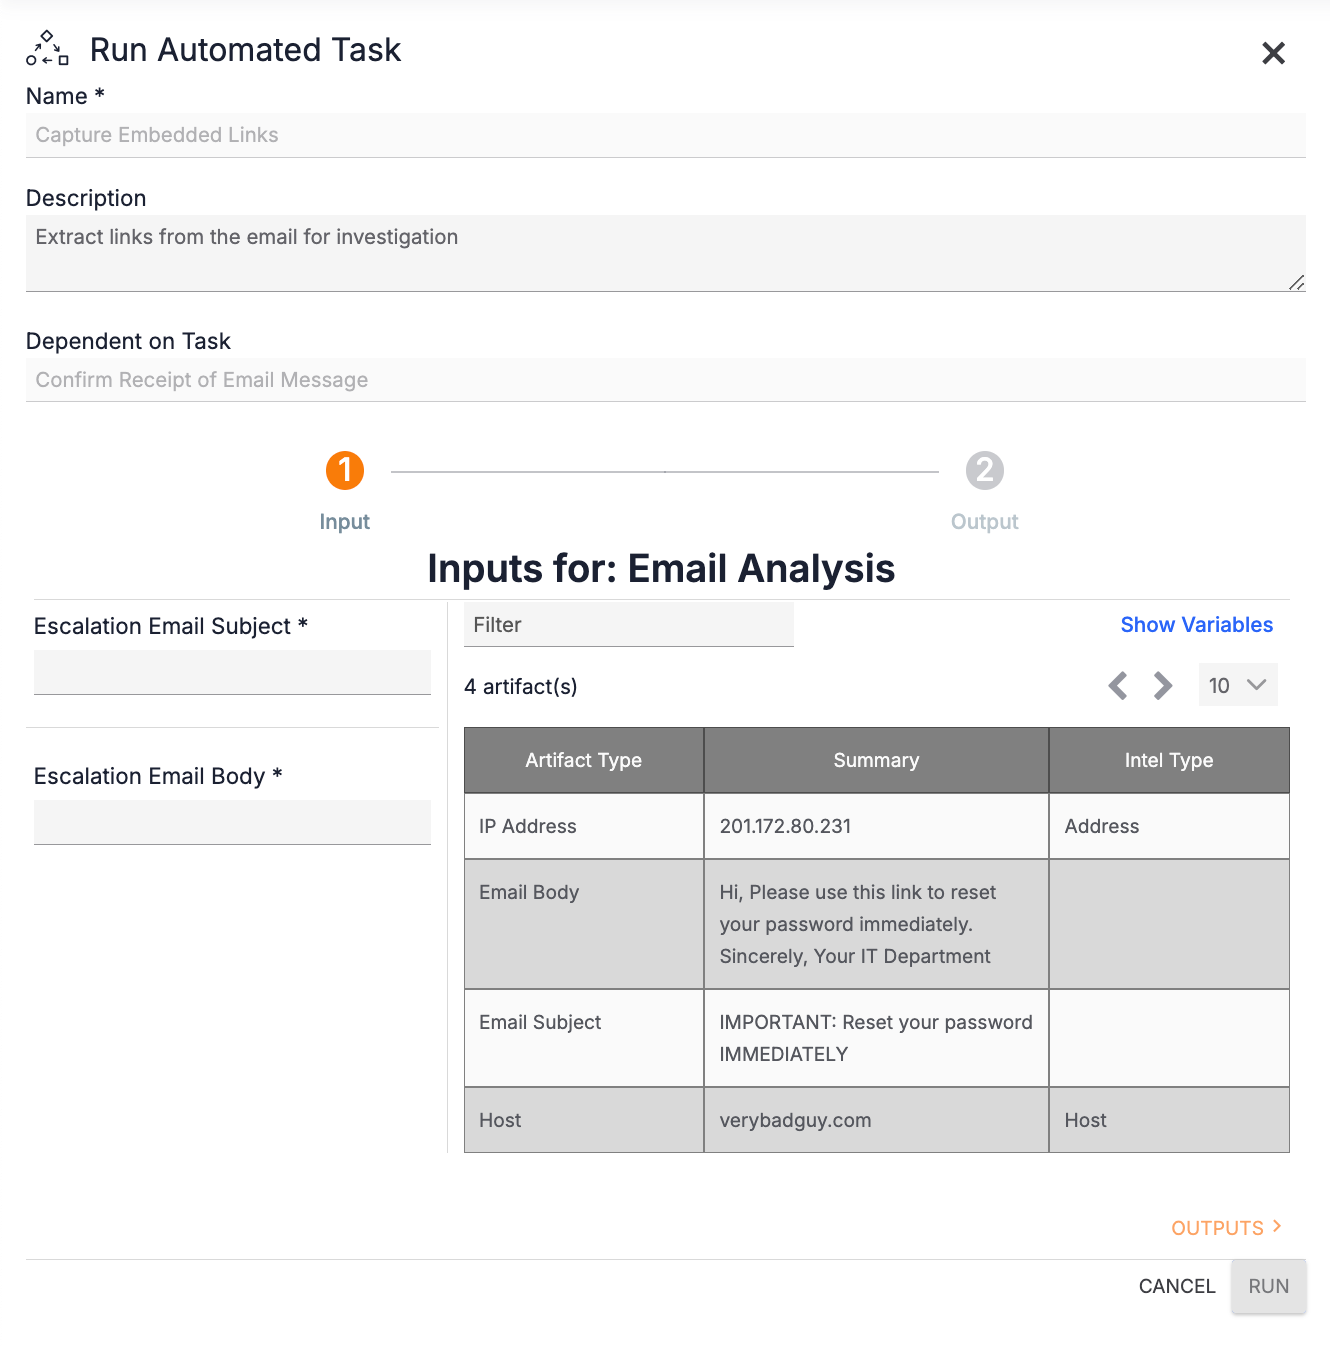
The bottom left of the drawer displays all input fields for the Playbook (Escalation Email Subject and Escalation Email Body in this example). Fields with an asterisk next to them are required and must be populated for the Playbook to run.
You can populate input fields with Artifacts in the Case, variables in your Organization, or, if applicable, output variables from the Task on which the automated Task is dependent (i.e., Workflow variables). You can also enter values manually into an input field’s text box.
By default, the table at the bottom right of the drawer displays all Artifacts in the Case that you can use to populate an input field. Use the Filter field at the top to enter text to filter the Artifacts by keyword. To populate an input field with an Artifact, click on the Artifact and drag it to the field.
To view variables in your Organization and Workflow variables that you can use to populate an input field, click Show Variables at the top right of the table. The table of Artifacts will be replaced with a table of variables (Figure 9).
To view Workflow variables only, toggle the Workflow Only slider on. This slider will not be displayed if there are no available output variables from the automated Task’s dependency, or if the automated Task has no dependencies. Use the Filter field at the top to enter text to filter the variables by keyword. To populate an input field with a variable, click on the variable and drag it to the field. To toggle back to the Artifacts table, click Show Artifacts at the top right of the table.
After filling out the input fields required by the Workflow Playbook, click OUTPUTS > at the lower-right corner to view the outputs that the Playbook will produce (Figure 10).
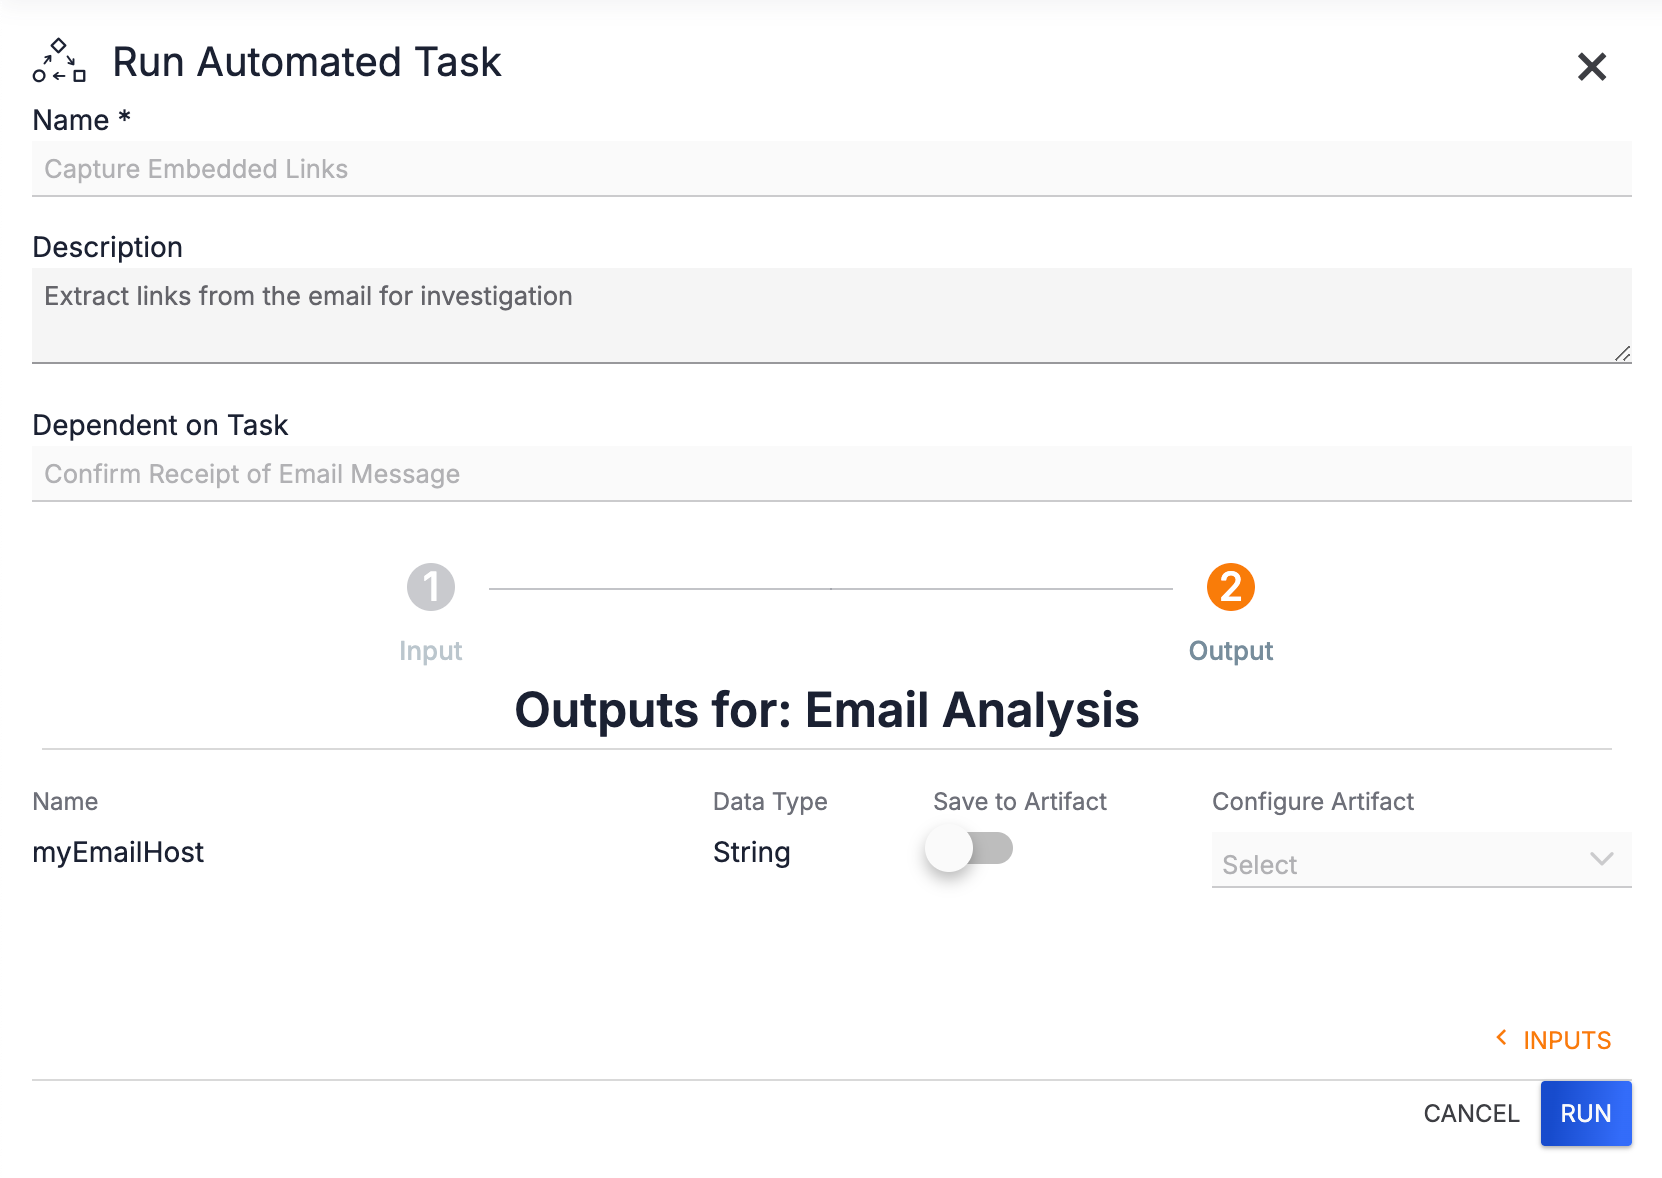
To save an output item as an Artifact, toggle the Save to Artifact slider on (orange). Fields for configuring the Artifact will be displayed (Figure 11).
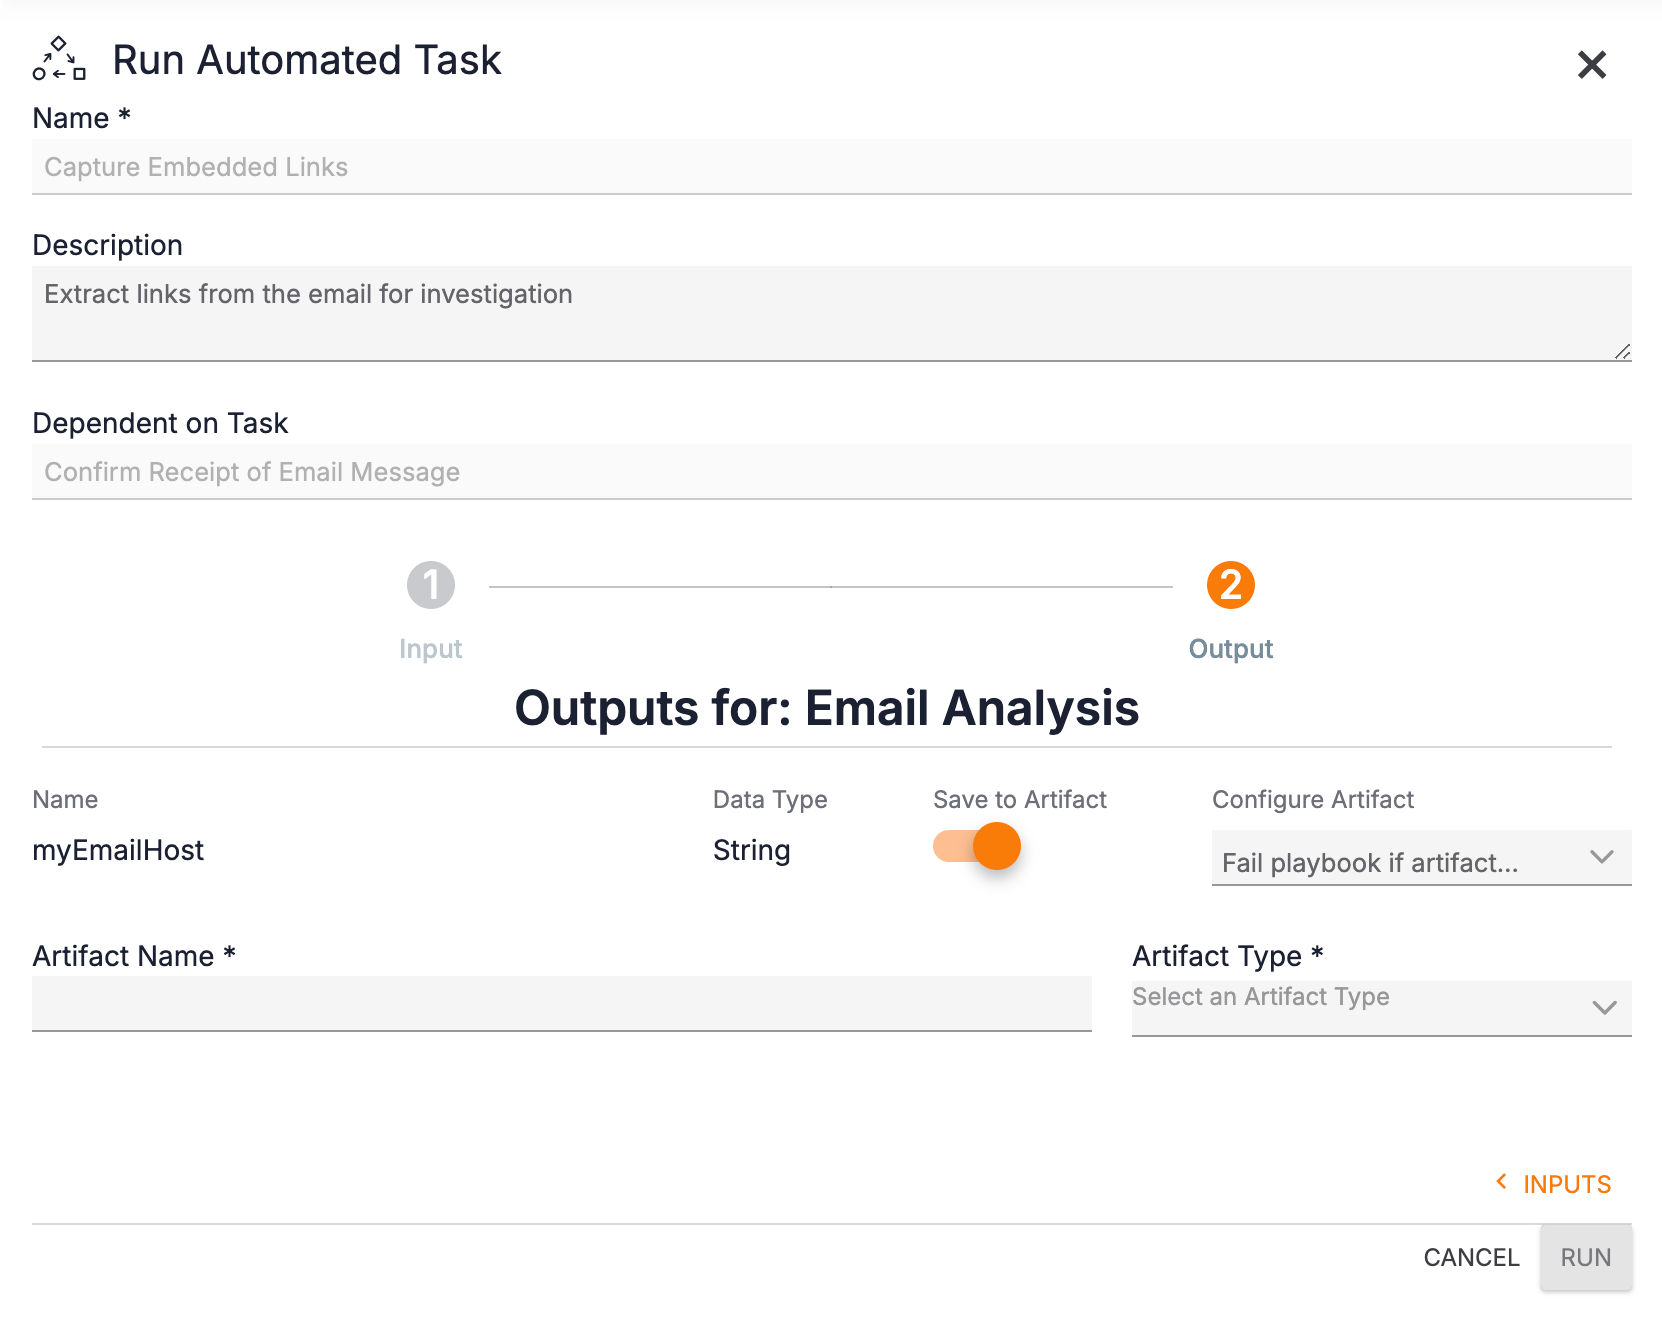
- Artifact Name: Enter a name for the Artifact.
- Artifact Type: Select the type of Artifact being saved.
- Only Artifact Types that map to the Data Type of the output will be displayed in the dropdown menu. For example, if the Data Type is String, the Artifact Type menu will display only types that are Strings.
- Configure Artifact: Select the failure option(s) for the Playbook. Note that no selection is required for this field, and more than one option may be selected. Available options include:
- Output is required: Select this option to make the Playbook fail if it does not produce any output.
- Fail playbook if artifact validation fails: Select this option to make the Playbook fail if it produces output that fails Artifact validation.
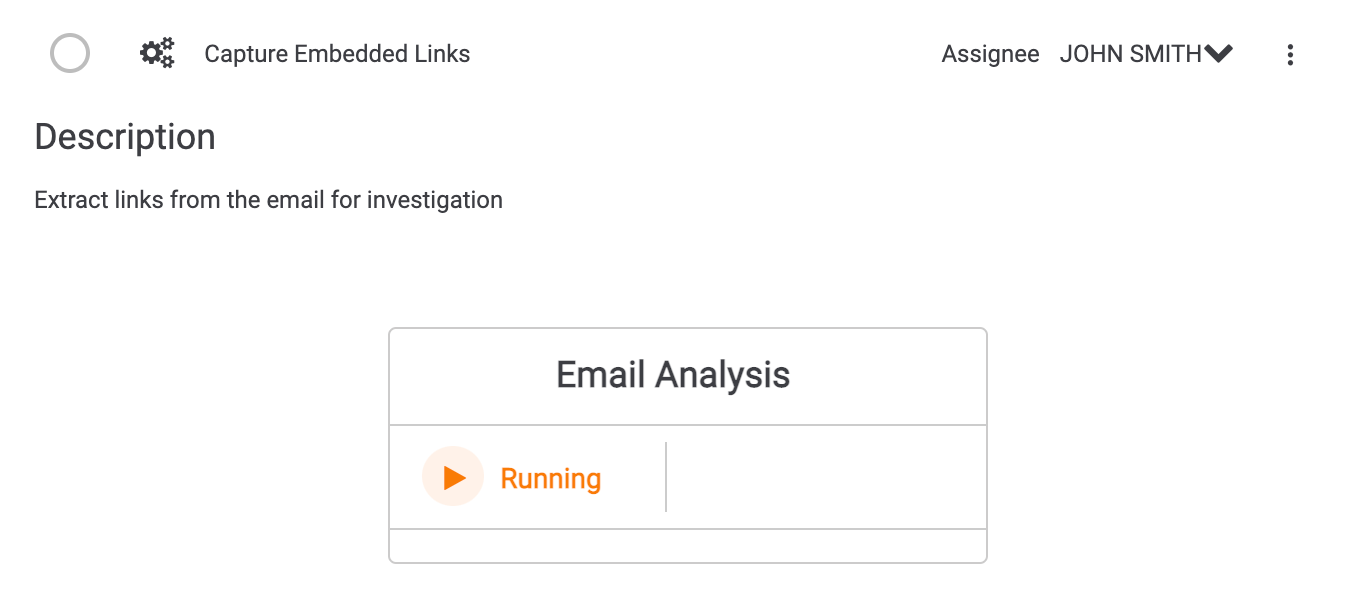
Click the RUN button to execute the Playbook. The Task will initially display a status of Running (Figure 12).
When the Playbook finishes running, it will display a status of Completed and the following changes will be displayed on the screen (Figure 13):
- The circle to the left of the Task will be checked.
- The Task will be crossed out and grayed out.
- A line of text will be added indicating that the Task was completed and naming the user who completed it.
- If the Task is the first Task completed in the Case, a completion bar will be displayed above the first Phase, showing the number of Tasks completed and the total number of Tasks. If the Task is not the first Task completed in the Case, the completion bar will be updated to indicate that another Task has been completed.
To re-run a completed automated Task, click the blue circleto the left of the Task, or click RE-RUN below the Completed status. The Run Automated Task drawer will be displayed (Figure 8). Proceed through the Input and Output screens to run the Workflow Playbook.
Re-opening a Task will not make dependent automated Tasks unavailable again. In this situation, dependent automated Tasks will remain open and available for completion when the Task on which they are dependent is re-opened. However, if a user enters new data into the Task on which the dependency exists and completes that Task again, the dependent automated Task will not automatically receive those data. Therefore, it is recommended to complete and then re-run the dependent automated Task after re-opening the Task on which it is dependent.
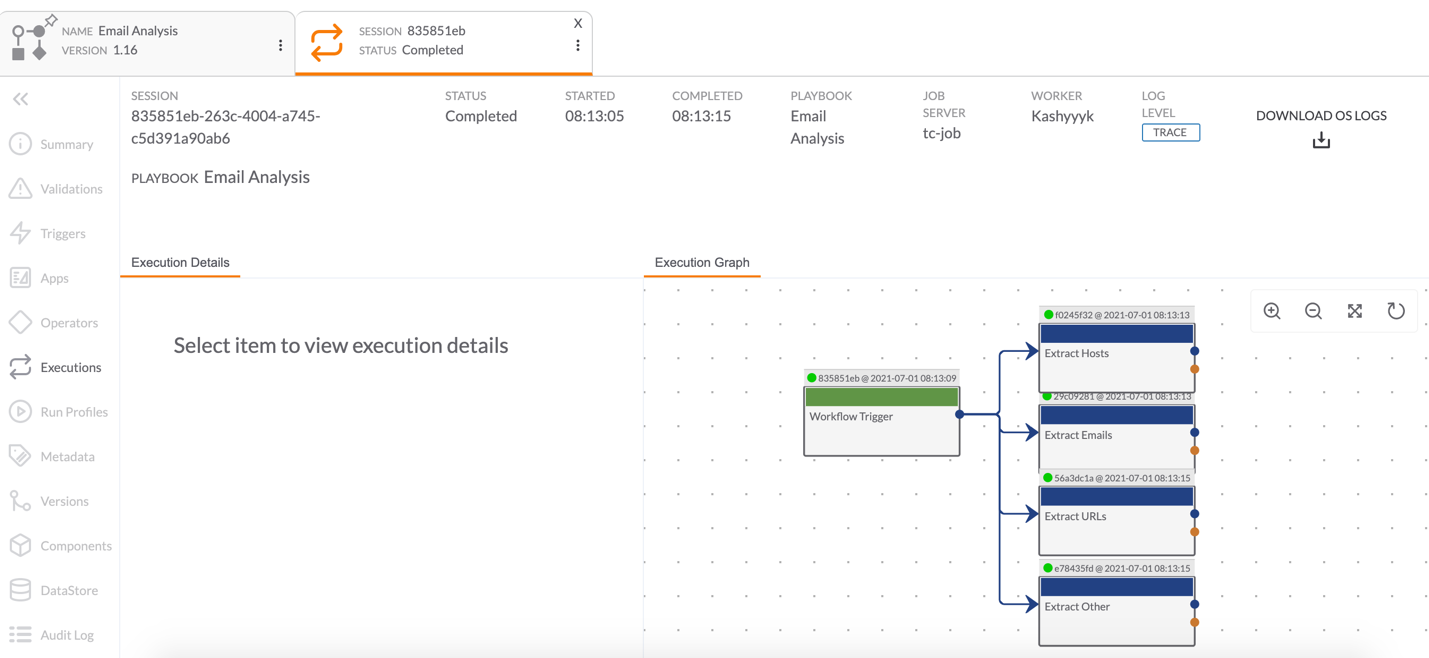
To view the execution logs for the Playbook, click VIEW LOGS. A new browser tab will open that displays the Executions screen for the Workflow Playbook in the Playbook Designer (Figure 14).
Assignee
A Task’s assignee is the user or user group responsible for tracking and monitoring the Task. The assignee receives notifications about the Task, including overdue notices, and can monitor and track the Task from the Tasks tab of the Workflow screen. Assignee information can also be used to filter metrics on TQL-based dashboard cards.
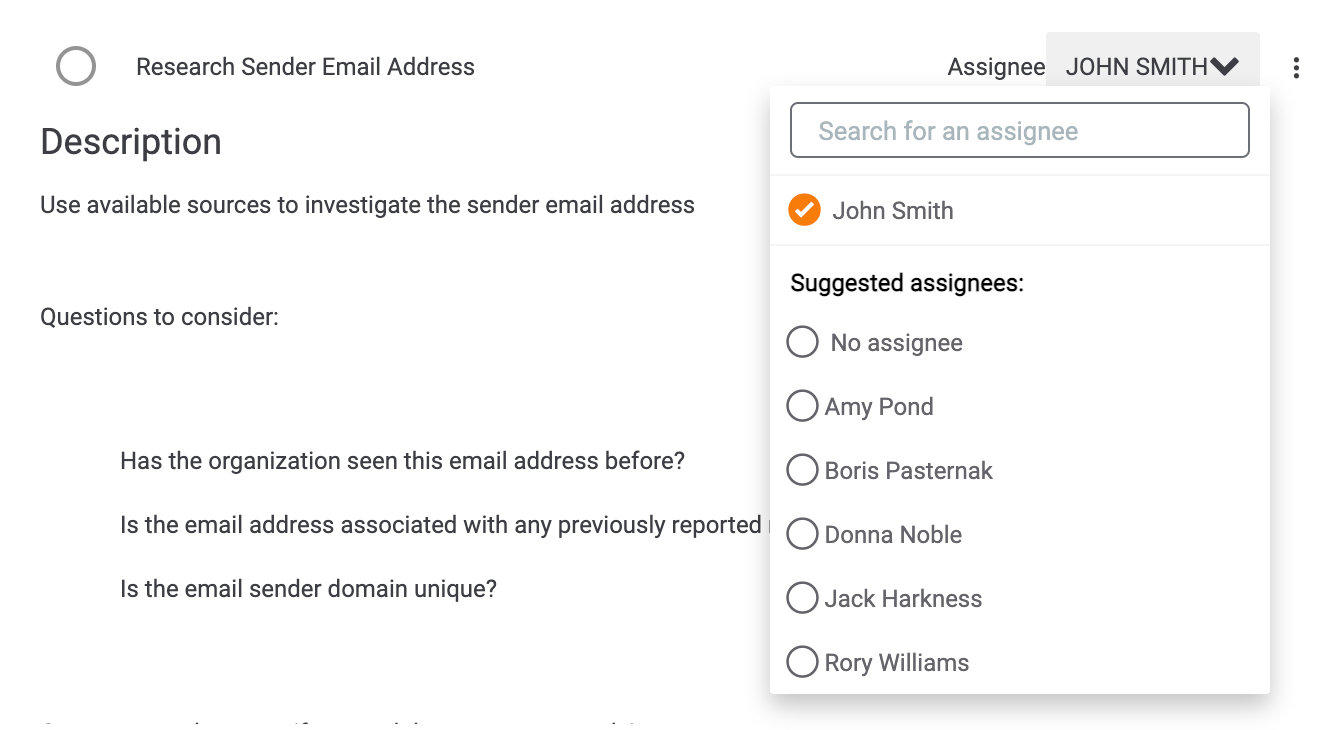
To change a Task’s assignee, click on the Assignee dropdown menu next to the Task name and select a new user or user group (Figure 15).
Dependencies
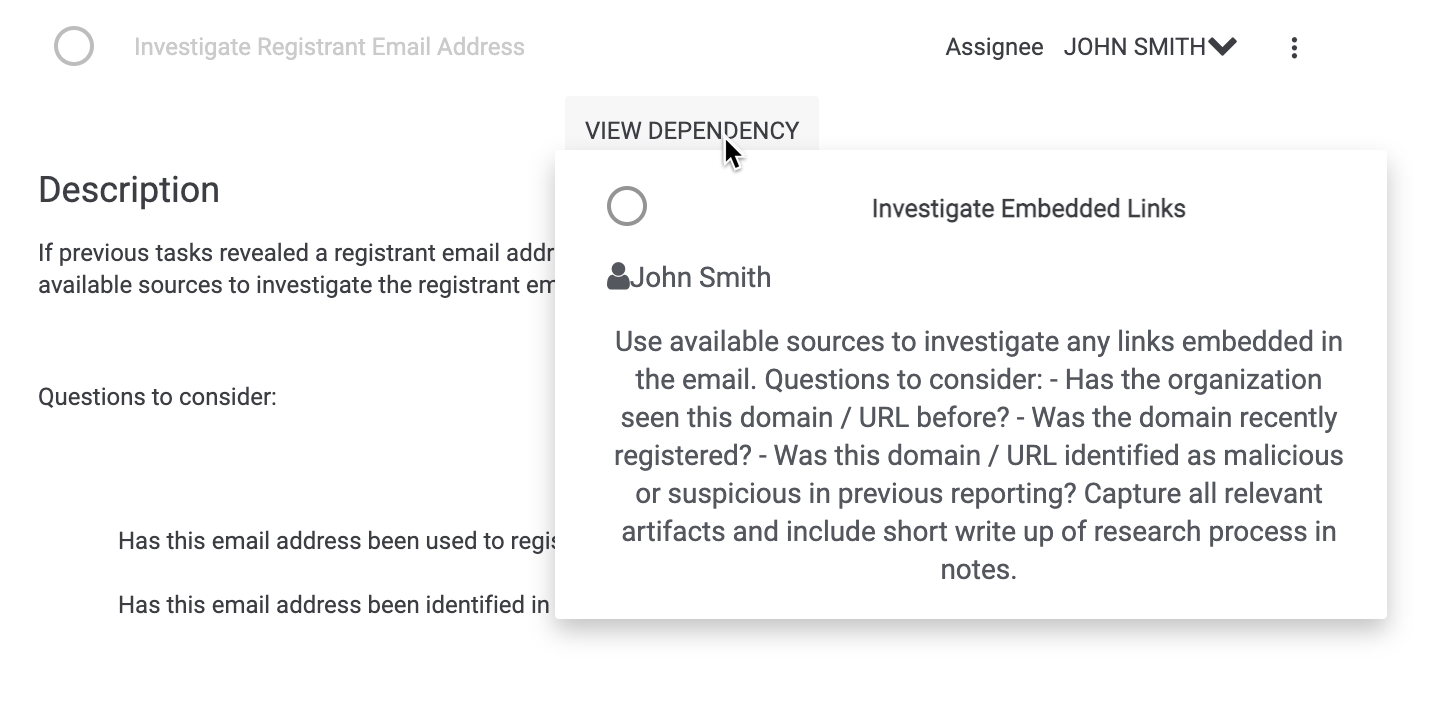
You can complete Tasks in any order, unless there are dependencies. A Task with a dependency can be completed only after the Task on which it is dependent is completed. Task dependencies are indicated by the VIEW DEPENDENCY text preceding the Task’s description (Figure 16).
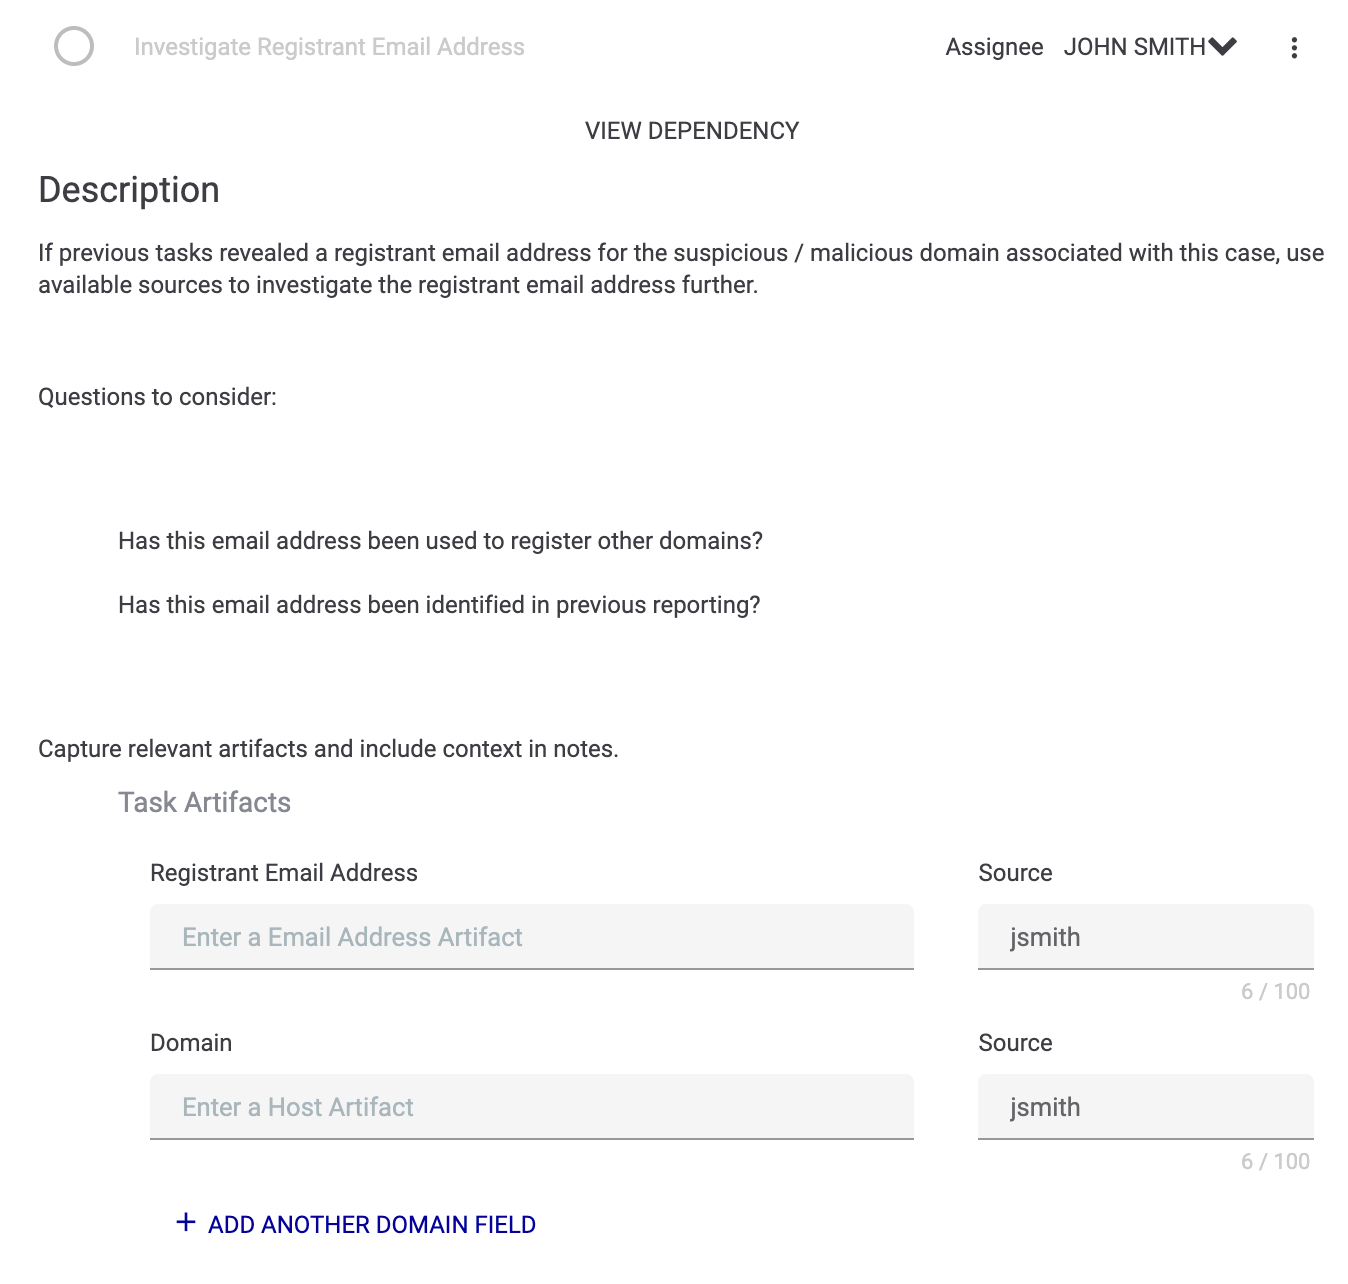
Hover over this text to view information about the Task on which the Task currently being viewed is dependent (Figure 17).
Required Tasks
Required Tasks, which must be completed before you can close a Case, are indicated by an asterisk next to the Task’s name (Figure 18).

Due Dates
If a Task is assigned a due date, that date and time will be displayed following the name and description of the Task (Figure 19).
Due dates and times can be added or modified when editing a Task. See the “Edit (or Edit Task Info)” section of Task Administrative Options more information on editing a Task.
ThreatConnect® is a registered trademark of ThreatConnect, Inc.
20128-02 v.02.C