Overview
The Tasks tab of the Workflow screen serves as a dashboard where users can monitor and track Tasks across all Workflow Cases in their Organization. This article provides instruction on the features of the Tasks screen, covering viewing, assigning, removing, sorting, and filtering Tasks.
See Workflow Overview for introductory information about Workflow, including definitions of Workflow-related vocabulary and an explanation of how the Workflow process works from start to finish. See Phases and Tasks for instructions on how to view the Phases and Tasks section in a Case, create manual and automated Tasks, perform administrative actions for a Task, and filter Tasks in a Case.
Before You Start
| Minimum Role(s) | ThreatConnect users of all Organization roles except App Developer may view Workflow Tasks. Edit and delete permissions depend on the specific role. See Table 4 of Organization Roles for more details. |
|---|---|
| Prerequisites | Workflow enabled by a System Administrator |
Tasks Screen
The Tasks screen displays all Workflow Tasks in your Organization. From here, you can view, assign, remove, sort, and filter Tasks.
Viewing Tasks
On the top navigation bar, hover the cursor over Workflow and select Tasks. The Tasks screen will be displayed (Figure 1).
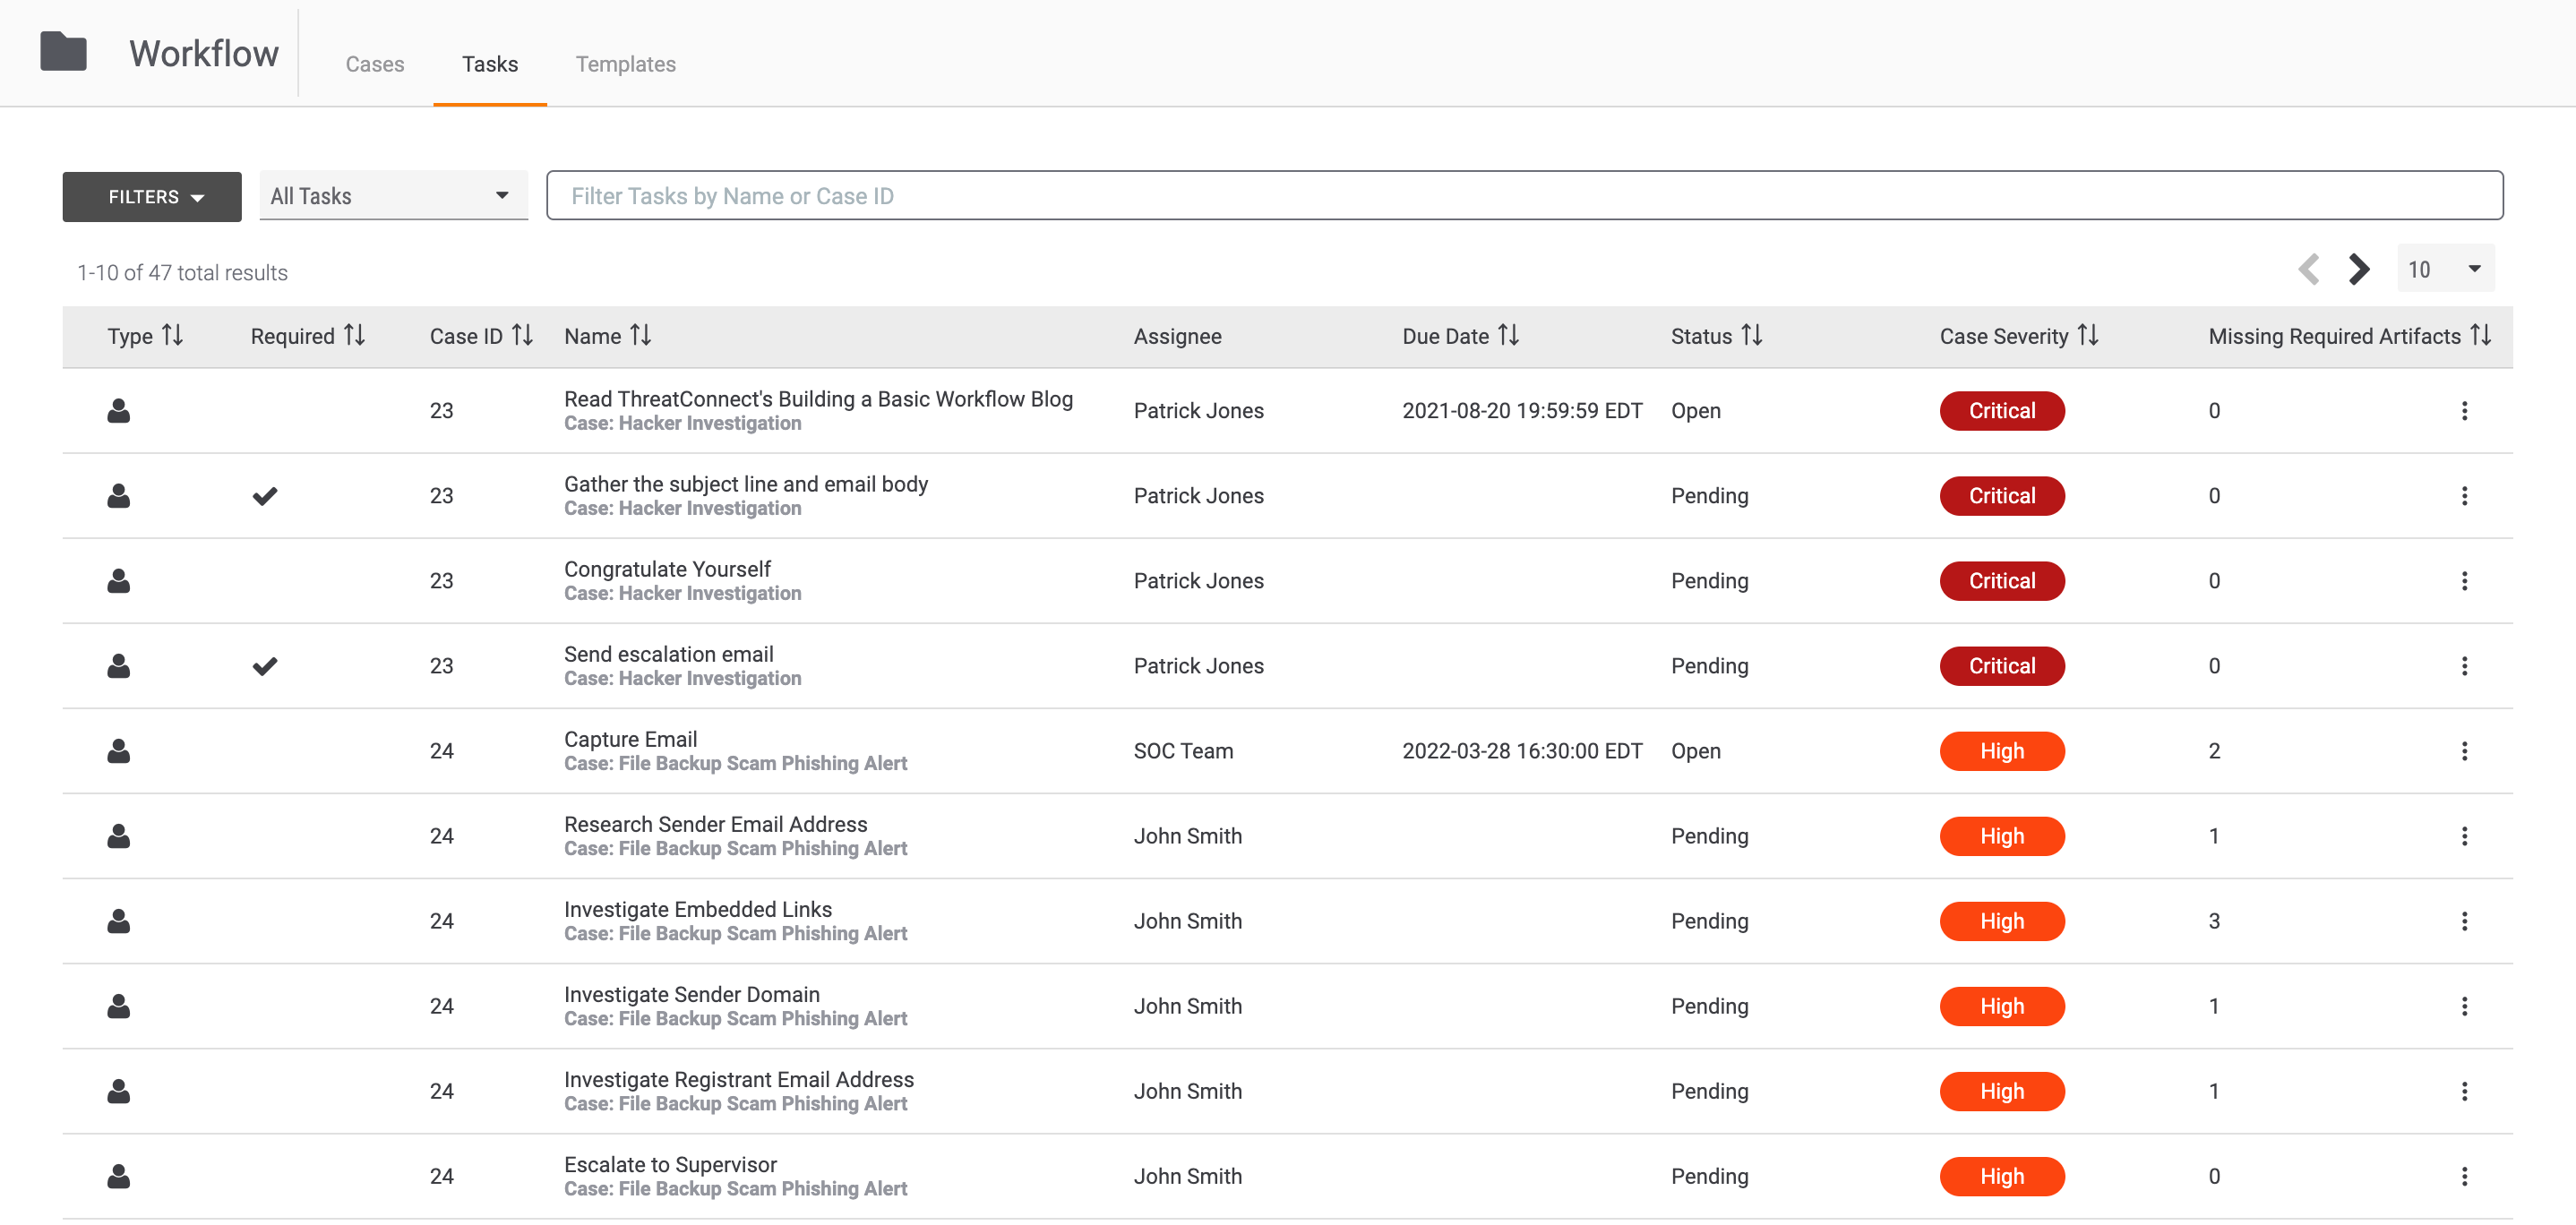
This screen displays the Tasks table, which consists of the following columns:
- Type: This column designates whether the Task is manual (
 ) or automated (
 ).
). - Required: This column displays a checkmark (
 ) if the Task is required (i.e., the Task must be completed for the Case containing it to be closed).
 - Case ID: This column displays the ID number of the Case containing the Task.
- Name: This column displays the name of the Task and the name of the Case containing the Task.
- Assignee: This column provides the name of the assignee of the Task. The assignee of a Task is the user or user group responsible for tracking and monitoring the Task.
- Due Date: This column displays the due date and time for the Task, if one is assigned.
- Status: This column displays the status of the Task:
- Open: The Task has not been completed, and it may be completed at any time.
- Completed: The Task has been completed.
- Pending: The Task may not be completed until the Task on which it is dependent has been completed.
- Reopened: The Task was previously completed and has been reopened.
- Case Severity: This column displays the severity of the Case containing the Task in a corresponding color (red for Critical, orange for High, yellow for Medium, and gray for Low). The severity of a Case is set by the user who created the Case and can be changed at any time by a user with edit access to the Case.
- Missing Required Artifacts: This column displays the number of required Artifacts that have not been collected for the Task.
- Administrative Options Menu: This column displays a ⋮ menu that provides options for assigning and removing Tasks. See the next section, “Task Administrative Options,” for more information.
Click anywhere in the row for a Task to view the Case containing the Task.
Task Administrative Options
The ⋮ menu in the rightmost column of the Tasks table provides options for assigning and removing Tasks.
Assign Task
Select Assign in the ⋮ menu for a Task to update the Task’s assignee. A Task may be assigned to a user or user group.
Remove Task
Select Remove in the ⋮ menu for a Task to remove (delete) the Task.
Sorting Tasks
You can sort Tasks by the following column headings:
- Type: This column heading, which is selected by default, displays all manual Tasks first, followed by all automated Tasks. Click on the column heading to display all automated Tasks first, followed by all manual Tasks.
- Required: Click on this column heading once to display all Tasks that are not required, followed by those that are required. Click on the column heading again to display all Tasks that are required, followed by those that are not required.
- Case ID: Click on this column heading once to display all Tasks in chronological order by the ID number of the Case containing the Task. Click on the column heading again to display all Tasks in reverse chronological order by the ID number of the Case containing the Task.
- Name: Click on this column heading once to display all Tasks in alphabetical order by name. Click on the column heading again to display all Tasks in reverse alphabetical order by name.
- Due Date: Click on this column heading once to display all Tasks in chronological order by due date and time, where Tasks with a due date are listed first. Click on the column heading again to display all Tasks in reverse chronological order by due date, where Tasks without a due date are listed first.
- Status: Click on this column heading once to display all Tasks in order by status, where completed Tasks are displayed first, followed by open Tasks, followed by pending Tasks (i.e., Tasks that are dependent on other Tasks that have not yet been completed), followed by reopened Tasks. Click on the column heading again to display all Tasks in reverse order by status.
- Case Severity: Click on this column heading to display all Tasks in order by the severity of the Cases that contain them, from low to critical. Click on the column heading again to display all Tasks in reverse order by Case severity.
- Missing Required Artifacts: Click on this column heading once to display all Tasks in ascending order by the number of missing required Artifacts. Click on the column heading again to display all Tasks in descending order by the number of missing required Artifacts.
By default, Tasks are sorted by Type. Sort preferences will persist when you navigate away from the Tasks screen or log out of your instance of ThreatConnect.
Filtering Tasks
You can filter Tasks with the FILTERS selector, the default display menu to the right of the FILTERS selector, and the search bar along the top of the Tasks screen. Filter settings will persist when you navigate away from the Tasks screen or log out of your instance of ThreatConnect.
FILTERS Selector
Use the FILTERS selector at the top left of the Tasks screen to filter Tasks by due date and time, completed date, status, assignee, and Case severity. After configuring the desired filters, click APPLY on the FILTERS selector. To reset the filters, click CLEAR on the FILTERS selector.
When filters have been applied, an orange circle will be displayed at the upper-left corner of the FILTERS selector. This element alerts you to the fact that you might be viewing an “incomplete” set of data.
Default Display Menu
The menu to the right of the FILTERS selector provides the following options for selecting the set of Tasks to display by default on the Tasks screen:
- All Tasks: Select this option to display all of the Tasks on your instance of ThreatConnect.
- All Open Tasks: Select this option to display only Tasks with a status of Open.
- All Past Due Date Tasks: Select this option to display only overdue Tasks.
- My Open Tasks: Select this option to display only Tasks with a status of Open that are assigned to you or a user group to which you belong.
- My Remaining Tasks: Select this option to display only Tasks with a status of Open or Pending that are assigned to you or a user group to which you belong.
- My Completed Tasks: Select this option to display only Tasks with a status of Complete that are assigned to you or a user group to which you belong.
- My Past Due Date Tasks: Select this option to display only overdue Tasks that are assigned to you or a user group to which you belong.NoteAlthough the All Past Due Date Tasks and My Past Due Date Tasks options are displayed in the default display menu, their functionality is not available at this time. Therefore, it is recommended to not select either option.
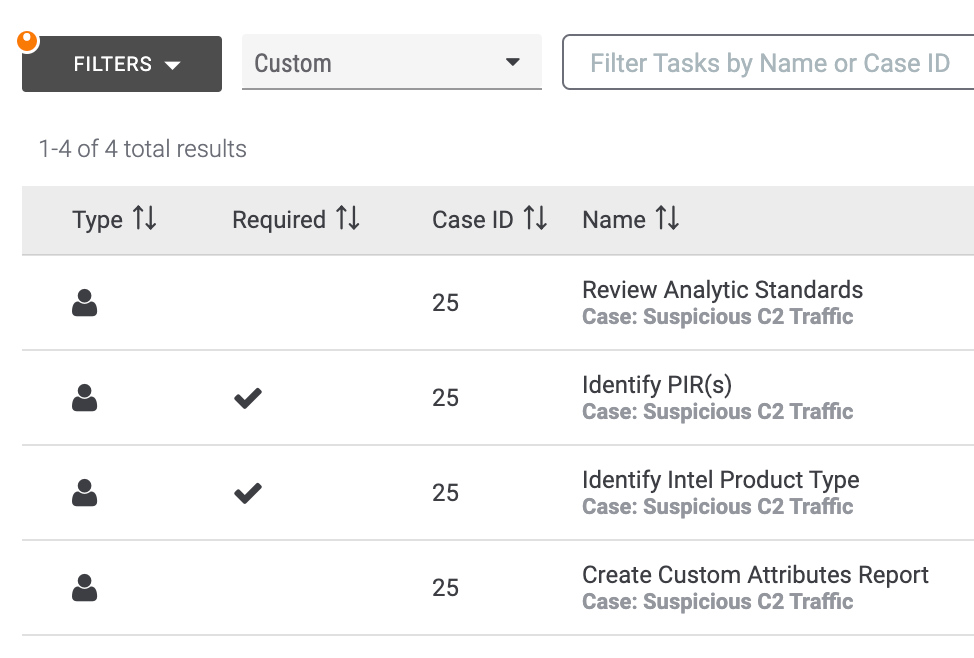
If the FILTERS selector is used to select the displayed Tasks and the selection matches one of the options in the default display menu (e.g., My Open Tasks), then that option will be displayed in the default display menu. If the selection does not have an equivalent option in the default display menu (e.g., only Tasks from high-severity Cases assigned to a particular user), then the default display menu will show a selection of Custom (Figure 2).
Filtering Tasks by Name or ID
Use the search bar to the right of the default display menu to filter Tasks by name or the ID number of the Case containing the Task.
ThreatConnect® is a registered trademark of ThreatConnect, Inc.
20092-01 v.03.E