When viewing Tasks in a Workflow Case, the available administrative options depends on whether you’re viewing the Phases and Tasks section in detail or list view.
Detail View
While in detail view, the vertical ellipsis on the right side of a Task provides a list of administrative options you can perform (Figure 1).
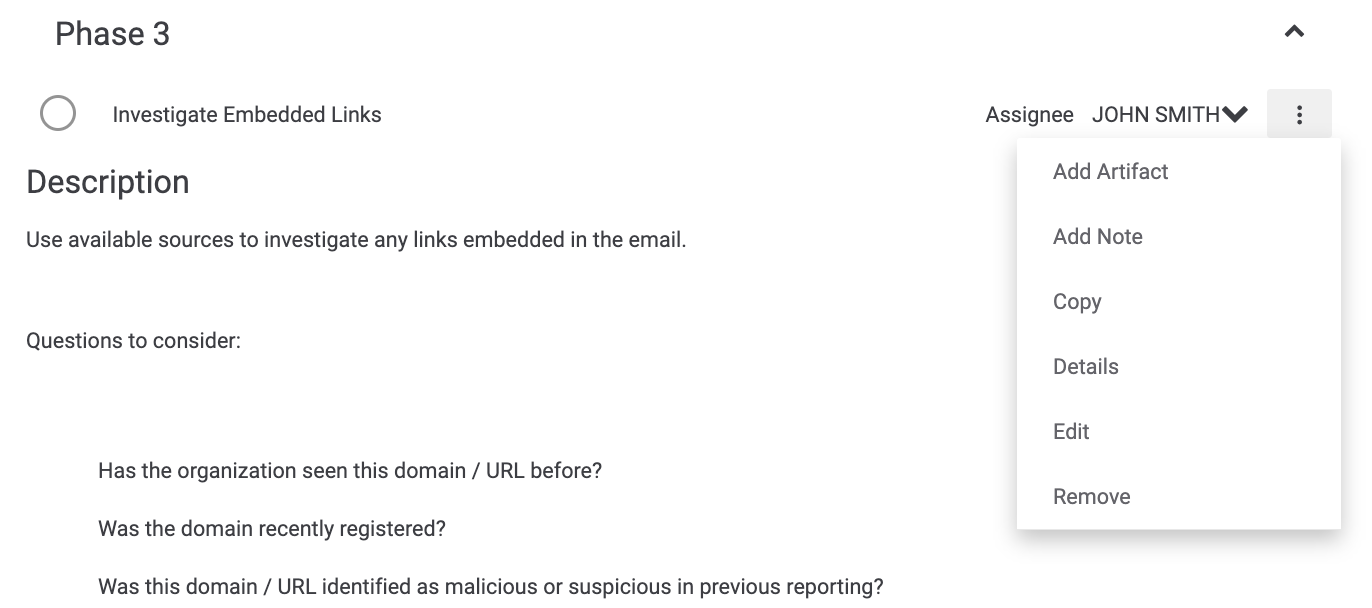
Add Artifact
Select Add Artifact to create a new Artifact for the Case that can be configured as a related Artifact to the Task, if desired. The Create Artifact drawer will be displayed (Figure 2).
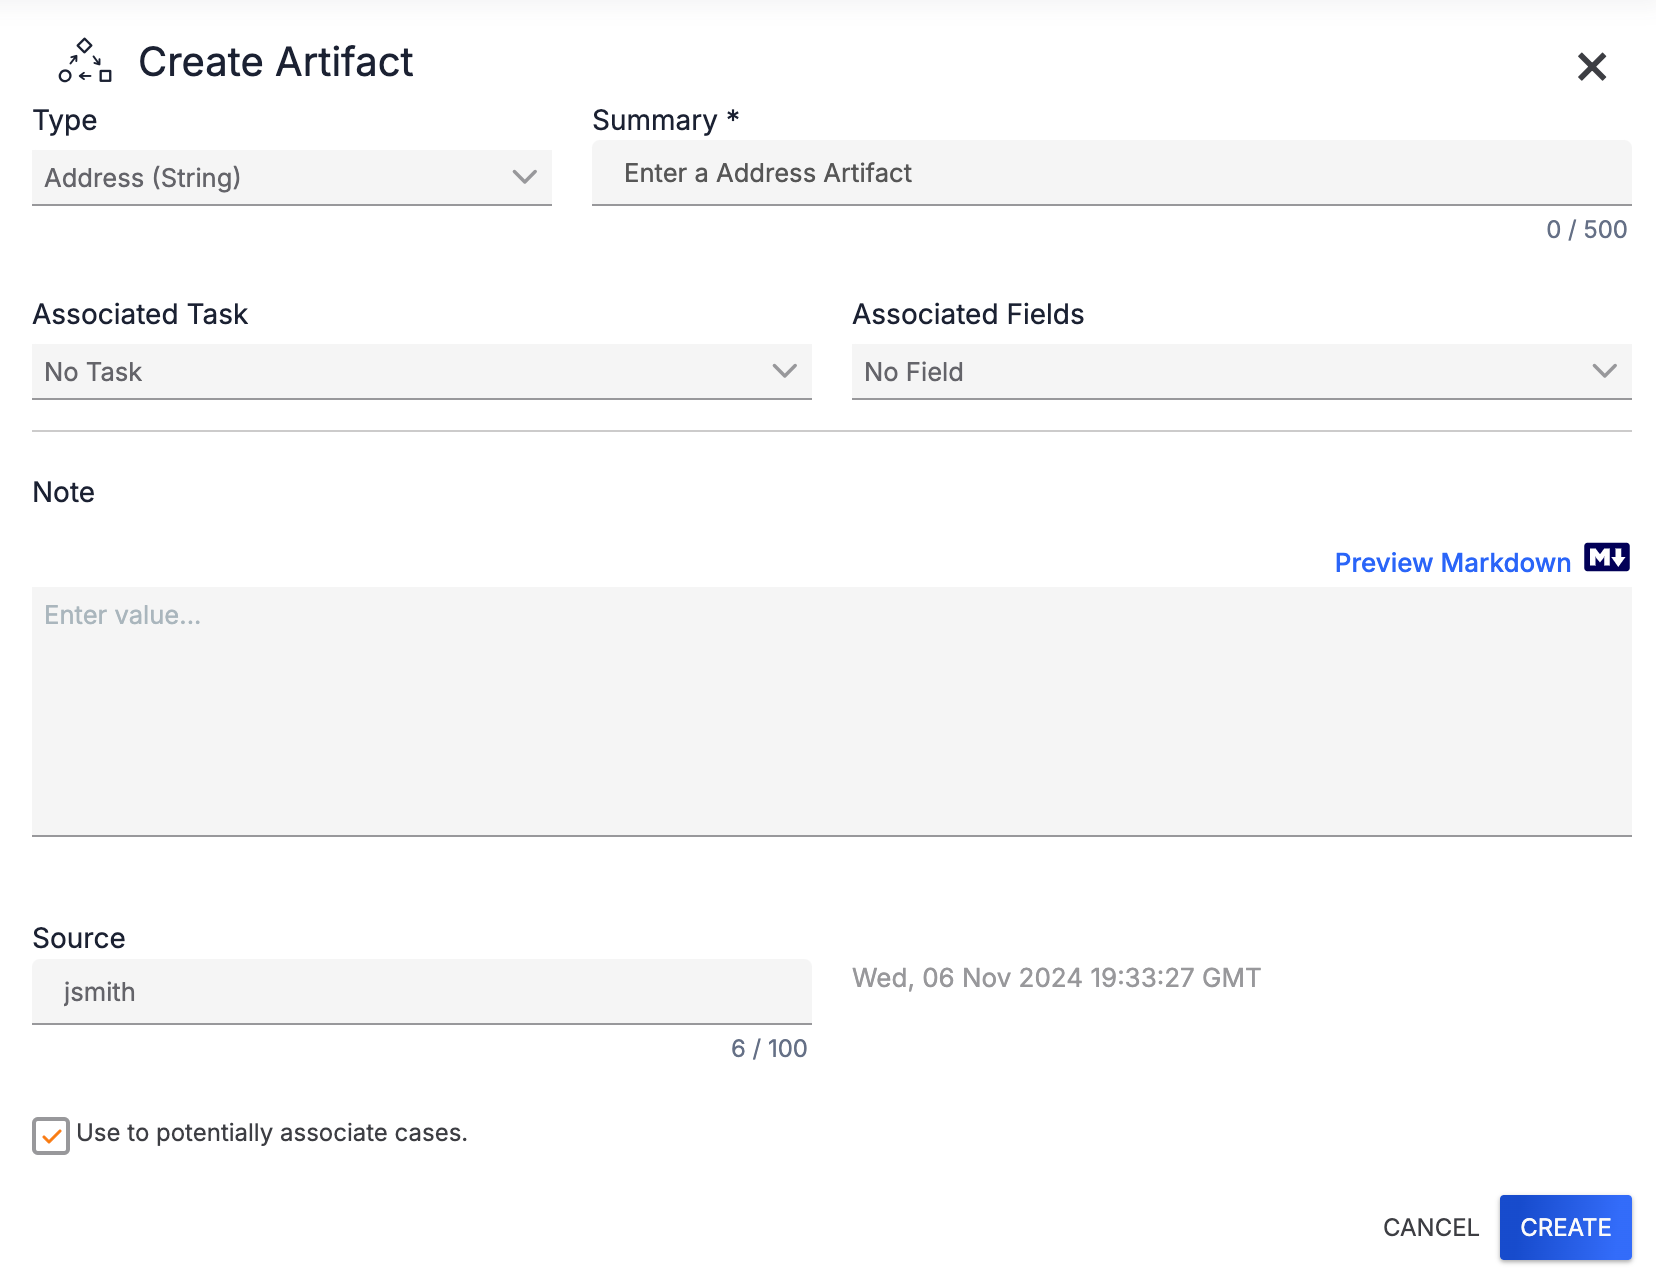
By default, the Create Artifact drawer associates the Artifact to the first Task in the Case that has not yet been completed (i.e., the default entry in the Associated Task dropdown). To associate the Artifact to the Task from which the Add Artifact option was selected, change this selection.
For instructions on how to fill out the remaining fields on the Create Artifact drawer, see Adding Artifacts to a Case.
Add Note
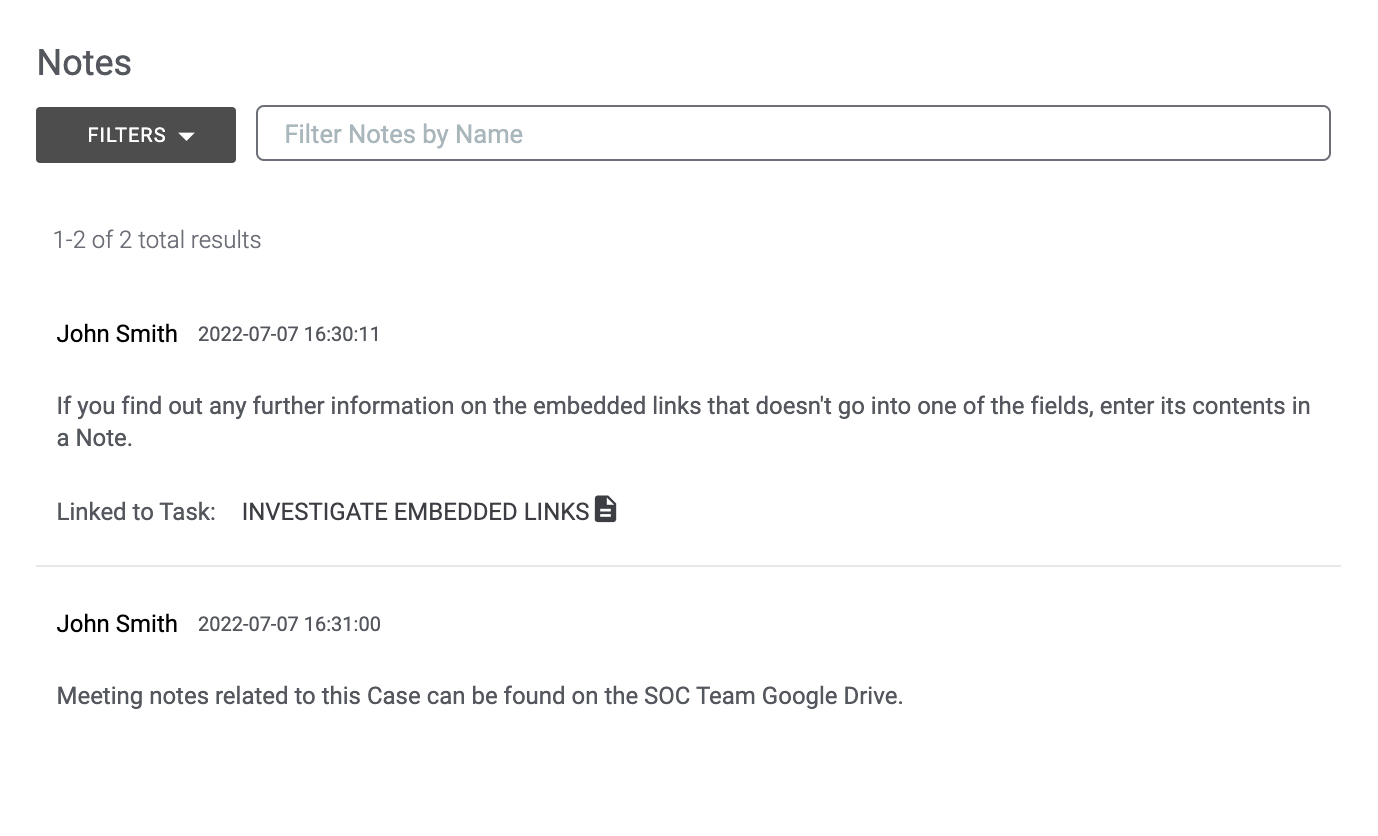
Select Add Note to add a Note, linked to the Task, to the Case. After the Note is created, it will be displayed at the bottom of the Notes section of the Case, with a line of text indicating the Task to which it is linked (Figure 3).
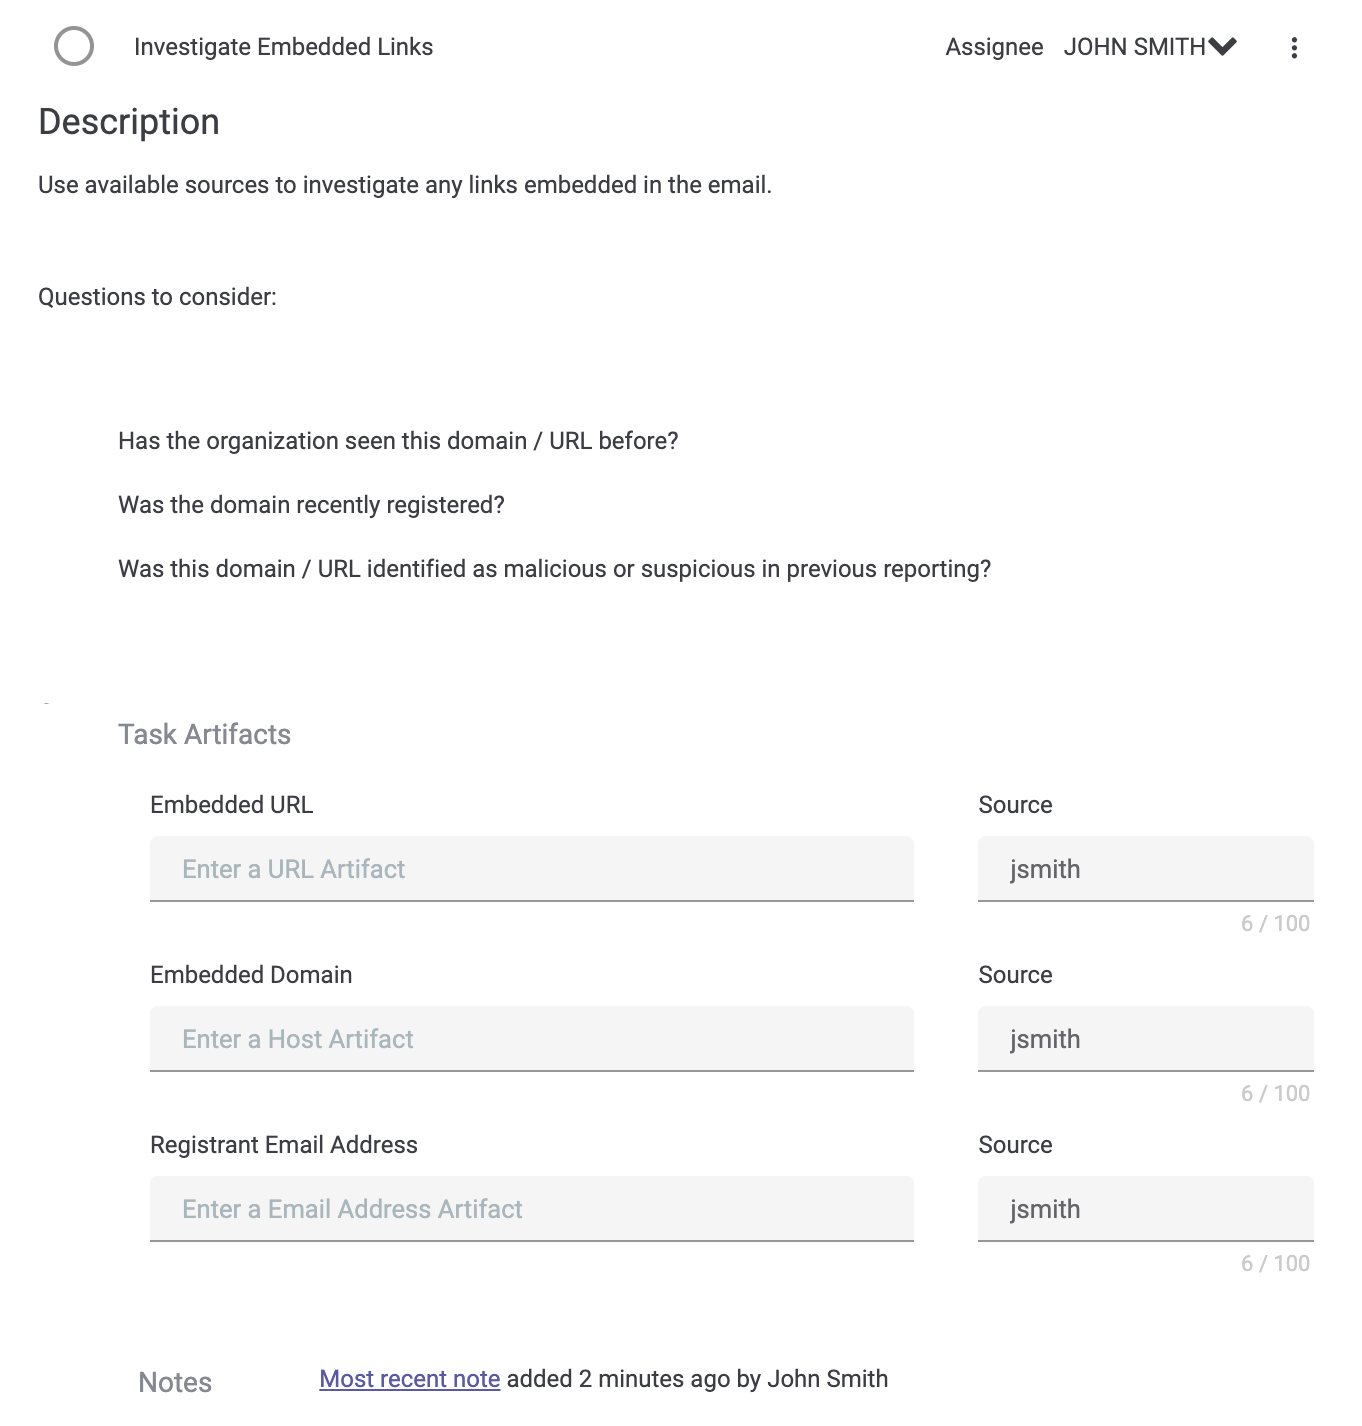
When refreshed, the Task will indicate below the description and Task Artifacts that a Note was added (Figure 4). The timestamp on the Note will be updated periodically.
Copy
Select Copy to make a copy of a Task, A duplicate of the Task will be added at the bottom of the Phases and Tasks section in the Additional Tasks subsection, with the name of the original Task followed by the word “Copy.” This feature is useful when you want to repeat a Task that has already been completed.
Details
Select Details to view all of the details of the Task. The Phases and Tasks section will be replaced by the Task details (Figure 5).
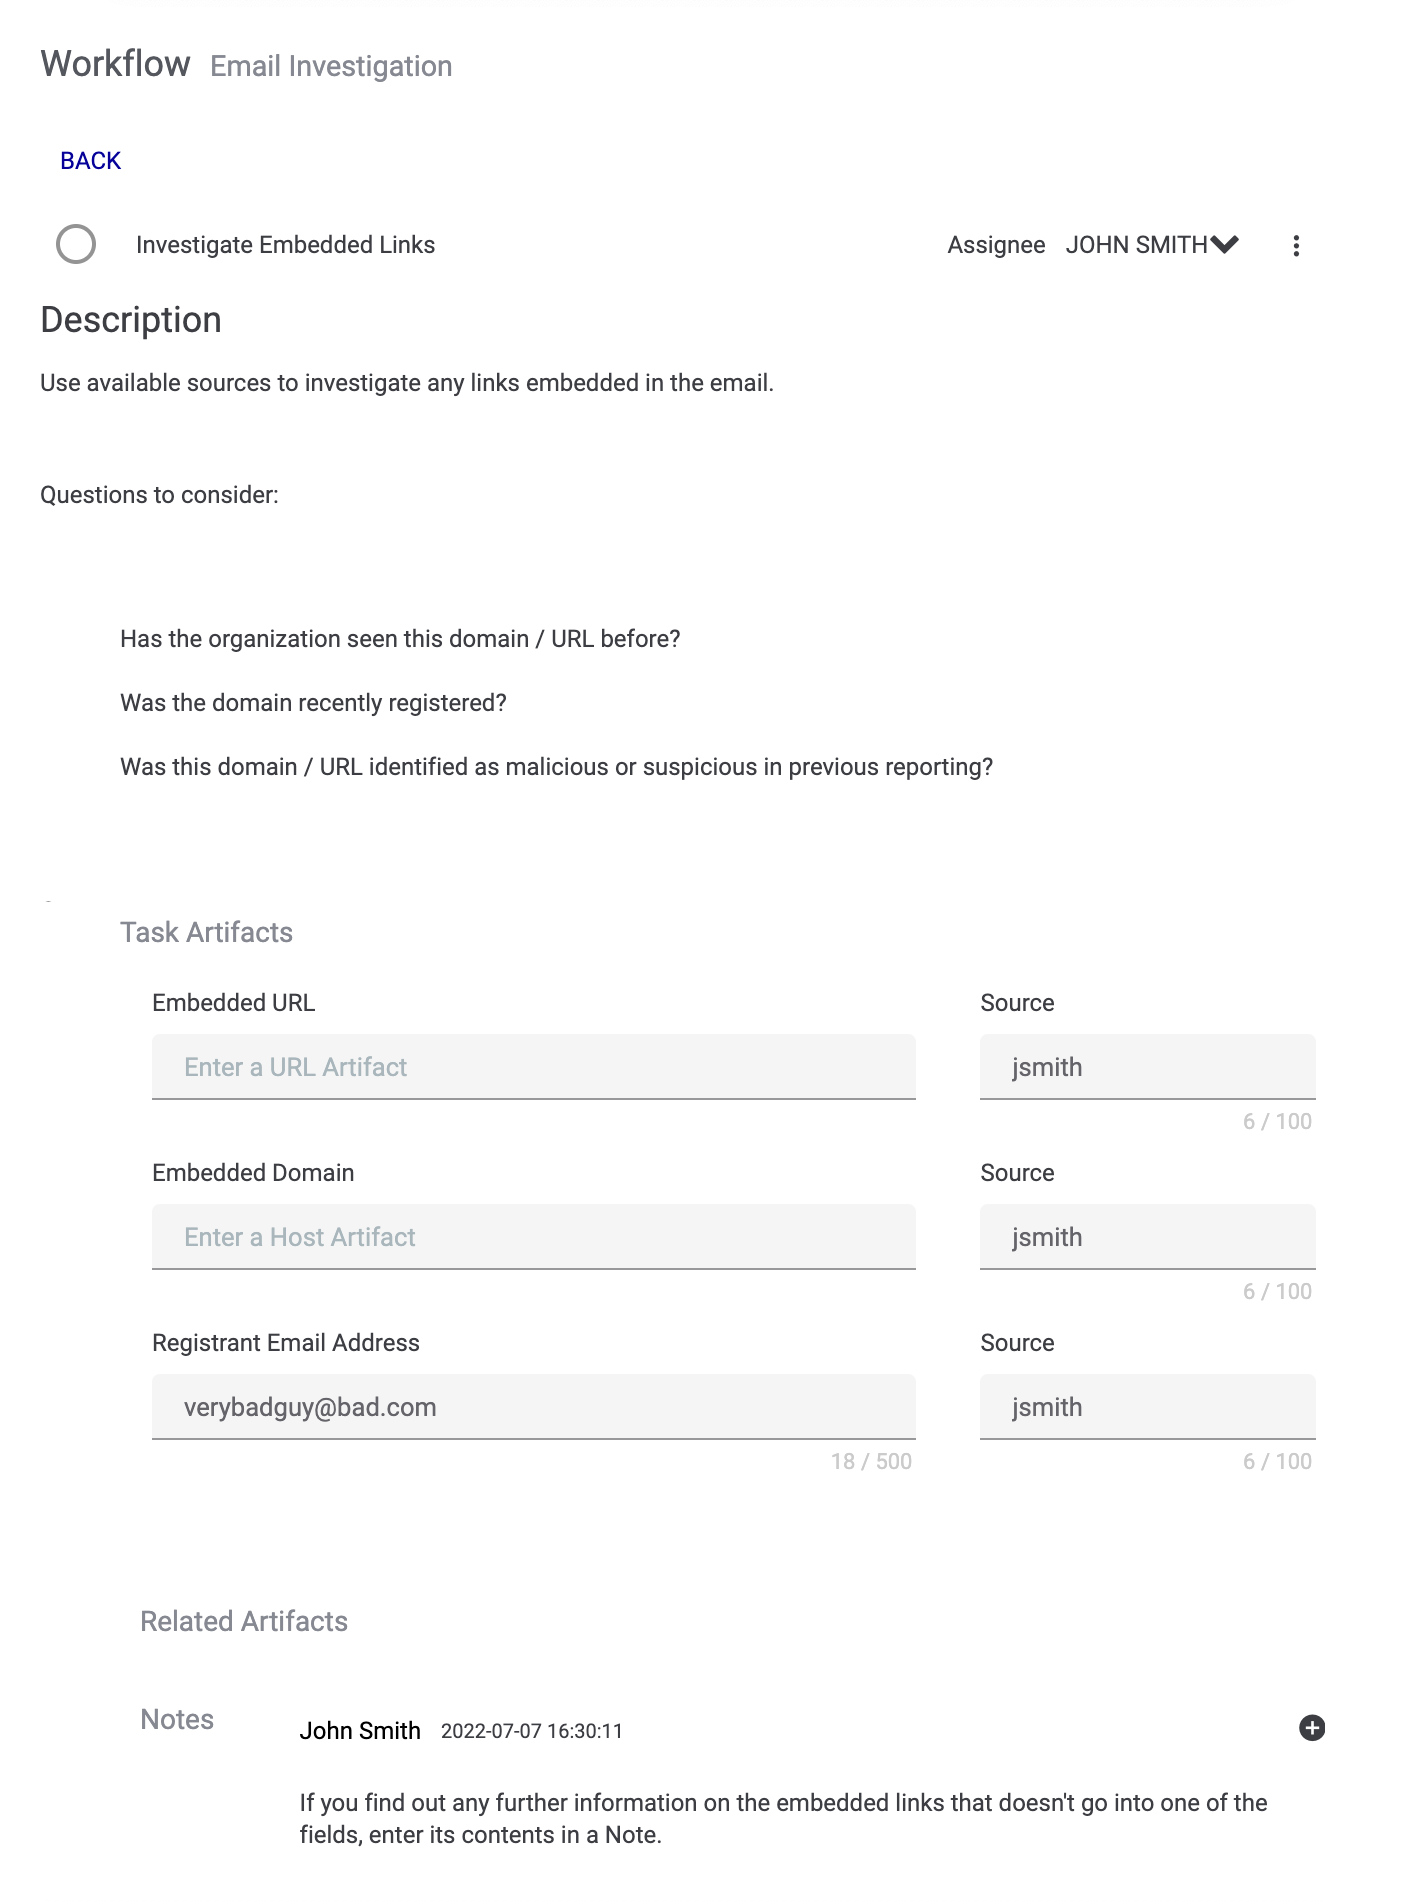
- Click the plus
 icon in the Notes section to add a new Note, if desired.
 - Press the Esc key on your keyboard, or click BACK at the top left, to return to the Phases and Tasks display.
Edit (or Edit Task Info)
Tasks that have not yet been completed will display the Edit option. Completed manual Tasks will display the Edit task info option, which, when selected, displays a tooltip to the right of the blue circle instructing you to click the circle to re-open the Task.
Editing Manual Tasks
Select Edit to edit a manual Task that has not yet been completed. The Edit Task drawer will be displayed (Figure 6).
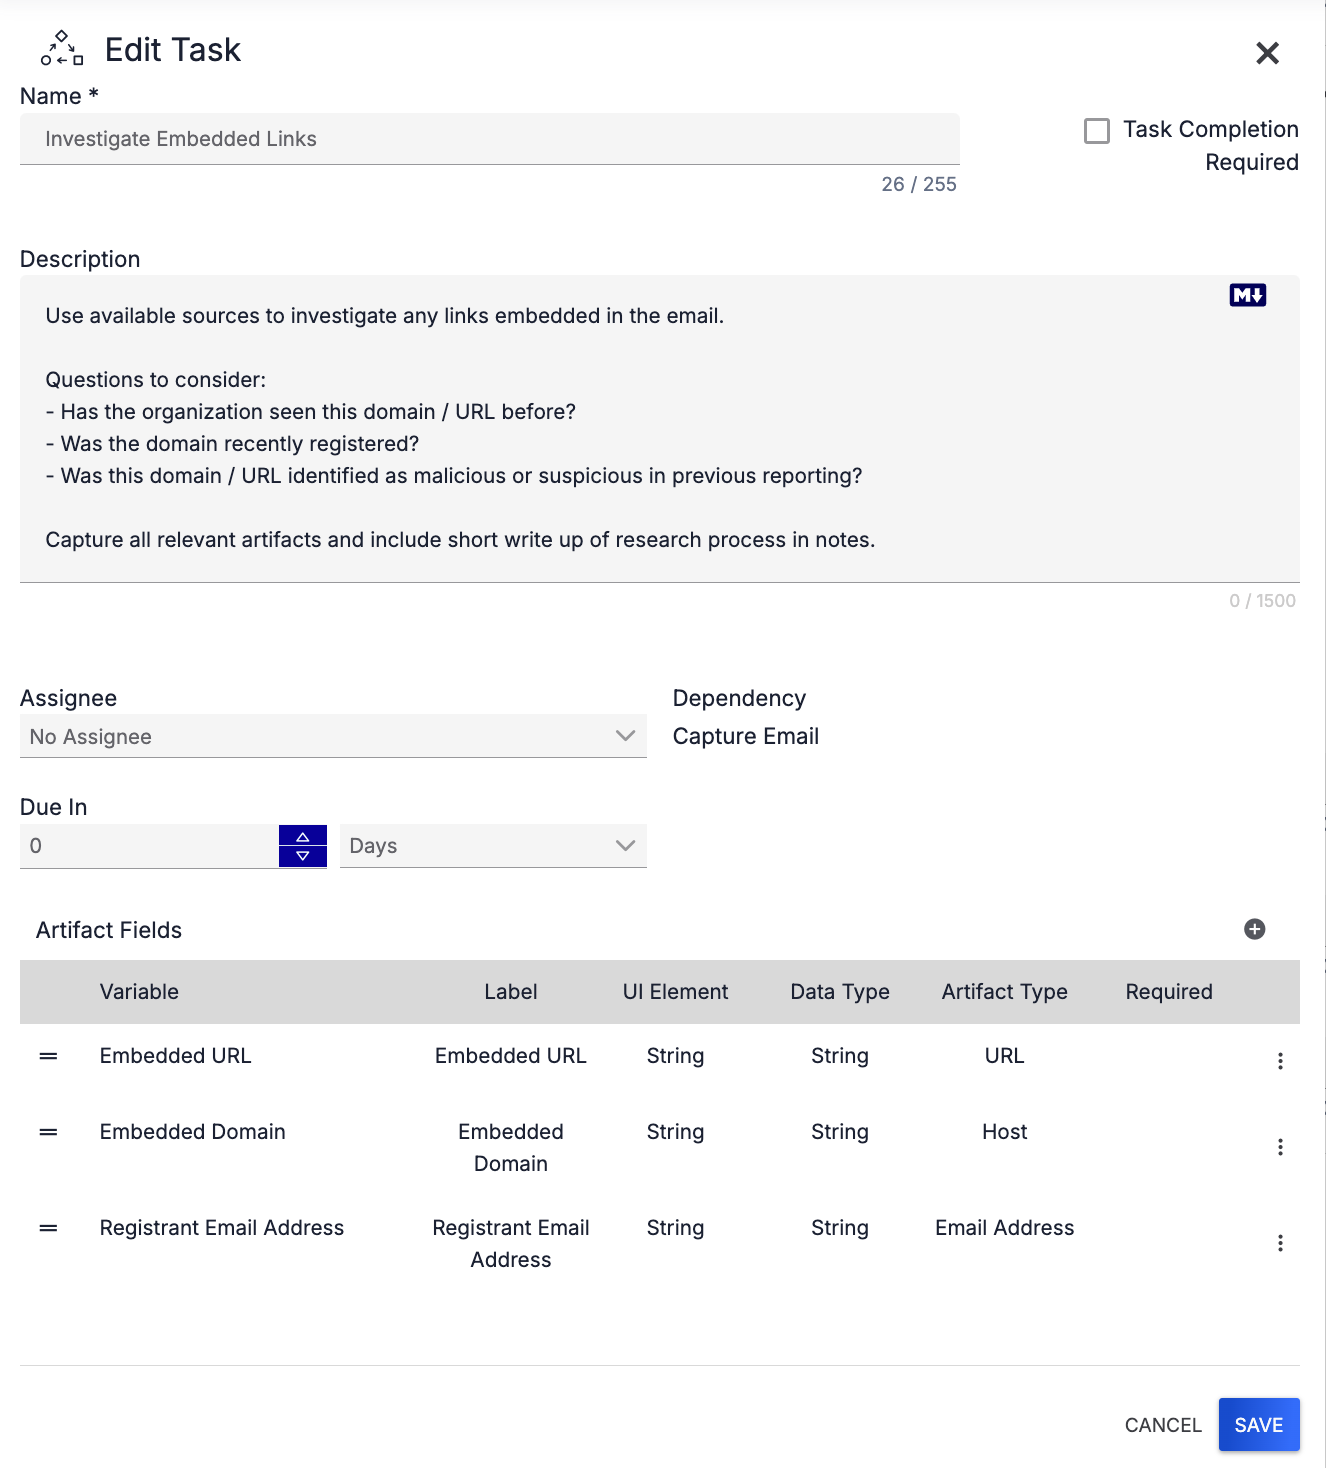
See Adding Tasks to a Case for descriptions of each field available on this drawer.
Adding Artifact Fields
To add a new Artifact Field to a Task, click the plusicon at the top right of the Artifact Fields table (Figure 7). The drawer will display options for configuring a new Artifact Field.
Editing Artifact Fields
To edit an Artifact Field, click the vertical ellipsis to the right of the row for the Artifact Field in the table and select Edit. The Edit Task drawer will display options for editing the Artifact Field. After making all desired changes, click the SAVE button.
Deleting Artifact Fields
To delete (remove) an Artifact Field, click on the vertical ellipsis to the right of the row for the Artifact Field in the table (Figure 6) and select Remove. If any automated Tasks in the Case use the Artifact Field as a variable, deleting the Artifact Field will invalidate those references.
Editing Automated Tasks
Select Edit to edit an automated Task that has not yet been completed. The Edit Task drawer will be displayed. For descriptions of each field available on this drawer, see Adding Tasks to a Case. For instructions on how to select and configure a Workflow Playbook for the Task, see the “Adding Automated Tasks” section of Adding Tasks to a Case.
Remove
Select Remove to remove (delete) the Task.
List View
While in list view, the vertical ellipsis in each column provides a list of administrative options you can perform (Figure 7). For some Tasks, only a subset of these options will be available, as described in the next set of subsections.
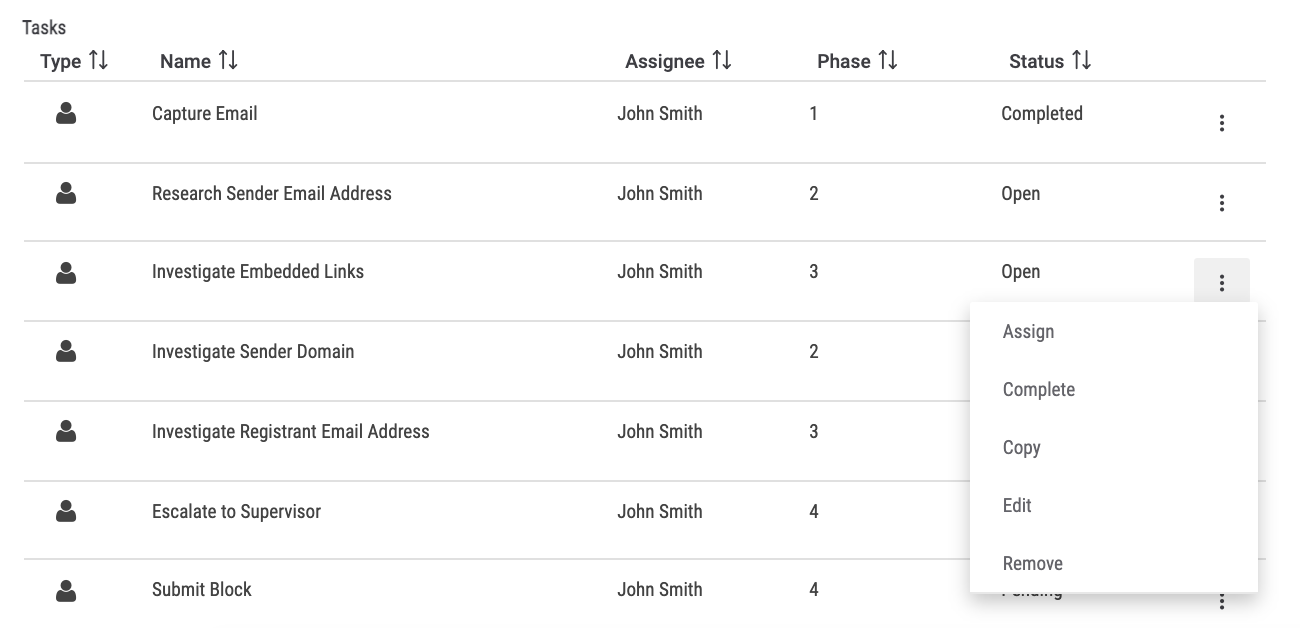
Assign
Select Assign to assign the Task to a user or user group or change the assignee of a Task. The Assign Task window will be displayed. Select an assignee from the dropdown menu, and click the CONFIRM button.
Complete
Select Complete to mark the Task as complete (i.e., change the status of the Task to Completed). If the Task is an automated Task, selecting Complete from the vertical ellipsis menu will display the Run Automated Task drawer. Follow the prompts in the drawer to run and complete the automated Task. Note that the prompts (e.g., required inputs) in the drawer will depend on the Playbook configuration for the automated Task.
The Complete option will not be displayed in the vertical ellipsis menu for Tasks with a Pending status, because a pending Task cannot be completed until the Task on which it is dependent is completed. In addition, it will not be displayed for Tasks with a Complete status, because those Tasks have already been completed. For open manual Tasks that have not yet received required user input, the Complete option will be displayed in the vertical ellipsis menu, but will be grayed out (i.e., not selectable).
Copy
Select Copy to add a copy of the Task to the Case. The copy will immediately be displayed at the bottom of the Tasks table, with the name of the original Task followed by the word “Copy.”
To change the name of the copy or configure the copied Task, select Edit from the vertical ellipsis menu for the copied Task.
Edit
Select Edit to edit the configuration for the Task. See the “Edit (or Edit Task Info)” section for more information.
Remove
Select Remove to remove (delete) the Task.
ThreatConnect® is a registered trademark of ThreatConnect, Inc.
20128-05 v.02.C