Overview
The timeline in a Workflow Case is a recording of actions performed in the Case in chronological order. Timelines enable security teams to quickly observe key events over a span of dates in a Case. They also allow users to drill down into important timeframes in the lifespan of a Case.
When an action is performed in a Case, a Timeline Event is added automatically to the Case’s Timeline card, which shows a timeline of all the changes made to the Case. This article describes how to view and filter Timeline Events, as well as how to manually add a Timeline Event to a Case.
Before You Start
| Minimum Role(s) |
|
|---|---|
| Prerequisites | Workflow enabled by a System Administrator; a Workflow Case created in your Organization (see Creating Cases) |
Timeline Card
Figure 1 shows an example of the Timeline card for a Case, which is located below the Notes card on the right side of the screen displaying the Case.
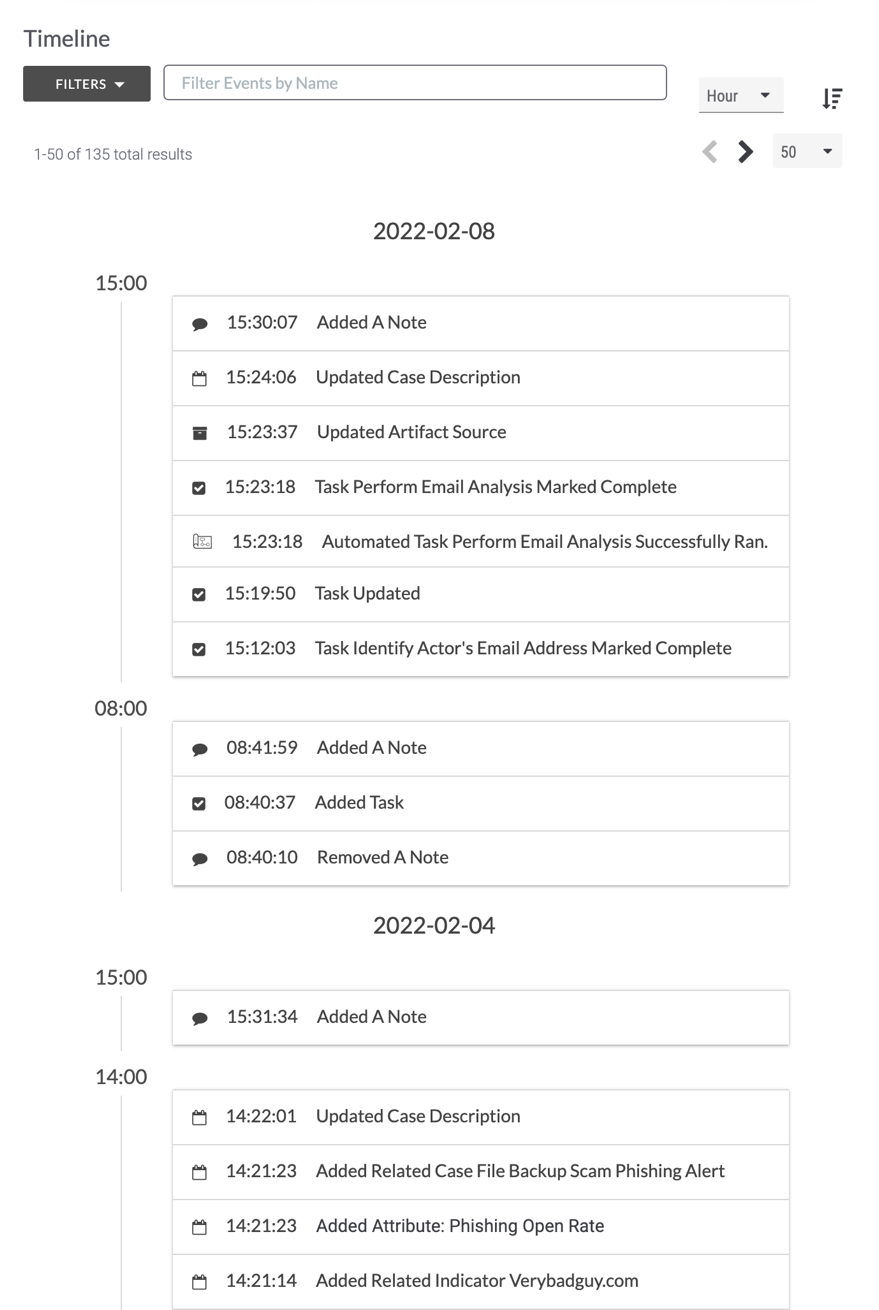
Each Timeline Event includes an icon indicating the type of Case element to which it corresponds:
 : Case, Attribute, or Association
 : Task
 : Artifact
 : Note
 : Playbook execution
Click on a Timeline Event to view the name of the user who performed the action corresponding to it (Figure 2).
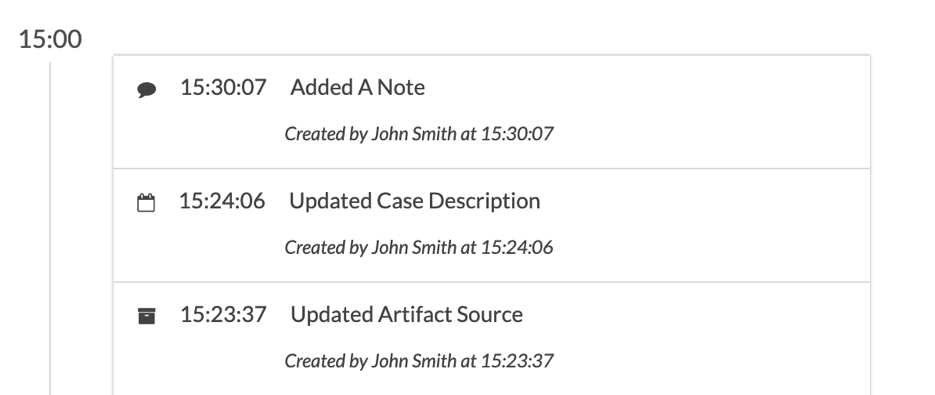
To hide the details, click on the Timeline Event again.
Adjusting Timeline Display Settings
Changing the Timeline Order
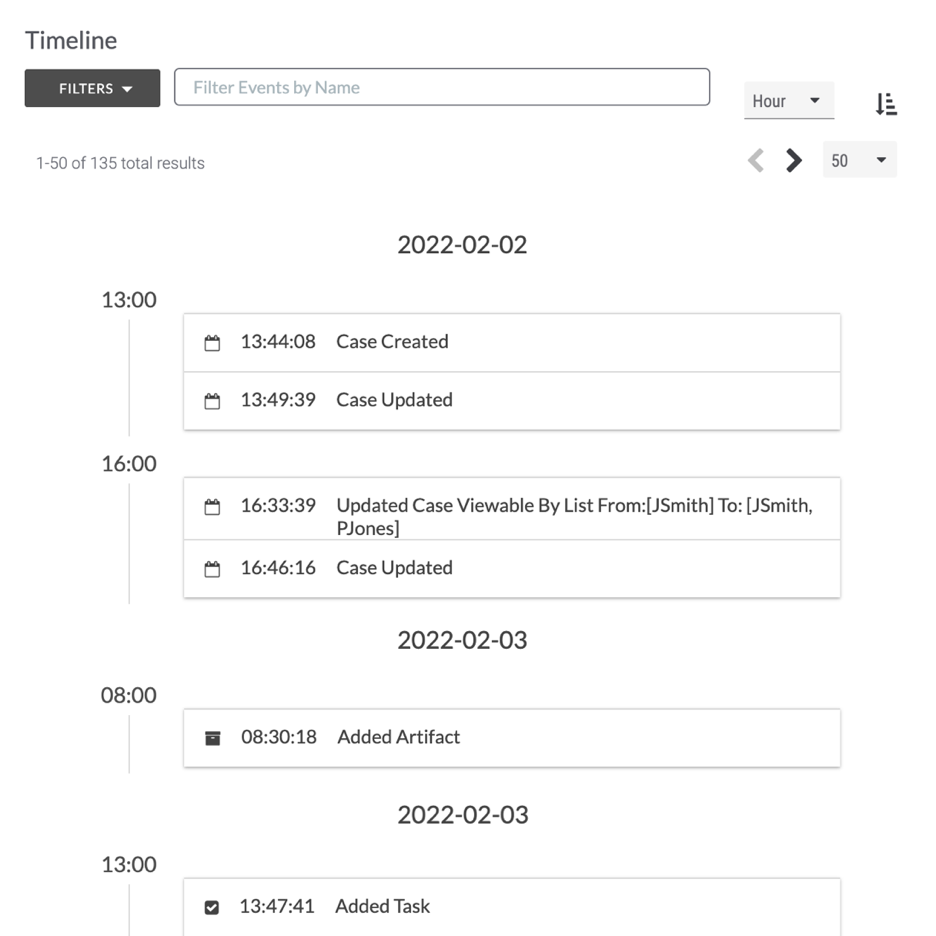
Timeline Events are ordered from newest to oldest by default. To view the oldest Timeline Events at the top of the Timeline card, click the Change Order  icon at the top right of the card. The order of Timeline Events will be reversed (Figure 3). Click the Change Order
  icon again to revert to the original (newest to oldest) order.
Changing the Timeline Increment
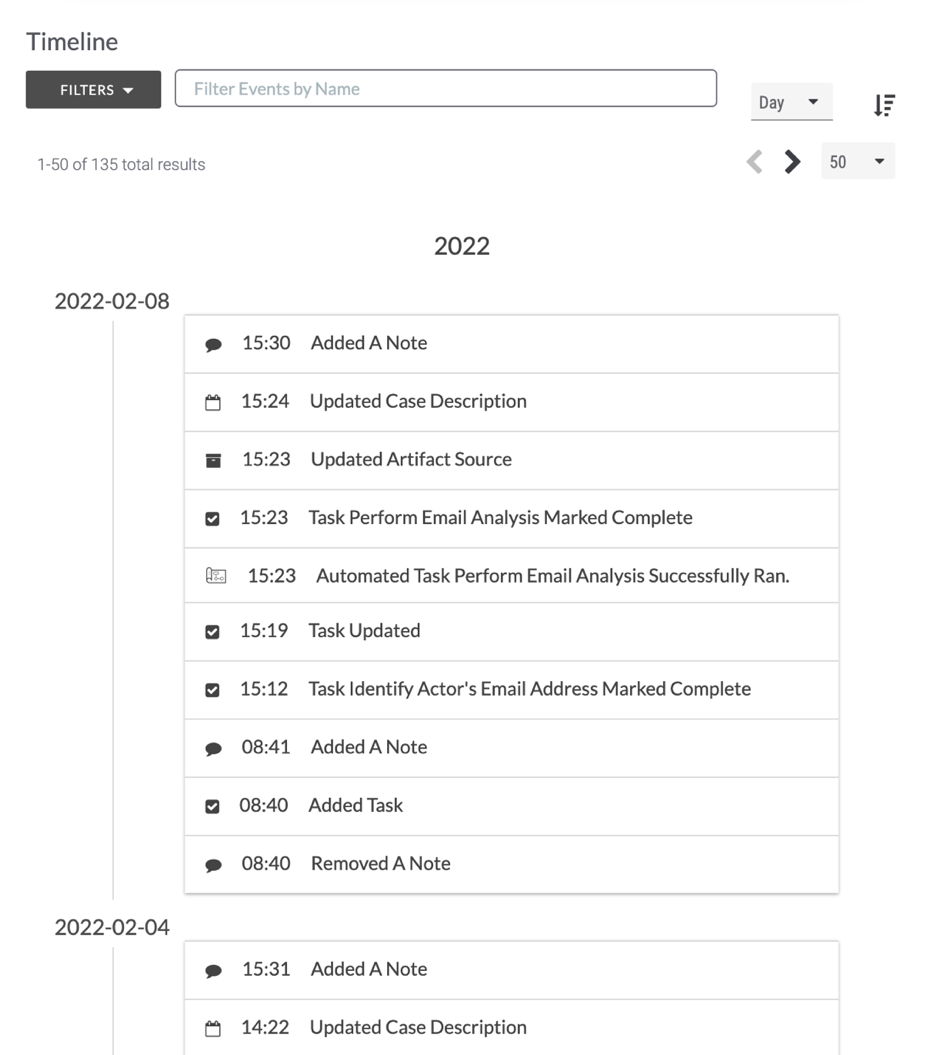
You can group Timeline Events more closely or space them further out by changing the time increment. The default time increment is Hour.
If desired, select another increment from the time increment dropdown menu at the top right of the Timeline card, to the right of the search bar. For example, selecting Day will condense all Timeline Events that took place on a particular day into a single block (Figure 4).
Adding Timeline Events
To add a Timeline Event to the Case, click the New…  button at the upper-right corner of the Case and select Timeline Event, or hover the cursor over the Timeline card and click on the plus
  icon displayed at the upper-right corner of the card. The Create Event drawer will be displayed (Figure 5).
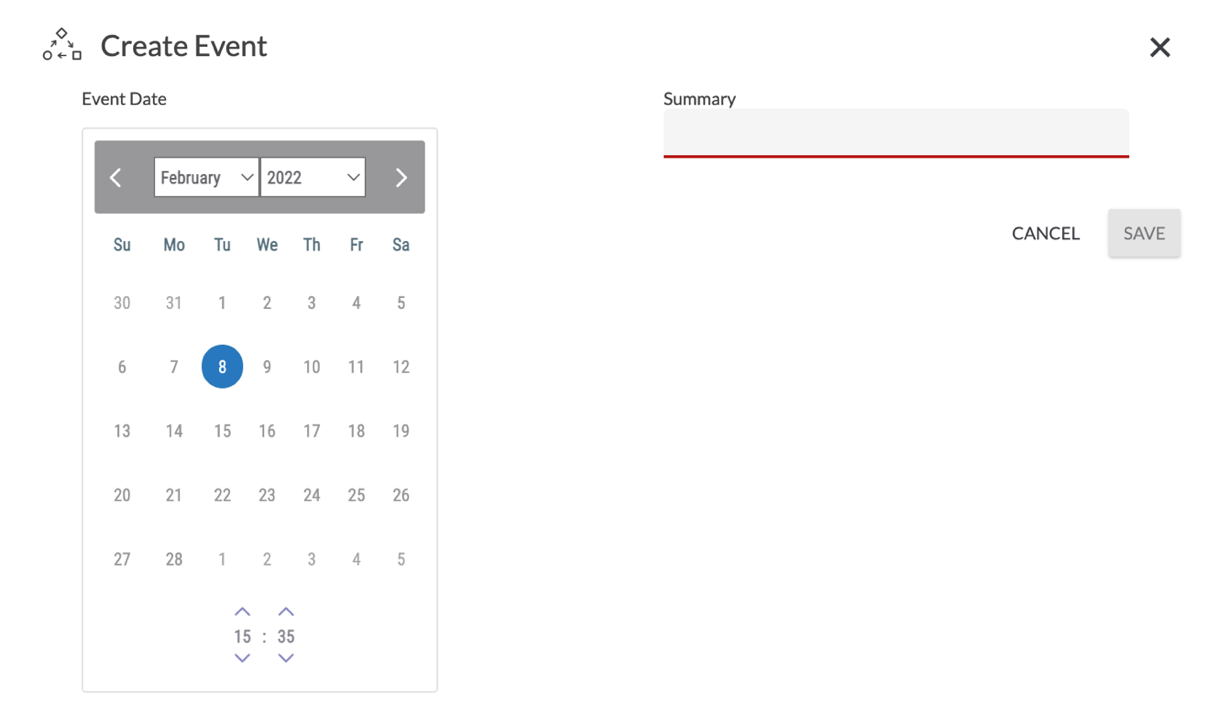
- Event Date: Select the date and time when the Timeline Event occurred.
- Summary: Enter the details for the Timeline Event.
- Click the SAVE button. The Timeline Event will be added to the Case and displayed in the Timeline card.
Editing Timeline Events
Only Timeline Events that were added manually to a Case may be edited. To do so, click on the Timeline Event to expand it (Figure 6).

Click EDIT at the lower-right corner of the expanded Timeline Event. The Create Event drawer will be displayed (Figure 7).
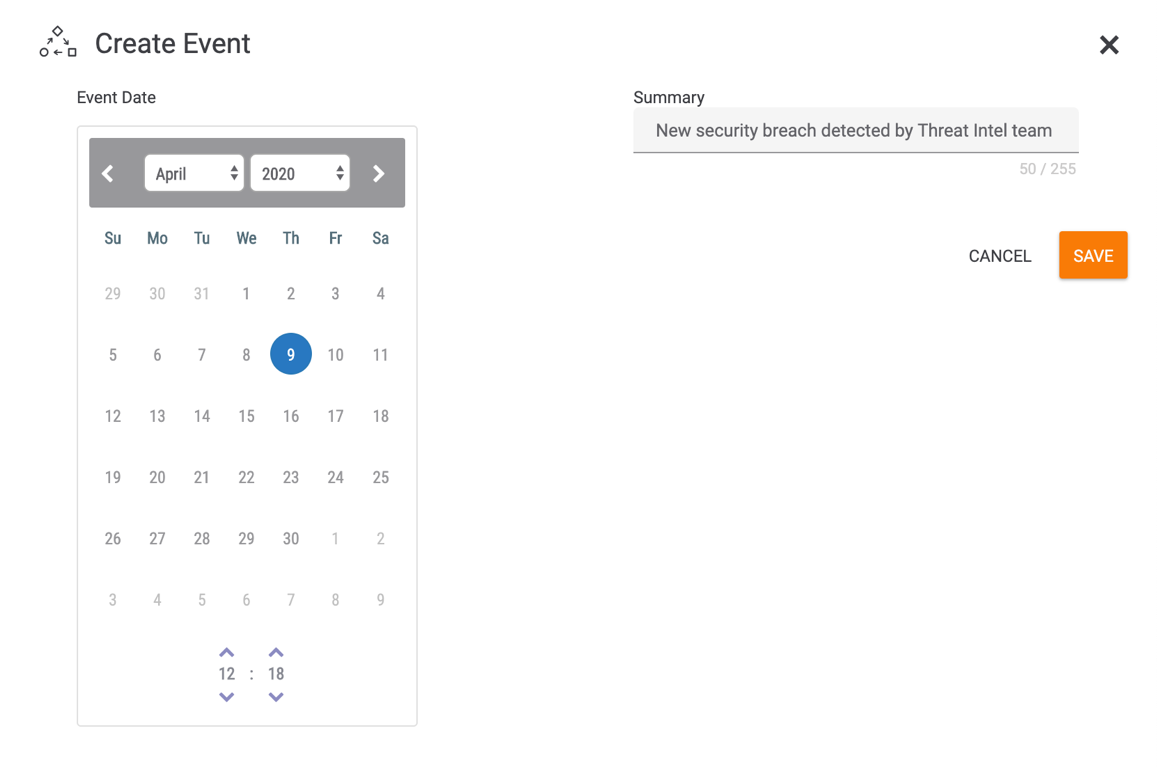
- Make the desired changes to the Timeline Event.
- Click the SAVE button.
Filtering Timeline Events
FILTERS Selector
The FILTERS selector provides options for filtering displayed Timeline Events by user, type of linked Case element that generated the Timeline Event, whether the Timeline Event was generated manually by a user or automatically by the system, the date on which the Timeline Event was added, and combinations of these selections (Figure 8).
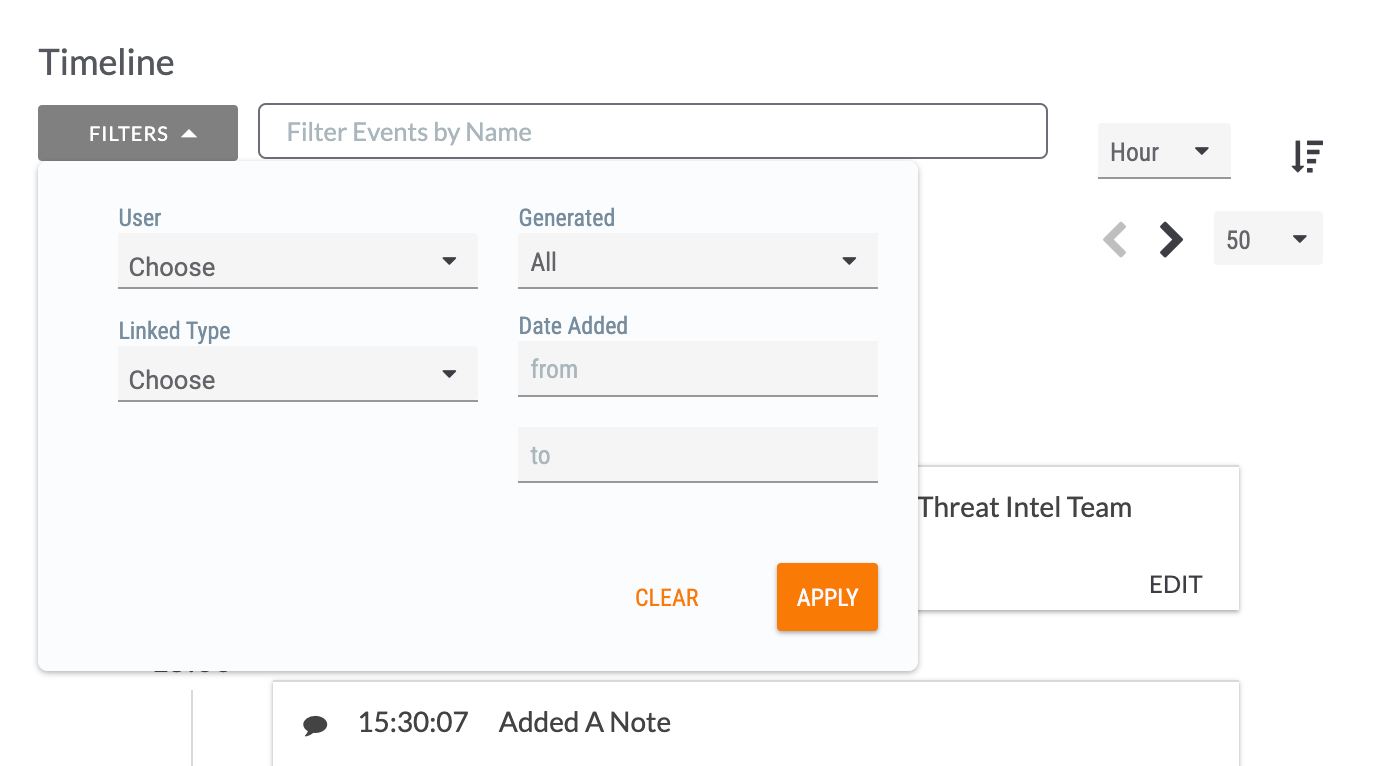
- User: Select one or more users. Only Timeline Events created by the selected user(s) will be displayed.
- Linked Type: Select one or more types of linked Case elements. Only Timeline Events generated by the selected element(s) will be displayed.
- Generated: Selecting System will display only Timeline Events generated automatically by the system, whereas selecting Manual will display only Timeline Events manually added by a user (see the “Adding Timeline Events” section). Selecting All will display all Timeline Events regardless of how they were generated.
- Date Added: Clicking on the from and to fields displays calendars from which the beginning and end of a date range can be selected. Only Timeline Events that were generated on dates within that range will be displayed.
- Click the APPLY button to apply the selected filters. To reset the filters, click the CLEAR button.
When filters have been applied, an orange circle  will be displayed at the upper-left corner of the FILTERS selector. This element alerts you to the fact that you might be viewing an “incomplete” set of data.
Filtering Timeline Events by Name
To filter Timeline Events by name (i.e., contents of the Timeline Event), enter the desired term in the search bar to the right of the FILTERS selector. The displayed Timeline Events will be filtered as text is entered into the search bar. Click the Clear  icon on the right side of the box to clear the entered text.
ThreatConnect® is a registered trademark of ThreatConnect, Inc.
20129-01 v.01.C