Overview
Run Profiles represent the data type or event needed to execute a Playbook in ThreatConnect® without needing to navigate away from the Playbook Designer. For example, you can create a Run Profile that represents an HTTP request that will execute when a WebHook Trigger is called, and then you can execute the Playbook using the Run Profile.
Before You Start
| Minimum Role(s) |
|
|---|---|
| Prerequisites | Playbooks enabled by a System Administrator |
Viewing and Managing Run Profiles
Viewing Run Profiles
- On the top navigation bar, click Playbooks to display the Playbooks screen.
- Open an existing Playbook or create a new one and configure it.
- Click
 Run Profiles on the side navigation bar of the Playbook Designer to display the Run Profiles pane, which displays the Run Profiles that have been created for the Trigger type used in the Playbook (Figure 1). To view all Run Profiles available in an Organization, toggle the Show All slider on while the Playbook is in Design Mode or Interactive Mode.
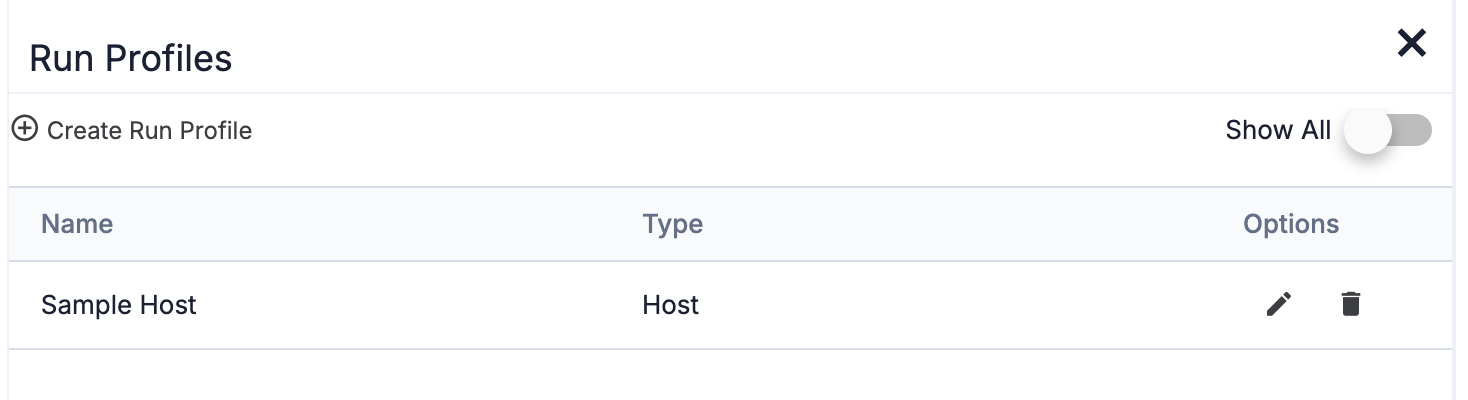
Editing Run Profiles
- Click Edit
 in the Options column for the Run Profile (Figure 1). The Create Profile screen will be displayed in the Run Profiles pane (Figure 2).
 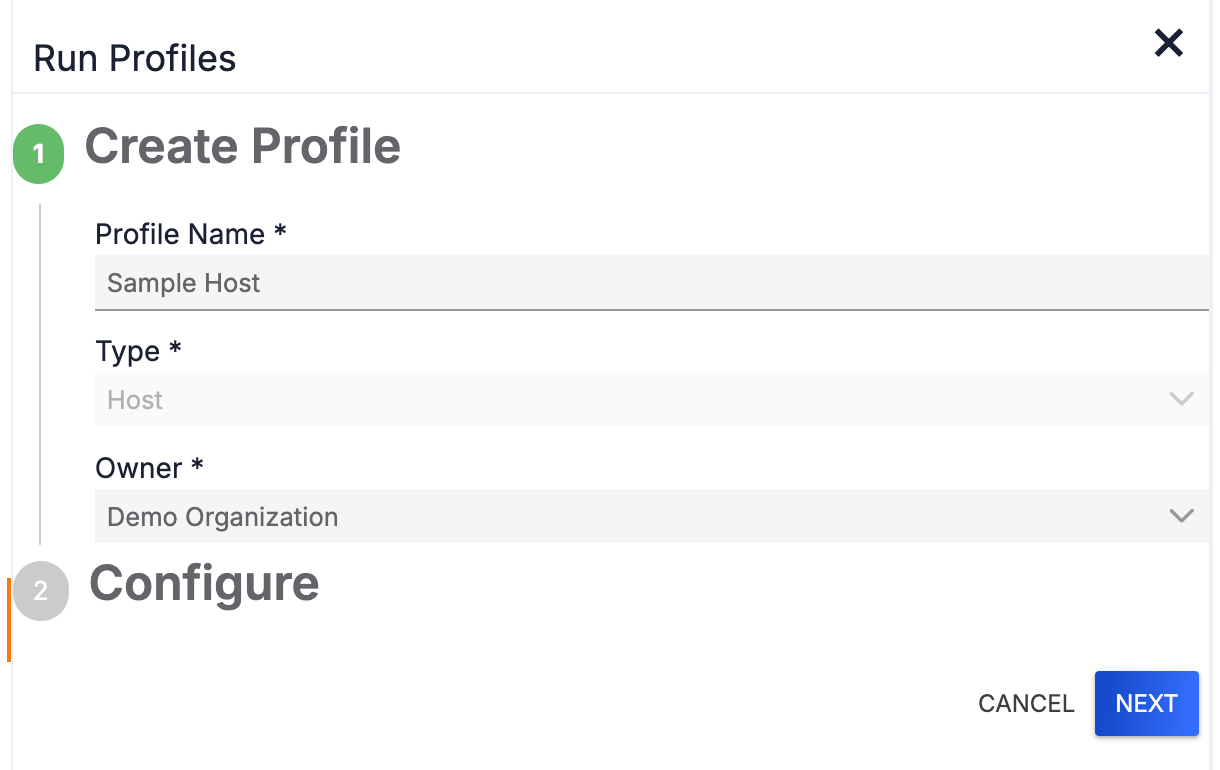 NoteThe Run Profile's Type cannot be changed.
 - Click the NEXT button to edit the configuration options. The options vary by Trigger type. See the “Creating Run Profiles" section for further guidance.
Deleting Run Profiles
Click Delete in the Options column for the Run Profile (Figure 1). The Delete Run Profile? window will be displayed. Click the DELETE button.
Creating Run Profiles
Run Profiles are created to represent a specific Indicator, Group, or Intelligence Requirement (IR) in an owner needed to execute the corresponding Indicator, Group, or Intel Requirement Trigger, respectively, or a specific event needed to execute a Mailbox, Timer, or WebHook Trigger. In addition to creating Run Profiles as described in this section, you can create a Run Profile for a logged Playbook execution from the Execution Details pane while viewing the results of the execution.
- Click + Create Run Profile at the upper-left corner of the Run Profiles pane (Figure 1). The Create Profile section will be displayed (Figure 3).
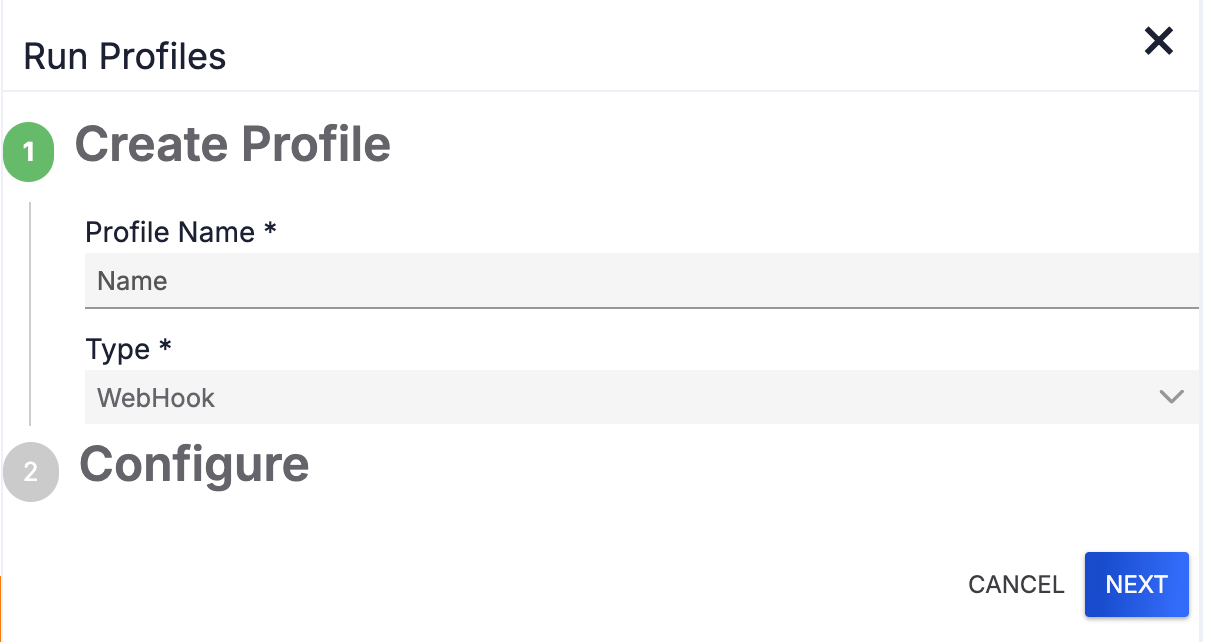
- Profile Name: Enter a name for the Run Profile.
- Type: Select the type of Run Profile to create. The options are all ThreatConnect Indicator types and Group types, Intel Requirement, Mailbox, Timer, and WebHook.
- The configuration options for Run Profiles vary by the Trigger type selected in the Type field. See the next set of subsections for guidance on each Trigger type.
Indicator, Group, or Intel Requirement Trigger
- Create a new Run Profile as described in the “Creating Run Profiles" section and select an Indicator or Group type or Intel Requirement as the Type. An Owner dropdown will be displayed (Figure 4).
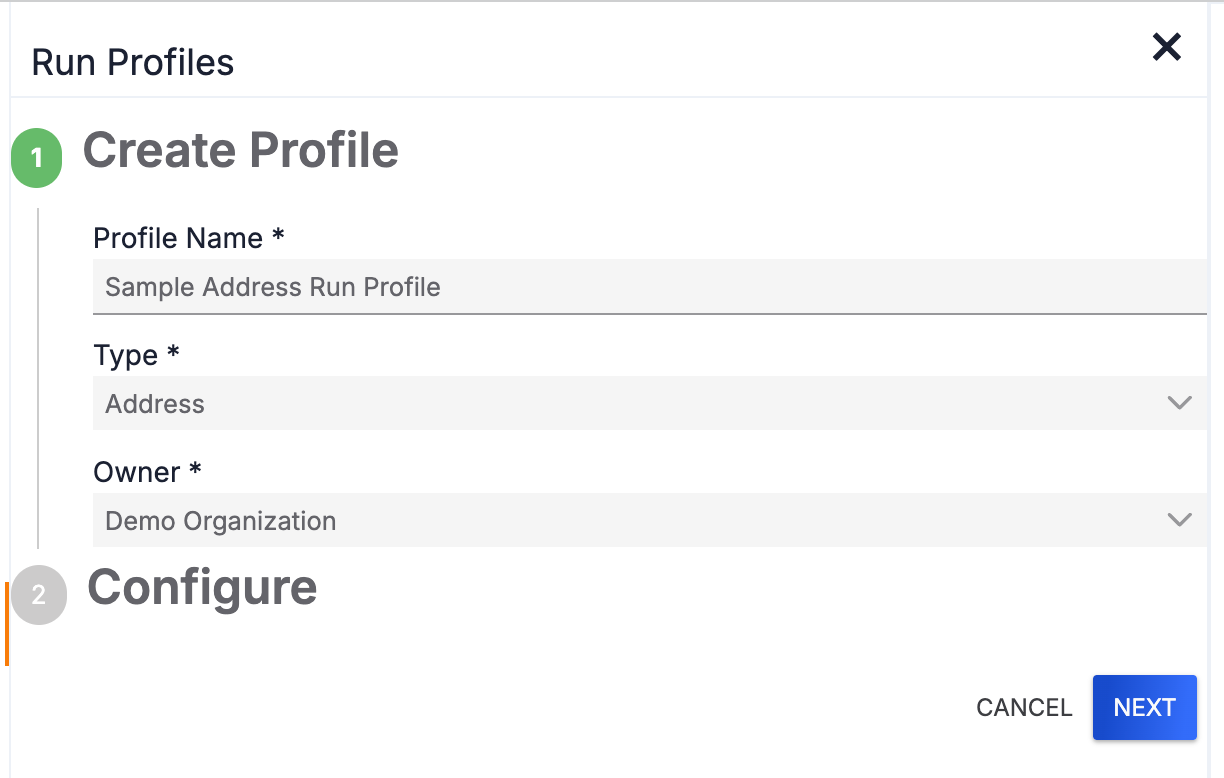
- Owner: Select the owner that contains the Indicator, Group, or IR that will act as the trigger for the Run Profile.
- Click the NEXT button.
- The Configure section will be displayed, showing a text field corresponding to the Indicator or Group type, or Intel Requirement for the Intel Requirement type, that was selected in the previous step (Figure 5).
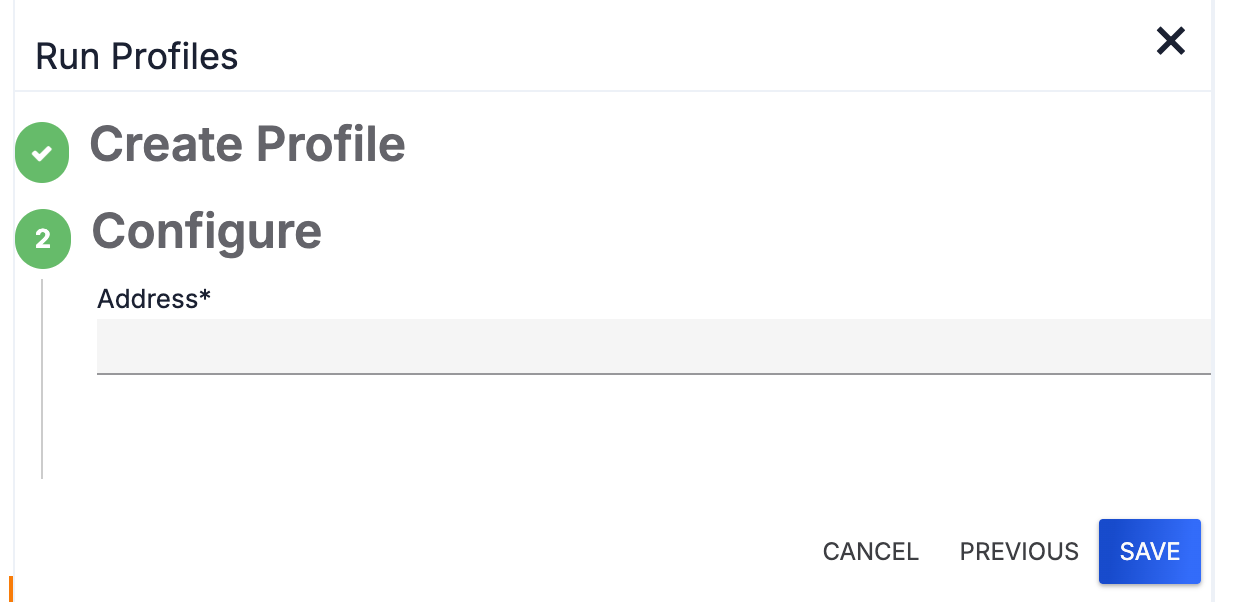
- Enter the name/summary of the Indicator, Group, or IR that will be used to execute the Playbook into the text field. As you type, a list of results matching the text entered will be displayed. Select an object from the list of results. Information about the object will be displayed (Figure 6). Click the
 icon to view the object’s Details screen.
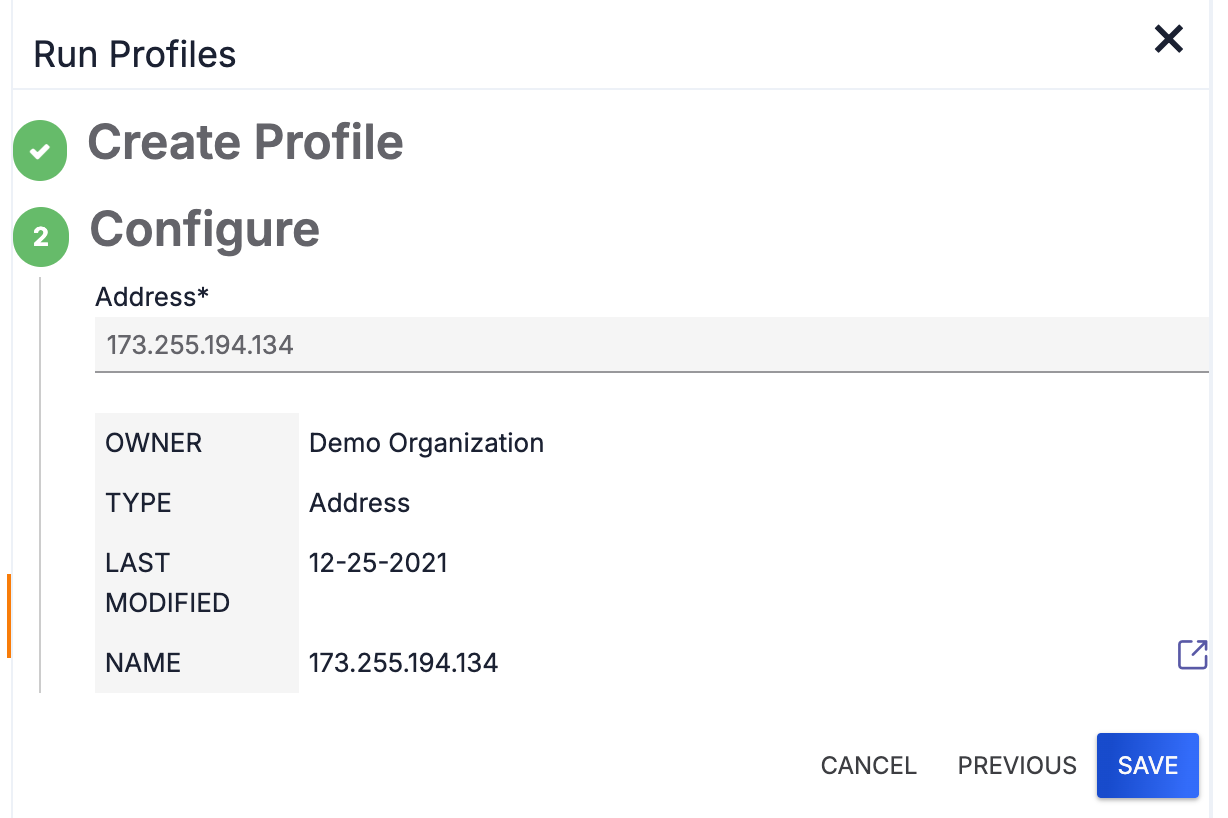
- Click the SAVE button.NoteIf a Run Profile is not displayed in the Run Profiles pane after you create it, ensure that the Playbook uses a Trigger type that matches the Run Profile’s Type. Alternatively, toggle the Show All switch on to display all Run Profiles in your Organization.
Mailbox Trigger
Create a new Run Profile as described in the “Creating Run Profiles" section, select Mailbox as the Type, and click the NEXT button. The Configure section will be displayed (Figure 7).
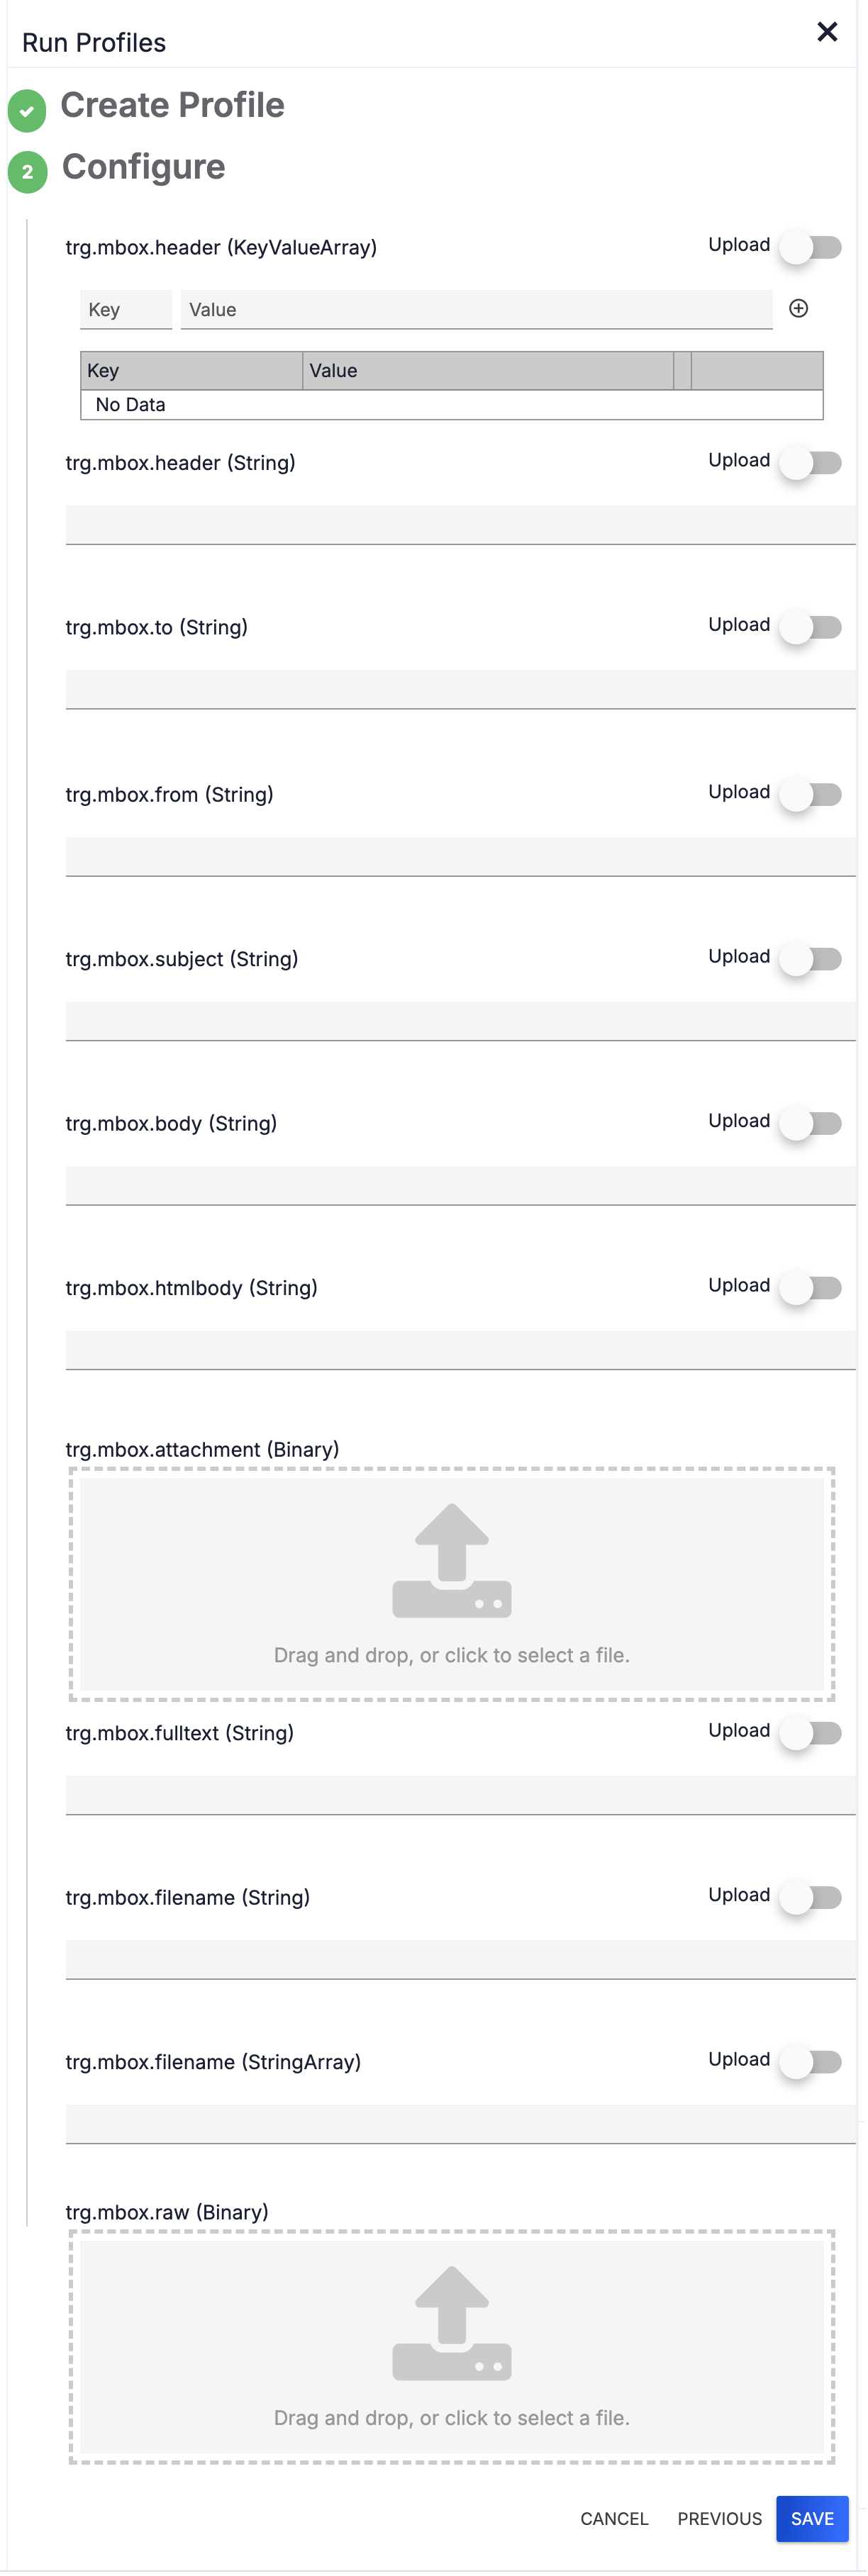
- trg.mbox.header (KeyValueArray): Enter the mailbox header in a key/value format.
- trg.mbox.header (String): Enter the mailbox header in string format.
- trg.mbox.to (String): Enter the mailbox recipient.
- trg.mbox.from (String): Enter the mailbox sender.
- trg.mbox.subject (String): Enter the email’s subject line.
- trg.mbox.body (String): Enter the body of the email in plain text format.
- trg.mbox.htmlbody (String): Enter the body of the email in HTML format.
- trg.mbox.attachment (Binary): Upload an email file attachment.
- trg.mbox.fulltext (String): Enter the full text contents of the email.
- trg.mbox.filename (String): Enter a single filename for the email.
- trg.mbox.filename (StringArray): Enter a StringArray of filenames representing email file attachments.
- Click the SAVE button.
Timer Trigger
Create a new Run Profile as described in the “Creating Run Profiles” section, select Timer as the Type, and click the NEXT button. The Configure section will be displayed (Figure 8).
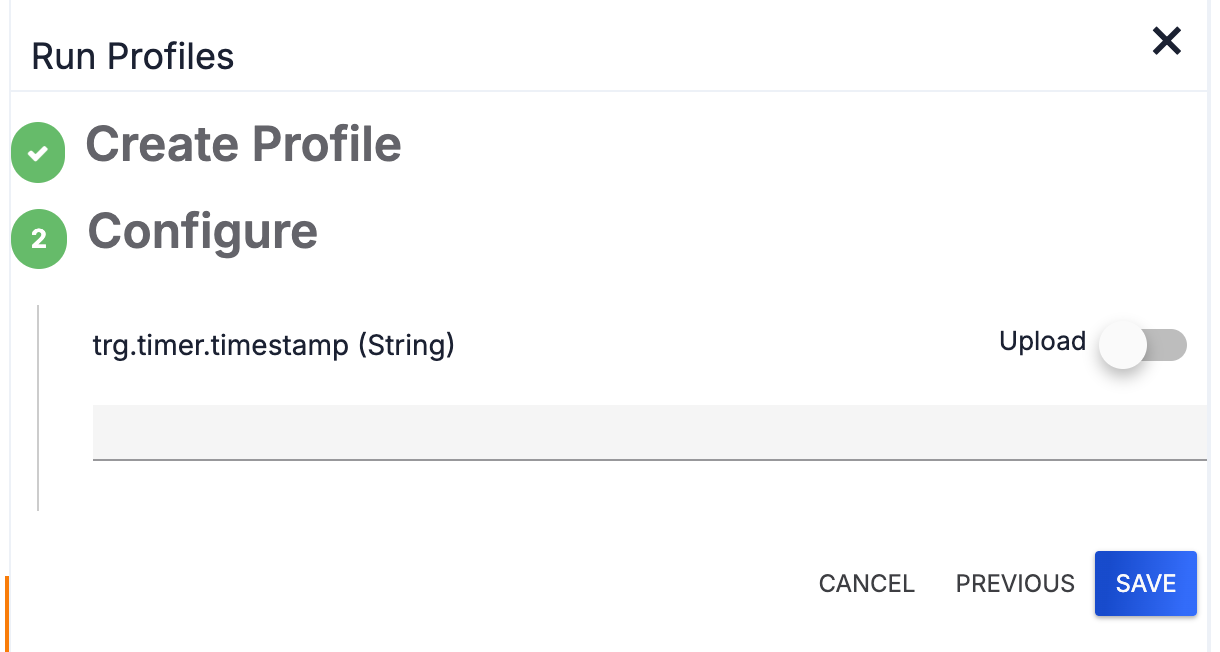
- trg.timer.timestamp (String): Enter the timestamp in ISO 8601 format. Alternatively, toggle the Upload slider on to upload a JSON file containing the timestamp.
- Click the SAVE button.
WebHook Trigger
Create a new Run Profile as described in the “Creating Run Profiles" section, select WebHook as the Type, and click the NEXT button. The Configure section will be displayed (Figure 9).
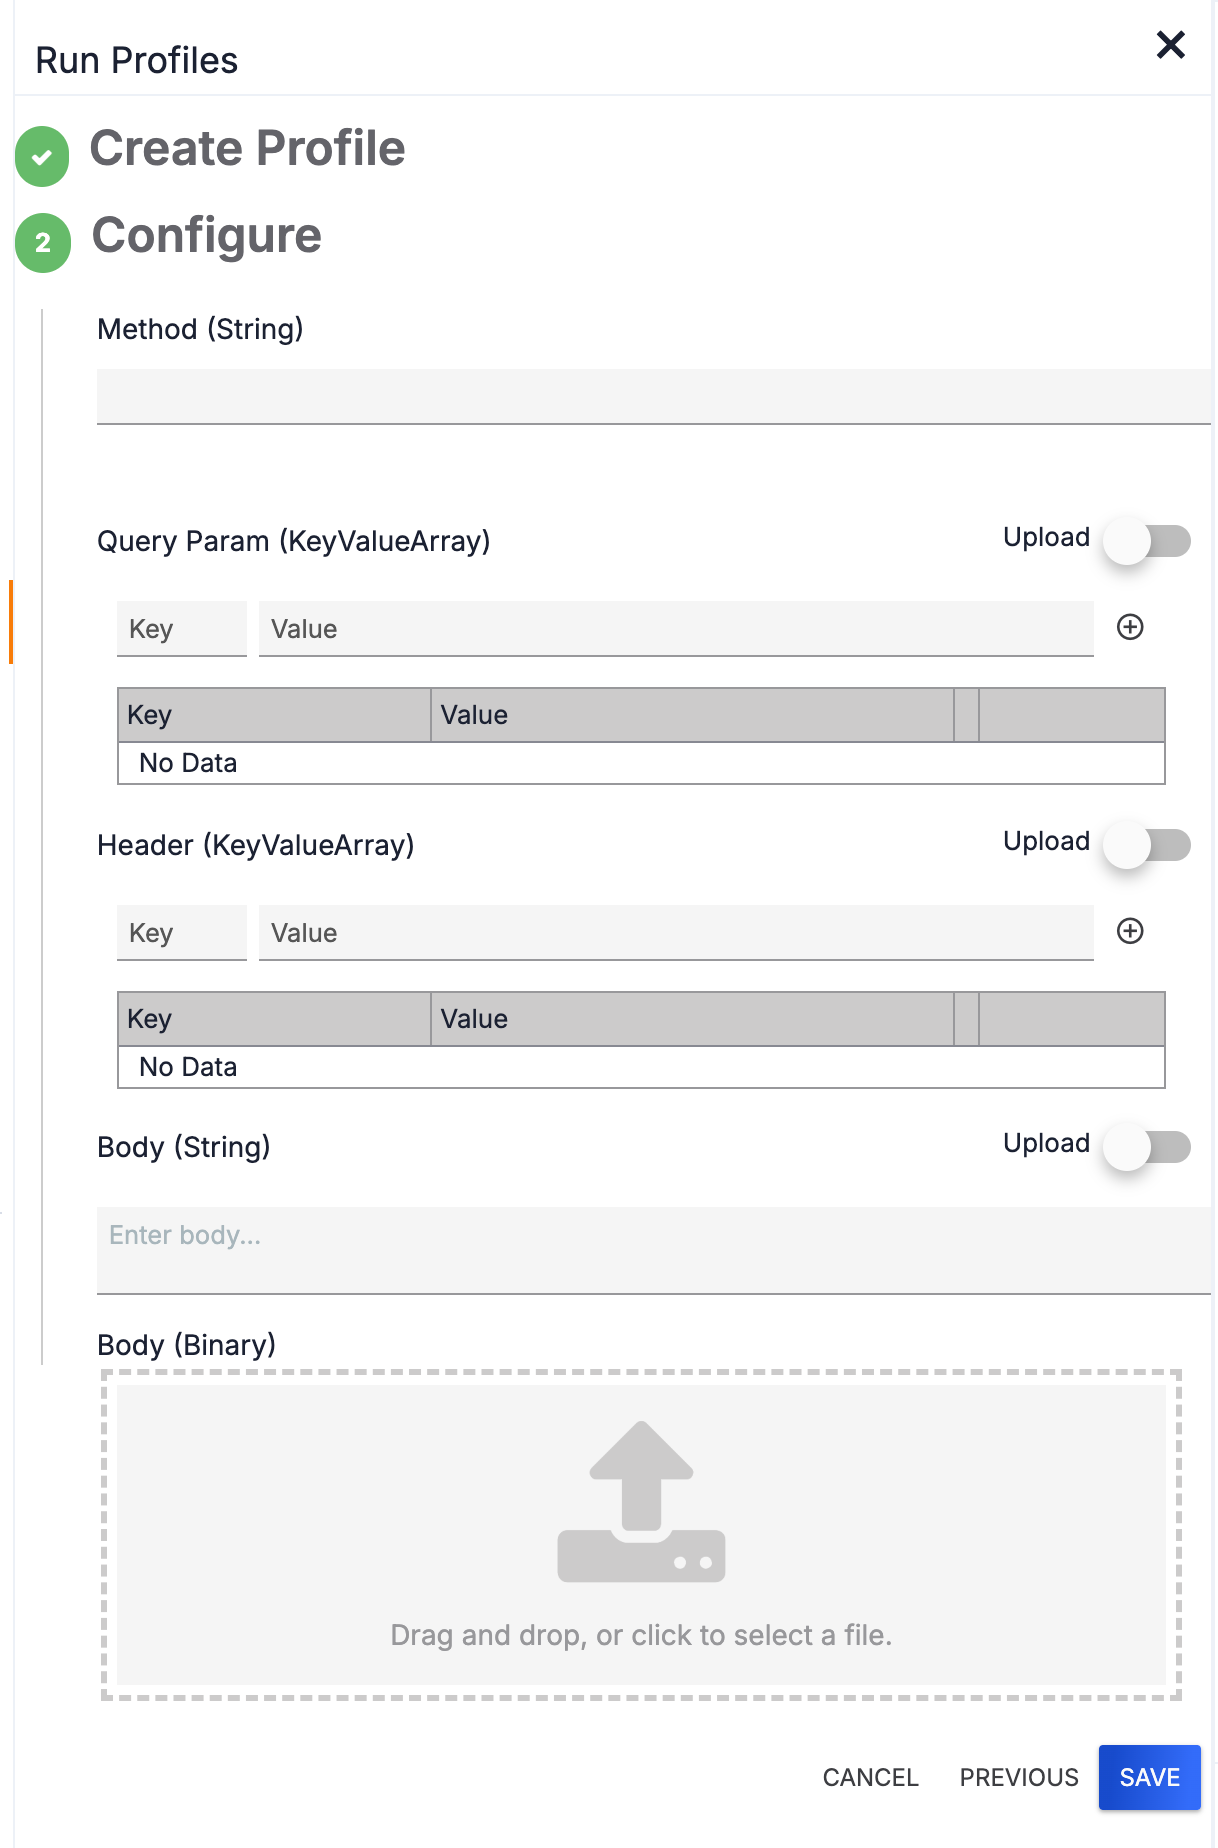
- Method (String): Enter the HTTP method that will be used when the WebHook Trigger is called. Acceptable values include GET, PUT, POST, DELETE, OPTIONS, and HEAD.
- Query Param (KeyValueArray): Enter a key/value pair of query parameters that will be sent to the HTTP request when the WebHook Trigger is called. Alternatively, toggle the Upload slider on to upload a JSON string with an array of key/value pairs.
- Header (KeyValueArray): Enter a key/value pair of header parameters that will be sent to the HTTP request when the WebHook Trigger is called. Alternatively, toggle the Upload slider on to upload a JSON string with an array of key/value pairs.
- Body (String): Enter string content used during POST and PUT calls to the WebHook Trigger. Alternatively, toggle the Upload slider on to upload a JSON file containing the string content.
- Body (Binary): Upload binary content used during POST and PUT calls to the WebHook Trigger.
- Click the SAVE button.
Executing a Playbook Using a Run Profile
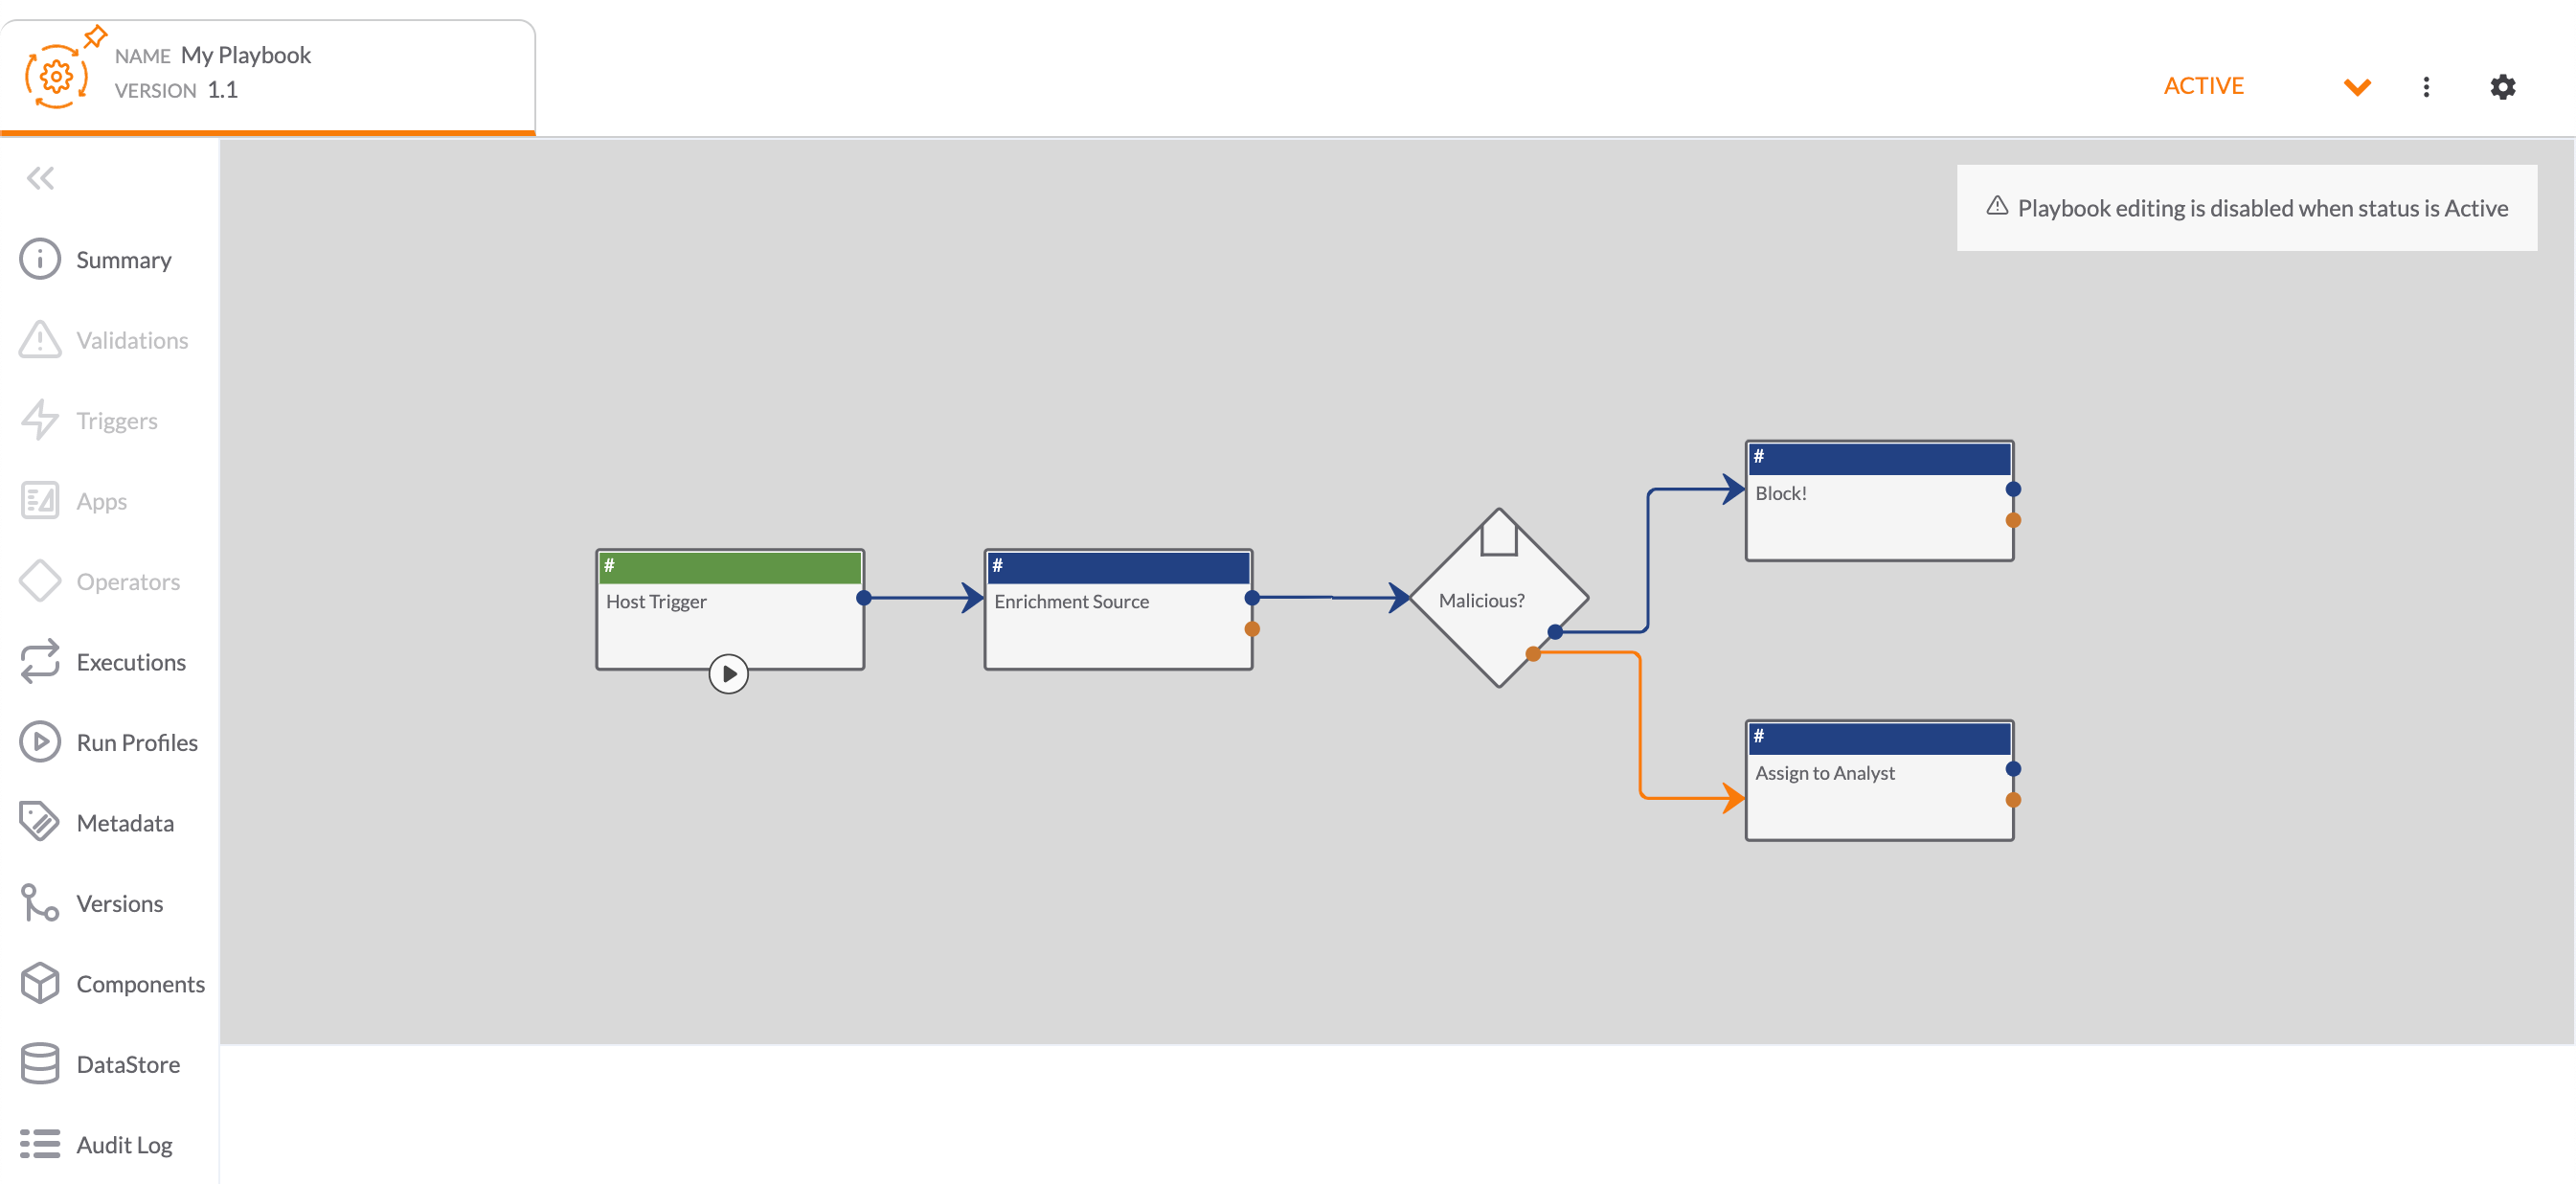
To execute an active Playbook using a Run Profile, open the Playbook in the Playbook Designer and click the Run Playbook icon displayed on the Playbook’s Trigger (Figure 10). A list of available Run Profiles matching the Trigger type will be displayed. If no available Run Profiles match the Trigger type, click Create Profile to create a new Run Profile. See the “Creating Run Profiles" section for more information.
For more information about Playbook executions, see Playbooks Executions.
ThreatConnect® is a registered trademark of ThreatConnect, Inc.
20113-01 v.01.E