With ThreatConnect® Intelligence Anywhere, you can import potential Indicators found during a scan into ThreatConnect and associate them to a new or existing Group.
Importing Indicators into an Existing Group
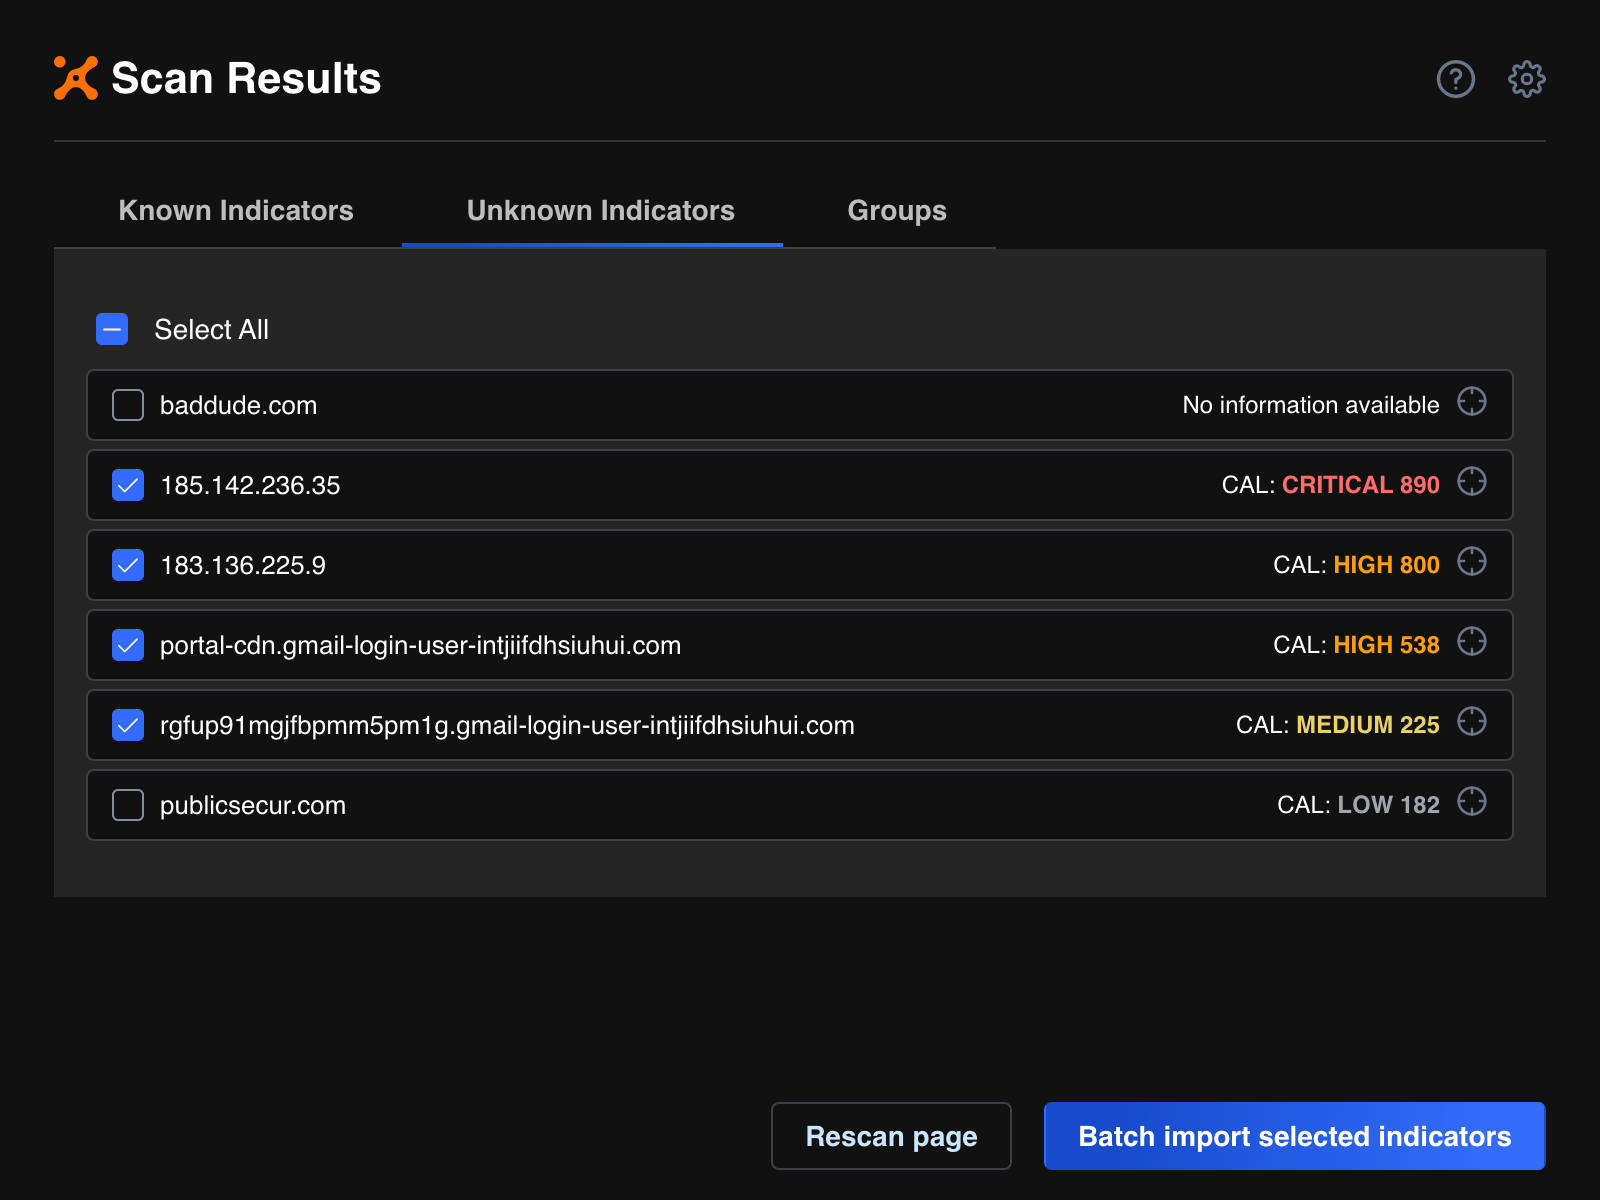
- Add a potential Indicator to the batch import list by selecting its checkbox in the Scan Results window or clicking the Add to batch import list button in its Details window. To add all known or unknown Indicators to the batch import list, select the Select All checkbox on the Known Indicators or Unknown Indicators tab, respectively, of the Scan Results window.
- Once all desired potential Indicators are added to the batch import list, click the Batch import selected indicators button on the Scan Results window (Figure 1).
- The Batch Import window will be displayed (Figure 2). Select Add all selected indicators to an already existing group.
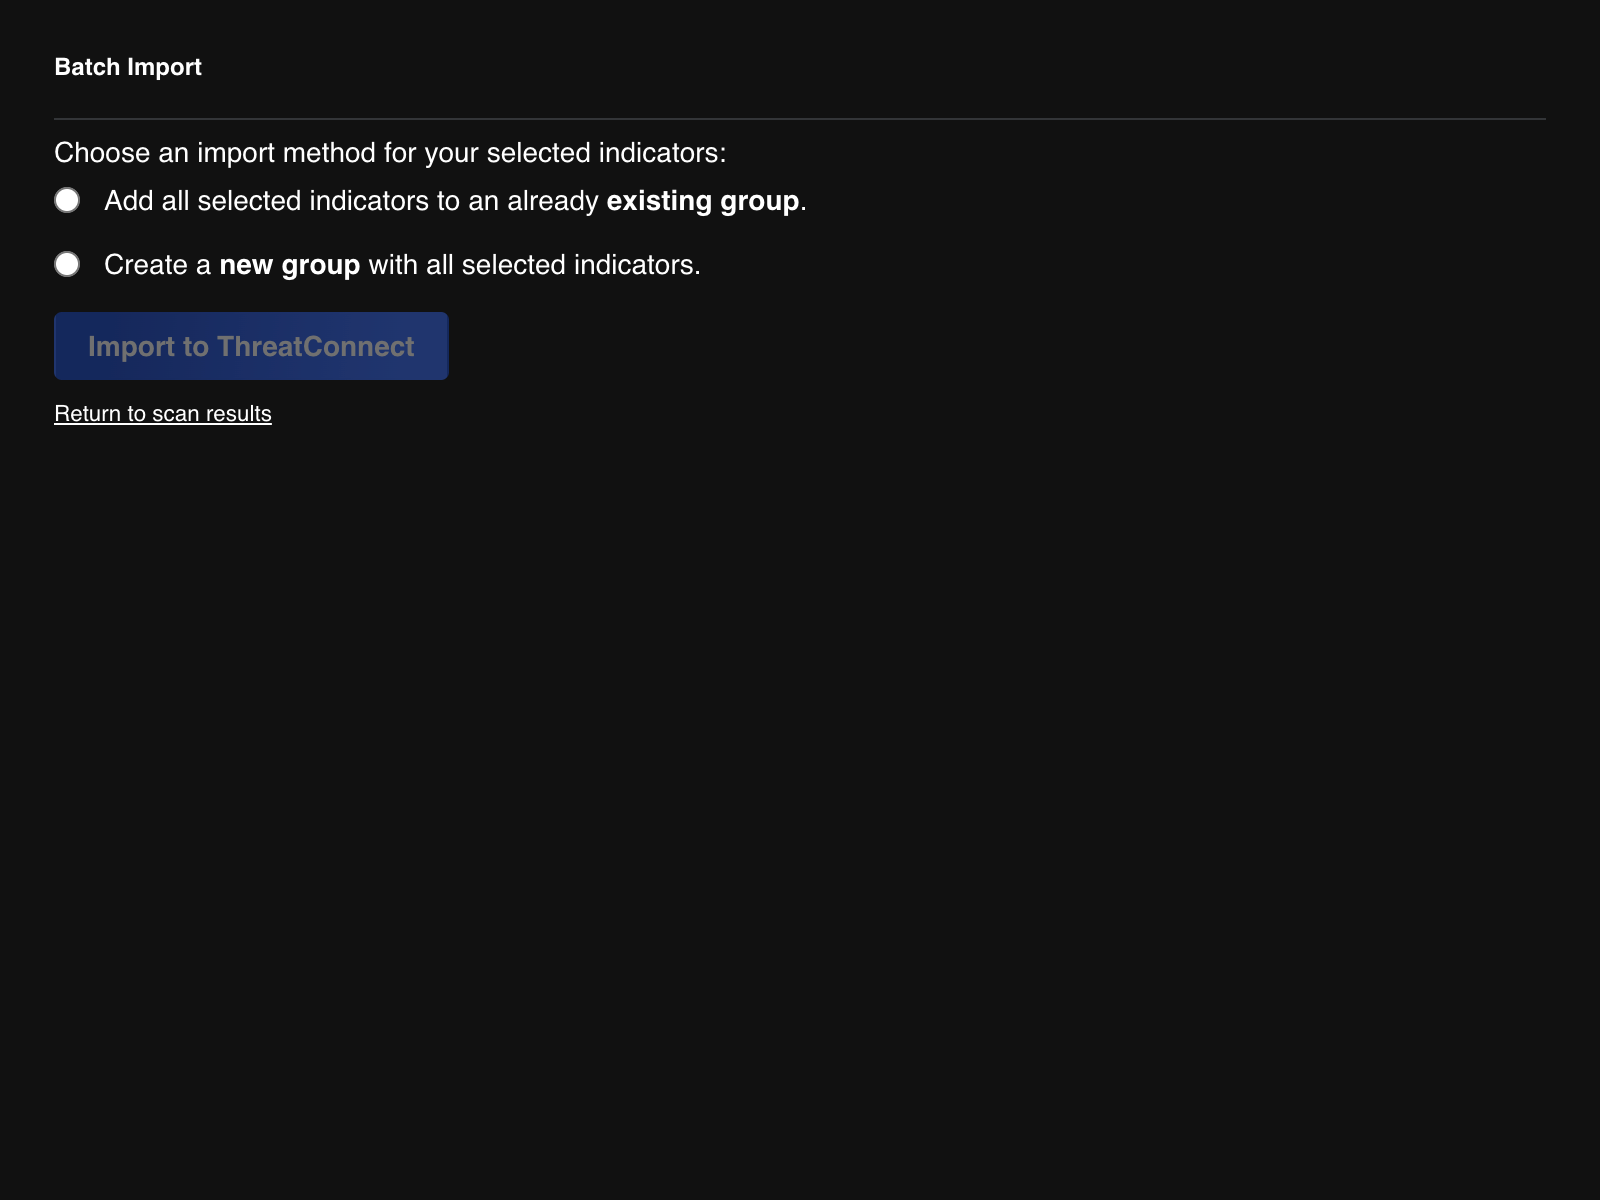
- Click the Import to ThreatConnect button. A new tab will open in your browser displaying the Select Group section of the Import to Existing Group screen in ThreatConnect (Figure 3).
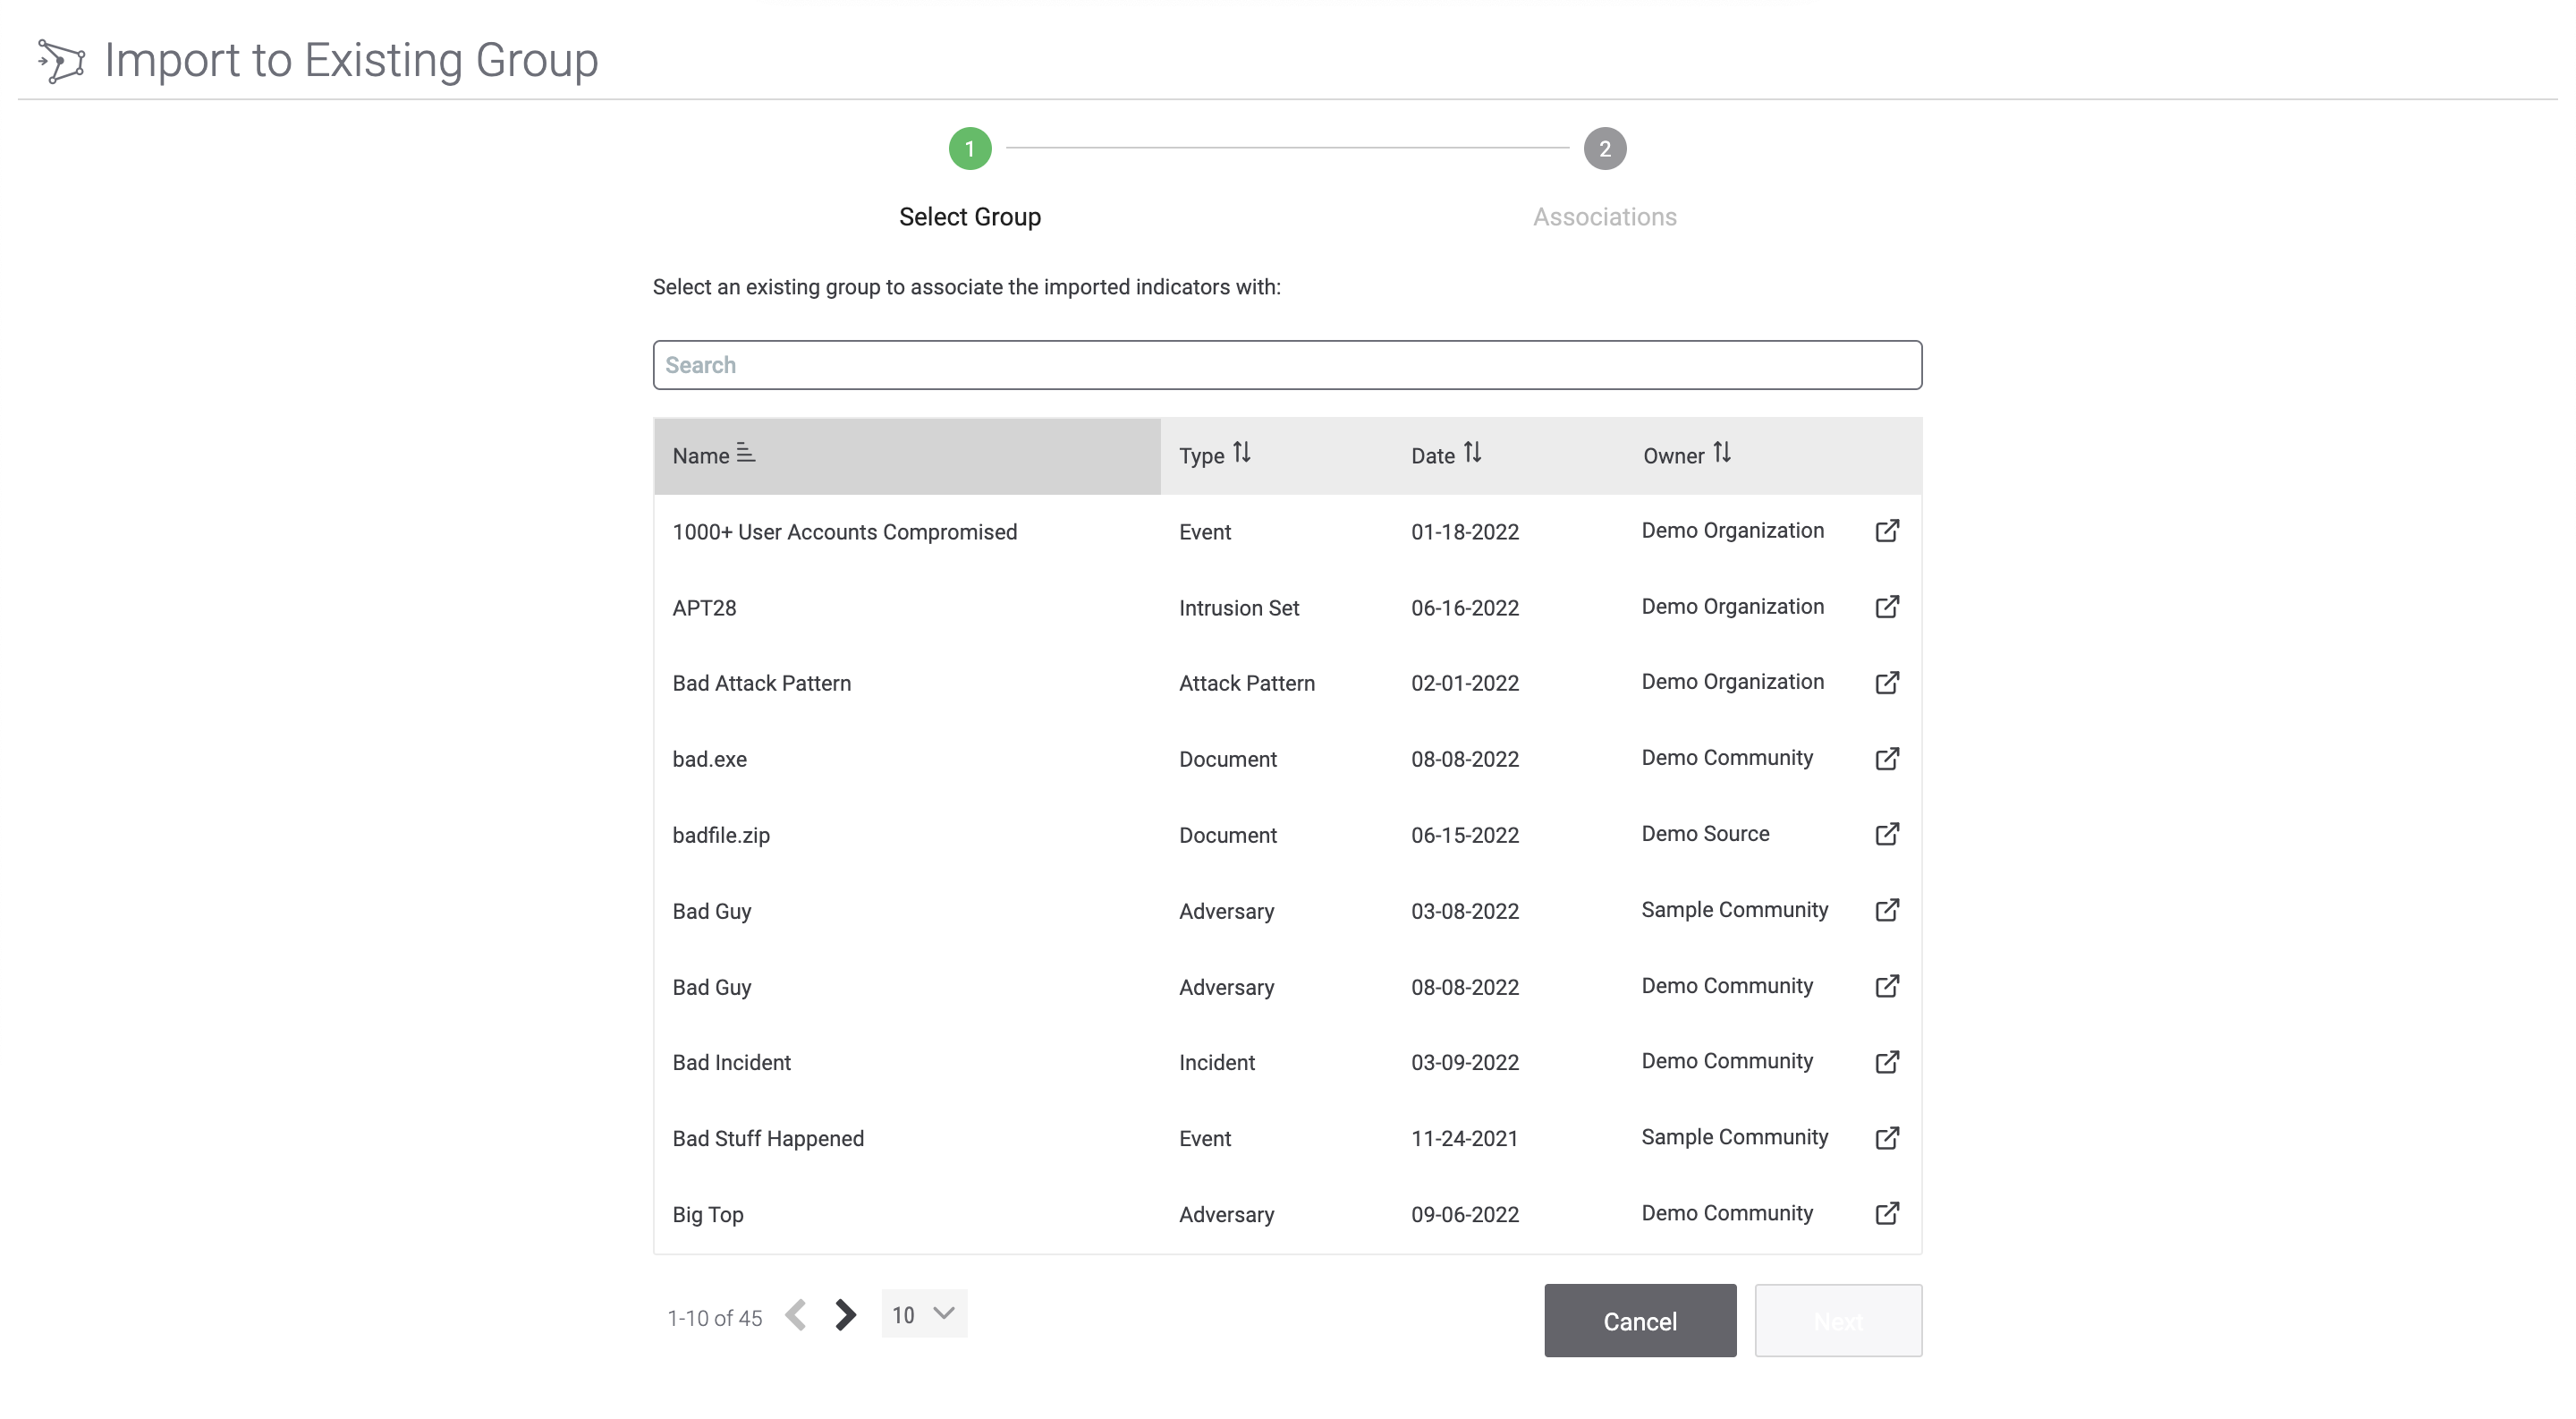
- Select the Group to which the selected potential Indicator(s) will be associated. To search for a Group, enter its name in the search bar above the table containing all Groups.
- To view a Group’s Details screen , click the Open in New Tab
 icon to the right of the Owner column.
 - Click the Next button.
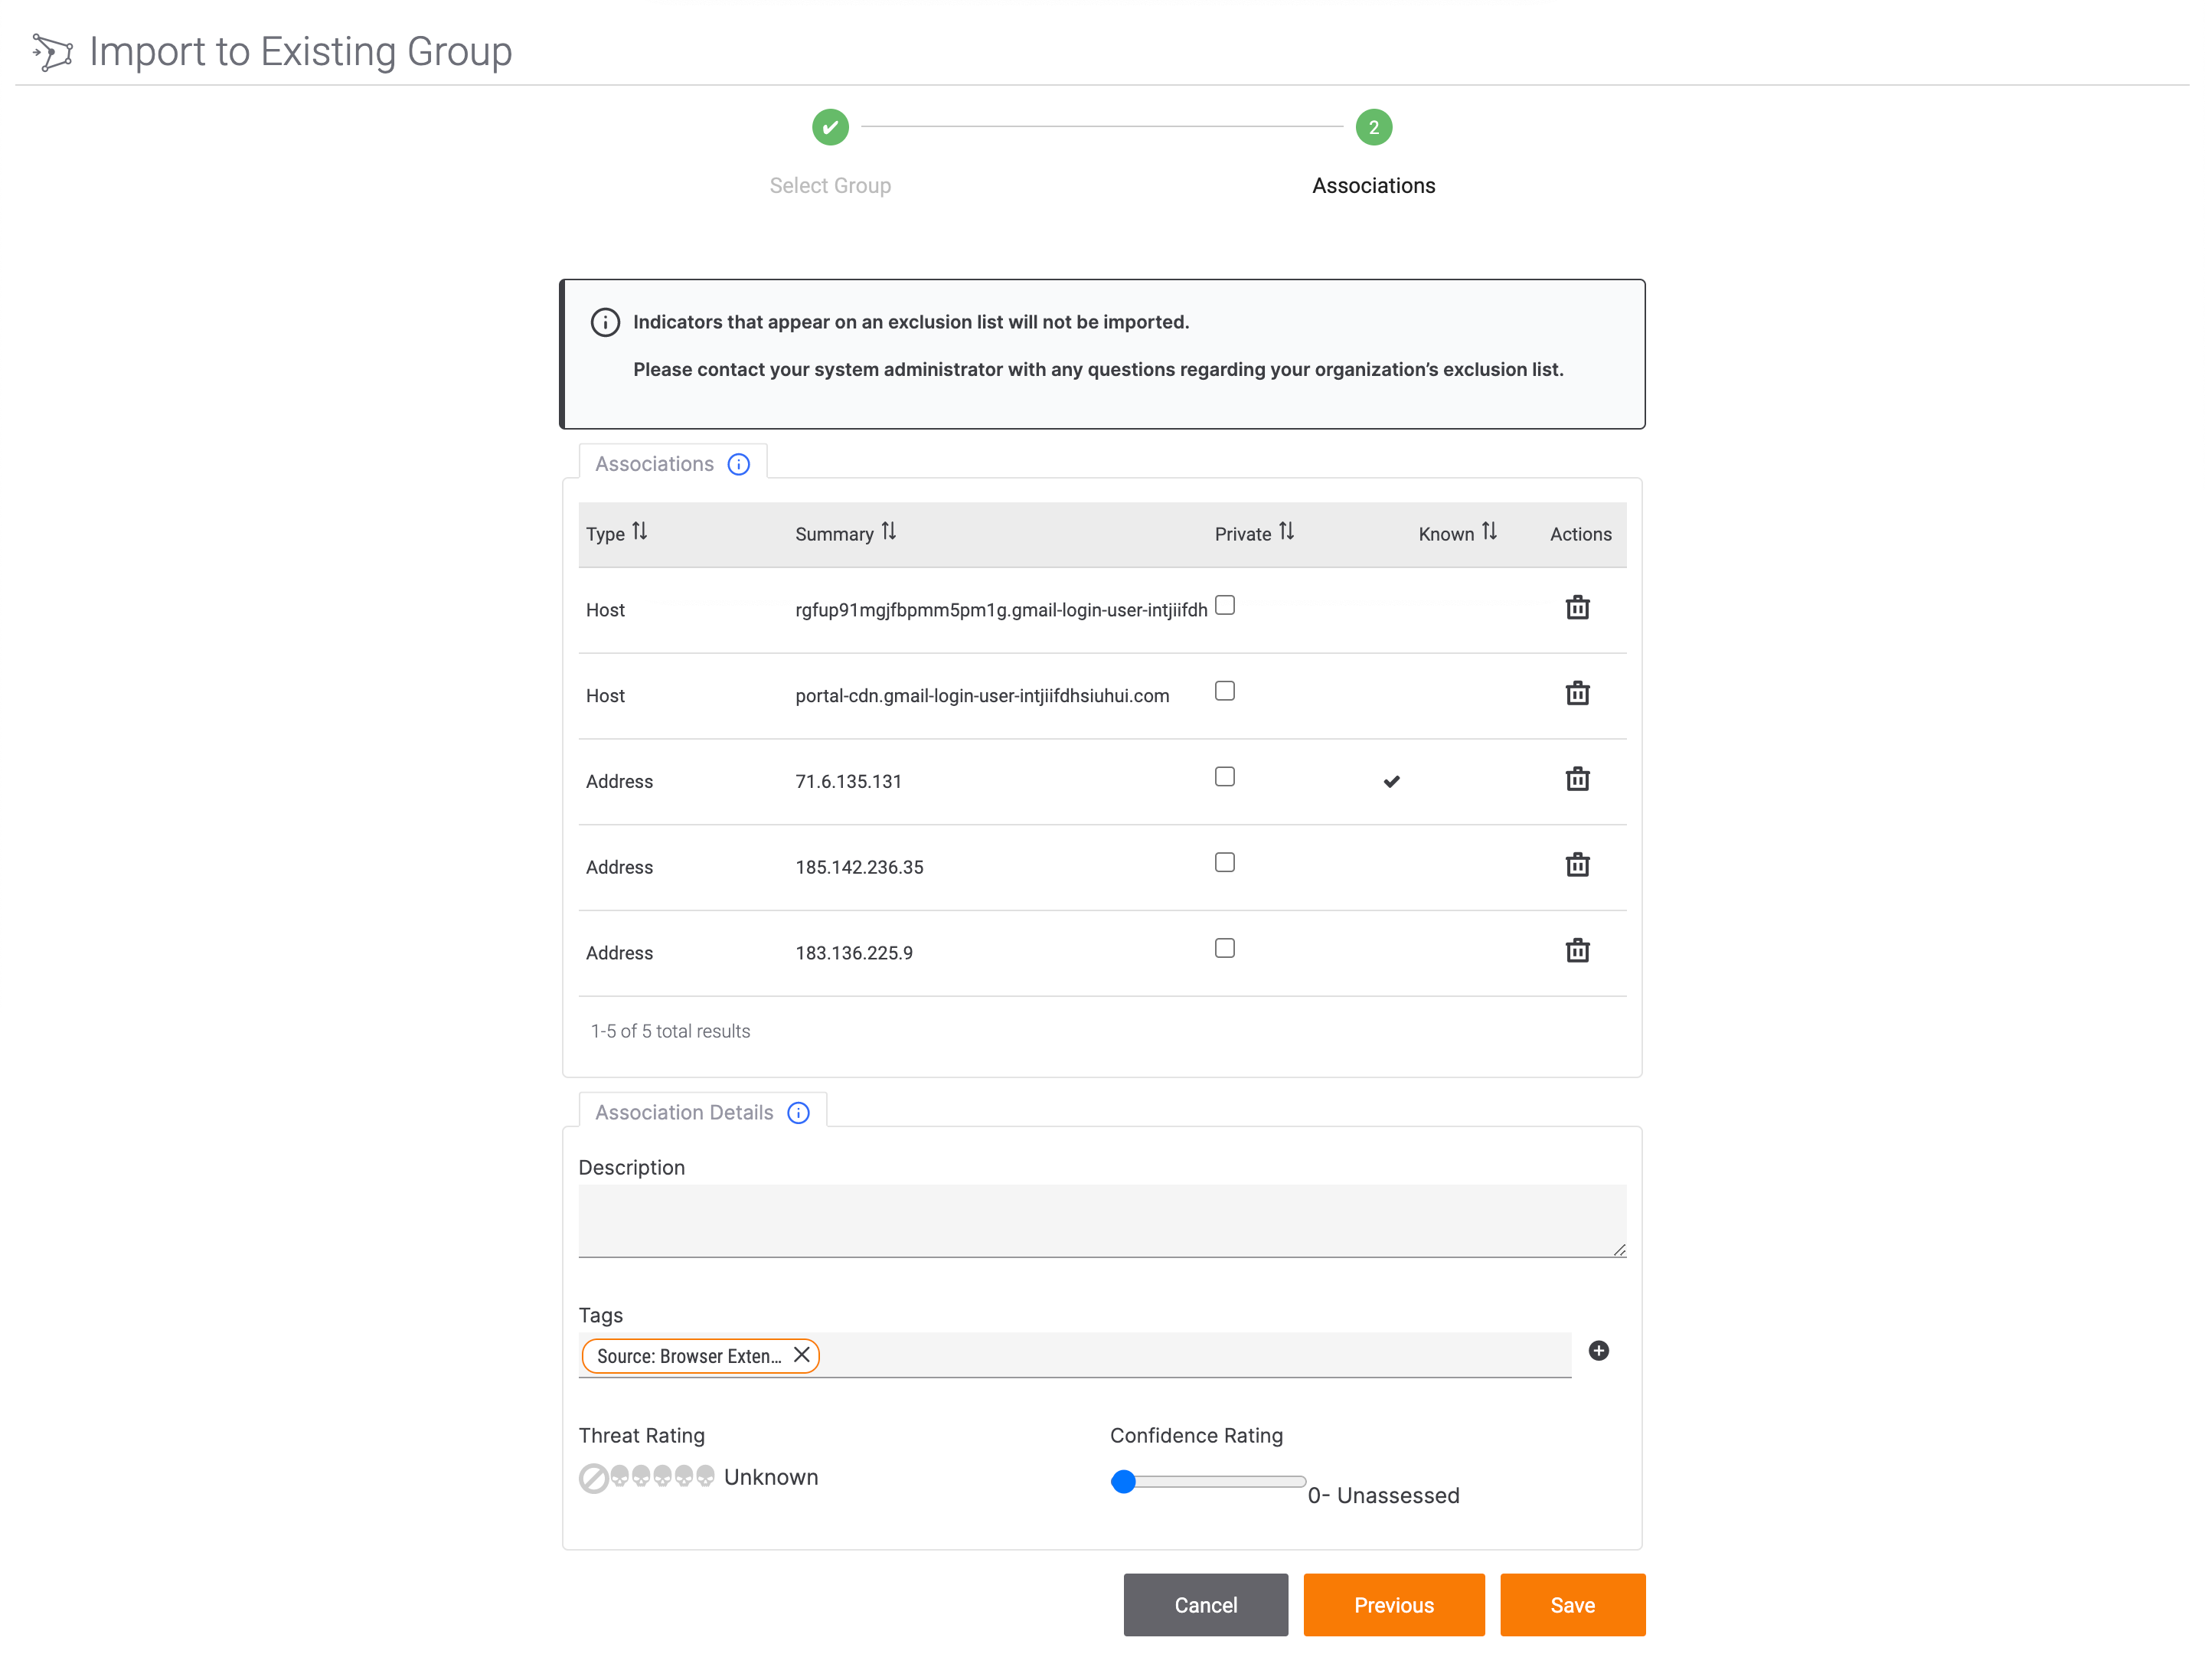
- The Associations section will be displayed (Figure 4).
 NoteSelected Indicators that were categorized as known in the Scan Results window may be labeled as unknown on the Associations section if they are unknown to the owner of the Group into which they are being imported.
- Associations: The selected potential Indicators will be displayed in the Associations card. In this card, you can complete the following actions:
- Private: To mark an Indicator as private, select the corresponding checkbox in the Private column. This column will be displayed only if your System Administrator has enabled private Indicators.
- Actions: To remove a potential Indicator from the list of Indicators being imported into ThreatConnect, click Delete
 .
.
- Association Details: In the Associations Details card, you can fill out the following information, which will be applied to all Indicators being imported and associated to the Group:
- Description: Enter a Description for the Indicator(s).
- Tags: Enter Tags to apply to the Indicator(s). By default, a Source: Browser Extension Tag will be applied to all selected potential Indicators. However, you can remove this Tag, if desired.
- Threat Rating: Use the skull icons to set the Threat Rating for the Indicator(s).
- Confidence Rating: Use the slider to set the Confidence Rating for the Indicator(s).
- Click the Save button.
- Associations: The selected potential Indicators will be displayed in the Associations card. In this card, you can complete the following actions:
The selected potential Indicator(s) will be imported into ThreatConnect and associated to the Group, and the Group’s Details screen will be displayed. The Indicators imported into ThreatConnect will be displayed on Indicators card of the Group’s Associations tab. You may also view these associations on the Associations card of the Group’s legacy Details screen, under the Associated Indicators section when the card is in table view.
Importing Indicators into a New Group
- Follow Steps 1 and 2 in the “Importing Indicators into an Existing Group” section.
- On the Batch Import window (Figure 2), select Create a new group with all selected indicators.
- Click the Import to ThreatConnect button. A new tab will open in your browser with the Details section of the Create screen for Groups in ThreatConnect displayed (Figure 5).
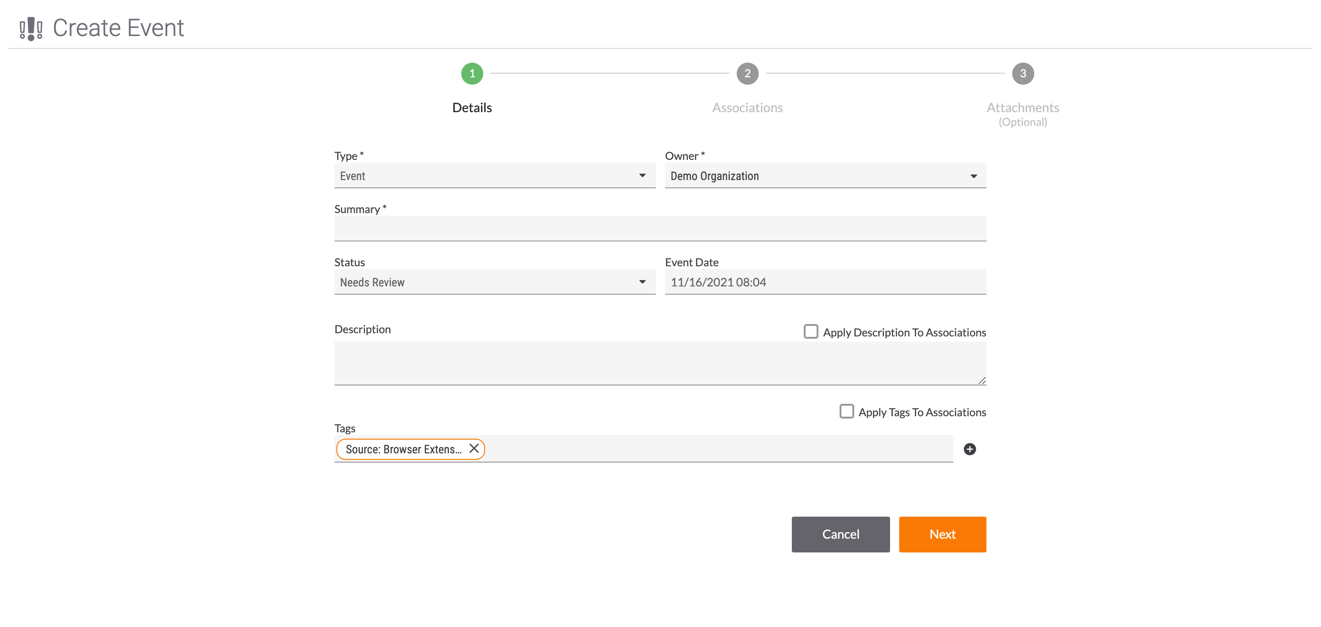
- Type: By default, Event is selected. If desired, select another Group type from the dropdown.
- Complete all fields on the Details section. For descriptions of each field available on this screen, see the “Creating a Group” section of Create.
- Click the Next button.NoteThe Save button is available only on the Associations and Attachments sections.
- The Associations section will be displayed (Figure 6).
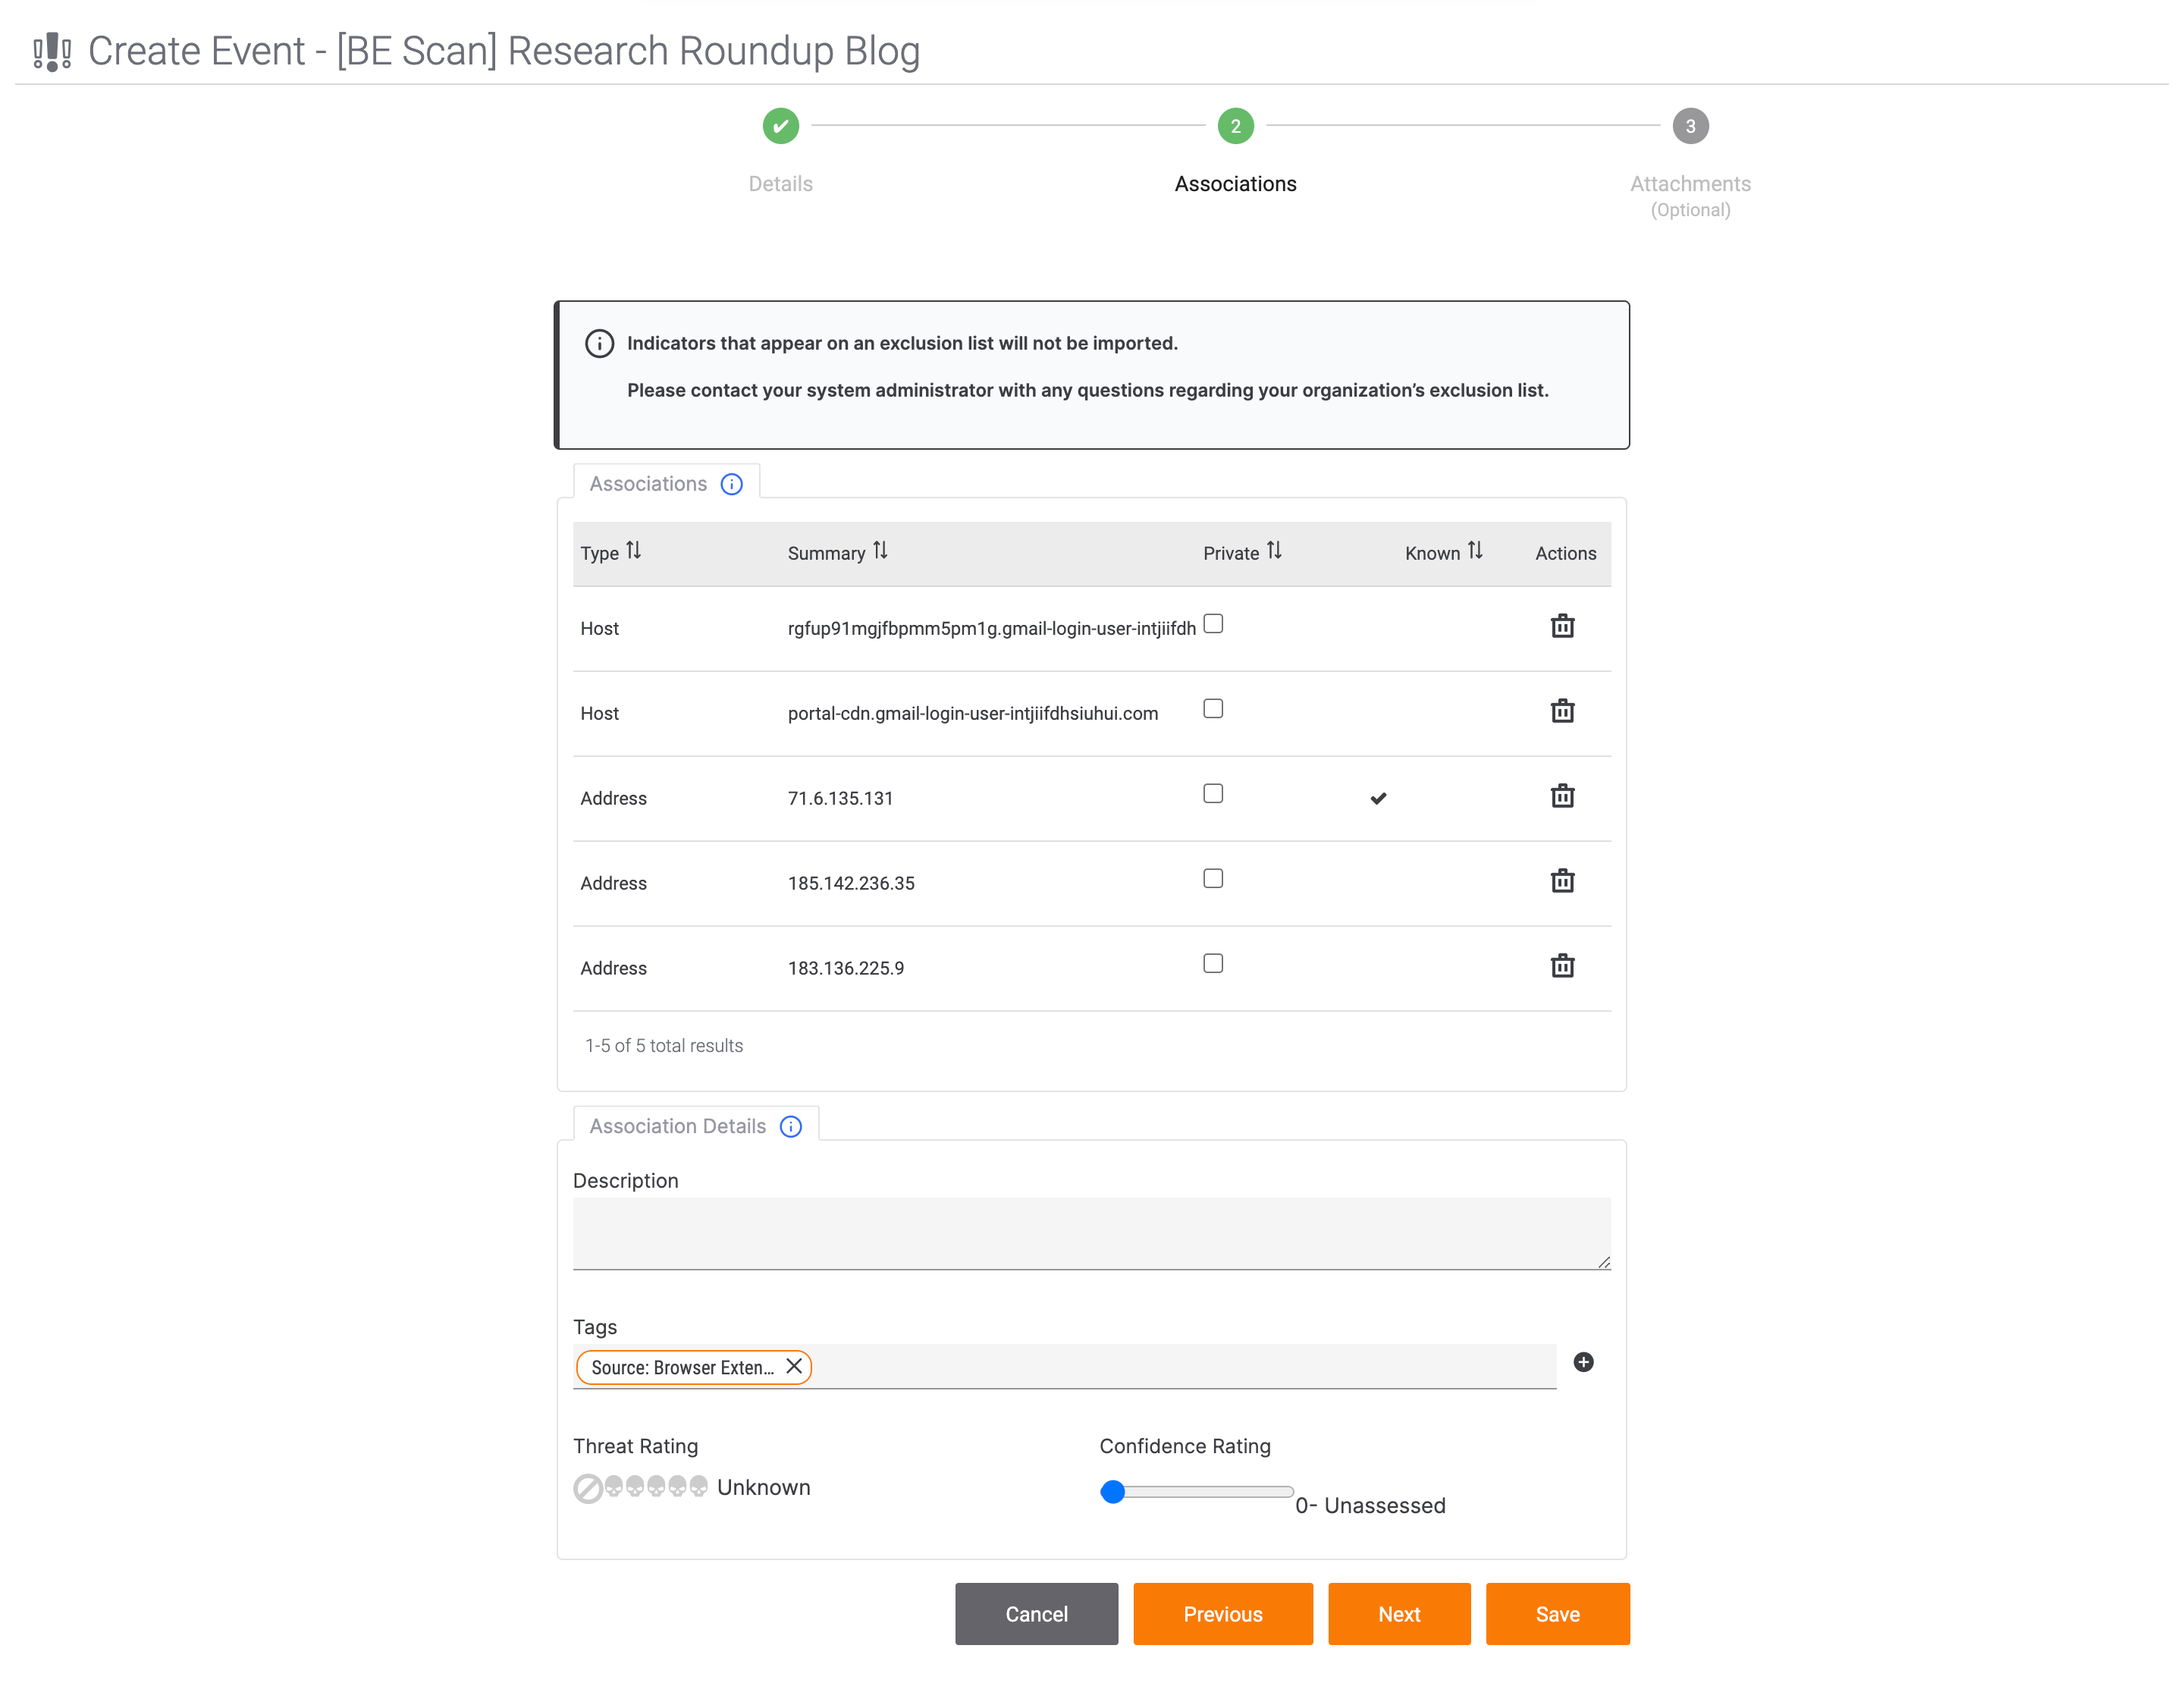 NoteSelected Indicators that were categorized as known in the Scan Results window may be labeled as unknown on the Associations section if they are unknown to the owner of the Group into which they are being imported.
- Associations: The selected potential Indicators will be displayed in the Associations card. In this card, you can complete the following actions:
- Private: To mark an Indicator as private, select the corresponding checkbox in the Private column. This column will be displayed only if your System Administrator has enabled private Indicators.
- Actions: To remove a potential Indicator from the list of Indicators being imported into ThreatConnect, click Delete .
- Association Details: In the Associations Details card, you can fill out the following information, which will be applied to all Indicators being imported and associated to the Group:
- Description: Enter a Description for the Indicator(s).
- Tags: Enter Tags to apply to the Indicator(s). By default, a Source: Browser Extension Tag will be applied to all selected potential Indicators. However, you can remove this Tag, if desired.
- Threat Rating: Use the skull icons to set the Threat Rating for the Indicator(s).
- Confidence Rating: Use the slider to set the Confidence Rating for the Indicator(s).
- Click the Next button.
- Associations: The selected potential Indicators will be displayed in the Associations card. In this card, you can complete the following actions:
- The Attachments section will be displayed (Figure 7). Attachments is an optional section where you can attach related files to the Group.
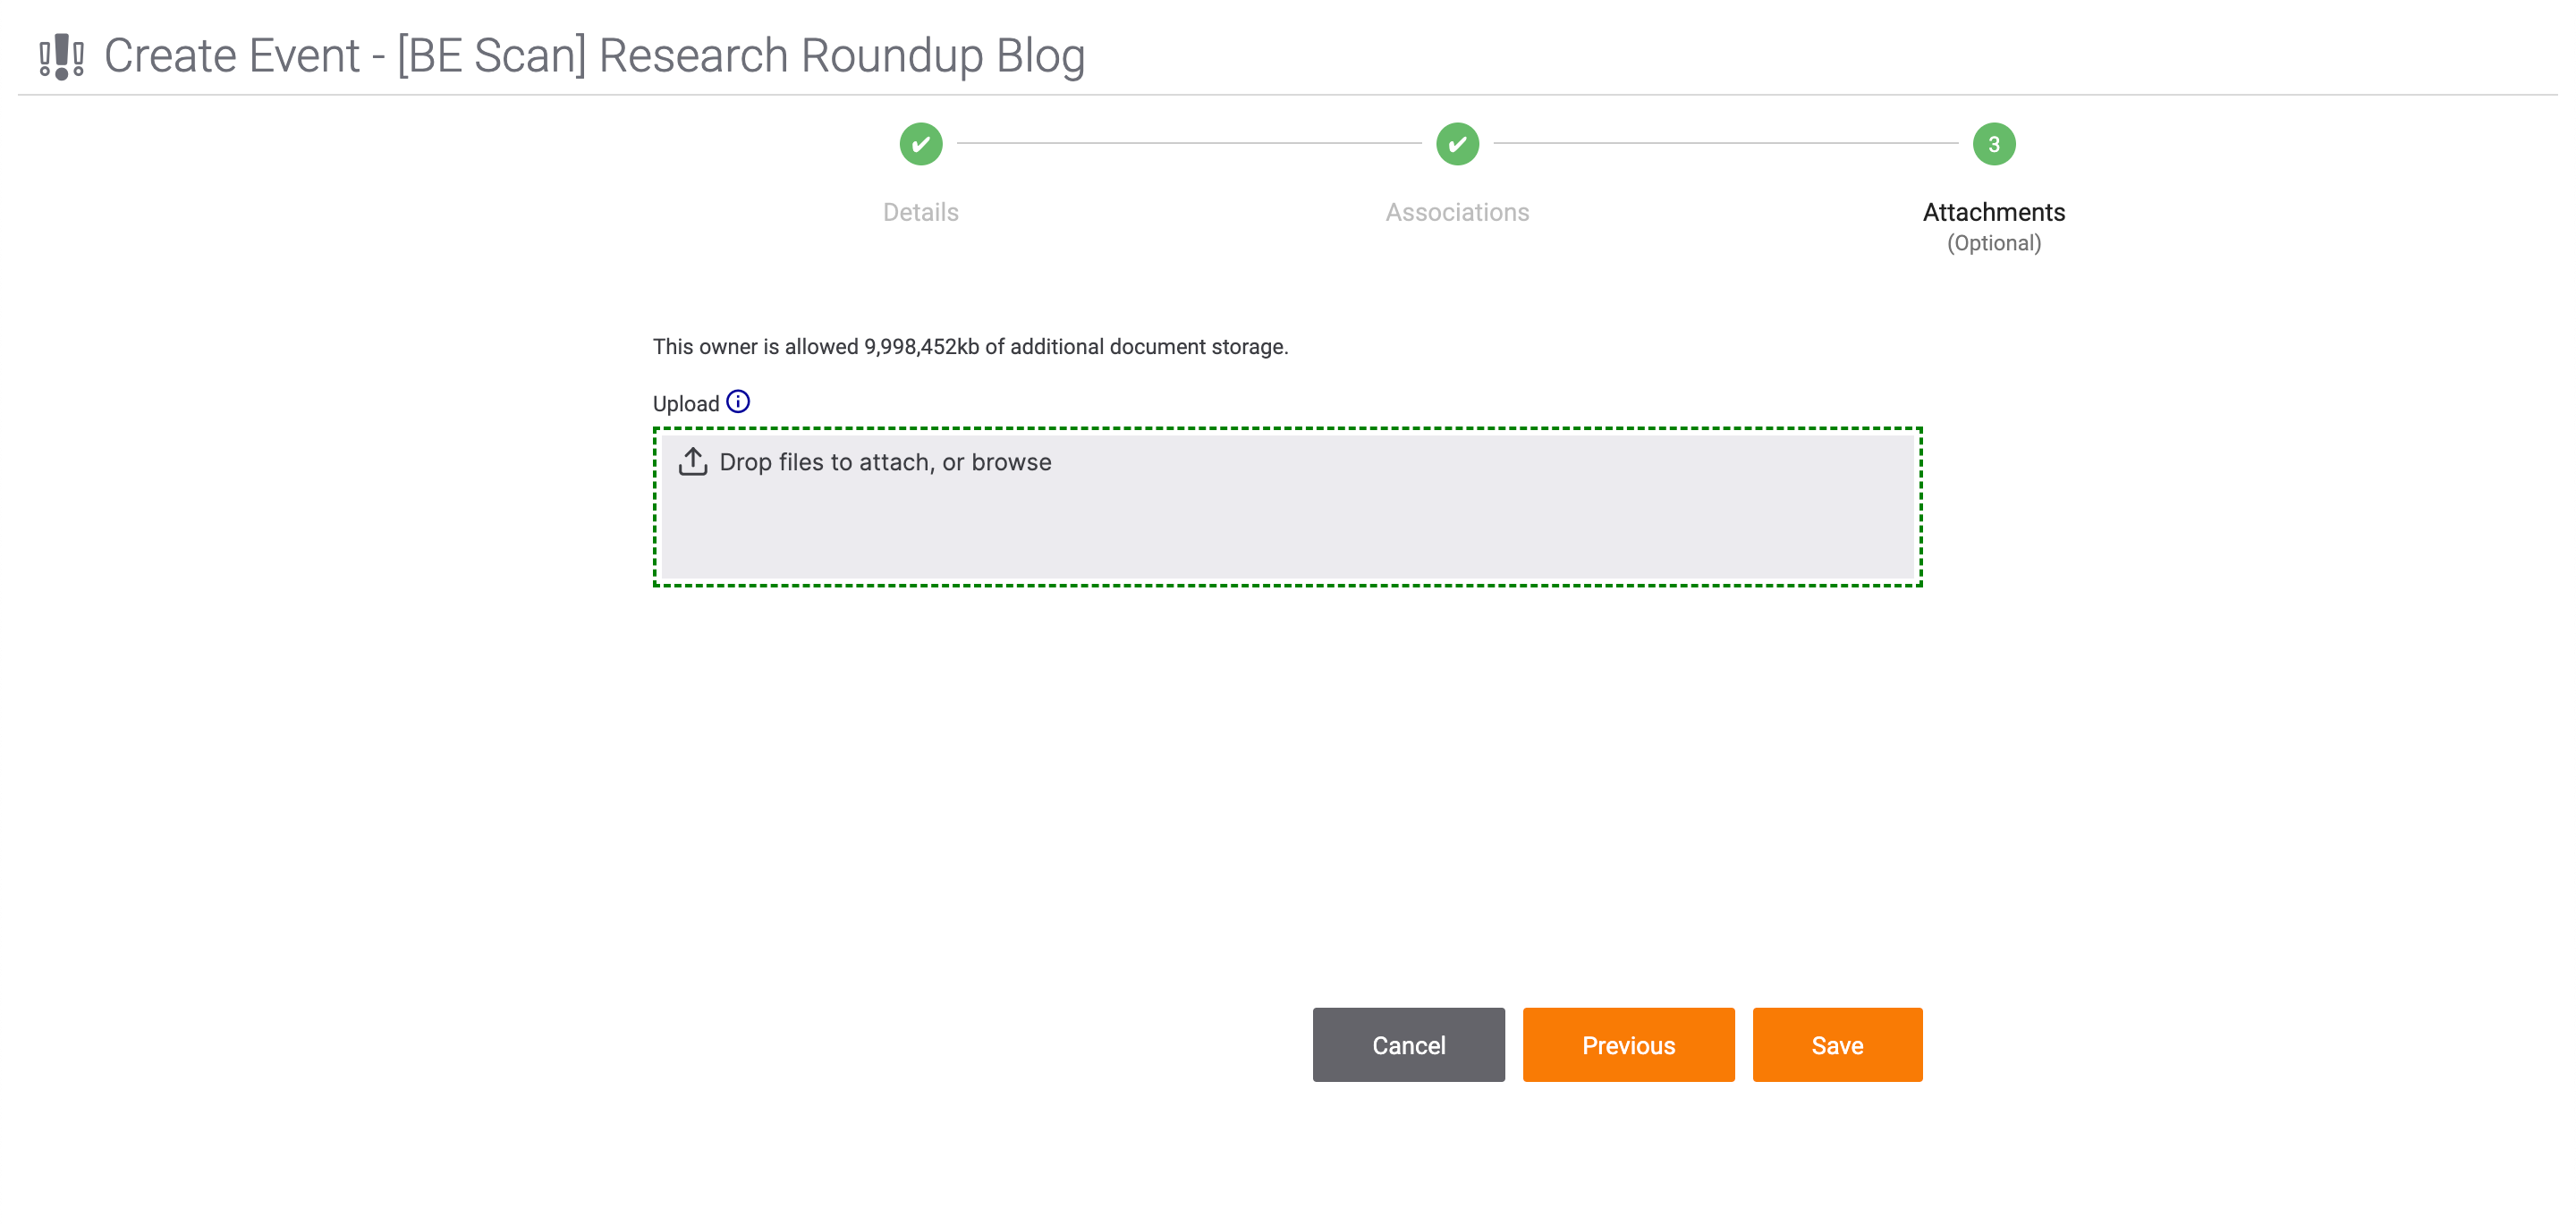
- Upload files for which Document Groups will be created and associated to the Group being created, if desired. After each file is uploaded, the filename will be displayed below the upload area, along with a checkbox labeled Add to Malware Vault. Leave this checkbox cleared unless you are uploading a malware file.
- Click the Save button.
The selected potential Indicator(s) will be imported into ThreatConnect and associated to the newly created Group, and the Group’s Details screen will be displayed. The Indicators imported into ThreatConnect will be displayed on Indicators card of the Group’s Associations tab. You may also view these associations on the Associations card of the Group’s legacy Details screen, under the Associated Indicators section when the card is in table view.
ThreatConnect® is a registered trademark of ThreatConnect, Inc.
20107-07 v.05.A