When viewing the Associations card in table view, the Associated Indicators section displays all Indicators associated to the primary object (Figure 1).
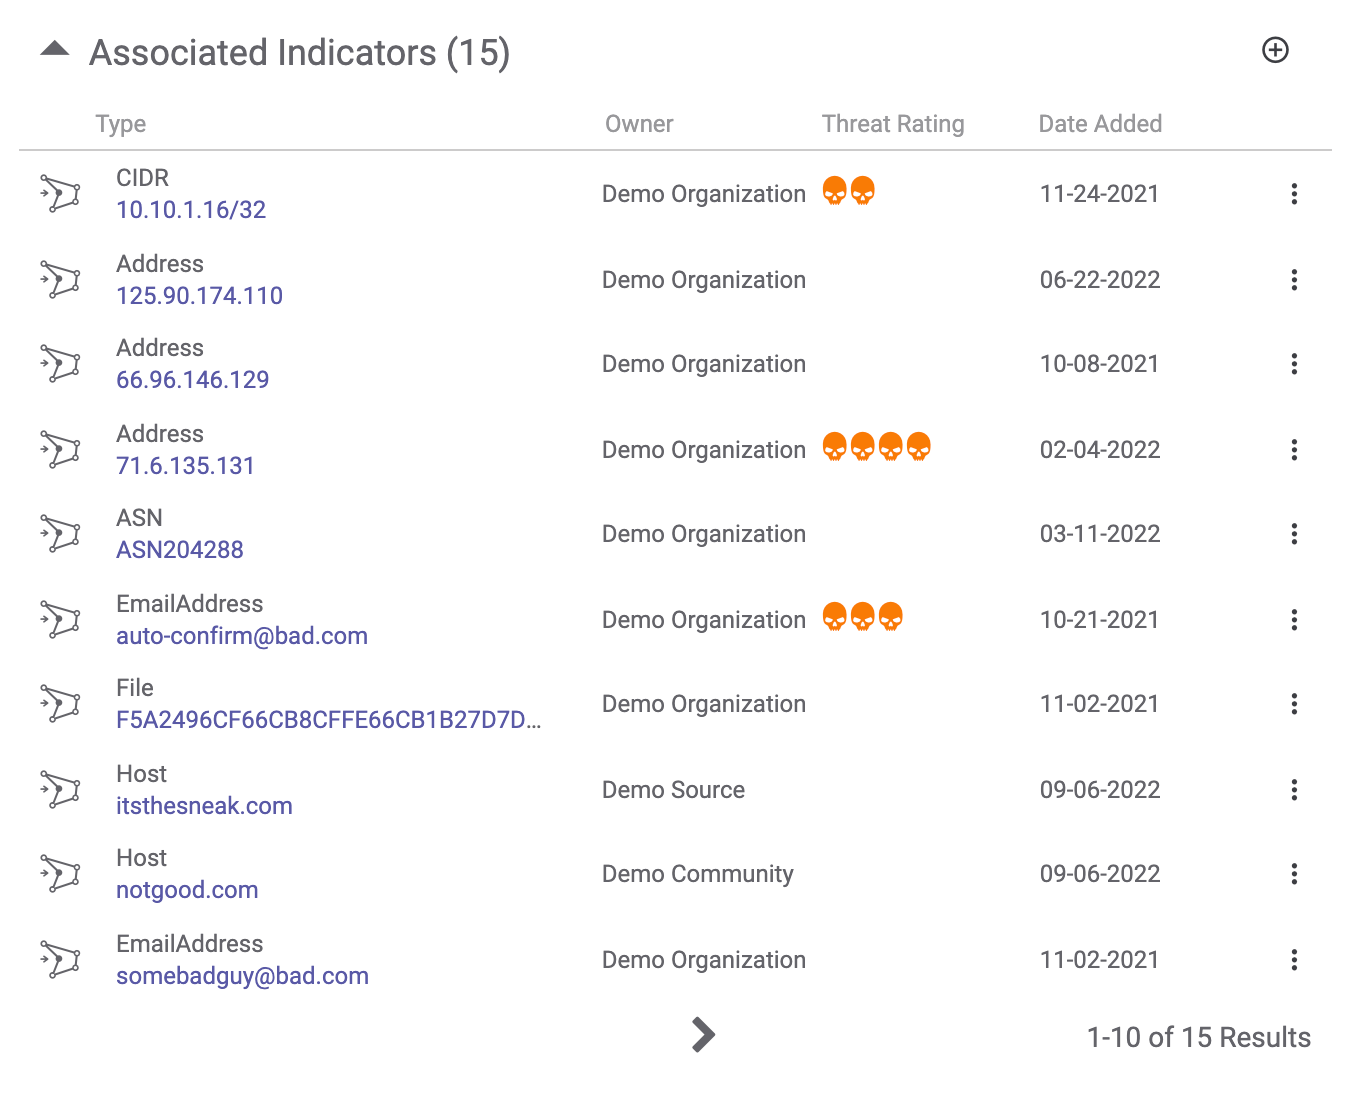
- Type: This column displays the Indicator’s type and summary. Click on the Indicator’s summary to view its Details screen.
- Owner: This column displays the owner to which the Indicator belongs.
- Threat Rating: This column displays the Indicator’s Threat Rating, if one has been set for the Indicator.
- Date Added: This column displays the date when the Indicator was created.
- Vertical ellipsis
 : Click the vertical ellipsis for an Indicator to display a menu with the following options:
- View Details: Select this option to view the Indicator’s Details screen.
- Remove Association: If the primary object is a Group, this option will be displayed. Select this option to dissociate the Indicator from the Group.
- Association Details: If the primary object is an Indicator, this option will be displayed. Select this option to display the Association Details window, which shows how the Indicator is associated to the primary object (Figure 2).
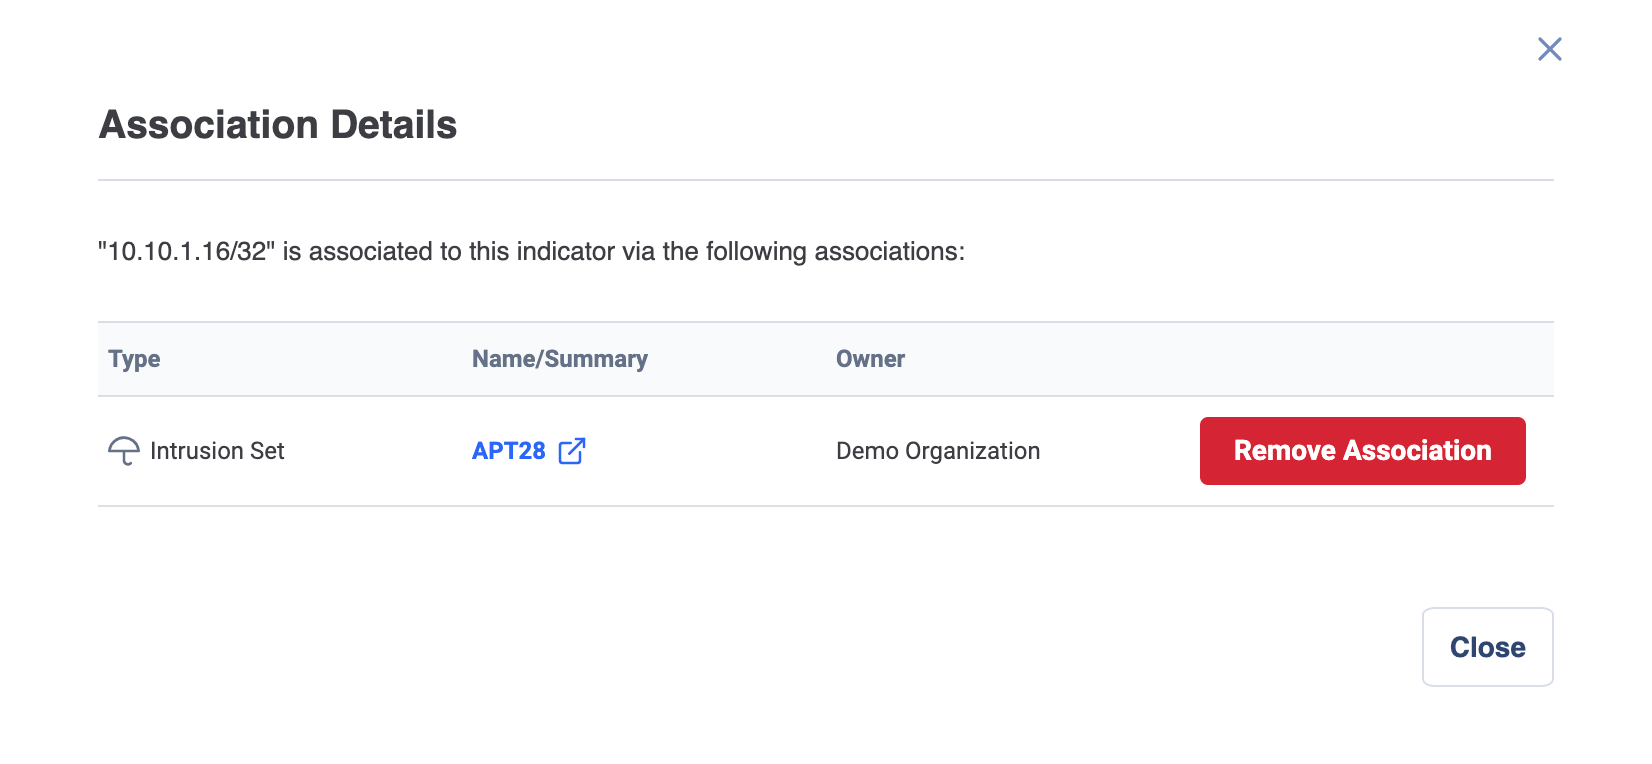
In the example in Figure 2, the two Indicators are related through a common Group. Click the Remove Association button to dissociate the Group from the primary Indicator object, thereby also removing the second-level association linking the Indicators.
Add New Associated Indicator
To add a new associated Indicator, click Add Association at the upper-right corner of the table. The Add Indicators window will be displayed. This window’s appearance depends on the primary object’s type.
Indicator-to-Indicator Association
If the primary object is an Indicator, the Add Indicators window will look like Figure 3.
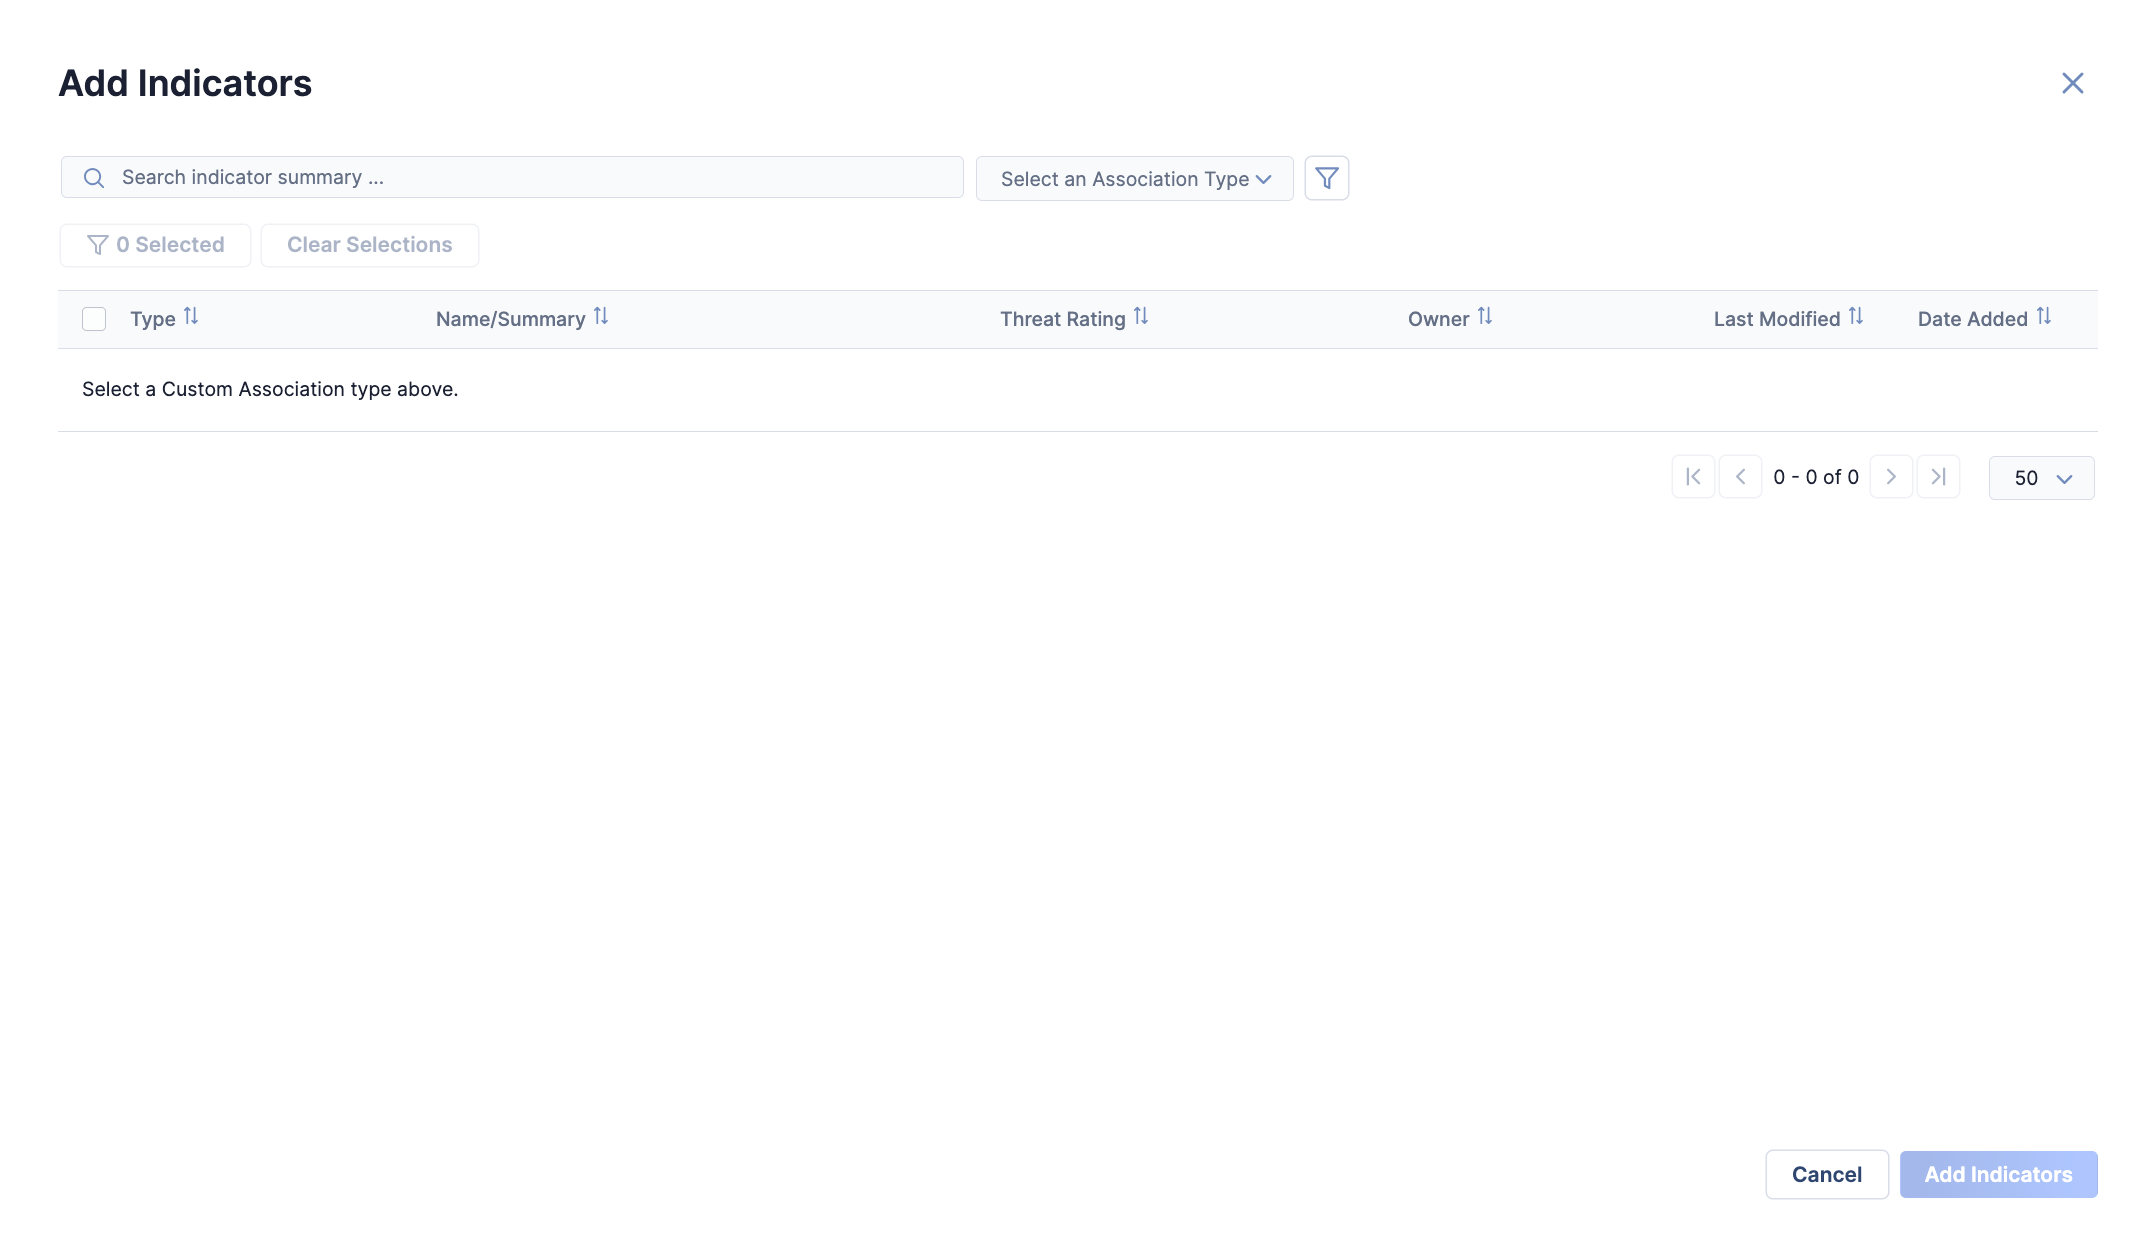
- Select an Association Type: Select a custom Indicator-to-Indicator association type. Indicators of the target type that are not associated to the primary object will be displayed.
- Select one or more Indicators to associate to the primary object. As you select Indicators, the Selected button at the top left of the window will update to reflect the current number of selected items. When at least one Indicator is selected, you can click the Selected or Clear Selection button to view only the selected items or clear all selections, respectively.
- To filter Indicators by creation date, last modified date, and, if cross-owner associations are enabled, owner, use the and Filters
 menu; to filter Indicators by summary, use the search bar.
 - Click the Add Indicators button to create associations to selected Indicators.
Group-to-Indicator Association
If the primary object is a Group, the Add Indicators window will look like Figure 4. By default, the Add Indicators window will be displayed with the Existing Indicators option selected, showing all existing Indicators not associated to the Group. To create an association to an Indicator that exists in one of your ThreatConnect owners, keep the selection of Existing Indicators at the top left of the Add Indicators window.
- Select one or more Indicators to associate to the Group. As you select Indicators, the Selected button at the top left of the window will update to reflect the current number of selected items. When at least one Indicator is selected, you can click the Selected or Clear Selection button to view only the selected items or clear all selections, respectively.
- To filter Indicators by type, creation date, last modified date, and, if cross-owner associations are enabled, owner, use the and Filtersmenu; filter Indicators by summary, use the search bar.
- Click the Add Indicators button to create associations to selected Indicators.
To create an association to an Indicator that does not exist in one of your ThreatConnect owners, select New Indicators at the top left of the Add Indicators window. The window will now display options for creating new Indicators (Figure 5).
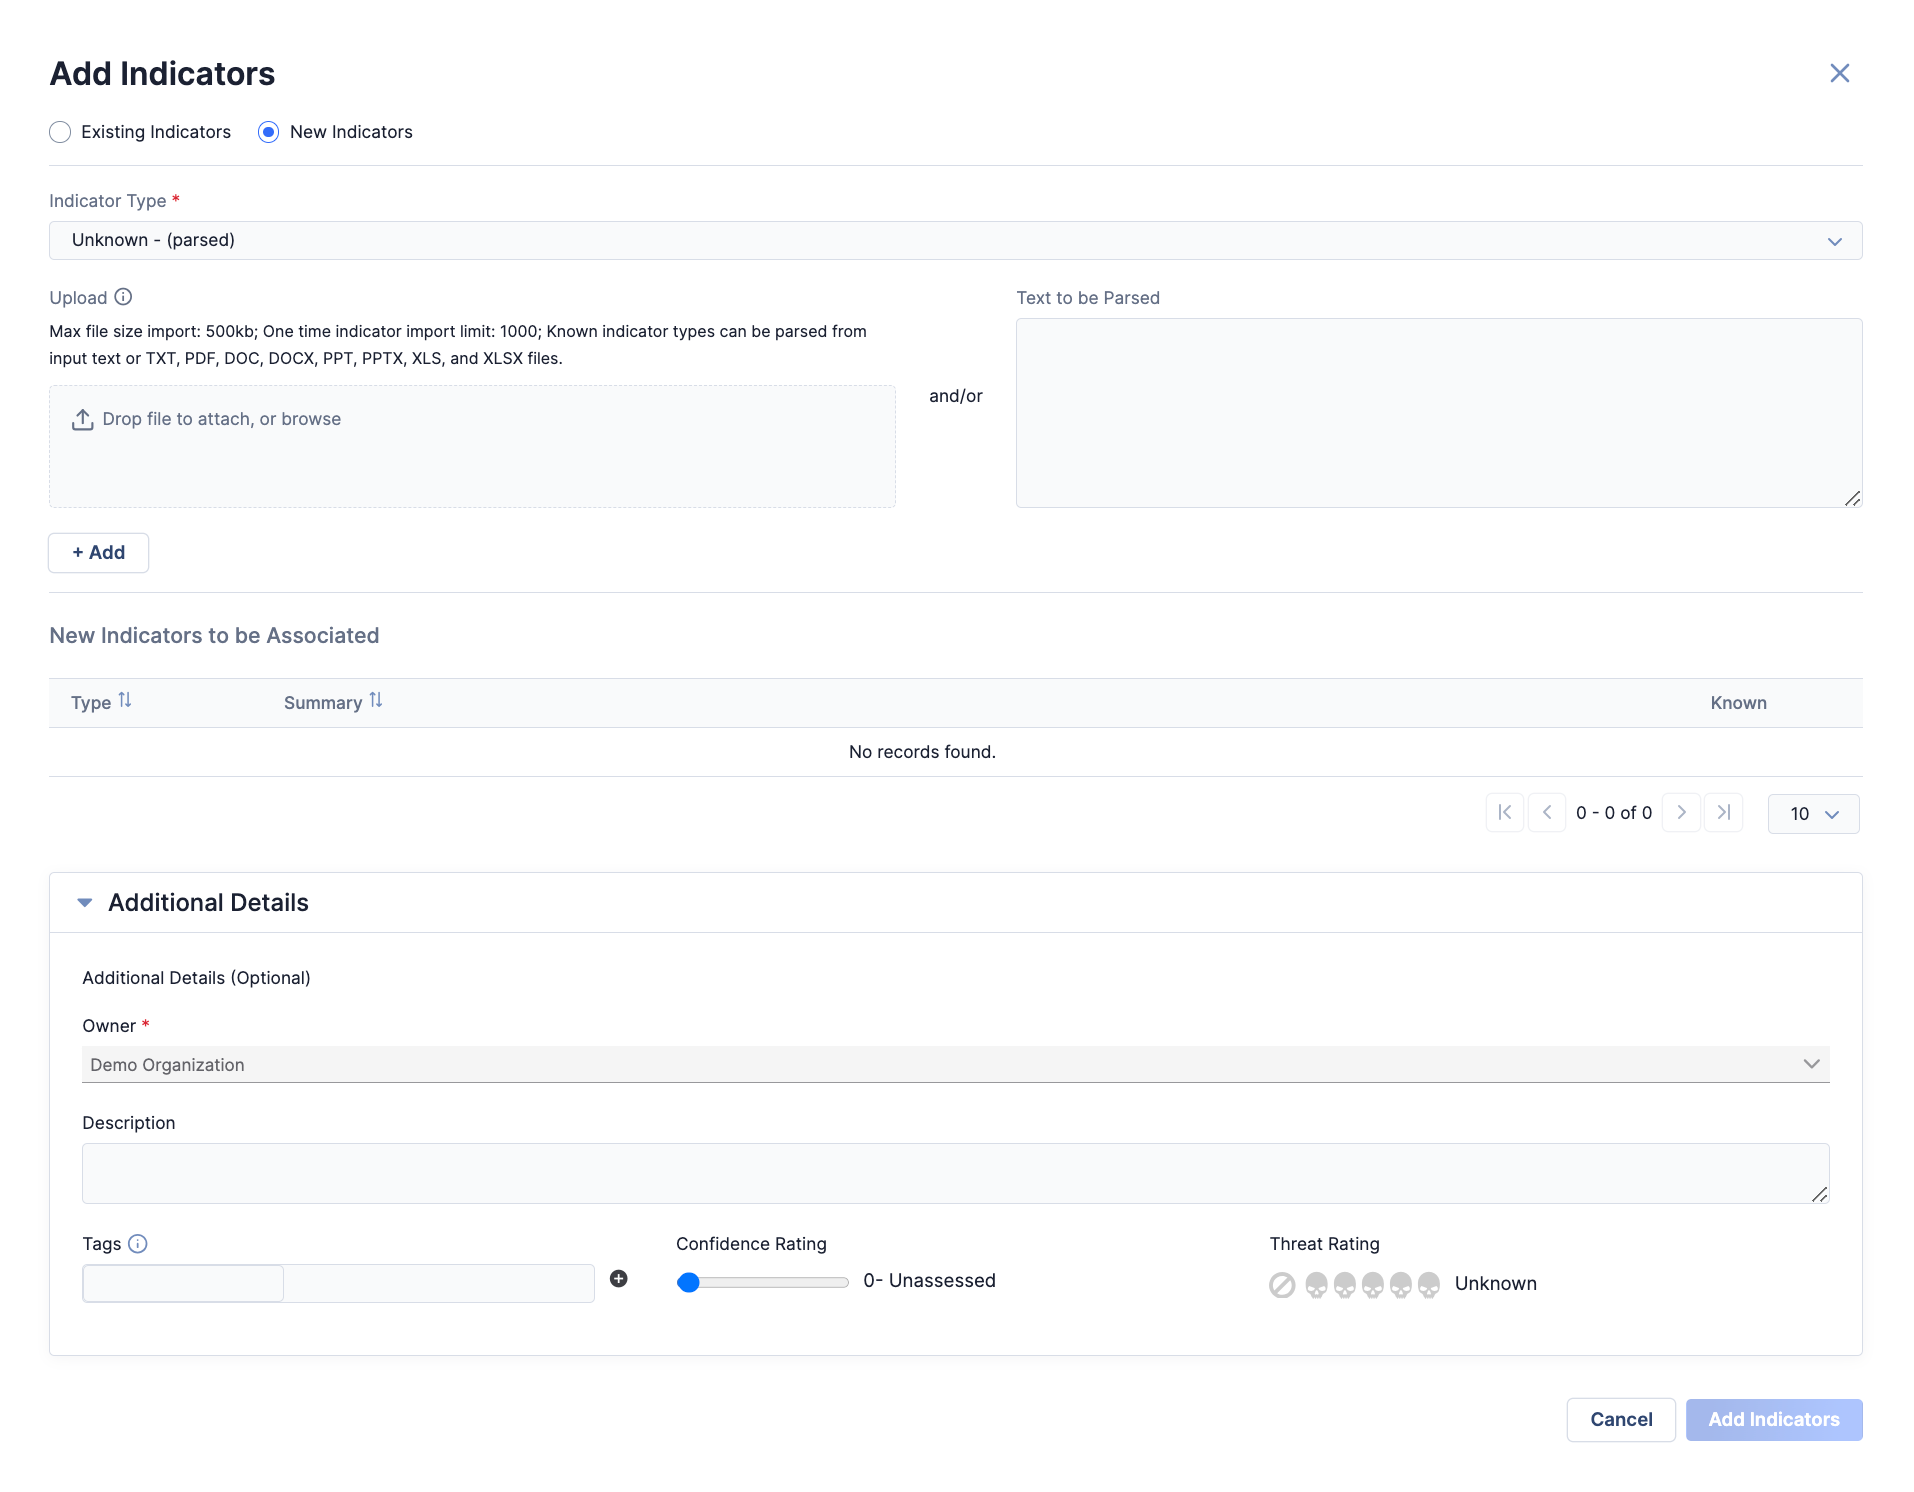
- Indicator Type: available choices include Unknown - (parsed), File, Email Subject, Hashtag, Mutex, Registry Key, and User Agent). The Indicator Type section will display options for entering Indicators of the selected type. If you selected Unknown - (parsed), options to upload a file or enter text to be parsed for Indicators will be displayed, as in Figure 5. After entering the Indicator values or content to be parsed for Indicators, click the + Add button.Note
Parsable Indicator types include Address, Email Address, File, Host, URL, ASN, and CIDR. Custom Indicator types may also be parsed if the following conditions are met:
- a System Administrator selected the Parsable checkbox when configuring the custom Indicator type;
- the custom Indicator type accepts a single value;
- a System Administrator created an import rule for the custom Indicator type.
For more information on custom Indicator types and Indicator import rules, see the “Custom Indicator Types” and “Indicator Import Rules” sections, respectively, of ThreatConnect System Administration Guide.
ImportantIndicators included on an Indicator Exclusion List will not be imported or associated to the Group. - New Indicators to be Associated: This section displays the Indicator(s) that will be created and associated to the Group in a table with the following columns:
- Type: The Indicator’s type.
- Summary: The Indicator’s summary.
- Known: Indicates whether the Indicator exists in the Group's owner.
- Private: This column will be displayed only if your System Administrator has enabled private Indicators. To mark an Indicator as private, select the corresponding checkbox in the Private column.
- Actions: To remove an Indicator from the table, click Delete
 in this column.
- Additional Details: In this section, you can fill out the following information for all Indicators being created and associated to the Group:
- Owner: This required field is displayed only if cross-owner associations are enabled on your ThreatConnect instance. Select the owner in which the Indicator(s) will be created. If cross-owner associations are not enabled on your ThreatConnect instance, the Indicator(s) will be created in the owner to which the primary Group object belongs.
- Description: Enter a Description for the Indicator(s).
- Tags: Enter Tags to apply to the Indicator(s).
- Confidence Rating: Use the slider to set the Confidence Rating for the Indicator(s).
- Threat Rating: Use the skull icons to set the Threat Rating for the Indicator(s).
- Click the Add Indicators button to create the new Indicators and associate them to the Group.
ThreatConnect® is a registered trademark of ThreatConnect, Inc.
20076-08 v.09.C