Overview
The Threat Graph feature in ThreatConnect® provides a graph-based interface that you can use to discover, visualize, and contextualize associations and relationships between Indicators, Groups, Cases, and Tags. The Add Associations option in Threat Graph, available for Indicators and Groups only, lets you create the following types of associations directly in Threat Graph:
- Indicator to Group
- Group to Group
- Group to Indicator
Before You Start
User Roles
- To add associations to Indicators and Groups in an Organization in Threat Graph, your user account must have an Organization role of Standard User, Sharing User, Organization Administrator, or App Developer.
- To add associations to Indicators and Groups in a Community or Source in Threat Graph, your user account must have a Community role of Contributor, Editor, or Director for that Community or Source.
Prerequisites
- To create cross-owner associations, turn on cross-owner associations for your ThreatConnect instance on the System Settings screen (must be a System Administrator to perform this action).
Adding Group Associations
Follow these steps to associate one or more existing Groups to an Indicator or Group in Threat Graph:
- Open Threat Graph.
- Select a node on the graph that corresponds to an Indicator or Group that exists in one of your ThreatConnect owners. If no such node is on the graph, pivot in ThreatConnect to add one.
- Select Add Associations in the node’s menu.
- If the Indicator or Group exists in multiple owners, select the copy of the Indicator or Group to use in the association.ImportantIf there are multiple copies of a Group in a single owner (that is, there is more than one Group with the same name and type in an owner), you cannot choose which copy of the Group will be used in the association.
- Select Groups… in the Add Associations submenu.
- On the Add Groups window, select one or more Groups to associate to the Indicator or Group, and then click Add Groups. After associations to the selected Groups are created, the following items will be added to the graph:
- One or more associated Group nodes, each with a node label that displays the corresponding Group’s summary.
- One or more orange arrows, each connecting an associated Group node to the Indicator or Group node from which you selected Add Associations.
Adding Indicator Associations
When adding Indicator associations to Groups in Threat Graph, you can create associations to existing Indicators and newly created Indicators.
Adding Associations to Existing Indicators
Follow these steps to associate one or more existing Indicators to a Group in Threat Graph:
- Open Threat Graph.
- Select a node on the graph that corresponds to a Group that exists in one of your ThreatConnect owners. If no such node is on the graph, pivot in ThreatConnect to add one.
- Select Add Associations in the node’s menu.
- If the Group exists in multiple owners, select the copy of the Group to use in the association.ImportantIf there are multiple copies of the Group in a single owner (that is, there is more than one Group with the same name and type in an owner), you cannot choose which copy of the Group will be used in the association.
- Select Indicators… in the Add Associations submenu.
- Select Existing Indicators at the top left of the Add Indicators window.
- Select one or more Indicators to associate to the Group on the Add Indicators window, and then click Add Indicators. After associations to the selected Indicators are created, the following items will be added to the graph:
- One or more associated Indicator nodes, each with a node label that displays the corresponding Indicator’s summary.
- One or more orange arrows, each connecting an associated Indicator node to the Group node from which you selected Add Associations.
Adding Associations to New Indicators
Follow these steps to create and associate one or more Indicators to a Group in Threat Graph:
- Open Threat Graph.
- Select a node on the graph that corresponds to a Group that exists in one of your ThreatConnect owners. If no such node is on the graph, pivot in ThreatConnect to add one.
- Select Add Associations in the node’s menu.
- If the Group exists in multiple owners, select the copy of the Group to use in the association.ImportantIf there are multiple copies of the Group in a single owner (that is, there is more than one Group with the same name and type in an owner), you cannot choose which copy of the Group will be used in the association.
- Select Indicators… in the Add Associations submenu.
- Select New Indicators at the top left of the Add Indicators window (Figure 1).
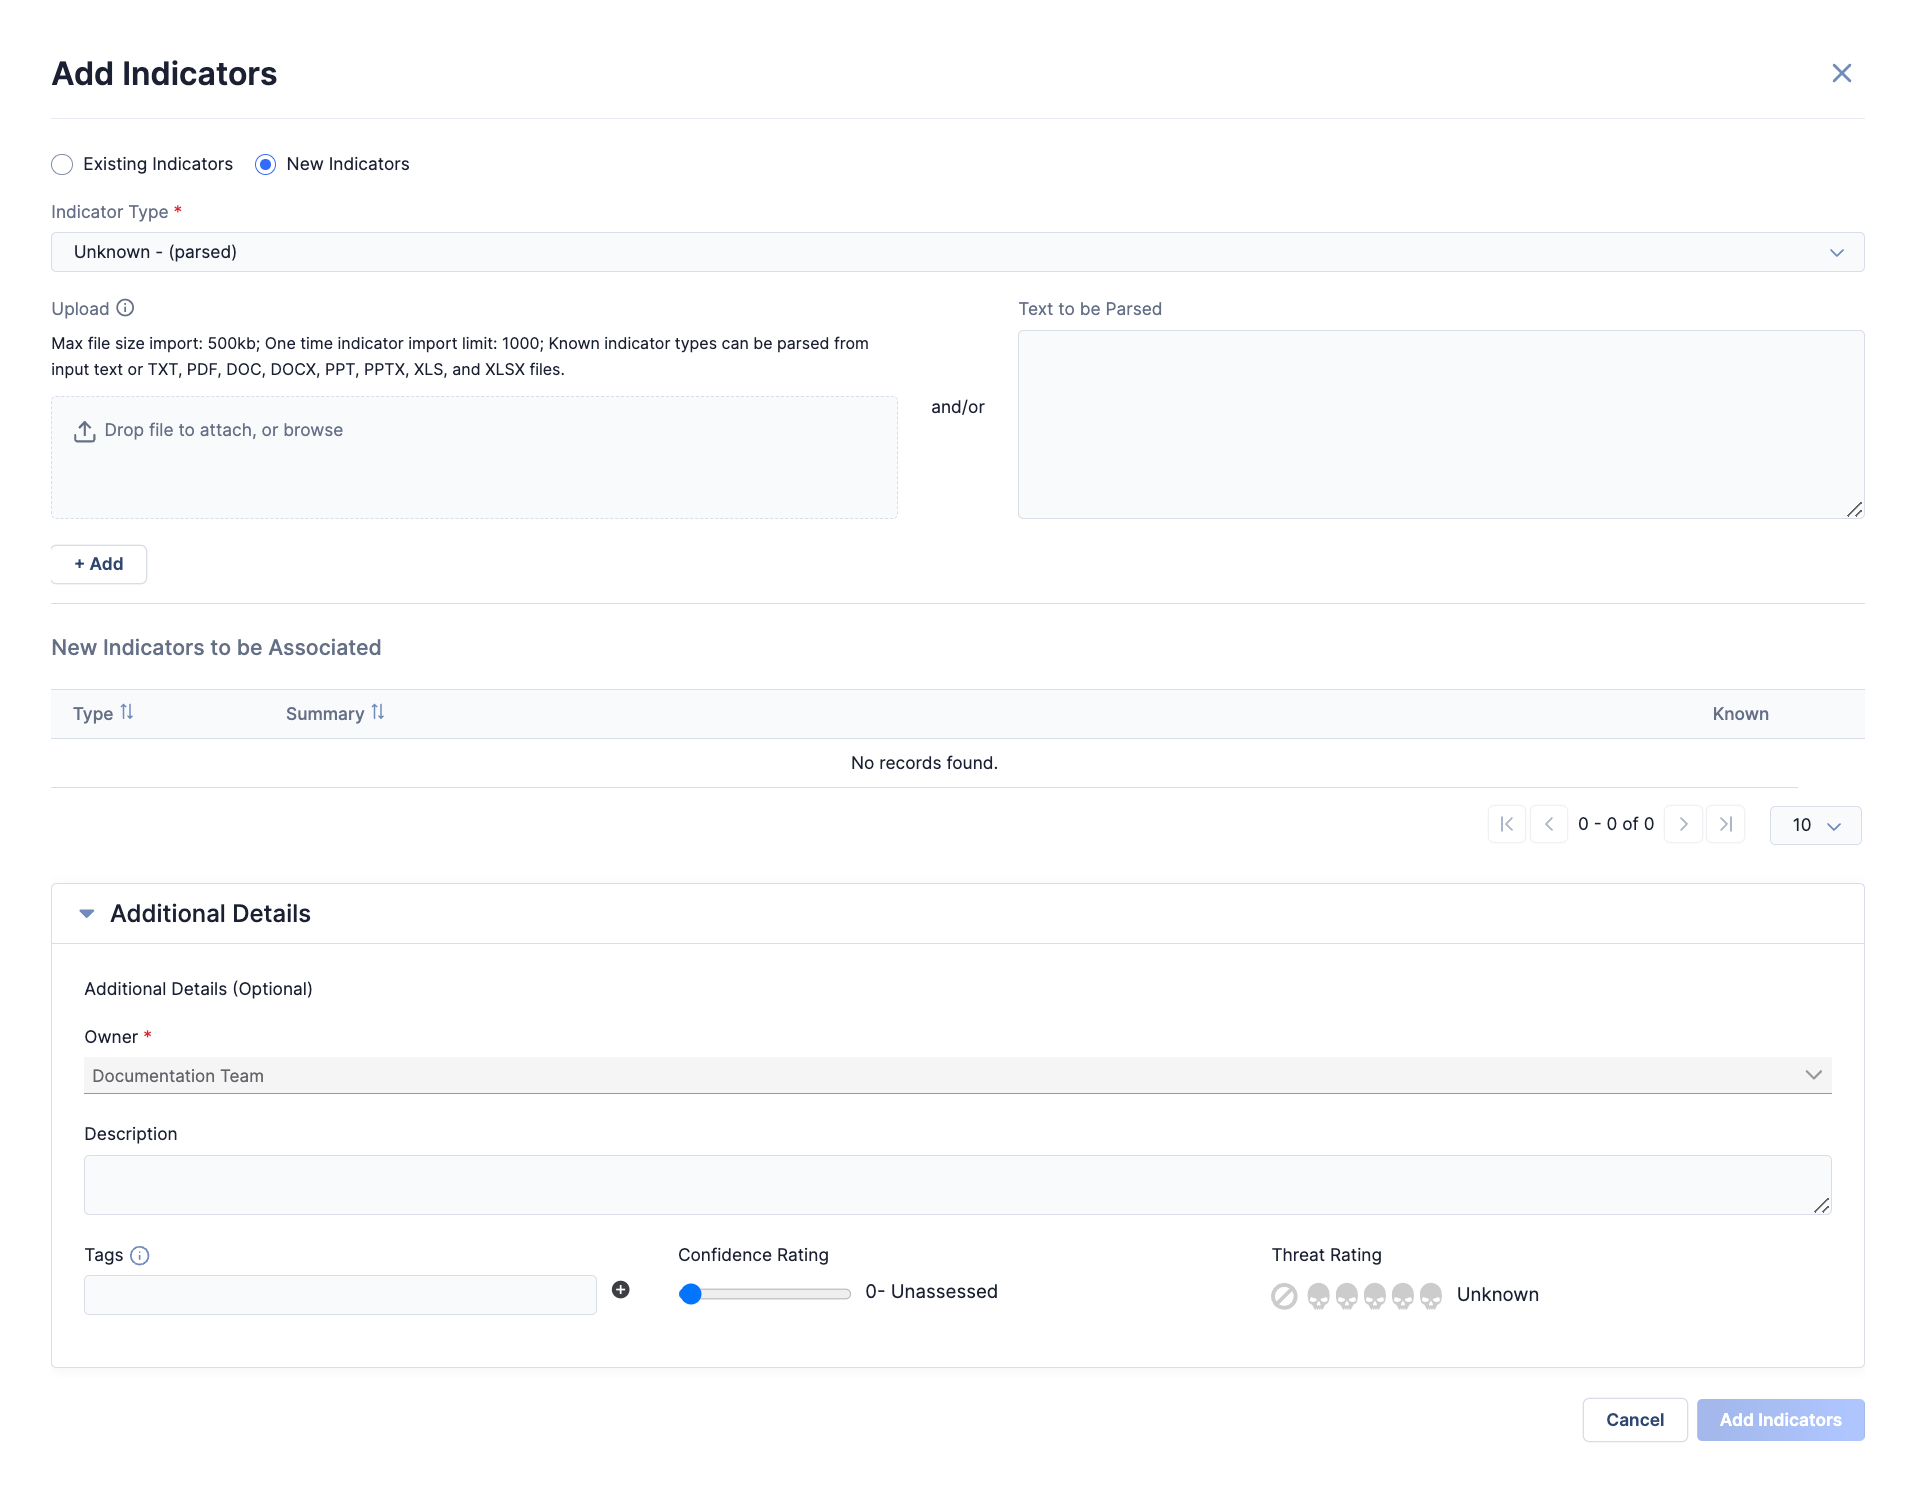
- Add one or more Indicators to create and associate to the Group on the Add Indicators window:
- Select an Indicator type in the Indicator Type dropdown. Available choices include Unknown - (parsed), File, Email Subject, Hashtag, Mutex, Registry Key, and User Agent.
- Enter the value(s) for one or more Indicators of the selected type. If you selected Unknown - (parsed) in the Indicator Type dropdown, the Add Indicators window will display an area to upload a file containing Indicators and an area to enter text to parse for Indicators. Parsable Indicator types include Address, Email Address, Host, URL, ASN, and CIDR.Note
Custom Indicator types may also be parsed if the following conditions are met:
- a System Administrator selected the Parsable checkbox when configuring the custom Indicator type;
- the custom Indicator type accepts a single value;
- a System Administrator created an import rule for the custom Indicator type.
For more information on custom Indicator types and Indicator import rules, see the “Custom Indicator Types” and “Indicator Import Rules” sections, respectively, of ThreatConnect System Administration Guide.
ImportantIndicators included on an Indicator Exclusion List will not be created or associated to the Group. - Click + Add.
- Repeat Steps a–c as desired. You can add multiple Indicators of a single type, and you can add Indicators of multiple types.
- (Optional) Review the list of Indicators that will be created and associated to the Group in the New Indicators to be Associated section of the Add Indicators window.NoteThe table in the New Indicators to be Associated section will include a Private column if your System Administrator turned on private Indicators for your ThreatConnect instance. To mark an Indicator as private, select the corresponding checkbox in the Private column.NoteA checkmark in the Known column indicates that the corresponding Indicator exists in at least one of your owners.
- Expand the Additional Details card on the Add Indicators window and fill out the following information for all Indicators that will be created and associated to the Group:
- Owner: Select the owner in which the Indicators will be created. The Owner dropdown will be available only if cross-owner associations are turned on for your ThreatConnect instance. If cross-owner associations are turned off for your ThreatConnect instance, the Indicators will be created in the owner in which the Group exists.
- Description: (Optional) Enter a default Description for the Indicators.
- Tags: (Optional) Enter one or more Tags to apply to the Indicators.
- Threat Rating: (Optional) Use the skull icons to set the Threat Rating for the Indicators.
- Confidence Rating: (Optional) Use the slider to set the Confidence Rating for the Indicators.ImportantIf an Indicator that will be created already exists in the ThreatConnect owner you are adding Indicators to, that copy of the Indicator will be updated based on the information entered in the Additional Details section. In this scenario, the values for the existing Indicator’s default Description, Threat Rating, and Confidence Rating will be replaced with the values entered for those options on this step, and Tags entered on this step will be applied in addition to any Tags that are already applied to the existing Indicator.
- Click Add Indicators on the Add Indicators window. After the Indicators are created and associated to the Group, the following items will be added to the graph:
- One or more associated Indicator nodes, each with a node label that displays the corresponding Indicator’s summary.
- One or more orange arrows, each connecting an associated Indicator node to the Group node from which you selected Add Associations.
ThreatConnect® is a registered trademark of ThreatConnect, Inc.
20117-16 v.01.A