Overview
A malicious or suspicious email can be imported into ThreatConnect® as an Email Group. ThreatConnect will search for Indicators, allow you to select which Indicators to import, and then associate these Indicators to the Email Group. Optionally, these same Indicators can be associated to one or more Victims. Once the Email Group is created, you can view the original email, email headers, and all associated Indicators.
Before You Start
| Minimum Role(s) | Organization role of Standard User |
|---|---|
| Prerequisites | An .eml or .msg file |
Importing an Email
- On the top navigation bar, hover the cursor over Import and select E-mail. The Import E-mail screen will be displayed (Figure 1).
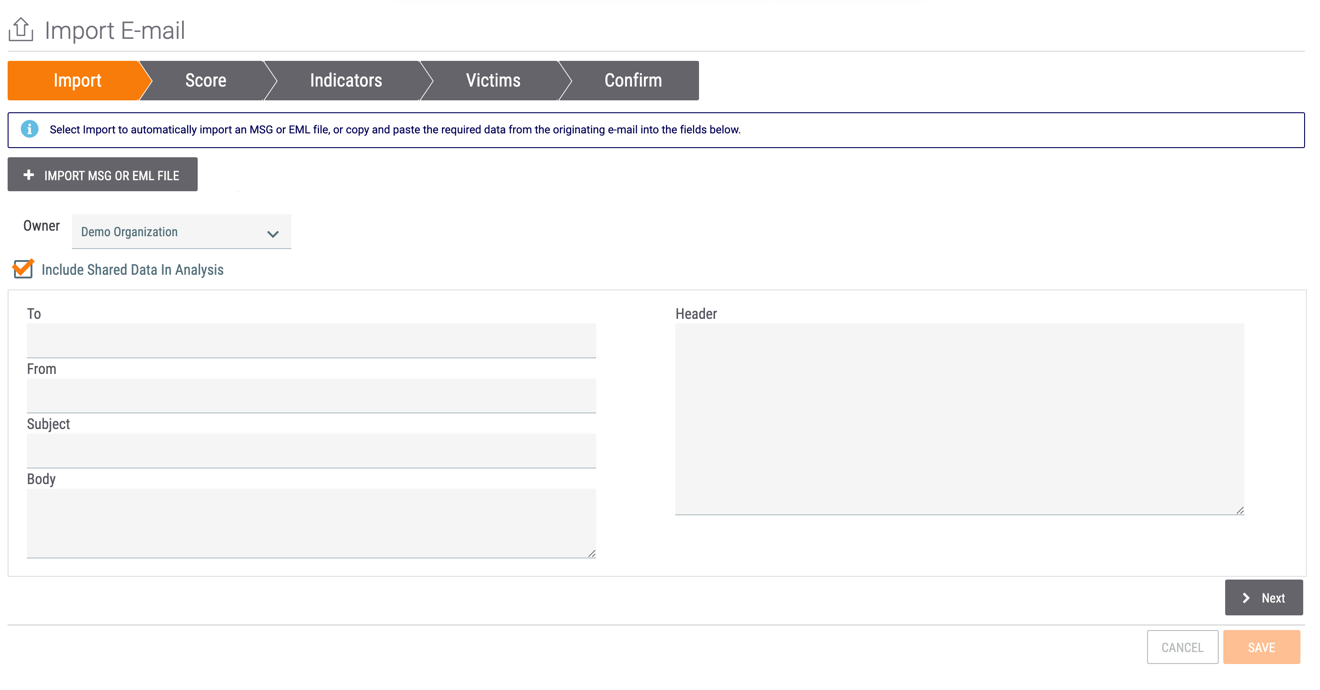
- Click the + IMPORT MSG OR EML FILE button to select an .msg or .eml file stored on your computer to import into ThreatConnect. After the file is selected, the contents of the email, including the recipient, sender, subject, body, and headers, will be displayed on the Import E-mail screen (Figure 2).
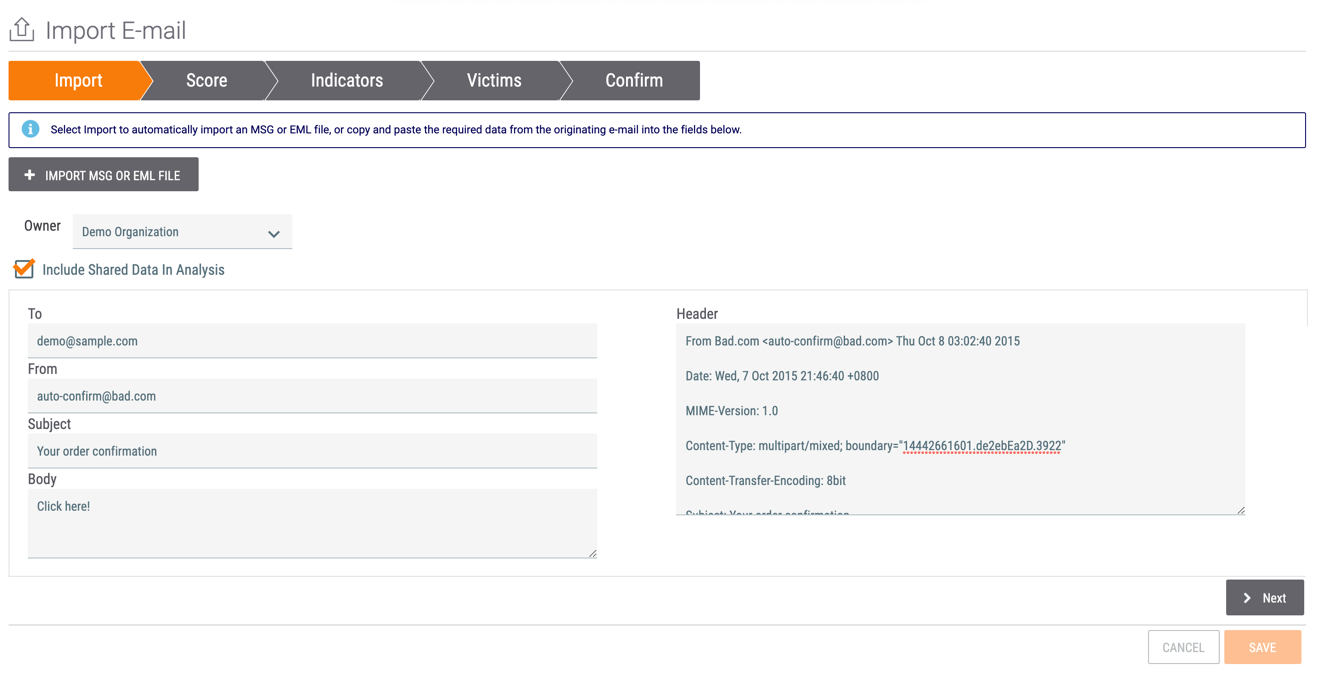
- Owner: Select the Organization, Community, or Source into which the email will be imported as an Email Group.
- Include Shared Data In Analysis: Select this checkbox to include crowd analytics, if available. When this feature is enabled, the email will be rated based on Indicators from your connections and Communities, as well as Indicators from within the email. When Indicators are evaluated within the email, your own Indicator ratings will be analyzed first to determine the score of the email. If there are no Indicators, the average ratings of those Indicators across your connections and Communities will be evaluated.NoteWhen importing an email into an Organization, the data will be pulled from the Organization as well as the Communities and Sources to which the Organization has access. When importing an email into a Community or Source, this checkbox will not be displayed, as only data from that Community or Source are used to evaluate and score the email.
- Click the Next button.
- The Score screen will be displayed (Figure 3).
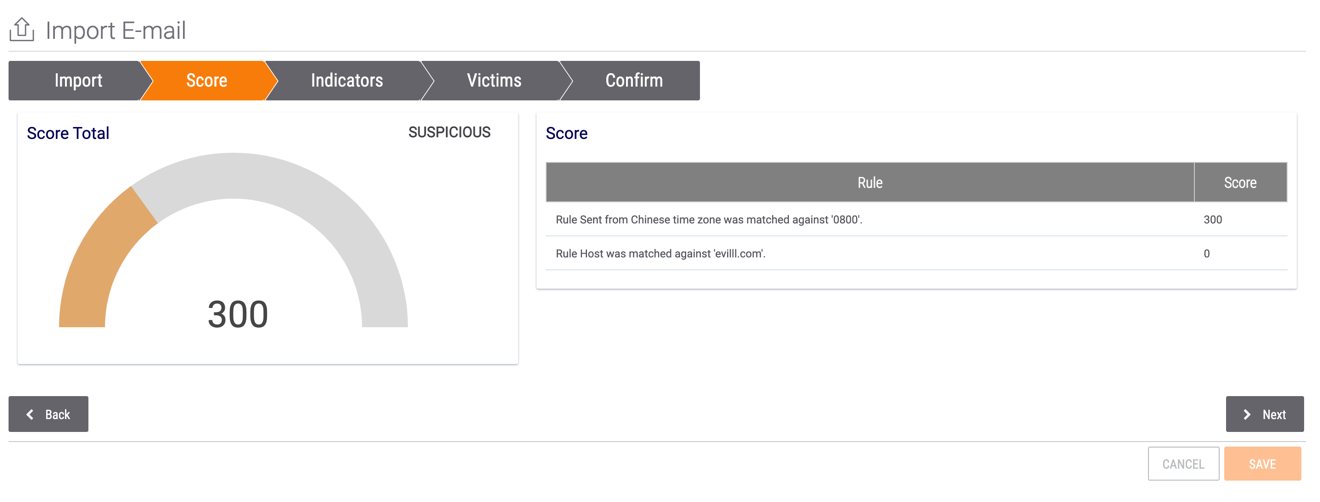
- Score Total: This card displays the Threat Score of the email, which can range from 0 to 1000. If the email is being imported into an Organization and the Include Shared Data In Analysis checkbox was selected in the previous screen, this score is based on the findings in other Organizations, Communities, and Sources. If the email is being imported into a Community or Source, or if it is being imported into an Organization and the Include Shared Data in Analysis checkbox was not selected in the previous screen, this score is based only on the findings within the owner into which the email is being imported.
- Score: This card explains the rules used to calculate the Score Total.NotePrivate Instance users should contact their System Administrator for details on the email scoring rules configured for their ThreatConnect instance.
- Click the Next button.
- The Indicators screen will be displayed (Figure 4). This screen displays all Indicators found in the header and body of the email.
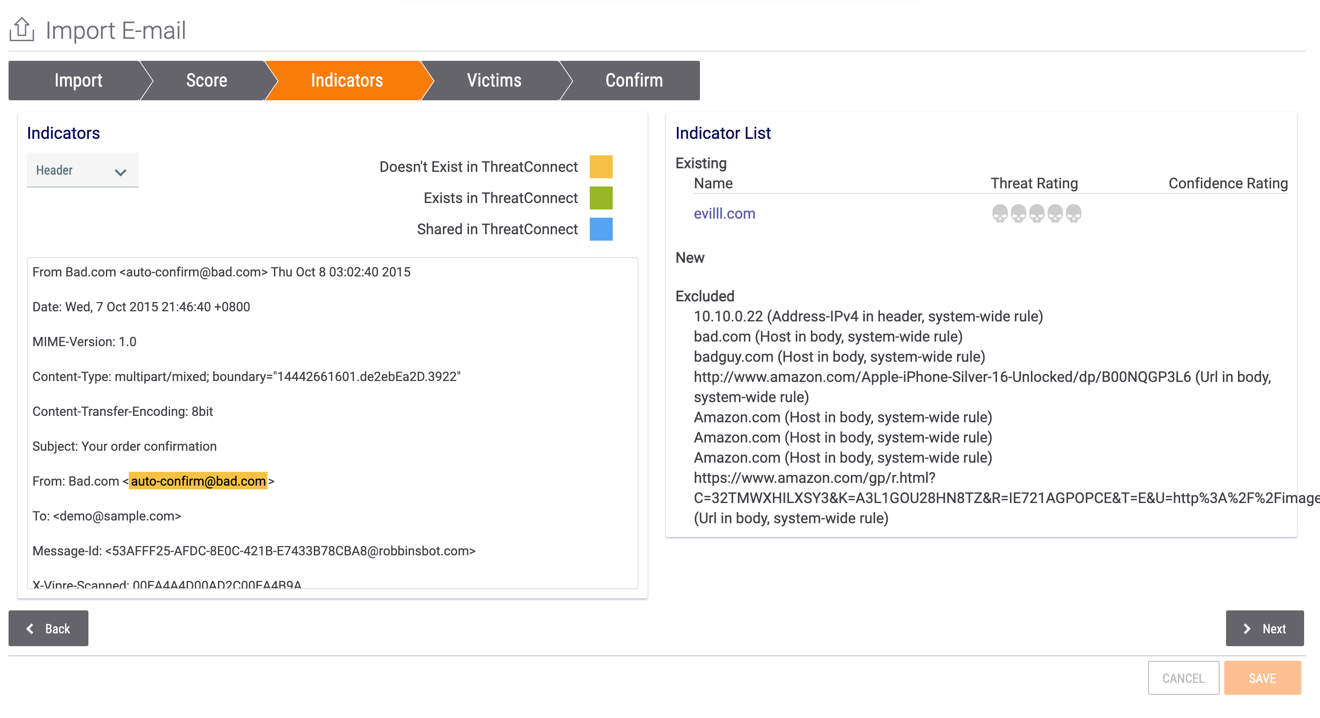
- Switch between the Header and Body sections by using the dropdown menu at the top left of the screen.
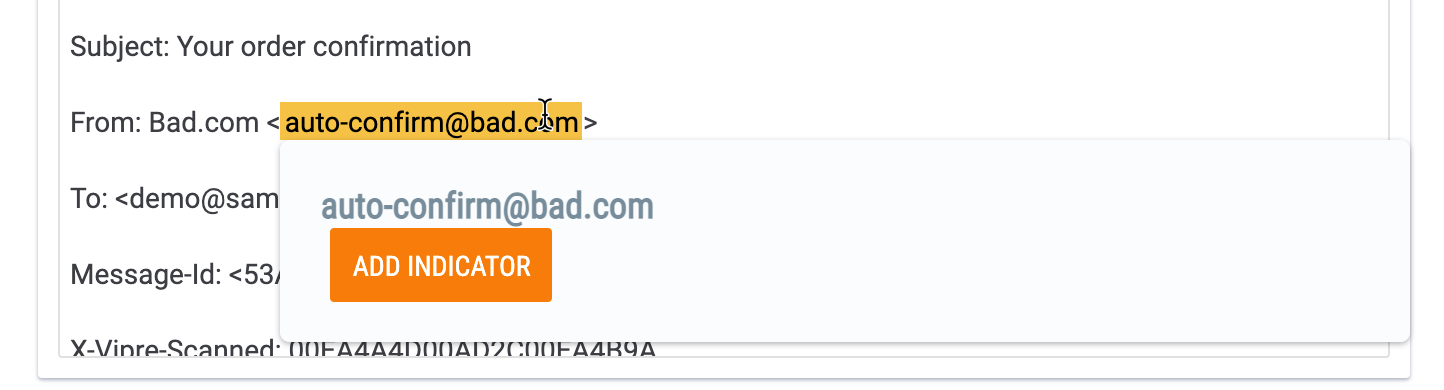
- In the Indicators card on the left, select desired Indicators to import by hovering the cursor over the Indicator and clicking the ADD INDICATOR button that is displayed (Figure 5).
- In the Indicator List card on the right, Indicators that already exist in the target Organization, Community, or Source will be listed in the Existing section as a hyperlink. Clicking on an Indicator in this section will display its Details screen.
- Any Indicator added from the Indicators card on the left will be listed in the New section of the Indicator List card.
- Indicators that are part of an Indicator Exclusion List will be listed in the Excluded section of the Indicator List card, along with a brief summary of the exclusion rule they fall under.
- Click the Next button.
- The Victims screen will be displayed (Figure 6).
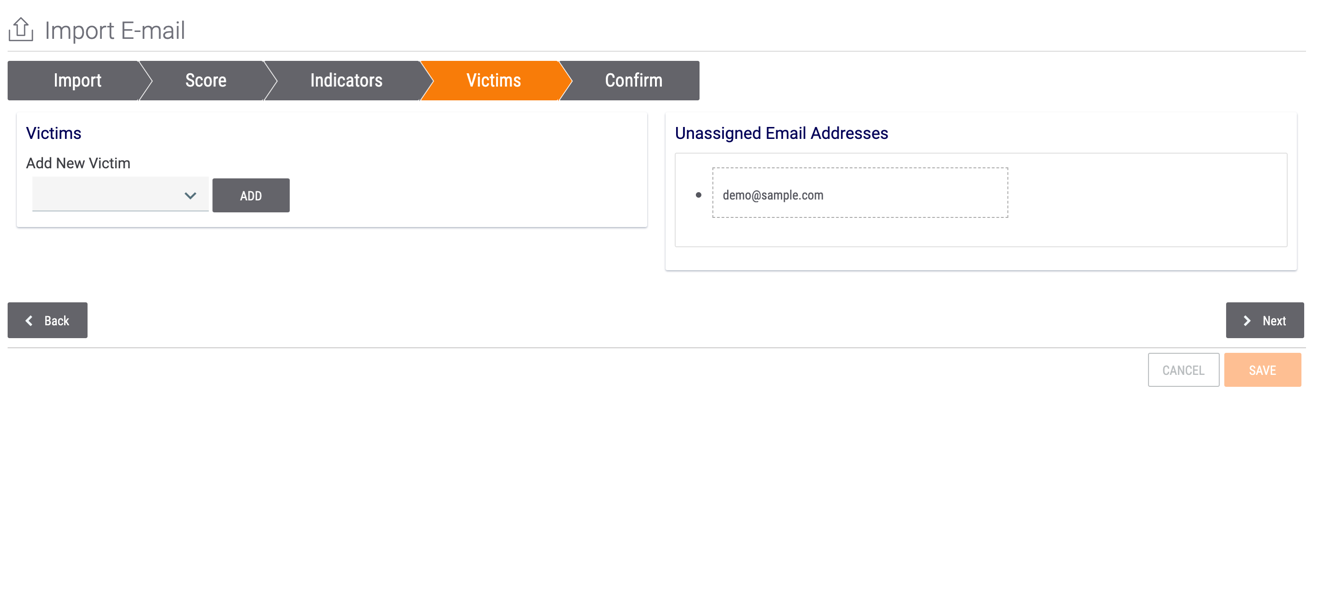
- To associate the email with a Victim, select or add Victims from the Victims card on the left and click the ADD button. Next, drag the Victim’s email address from the Unassigned Email Addresses card on the right to the Victims card to associate it to the Victim.
- Click the Next button.
- The Confirm screen will be displayed (Figure 7).
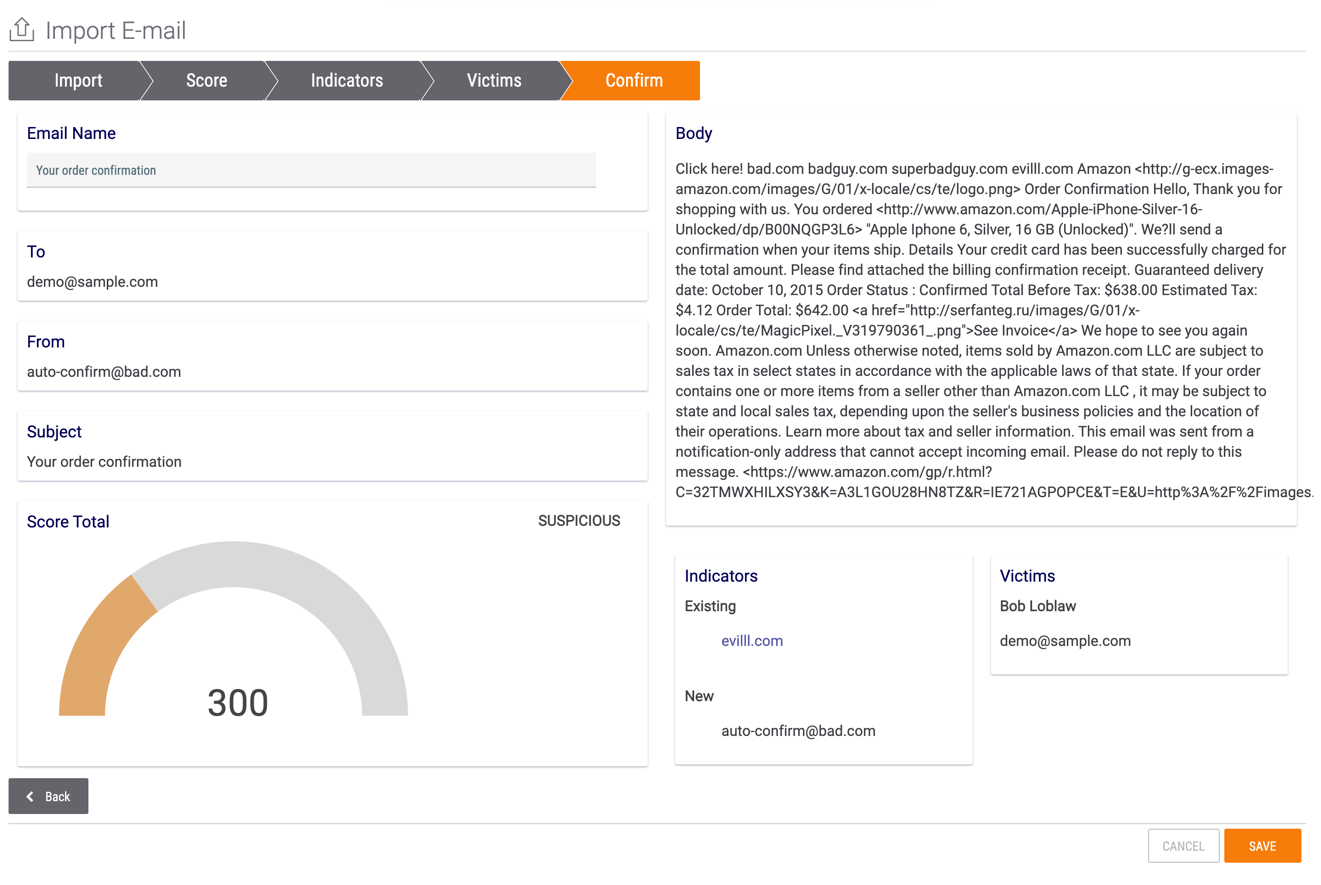
- Review this screen and ensure you have captured all desired information from the email.
- Click the SAVE button to complete the import process.
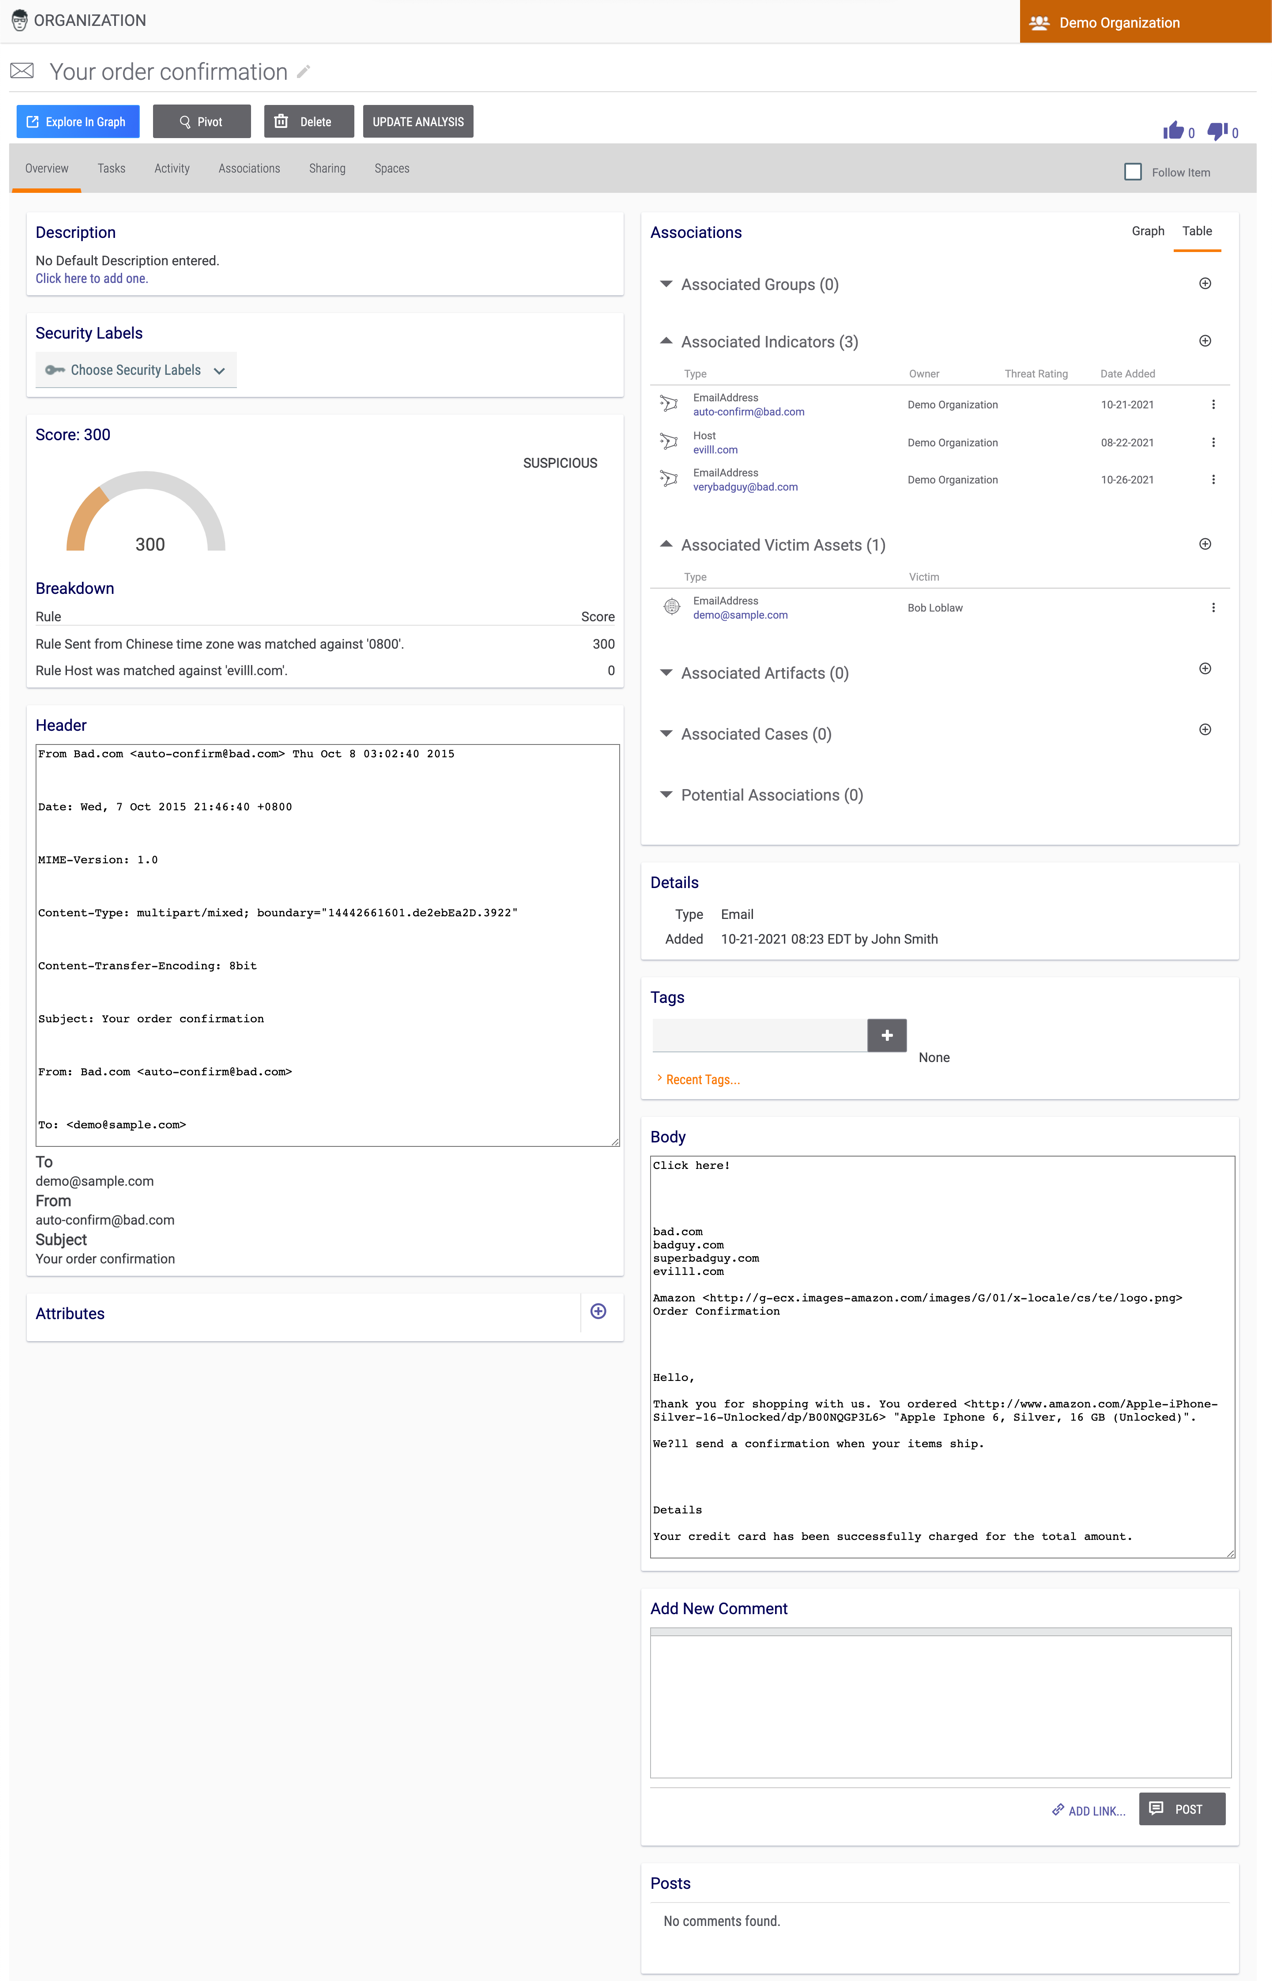
- The Details screen for the new Email Group will be displayed (Figure 8), showing all properties of the email, including the Body, Header, and Score Breakdown.
ThreatConnect® is a registered trademark of ThreatConnect, Inc.
20007-01 v.08.C