Using Automated Email Ingest
- 21 Mar 2024
- 2 Minutes to read
-
Print
-
DarkLight
-
PDF
Using Automated Email Ingest
- Updated on 21 Mar 2024
- 2 Minutes to read
-
Print
-
DarkLight
-
PDF
Article summary
Did you find this summary helpful?
Thank you for your feedback!
Overview
In addition to supporting manual importing of .eml and .msg files, ThreatConnect® allows you to set up phishing and feed mailboxes for automated ingestion of both Indicators and phishing emails. ThreatConnect will search for Indicators, automatically import them, and then associate these Indicators to an Email Group corresponding to the imported email.
Important
An Organization Administrator must create the phishing and feed mailboxes before you can use them.
Before You Start
| Minimum Role(s) | Organization role of Standard User |
|---|---|
| Prerequisites | An .eml or .msg file |
Feed Mailbox
- Copy the email address of the mailbox to be used.ImportantThis email address will need to be created and supplied beforehand by an Organization Administrator. If you do not know the mailbox’s email address, contact an Organization Administrator. A System Administrator can rename the mailbox’s email address if desired (e.g., to make it more user friendly).
- Create a new email message in your email provider.
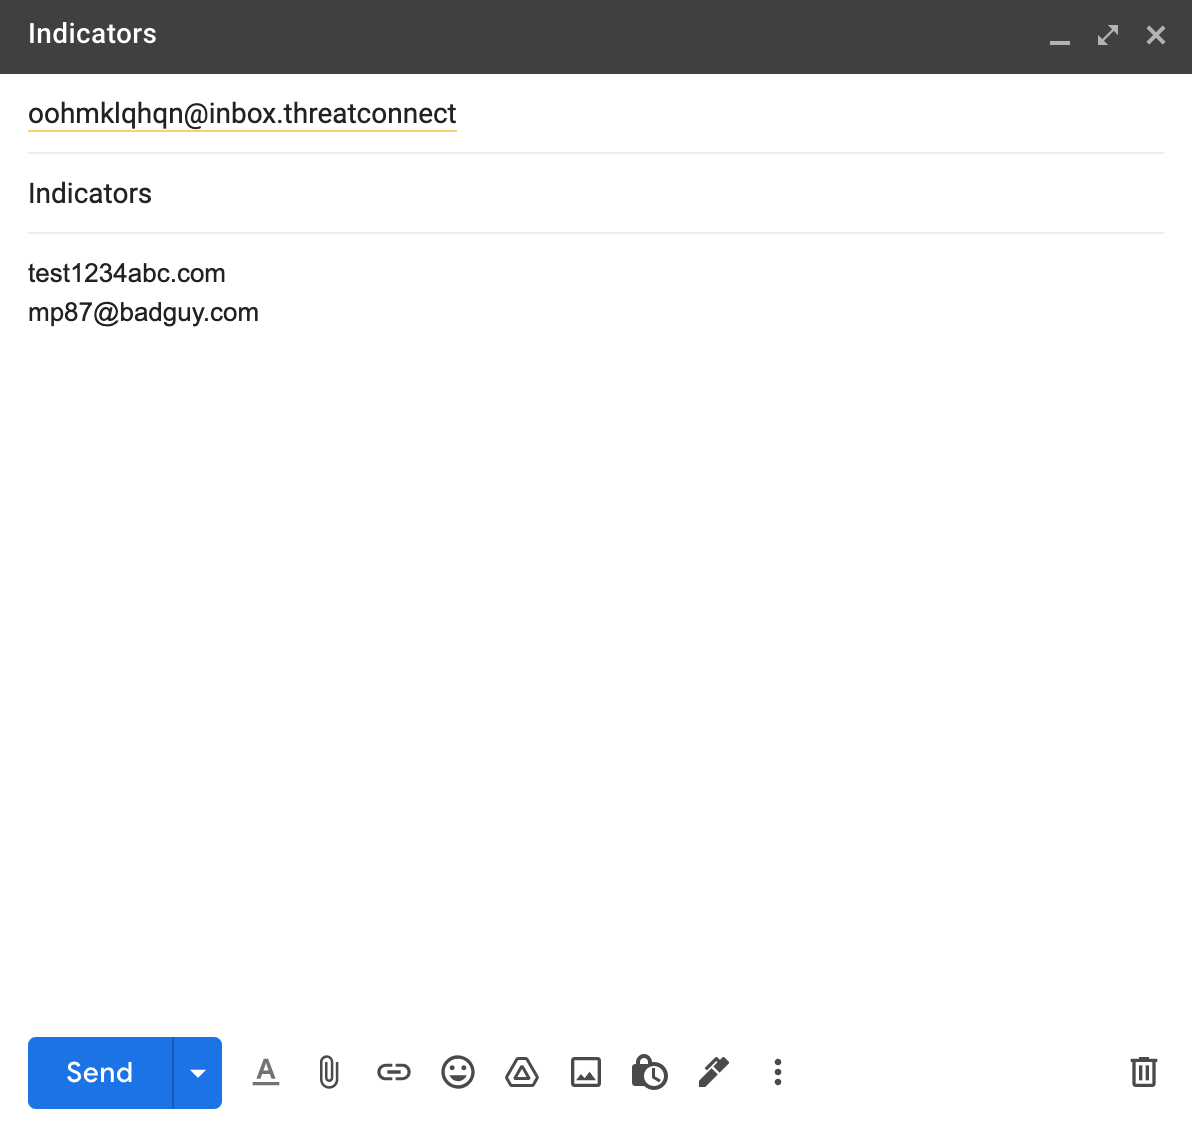
- Paste the email address in the To: field, and enter the Indicators you want ThreatConnect to ingest in the body of the email (Figure 1).
- Once all information is entered, send the email.ImportantRemove any email signatures so that any email addresses or hostnames in the signature are not accidentally added as Indicators in ThreatConnect.
- If desired, you can navigate to the Browse screen to verify that the Indicators have been added to your Organization.
Phishing Mailbox
- Copy the email address of the mailbox to be used.ImportantThis email address will need to be created and supplied beforehand by an Organization Administrator. If you do not know the mailbox’s email address, contact an Organization Administrator. A System Administrator can rename the mailbox’s email address if desired (e.g., to make it more user friendly).
- Create a new email message in your email provider.
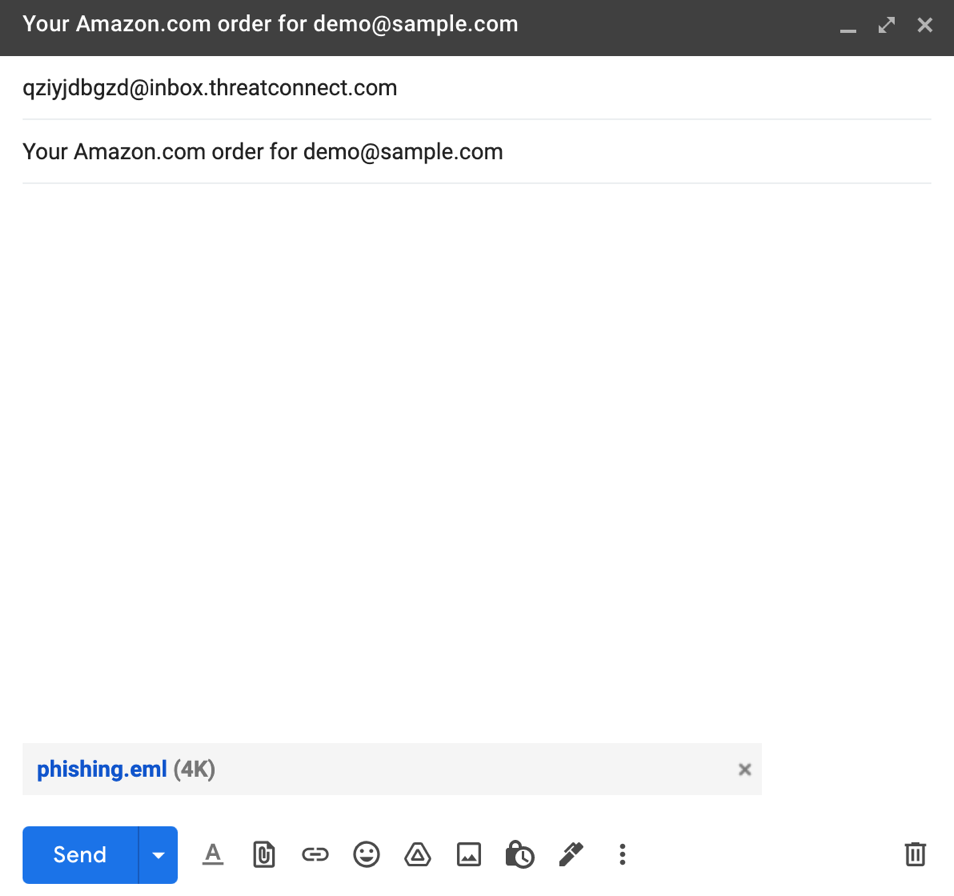
- Paste the email address in the To: field, enter what you want to be the Email Group's name (Summary) in ThreatConnect as the subject line of the email, and add a phishing email as an .eml attachment (Figure 2).
- Once all information is entered, send the email.
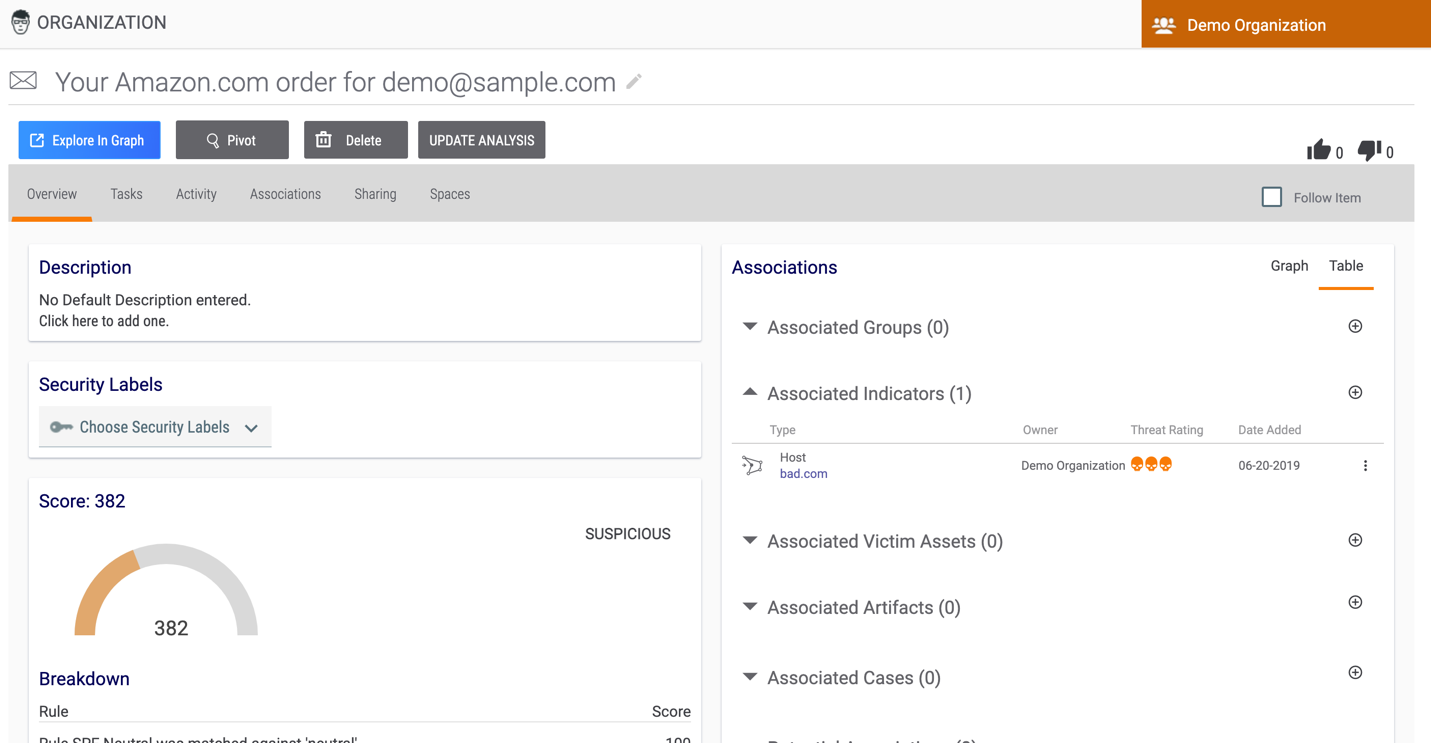
- Navigate to the Details screen for the new Email Group (Figure 3).
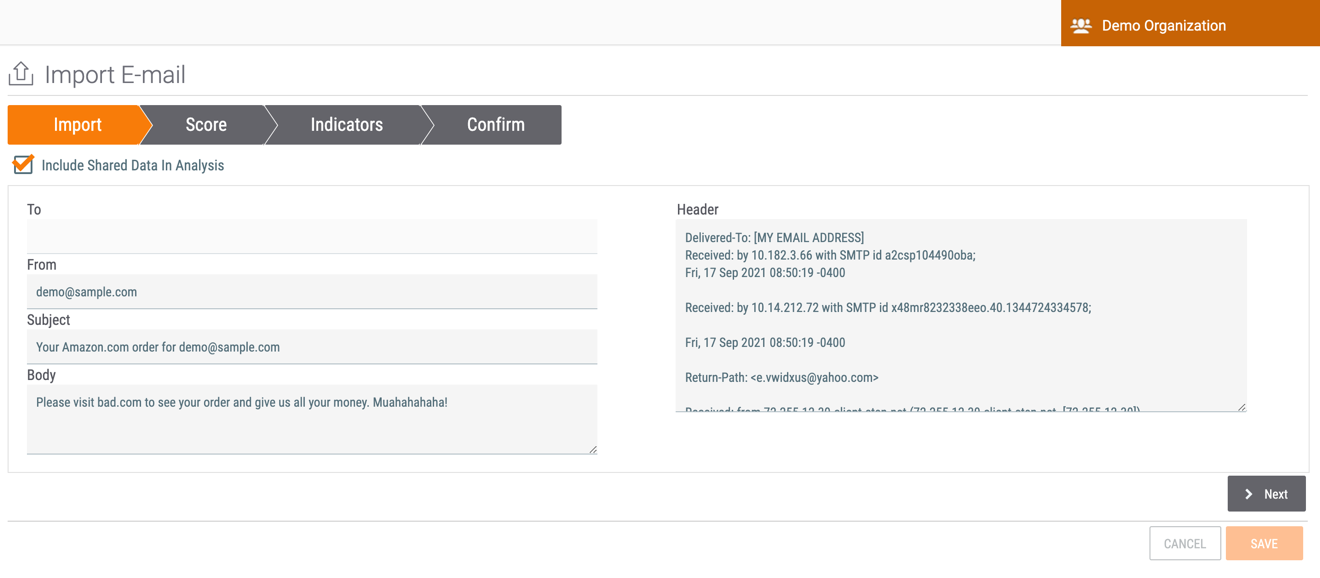
- Click the UPDATE ANALYSIS button. The Import tab of the Import E-mail screen will be displayed (Figure 4). This screen displays the contents of the email and its header.
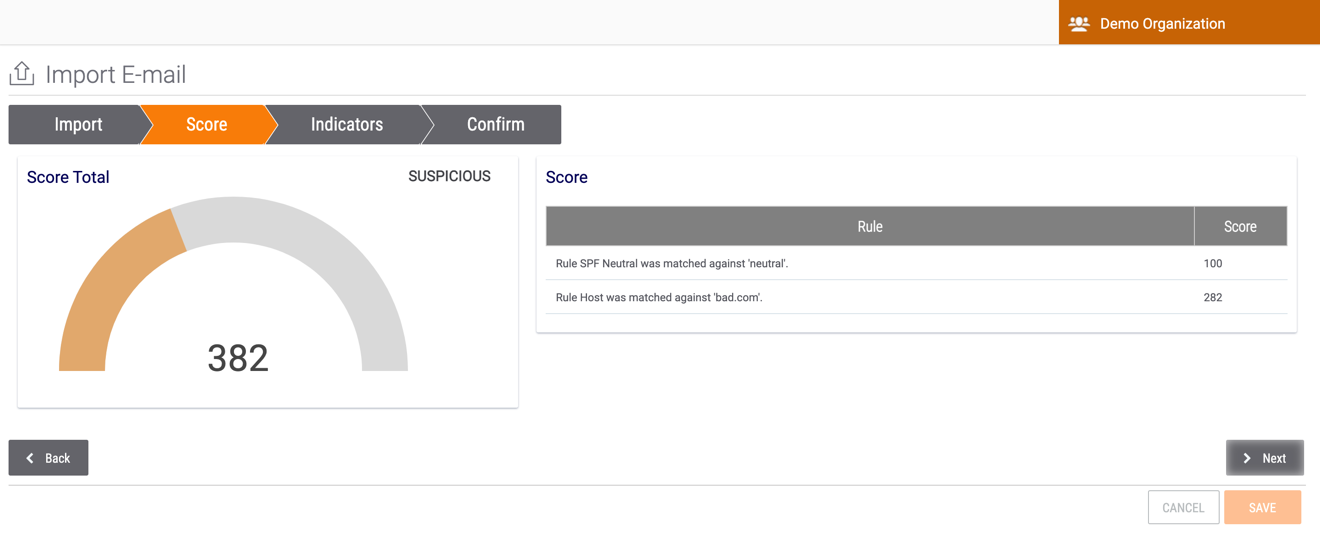
- Click the Next button. The Score screen will be displayed (Figure 5). This screen displays a breakdown of how the total Score for the phishing email was calculated based on the email scoring rules configured on the E-mail Scoring tab of the System Settings screen. See the “Email-Scoring Rules” section of ThreatConnect System Administration Guide for more information.
- Click the Next button. The Indicators screen will be displayed (Figure 6).
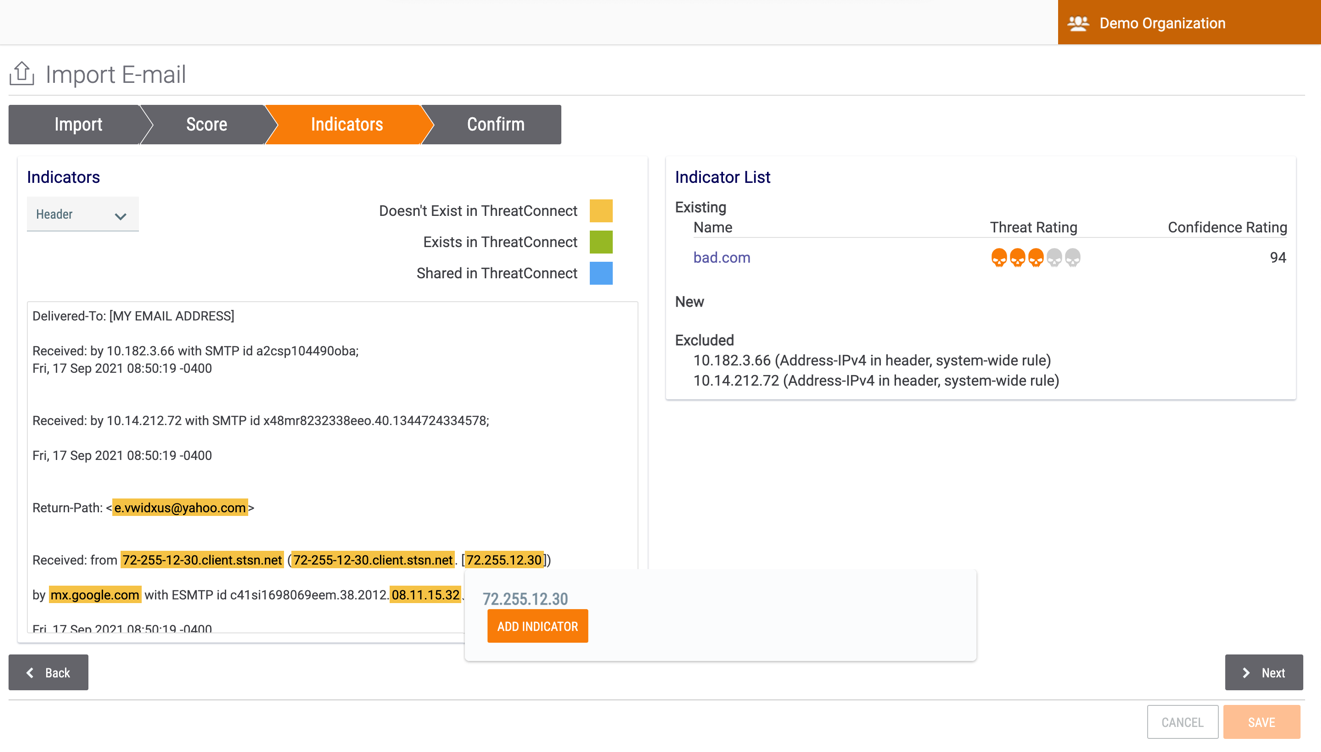
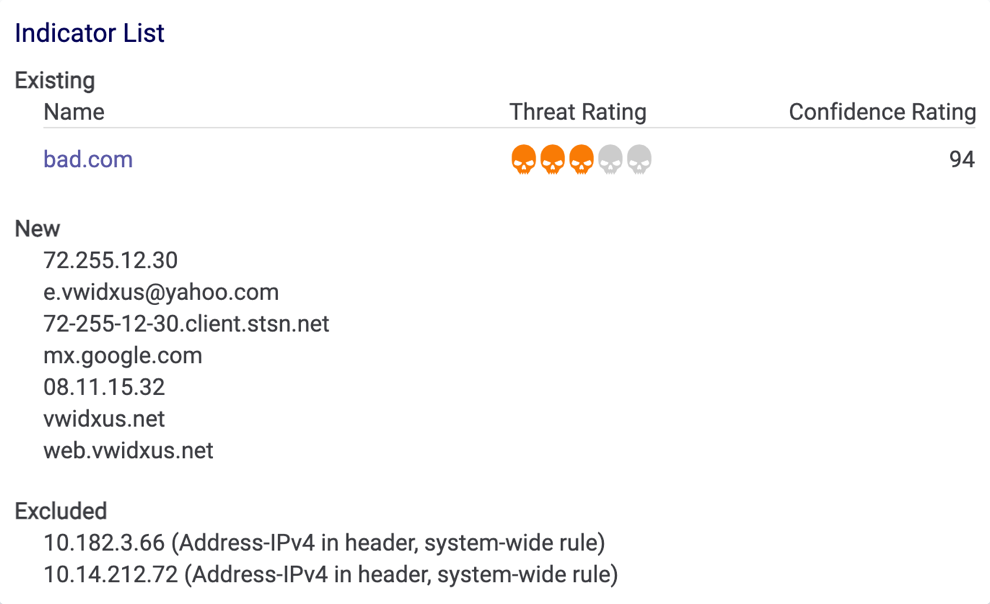
- To add Indicators highlighted in the email header and body into ThreatConnect, hover over them and click the ADD INDICATOR button that is displayed, as demonstrated for the 72.255.12.30 Address Indicator in Figure 6. Indicators that are added will be displayed under the NEW heading on the Indicator List card (Figure 7).ImportantIndicators found in the email will be associated to the Email Group only if they exist in the Organization, Community, or Source to which the phishing mailbox belongs.
- Click the Next button. The Confirm screen will be displayed (Figure 8).
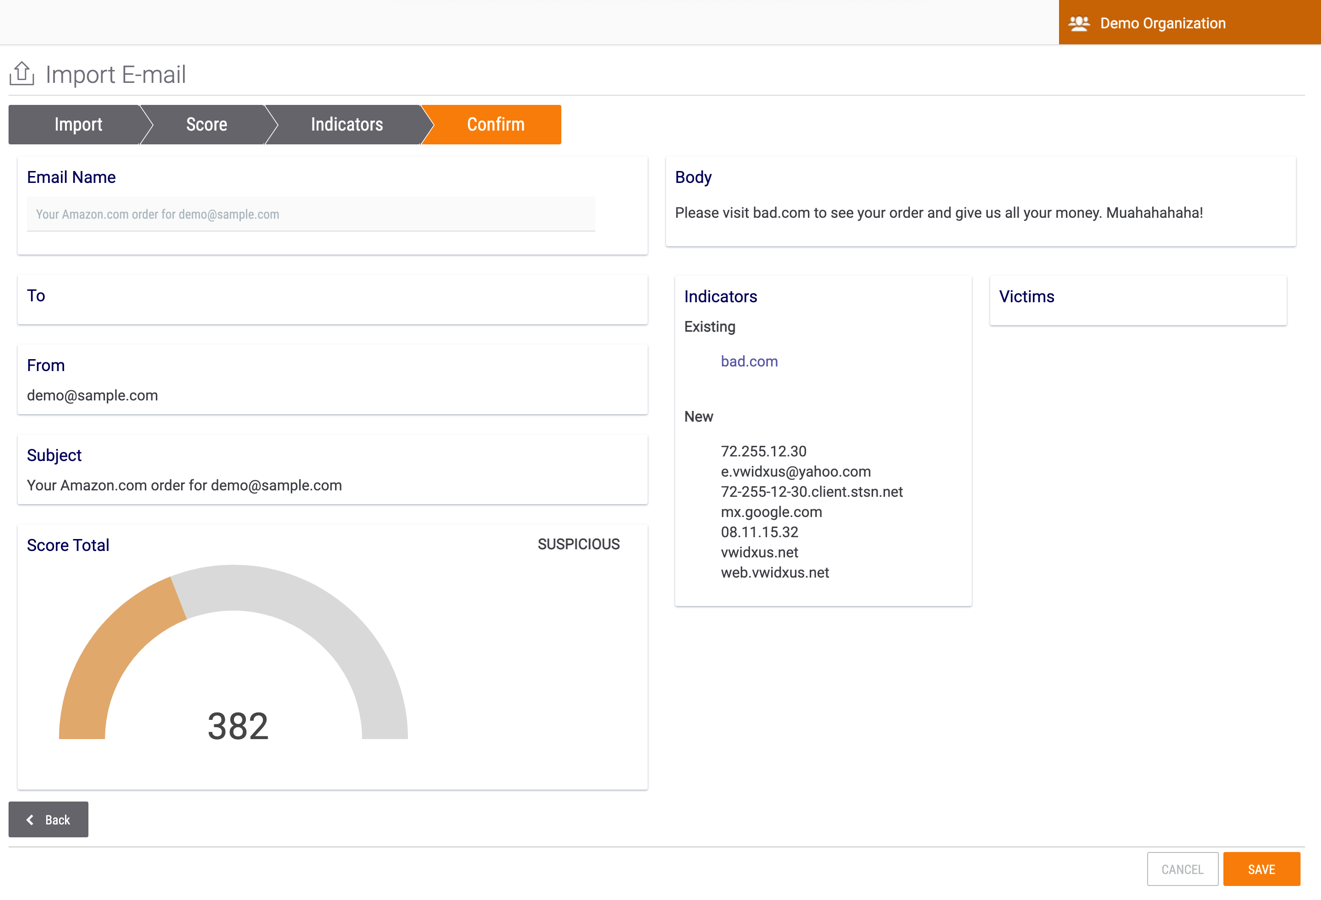
- Verify the data, and then click the SAVE button.
ThreatConnect® is a registered trademark of ThreatConnect, Inc.
20045-01 v.07.C
Was this article helpful?


