- 30 Jan 2024
- 7 Minutes to read
-
Print
-
DarkLight
-
PDF
Graph View: Object Menu
- Updated on 30 Jan 2024
- 7 Minutes to read
-
Print
-
DarkLight
-
PDF
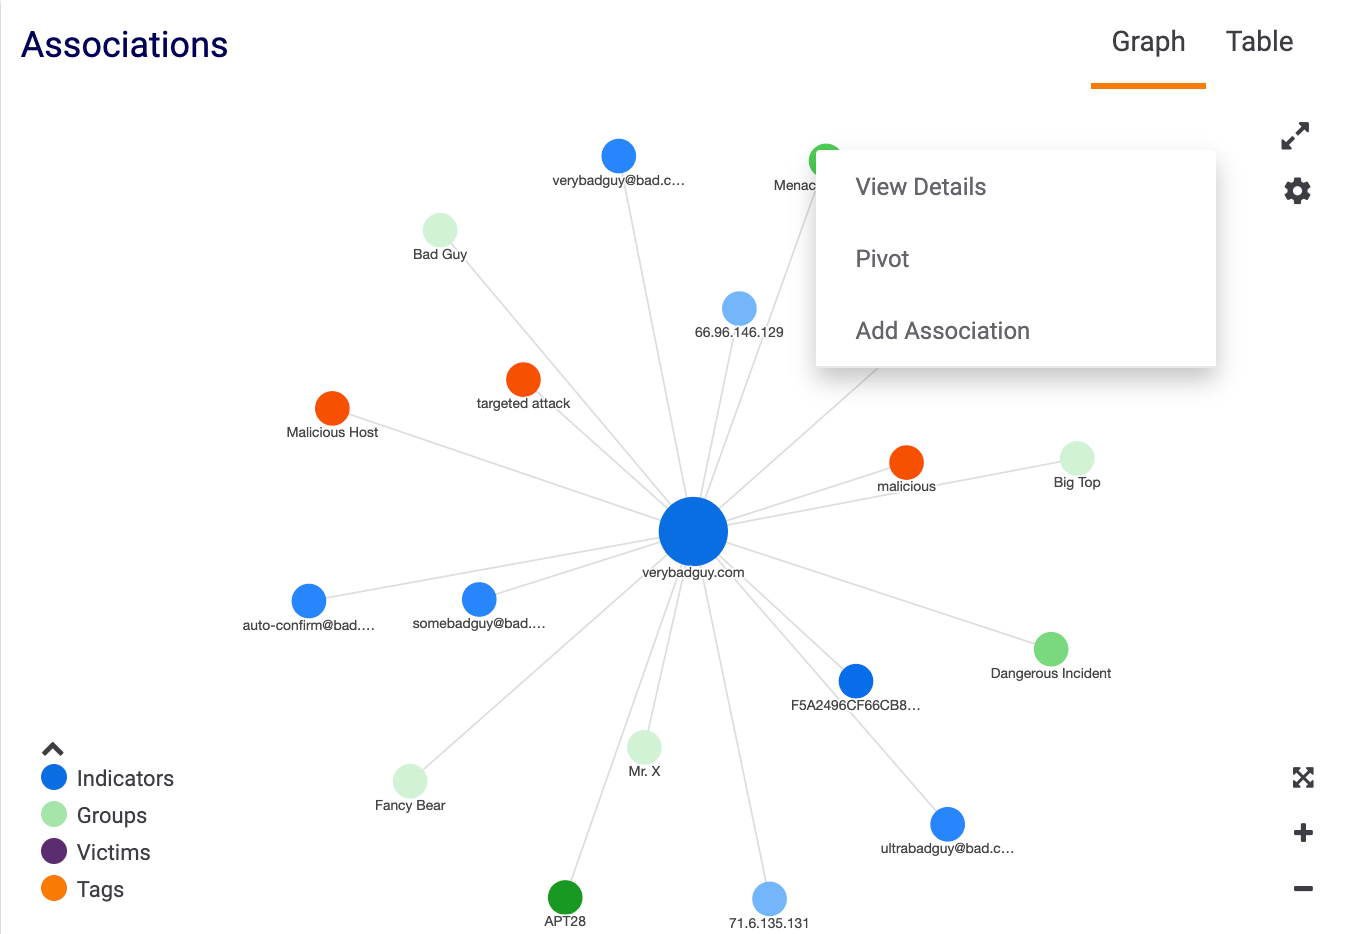
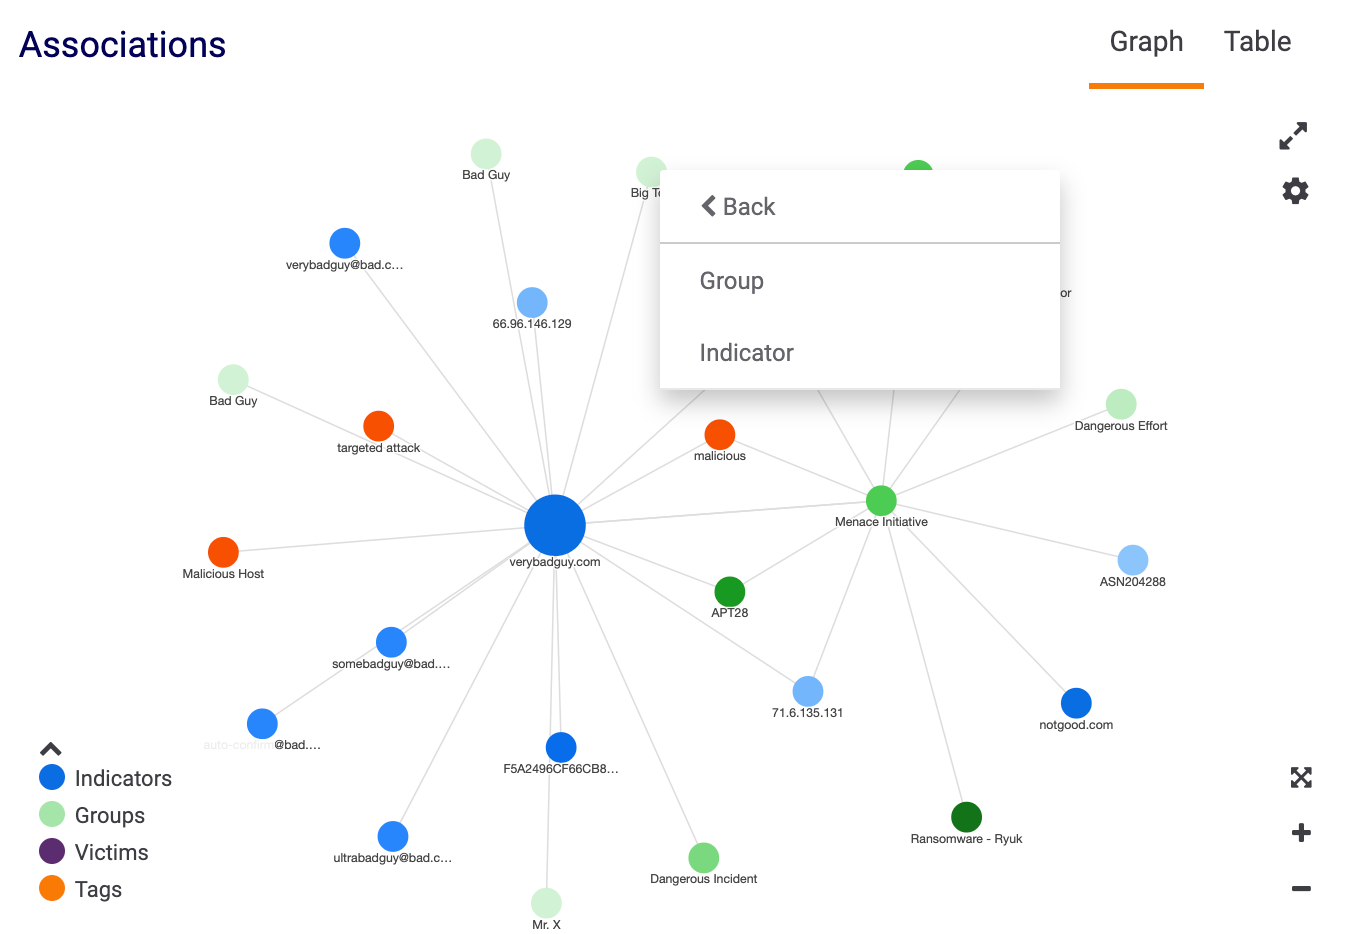
When viewing the Associations card in graph view, clicking on a node representing an associated object will display a contextual menu (Figure 1) with the following options: View Details, Pivot, and Add Association.
View Details
Select View Details to display the selected object’s Details drawer. If the selected object exists in multiple owners, you will be prompted to select the owner in which you want to view details about the object.
Pivot
Select Pivot to pivot on associations for the selected node. After you select Pivot, you will be prompted to choose the type of object on which to pivot: Indicators, Groups, Tags, or Victims (Figure 2).
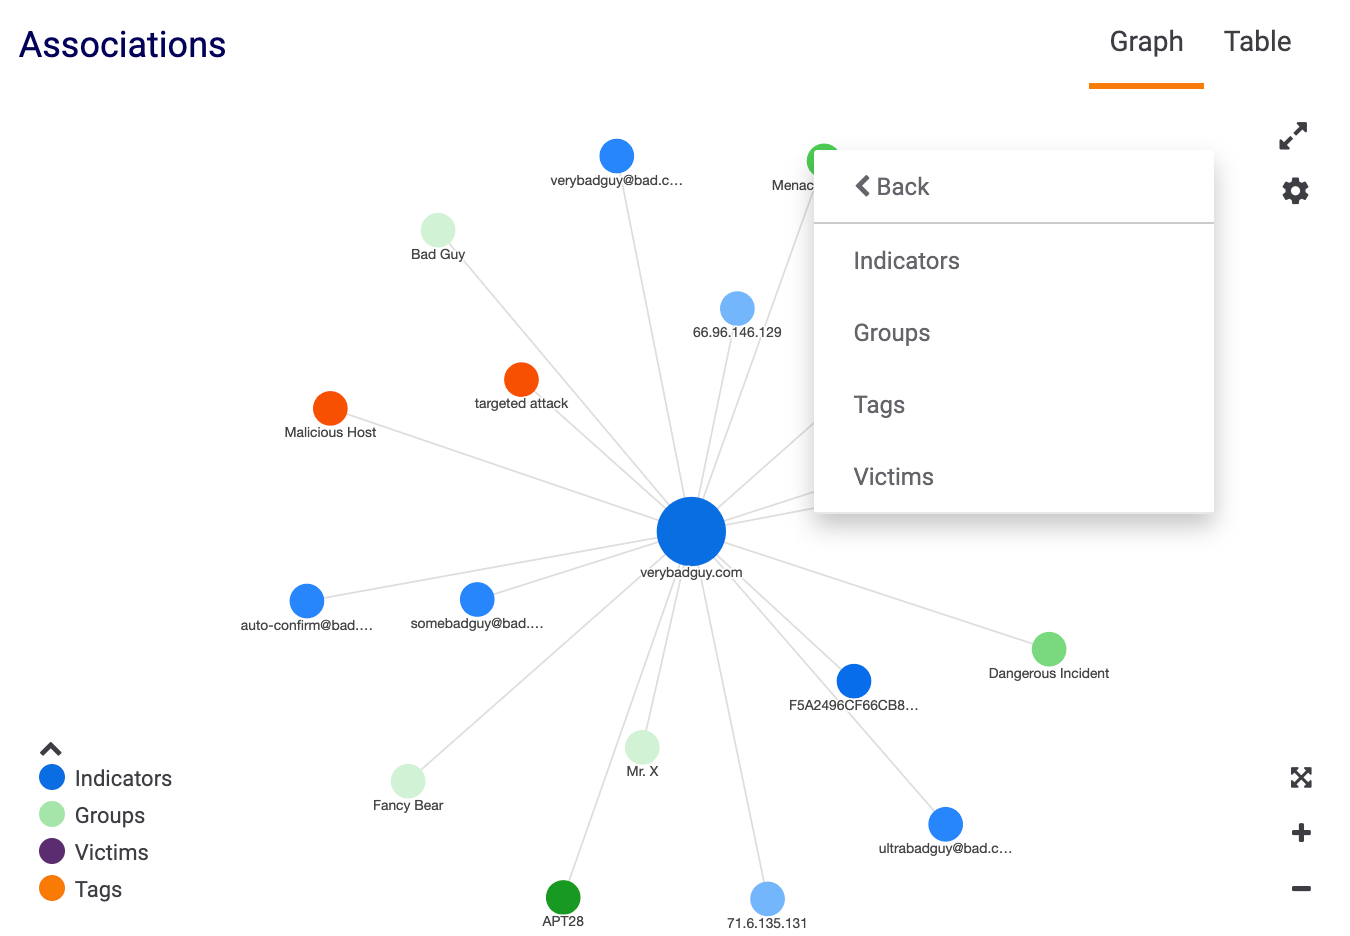
Select an object type to display all objects of that type that are associated to the selected node. You can pivot on multiple object types for a single node by clicking on the node, selecting Pivot, and selecting the next type from the menu displayed in Figure 2.
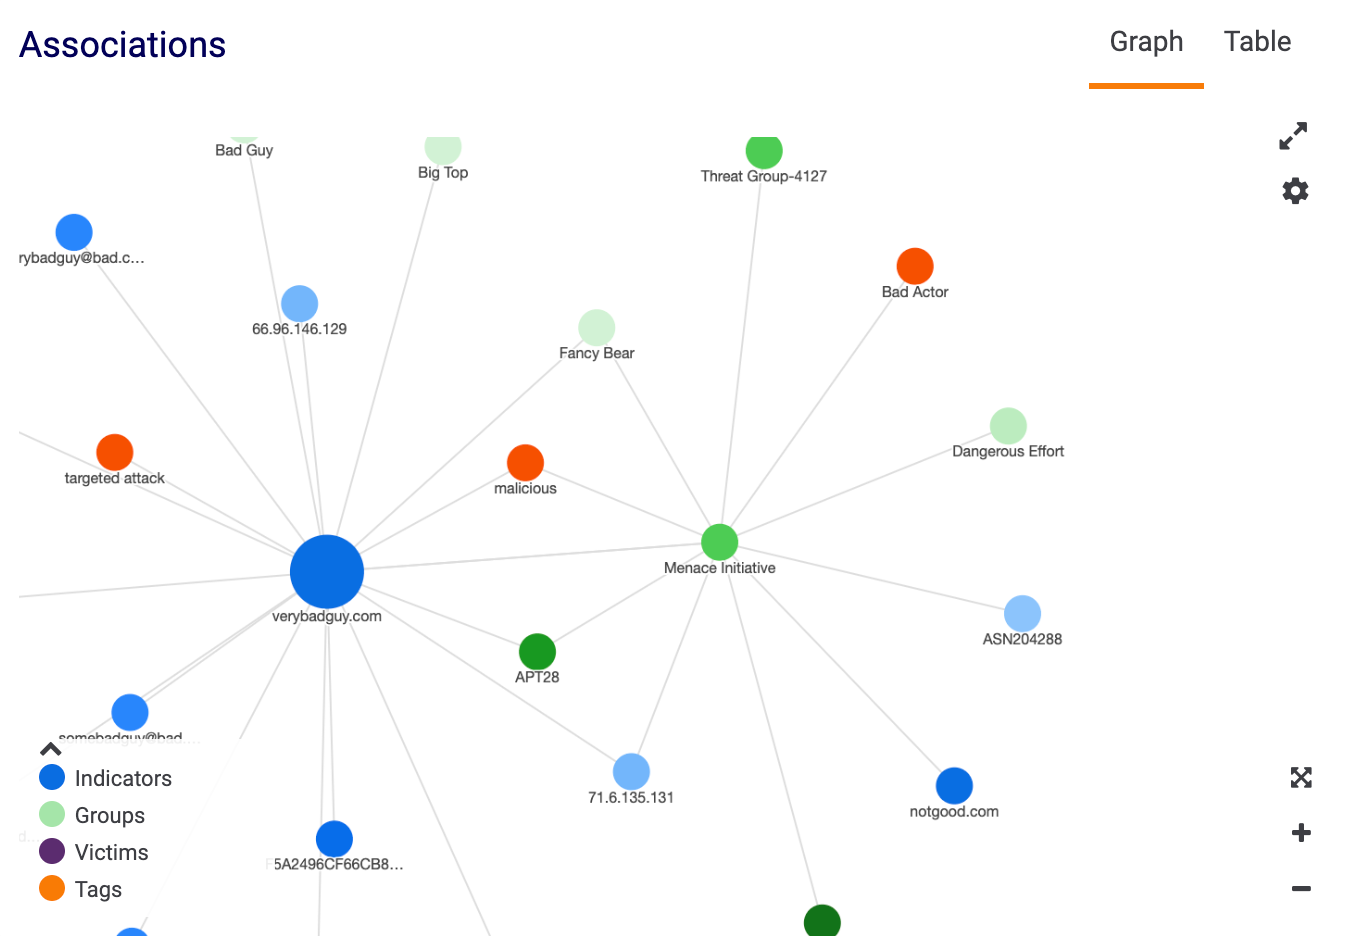
Figure 3 shows all Indicators, Groups, and Tags associated to the Menace Initiative Threat Group. These objects are considered second-level associations because they are two levels of association away from the primary object. You can, in turn, click on them to explore their details and associated objects.
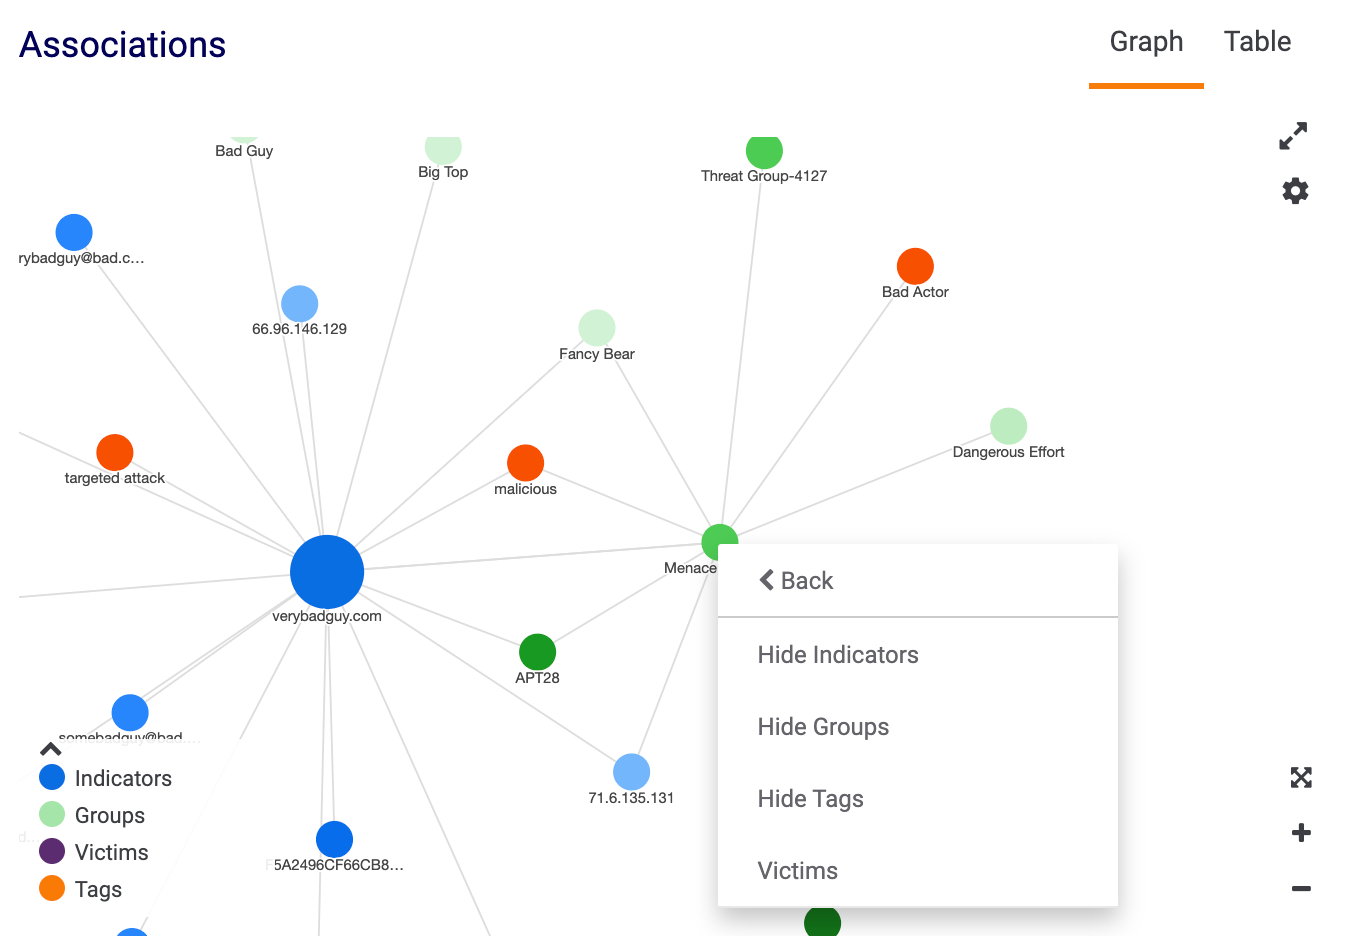
To hide second-level associated objects, click on the node to which they’re associated, select Pivot, and select one of the Hide options (Figure 4).
Add Association
From graph view, you may add associations to the primary object or to associated objects via the Add Association option (Figure 1). This option will be displayed only if the following conditions apply:
- If the object is an Indicator, custom Indicator-to-Indicator association types must be enabled and available.
- You have a permission level of Create or higher for Indicators and Groups in the object’s owner.
- The object is not a Tag.
Selecting Add Association in Figure 1 will display a menu listing two object types: Group and Indicator (Figure 5).
If cross-owner associations are enabled on your ThreatConnect instance, you can create associations to Indicators and Groups in any owner to which you have access; otherwise, you can only create associations to Indicators and Groups that belong to the same owner as the selected object.
Group
Select Group to create associations to one or more Groups. The Add Groups window will be displayed (Figure 6), showing all available Groups that are not already associated to the object from which you selected Group.
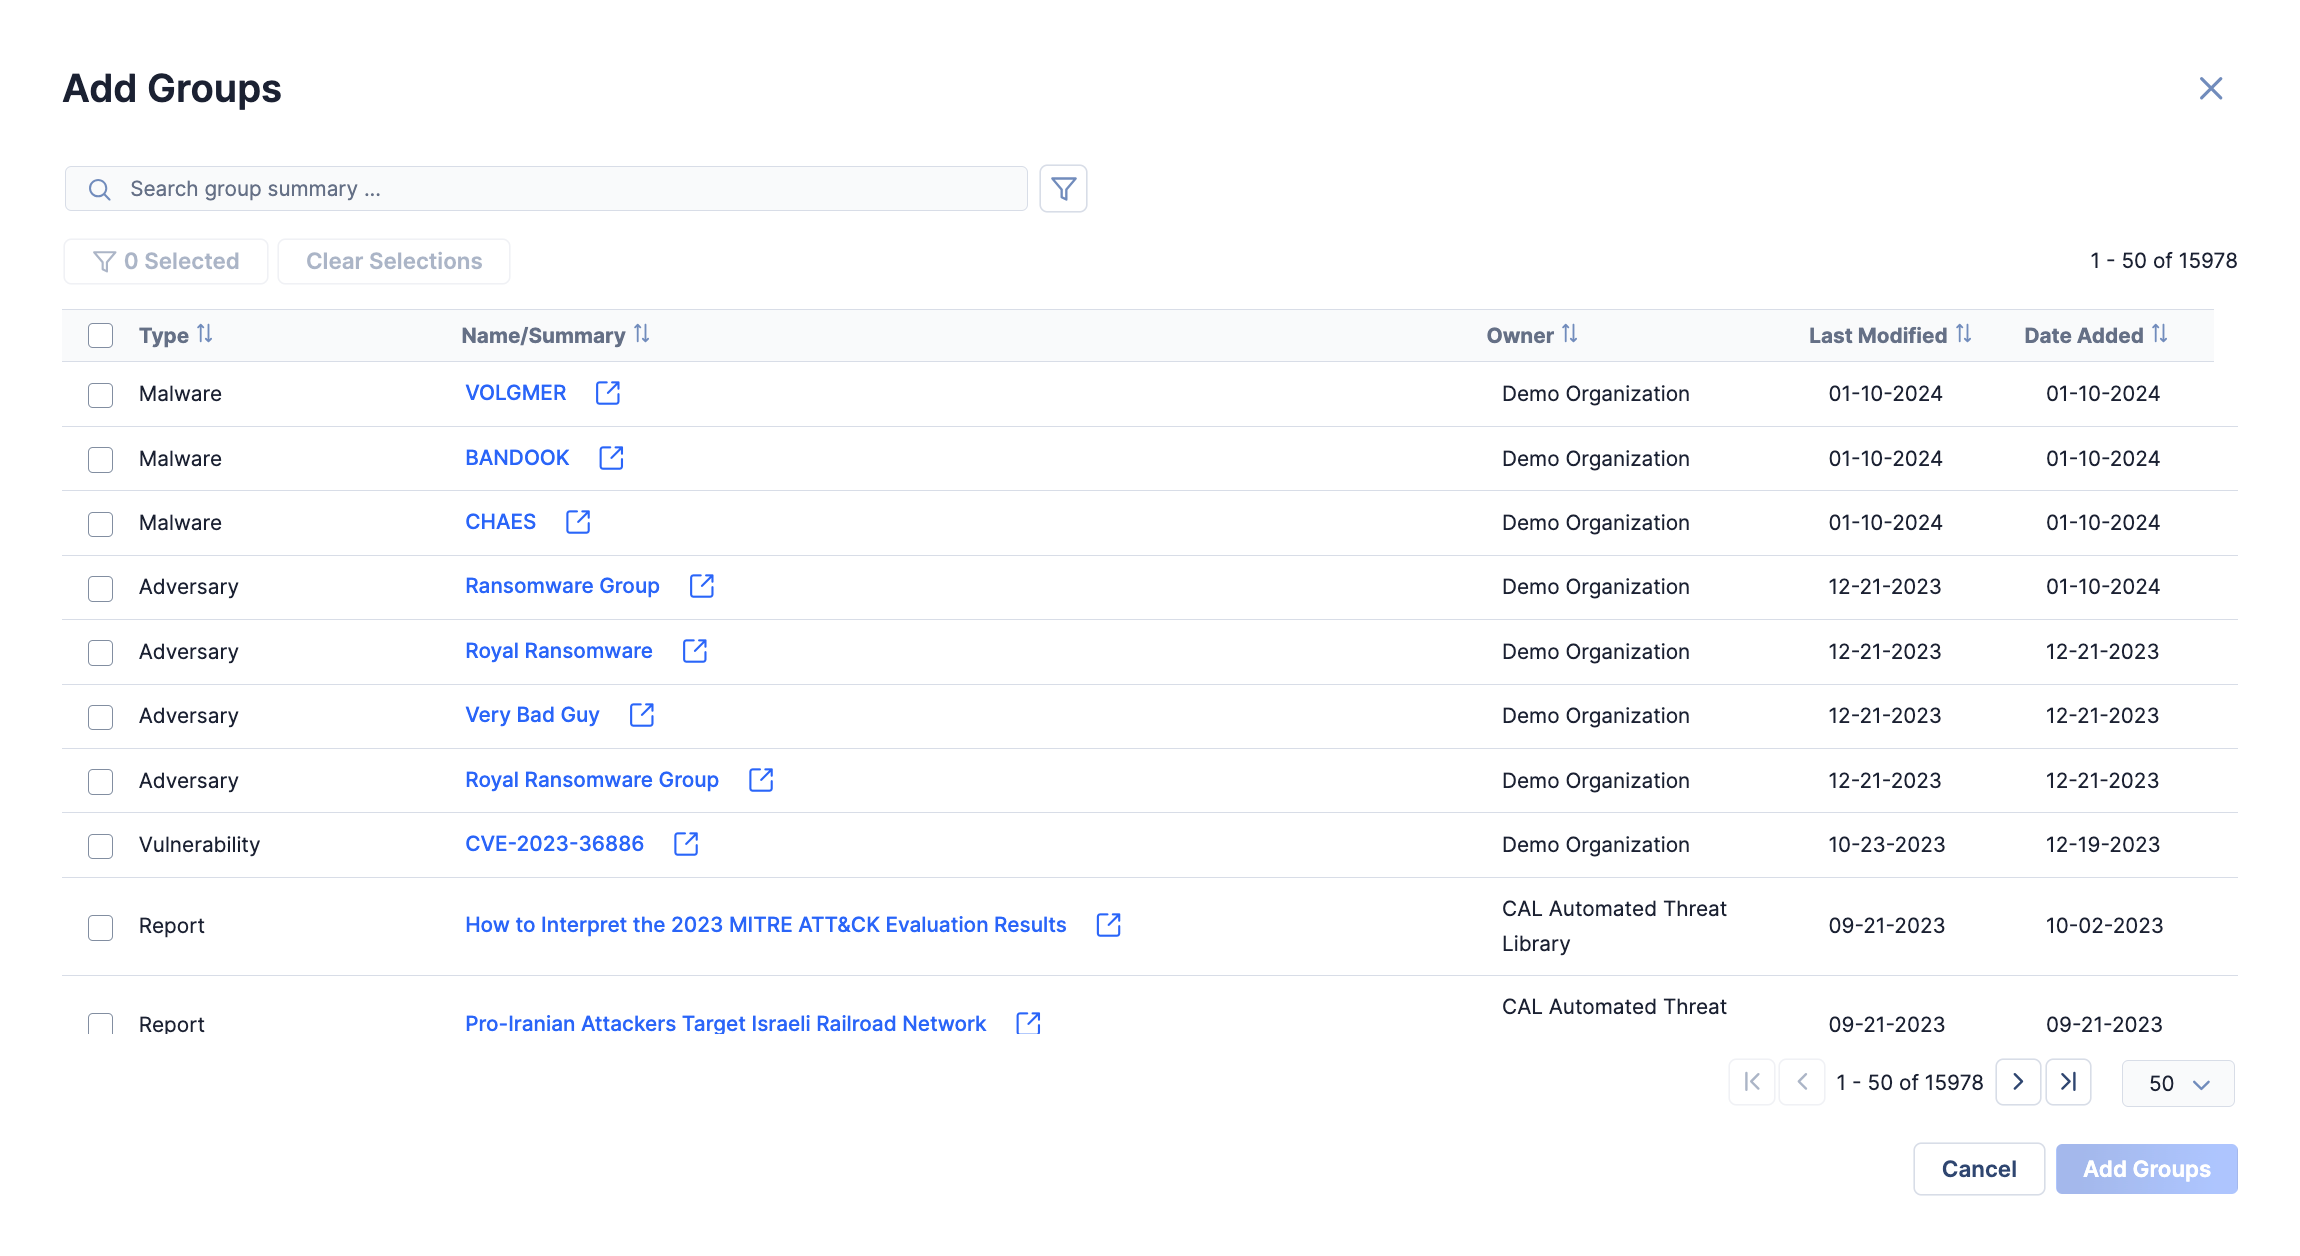
- Select one or more Groups to associate to the selected object. As you select Groups, the Selected button at the top left of the window will update to reflect the current number of selected items. When at least one Group is selected, you can click the Selected or Clear Selection button to view only the selected items or clear all selections, respectively.
- To filter Groups by type, creation date, last modified date, and, if cross-owner associations are enabled, owner, use the Filters
 menu; to filter Groups by summary, use the search bar.
 - Click the Add Groups button to create associations to the selected Groups.
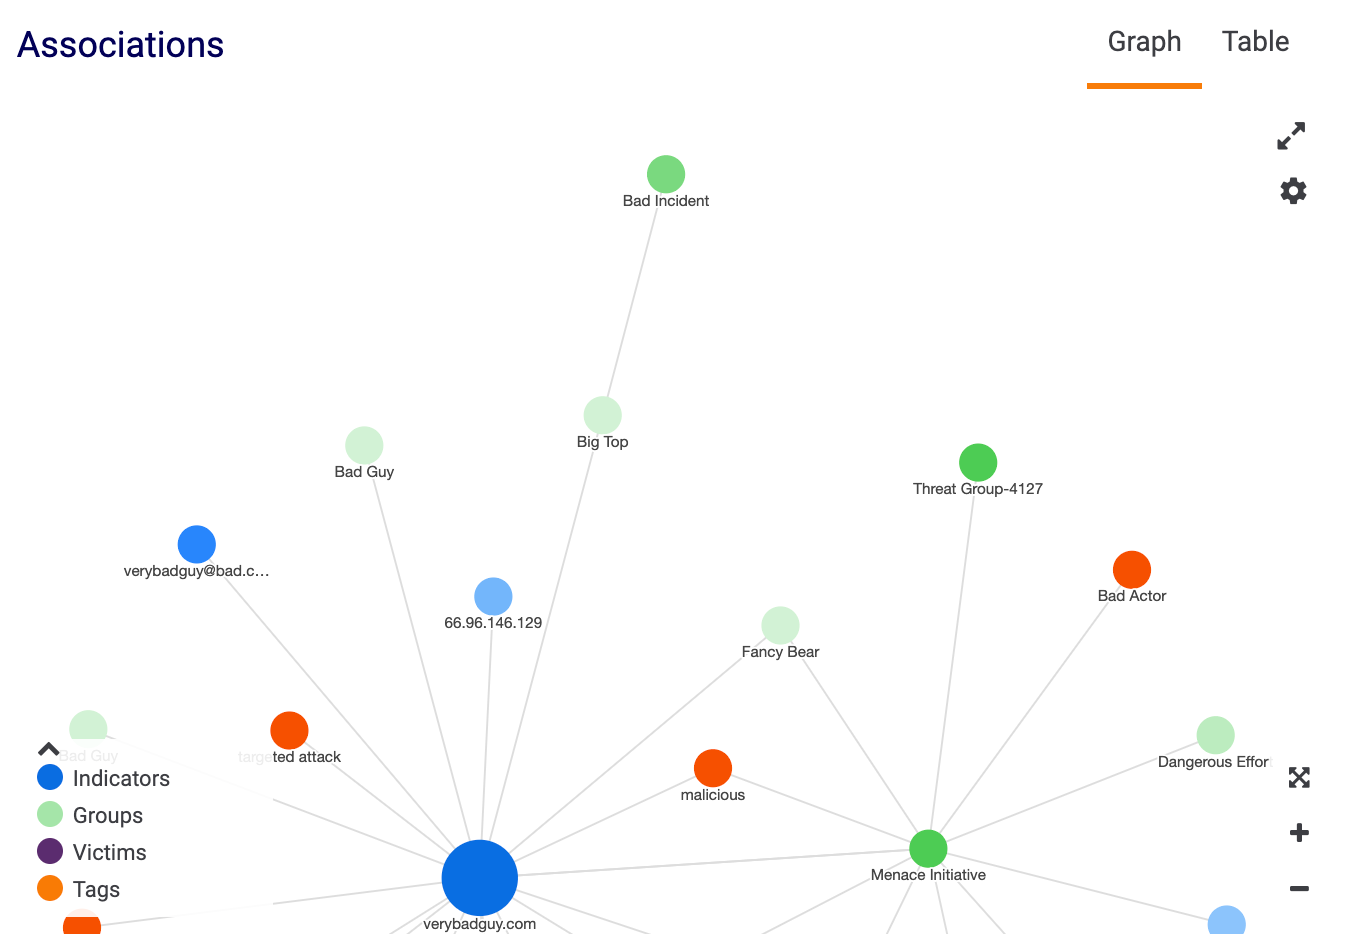
The new associations(s) will be displayed in the graph, as shown in Figure 7 for the Big Top Adversary Group, to which an association to the Bad Incident Incident Group was created.
Indicator
Select Indicator to create associations to one or more Indicators. The Add Indicators window will be displayed. This window’s appearance depends on the type of object from which you selected Indicator.
Indicator-to-Indicator Association
If the object from which you selected Indicator is an Indicator, the Add Indicators window will look like Figure 8.
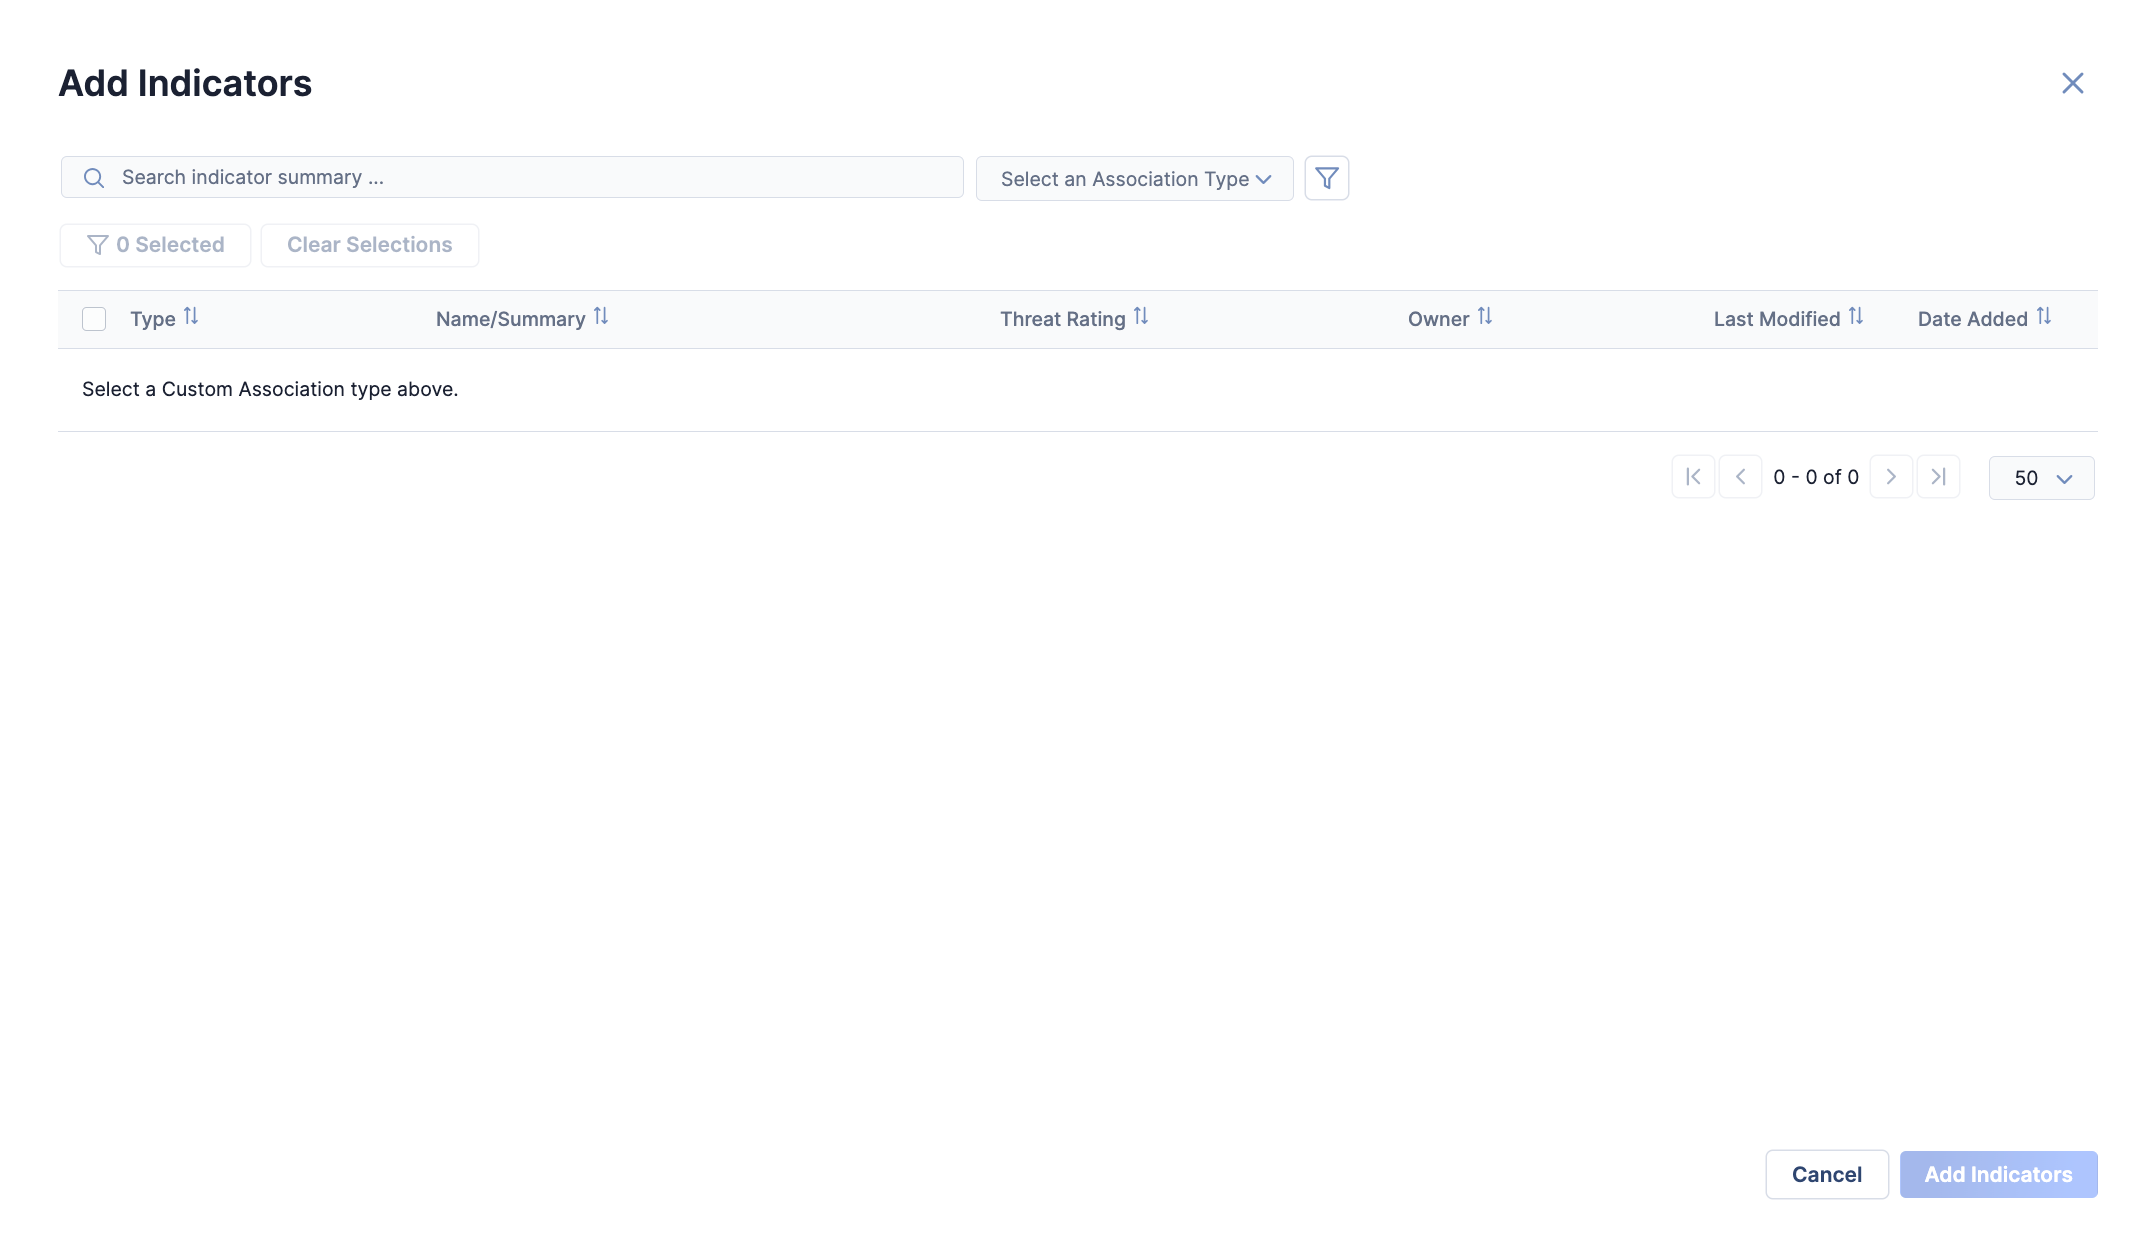
- Select an Association Type: Select a custom Indicator-to-Indicator association type. Indicators of the target type that are not associated to the selected Indicator will be displayed.
- Select one or more Indicators to associate to the selected object. As you select Indicators, the Selected button at the top left of the window will update to reflect the current number of selected items. When at least one Indicator is selected, you can click the Selected or Clear Selection button to view only the selected items or clear all selections, respectively.
- To filter Indicators by creation date, last modified date, and, if cross-owner associations are enabled, owner, use the and Filters
 menu; to filter Indicators by summary, use the search bar.
 - Click the Add Indicators button to create associations to selected Indicators.
Group-to-Indicator Association
If the object from which you selected Indicator is a Group, the Add Indicators window will look like Figure 9. By default, the Add Indicators window will be displayed with the Existing Indicators option selected, showing all existing Indicators not already associated to the selected Group. To create an association to an Indicator that exists in one of your ThreatConnect owners, keep the selection of Existing Indicators at the top left of the Add Indicators window.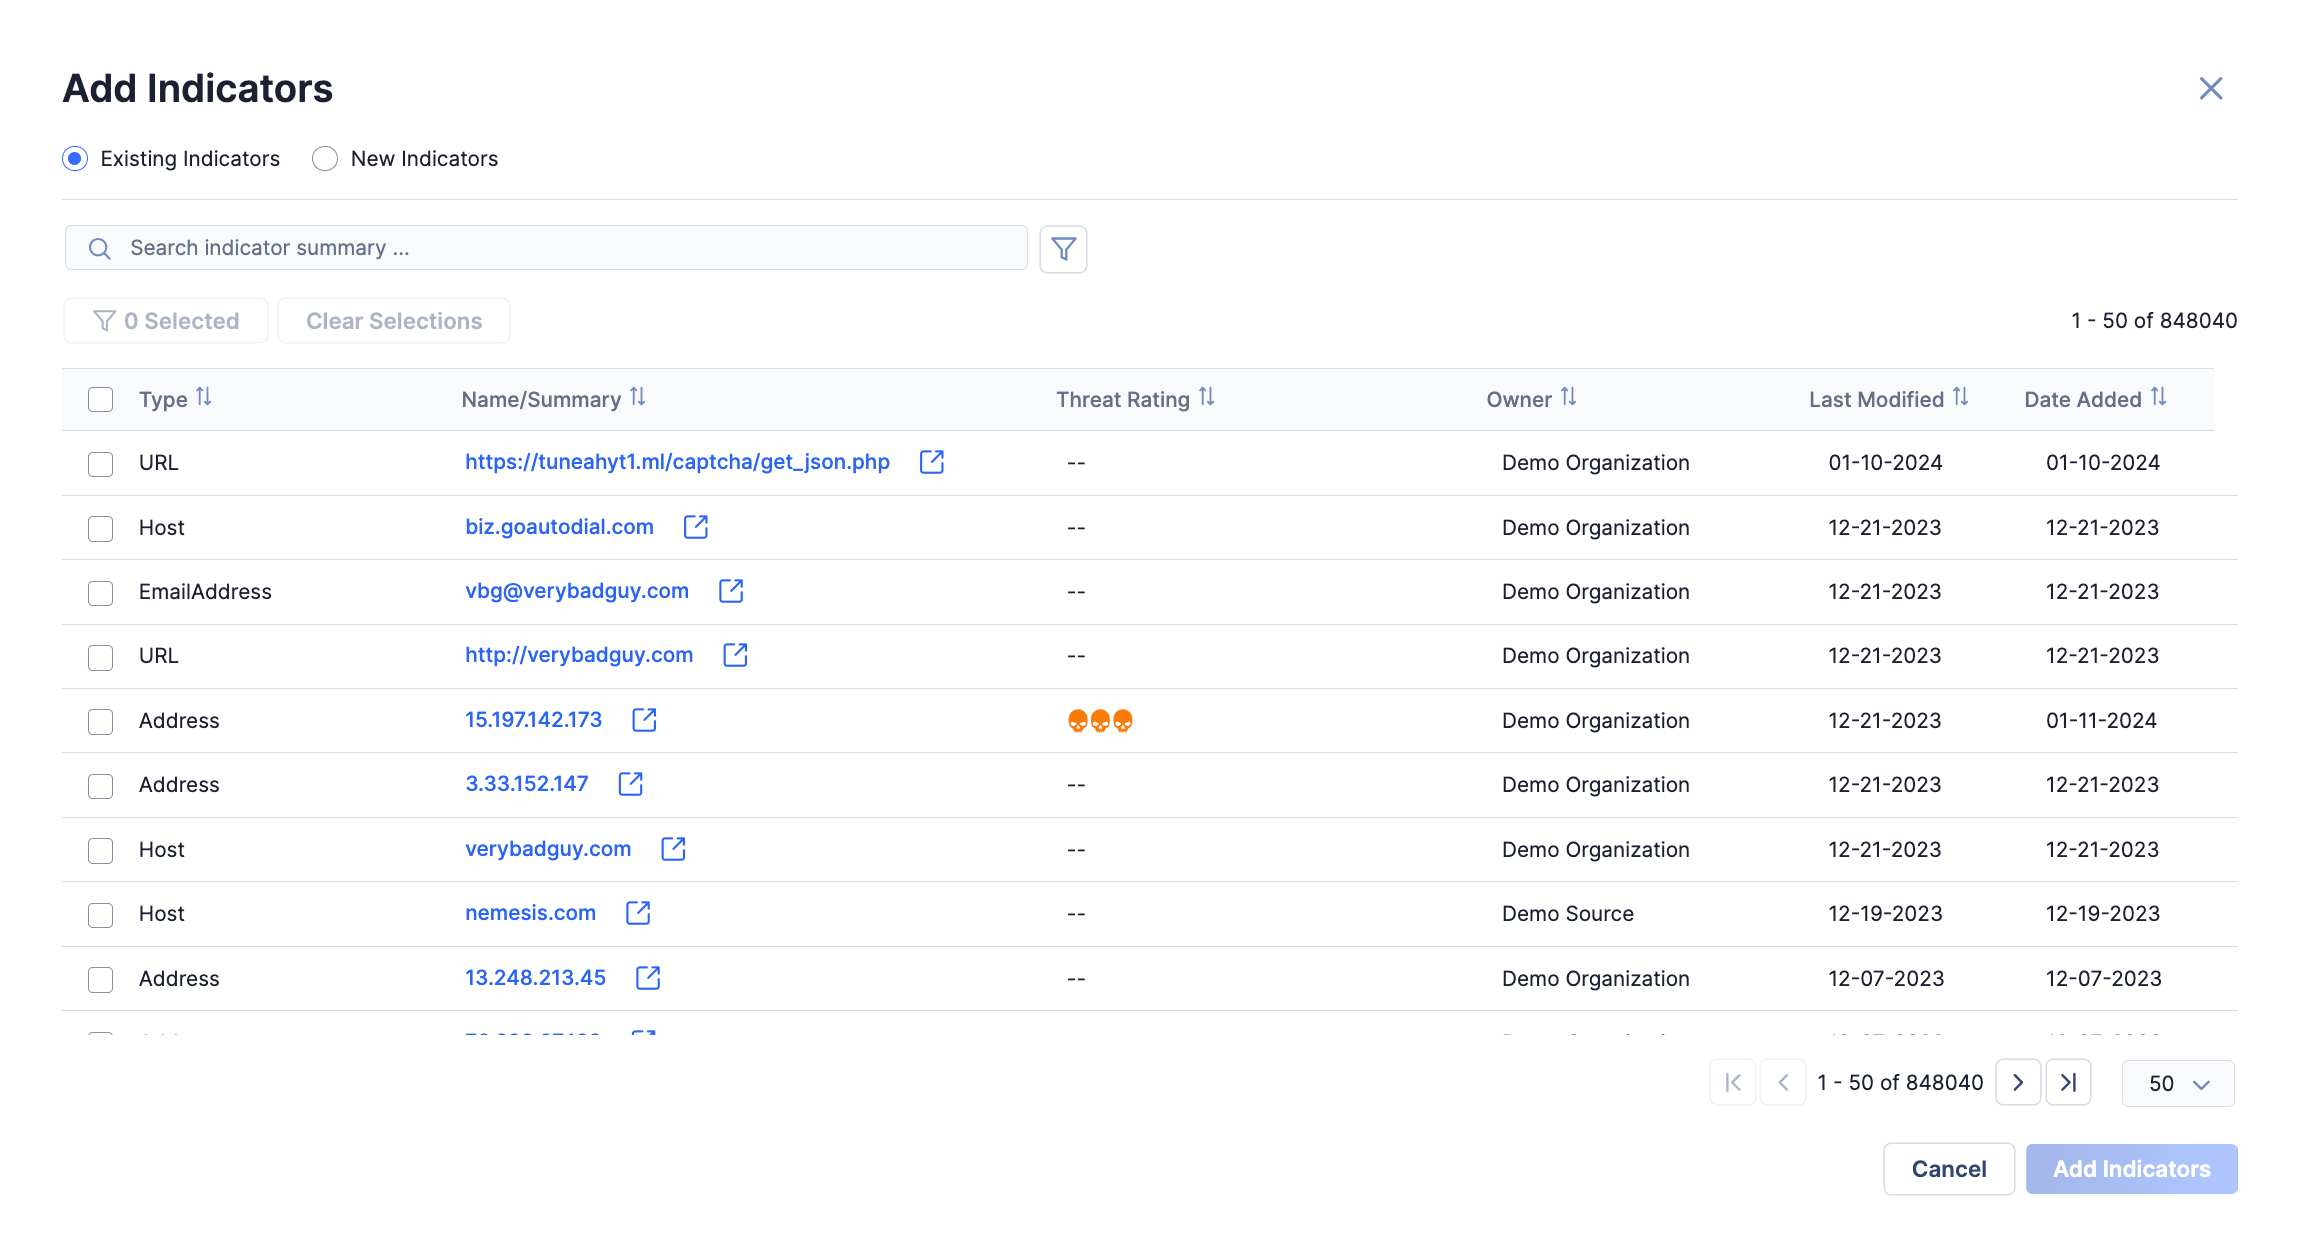
- Select one or more Indicators to associate to the selected object. As you select Indicators, the Selected button at the top left of the window will update to reflect the current number of selected items. When at least one Indicator is selected, you can click the Selected or Clear Selection button to view only the selected items or clear all selections, respectively.
- To filter Indicators by type, creation date, last modified date, and, if cross-owner associations are enabled, owner, use the and Filters
 menu; filter Indicators by summary, use the search bar.
 - Click the Add Indicators button to create associations to selected Indicators.
To create an association to an Indicator that does not exist in one of your ThreatConnect owners, select New Indicators at the top left of the Add Indicators window. The window will now display options for creating new Indicators (Figure 10).
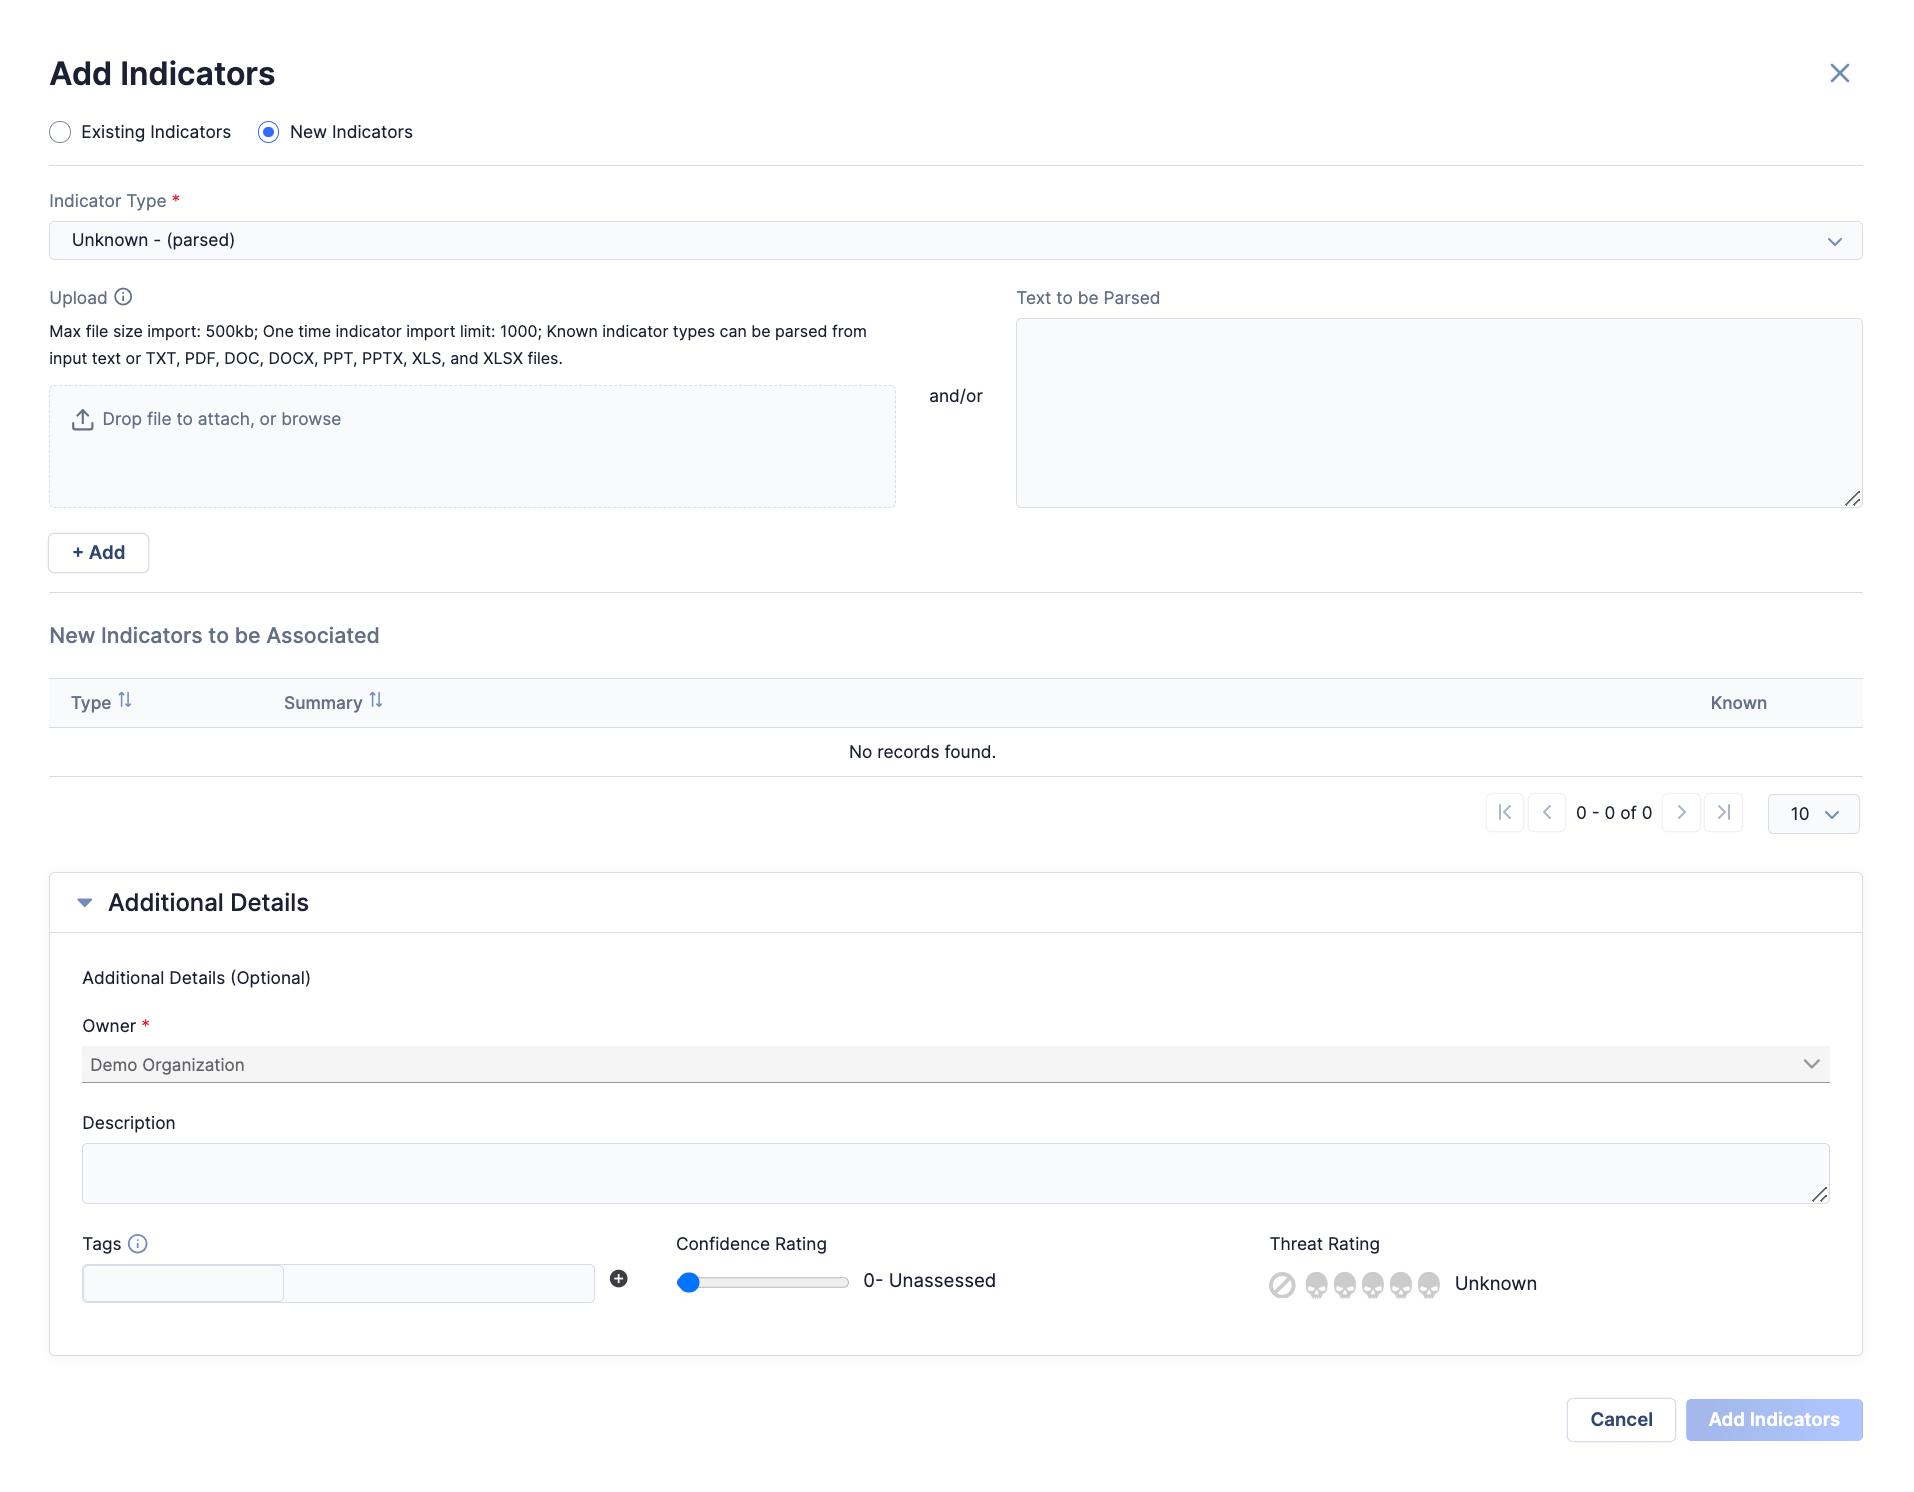
- Indicator Type: Select an Indicator type (available choices include Unknown - (parsed), File, Email Subject, Hashtag, Mutex, Registry Key, and User Agent). The Indicator Type section will display options for entering Indicators of the selected type. If you selected Unknown - (parsed), options to upload a file or enter text to be parsed for Indicators will be displayed, as in Figure 10. After entering the Indicator values or content to be parsed for Indicators, click the + Add button.Note
Parsable Indicator types include Address, Email Address, File, Host, URL, ASN, and CIDR. Custom Indicator types may also be parsed if the following conditions are met:
- a System Administrator selected the Parsable checkbox when configuring the custom Indicator type;
- the custom Indicator type accepts a single value;
- a System Administrator created an import rule for the custom Indicator type.
For more information on custom Indicator types and Indicator import rules, see the “Custom Indicator Types” and “Indicator Import Rules” sections, respectively, of ThreatConnect System Administration Guide.
ImportantIndicators included on an Indicator Exclusion List will not be imported or associated to the Group. - New Indicators to be Associated: This section displays the Indicator(s) that will be created and associated to the Group in a table with the following columns:
- Type: The Indicator’s type.
- Summary: The Indicator’s summary.
- Known: Indicates whether the Indicator exists in the Group's owner.
- Private: This column will be displayed only if your System Administrator has enabled private Indicators. To mark an Indicator as private, select the corresponding checkbox in the Private column.
- Actions: To remove an Indicator from the table, click Delete
 in this column.
- Additional Details: In this section, you can fill out the following information for all Indicators being created and associated to the Group:
- Owner: This required field is displayed only if cross-owner associations are enabled on your ThreatConnect instance. Select the owner in which the Indicator(s) will be created.
- If cross-owner associations are not enabled on your ThreatConnect instance and the associated object to which you are adding a new Indicator association is not in the primary object’s owner, but rather is associated to an object of the same name in a different owner, then the new Indicator will be created in the primary object’s owner, not the associated object’s owner.
- Description: Enter a Description for the Indicator(s).
- Tags: Enter Tags to apply to the Indicator(s).
- Confidence Rating: Use the slider to set the Confidence Rating for the Indicator(s).
- Threat Rating: Use the skull icons to set the Threat Rating for the Indicator(s).
- Click the Add Indicators button to create the new Indicators and associate them to the selected Group.
ThreatConnect® is a registered trademark of ThreatConnect, Inc.
20076-04 v.09.C


