- To add an App to a Playbook, click the
 Apps button on the side navigation bar of the Playbook Designer. All available Apps will be displayed to the left of the design pane (Figure 1). To narrow down the results, collapse the sub-menus, or type the name of the desired App in the search bar.
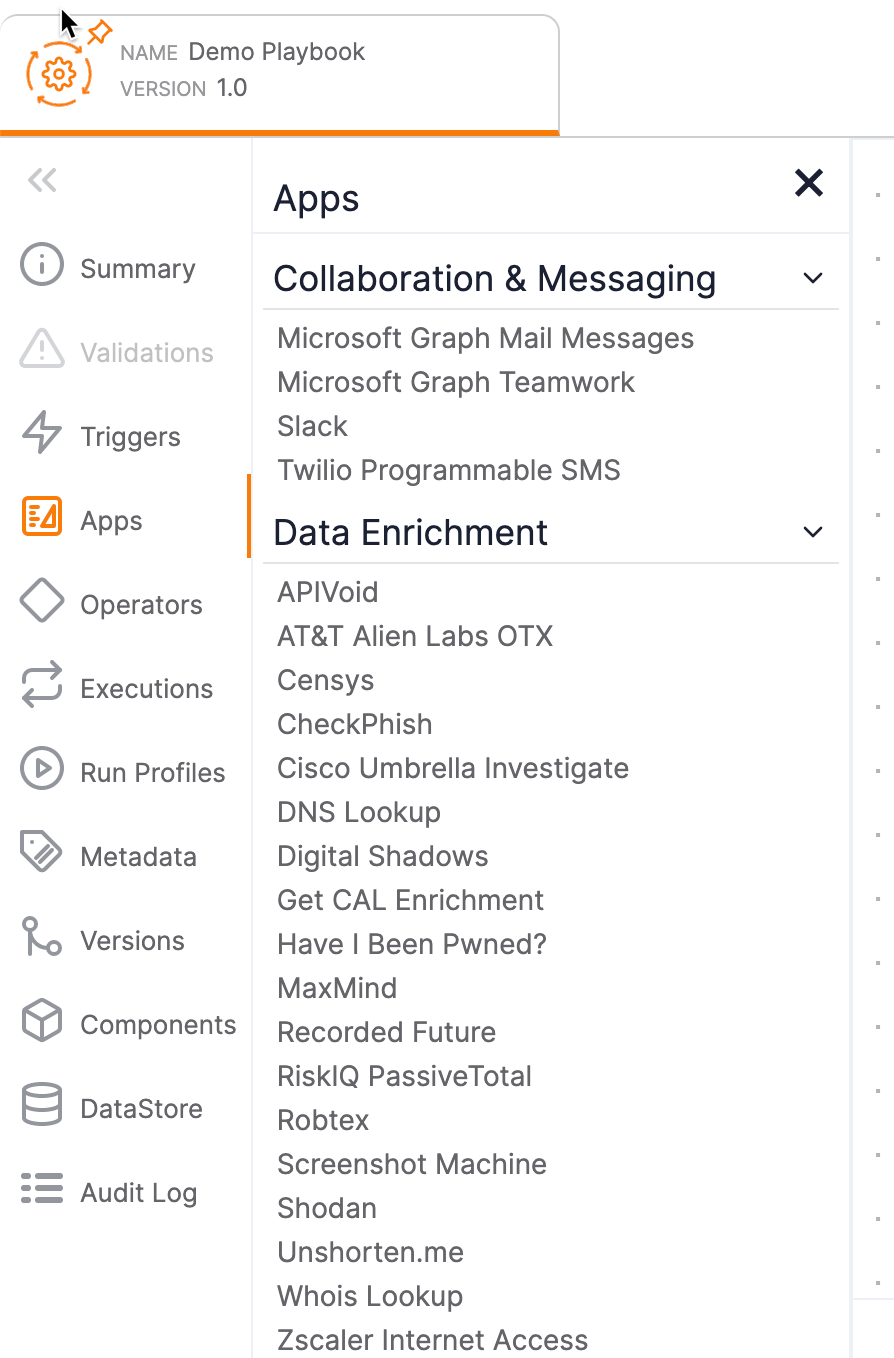
- Select an App to add to the design pane (Figure 2). See the “Apps” section of Parts of a Playbook for a definition of each App category. This example, which builds from the example in Adding a Trigger, uses the Get CAL Enrichment App.
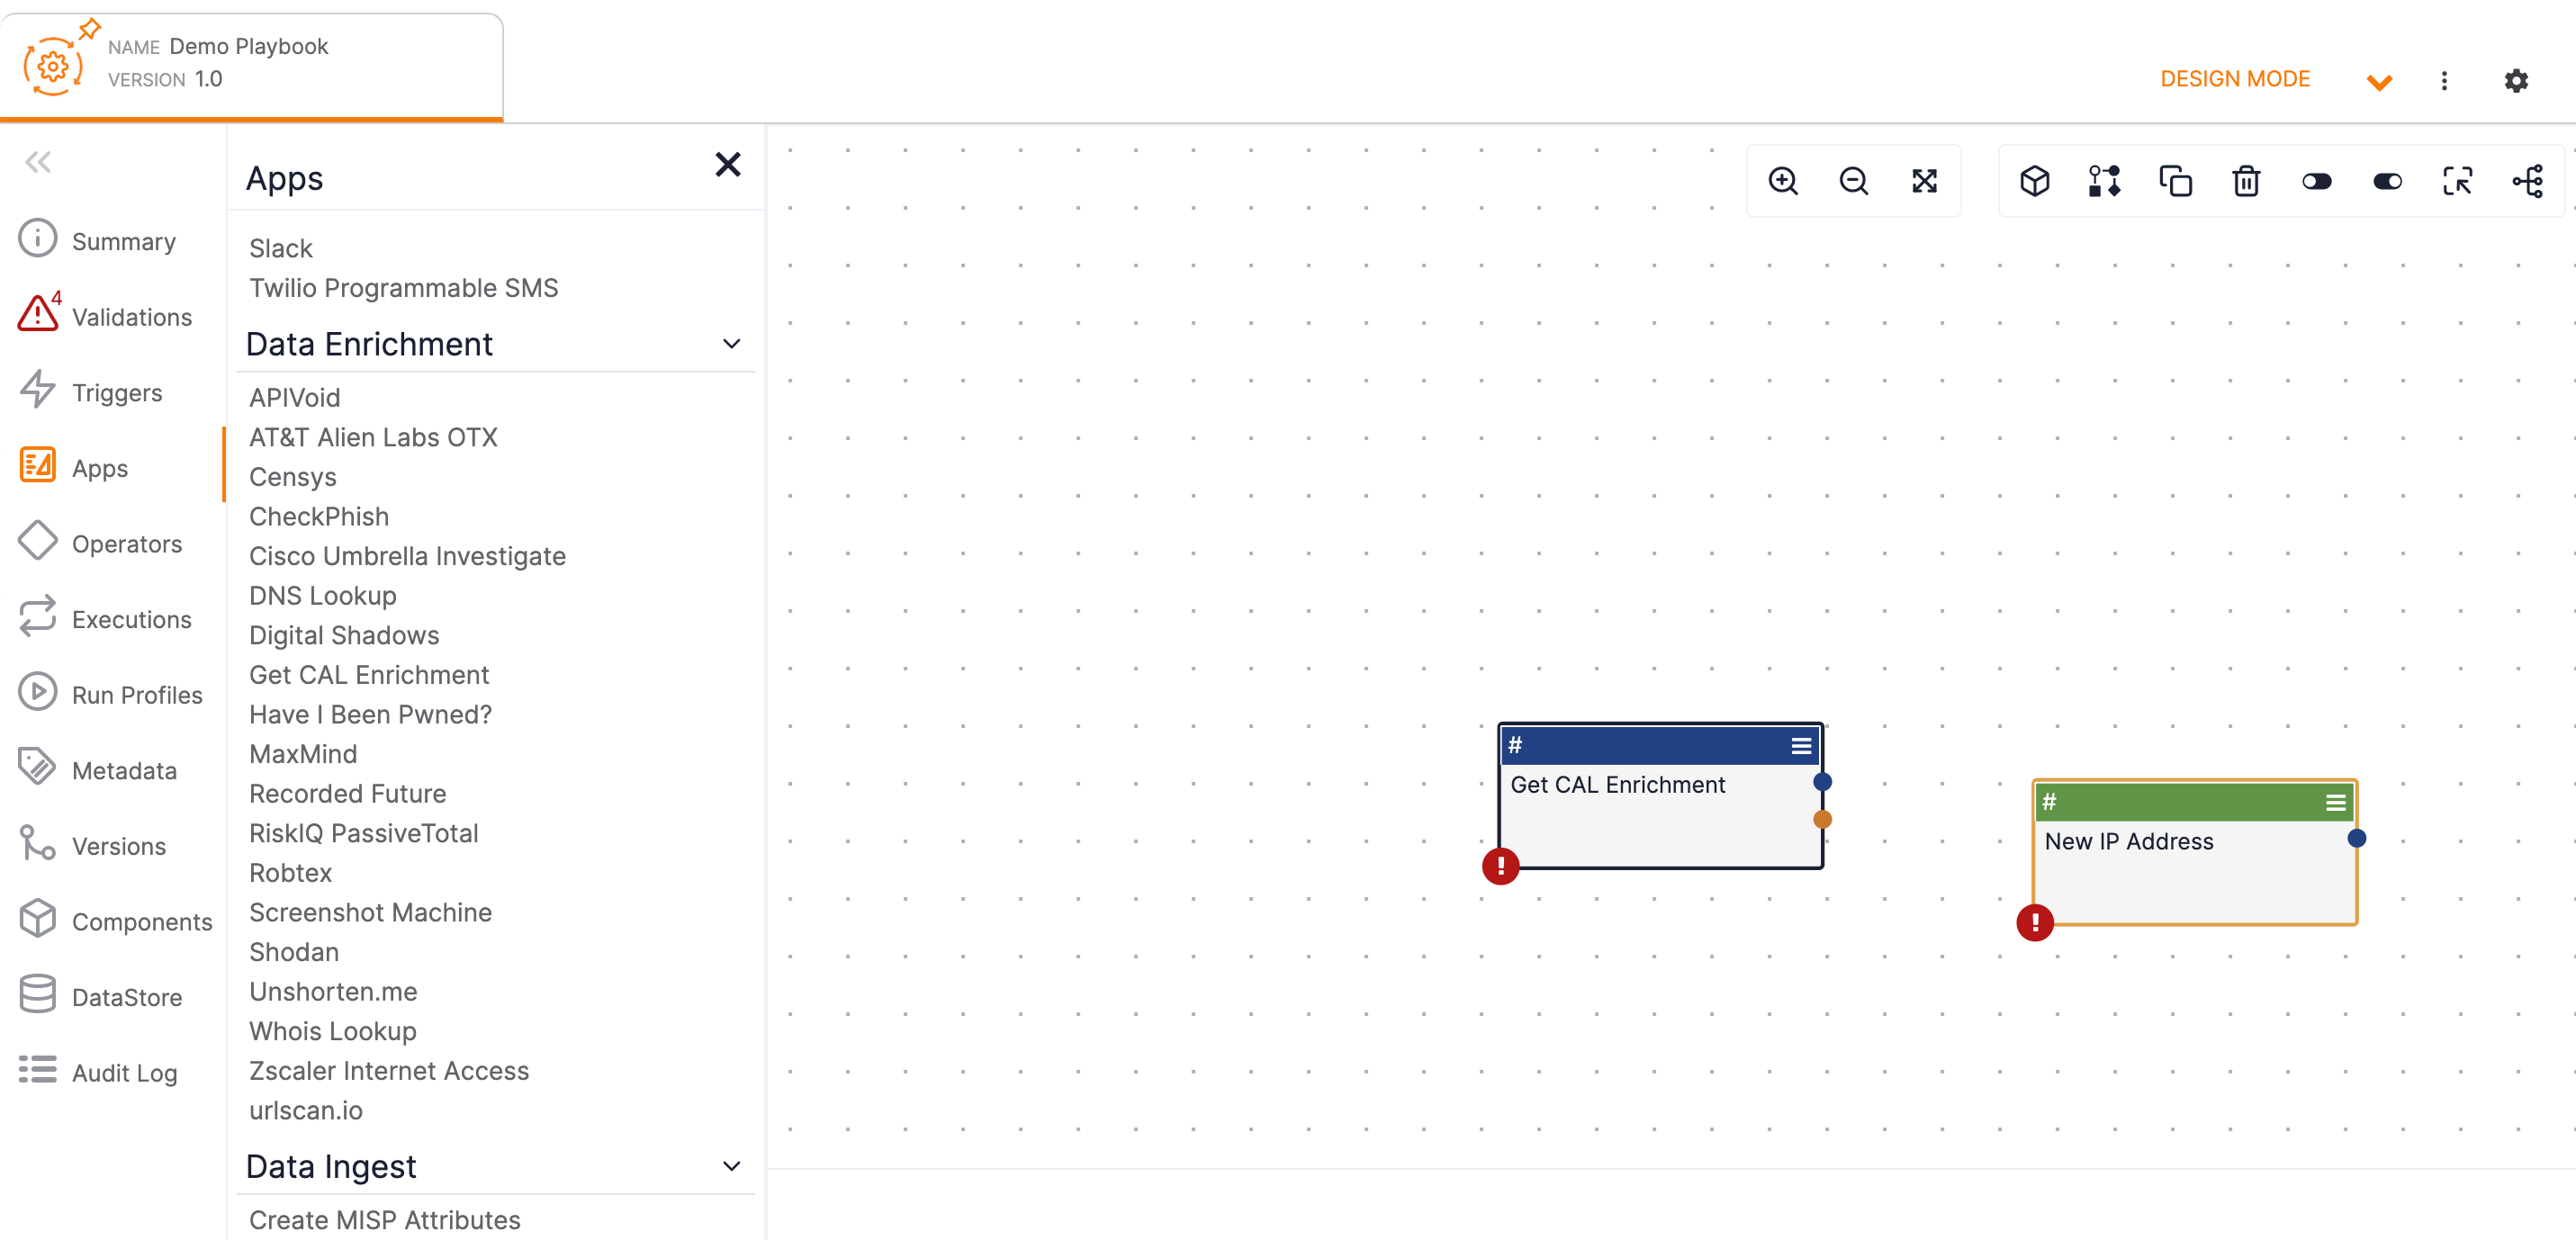 NoteThe red exclamation point icon at the lower-left corner of the App indicates that required information is missing, creating a validation error. Hover the cursor over the icon on the App to view details on the missing information. Details on validation errors can also be found in the
 Validations pane of the side navigation bar, where the icon displayed on the sidebar shows the current number of validation errors in the Playbook (e.g.,
 ).
). - If desired, move the App in the design pane, and then double-click inside the App to open the Edit App configuration pane on the left side of the screen (Figure 3).ImportantThe contents of the Edit App configuration pane differ for each App type. Click Display Documentation
 at the upper right of the Edit App pane to view information about the App, including its version, a description, input parameters, and output variables. Refer to this information when configuring the options in the Edit App pane.NoteTo get the latest version of an App, please contact your System Administrator.
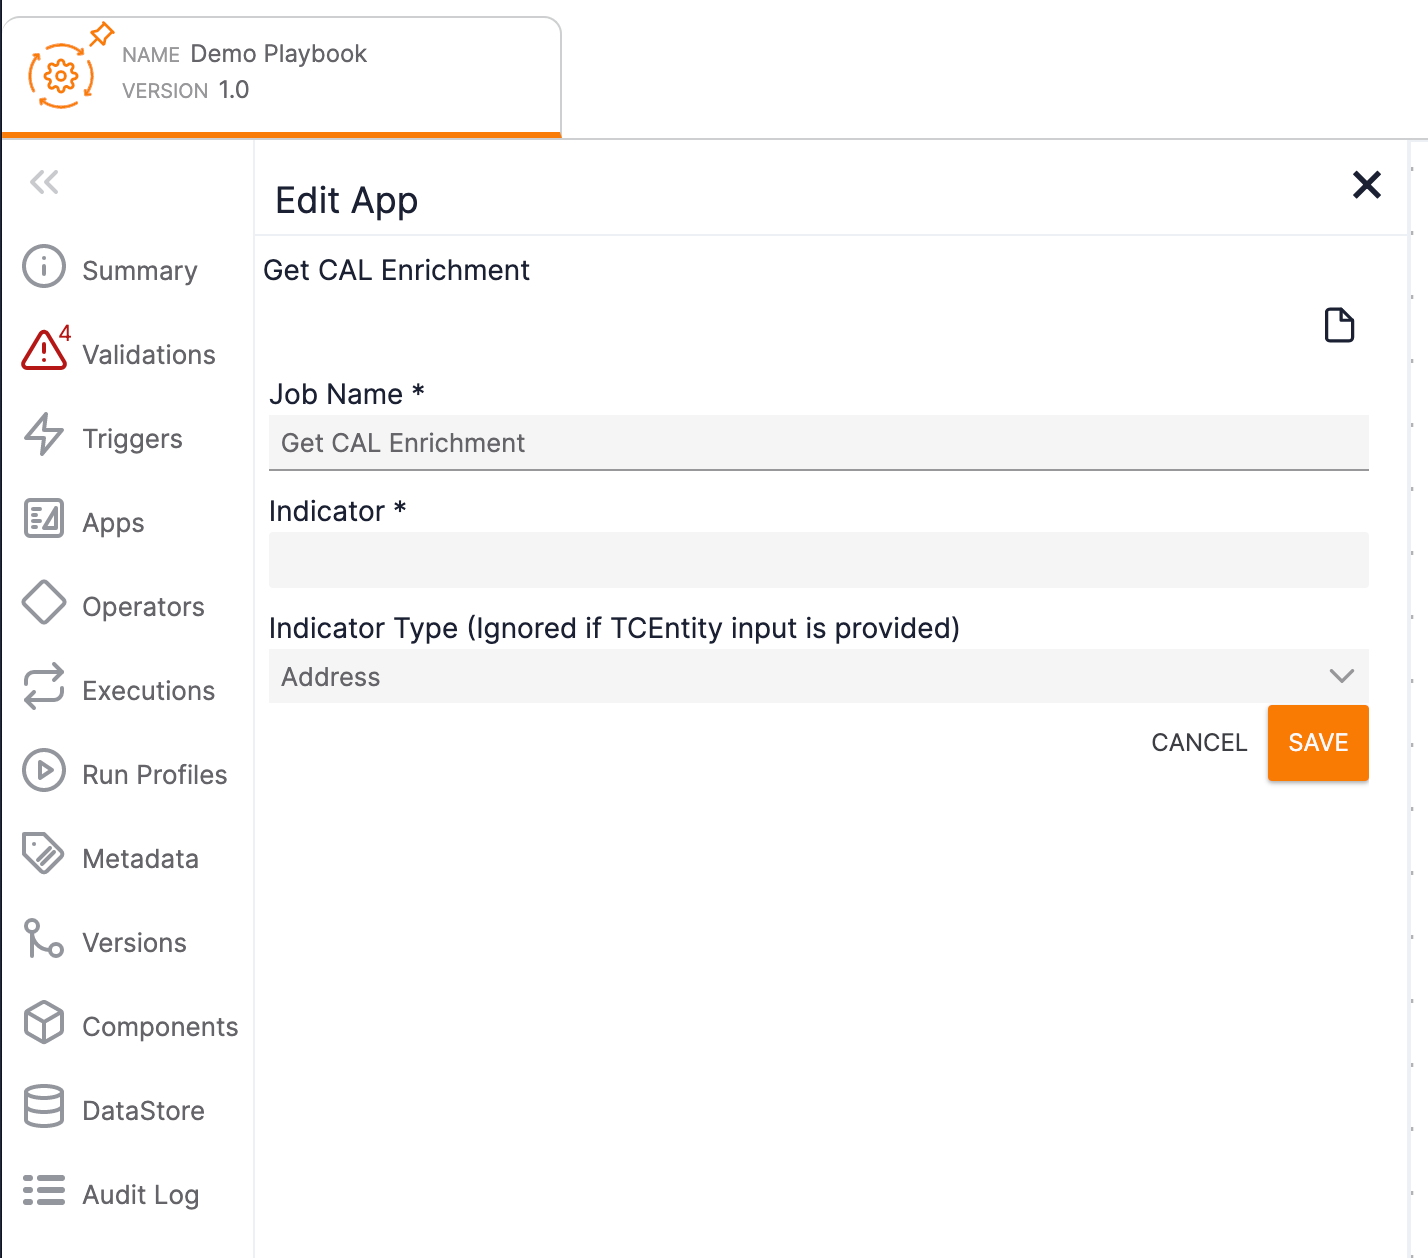
- Fill in the configuration parameters for the App, and then click the SAVE button.ImportantWhen filling in parameter fields, enter a hashtag (#) character to view and select from a list of available global variables and output variables from upstream Playbook elements. These output variables will be displayed in the list only if the App has been connected to a Playbook element in the upstream logic (that is, to a Playbook element that comes before it in the Playbook’s logical flow). As such, it is recommended that you connect Apps to upstream elements prior to their configuration. See Connecting Playbook Elements for more information.
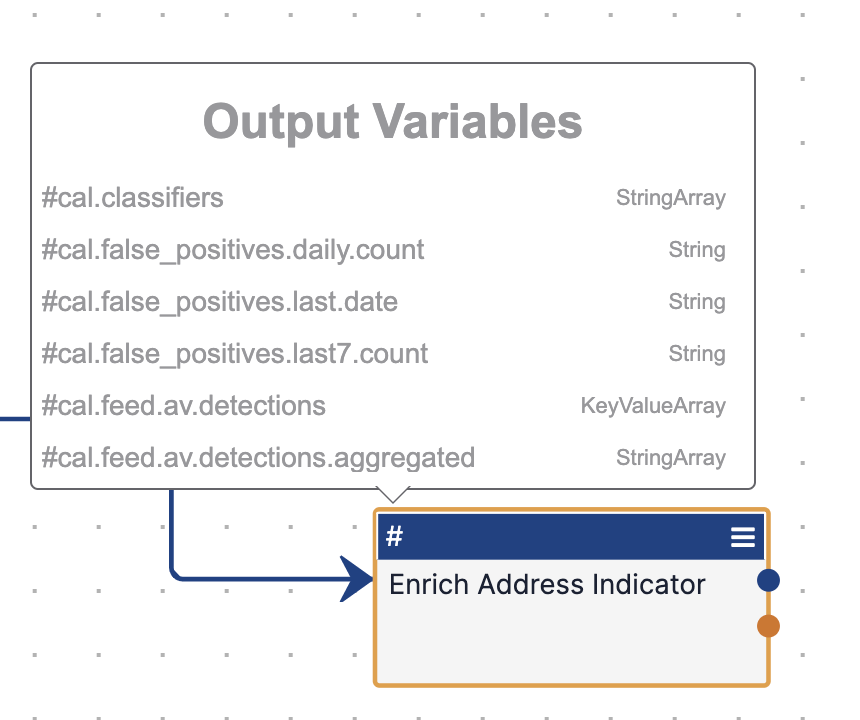
If desired, hover the cursor over the hashtag at the upper-left corner of the App box in the design pane to view a scrollable list of available output variables (Figure 4). Output variables are values that a Trigger, App, or Operator can send to other Apps and Operators. They can also be used in an Attribute, the body of an email, etc.
Click the Menu icon at the upper-right corner of the App box to view a dropdown with some or all of the following options:
- Edit: Select this option to edit the App.
- Log: Select this option to set or change the log level for the App.NoteWhen setting or changing the log level, if you choose a level other than Playbook Default and select the Apply to all ‘downstream’ apps checkbox, then a Log Level
 icon will be displayed on the boxes for the App and all its downstream Apps and Operators, indicating that the log level is the same for all Playbook elements with the icon. Hover over the icon to view the log level.
 - Environment: Select this option to choose an Environment Server on which to execute the App. Once you have chosen an Environment Server, an Environment
 icon will be displayed at the upper left of the App box.NoteThis option will be available only if your System Administrator has configured the App for remote execution,
 - Disable: Select this option to disable the App. When an App is disabled, it will be grayed out, and the Disable option will be replaced by an Enable option.
- Run As: Select this option to allow the App to be run by a selected user rather than the user running the Playbook. This option is available only for some Apps, such as Report False Positive and Report Observation.
- Clone: Select this option to clone the App.
- Delete: Select this option to delete the App.
ThreatConnect® is a registered trademark of ThreatConnect, Inc.
20110-23 v.03.A