Overview
Settings for your ThreatConnect® user account can be configured via the My Profile screen.
Before You Start
| Minimum Role(s) | System and Organization role of Read Only User |
|---|---|
| Prerequisites | None |
Overview Tab
The Overview tab of the My Profile screen provides basic information on your ThreatConnect account and settings.
On the top navigation bar, hover the cursor over Settings  and select My Profile. The Overview tab of the My Profile screen will be displayed (Figure 1).
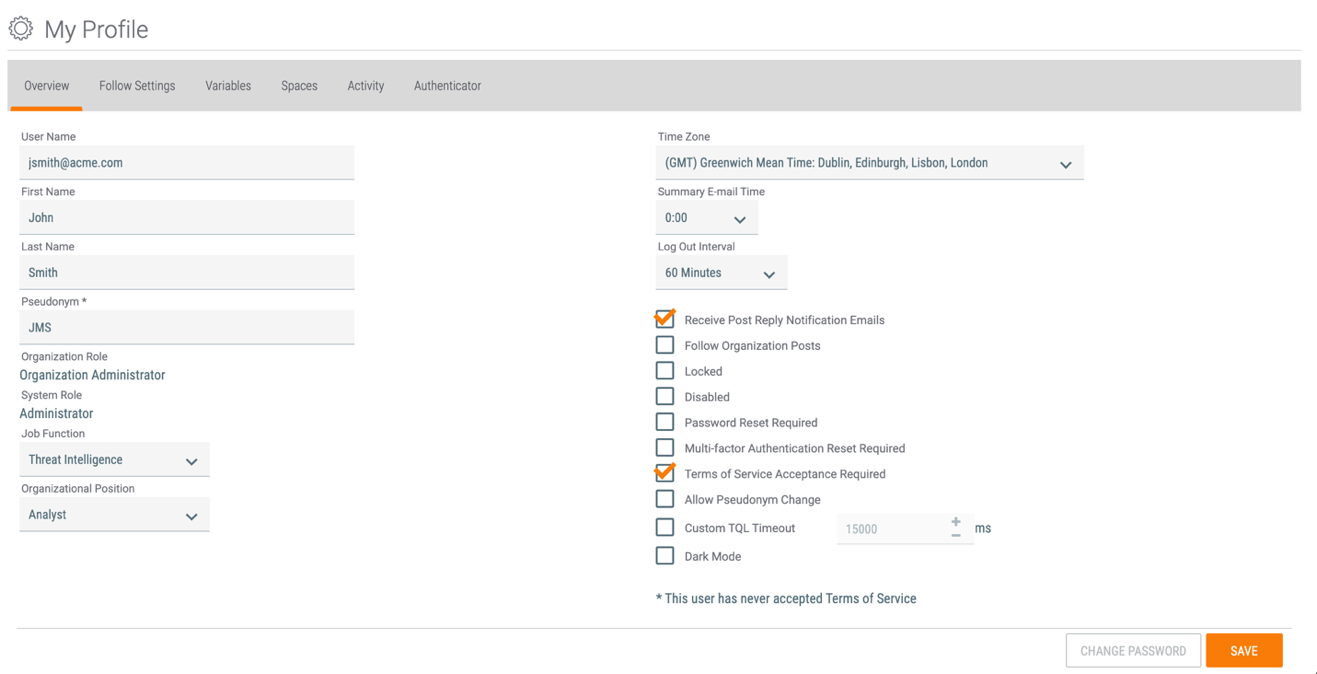
- User Name: The user name for your account.NoteOnly users with a System role of Administrator or Operations Administrator may edit their User Name.
- First Name: The first name for your user account.
- Last Name: The last name for your user account.
- Pseudonym: Your pseudonym.NoteOnly users with a System role of Administrator or Operations Administrator may edit their Pseudonym.
- Organization Role: Your role within your ThreatConnect Organization, which determines the permissions you have in the Organization.
- System Role: Your role within the System, which determines the System-level permissions you have on your instance of ThreatConnect.
- Job Function: Your functional department within your organization or company.
- Organizational Position: Your position or title within your organization or company.
- Time Zone: The time zone you are in.
- Summary E-Mail Time: The time at which ThreatConnect will send a notification summary email to you.NoteNotification priority levels for individual Indicators and Groups can be set on the Details screen for the object. The definitions of the priority levels are configured in the Notifications Center.
- Log Out Interval: The amount of time for which your account can remain inactive before you are automatically logged out.
- Receive Post Reply Notification Emails: Select this checkbox to receive notifications when other users reply to a comment you have posted.
- Follow Organization Posts: Select this checkbox to follow your Organization and receive alerts when posts are made in it. When the checkbox is selected, a dropdown menu will be displayed next to it for setting the notification priority for these alerts. Notification priority levels are configured in the Notifications Center.
- Locked / Disabled / Password Reset Required / Multi-factor Authentication Reset Required / Terms of Service Acceptance Required / Allow Pseudonym Change: These checkboxes are available only to users with a System role of Administrator or Operations Administrator. While you may use these checkboxes to modify your own account, doing so is not recommended, as it may result in losing access to your account.NoteThe Multi-factor Authentication Reset Required checkbox is available only to users with a System role of Administrator.
- Custom TQL Timeout: Select this checkbox to override the system-level ThreatConnect Query Language (TQL)query timeout for your account. In the field to the right of the checkbox, enter the maximum amount of time, in milliseconds, that TQL queries you make will be allowed to run before timing out.NoteThe Custom TQL Timeout checkbox is available only to users with a System role of Administrator or Operations Administrator.
- Dark Mode: Select this checkbox to set the current user interface to a dark theme.
- CHANGE PASSWORD: Click this button to change the password for your account.
- SAVE: Click this button to save changes made on the Overview tab.
Follow Settings Tab
The Follow Settings tab of the My Profile screen lists the Communities, Sources, Groups, Indicators, Tags, and Tracks you are following and provides options to unfollow them.
On the top navigation bar, hover the cursor over Settings  and select My Profile. Click the Follow Settings tab (Figure 2).
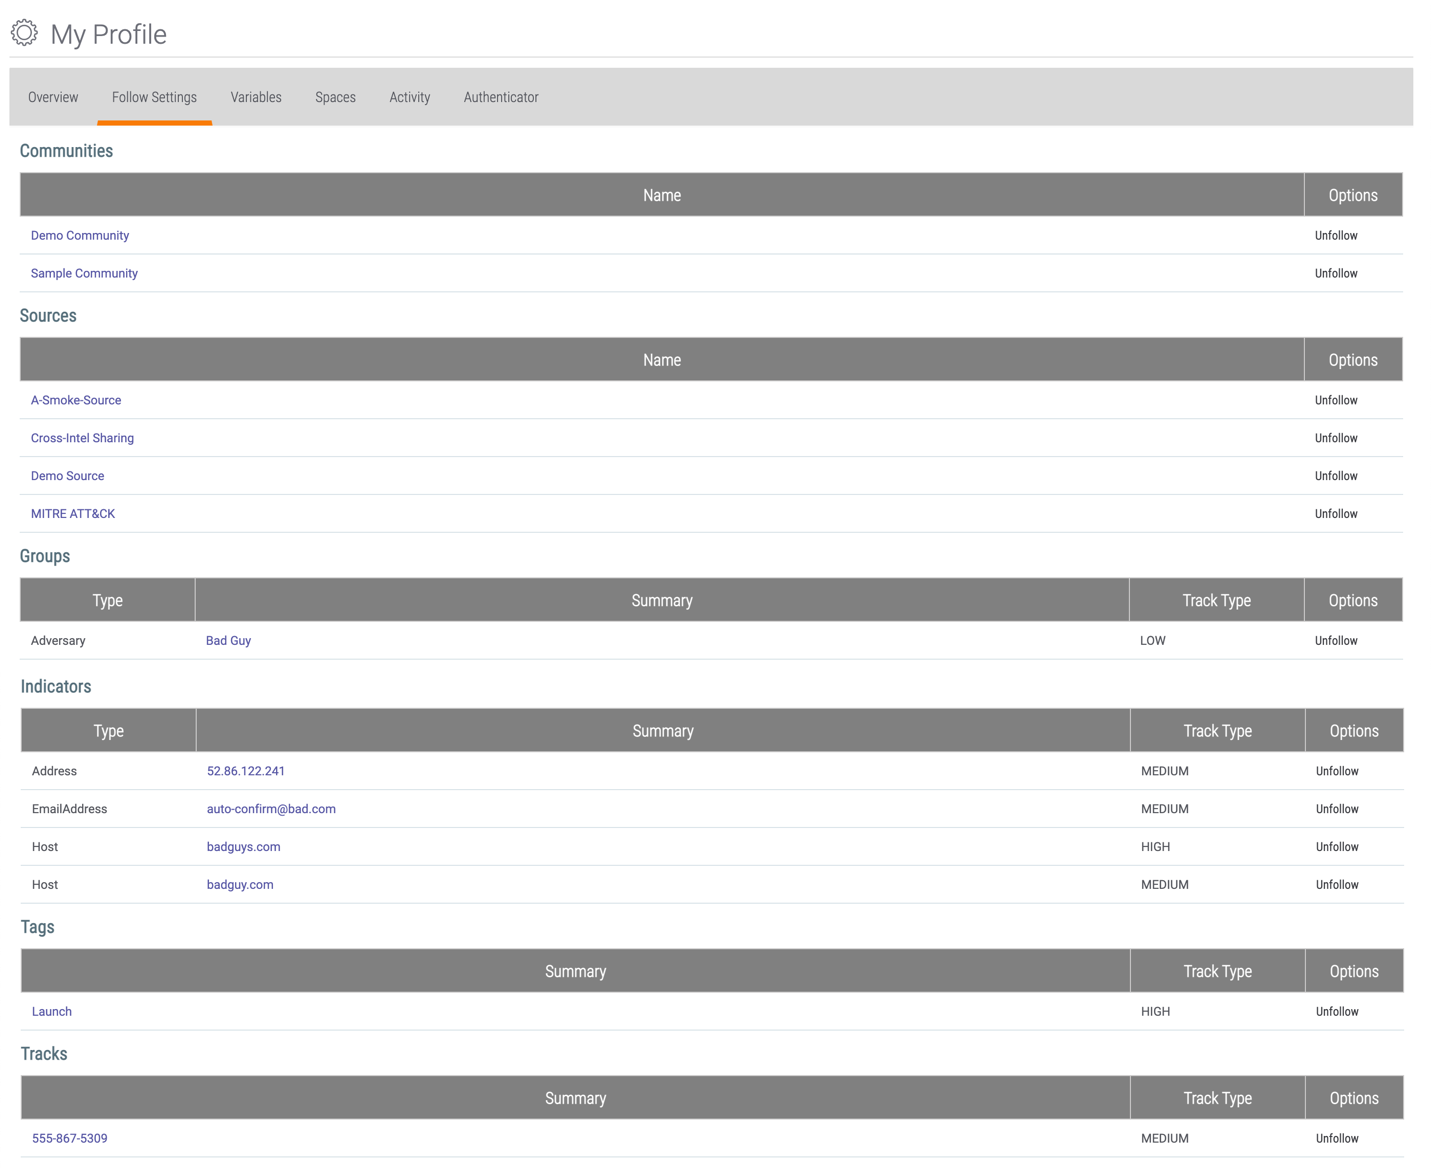
- Click on an item (e.g., Community, Source, Group, etc.) to view its profile page or Details screen.
- Click the Unfollow link for an item to unfollow it. The item will immediately be unfollowed and removed from the screen without confirmation.
- To change the Track Type (i.e., notification priority) for a Group, Indicator, Tag, or Track, navigate to the Overview tab of the Details screen for the item and select a different Notification Priority at the upper right of the screen.
Variables Tab
The Variables tab of the My Profile screen lists all variables you have configured and provides options for editing and deleting existing variables and creating new variables. These variables, which are specific to your ThreatConnect account, can be used to populate certain fields, such as the ThreatConnect API Access ID or Secret Key, so that you may easily select them from a dropdown menu rather than having to type out their values.
On the top navigation bar, hover the cursor over Settings  and select My Profile. Click the Variables tab (Figure 3).
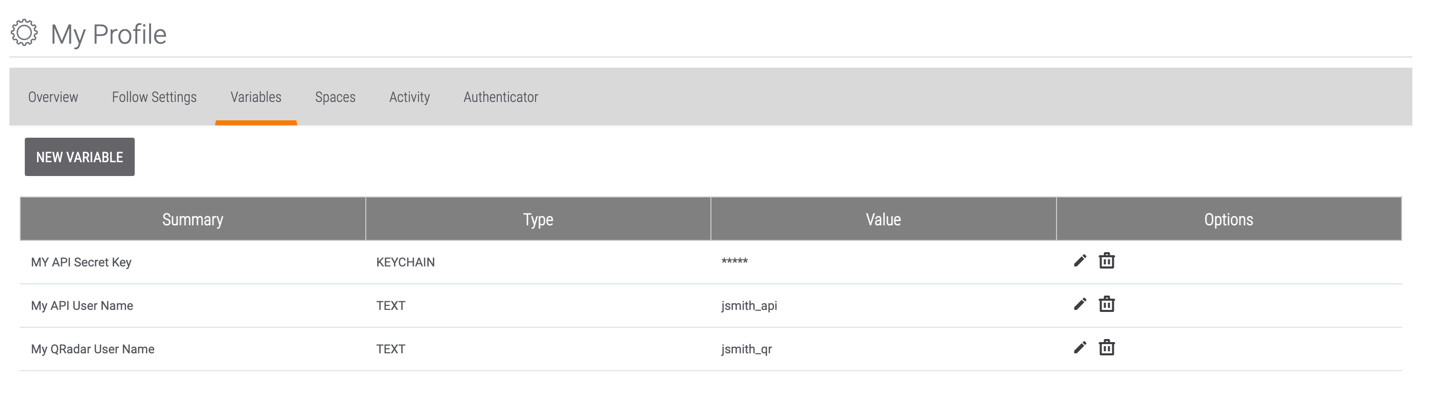
- Summary: The name of the variable.
- Type: The type of the variable (KEYCHAIN, TEXT, or FILE). Keychain variables are used to store passwords and other secret data. Text variables are used to hold text values (e.g., user names, URLs). File variables are used to store files (e.g., certificates, private keys).
- Value: The value of the variable. The values for keychain variables are not displayed in order to maintain their integrity.
- Options: Click Edit
 to edit a variable. Click Delete
 to delete a variable.NoteYou may not edit a variable’s Summary. To give a variable a different Summary, delete the variable and create a new one with the new Summary.
To add a new variable, click the NEW VARIABLE button. The Property window will be displayed (Figure 4).
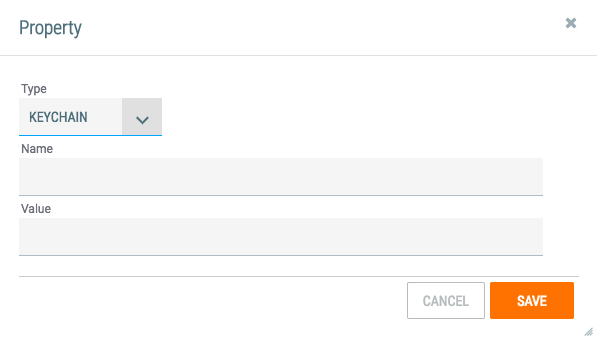
- Type: Select a variable type (KEYCHAIN, TEXT, or FILE). Keychain variables are used to store passwords and other secret data. Text variables are used to hold text values (e.g., user names, URLs). File variables are used to store files (e.g., certificates, private keys).
- Name: Enter a name for the variable.
- Value: Enter the value for a keychain or text variable. For a file, use the + SELECT FILE button to browse to and select a file.
- Click the SAVE button.
Spaces Tab
The Spaces tab of the My Profile screen lists all Spaces Apps you have configured and, depending on the Space type, provides options for editing and removing them.
On the top navigation bar, hover the cursor over Settings  and select My Profile. Click the Spaces tab (Figure 5).
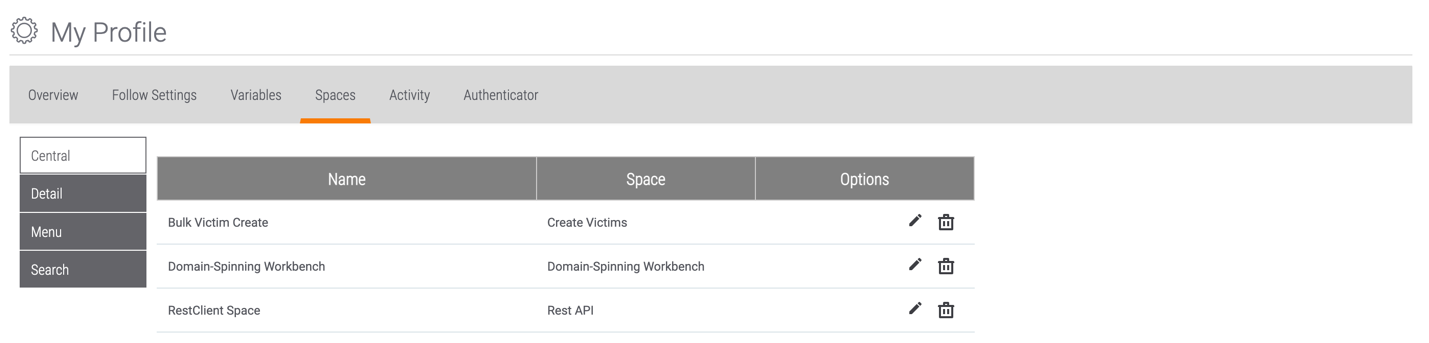
- Central: This tab provides a table listing all Apps you have created under the Spacesoption on the top navigation bar.
- Name: The name you have given to the Spaces App.
- Space: The name of the Space.
- Options: Click Edit
 to edit the App’s configuration. Click Delete
 to remove the Spaces App.
- Detail: This tab provides a table listing all Contextually Aware Spaces Appsyou have configured.
- Name: The name of the App.
- Space: The type of object for which the App is configured.
- Options: Click Edit
 to edit the App’s configuration. Click Delete
 to remove the Spaces App.
- Menu: This tab provides a table listing all Menu Spacesyou have created.
- Name: The name you have given to the Menu Space.
- Options: Click Delete
 to remove the Menu Space.
- Search: This tab is not used anymore and provides an empty table.
Activity Tab
The Activity tab of the My Profile screen displays a summary of your activity in your Organization and in the Communities and Sources to which you have access.
On the top navigation bar, hover the cursor over Settings  and select My Profile. Click the Activity tab (Figure 6).
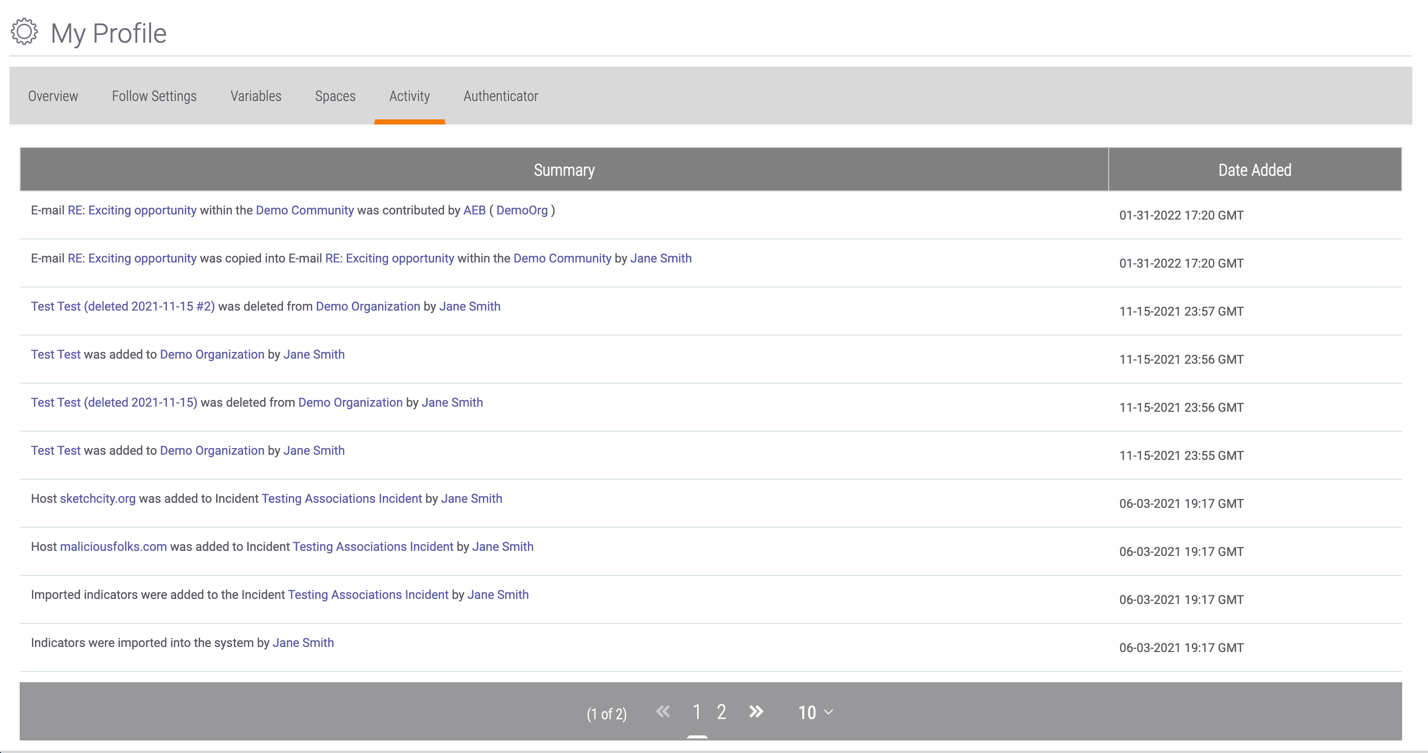
- Summary: A description of an action you took in an Organization, Community, or Source.
- Date Added: The date and time at which that action was taken.
Authenticator Tab
The Authenticator tab of the My Profile screen allows you to enable and disable multi-factor authentication (MFA) for your ThreatConnect account.
On the top navigation bar, hover the cursor over Settings  and select My Profile. Click the Authenticator tab (Figure 7).
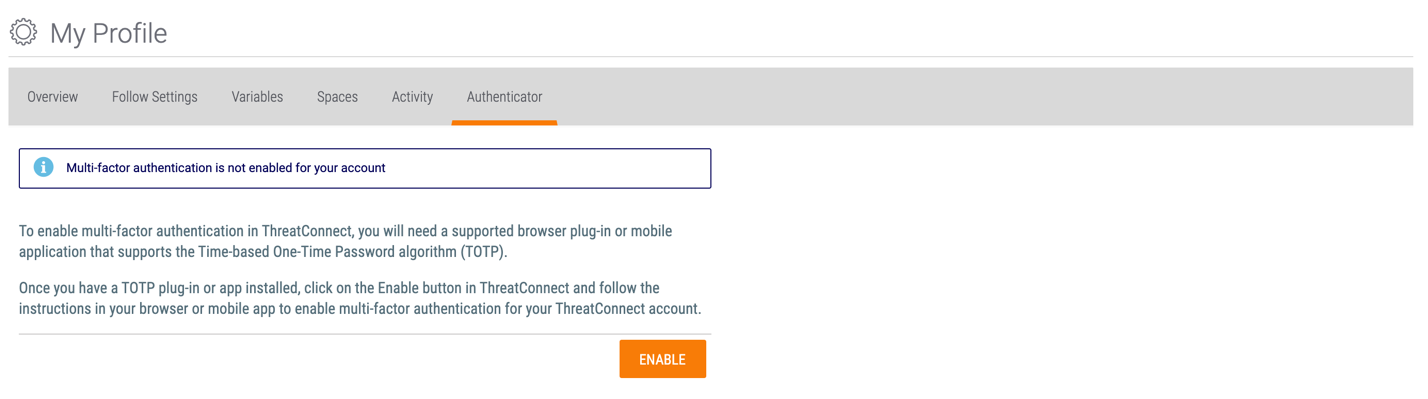
To enable MFA, click the ENABLE button. The Setup multi-factor authentication window will be displayed (Figure 8).
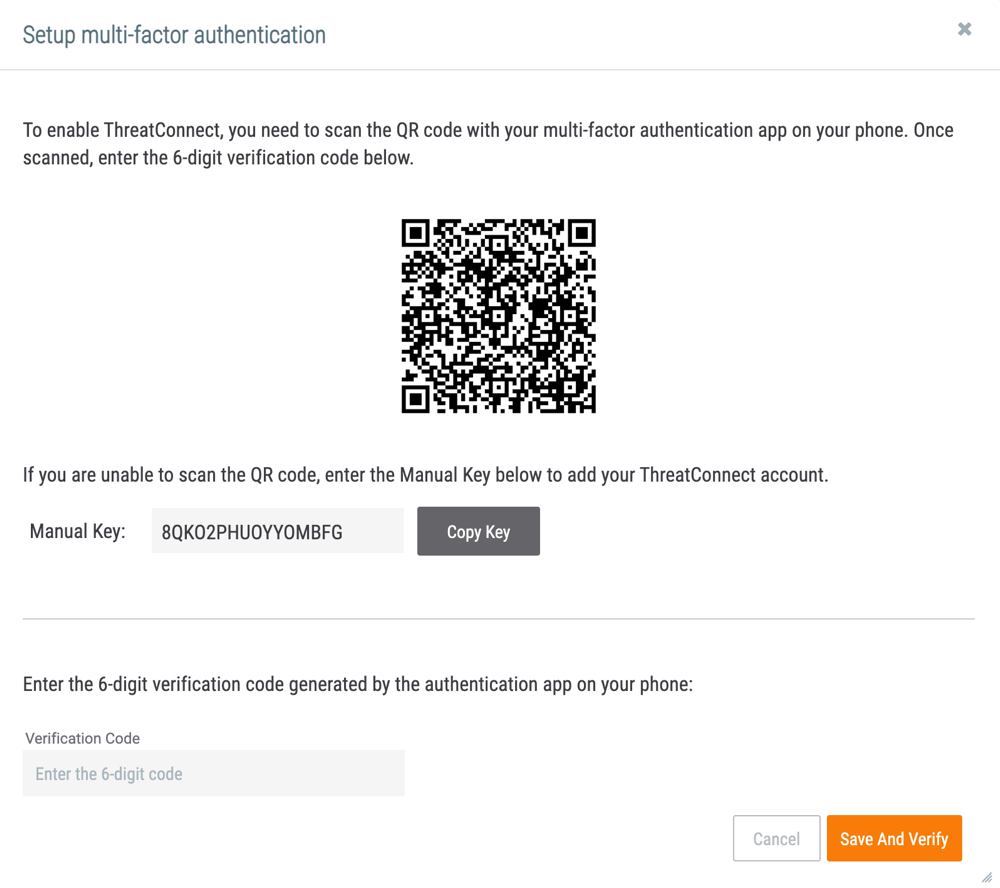
- Scan the QR code with an authenticator app (e.g., Google Authenticator™) or manually enter the generated key into the authenticator app.
- Enter the Verification Code generated by the authenticator app.
- Click the Save and Verify button.
The Authenticator tab will display a message confirming that MFA has been enabled for your account (Figure 9).
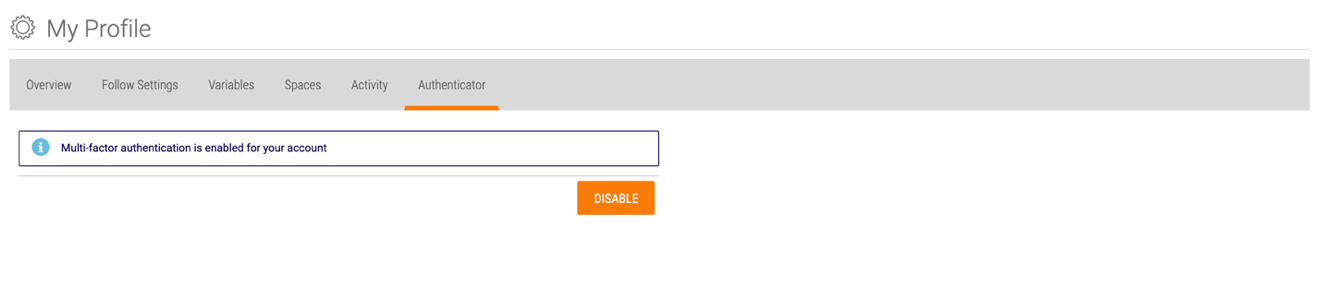
To disable MFA, click the DISABLE button. The Remove Authenticator window will be displayed. Click the YES button to disable MFA on your account.
ThreatConnect® is a registered trademark of ThreatConnect, Inc.
Google Authenticator™ is a trademark of Google LLC.
20040-01 v.16.D