Overview
When working with a Group in a Community or Source in ThreatConnect®, you can copy the Group to your Organization if data copying is allowed in the Community or Source. This action is similar to contributing a Group to a Community or Source, except that it creates a new Group in your Organization (with Tags, Attributes, and associated Groups and Indicators, if desired) instead of creating a Group in a Community or Source. Any changes made to the newly copied Group will not affect the original Group.
A common use of this function is to update a Group with organizationally defined Attributes, Tags, and Indicators. The Group in your Organization can then be contributed to other Communities and Sources.
Before You Start
| Minimum Role(s) |
|
|---|---|
| Prerequisites |
|
Allowing Data Copy For a Community or Source
Follow these steps to enable the Allow Data Copy setting for a Community or Source and its members:
- Log into ThreatConnect with a Director account for the desired Community or Source.
- On the top navigation bar, click Posts to display the Home view of the Posts screen.
- Select a Community or Source in the My ThreatConnect card to display its Posts screen.
- Click Info
 at the top right of the Community or Source card on the Posts screen to display the Information tab of the Community Info (Figure 1) or Source Info screen.
- Select the Allow Data Copy checkbox on the left side of the screen.
- Select the checkbox in the Allow Data Copy column of the Community Members or Source Members table for your Organization.
Copying a Group to an Organization
Follow these steps to copy a Group in one of your Communities or Sources to your Organization.
- Navigate to the legacy Details screen for a Group in one of your Communities or Sources.
- Click the Copy To My Org button in the legacy Details screen header. The Initial tab of the Copy Datawindow will be displayed (Figure 2).ImportantFor the Copy To My Org button to be displayed on the legacy Details screen, the Allow Data Copy setting must be enabled for the Community or Source to which the Group belongs, as well as for your Organization. See the “Allowing Data Copy For a Community or Source” section for more information.
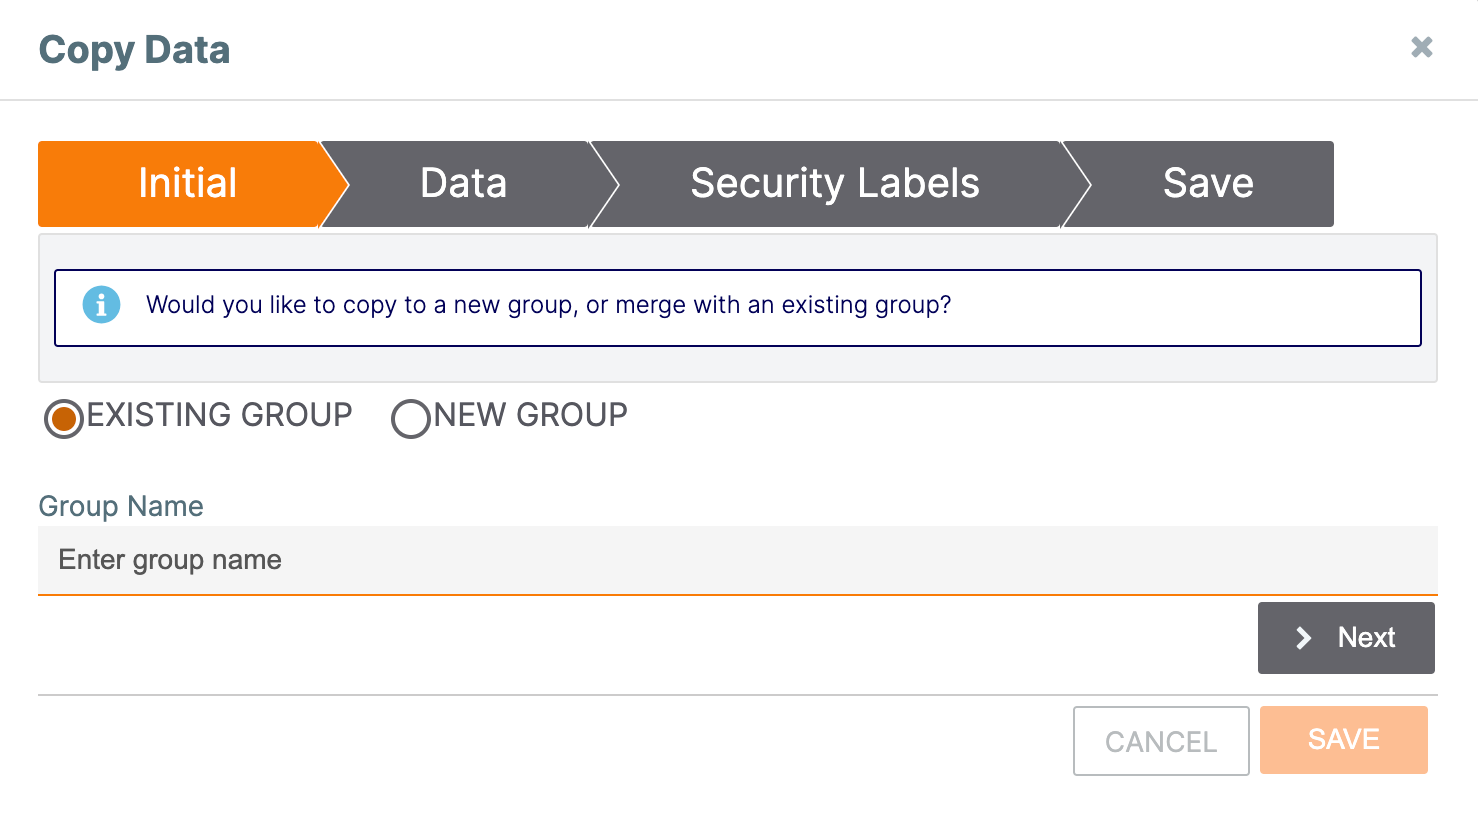
- EXISTING GROUP: Select this option to merge the copied Group with an existing Group in your Organization. Then enter the name of the existing Group in the Group Name text box, which will auto-populate with available Groups after you enter at least three characters.
- NEW GROUP: Select this option to create a new Group in your Organization. The name of the original Group will auto-populate in the Group Name text box. Edit this name, if desired.
- Click the Next button.
- The Data tab of the Copy Data window will be displayed (Figure 3).
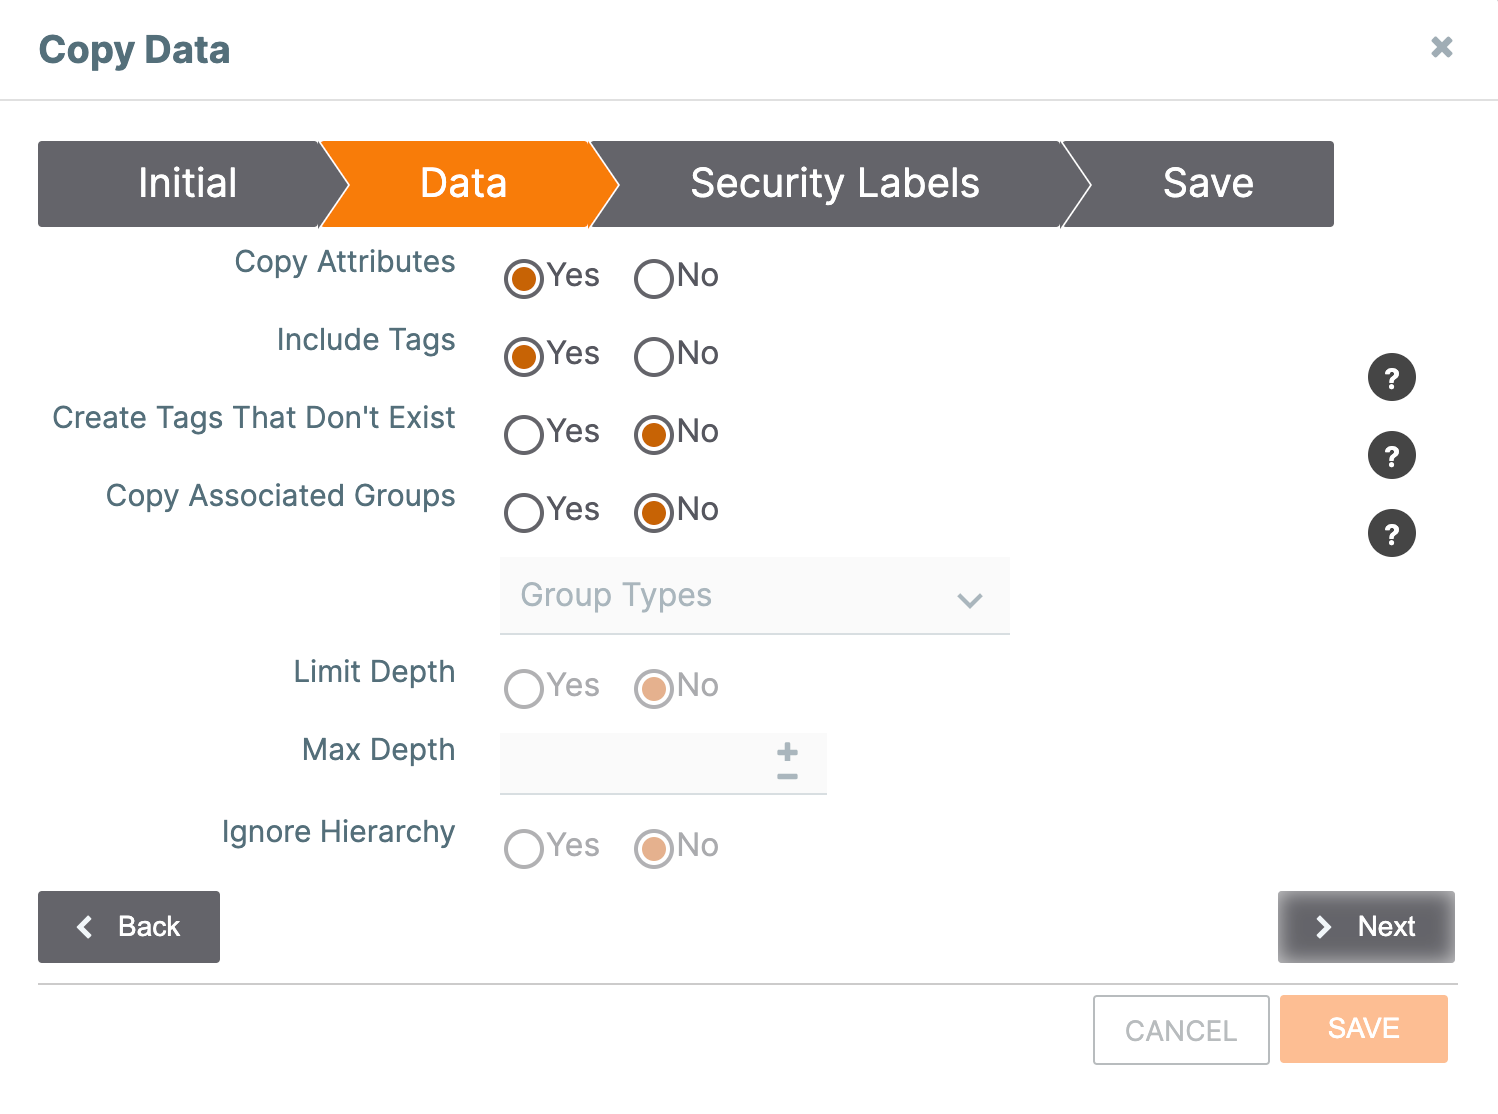
- Copy Attributes: Specify whether to copy the original Group's Attributes to the copied Group.
- Include Tags: Specify whether to apply the original Group's Tags to the copied Group.
- Create Tags That Don't Exist: Specify whether to create Tags applied to the original Group that do not already exist in your Organization and apply them to the copied Group. This option is available only if you selected Yes for the Include Tags option.
- Copy Associated Groups: Specify whether to copy the original Group's associated Groups to your Organization and associate them to the copied Group. If you select Yes, you must select the type(s) of associated Groups to copy from the Group Types dropdown.ImportantThe Task Group cannot be copied as an associated Group because this Group type may contain sensitive information and is specific to users in a given Organization.
- Limit Depth: Specify whether to set a limit for the number of association levels to copy when copying the Group to your Organization. This option is available only if you selected Yes for the Copy Associated Groups option.WarningIn order to avoid lag times and overloading the system, it is recommended to select a Max Depth of no more than 2 unless you have a controlled , isolated data set.
- Max Depth: Enter the maximum number of association levels to copy when copying the Group to your Organization (e.g., an entry of 1 indicates that only the primary Group and Groups directly associated to it will be copied, while an entry of 2 indicates that the primary Group, Groups directly associated to it, and Groups directly associated to those associated Groups will be copied). This option is available only if you selected Yes for the Copy Associated Groups and Limit Depth options.
- Ignore Hierarchy: Specify whether to ignore Group hierarchy rules when copying associated Groups to your Organization. If you select Yes for this option, all associated Groups, up to the maximum association level (i.e., the value entered for Max Depth), will be copied to your Organization, regardless of their position in the Group hierarchy. This option is available only if you selected Yes for the Copy Associated Groups and Limit Depth options.
- Click the Next button.
- The Security Labels tab of the Copy Data window will be displayed (Figure 4).
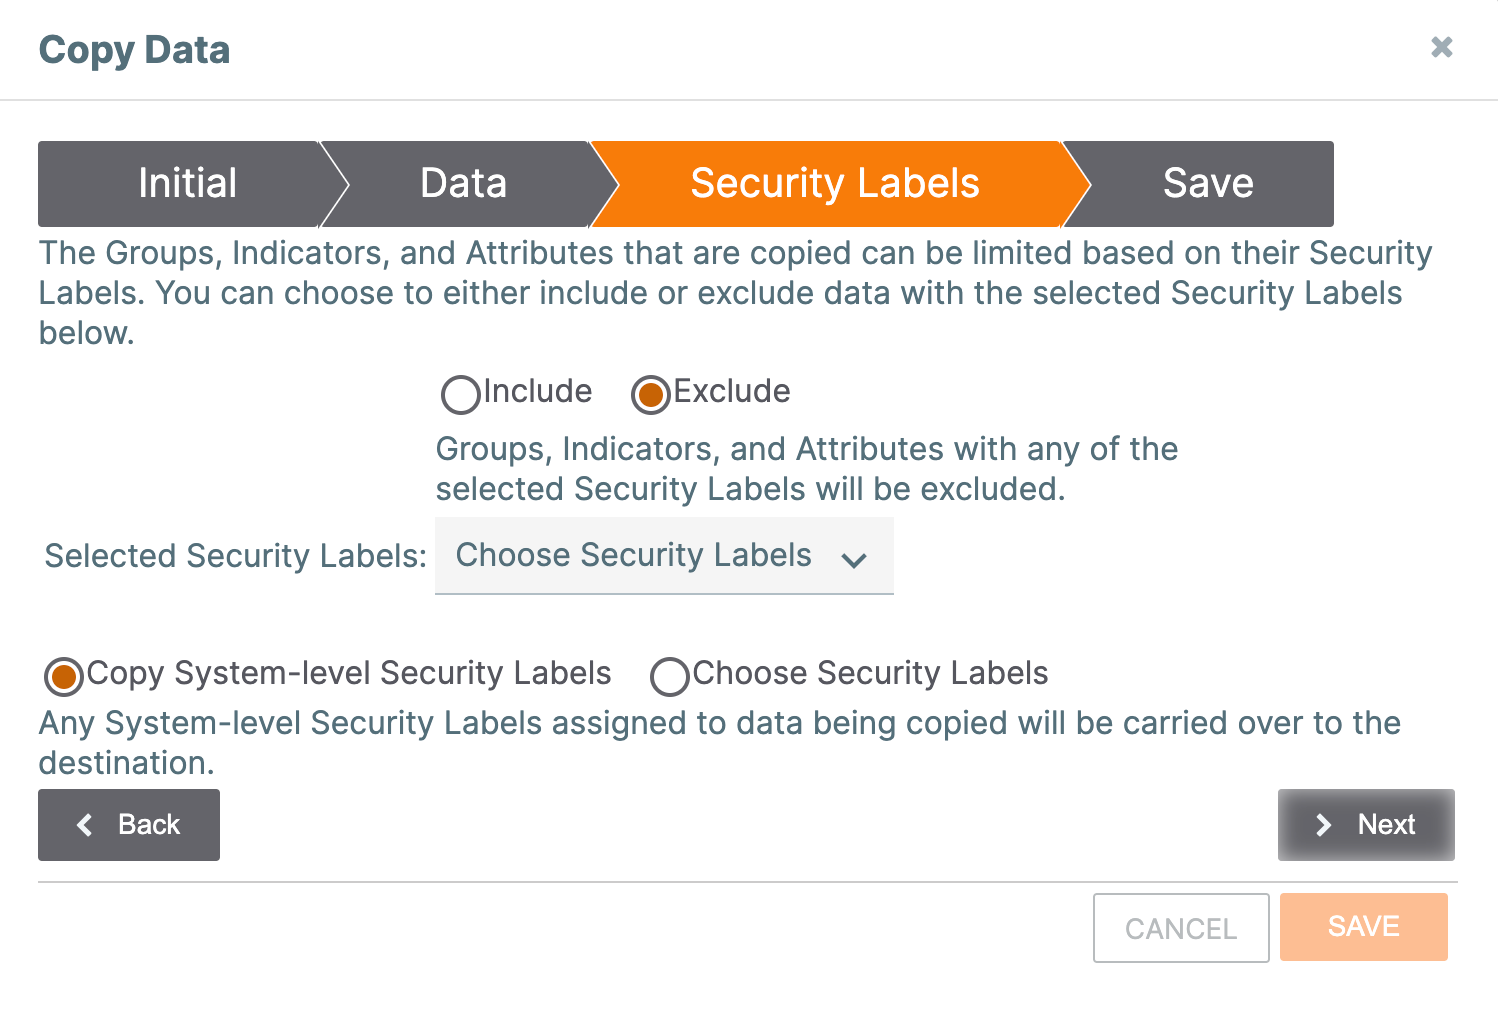
- Include and Exclude: Specify whether to include or exclude associated Groups, associated Indicators, and Attributes with one or more of the Security Labels selected from the Choose Security Labels dropdown applied to them. By default, Exclude is selected.
- Copy System-level Security Labels: Select this option to copy only System-level Security Labels applied to the Groups, Indicators, and Attributes to be copied. By default, this option is selected.
- Choose Security Labels to apply to copied data: Select this option to specify the Security Labels to apply to the Groups, Indicators, and Attributes to be copied. After you select this option, three dropdowns will be displayed: Indicator Security Labels, Group Security Labels, and Attribute Security Labels. Use these dropdowns to select the Security Labels in the Community or Source to apply to the corresponding data type.
- Click the Next button.
- The Save tab of the Copy Data window will be displayed (Figure 5).
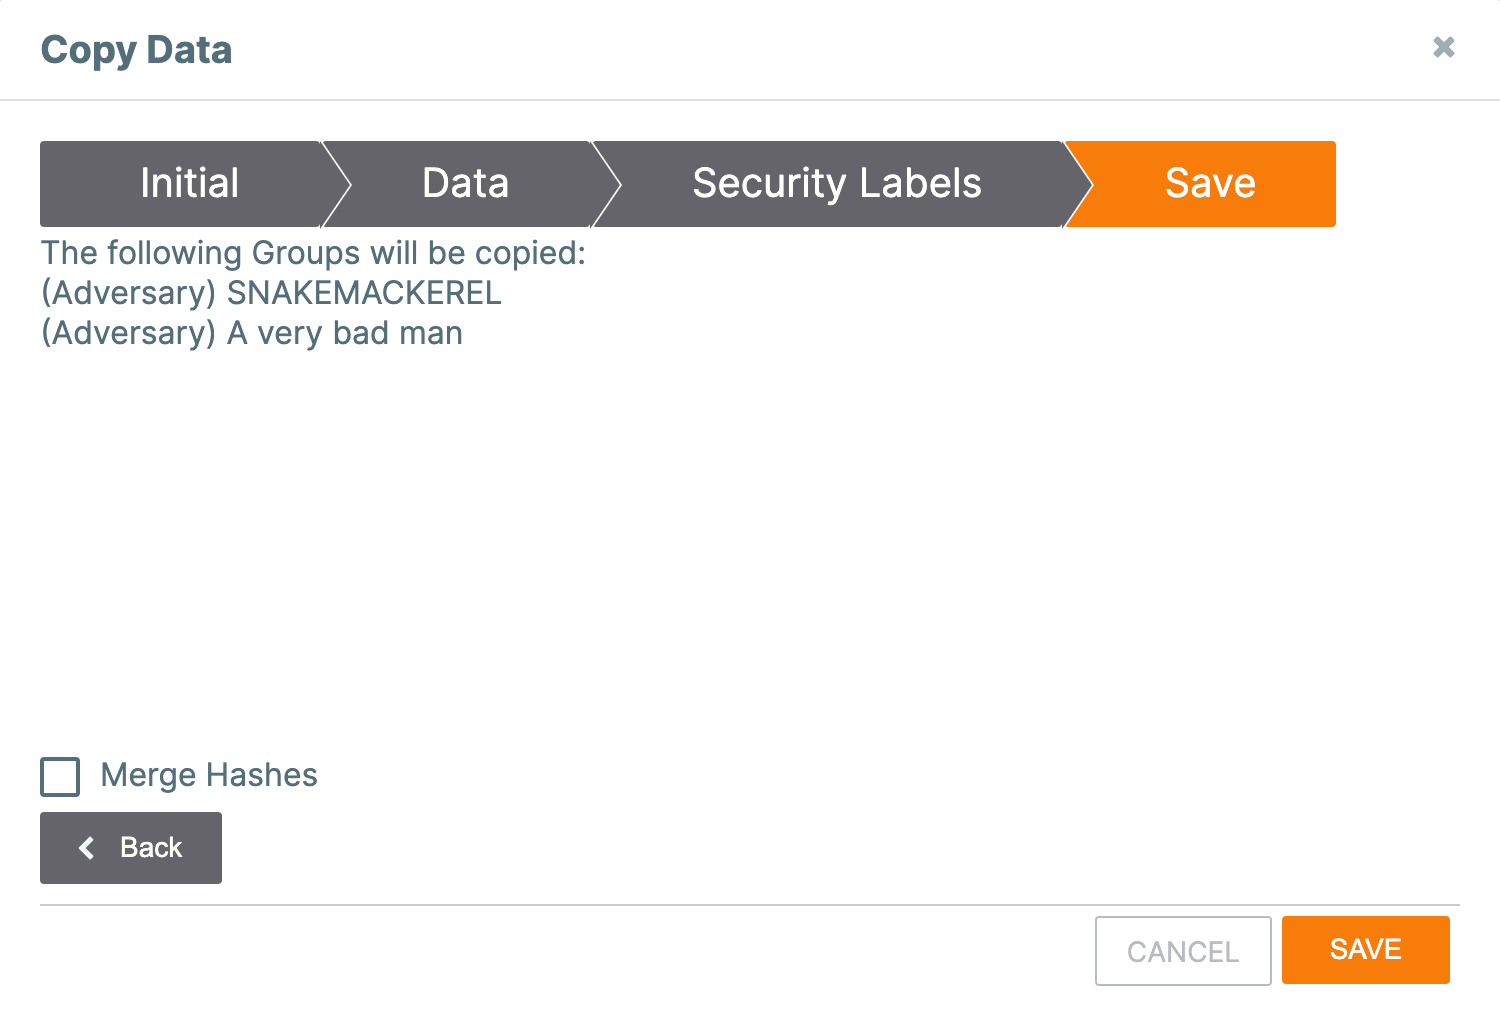
- Review the list of Groups that will be copied into your Organization.WarningIn order to avoid lag times and overloading the system, it is recommended to copy no more than 20 Groups, with a hard limit of 300 Groups.
- Merge Hashes: If copying a Group with an associated File Indicator that exists in the Community and your Organization, select this checkbox to synchronize the file hashes between the two File Indicators. If you do not select this checkbox and the file hashes between the two Indicators are not synchronized, an error message will be displayed directing you to either correct the discrepancy manually (by canceling out of the Copy Data window, adding the missing file hash to the File Indicator in your Organization, and then restarting the copying process) or select the Merge Hashes checkbox to correct it automatically (by clicking the Back button, clicking the Next button on the Security Labels screen, and then selecting the Merge Hashes checkbox, which will no longer be grayed out). If the File Indicators contain mismatched hashes that cannot be merged, or if the File Indicator in the Community and the File Indicator in your Organization contain duplicated hashes, the copying process will fail and you will be prompted to correct the discrepancy manually.
- Click the SAVE button to complete the copying process.
- Review the list of Groups that will be copied into your Organization.
ThreatConnect® is a registered trademark of ThreatConnect, Inc.
20032-01 v.09.B