Contextually Aware Spaces
- 07 Jun 2024
- 3 Minutes to read
-
Print
-
DarkLight
-
PDF
Contextually Aware Spaces
- Updated on 07 Jun 2024
- 3 Minutes to read
-
Print
-
DarkLight
-
PDF
Article summary
Did you find this summary helpful?
Thank you for your feedback!
Overview
Important
Spaces Apps are no longer supported by ThreatConnect, but legacy Spaces Apps may be used on a case-by-case basis.
Contextually Aware Spaces in ThreatConnect® are analytic panes that run and display multiple Apps for use with a particular Indicator or Group in a single, convenient place. They are a powerful enrichment tool to automate and improve the way you work with specific Indicator or Group types and provide a way to bring the capabilities of popular third-party tools directly into ThreatConnect.
Note
Contextually Aware Spaces are used with Apps that apply only to a specific type of Indicator or Group. They are accessed via the Spaces tab on the legacy Details screen for an object. ThreatConnect also includes Central Spaces and Menu Spaces with Apps that can be applied across ThreatConnect. They are accessed via the Spaces option on the top navigation bar.
Important
Before you can add an App to a Space, a System Administrator must install the App. System Administrators may install Spaces Apps from the TC Exchange™ Settings screen by selecting Apps from the Type dropdown at the upper left of the screen and Spaces Apps from the App Type dropdown next to the Type dropdown. See the “TC Exchange Settings Screen” section of ThreatConnect System Administration Guide for more information.
Before You Start
| Minimum Role(s) | Organization role of Read Only User |
|---|---|
| Prerequisites | An Indicator or Group for which a Contextually Aware Spaces App can be configured; a Contextually Aware Spaces App installed by a System Administrator
|
Adding and Configuring a Contextually Aware Spaces App
- Navigate to the legacy Details screen for an Indicator.
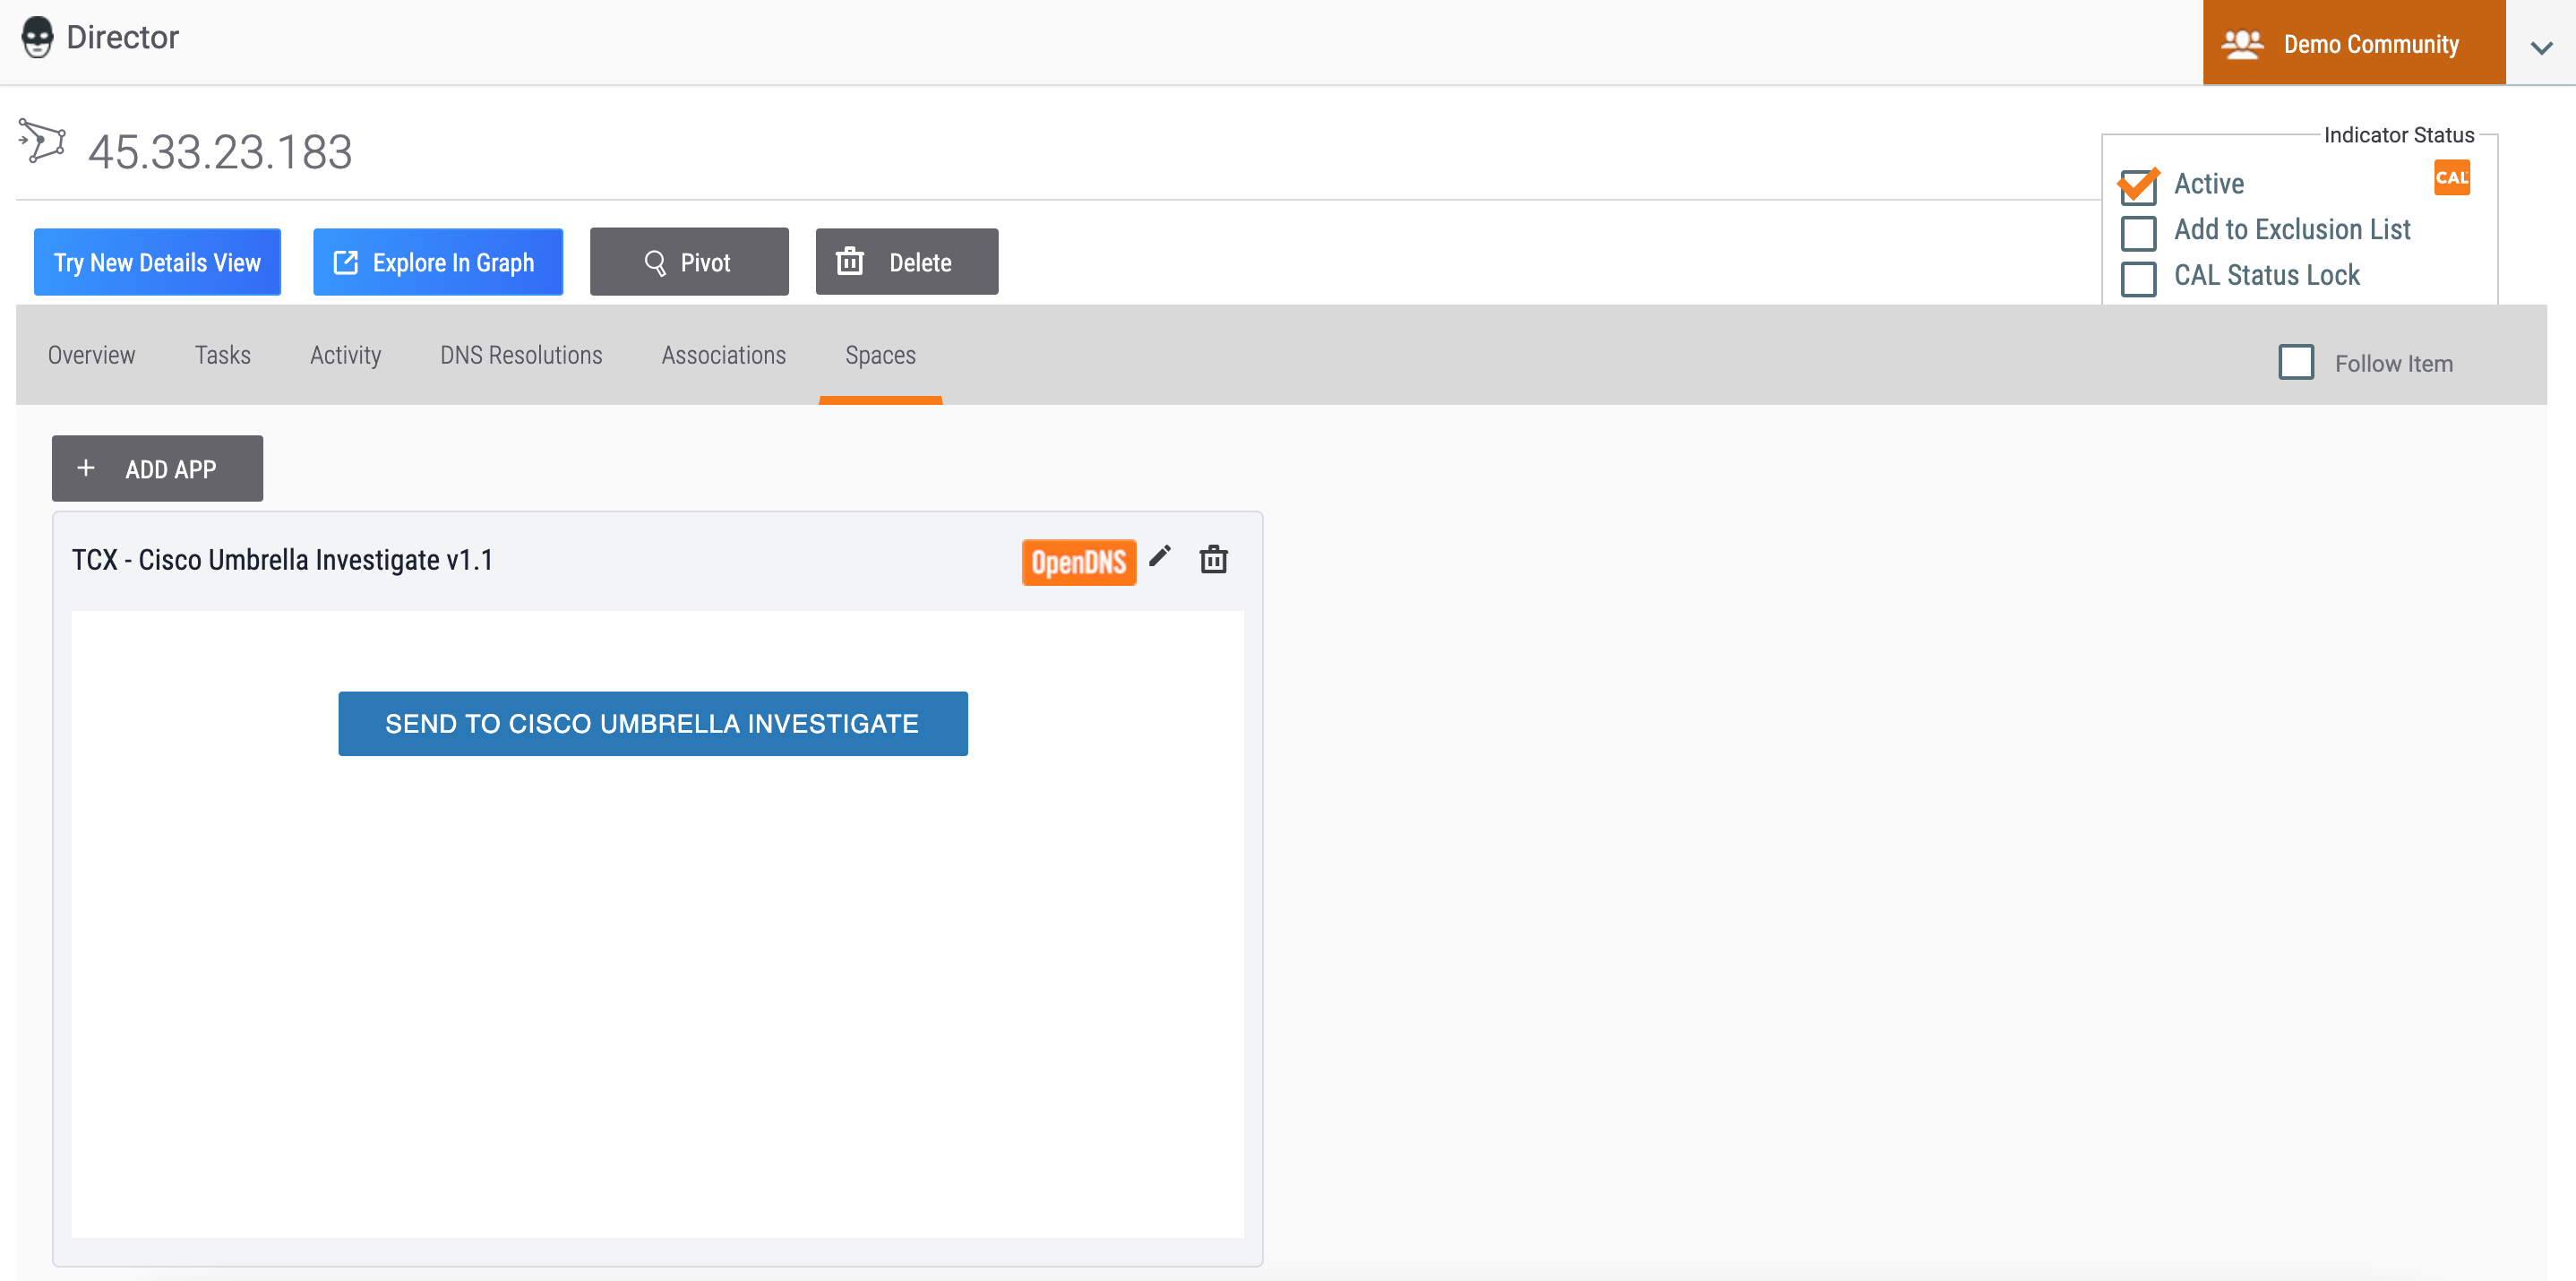
- Click the Spaces tab. The Spaces screen will be displayed (Figure 1).
 NoteIf no Contextually Aware Spaces Apps can be configured for the selected Indicator or Group type, the + ADD APP button will be grayed out.
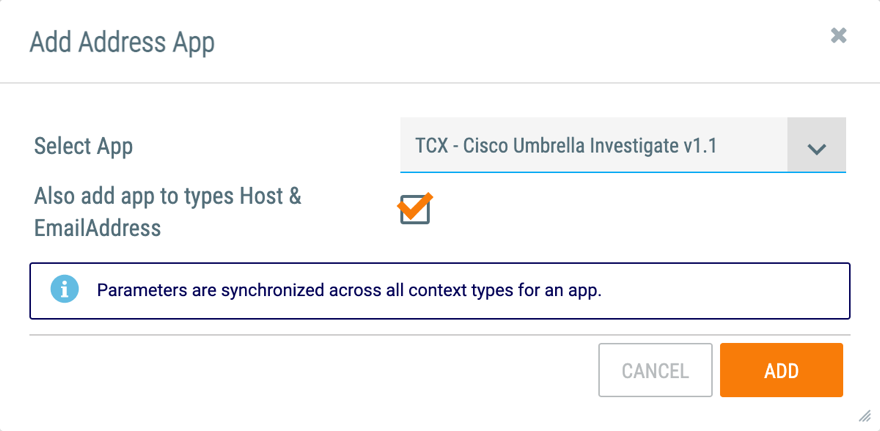
 - Click the + ADD APP button. The Add App window will be displayed for the selected object type (Figure 2).

- Select App: Select an App to add to the Space. Only Apps that apply to the selected type of Indicator or Group will be displayed in the dropdown menu.
- Also add app to types: Select the checkbox under the menu, if available, to add the App to the Spaces screen of other Indicator types for which the App has functionality. By default, this checkbox is selected.
- Click the ADD button.
- The App will be displayed in the Spaces screen (Figure 3).

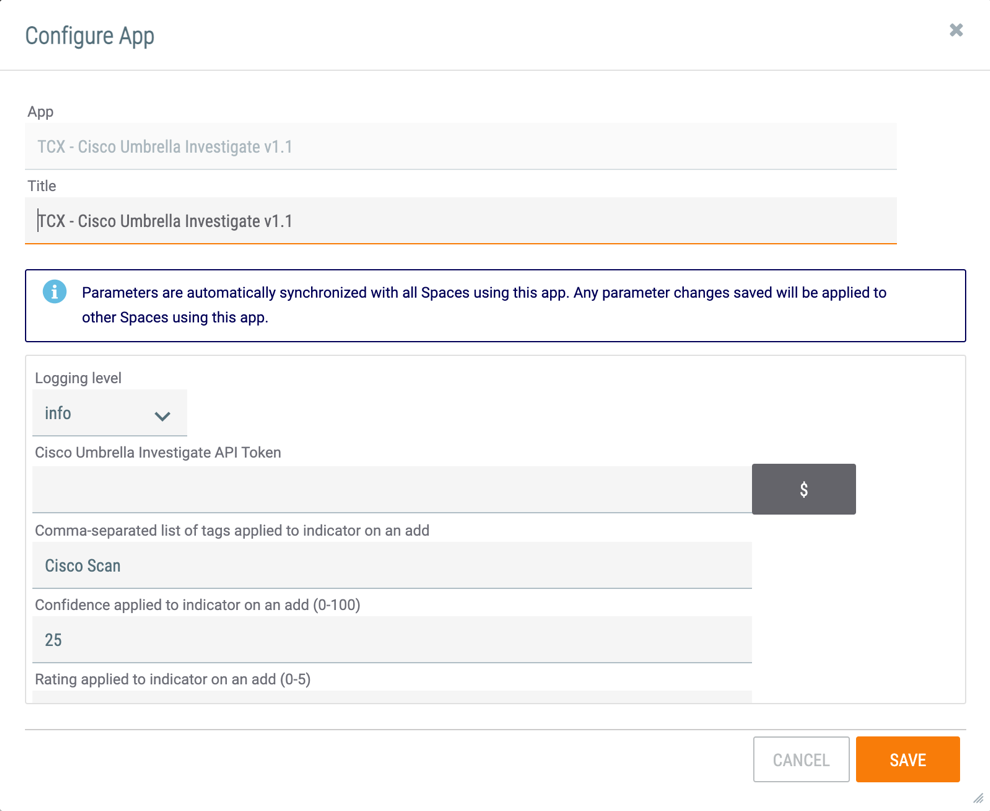
- Most third-party integration Apps require a secret key or Application Programming Interface (API) token to work. To configure the App, click Edit
 at the upper-right corner of the Spaces card for the App. The Configure App window will be displayed (Figure 4).
NoteThe configuration options displayed in the Configure App window are dependent on the App selected in Step 3.
- Enter or adjust the configuration options for the App.
- Click the SAVE button.
Deleting a Contextually Aware Spaces App
- Follow Steps 1–2 in the “Adding and Configuring a Contextually Aware Spaces App” section to access the Spaces screen for an Indicator or Group.
- Click Delete
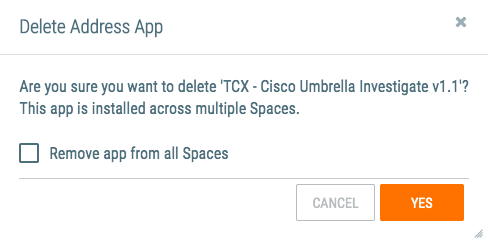
 at the upper-right corner of the Spaces card for the App (Figure 4). The Delete App window for the selected object type will be displayed (Figure 5).

- Remove app from all Spaces: Select this checkbox to remove the App from the Spaces screen of all other object types for which the App was installed. If the App was not installed for other object types (i.e., the Also add to types checkbox was not selected when installing the App), this checkbox will not be displayed.
- Click the YES button to delete the App.
ThreatConnect® is a registered trademark, and TC Exchange™ is a trademark, of ThreatConnect, Inc.
20042-03 v.08.C
Was this article helpful?


