Overview
One of the most valuable features of ThreatConnect® is the ability to manage a team’s productivity. With the correct permissions, you can assign Task Groups to fellow team members for completion. When creating a Task Group, you can specify a due date, schedule auto-generated reminder emails for assignees, and configure escalations to take place if assignees do not complete the Task by its assigned due date.
Before You Start
| Minimum Role(s) | Organization role of Standard User |
|---|---|
| Prerequisites | None |
Creating a Task
Create Screen
Hover the cursor over Create on the top navigation bar and select Task. The Details section of the Create Task screen will be displayed (Figure 1).
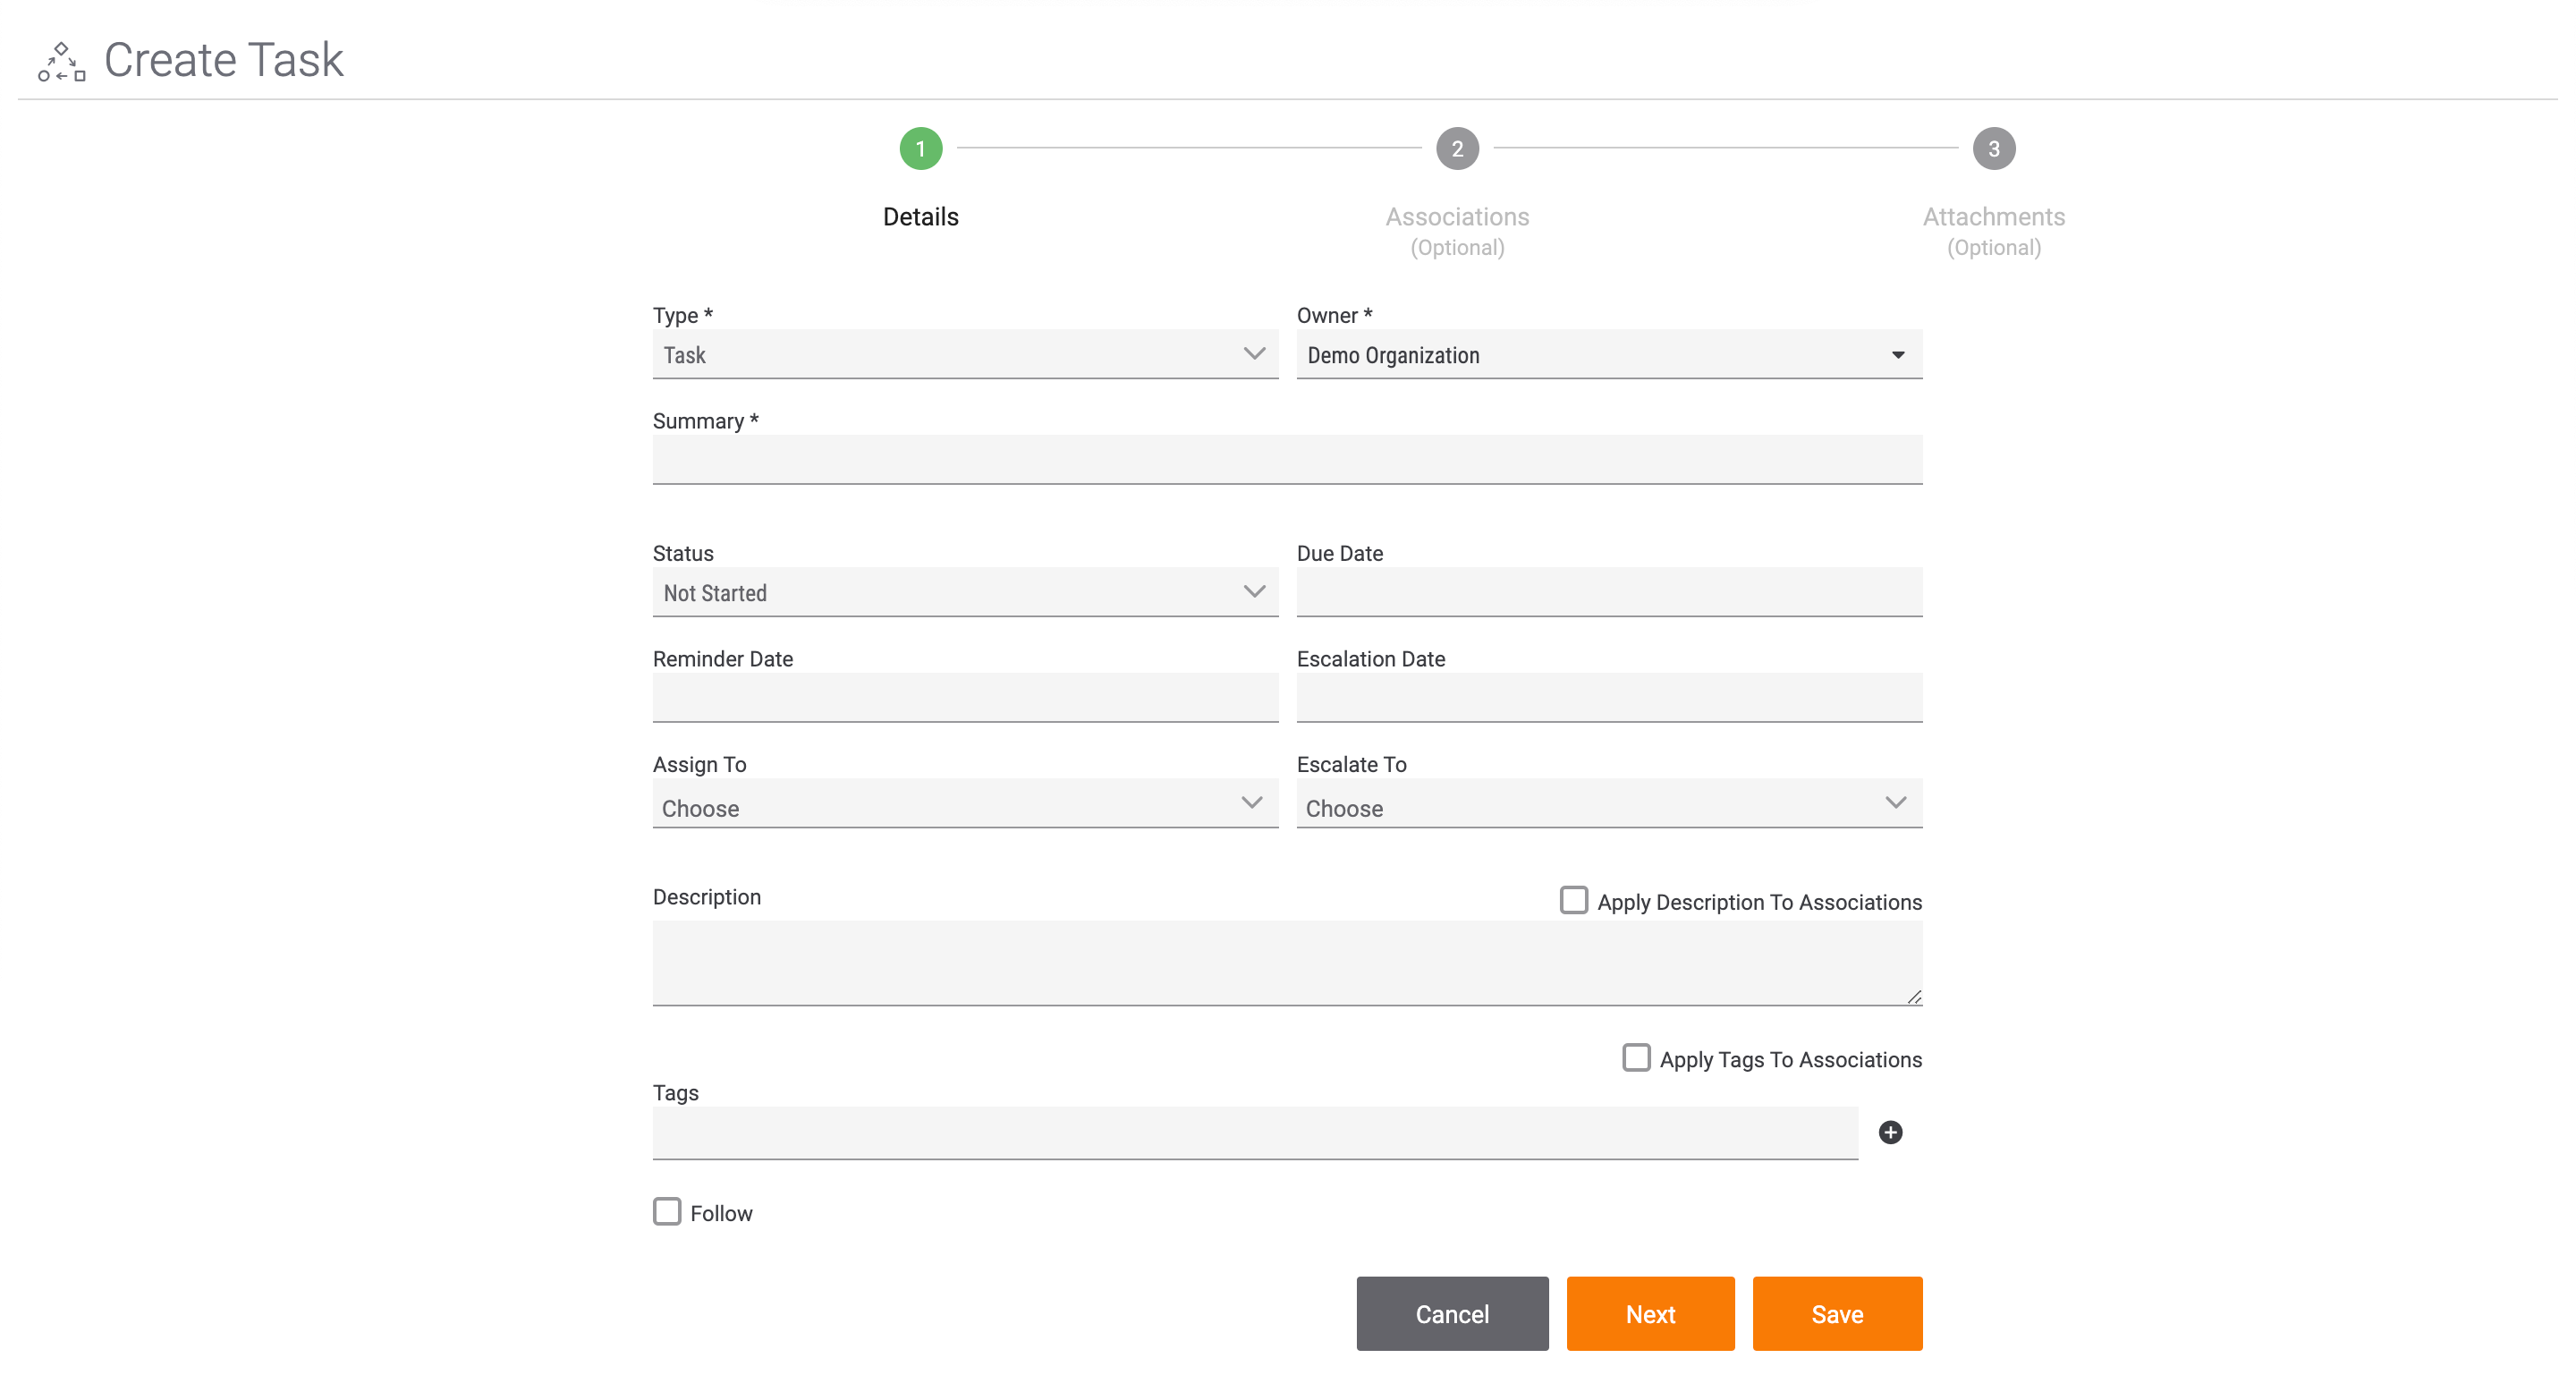
- Type: Leave this field set as Task.
- Owner: Select the Organization, Community, or Source in which the Task will be created.
- Summary: Enter a name for the Task (e.g., Investigate Hash from Phishing Email).
- Status: Select the current status of the Task.
- Reminder Date: Select a date on which a reminder about the Task will be sent.
- Assign To: Select one or more users to whom the Task is to be assigned.
- Due Date: Select a due date for the task.
- Escalation Date: Select an escalation date for the Task.
- Escalate To: Select one or more users to whom the Task is to be escalated. If this date is met and the Task has not been completed, the system will assign the Task to the selected user(s).
- Description: Enter all Task-related instructions and information.
- Apply Description to Associations: Select this checkbox to apply the Description to the associated Indicators provided in the Associations section.
- Tags: Enter all Tags associated with this Task. Click Add
 to add each Tag.
 - Apply Tags to Associations: Select this checkbox to apply the Tags to the associated Indicators provided in the Associations section.
- Follow: Select this checkbox to receive Task status notifications.
- Click one of the following buttons to proceed with creating the Task:
- NEXT: Click this button to add associated Indicators and attachments to the Task Group before creating it. See “Creating Group” section of Create for further instruction.
- SAVE: Click this button to create the Task and view its legacy Details screen.
Tasks Tab of the Details Screen
- Navigate to the legacy Details screen for an Indicator, Group, or Tag.NoteThe Tasks tab is available only on the legacy Details screen.
- Click the Tasks tab. The Tasks screen will be displayed (Figure 2).

- Click the + NEW button. The Edit Task window will be displayed (Figure 3).
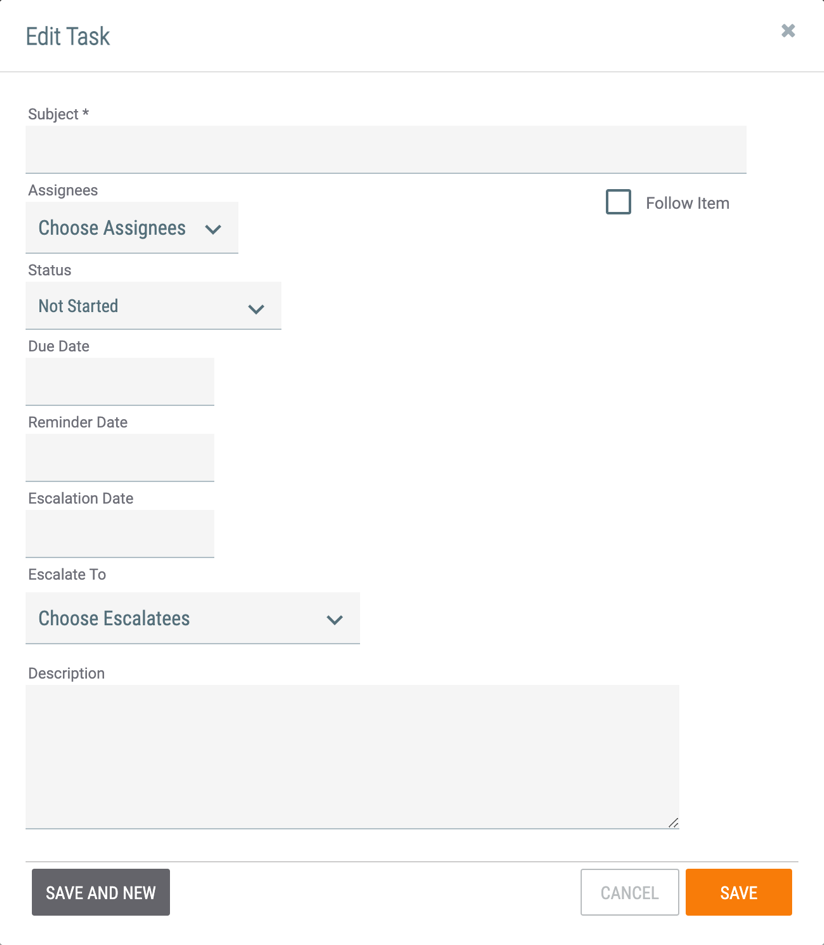
- Subject: Enter a name for the Task (e.g., Investigate Hash from Phishing Email).
- Assignees: Select one or more users to whom the Task is to be assigned.
- Status: Select the current status of the Task.
- Due Date: Select a due date for the task.
- Reminder Date: Select a date on which a reminder about the Task will be sent.
- Escalation Date: Select an escalation date for the Task.
- Escalate To: Select one or more users to whom the Task is to be escalated. If this date is met and the Task has not been completed, the system will assign the Task to the selected user(s).
- Description: Enter all Task-related instructions and information.
- Follow Item: Select this checkbox to receive Task status notifications.
- Click one of the following buttons to create the Task:
- SAVE: Click this button to create the Task and close the Edit Task window.
- SAVE AND NEW: Click this button to create the Task and keep the Edit Task window open with all fields cleared. This functionality is useful when creating multiple associated Tasks for an object.
Reassigning a Task
Details Screen for a Task
- Navigate to the legacy Details screen for a Task Group.NoteOnly the legacy Details screen is available for Task Groups.
- Scroll down to the Assignees and Escalate To cards on the left side of the screen (Figure 4).
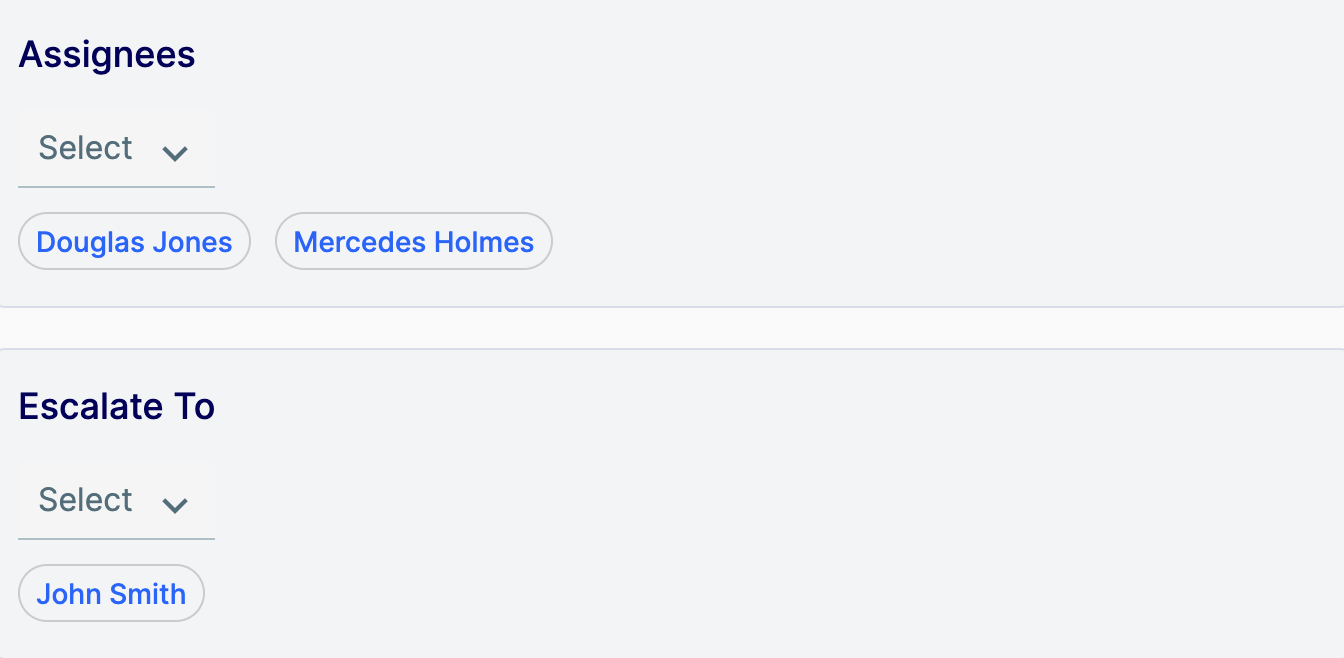
- Use the Select dropdown menu in the Assignees and Escalate To cards to add or remove Task assignees and users to whom the Task is to be escalated, respectively.
Tasks Tab of the Details Screen
If a Task is associated to an Indicator, Group, or Tag, you can reassign the Task via the Tasks tab of the legacy Details screen for the object to which the Task is associated.
- Follow Steps 1–2 in the “Tasks Tab of the Details Screen” section to navigate to the Tasks tab of the legacy Details screen (Figure 2) for an Indicator, Group, or Tag.
- Click Edit
 in the Options column for the Task that is to be reassigned. The Edit Task window will be displayed (Figure 3).
 - Use the Assignees and Escalate To dropdown menus to add or remove Task assignees and users to whom the Task is to be escalated, respectively.
ThreatConnect® is a registered trademark of ThreatConnect, Inc.
20012-01 v.09.A