Before following the steps listed in this article, verify that your System Administrator installed the MITRE ATT&CK™ 2.0.x App via TC Exchange™.
Creating the MITRE ATT&CK Job
- Log into ThreatConnect with an Organization Administrator account.
- On the top navigation bar, hover the cursor over Settings
 and select Org Settings. The Membership tab of the Organization Settings screen will be displayed.
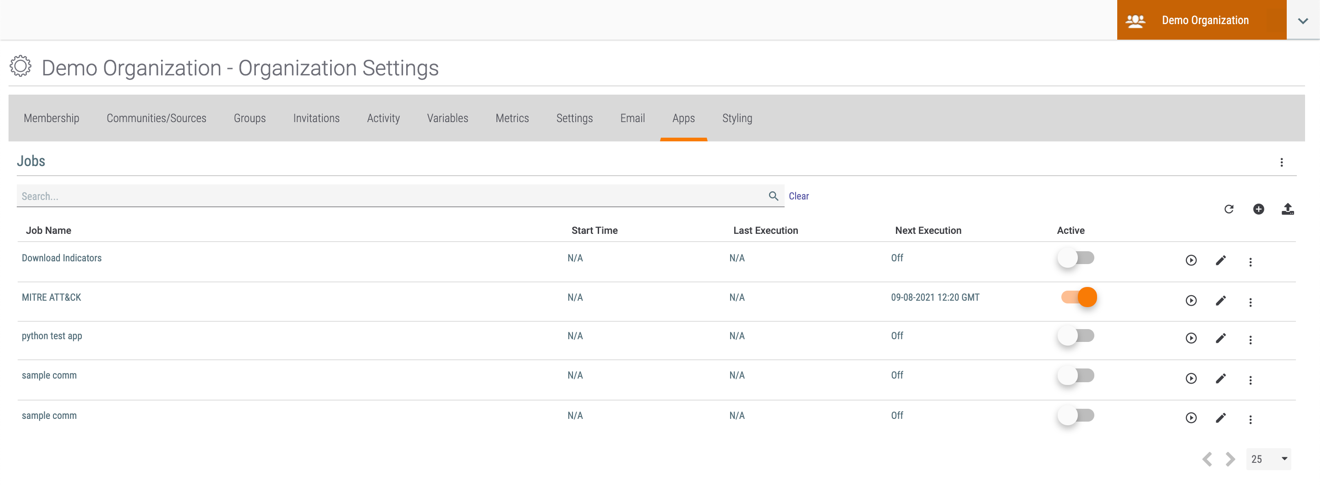
 - Click the Apps tab. The Jobs view of the Apps screen will be displayed (Figure 1).

- Click Add Job
 at the top right of the table. The Program step of the Add Job drawer will be displayed (Figure 2).
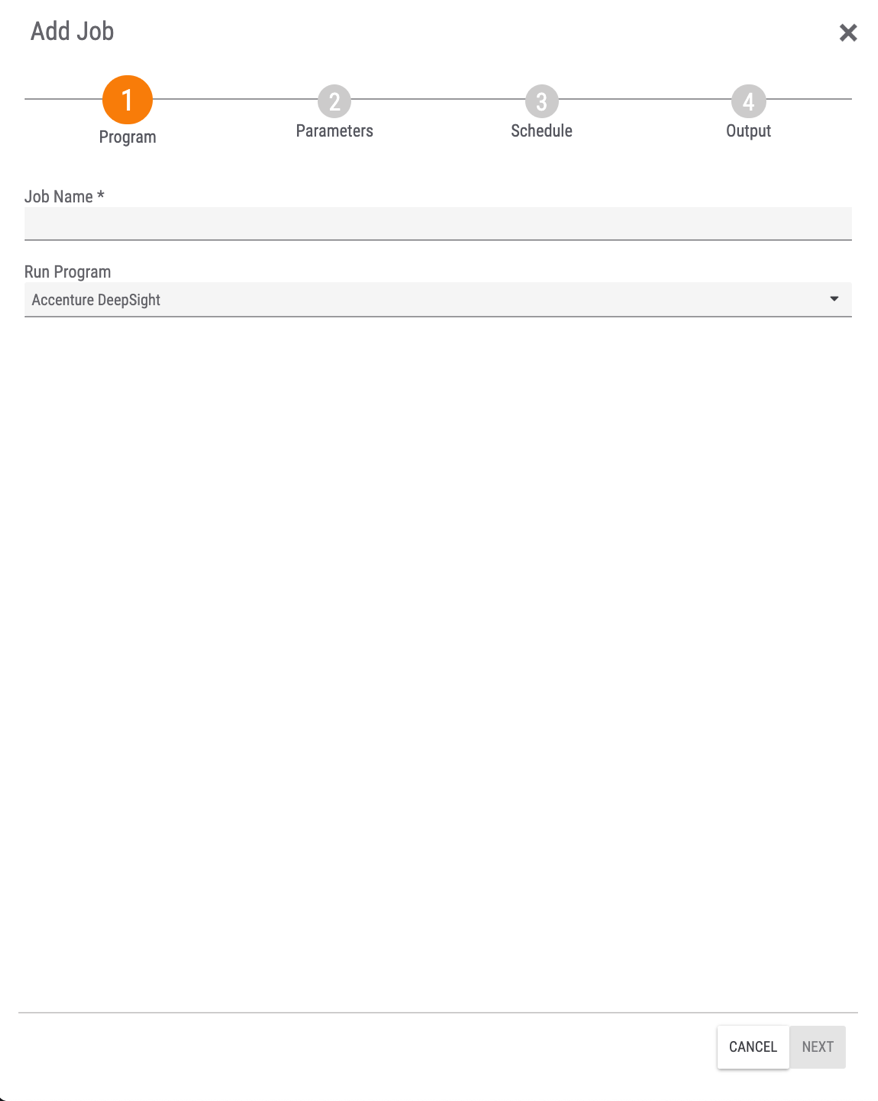
- Job Name: Enter a name (e.g., MITRE ATT&CK) for the Job.
- Run Program: Select MITRE ATT&CK.NoteIf the MITRE ATT&CK 1.1.x App is also installed in your Organization and the Organization has permissions to run the App, two MITRE ATT&CK options will be listed in the Run Program dropdown menu. Select the second MITRE ATT&CK option to configure a Job for the MITRE ATT&CK 2.0.x App.
- Click the NEXT button.
- The Parameters step of the Add Job drawer will be displayed (Figure 3).
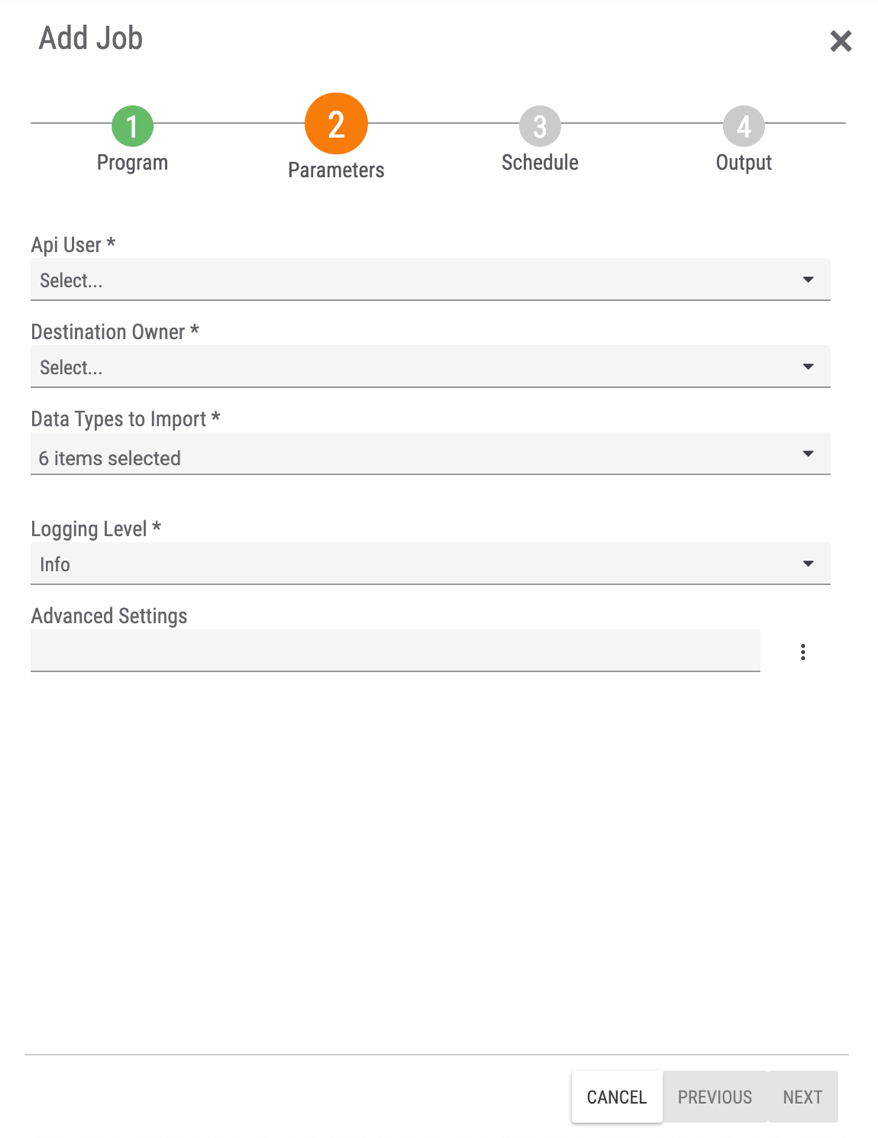
- Api User: Select an API user.
- Destination Owner: Select the owner into which the MITRE ATT&CK data objects are to be added.
- Data Types to Import: Leave all checkboxes (Attack Patterns, Intrusion Sets, Malware, Tactics, Tools, and Document with all Tags) selected.
- Logging Level: Select a logging level for the Job.
- Advanced Settings: By default, the MITRE ATT&CK 2.0.x App will delete Groups in the destination owner that are not included in the MITRE ATT&CK Source feed when the Job is run. To prevent this behavior, enter delete_enabled=false for this parameter.WarningIf the Advanced Settings parameter is left blank, the Job will delete Groups in the destination owner that are not included in the MITRE ATT&CK Source feed each time the Job is run.
- Click the NEXT button.
- The Schedule step of the Add Job drawer will be displayed (Figure 4).
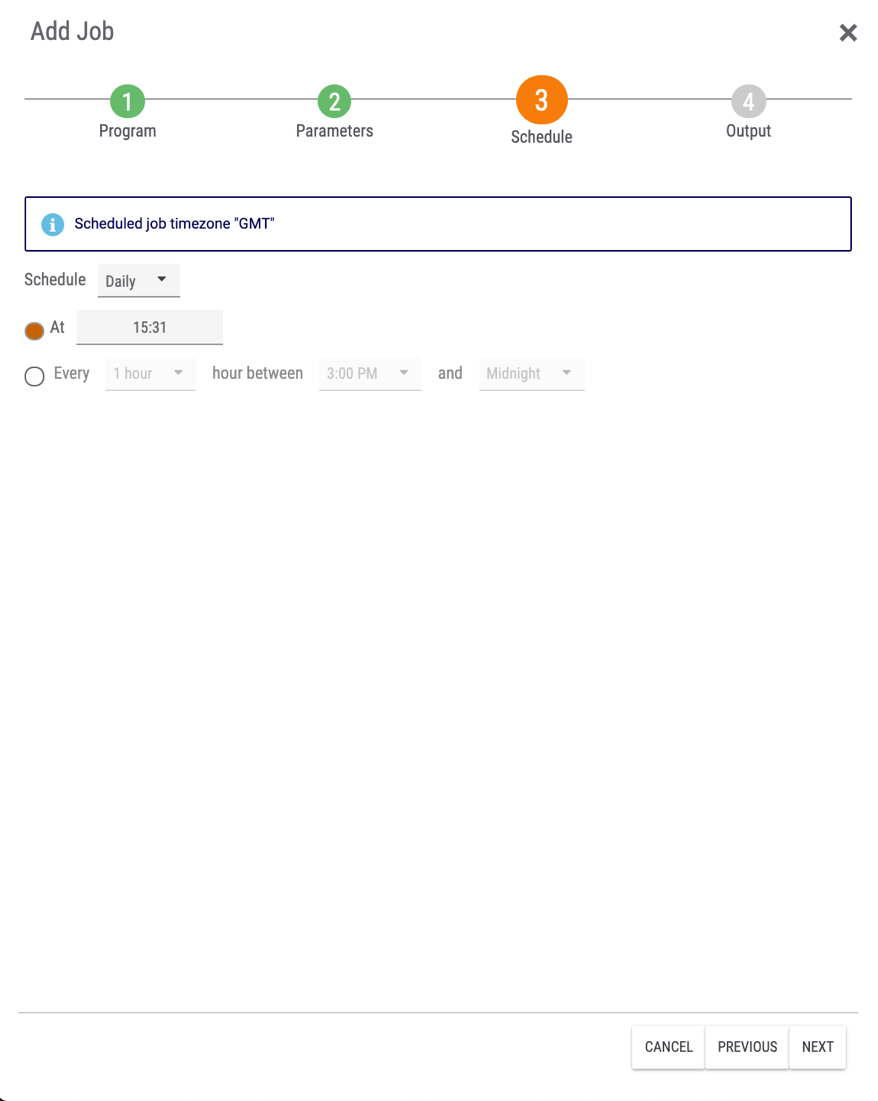
- Schedule: Select the frequency of Job runs.
- At: Select this option to schedule a specific time for Job runs, and use the corresponding field to enter the Job run time.
- Every: Select this option to schedule Job runs to occur at intervals, and use the corresponding fields to set the specific frequency and interval.
- Click the NEXT button.
- The Output step of the Add Job drawer will be displayed (Figure 5).
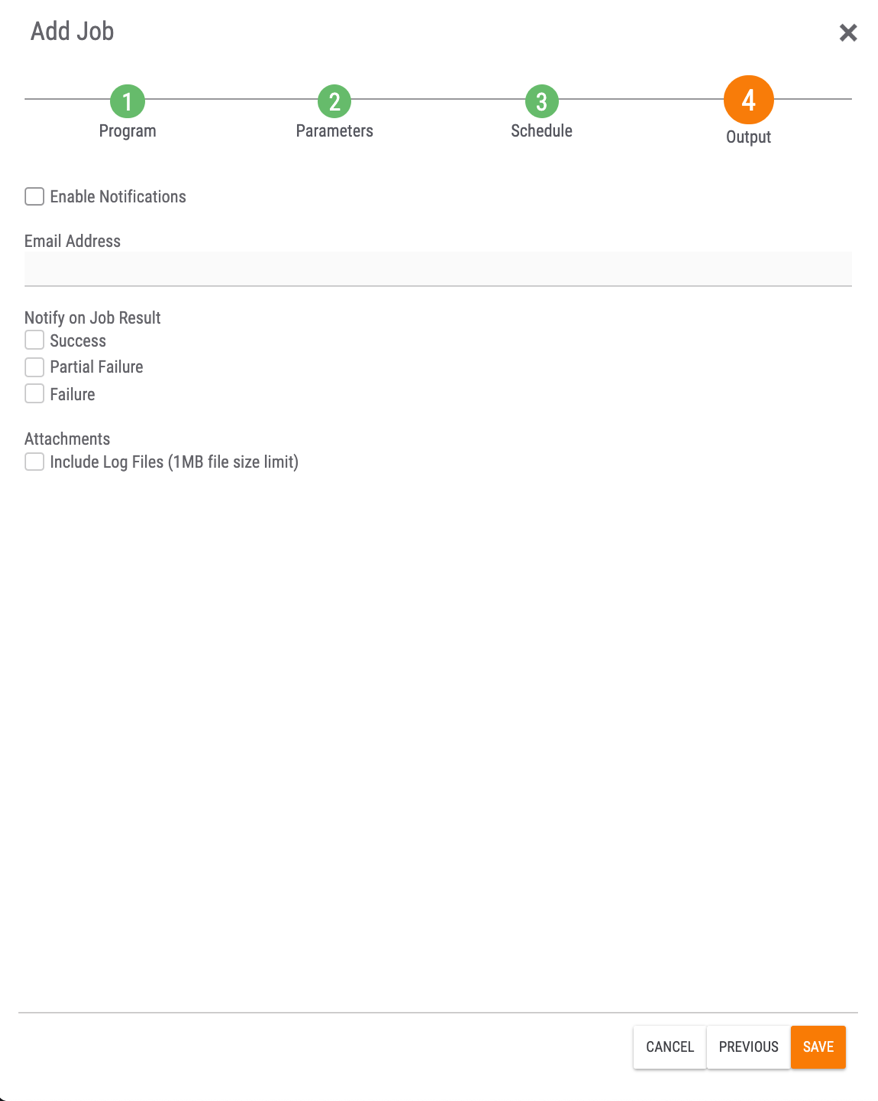
- Enable Notifications: Select this checkbox to enable notifications on the results of Job runs. If this checkbox is not selected, none of the other options in this step will be available.
- Email Address: Enter the email address to which notifications should be sent.
- Notify on Job Result: Select the checkbox(es) for the type(s) of Job results for which notification emails should be sent.
- Attachments: Select the Include Log Files checkbox to include log files in notification emails.
- Click the SAVE button.
- The Jobs view of the Apps screen will now display the MITRE ATT&CK Job.
Activating and Running the MITRE ATT&CK Job
- Toggle the switch in the Active column for the MITRE ATT&CK Job on to activate the Job (Figure 6). A message stating that the Job was successfully activated will be displayed in the lower-left corner of the screen.
- To add MITRE ATT&CK data objects to the destination owner immediately, run the Job by clicking Run Job
 in the Options column.
 - A window will be displayed prompting you to confirm whether you want to run the MITRE ATT&CK Job at this time. Click the YES button.
- The Start Time column will display the time that the Job started running, and the Last Execution column will display a status of Running for the Job. After about two minutes, refresh the screen. The Last Execution column should display a status of Completed for the Job.
- Navigate to the Browse screen and confirm that the MITRE ATT&CK data objects were added to the destination owner.
ThreatConnect® is a registered trademark, and TC Exchange™ is a trademark, of ThreatConnect, Inc.
MITRE ATT&CK™ is a trademark of The MITRE Corporation.
20119-05 v.03.A