Installing the Microsoft Sentinel Content Pack
Follow the steps in this section to install the Microsoft Sentinel™ Content Pack through TC Exchange™ in ThreatConnect®.
- Log into ThreatConnect with a System Administrator account.
- On the top navigation bar, hover over Settings
 and select TC Exchange Settings. The Installed tab of the TC Exchange Settings screen will be displayed.
 - Click the Catalog tab. The Catalog screen will be displayed.
- Select Content Packs from the dropdown to the left of the search bar to display all Content Packs in the TC Exchange catalog (Figure 1).
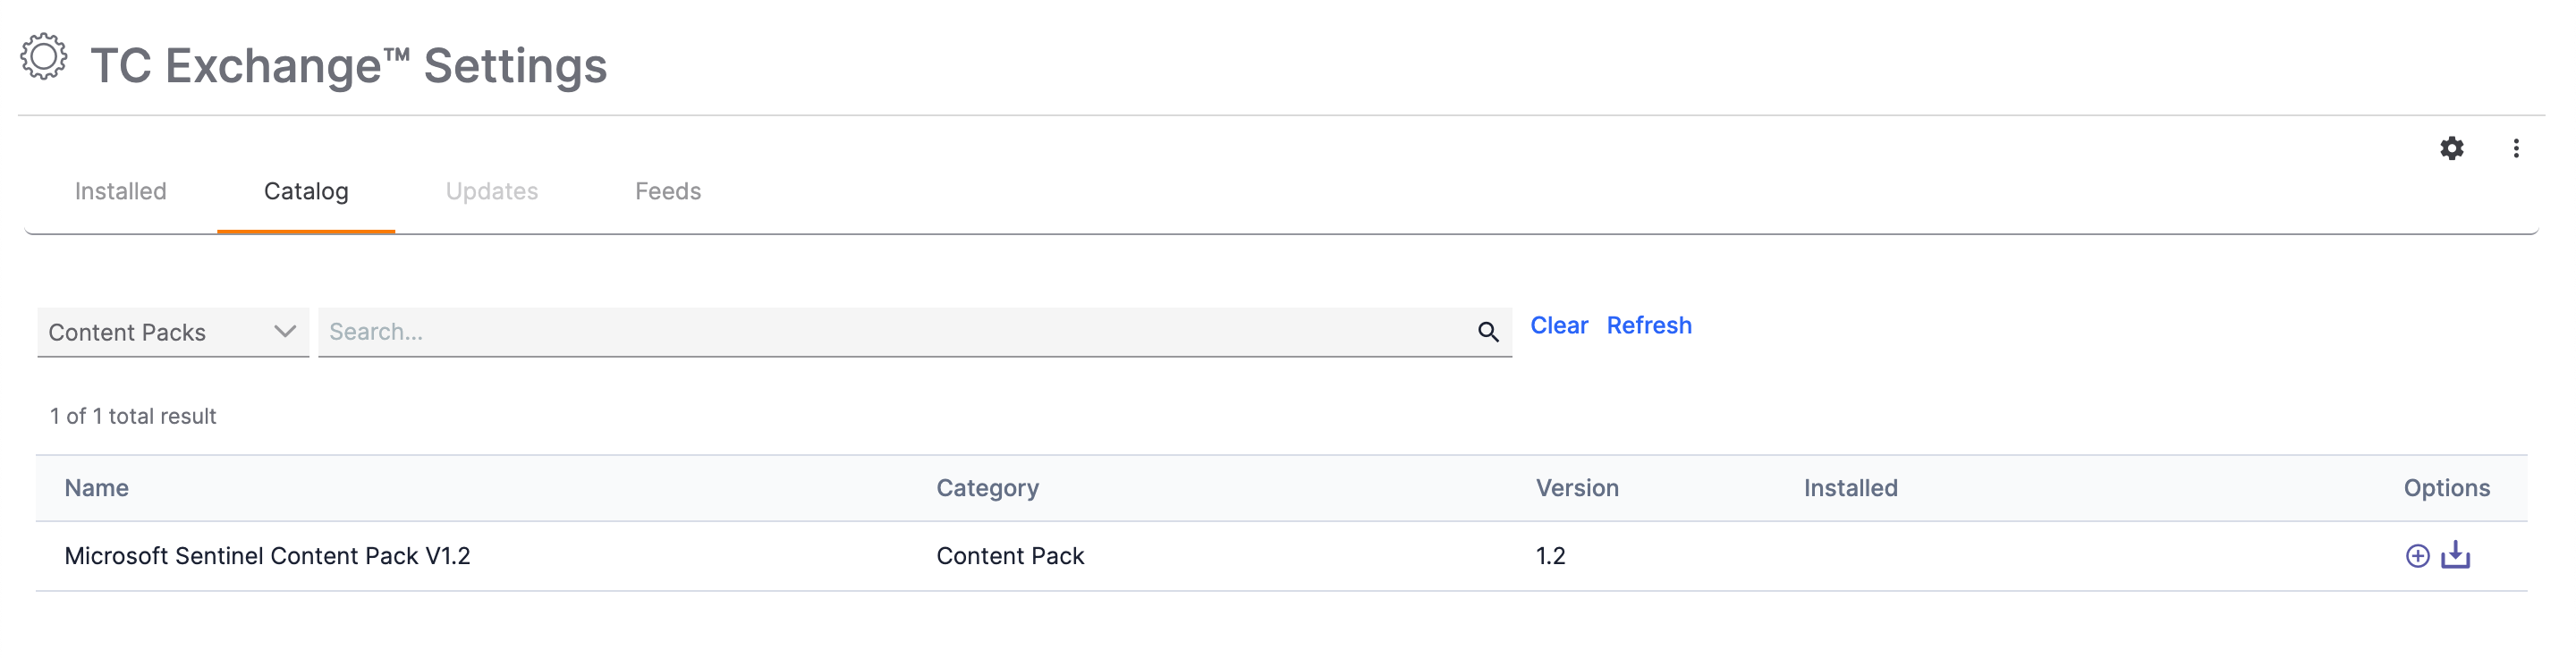
- Click Install
 in the Options column for the Microsoft Sentinel Content Pack. A drawer showing all items in the Content Pack will be displayed (Figure 2). Note that you may need to scroll down to view all items in the table displayed in this drawer.
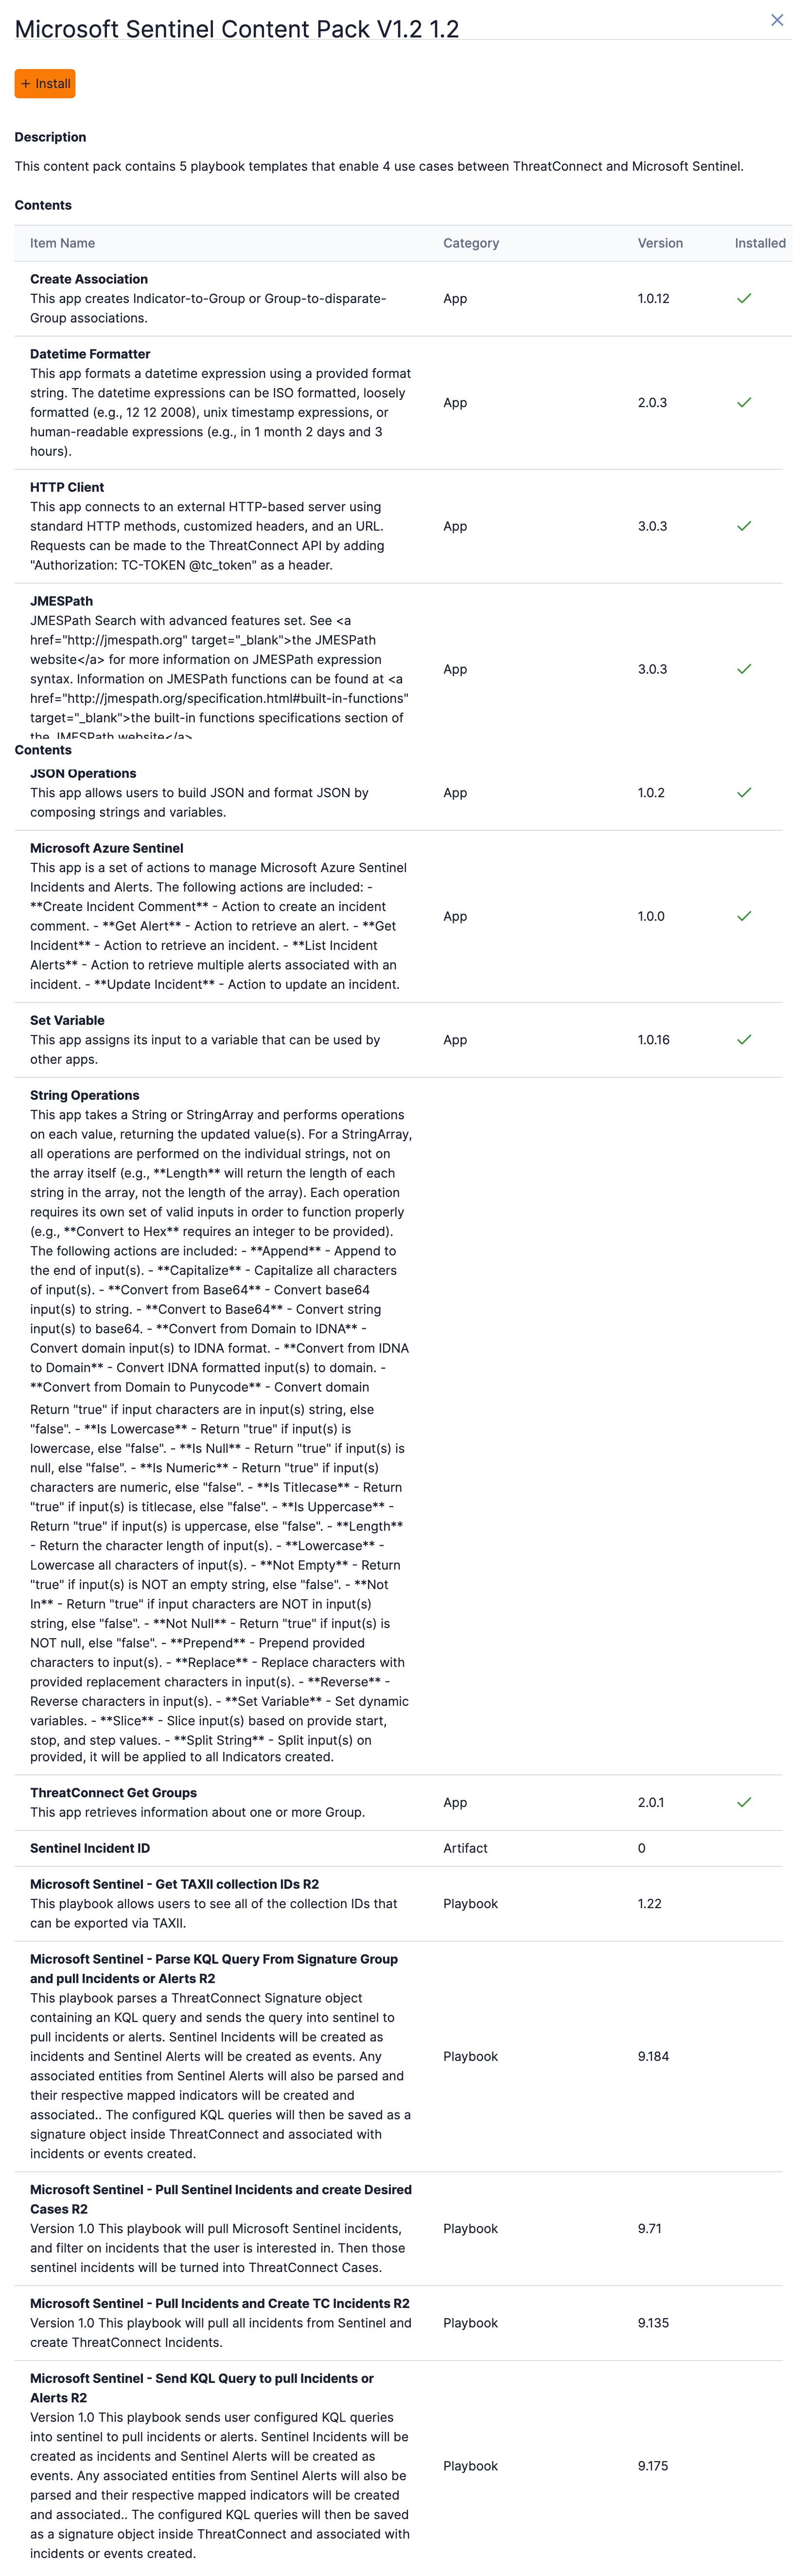
- Description: This section displays the Content Pack’s description.
- Contents: This section displays the items (i.e., Apps, Artifact types, Attribute Types, Playbooks, and Workflows) that the Content Pack contains. If an item is already installed on your ThreatConnect instance, a green checkmark will be displayed in the Installed column.
- Click the + Install button to install the Content Pack and any items it contains that are not already installed or created on your ThreatConnect instance.
After the Content Pack is installed, the following items will be created at the System level on your ThreatConnect instance:
- Playbooks Templates:
- Microsoft Sentinel - Get TAXII™ collection IDs R2
- Microsoft Sentinel - Parse KQL Query From Signature Group and pull Incidents or Alerts R2
- Microsoft Sentinel - Pull Sentinel Incidents and create Desired Cases R2
- Microsoft Sentinel - Pull Incidents and Create TC Incidents R2
- Microsoft Sentinel - Send KQL Query to pull Incidents or Alerts R2
- Artifact types:
- Sentinel Incident ID
Configuring the Microsoft Sentinel Content Pack
The Microsoft Sentinel Content Pack leverages the Microsoft® Azure® Sentinel Playbook App and several Playbooks to accomplish its use cases. The following subsections describe the configuration that must be completed in order to use this App and the Content Pack’s Playbooks.
Registering and Configuring an App in the Azure Portal
To use the Microsoft Azure Sentinel Playbook App and the Microsoft Sentinel Content Pack’s Playbooks, you must register an app in the Azure portal. Before following the steps in this section, verify that you have created an Azure Active Directory™ (AD) tenant in the Azure portal.
- Register an app in Azure AD. In most cases, an account type of Single Tenant should be selected and the optional Redirect URI field should be left empty.
- Add a client secret to the app you registered in Step 1. The client secret’s value will be used as the value for the Client Secret parameter in the Microsoft Azure Sentinel Playbook App and the Content Pack’s Playbooks.ImportantMake sure to save the client secret’s value, as you will not be able to retrieve it after leaving the Client & secrets page in the Azure portal.
- Navigate to Microsoft Sentinel, click Settings in the side navigation bar, select the Workspace settings tab, and locate the resource group associated with the Microsoft Sentinel workspace.
- Return to the Azure portal homepage and select Resource groups on the side navigation bar. The Resource groups page will be displayed.
- Select the resource group you located in Step 3. The resource group’s page will be displayed.
- On the resource group’s page, select Access control (IAM) on the side navigation bar, click Role assignments, and assign the Contributor role to the app you registered in Step 1. Note that you can search for the registered app in the Members tab of the Add role assignment page.
The app you registered is now properly configured for use with the Microsoft Azure Sentinel Playbook App and the Content Pack’s Playbooks.
Setting Up Credentials for Playbooks
The credentials listed in this section are used for communication between ThreatConnect and Microsoft Sentinel in the Microsoft Azure Sentinel Playbook App and the Content Pack’s Playbooks. It is recommended to create an Organization-level variable in ThreatConnect for each credential. (See the “Variables” section of ThreatConnect Organization Administration Guide for instructions on creating Organization-level variables.)
- Tenant ID: The ID of the Azure AD tenant. To obtain this value, navigate to the Properties page in Azure AD.
- Example value: abcd1234-a333-a333-a333-abcdabcd123
- Client ID: The client ID of the app you registered in the “Registering and Configuring an App in the Azure Portal” section. To obtain this value, navigate to the Overview page for the app in Azure AD.
- Example value: abcd1234-a333-a333-a333-abcdabcd123
- Client Secret: The value of the client secret created in Step 2 of the “Registering and Configuring an App in the Azure Portal” section. Note that the client secret’s value is displayed in the Value column of the Client secrets tab of the Clients & secrets page in Azure.
- Example value: ab123~ABCDabd.abc175.ABCdc.abc~abcabcABC
- Subscription ID: The ID of the subscription assigned to the Microsoft Sentinel workspace. To obtain this value, navigate to Microsoft Sentinel, click Settings in the side navigation bar, and select the Workspace settingstab.
- Example value: abcd1234-a333-a333-a333-abcdabcd123
- Resource Group Name: The name of the resource group associated with the Microsoft Sentinel workspace. To obtain this value, navigate to Microsoft Sentinel, click Settings in the side navigation bar, and select the Workspace settingstab.
- Example value: threatconnect-example
- Workspace Name: The name of the workspace to which Microsoft Sentinel is added. To obtain this value, navigate to Microsoft Sentinel, click Settings in the side navigation bar, and select the Workspace settingstab.
- Example value: tc-sentinel
- Workspace ID: The ID of the workspace to which Microsoft Sentinel is added. To obtain this value, navigate to Microsoft Sentinel, click Settings in the side navigation bar, and select the Workspace settingstab.
- Example value: 9081f3fe-0f4a-aaaa-aaaa-5083530be7cf
ThreatConnect® is a registered trademark, and TC Exchange™ is a trademark, of ThreatConnect, Inc.
Azure® and Microsoft® are registered trademarks, and Active Directory™ and Microsoft Sentinel™ are trademarks, of Microsoft Corporation.
TAXII™ is a trademark of The MITRE Corporation.
20153-02 v.01.A