Uploading Malware
- 17 Jul 2024
- 2 Minutes to read
-
Print
-
DarkLight
-
PDF
Uploading Malware
- Updated on 17 Jul 2024
- 2 Minutes to read
-
Print
-
DarkLight
-
PDF
Article summary
Did you find this summary helpful?
Thank you for your feedback!
Overview
Malware can be uploaded to ThreatConnect® for the purpose of analysis. For security reasons, this task can be accomplished only by encrypting and zipping the malware and then creating it as a Document Group in ThreatConnect.
Important
Do not use the Malware Group to upload malware to the Malware Vault. Instead, use the Document Group to upload malware to the Malware Vault, and then, if desired, create a Malware Group and associate it to the Document Group that was uploaded to the Malware Vault.
Before You Start
| Minimum Role(s) |
|
|---|---|
| Prerequisites | None |
Uploading a File to the Malware Vault
- Select a malware file and convert it to a password-protected, encrypted, and compressed (.zip) format.
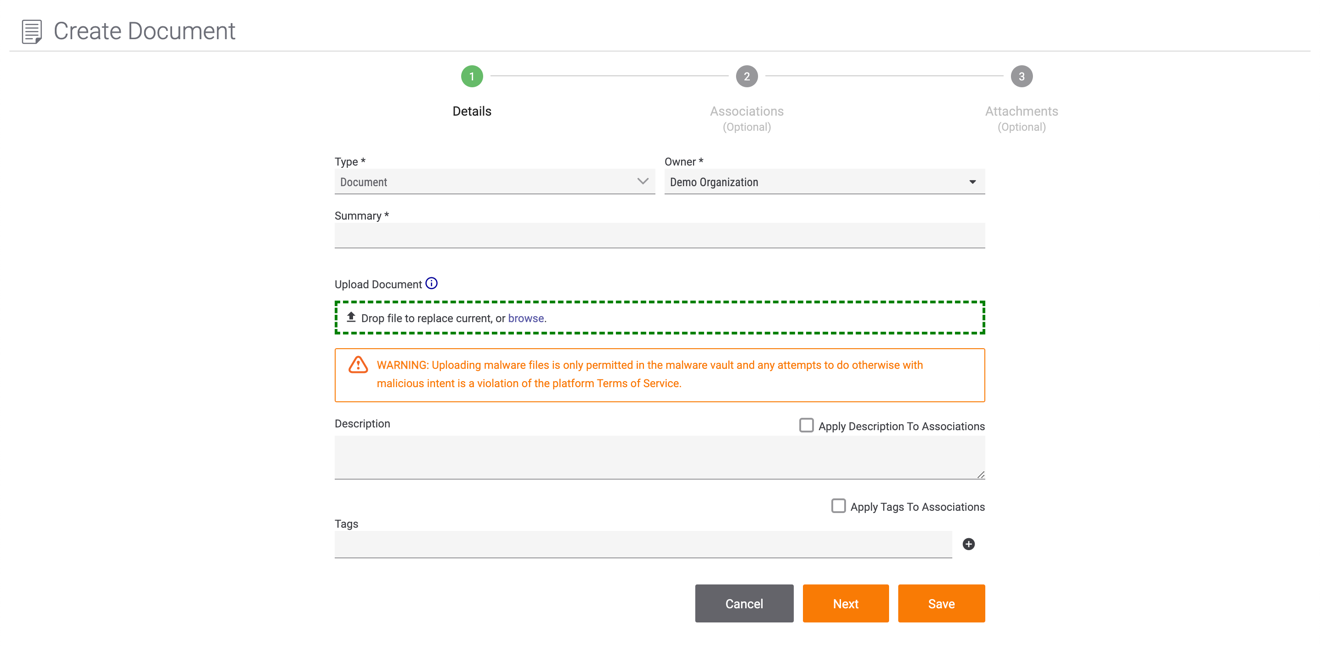
- On the top navigation bar, hover over Create and select Document in the Group column. The Create Document screen will be displayed with the Details section selected (Figure 1).

- Type: The Type dropdown menu is used to select a different Group type. Keep the selection as Document.
- Owner: Select the owner of the Document Group.
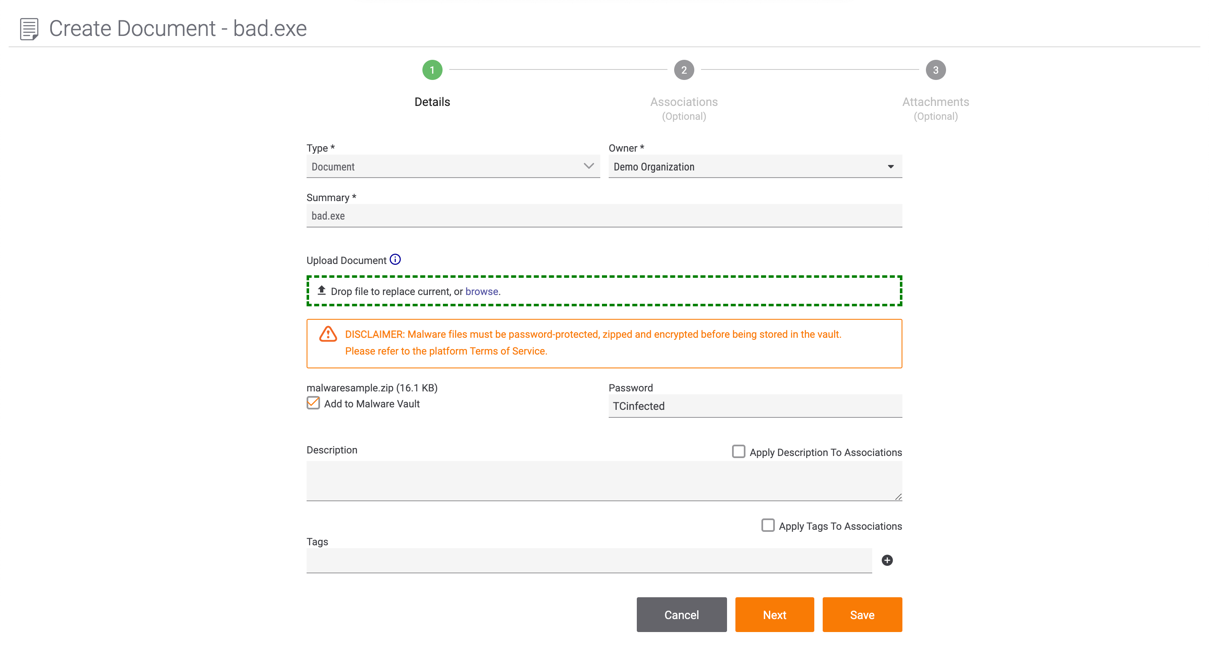
- Summary: Enter a name for the Document Group. For Malware Vault Document Groups, the name should be the filename of the original malware sample, including the file extension, inside the password-protected .zip folder (e.g., bad.exe).
- Upload Document: Use this section to upload the malware file. Once the malware file has been uploaded, the filename will be displayed below the orange malware warning, along with a checkbox labeled Add to Malware Vault. Selected this checkbox to add the file to the Malware Vault (Figure 2).

- Password: Enter the password needed to unencrypt the file.Note“TCinfected” is the default, and preferred, password for any malicious files uploaded to the Malware Vault.
- Description: Provide a general description of the Group, such as the types of actors it comprises; tactics, techniques, and procedures (TTPs); etc.
- Apply Description to Associations: Select this checkbox to apply the Description to the associated Indicators provided in the Associations section.
- Tags: Enter Tags for the Group.
- Apply Tags to Associations: Select this checkbox to apply the Tags to the associated Indicators provided in the Associations section.
- If desired, add associated Indicators and attachments to the Document Group. See the “Creating a Group” section of Create for further instruction.
- Click the SAVE button.
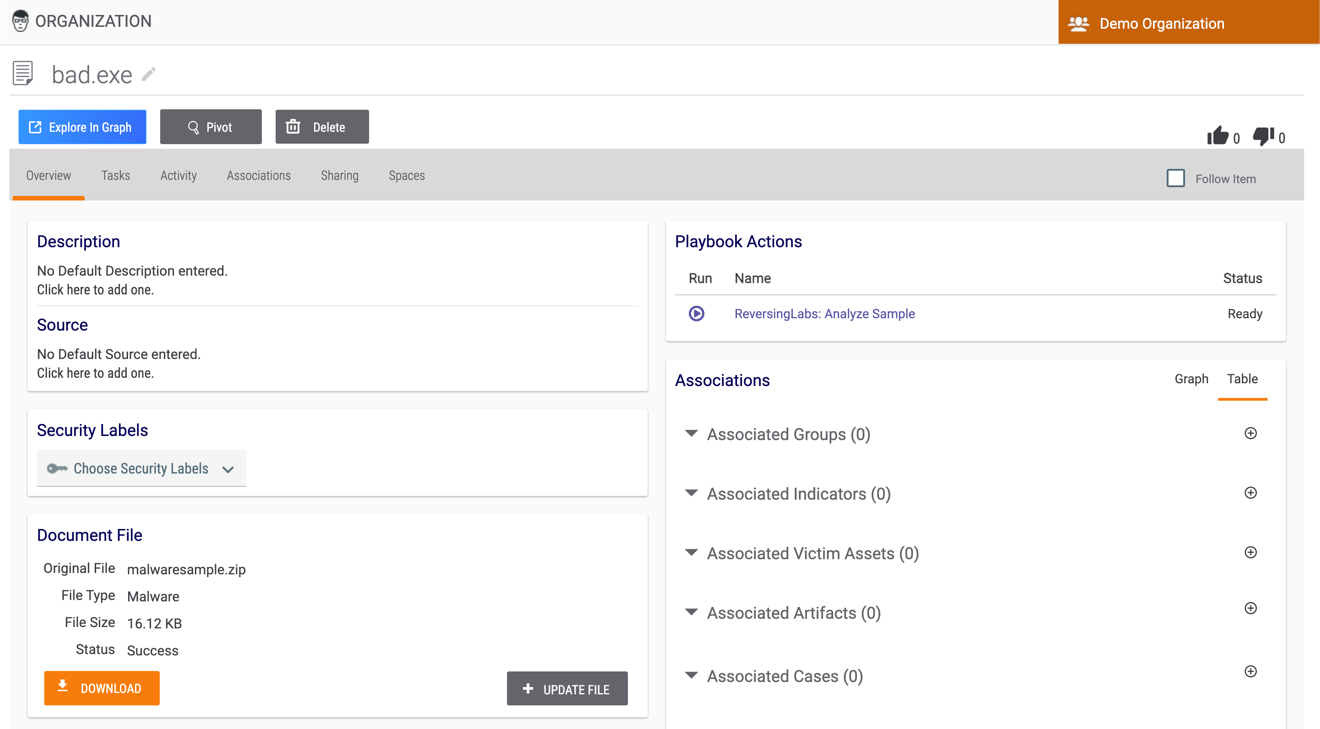
- The Overview tab of the Details screen for the Document Group will be displayed (Figure 3).

Malware Restrictions
Organization Administrators can prevent users in Communities from accidentally uploading malware.
- On the top navigation bar, hover the cursor over Settings
 and select Org Settings. The Organization Settings screen will be displayed.
 - Select the Communities/Sources tab. The Communities/Sources screen will be displayed.
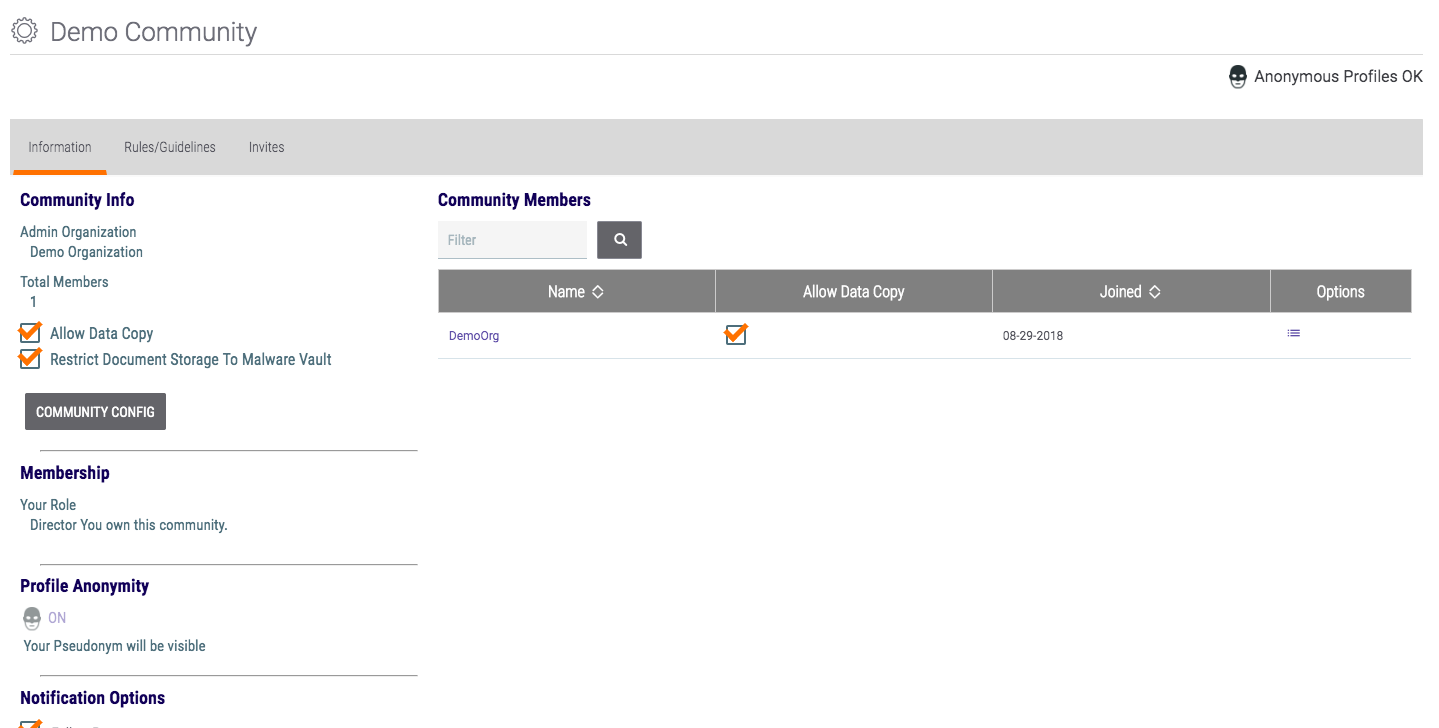
- Select a Community to display its Information screen (Figure 4).

- Ensure that the Restrict Document Storage To Malware Vault checkbox is selected so that all documents that Community contributors upload will be placed automatically in the Malware Vault. This restriction is enforced in three locations: the Create Document screen (Figure 1 and Figure 2), when uploading a file to an existing Document Group on its Details screen, and API Document creation for Documents in Communities.NoteCommunity Editors and Community Directors will not be affected by the restriction.
ThreatConnect® is a registered trademark of ThreatConnect, Inc.
20036-01 v.08.B
Was this article helpful?


