The Contents tab is a clickable table of contents for the files that compose the App (Figure 1).
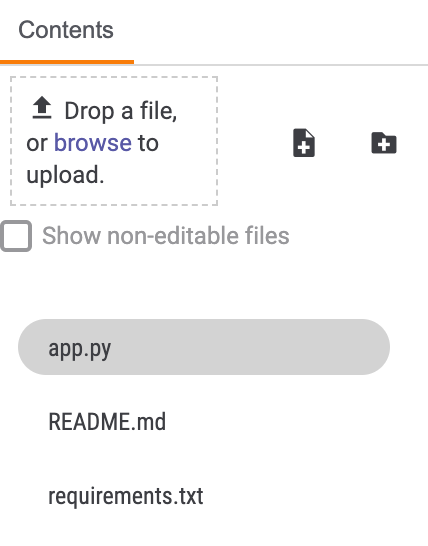
The selected file, indicated by gray shading (e.g., app.py in Figure 1), is the file that shows in the Code Editor displayed in the center of the App Builder screen.
You can add a file to the project by dragging and dropping it into the Drop a file, or browse to upload. square or by clicking on this square to locate and select a file on your computer to upload.
Select the Show non-editable files checkbox to view the files associated with the App that may not be edited (Figure 2). You can view these files in read-only form in the Code Editor, as indicated by the lock icon displayed to the right of the file name.

Although these files cannot be edited, their contents are automatically customized as you enter information into the App Builder. For example, Figure 3 shows the contents of the install.json file for the project. The name of the App is on line 3, and an App note, as entered in Markdown, is on line 13.

Files
Creating a New File
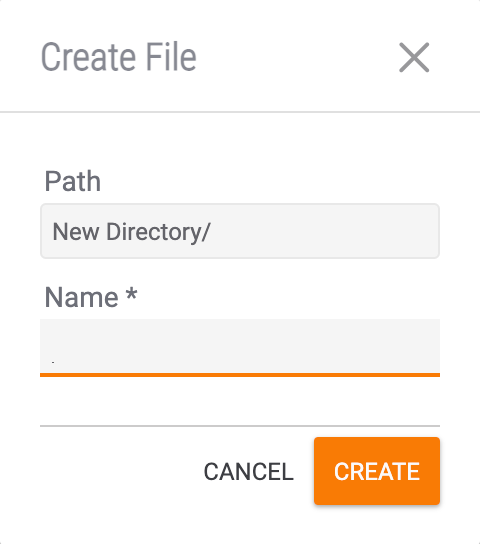
To create a new file, click Create File . The Create File window will open (Figure 4).
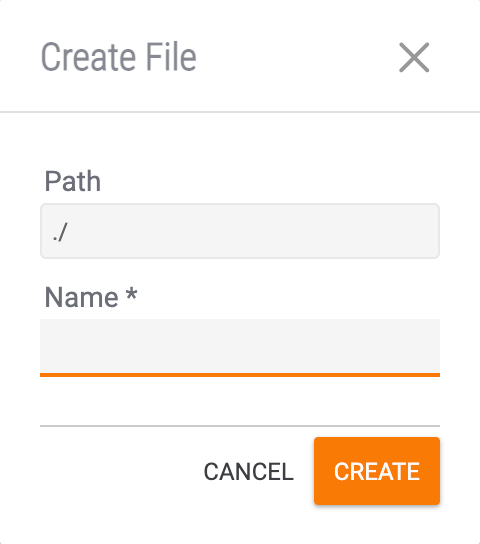
- Path: The file’s path cannot be edited.
- Name: Enter a name for the file.
- Click the CREATE button. The new file will open in the Code Editor.
You can also create files in directories in the project contents. See the “Directory Administration” section for more information.
File Administration
You can rename or delete files that you uploaded or created. To access these administrative functions, hover the cursor over the name of the file in the Contents tab to display a horizontal ellipsis to the right of the file name (Figure 5).

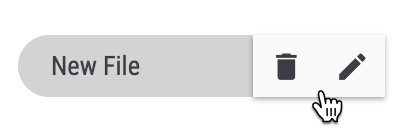
Hover the cursor over the ellipsis to display two icons (Figure 6).
- Delete
 : Click this icon to delete the file. The Confirm window will be displayed. Click the REMOVE button to delete the file.
 - Edit
 : Click this icon to rename the file. The Rename File window will be displayed. Enter a new name for the file, and then click the CREATE button.
Directories
Creating a New Directory
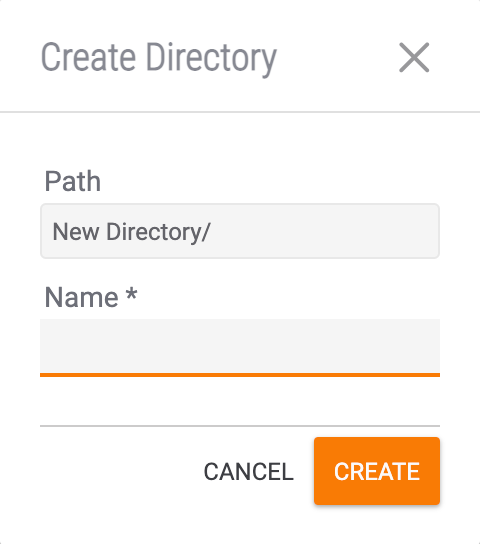
To create a new directory, click Create Directory . The Create Directory window will be displayed (Figure 7).
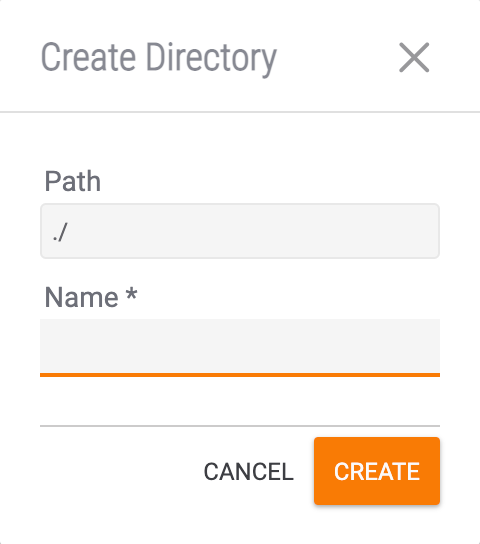
- Path: The directory’s path cannot be edited.
- Name: Enter a name for the directory.
- Click the CREATE button. The new directory will be displayed in the Contents tab.
Directory Administration
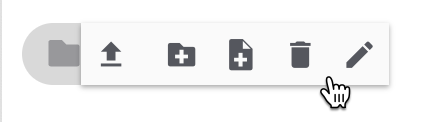
To access the administrative functions that may be performed on directories, hover the cursor over the name of the directory in the Contents tab to display a horizontal ellipsis to the right of the directory name (Figure 8).

Hover the cursor over the ellipsis to display five icons (Figure 9).
To upload a file to the directory, click Upload File . Select a file for upload from the file manager window that is displayed.
To create a new directory in the directory (i.e., a sub-directory), click Create Directory. The Create Directory window will be displayed (Figure 10).
- Path: The directory’s path. In this example, the path indicates that the new directory will be in the existing directory (New Directory). The Path field cannot be edited.
- Name: Enter a Name for the directory.
- Click the CREATE button. The new directory will be displayed in the Contents tab within the original directory.
To create a file in the directory, click Create File. The Create File window will be displayed (Figure 11).
- Path: The file’s path. In this example, the path indicates that the new file will be in the directory. The Path field cannot be edited.
- Name: Enter a name for the file.
- Click the CREATE button. The new file will open in the Code Editor.
To delete the directory, click Delete. The Confirm window will be displayed. Click the REMOVE button to delete the directory.
To rename the directory, click Edit. The Rename Directory window will be displayed. Enter a new name for the directory, and then click the CREATE button.
ThreatConnect® is a registered trademark of ThreatConnect, Inc.
20084-07 v.07.B