The vertical ellipsis menu in the rightmost column for an Artifact provides six administrative options for the Artifact (Figure 1).
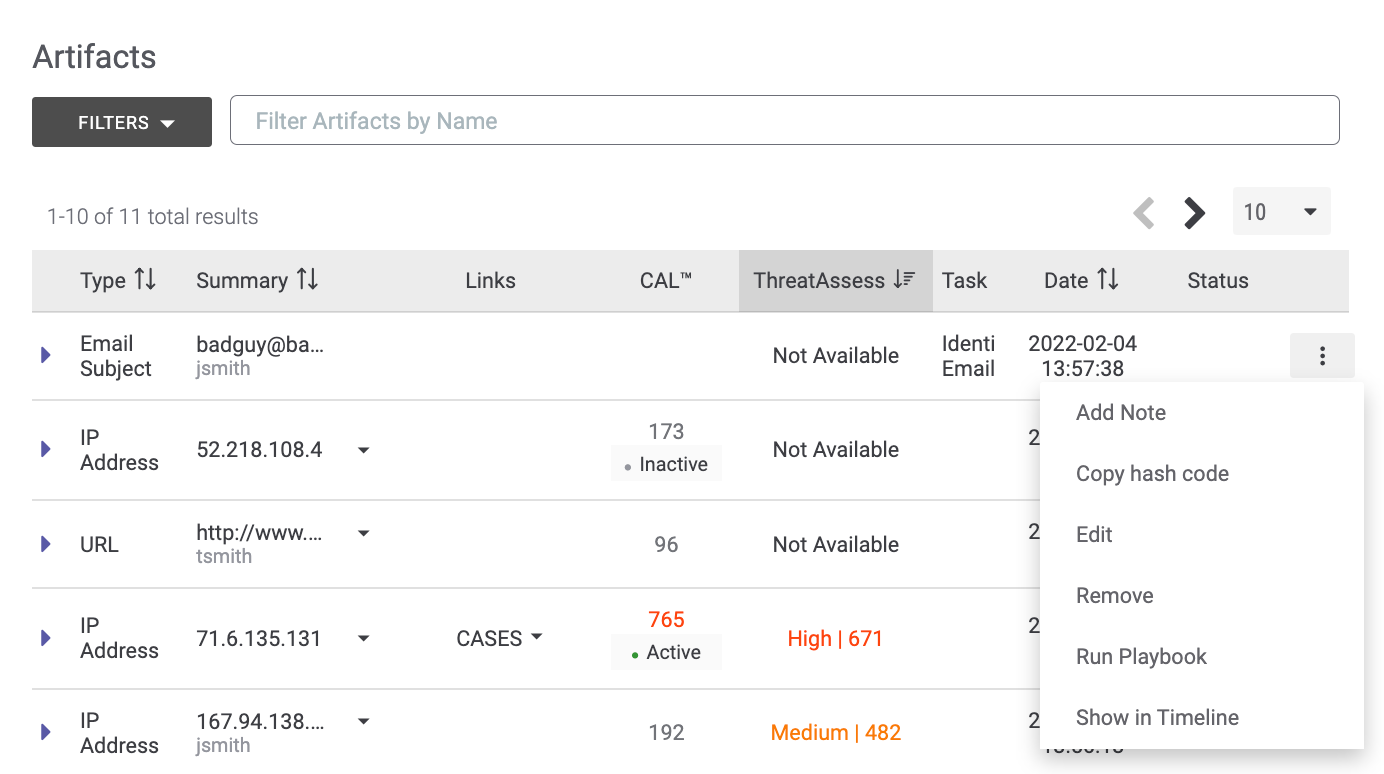
Add Note
Select Add Note to add a Note to the Case that will be linked to the Artifact. The Create Note drawer will be displayed (Figure 2).
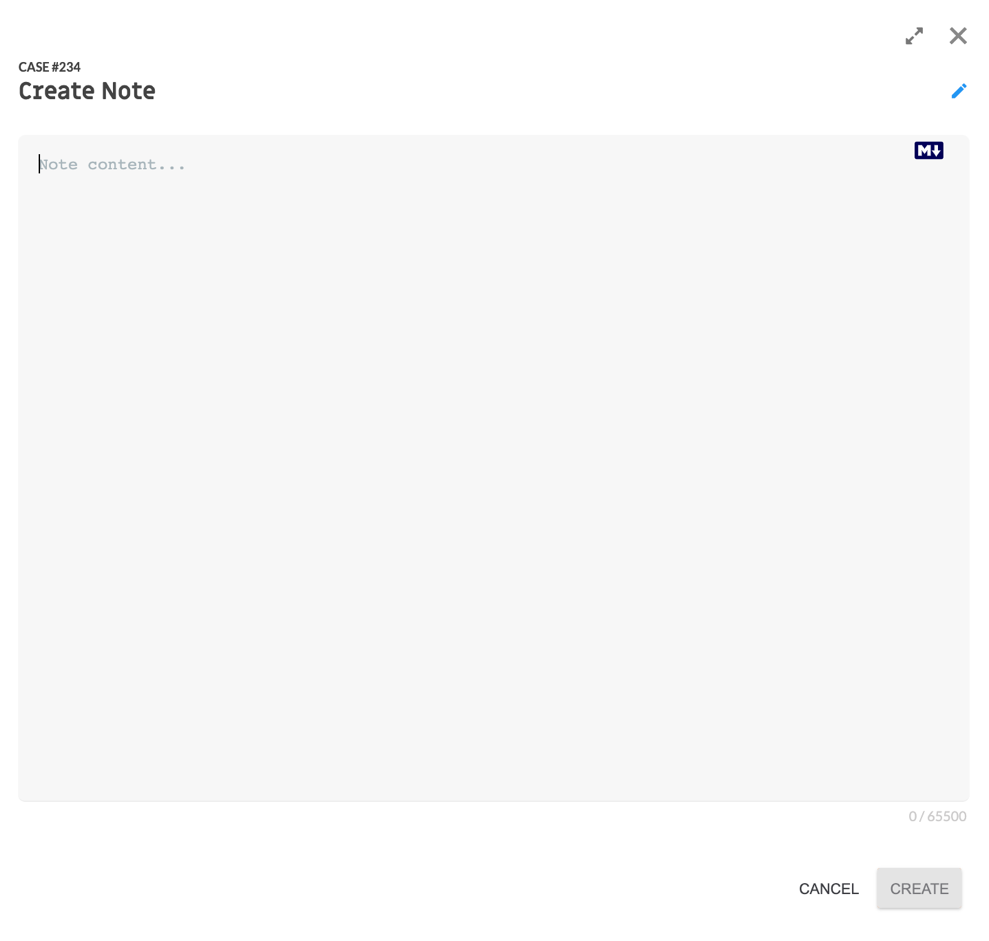
- Enter the contents of the Note in the text box, either in plain text or in Markdown.NoteThe text box displayed in the Create Note drawer supports the Marked library (https://marked.js.org/).
- Click the CREATE button. The Note will be added to the Case and displayed in the Notes card, with a link to the Artifact.
Copy hash code
Select Copy hash code to copy the hash code for the Artifact (including Artifacts that have String values, such as Addresses) to the clipboard—for example, to paste and send to a System Administrator for addition to an exclusion list.
Edit
Select Edit to edit the Artifact. The Edit Artifact drawer will be displayed (Figure 3).
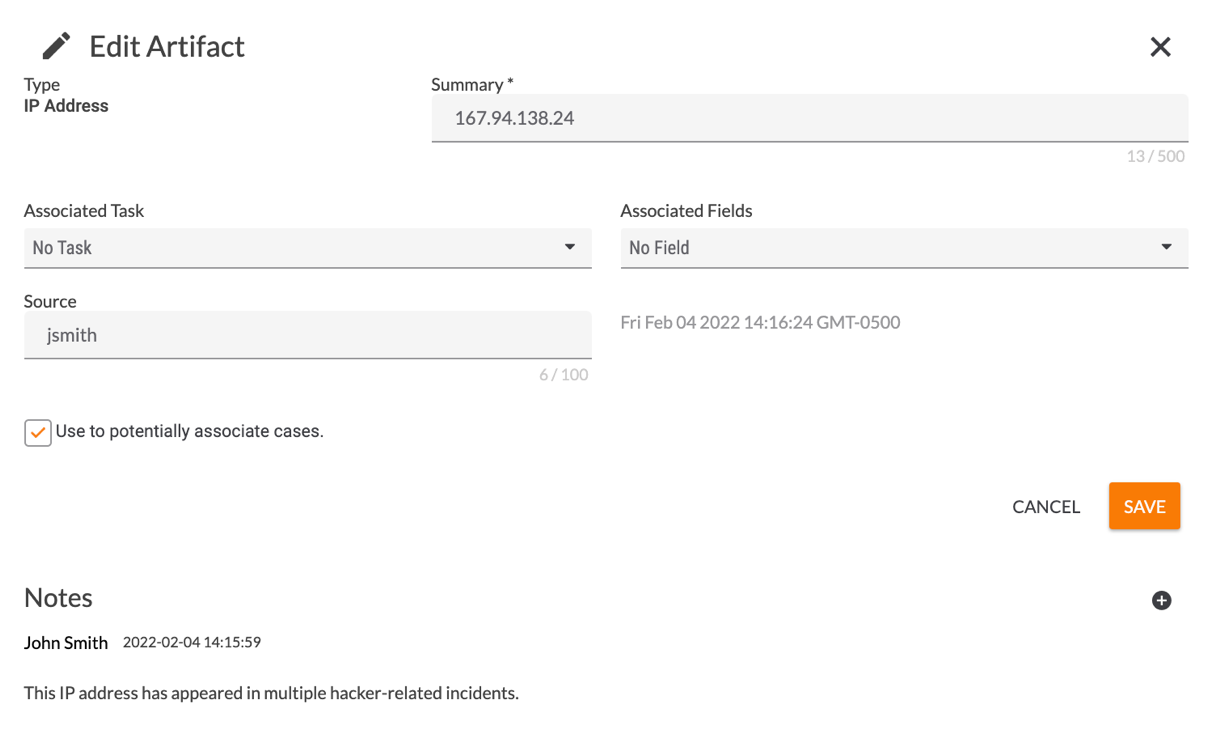
- Edit the Artifact as desired. For an explanation of each option available on this drawer, see Adding Artifacts to a Case. Note that you cannot change an existing Artifact’s type.
- To add a new Note to the Artifact, click Add
 at the bottom right of the Edit Artifact drawer. The Create Note drawer will be displayed. See the “Add Note” section for more information about adding a Note to an Artifact.
 - Click the SAVE button to save the edits.
Remove
Select Remove to delete the Artifact. The Remove Artifact window will be displayed. Click the CONFIRM button to delete the Artifact from the Case.
Run Playbook
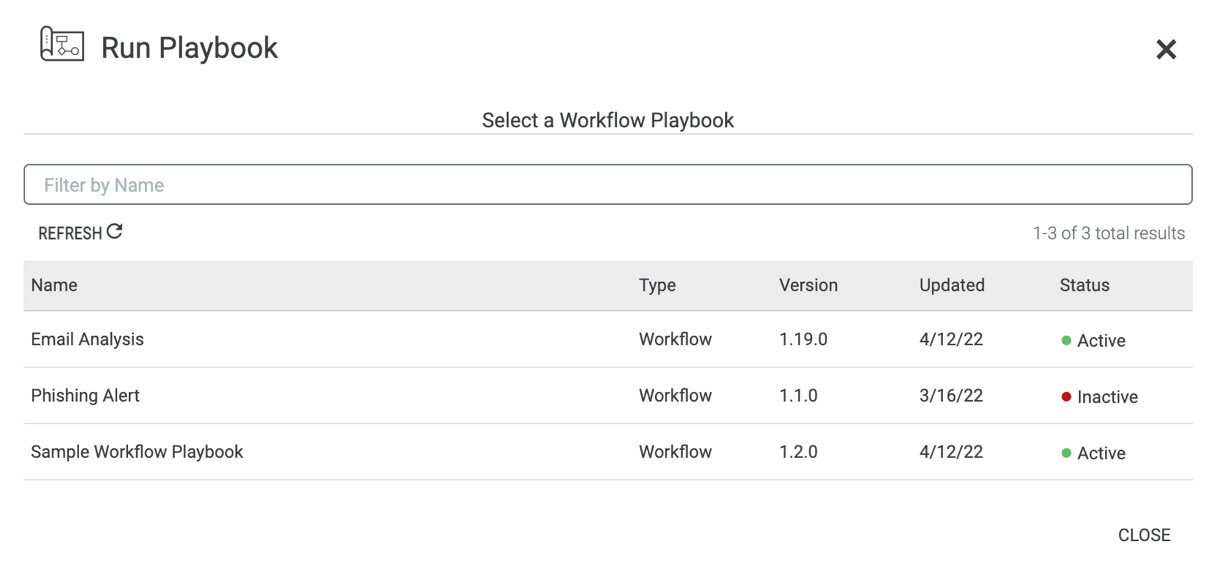
Select Run Playbook to run a Workflow Playbook on the Artifact. The Run Playbook drawer will be displayed, showing all Workflow Playbooks in your Organization (Figure 4).
Select a Playbook to run on the Artifact. The Run Playbook drawer will display the required inputs for that Playbook, with the selected Artifact highlighted in the table of Artifacts on the bottom right of the drawer (Figure 5).
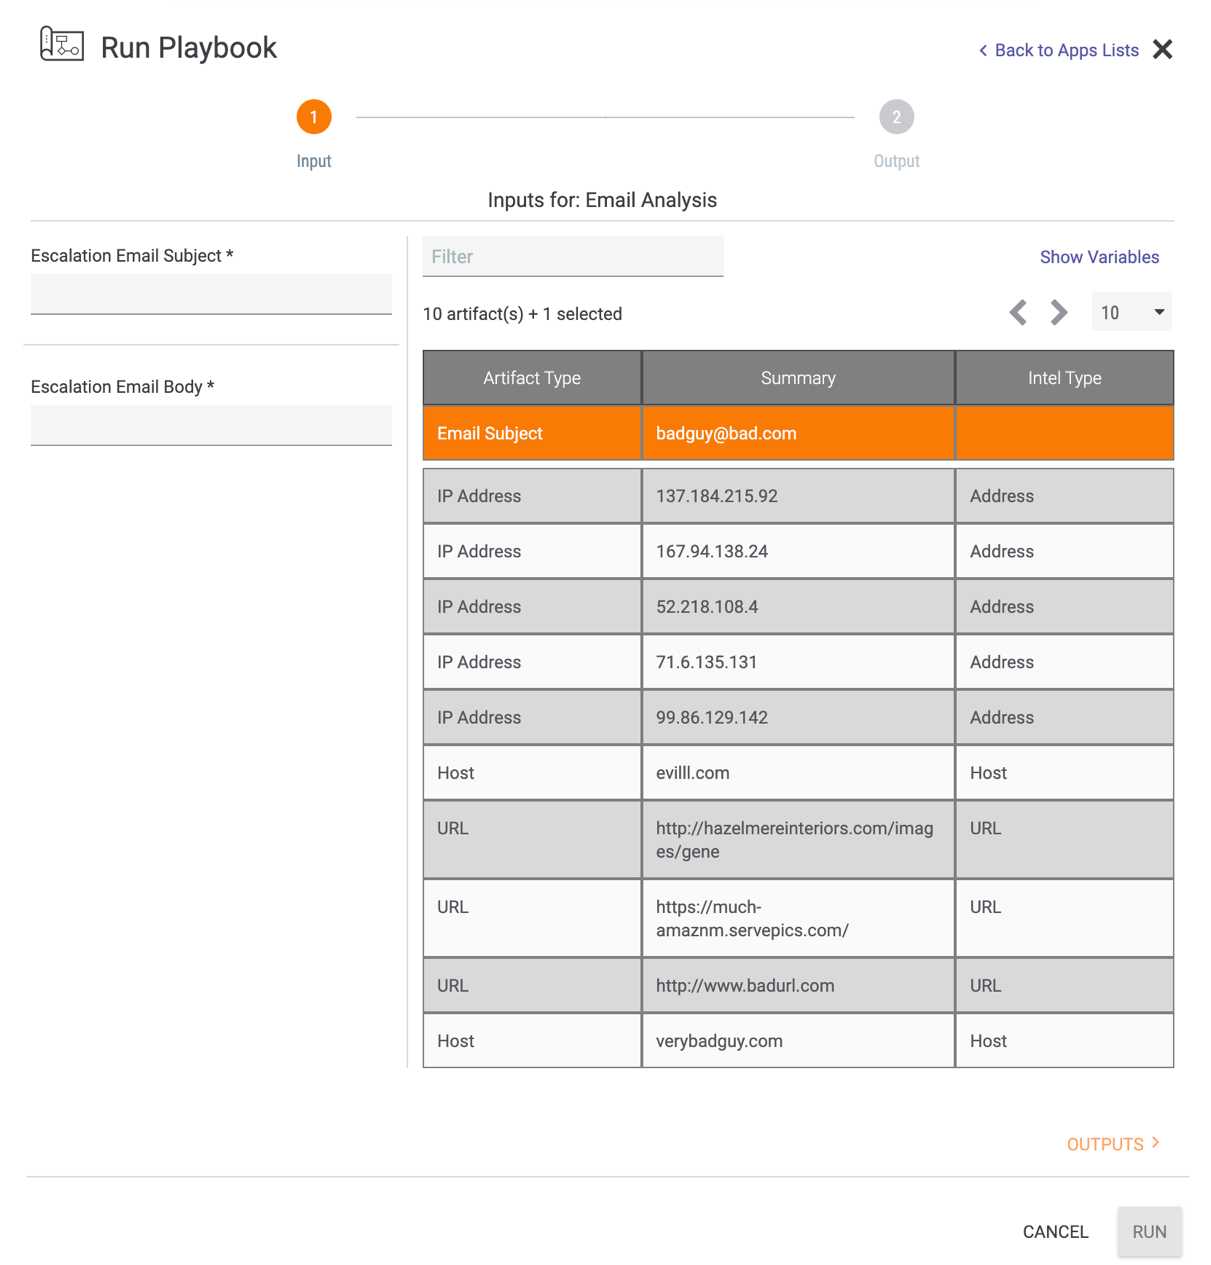
- Fill in all required input fields. Note that you can use the Filter field to filter Artifacts by keyword, if desired. Similarly, click the Show Variables link to view all variables in your Organization, if desired.
- Click the OUTPUTS > link at the bottom right of the drawer.
The drawer will display all outputs that the Playbook will produce (Figure 6).
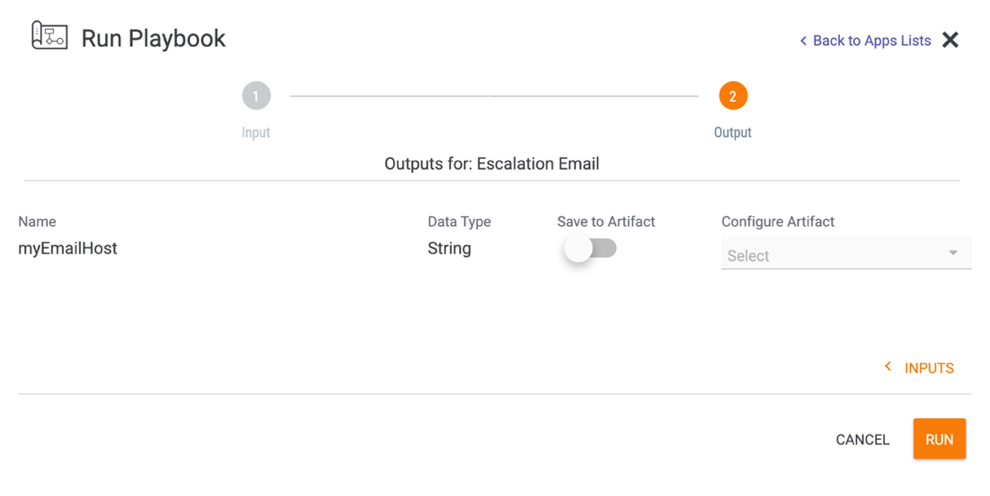
To save an output as an Artifact, toggle the Save to Artifact slider on. Fields for configuring the Artifact will be displayed (Figure 7).
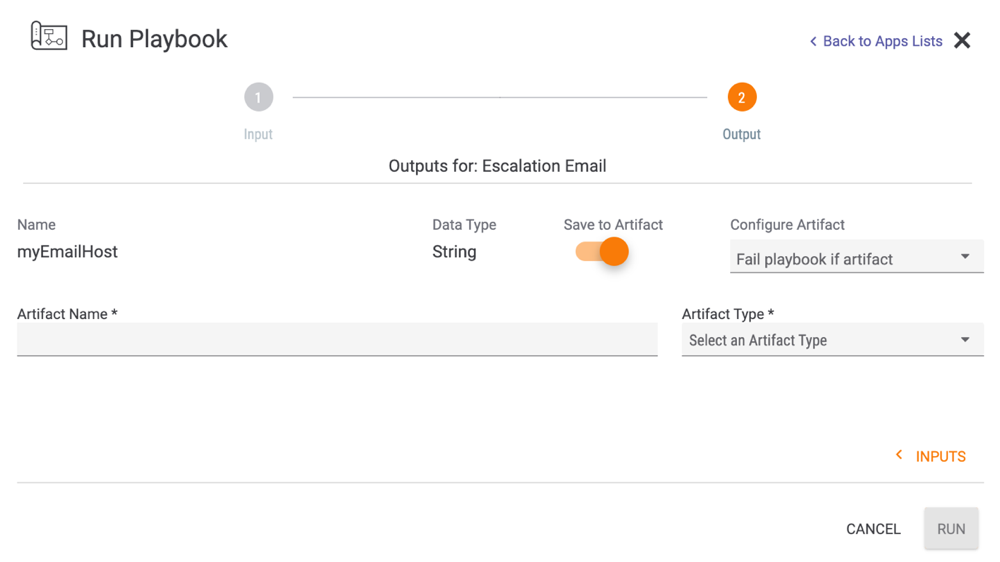
- Artifact Name: Enter a name for the Artifact.
- Artifact Type: Select the type of Artifact being saved. Only Artifact types that map to the output’s data type (String in this example) will be displayed in the Artifact Type dropdown.
- Configure Artifact: Select the failure option(s) for the Playbook. Note that no selection is required for this field, and more than one option may be selected. Available options include:
- Output is required: Select this option to make the Playbook fail if it does not produce any output.
- Fail playbook if artifact validation fails: Select this option to make the Playbook fail if it produces output that fails Artifact validation.
- Click the RUN button to run the Playbook.
Show in Timeline
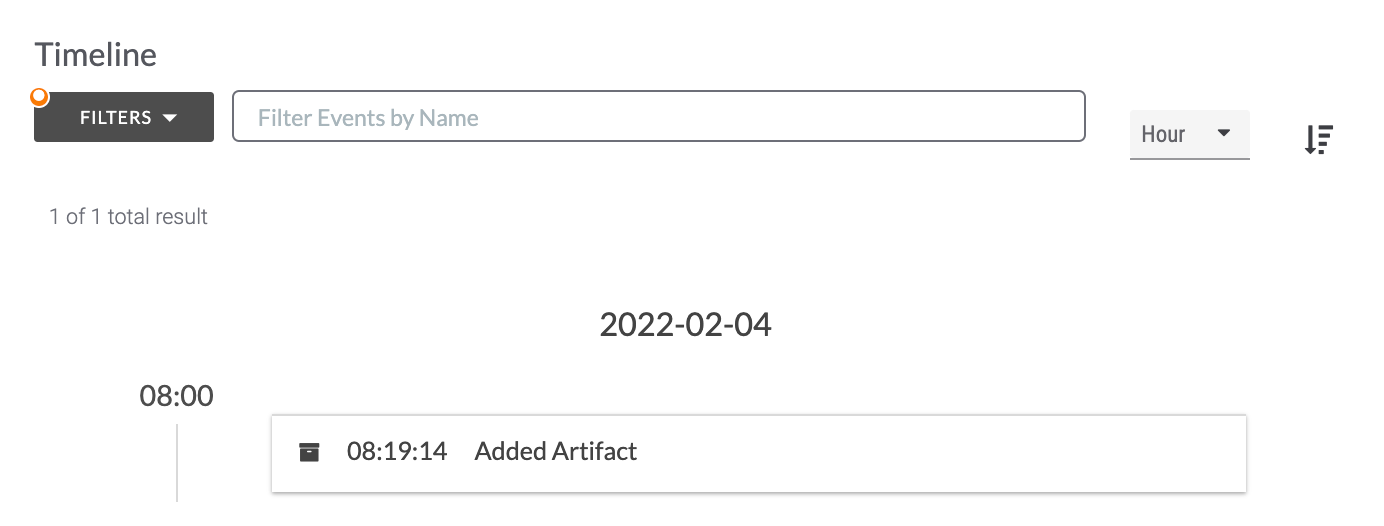
Select Show in Timeline to filter the Case’s Timeline card to display Timeline Events related to the Artifact (Figure 8).
ThreatConnect® is a registered trademark of ThreatConnect, Inc.
20123-04 v.02.B