Overview
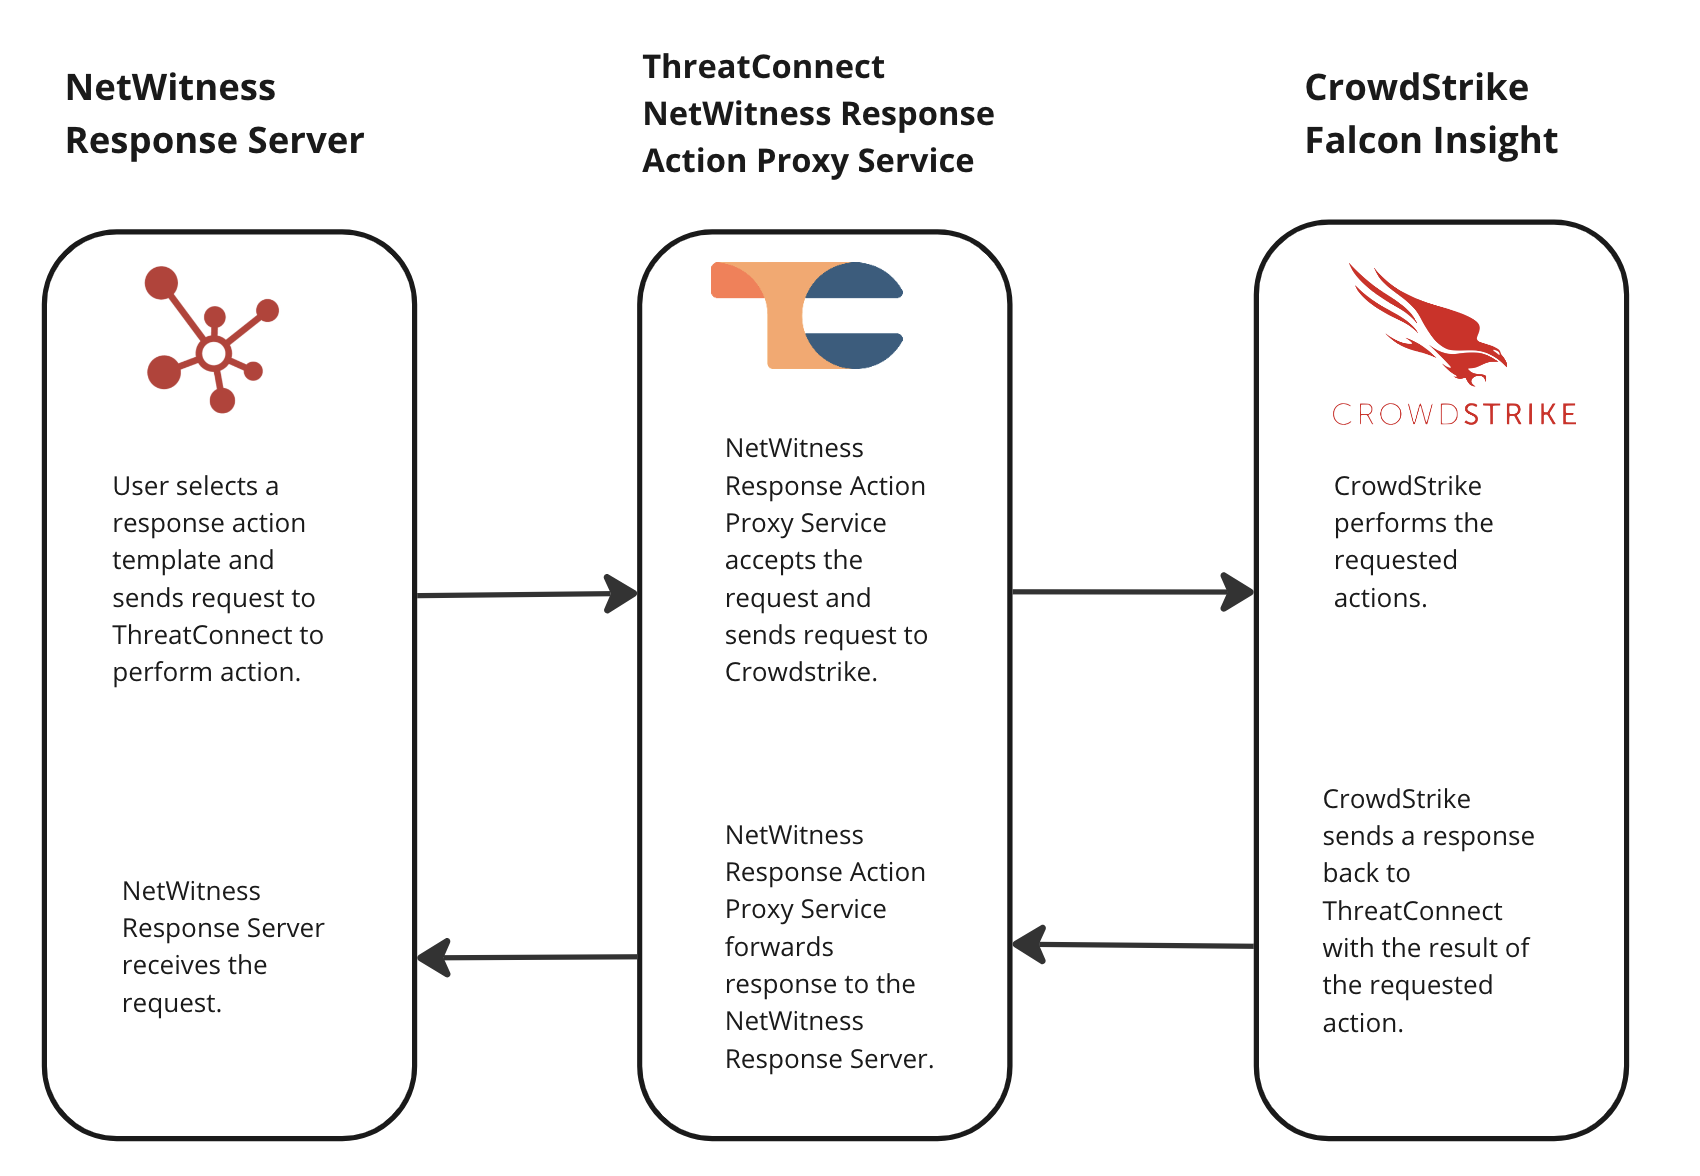
The ThreatConnect® NetWitness Response Action Proxy integration is a request proxy integration between the RSA NetWitness® Response Server and CrowdStrike Falcon® Insight. This integration lets NetWitness Orchestrator customers use NetWitness Response Actions to retrieve the status of a host and then isolate or unisolate the host with CrowdStrike Falcon Insight. All requests are proxied through a Service in ThreatConnect that corresponds to the NetWitness Response Action Proxy Service App.
Dependencies
ThreatConnect Dependencies
- Active ThreatConnect Application Programming Interface (API) user
- ThreatConnect instance with version 7.2 or newer installed
NetWitness Dependencies
- NetWitness Platform 12.5
CrowdStrike Falcon Insight Dependencies
- CrowdStrike Falcon Insight Client ID
- CrowdStrike Falcon Insight Client Secret
- CrowdStrike API endpoint applicable to the country or region in which you reside
Integration Installation and Configuration
Step 1: Install the Integration
Follow these steps to install the NetWitness Response Action Proxy Service App via TC Exchange™:
- Log into ThreatConnect with a System Administrator account.
- Hover over Settings
 on the top navigation bar and select TC Exchange Settings.
 - Locate the NetWitness Response Action Proxy Service App on the Catalog tab. Then click Install
 in the Options column.
Step 2: Configure the Integration
After the NetWitness Response Action Proxy Service App is installed successfully, follow these steps to configure the corresponding Service for the App:
- Log into ThreatConnect with a System Administrator account.
- Hover over Playbooks on the top navigation bar and select Services.
- Click + NEW at the top left of the Services screen.
- Fill out the fields on the Select step of the Create Service drawer (Figure 1) as follows:
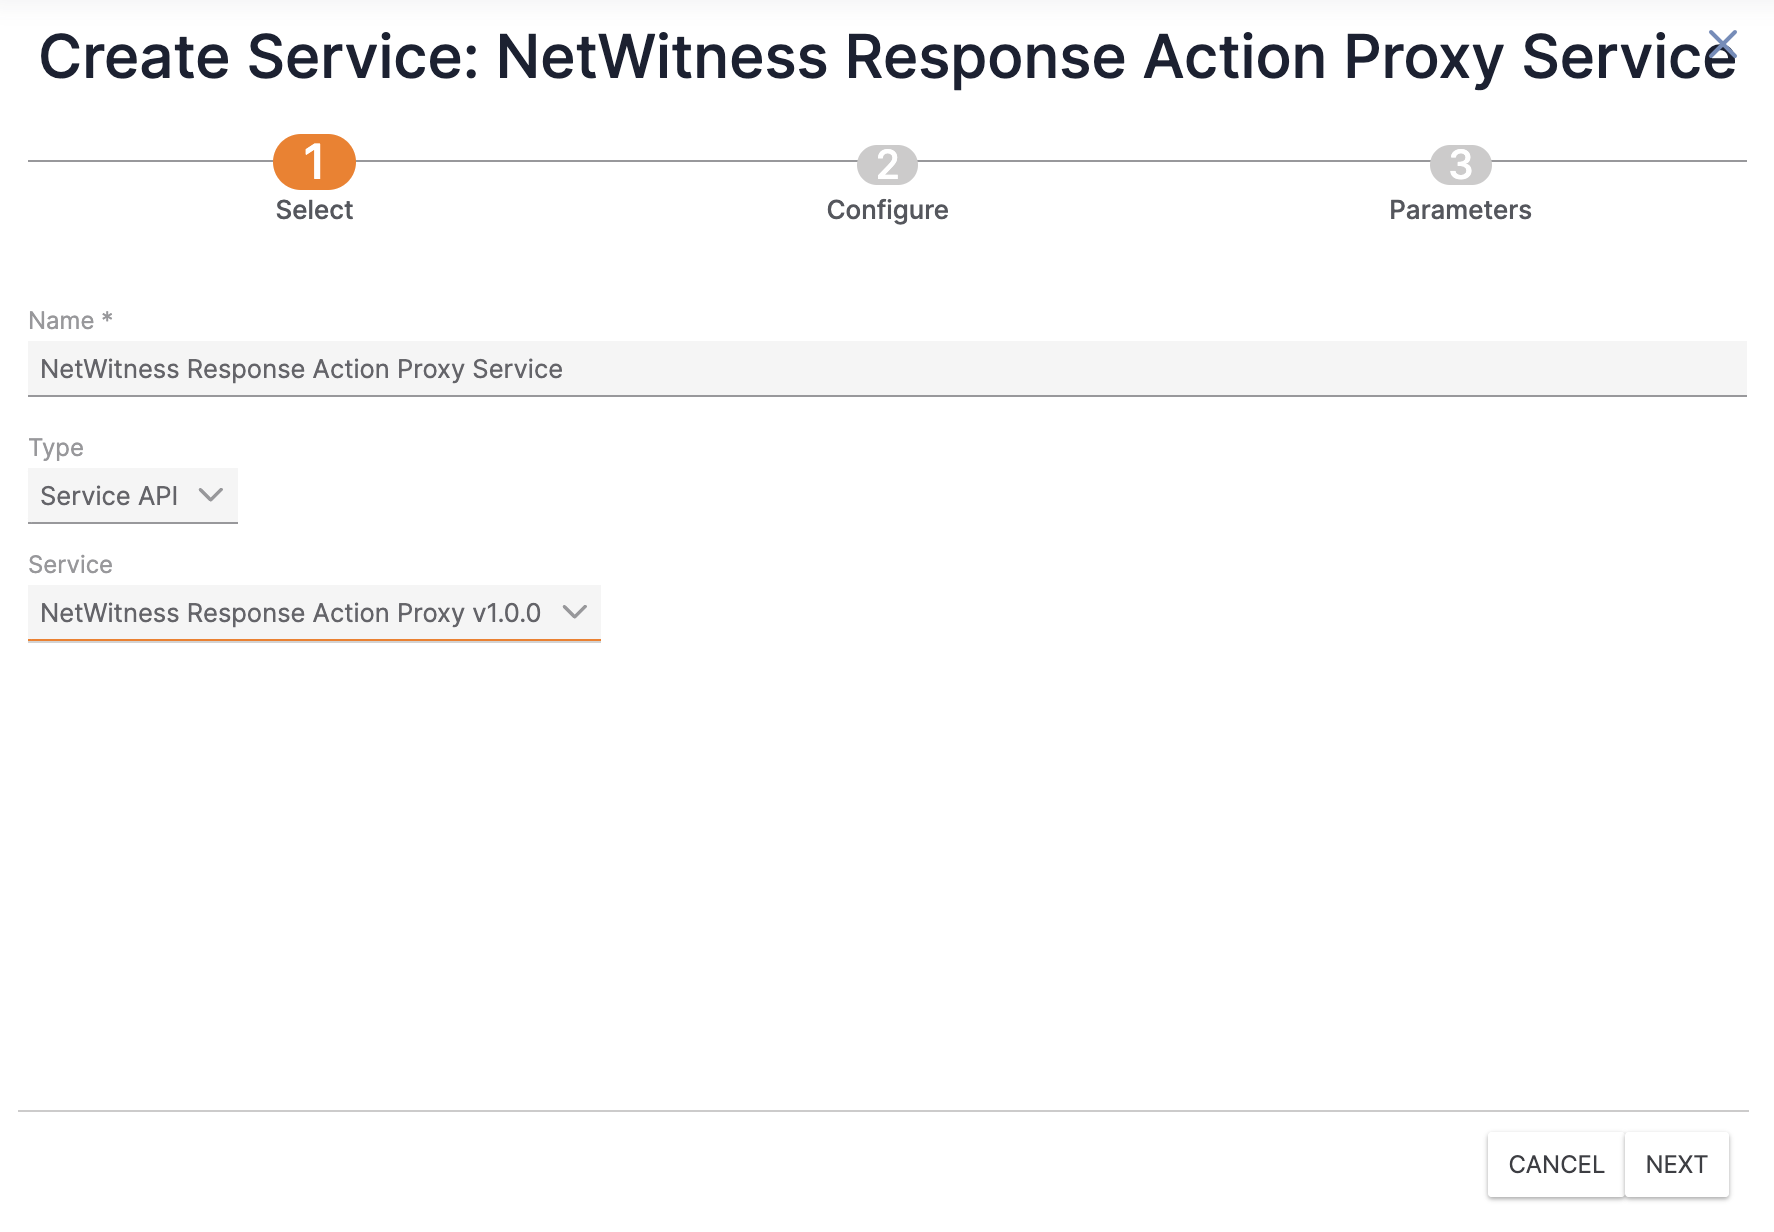
- Name: Enter a name for the Service.
- Type: Select Service API.
- Service: Select NetWitness Response Action Proxy v1.0.0.
- Click Next to proceed to the Configure step (Figure 2). Then fill out the fields on the Configure step as follows:
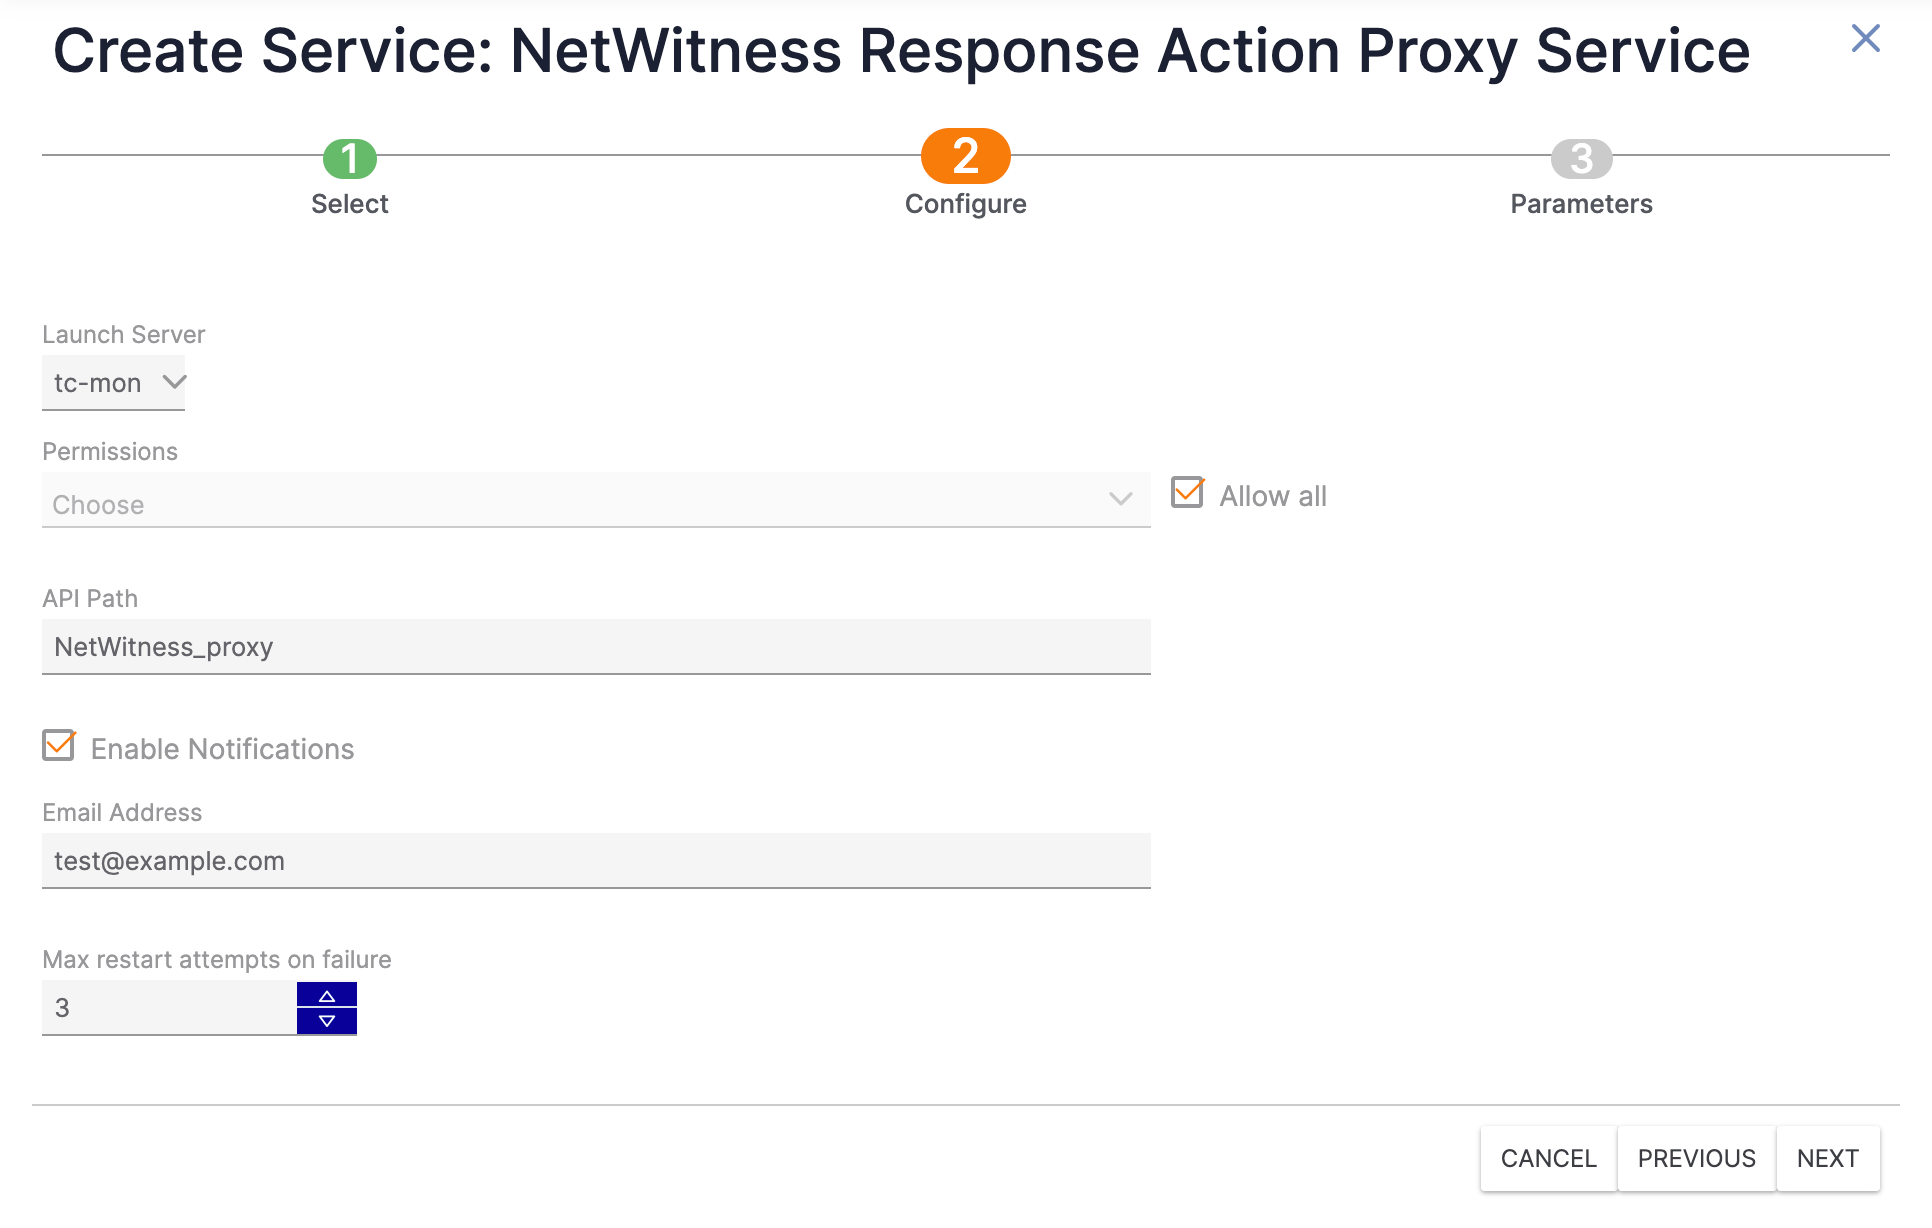
- Launch Server: Select tc-mon.
- Permissions: Select one or more Organizations that will be allowed to use the Service. Alternatively, select Allow all to allow all Organizations to use the Service.
- API Path: Enter the desired API path name for the Service. (The default API path name is NetWitness_proxy.) This is the path that will be appended to the base URL API path. For example, if the base URL API path is https://example.threatconnect.com/api and the value of the API Path field is NetWitness_proxy, the API path for the Service will be https://example.threatconnect.com/api/NetWitness_proxy.
- Enable Notifications: Select Enable Notifications to send an email when the Service fails to start. It is recommended to enable this setting.
- Email Address: If you selected Enable Notifications, enter the email address to which notifications should be sent. It is recommended to enter an email address for a ThreatConnect user with a System role of Administrator.
- Max restart attempts on failure: Enter the number of times ThreatConnect should try to restart the Service if it fails. It is recommended to set this value to 3.
- Click Next to proceed to the Parameters step (Figure 3). Then fill out the fields on the Parameters step as follows:
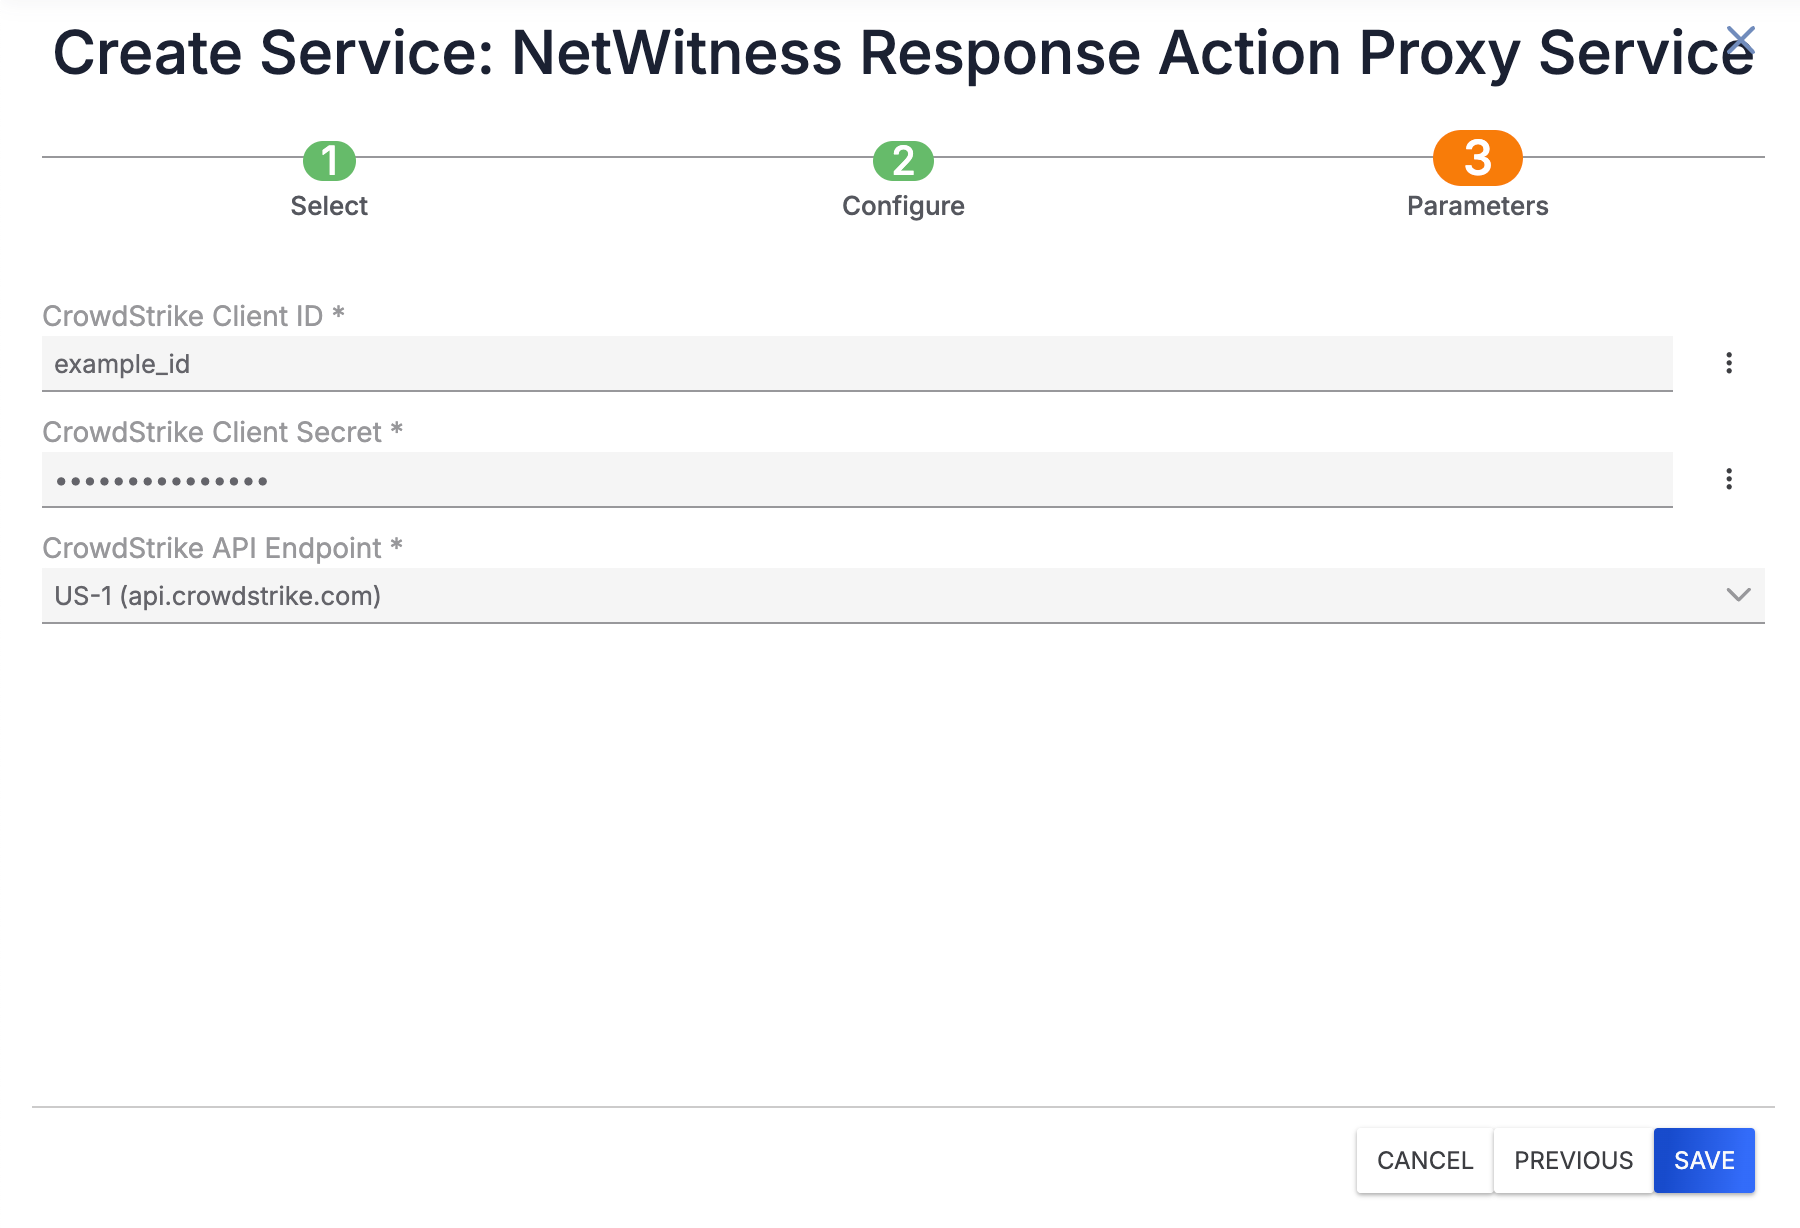
- CrowdStrike Client ID: Enter the CrowdStrike Falcon Insight Client ID that the integration will use.
- CrowdStrike Client Secret: Enter the CrowdStrike Falcon Insight Client Secret that the integration will use.
- CrowdStrike API Endpoint: Select the CrowdStrike API endpoint that the integration will use.
- Click Save on the Create Service drawer to create the Service.
- Locate the newly created Service on the Services screen, and then turn on the toggle to the left of the Service to activate it (Figure 4). If the Service fails to activate, the screen will display a Service Failed message that explains why the Service failed to activate.

Additional Configuration
ThreatConnect Configuration
A ThreatConnect API user account is required in order to use the NetWitness Response Action Proxy integration. If you do not have a ThreatConnect API user account, follow these steps to create one:
- Log into ThreatConnect with an Organization Administrator account.
- On the top navigation bar, hover over Settingsand select Org Settings.
- On the Membership tab of the Organization Settings screen, click Create API User to create an API user. When creating the API user, configure it as follows:
- System Role: Select Api User.
- Organization Role: Select Standard User.
- Include in Observations and False Positives: Leave this checkbox cleared.
- Allow User to Exceed API Link Limit: Leave this checkbox cleared.
NoteAPI token authentication is not available for the NetWitness Response Action Proxy integration. - On the API User Administration window, record the Access ID and Secret Key for the API user, as they will be used in the NetWitness Platform to send requests to the integration.
NetWitness Configuration
Visit the NetWitness Community website or contact NetWitness technical support for assistance with configuring the NetWitness Response Action Proxy integration in the NetWitness Platform.
Sending API Requests Through NetWitness Response Action Proxy
All API requests to the NetWitness Response Action Proxy integration must include Timestamp and Authorization headers for authentication purposes.
There are three API calls that can be made to the NetWitness Response Action Proxy Service App, each of which is listed in Table 1. Note that each example request in Table 1 uses the following placeholder values, which should be replaced before sending a request:
{BASE_URL}: The base URL of your ThreatConnect instance followed by /api (e.g., https://example.threatconnect.com/api).{SERVICE_URL}: The value entered for the API Path field when creating the Service. (See Step 5 in the “Step 2: Configure the Integration” section for more information.){HOST}: The hostname of the device to query or take action on (e.g., my-lab-computer).
The following is an example of how a complete request to the NetWitness Response Action Proxy integration’s status endpoint should look:
GET https://example.threatconnect.com/api/NetWitness_proxy/api/1.0/crowdstrike/status/my-lab-computer
| Endpoint | Example Request |
|---|---|
status | |
isolate_device | |
unisolate_device | |
Integration Troubleshooting
The NetWitness Response Action Proxy integration includes a built-in audit log that can help diagnose issues with the integration.
Using the NetWitness Response Action Proxy Audit Log
Follow these steps to access and use the NetWitness Response Action Proxy audit log:
- Log into ThreatConnect with a System Administrator account.
- Hover over Playbooks on the top navigation bar and select Services.
- Locate the Service you created for the NetWitness Response Action Proxy Service App on the Services screen, and then click the URL in the API Path field (Figure 5) to open the NetWitness Response Action Proxy audit log.

- The NetWitness Response Action Proxy audit log (Figure 6) shows all requests that have passed through the NetWitness Response Action Proxy Service App in a tabular format with the following columns:
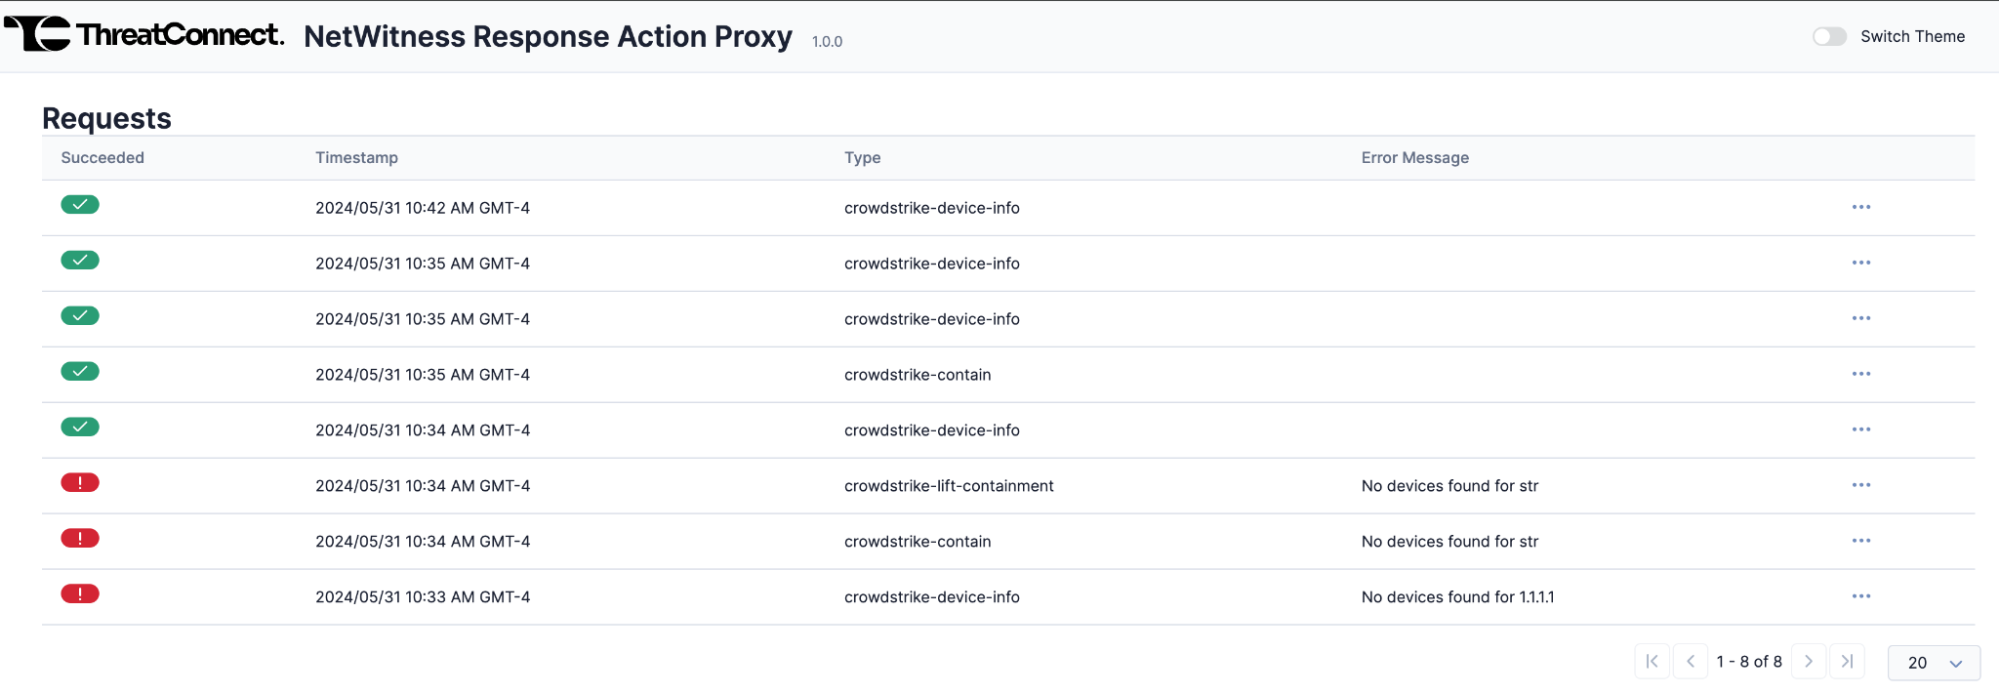 NoteThe default color mode for the NetWitness Response Action Proxy audit log is light mode. However, you can switch to dark mode using the Switch Theme toggle at the top right of the screen.
- Succeeded: This column indicates whether the request was successful. Successful requests will have a green checkmark, and failed requests will have a red exclamation mark and an error message in the Error Message column.
- Timestamp: The timestamp of the request.
- Type: The request’s type. Possible values for this column include the following:
- crowdstrike-device-info: The request was a GET request to the
statusendpoint to retrieve information about the host from CrowdStrike Falcon Insight. - crowdstrike-contain: The request was a POST request to the
isolate_deviceendpoint to isolate the host using CrowdStrike Falcon Insight. - crowdstrike-lift-containment: The request was a POST request to the
unisolate_deviceendpoint to lift isolation of the host using CrowdStrike Falcon Insight. - Error Message: The error message associated with the request. This column displays a value only for failed requests.
- (Optional) Click the ⋯ menu for the request and then select View Details to view the details of the request or Download to download the audit log for the request.
Viewing Request Details
- Navigate to the NetWitness Response Action Proxy audit log.
- Click the ⋯ menu for a request, and then select View Details.
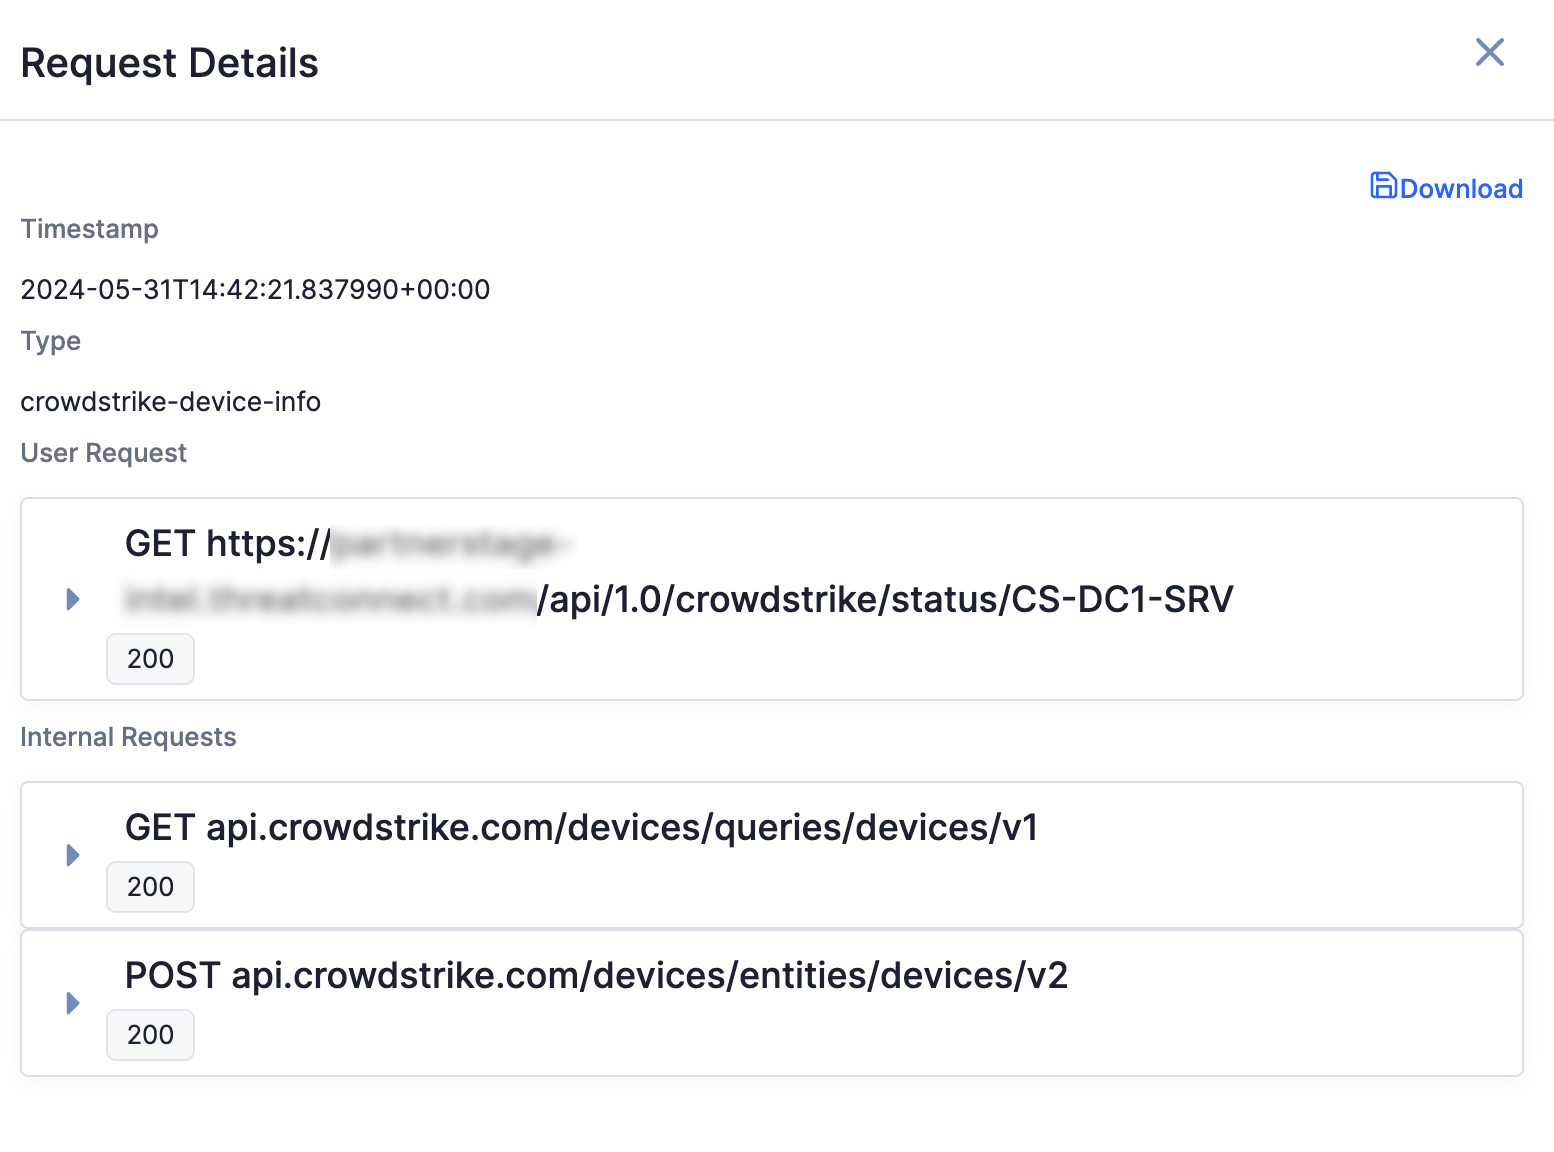
- When viewing the details of a request, the Request Details window will show a user request and the accompanying internal requests (Figure 7). The user request is the request from the user coming from the NetWitness Platform. The internal requests are the requests from the NetWitness Response Action Proxy Service App to CrowdStrike Falcon Insight.
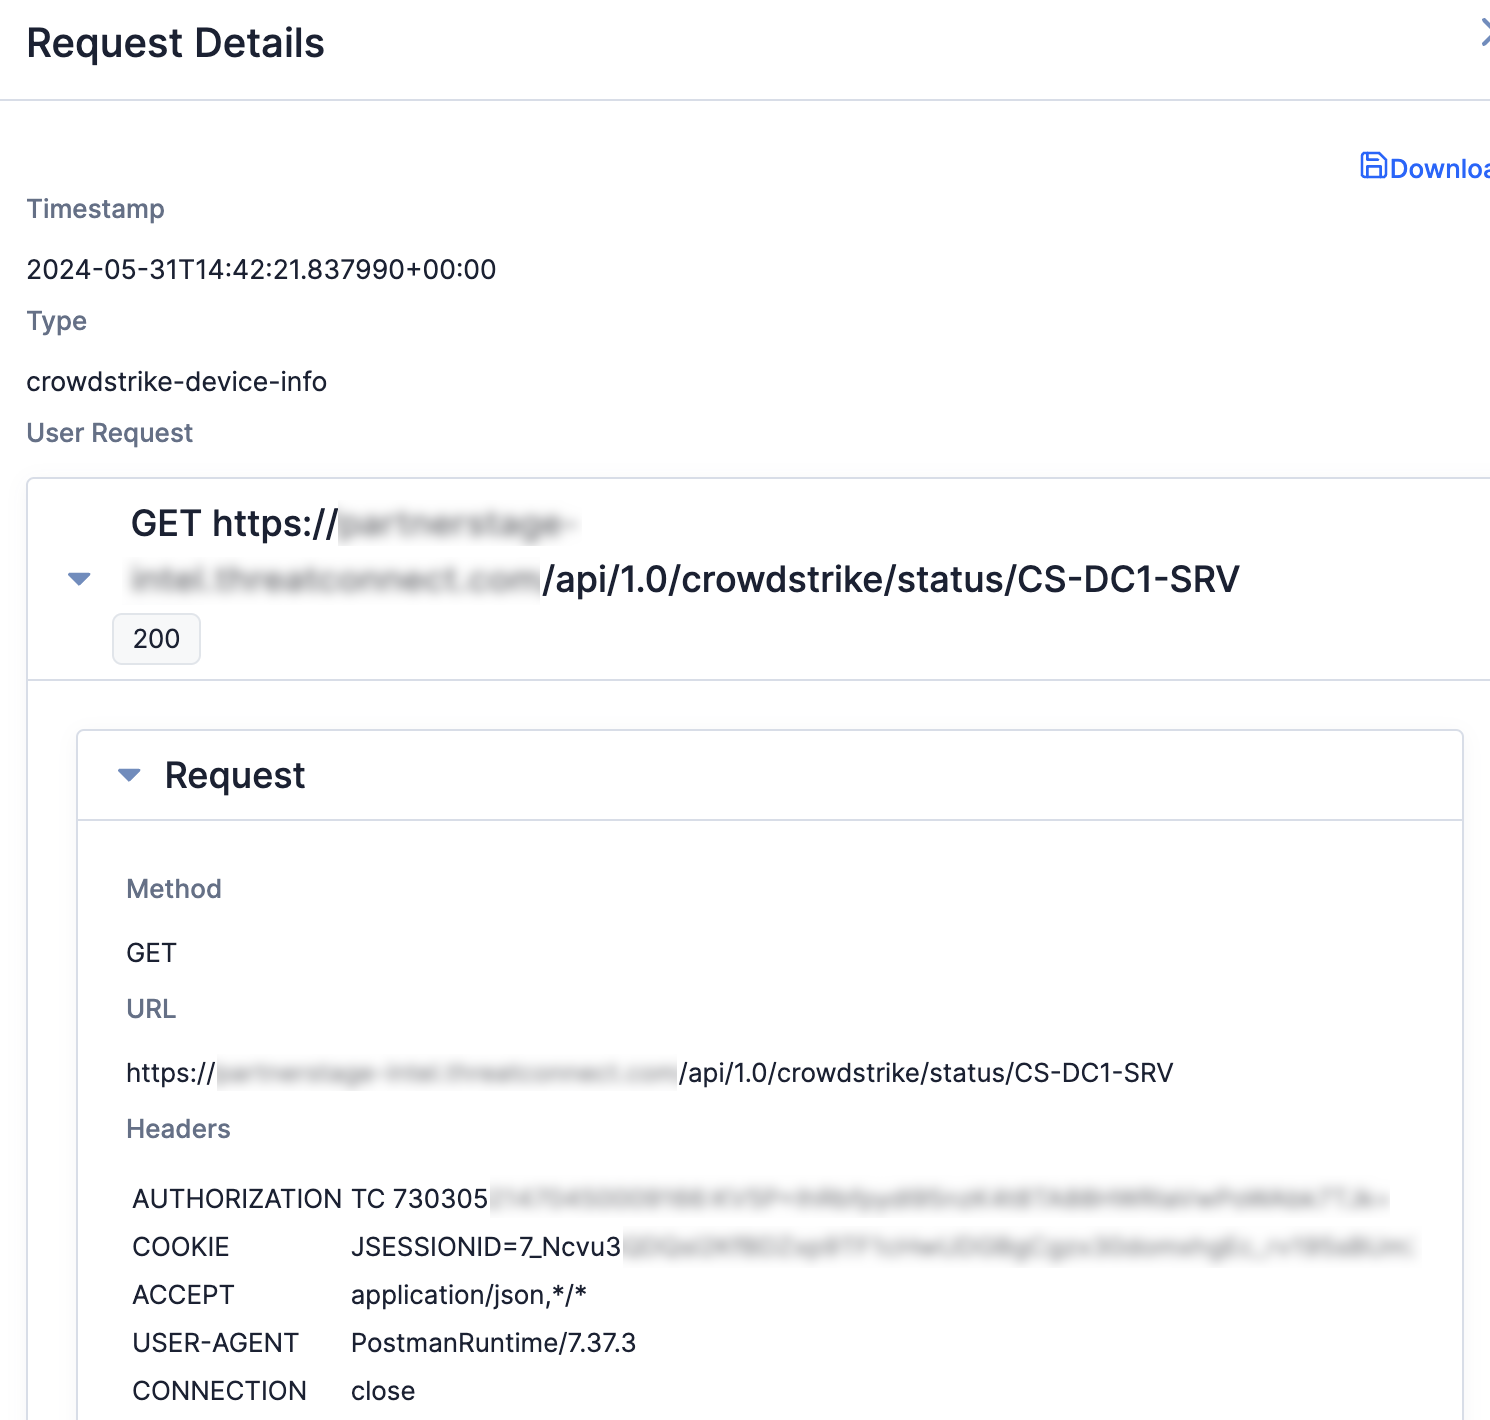
- Click on a request in the Request Details window to view more details about the request, including its HTTP method, URL, and headers (Figure 8).
Downloading the Audit Log for a Request
- Navigate to the NetWitness Response Action Proxy audit log.
- Click the ⋯ menu for a request, and then select Download. A JSON file with the contents of the audit log for the request will be downloaded onto your computer.
ThreatConnect® is a registered trademark, and TC Exchange™ is a trademark, of ThreatConnect, Inc.
CrowdStrike® and CrowdStrike Falcon® are registered trademarks of CrowdStrike, Inc.
RSA NetWitness® is a registered trademark of RSA Security LLC.
30086-01 EN Rev. B