Installing and Configuring the TAXII 2.1 Server Service (App Version 1.0)
- 06 Sep 2022
- 2 Minutes to read
-
Print
-
DarkLight
-
PDF
Installing and Configuring the TAXII 2.1 Server Service (App Version 1.0)
- Updated on 06 Sep 2022
- 2 Minutes to read
-
Print
-
DarkLight
-
PDF
Article summary
Did you find this summary helpful?
Thank you for your feedback!
Installing the ThreatConnect TAXII Server Service App
System Administrators can follow these steps to install the ThreatConnect TAXII™ Server Service App on their ThreatConnect instance via TC Exchange™:
- Log into ThreatConnect with a System Administrator account.
- On the top navigation bar, hover the cursor over Settings
 and select TC Exchange Settings. The Installed tab of the TC Exchange Settings screen will be displayed.
 - Select the Catalog tab. The Catalog screen will be displayed.
- Enter “taxii” (without quotation marks) in the search bar to filter the results to show the ThreatConnect TAXII Server Service App (Figure 1).

- Click Install
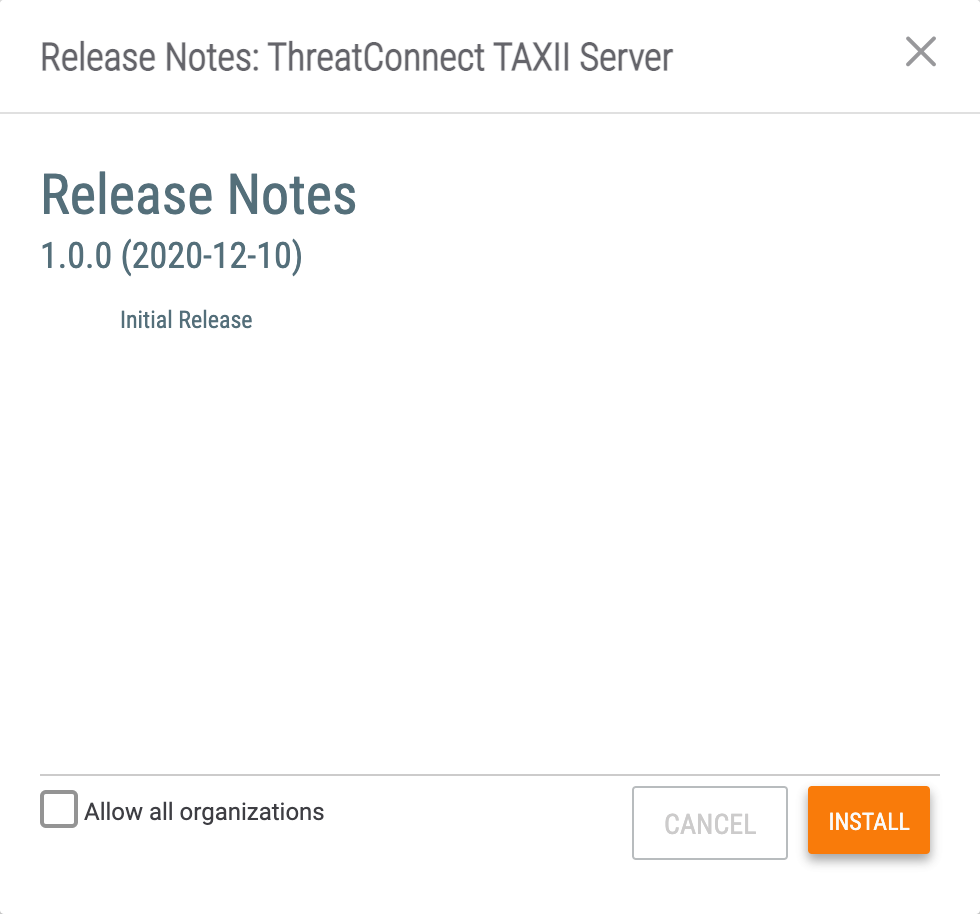
 in the Options column. The Release Notes window for the ThreatConnect TAXII Server Service App will be displayed (Figure 2).
- Allow all organizations: When installing a Service App, it does not matter whether this checkbox is selected. The Service itself, rather than the Service App, sets the permissions and access to the App, as detailed in the “Creating and Configuring the ThreatConnect TAXII Server Service” section.
- Click the INSTALL button.
Creating and Configuring the ThreatConnect TAXII Service
System Administrators can follow these steps to create and configure the TAXII™ Service after installing the ThreatConnect TAXII Server Service App:
- Log into ThreatConnect with a System Administrator account.
- On the top navigation bar, hover the cursor over Playbooks and select Services. The Services screen will be displayed.
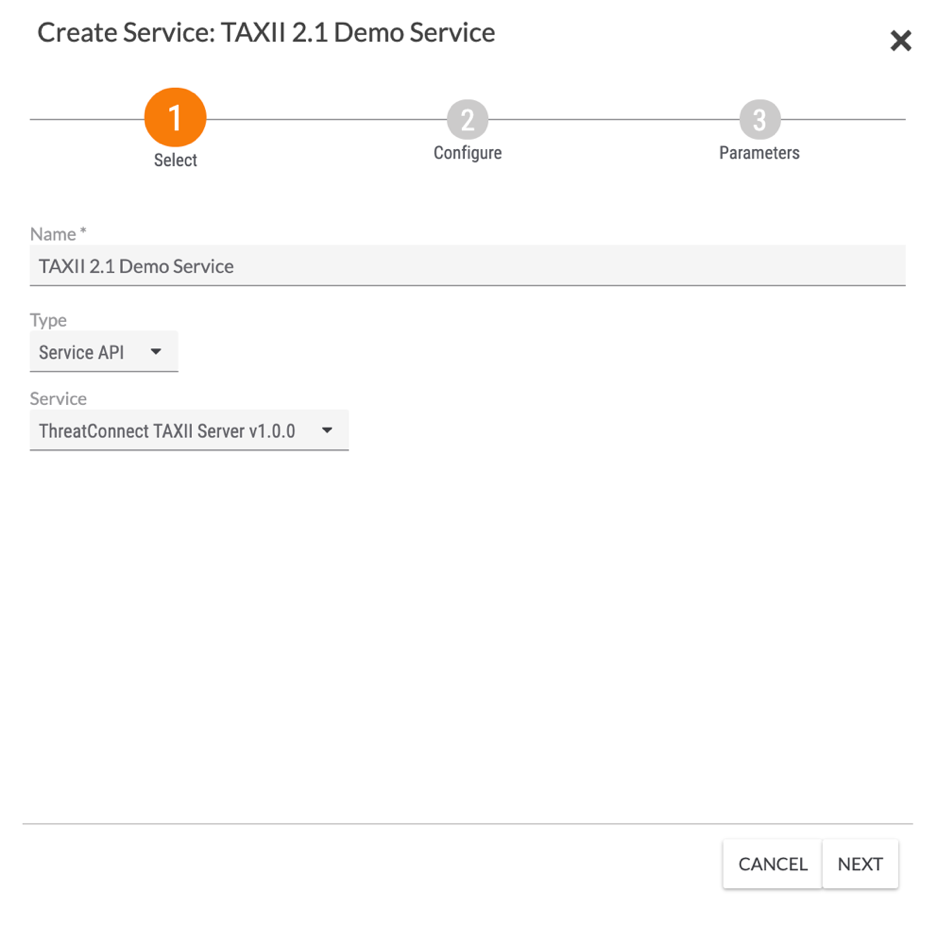
- Click the + NEW button at the upper-left corner of the screen. The Select screen of the Create Service drawer will be displayed (Figure 3).

- Name: Enter a unique name for the Service. When naming the Service, take into account that one Service can be created multiple times for different customers by using different credentials.
- Type: Select Service API.
- Service: Select ThreatConnect TAXII Server v1.0.0.
- Click the NEXT button.
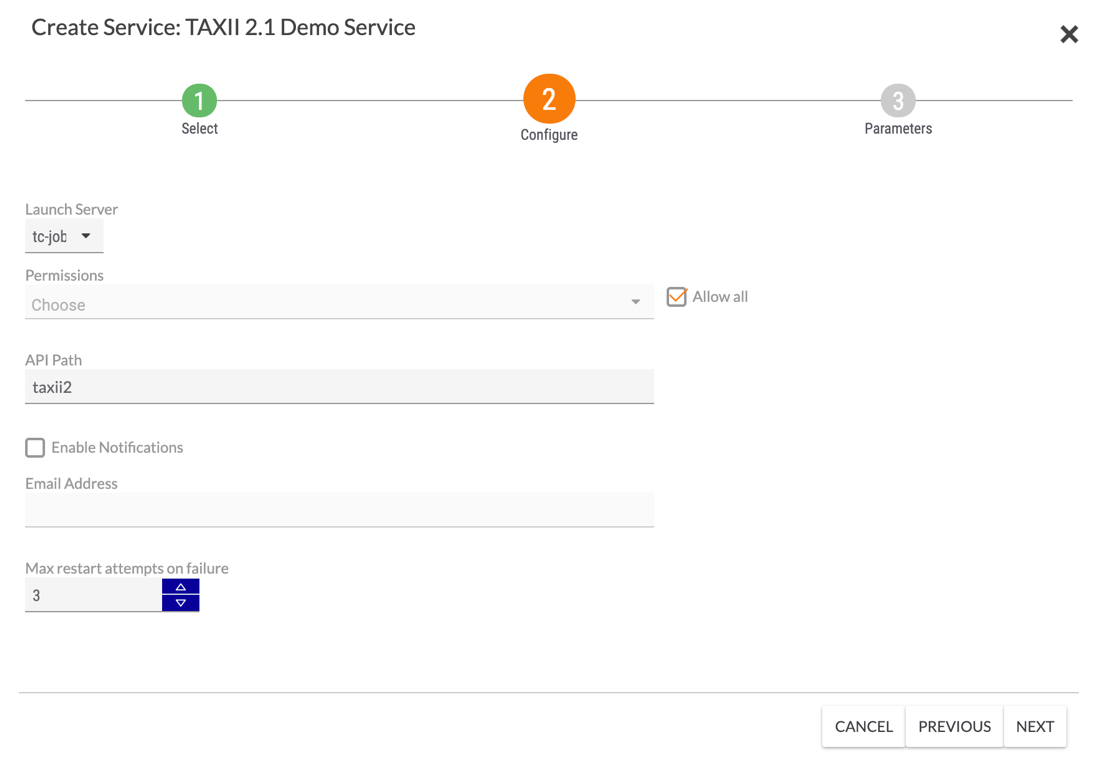
- The Configure screen of the Create Service drawer will be displayed (Figure 4).

- Launch Server: Select tc-job.
- Permissions: Select the Organization(s) that will have access to the Service.NoteEnsure that you select the Organization in which the TAXII user is to be created.
- Allow all: Select this checkbox if you want to give all Organizations on the ThreatConnect instance access to the Service.
- API Path: Enter a unique API path that will be used to make the TAXII requests. The default, taxii2, is a good option.NoteIf multiple copies of the Service will be run, each of their paths must be unique.
- Enable Notifications: Select this checkbox to send an email when the Service fails to start. It is recommended to enable this setting.
- Email Address: If the Enable Notifications checkbox is selected, enter the email address to which notifications should be sent. It is recommended to enter an email address for a ThreatConnect user with a System role of Administrator.
- Max restart attempts on failure: Enter the number of times ThreatConnect should try to restart the Service if it fails. It is recommended to set this value to 3.
- Click the NEXT button.
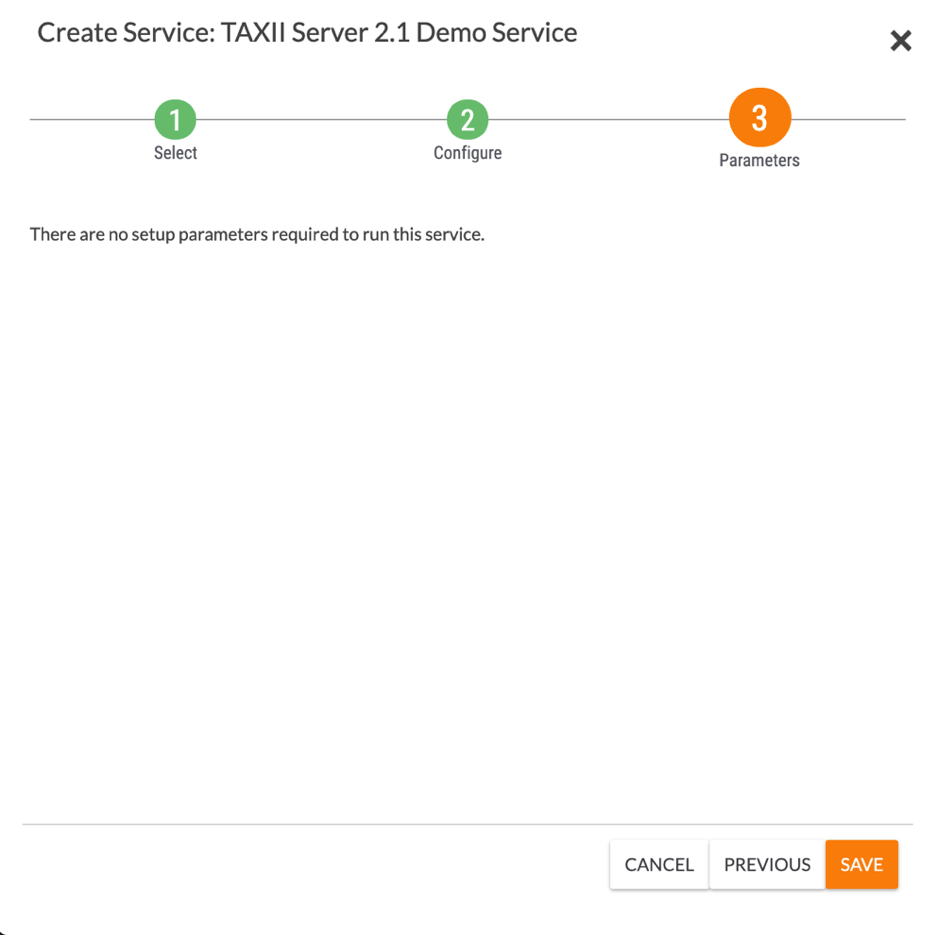
- The Parameters screen of the Create Service drawer will be displayed (Figure 5).

- Click the SAVE button.
- The Service will now be displayed on the Services tab of the Playbooks screen (Figure 6). Toggle the REST API slider on, and, if desired, adjust the Log Level.
 NoteIt is recommended that the log level for the ThreatConnect TAXII Server Service be set to INFO, WARN, or ERROR.
ThreatConnect® is a registered trademark, and TC Exchange™ is a trademark, of ThreatConnect, Inc.
TAXII™ is a trademark of The MITRE Corporation.
20103-02 v.05.A
Was this article helpful?


