Creating Custom Owner Roles
- 25 Aug 2022
- 3 Minutes to read
-
Print
-
DarkLight
-
PDF
Creating Custom Owner Roles
- Updated on 25 Aug 2022
- 3 Minutes to read
-
Print
-
DarkLight
-
PDF
Article summary
Did you find this summary helpful?
Thank you for your feedback!
Users with a System role of Administrator (i.e., a System Administrator) can view specific settings for each out-of-the-box owner role and create, modify, and delete custom owner roles on the Owner Roles tab of the Account Settings screen (Figure 1).
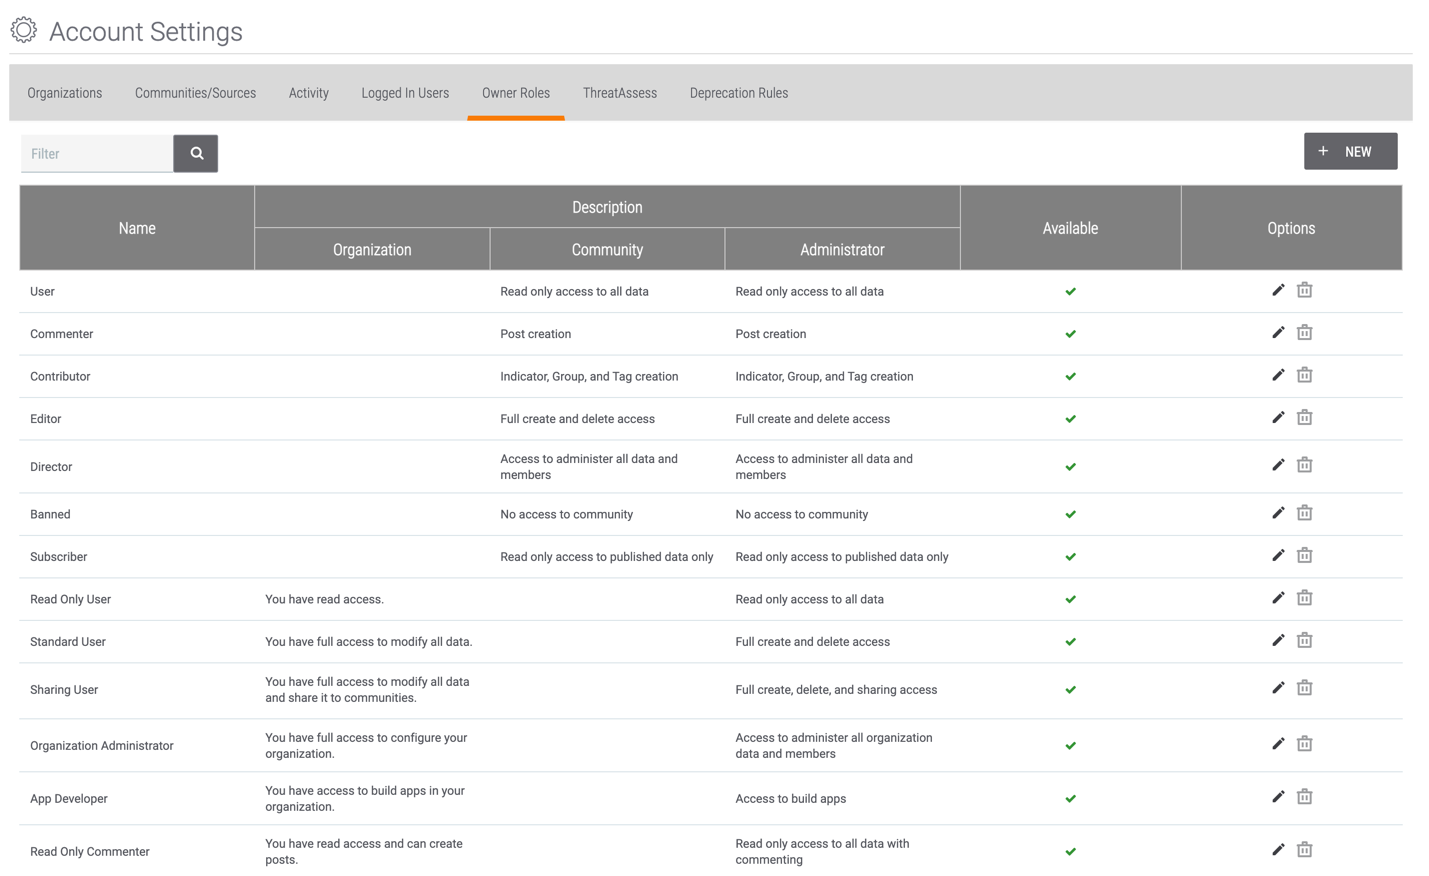
Click the pencil  icon in the Options column for an out-of-the-box owner role to view permissions for that role. These roles may not be modified or deleted, but they may be made available or unavailable on the ThreatConnect instance by selecting or clearing the Available checkbox, respectively, in the Edit Owner Role window that is displayed after clicking the pencil.
To create a custom role, click + NEW at the top right of the screen. The Create Owner Role window will be displayed, including the permissions available on the Access Control tab (Figure 2). Figure 3, Figure 4, and Figure 5 show the the Intel, Case Management, and Playbooks tabs, respectively, on the bottom half of this window.
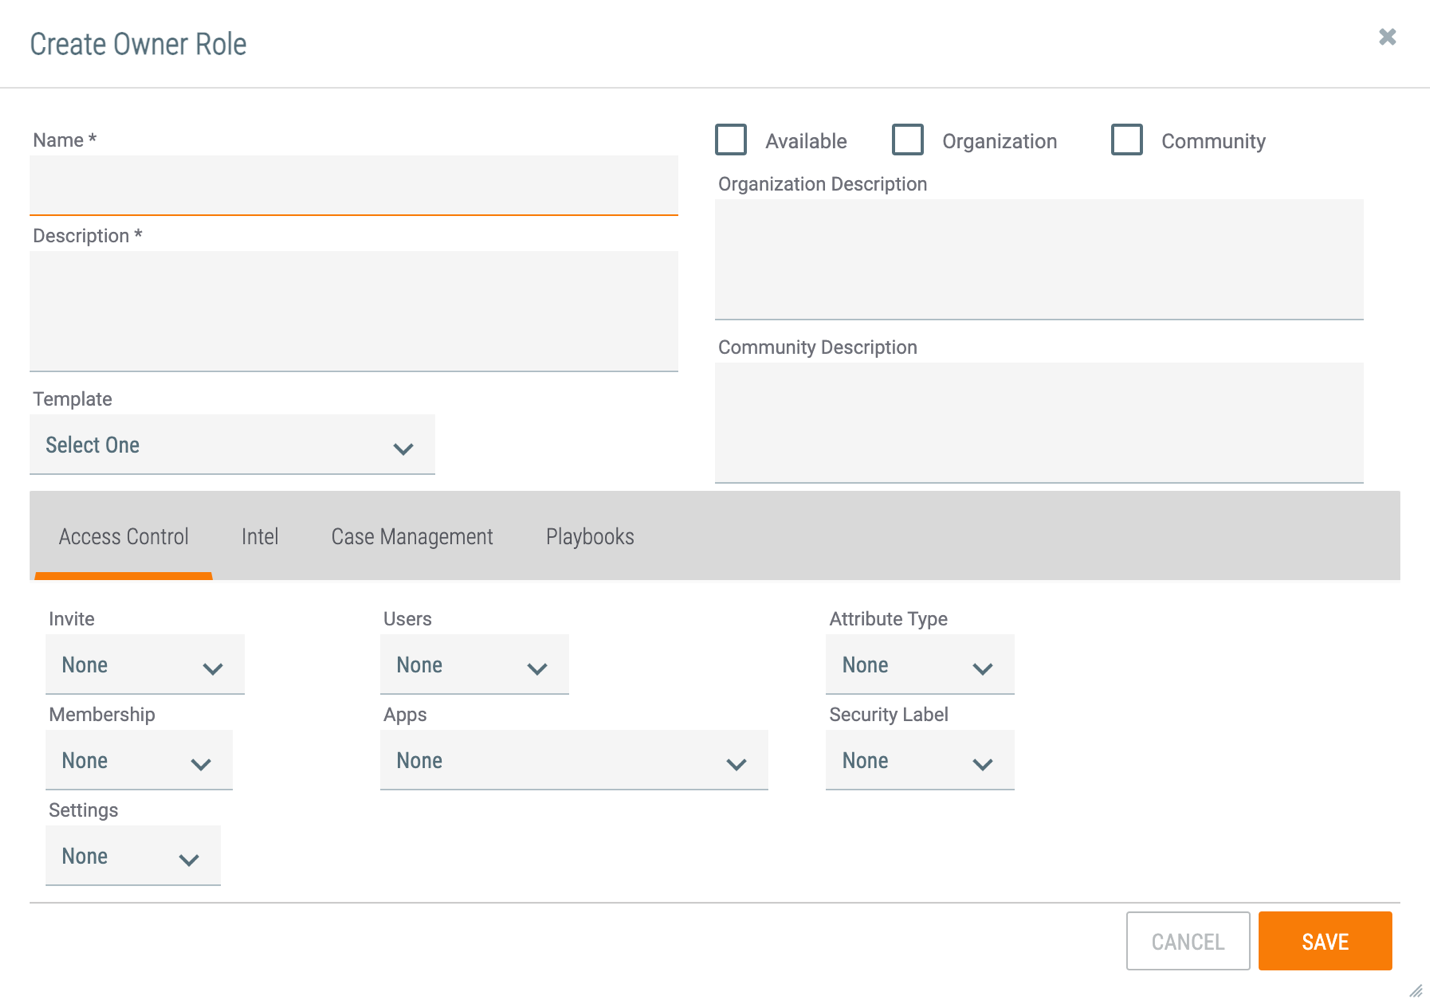
- Name: Enter a name for the custom role.
- Available: Select this checkbox to make the custom role available on the ThreatConnect instance. Only available roles may be assigned to users.ImportantThis checkbox is not selected by default. It must be checked for the role to become available on the instance.
- Organization: Select this checkbox to make this role available as an Organization role.
- Community: Select this checkbox to make this role available as a Community role.
- Description: Enter a description for the custom role. This description will be displayed in the Administrator column on the Owner Roles tab.
- Template: If desired, select an out-of-the-box owner role to use as a template for the custom role. All of the permissions in the Access Control, Intel (Figure 3), Case Management (Figure 4), and Playbooks (Figure 5) tabs will be set to the permissions for the selected role.ImportantThe Allow Intel Access checkbox in the Intel tab and the Allow CM Access checkbox in the Case Management tab will not be automatically selected, even if they are enabled for the role selected as a template. The permissions in these tabs will be set to those of the template role, but the tab itself must be enabled manually by selecting its Allow Access checkbox.
- Organization Description: If you selected the Organization checkbox, you must provide a description of the role’s scope within the Organization. This description will be displayed in the Organization column on the Owner Roles tab.
- Community Description: If you selected the Community checkbox, you must provide a description of the role’s scope within the Community. This description will be displayed in the Community column on the Owner Roles tab.
- Access Control: The permissions in this tab apply to Organization or Community administration. See the “Intel Access Permissions” section of Permission Definitions for details on the options for each permission type.NoteIf both the Organization and Community checkboxes are selected, then the permissions apply to the user’s role in both the Organization and the Community.
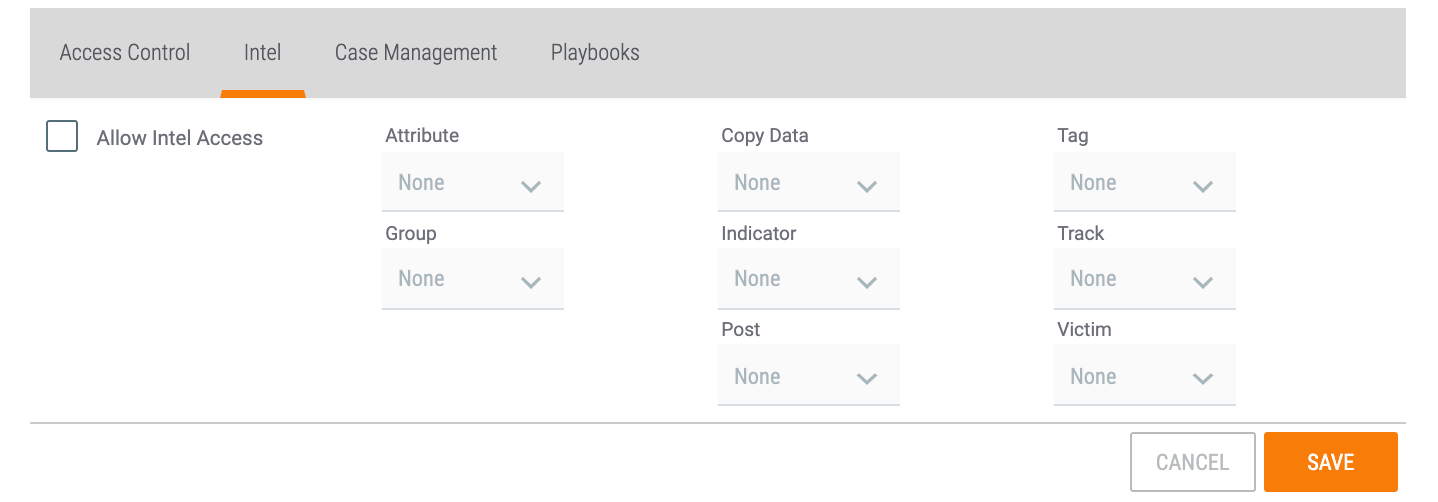
- Intel: The permissions in this tab apply to threat intelligence in the Organization or Community. See the “Threat Intelligence Permissions” section of Permission Definitions for details on the options for each permission type. After clicking on the Intel tab, select the Allow Intel Access checkbox to enable the user’s access to threat intelligence and to set each permission type. If the checkbox is not selected, the user will not have access to any threat intelligence in the Organization or Community.NoteIf both the Organization and Community checkboxes are selected, then the permissions apply to the user’s access to threat intelligence in both the Organization and the Community.
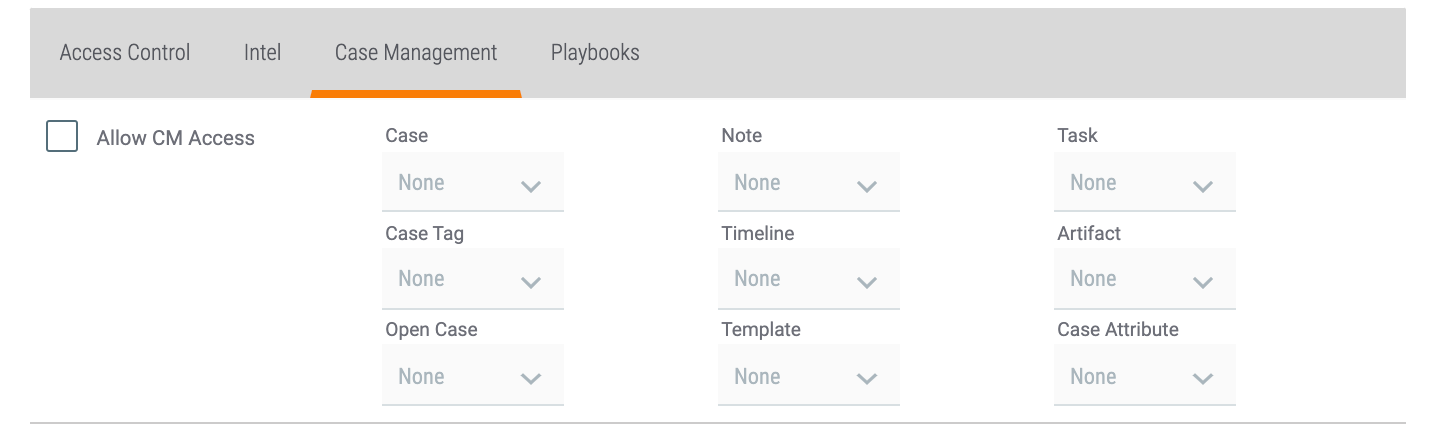
- Case Management: The permissions in this tab apply to the Workflow functionality in the Organization. See the “Workflow Permissions” section of Permission Definitions for details on the options for each permission type. After clicking on the Case Management tab, select the Allow CM Access checkbox to enable the user’s access to Workflow and to set each permission type. If you do not select this checkbox, the user will not have access to any Workflow functionality in the Organization.NoteThis tab is disabled when the Community checkbox is selected because Workflow permissions do not apply to Communities. As such, Workflow permissions may not be set for a role that covers both Organizations and Communities.
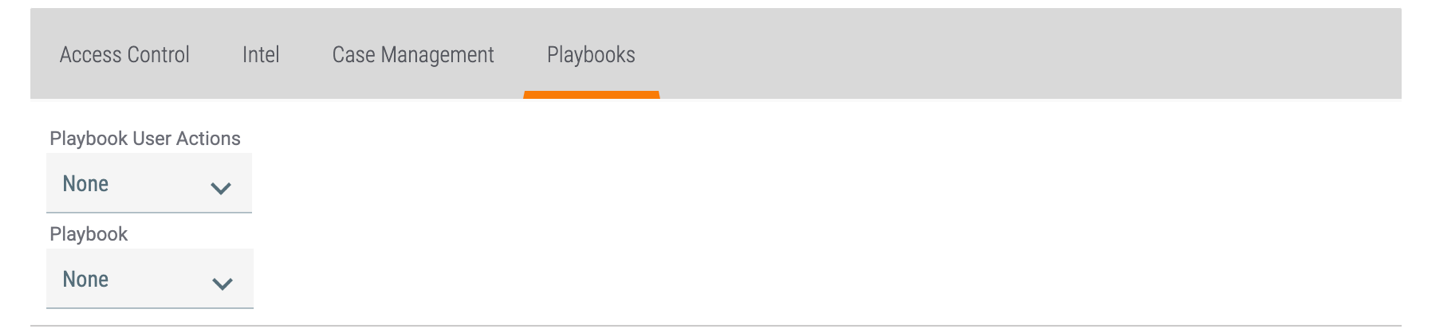
- Playbooks: The permissions in this tab apply to Playbooks in the Organization. See the “Playbooks Permissions” section of Permission Definitions for details on the options for each permission type.NoteThis tab is disabled when the Community checkbox is selected because Playbooks do not apply to Communities. As such, Playbook permissions may not be set for a role that covers both Organizations and Communities.
Click the SAVE button to save the custom role, which will be displayed in the table in Figure 1.
ThreatConnect® is a registered trademark of ThreatConnect, Inc.
20095-05 v.04.D
Was this article helpful?
