- 11 Nov 2025
- 3 Minutes to read
-
Print
-
DarkLight
-
PDF
Configure Okta as SAML Provider
- Updated on 11 Nov 2025
- 3 Minutes to read
-
Print
-
DarkLight
-
PDF
Configure SAML authentication with Okta
Polarity SAML authentication should work with any identity provider (IdP) given the application is set up correctly within the identity provider's account. This guide walks through configuring Polarity SAML Authentication with Okta SAML 2.0.
Configure Okta for Polarity
Create a “Polarity App”
The first step to setting up SAML authentication is to create a new App for Polarity within Okta. 
General Settings
Navigate to "Applications" and click on "Create App Integration". Select the "SAML 2.0" option and click "Next". Fill in the settings as follows:
App name
Polarity
App logo (optional)
You can download and upload the Polarity logo from this link:
https://assets.polarity.io/img/logos/logo-large.png
Click "Next" to go the next page of options
SAML Configuration
Single sign-on URL(This is a required field)
https://<yourpolaritydomain>/sso/sp/consume/samlNote
Use this for Recipient URL and Destination URL should be checked
Audience URI (SP Entity ID)
https://<yourpolaritydomain>
Default RelayState (required)
https://<yourpolaritydomain>/auth-success
Name ID format
EmailAddress
Application Username
Email
Update application username on
Create and update
Attribute Statements
Attributes (in Polarity)
Name Format
Values (in Okta)
usernameUnspecified
user.loginemailUnspecified
user.emailfullnameUnspecified
user.firstName
Group Attribute Statements
leave blank
Click "Next" and finish the Application setup
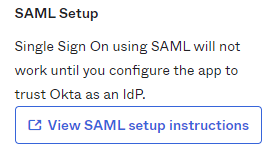
Navigate to the "Polarity" application in Okta and click on the "Sign On" tab at the top of the page.
On the right side find the button that says "View SAML setup instructions". This page provides all the settings required when configuring SAML via the Polarity Server Configuration page.
Configure Polarity for Okta
Now that the Polarity Okta Application has been set up we can configure SAML within Polarity using the SAML configuration values provided by Okta in the step above. To get to the SAML configuration page within Polarity navigate to "Advanced Settings" -> "Server Configuration" -> "Client Authentication" and then pick "SAML" from the drop-down menu:

SAML Configuration
Polarity Server Fully Qualified Domain Name (FQDN)
Enter your Polarity Server's fully qualified domain name.
SAML Identity Provider (IdP) XML Metadata
From the Okta configuration page, scroll to the bottom of the page and copy the entire contents of the IdP Metadata which is in XML format.

Copy and paste this XML into the “SAML Identity Provider (IdP) XML Metadata” field within the Polarity SAML configuration page.
Sign in button label
You can modify the SAML sign in button label here with your preferred text. The default value is "Sign in with SAML".
Username attribute
username
Email attribute
email
Full name attribute
fullname
Group attribute (optional)
This is the the attribute in the SAML assertion which specifies which groups the user belongs to (optional).
If this field is left empty then no authorization checks will be made and all authenticated SAML users will be able to access Polarity.
If an invalid attribute is provided no users will be authorized.
If this attribute is provided and you would like Polarity to enforce authorization you should also fill out the Authorized groups regular expression option.
If you are controlling access to Polarity via “Okta Assignments” (recommended) leave this option blank and assign users to the Polarity Application via Okta.
Authorized group regular expression (optional)
If provided, each group the user belongs to as specified by the Group attribute option will be matched against the provided regular expression.
If any group matches, the user will be authorized to login to Polarity.
The provided regular expression should not include leading or trailing forward slashes. In addition, the regular expression will be wrapped in
^(?: )$to default to exact matches.
Save Options
In the top right of the Polarity web interface, click on the "Apply Changes" button to save your new SAML configuration.
The Polarity sign in page will now have an additional "Sign in with SAML" button (optionally renamed if you modified the Sign in button label). When a user clicks on this button they will be redirected to Okta to authenticate. If the user has been assigned access to the Polarity application in Okta, a new local account will automatically be created for that user and they will be logged into Polarity.
Users that sign in via SAML cannot login with the local account as the account will be marked as "Remote" in Polarity’s “Team” view. All password management for the account is done via Okta.


